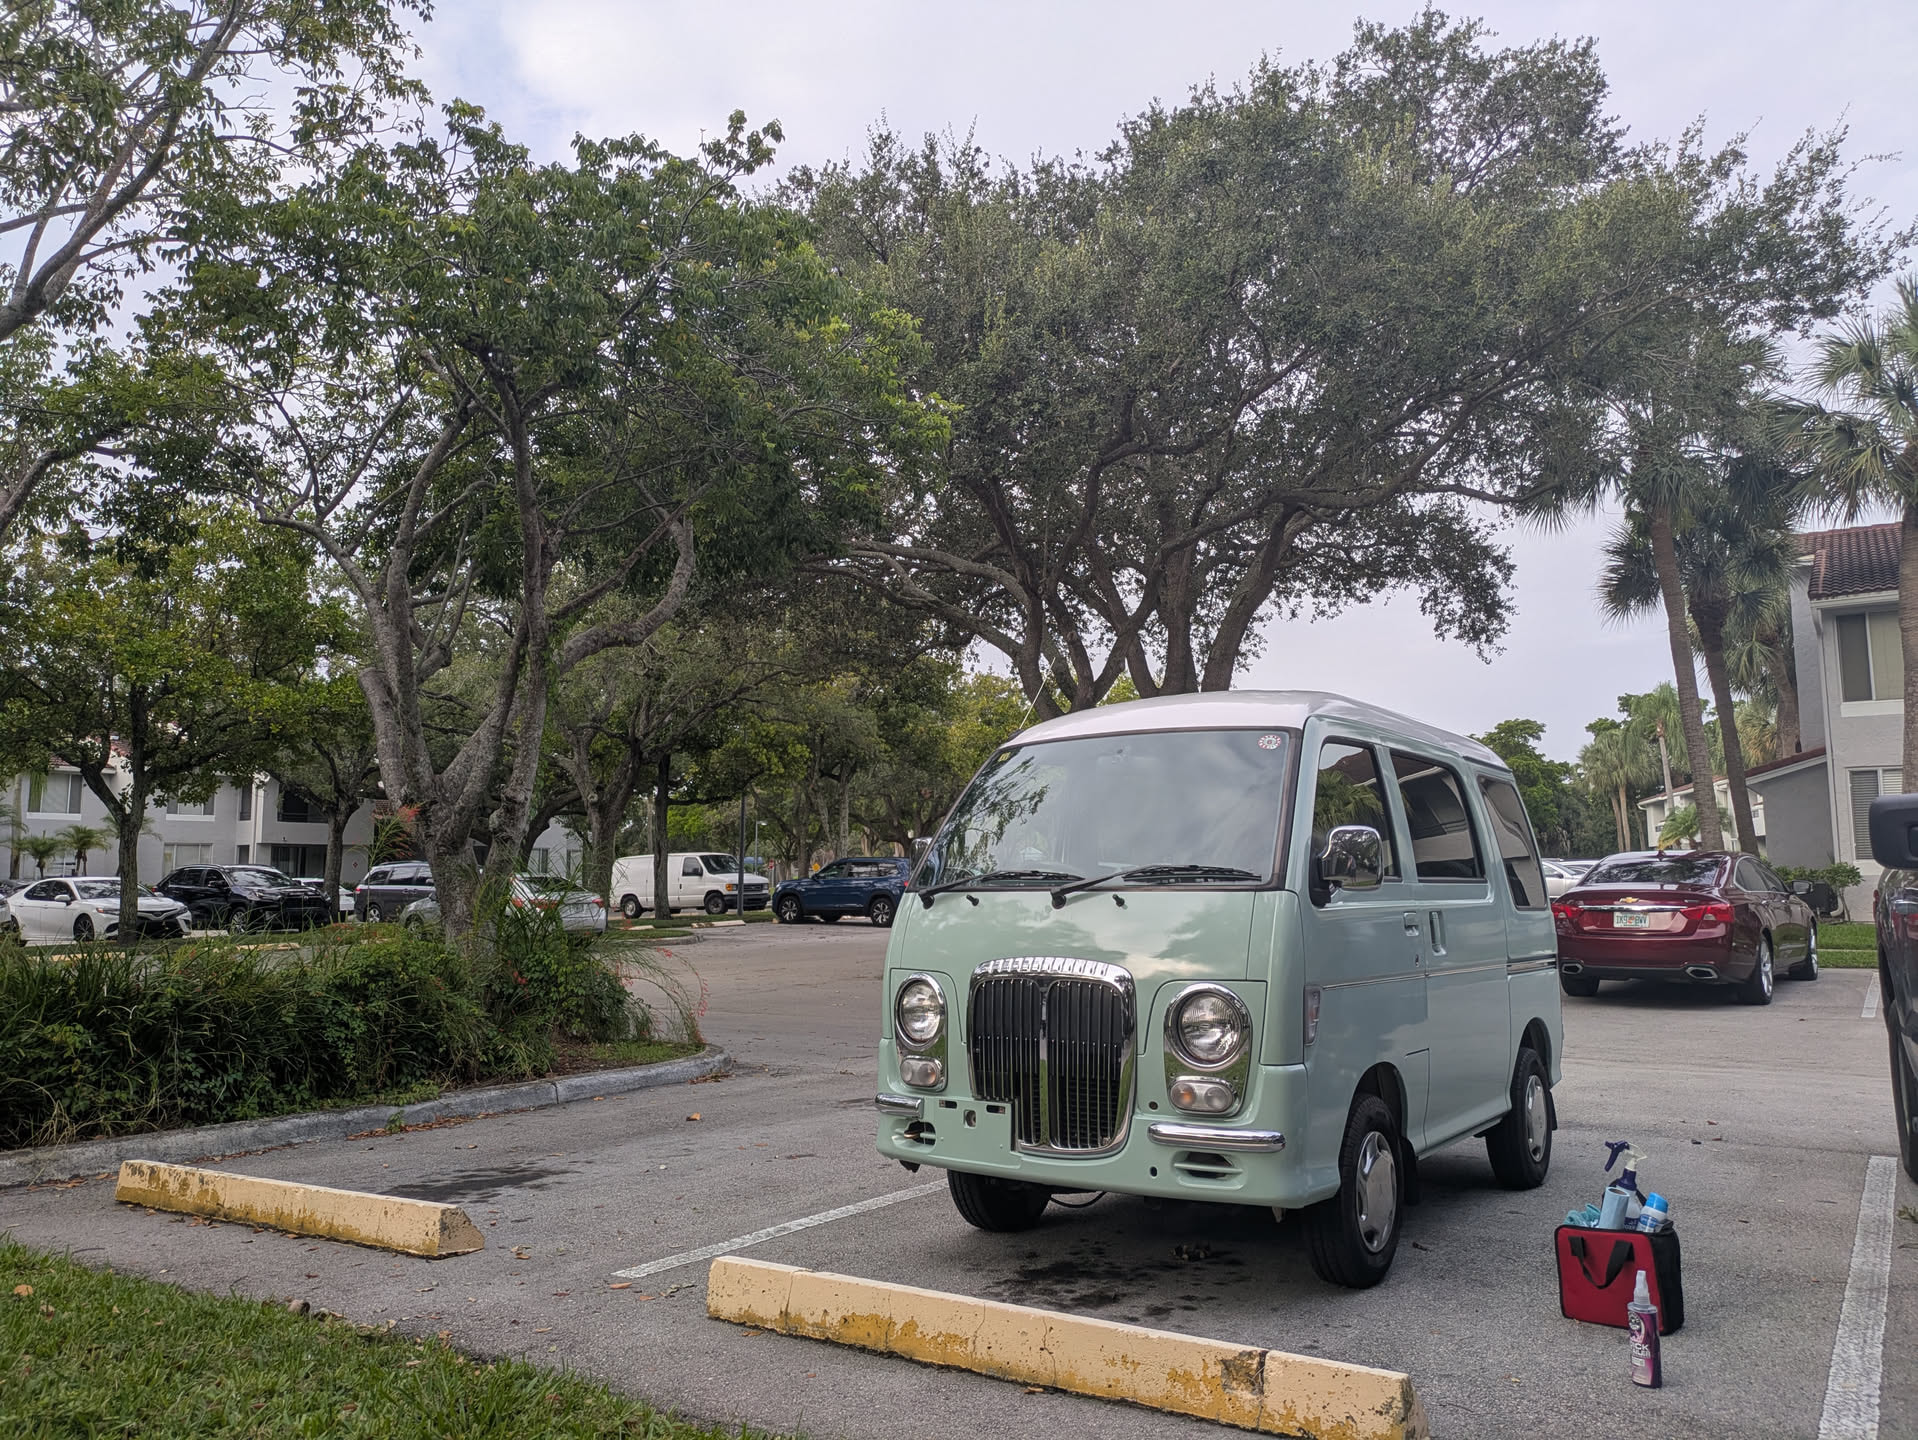
Atrai Classic nugget

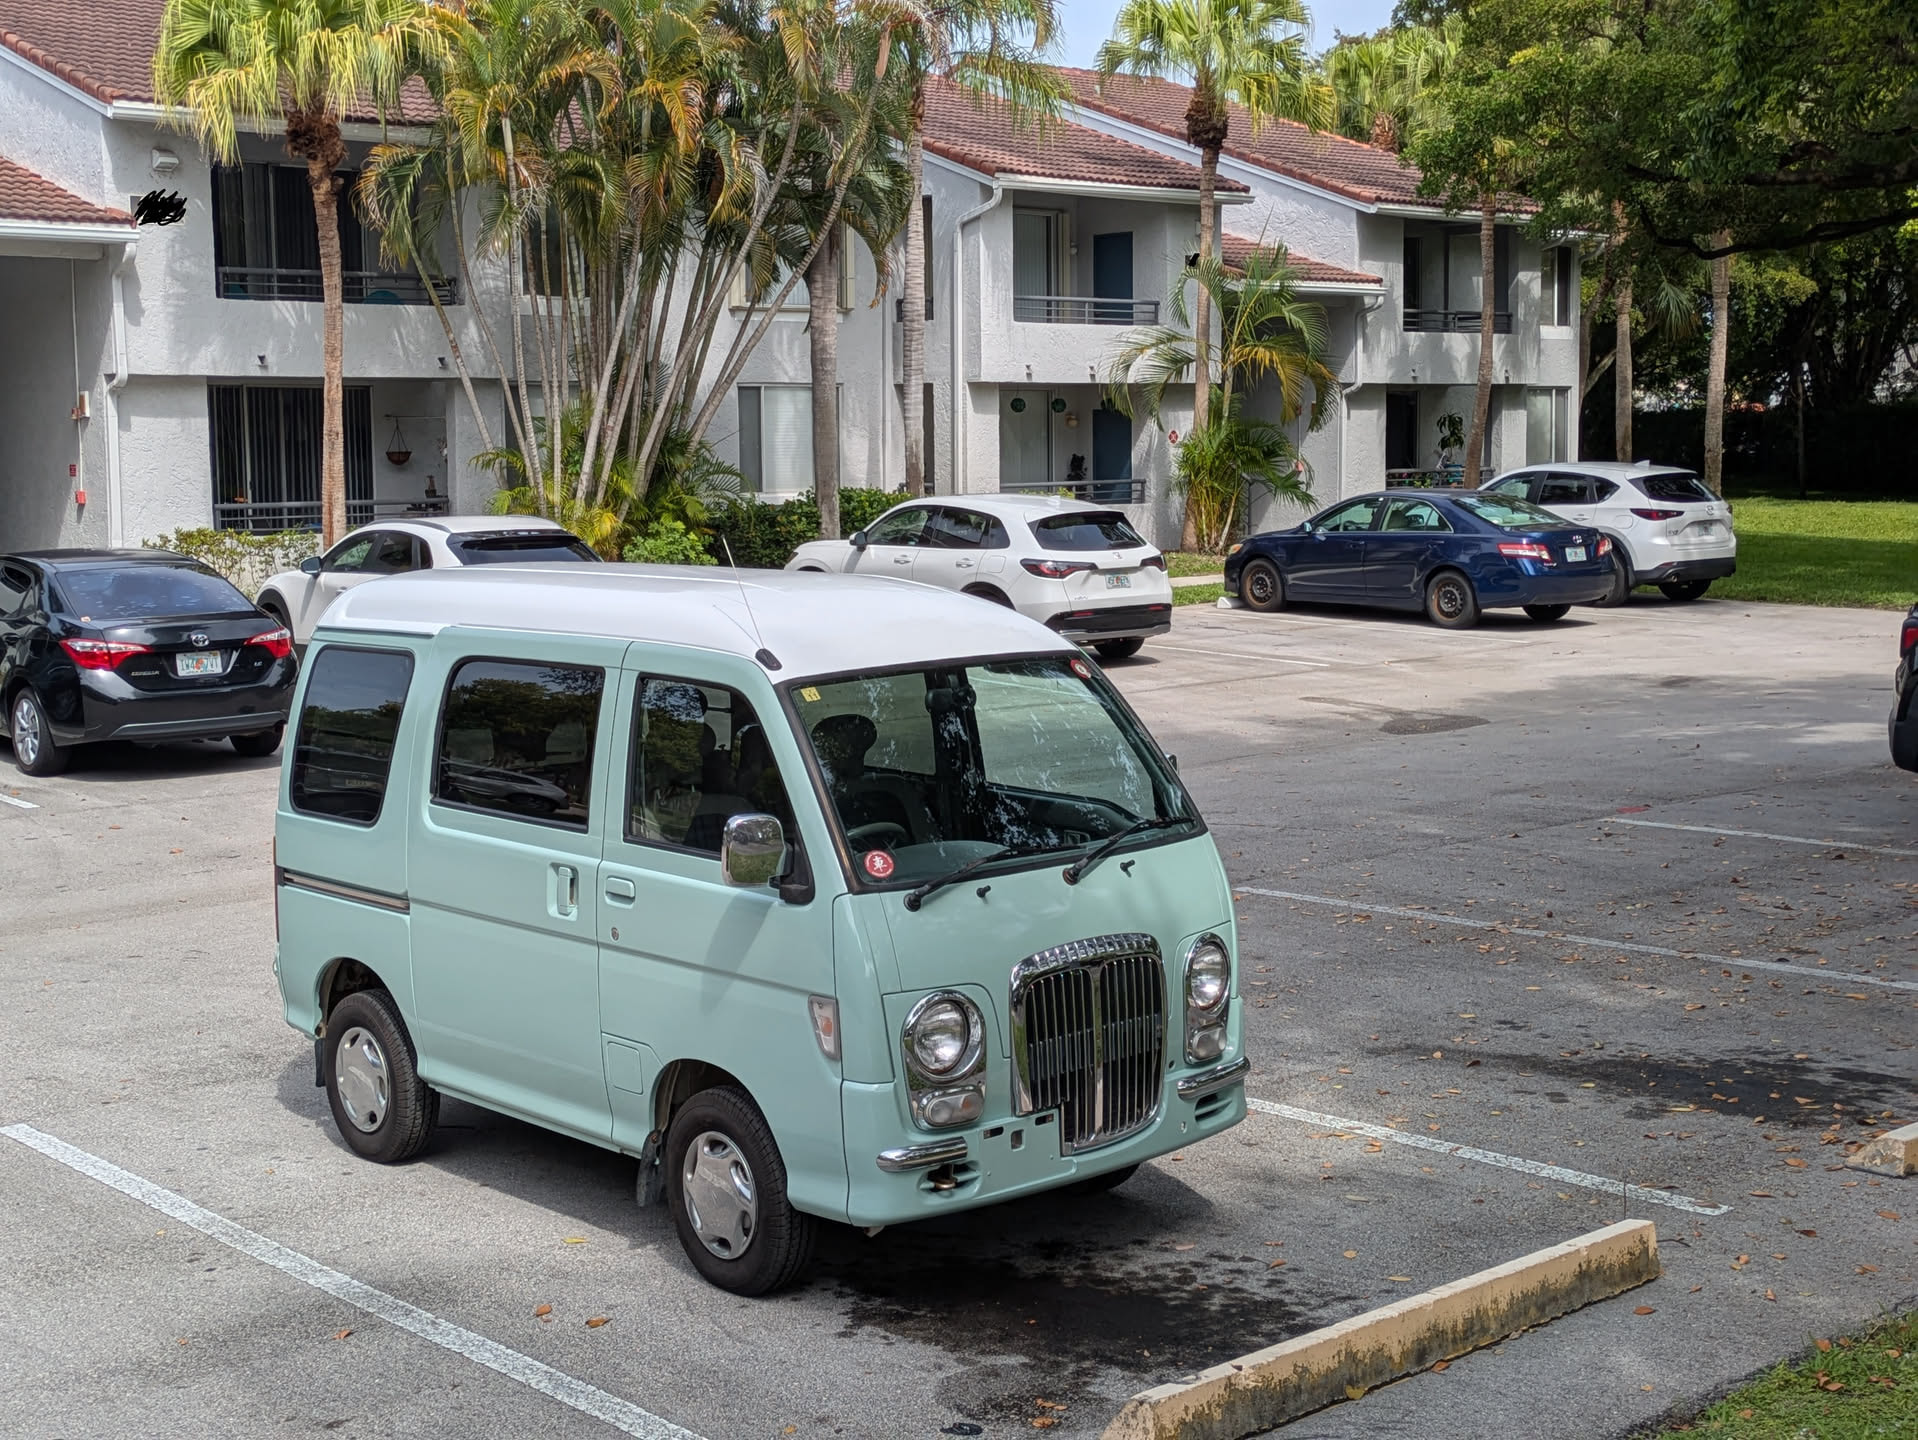
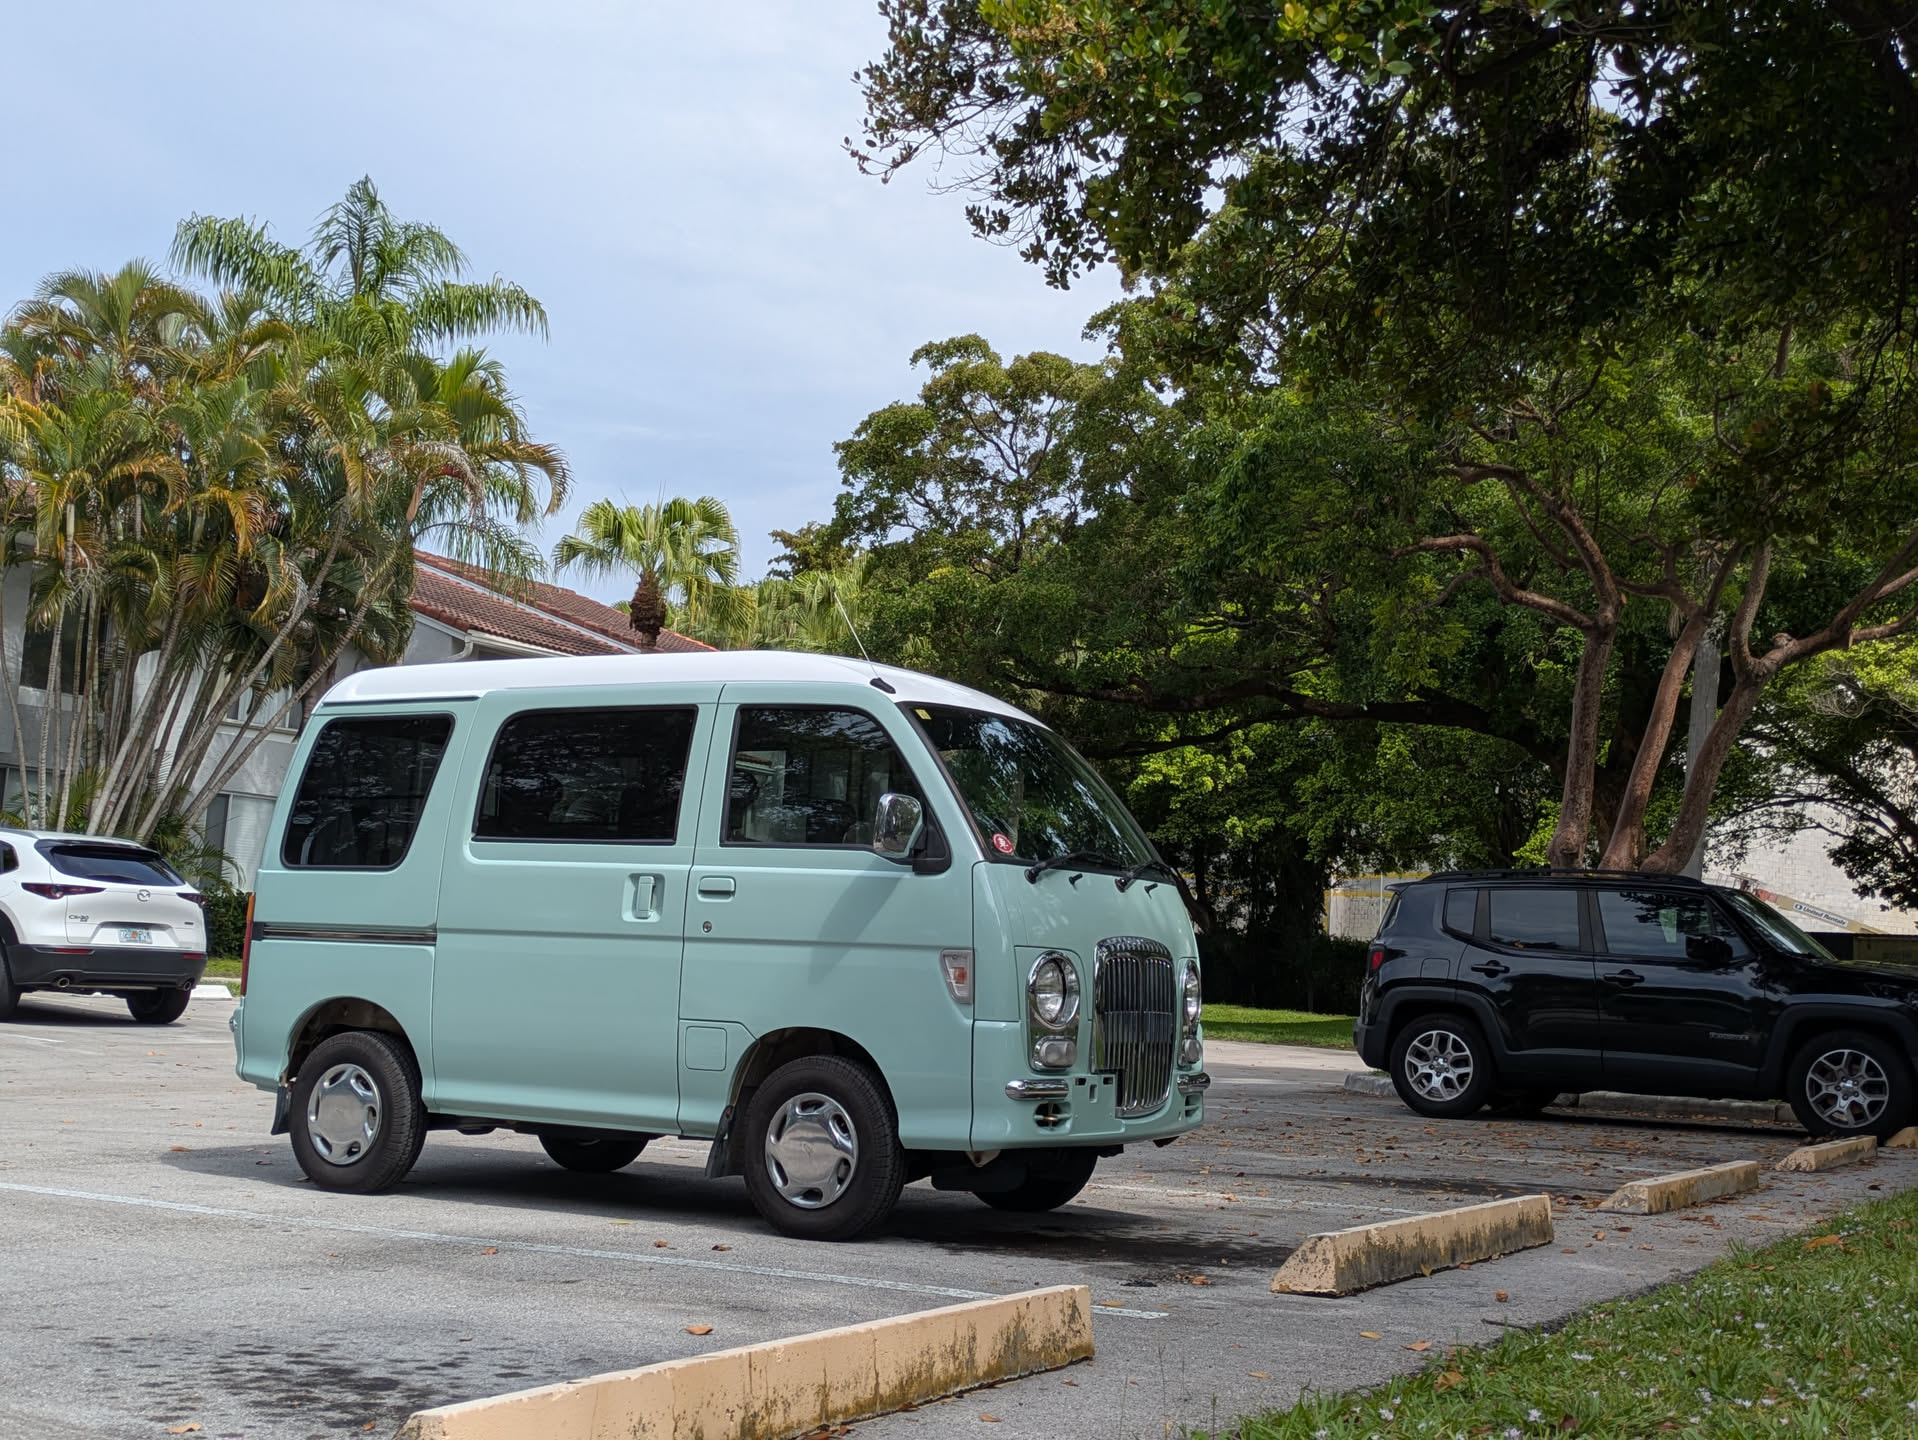
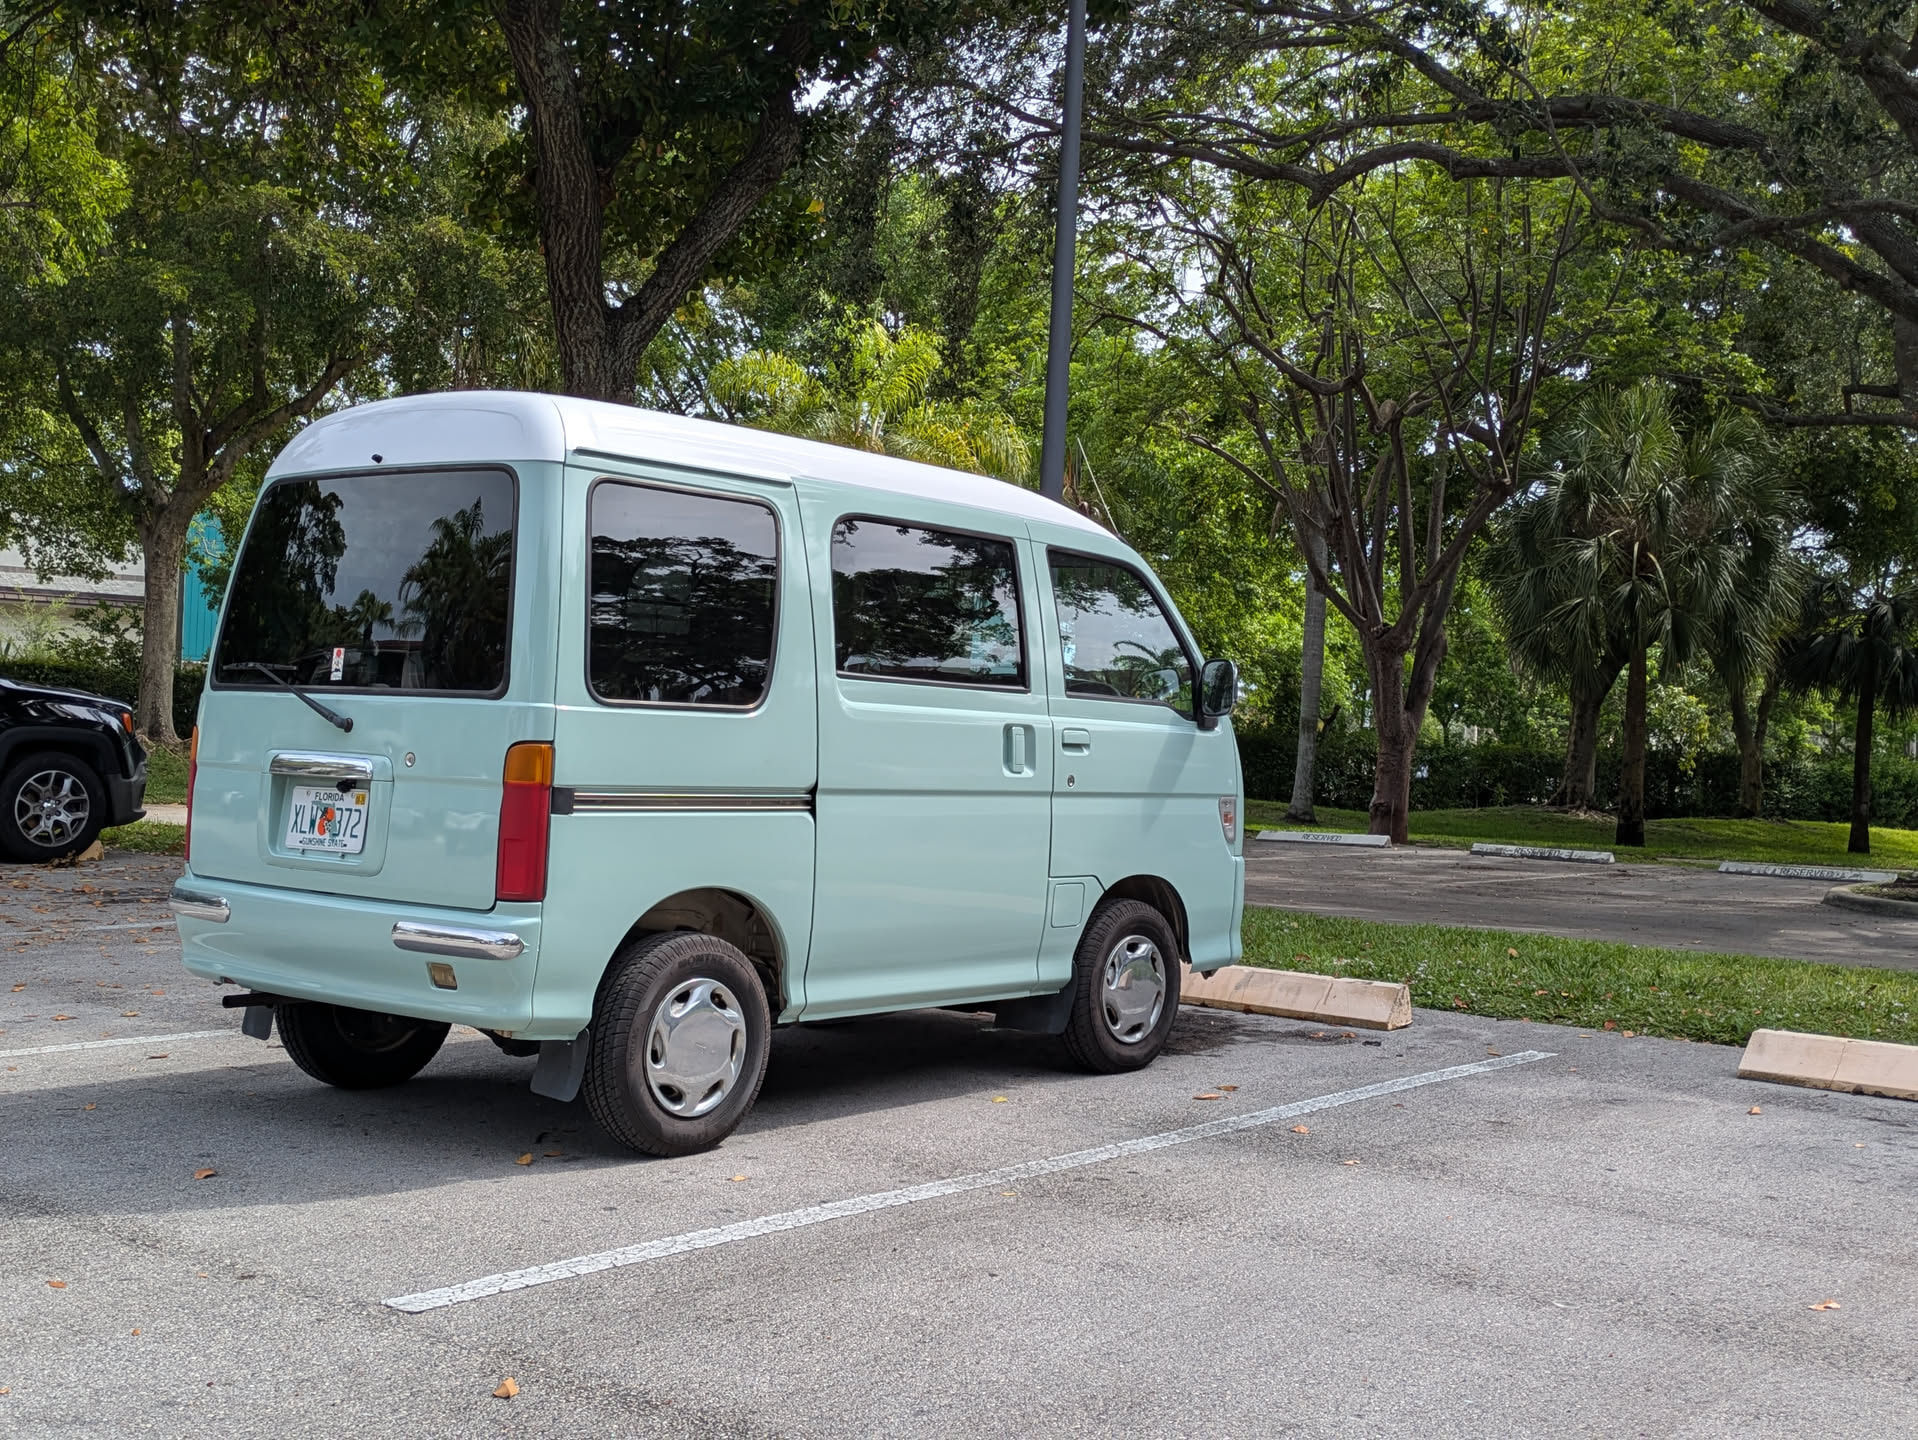
This thread is documenting my new to me project car, a 1997 Daihatsu Atrai Classic S120V.

Manual, RWD, EF-GS engine

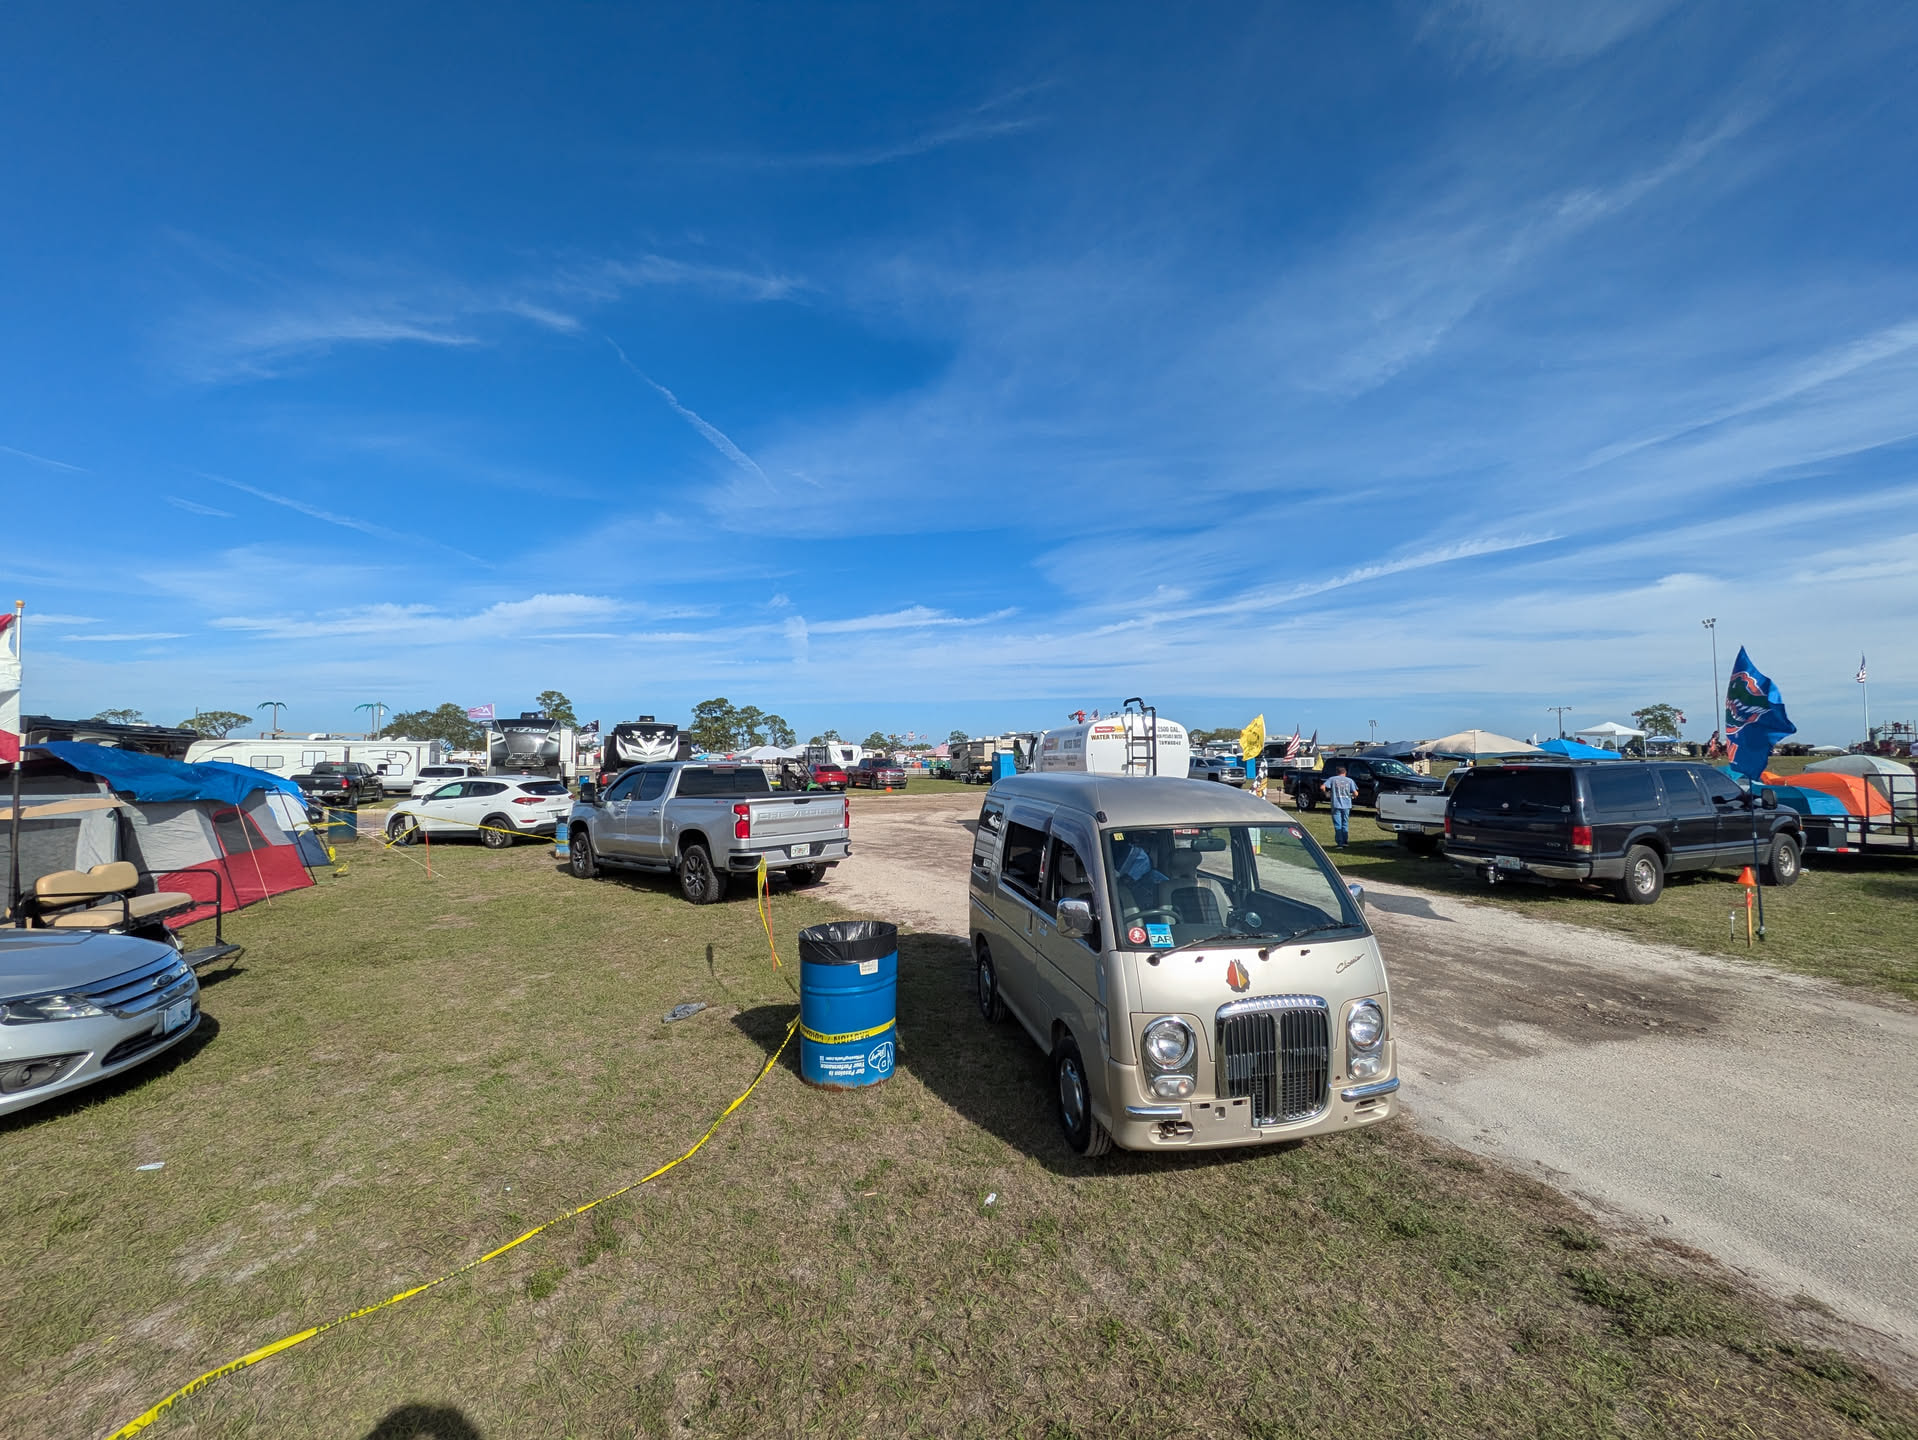
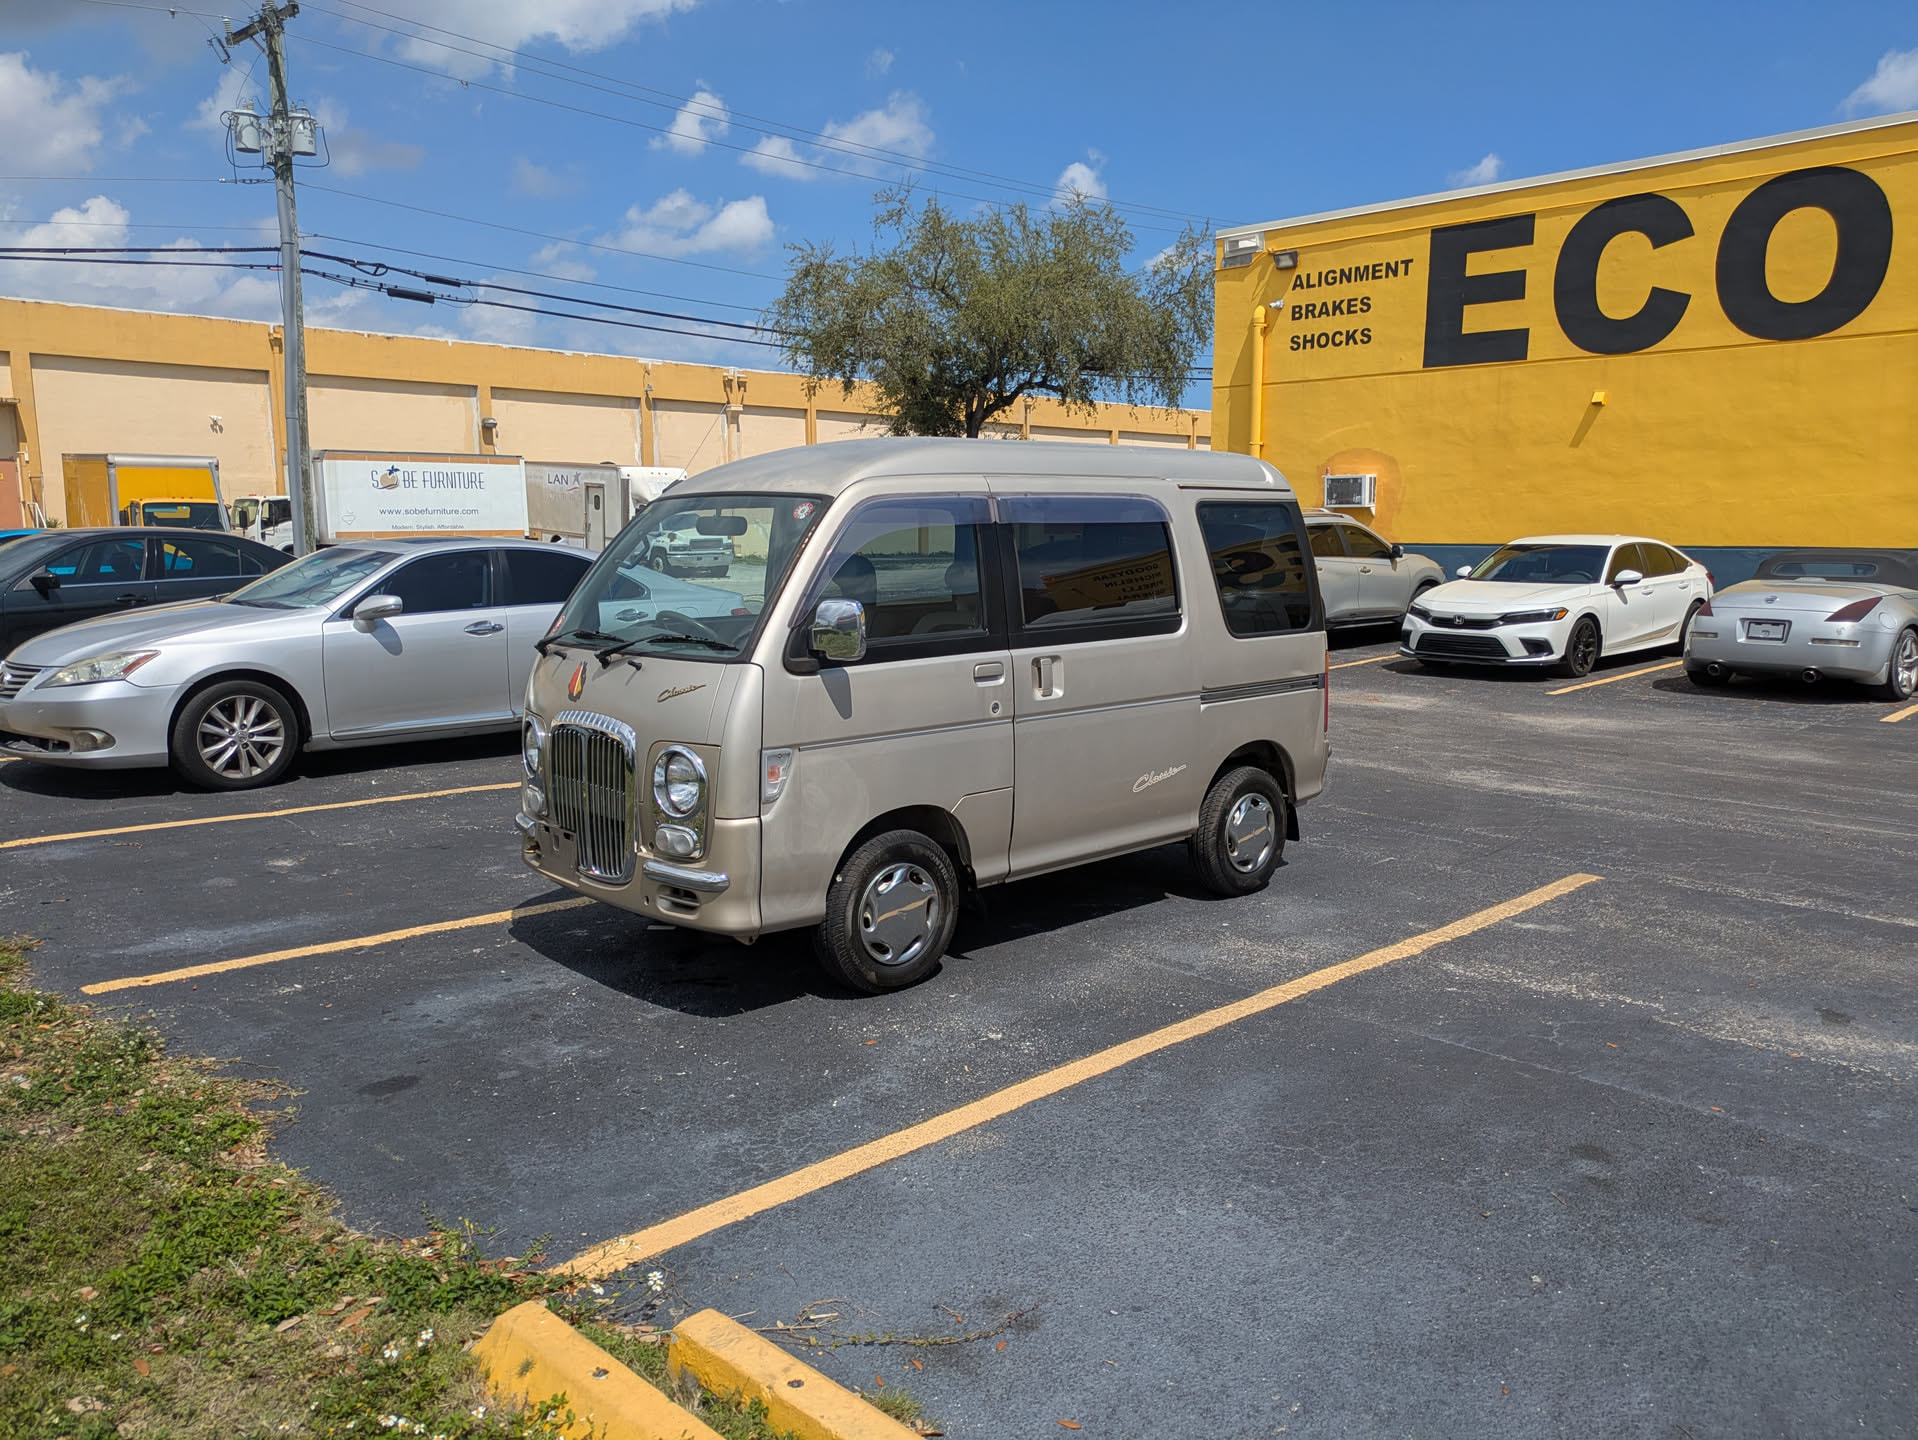
This was my first time meeting it in person. I came across it on their website and decided to go see it, expecting to find some rust or other reason to not like it. It started right up and was surprisingly clean! So i put the deposit down and expected the test drive to go poorly. It drove great. Made an offer expecting to get turned down, and he accepted it, so now its mine.

The day I took it home. It had been like a decade since I drove stick and I’m obviously not going to take this on the highways, so it was over an hour of city traffic to get it back to my apartment. It wasn’t very fun but it got done.

Not even 7 days of owning it I took it on a 300 mile round trip road trip to the 12 hours of Sebring and had a blast showing it off! Didn’t place a single step wrong the entire trip.

This was the last time it was stock so I’ll continue it in further posts as I can be bothered to write them.

4 Likes

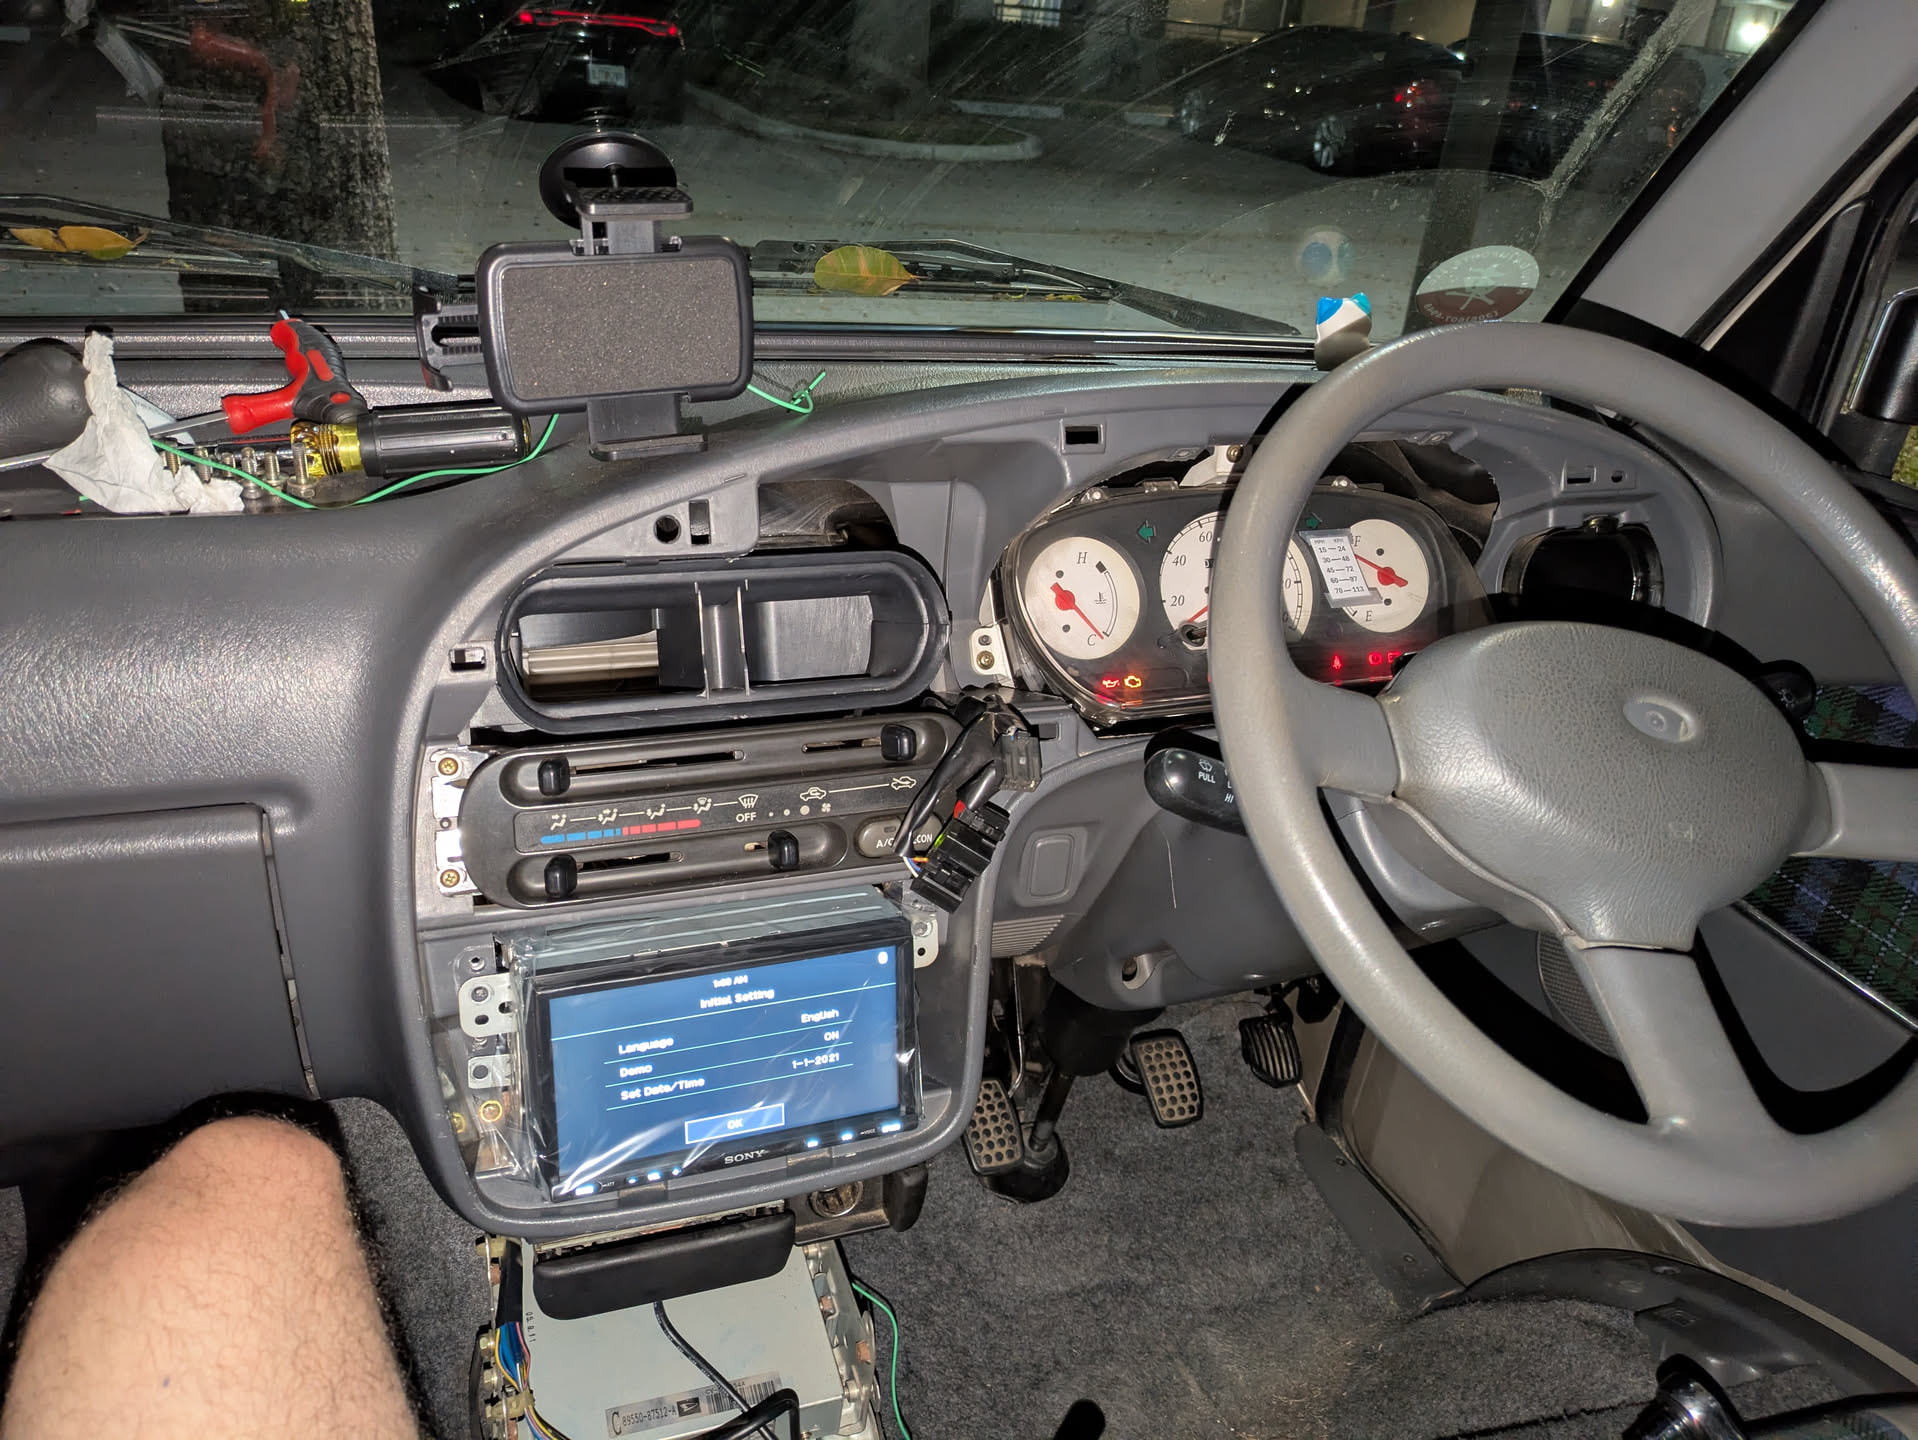
My first round of mods was mostly focused on comfort. A new headunit that could actually pick up american radio stations and had an aux as I did the entire trip to sebring with a bluetooth speaker, and a reverse cam (never doing this again).

Heres the headunit going in, Sony XAV-AX3200 because I far too used to android auto to go without it. Plus the screen sits low in the dash so it hides well.

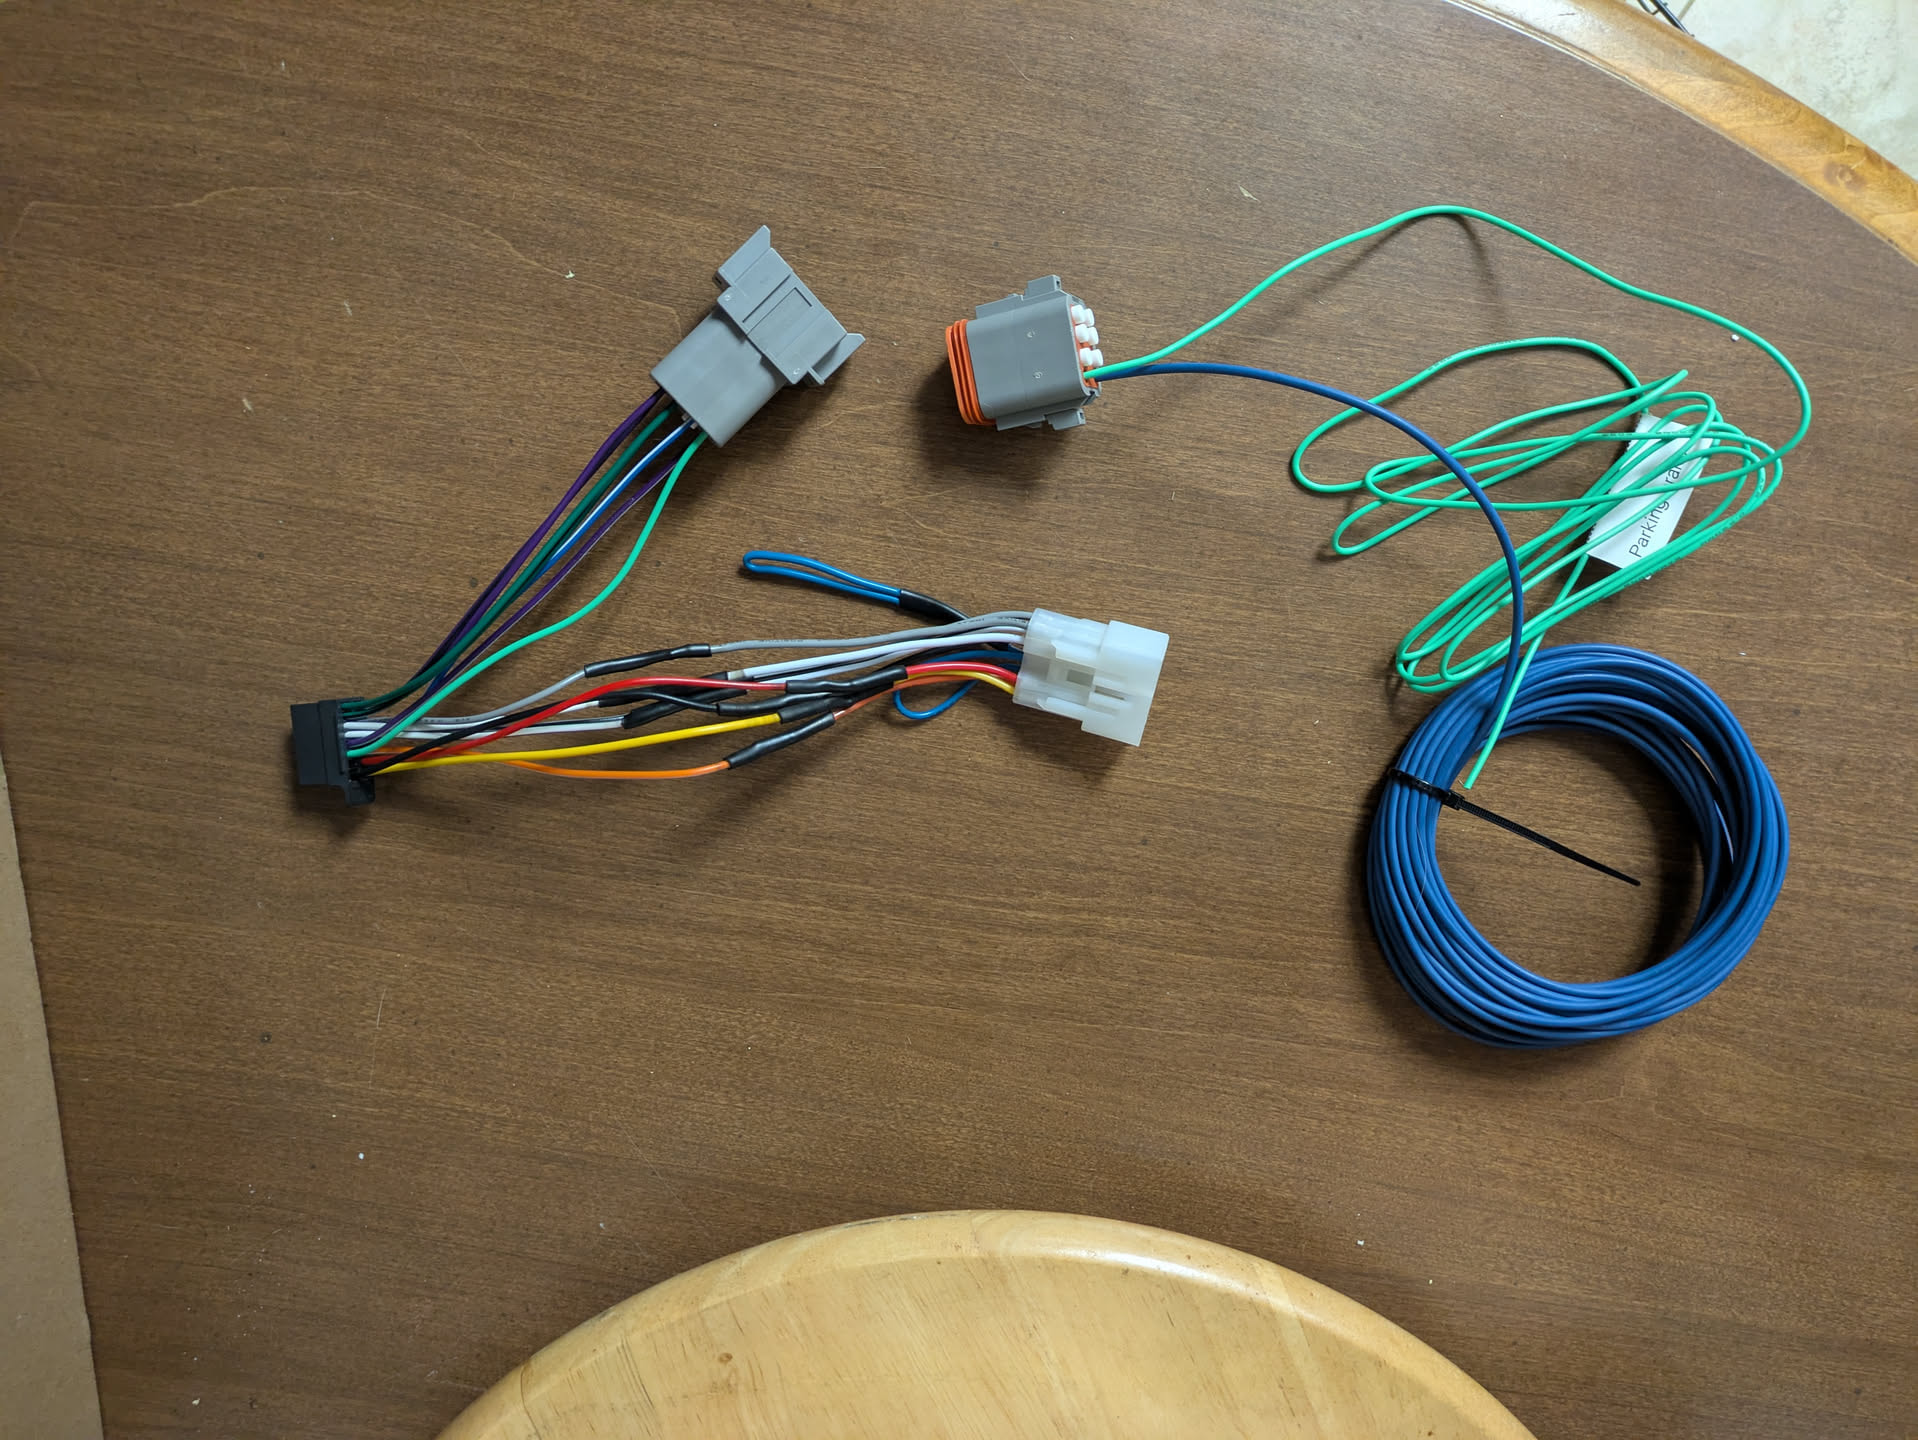
The adapter I made from a Metra 70-1761 which was plug and play. I broke out the reverse trigger, parking brake, and rear speakers to a DT mini connector as the car did not come with factory rear speakers, only ones in the front doors.

The dash cam is a dash cam. Garmin mini 3, not much to say about it.

Also the reverse camera was a waste of time. It took 2 hours to fish the wire up thru the tailgate, down the D pillar, thru the fender, under the carpet and center console, and up to the headunit. And for what? I’m sure you can imagine how good the rear visibility is. Don’t make the same mistake as me.

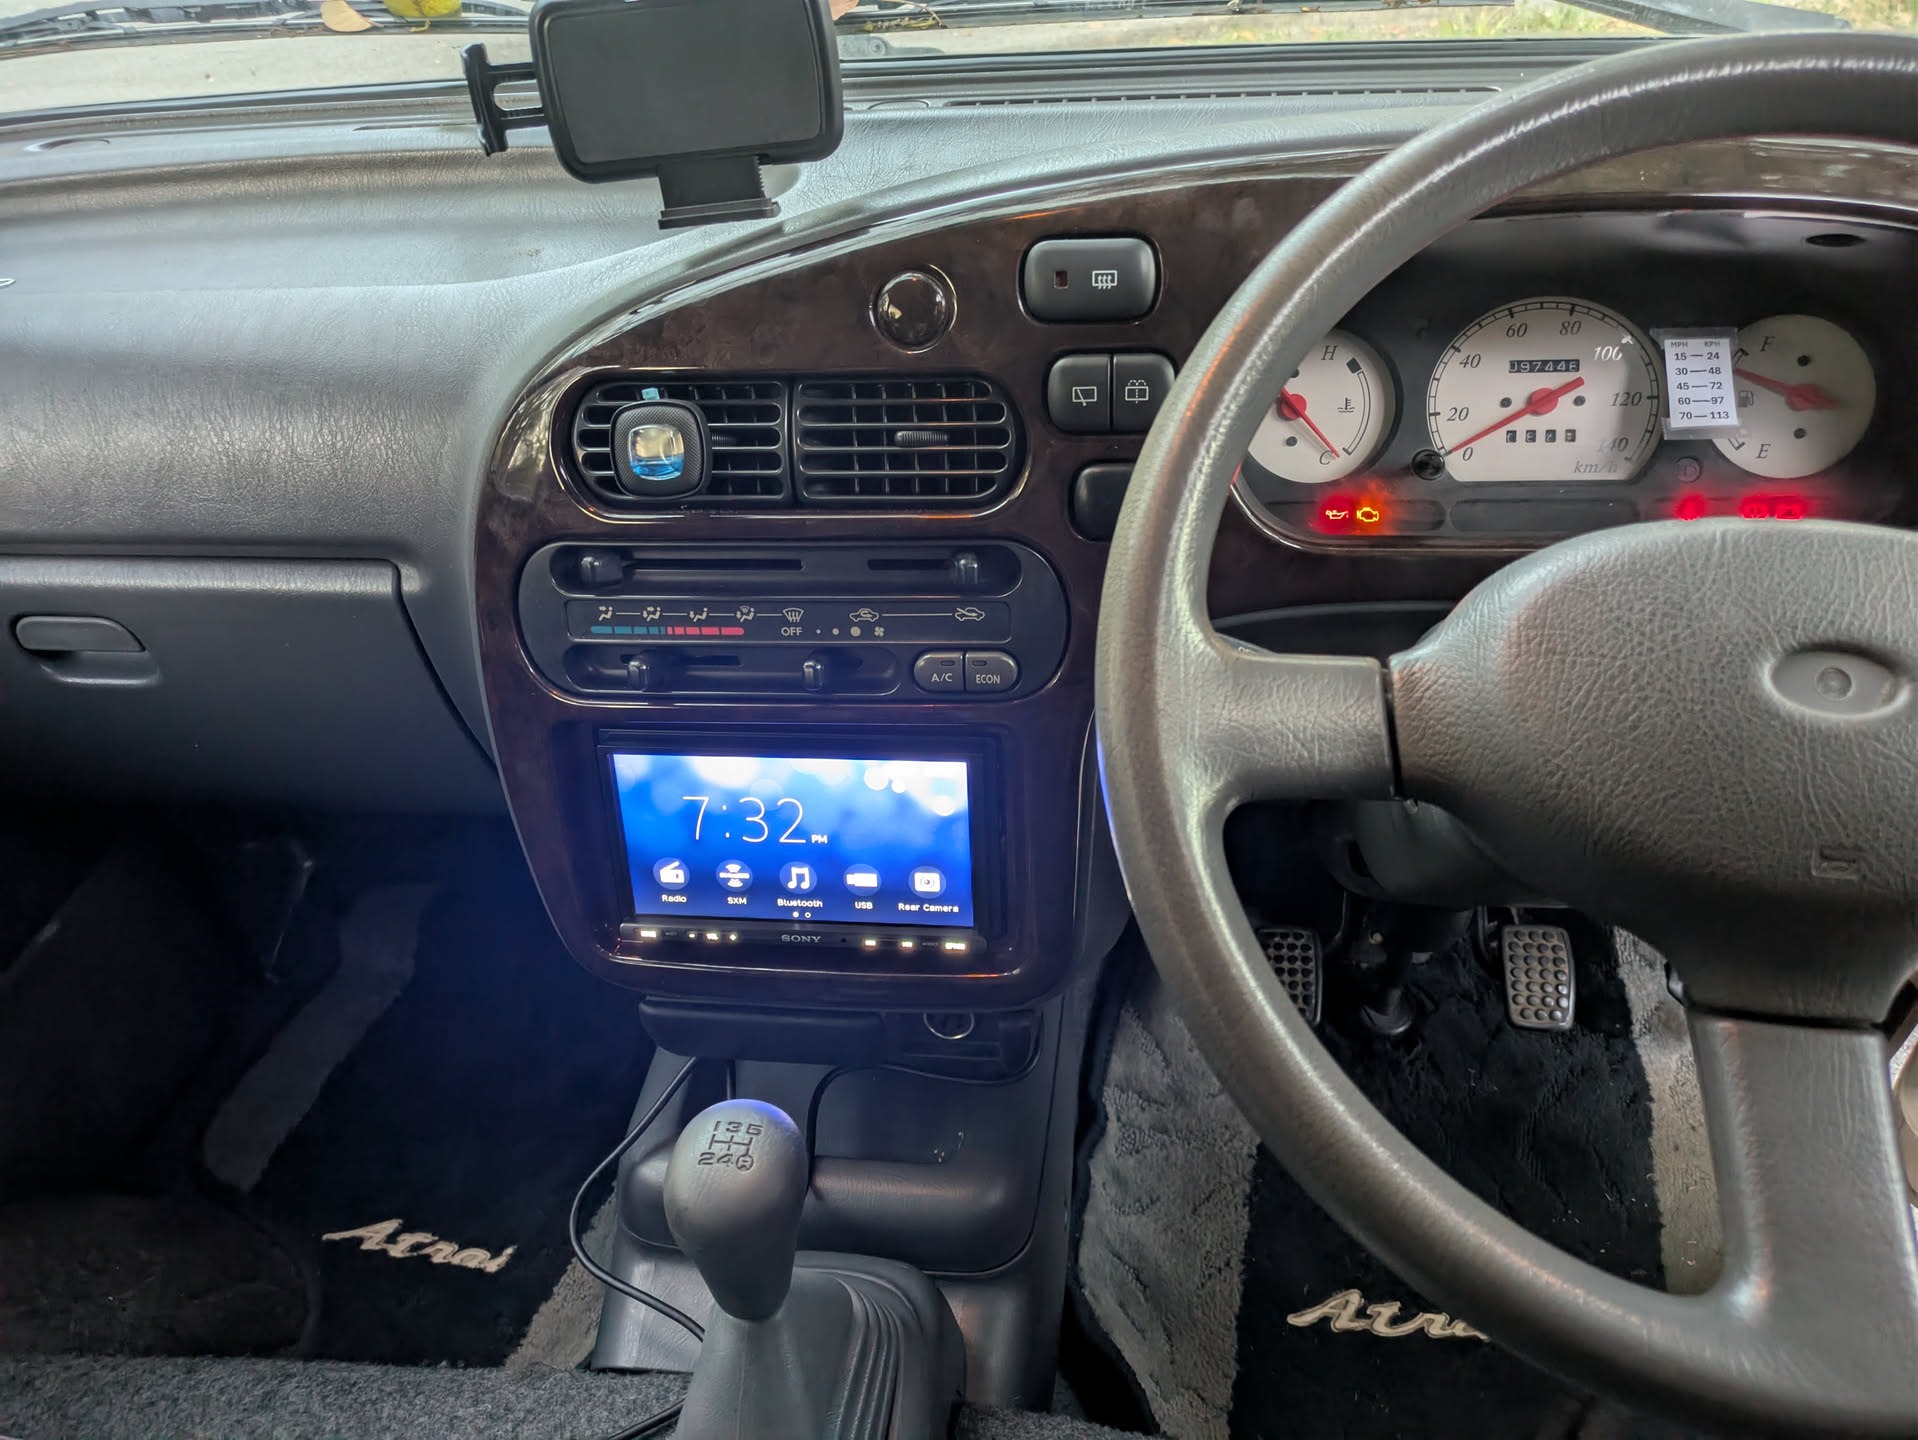
Pic of how the headunit sits in the dash. The gear stick only gets in the way a little bit, but I like it. I also stuck the daihatsu emblem back onto the wheel later.

1 Like

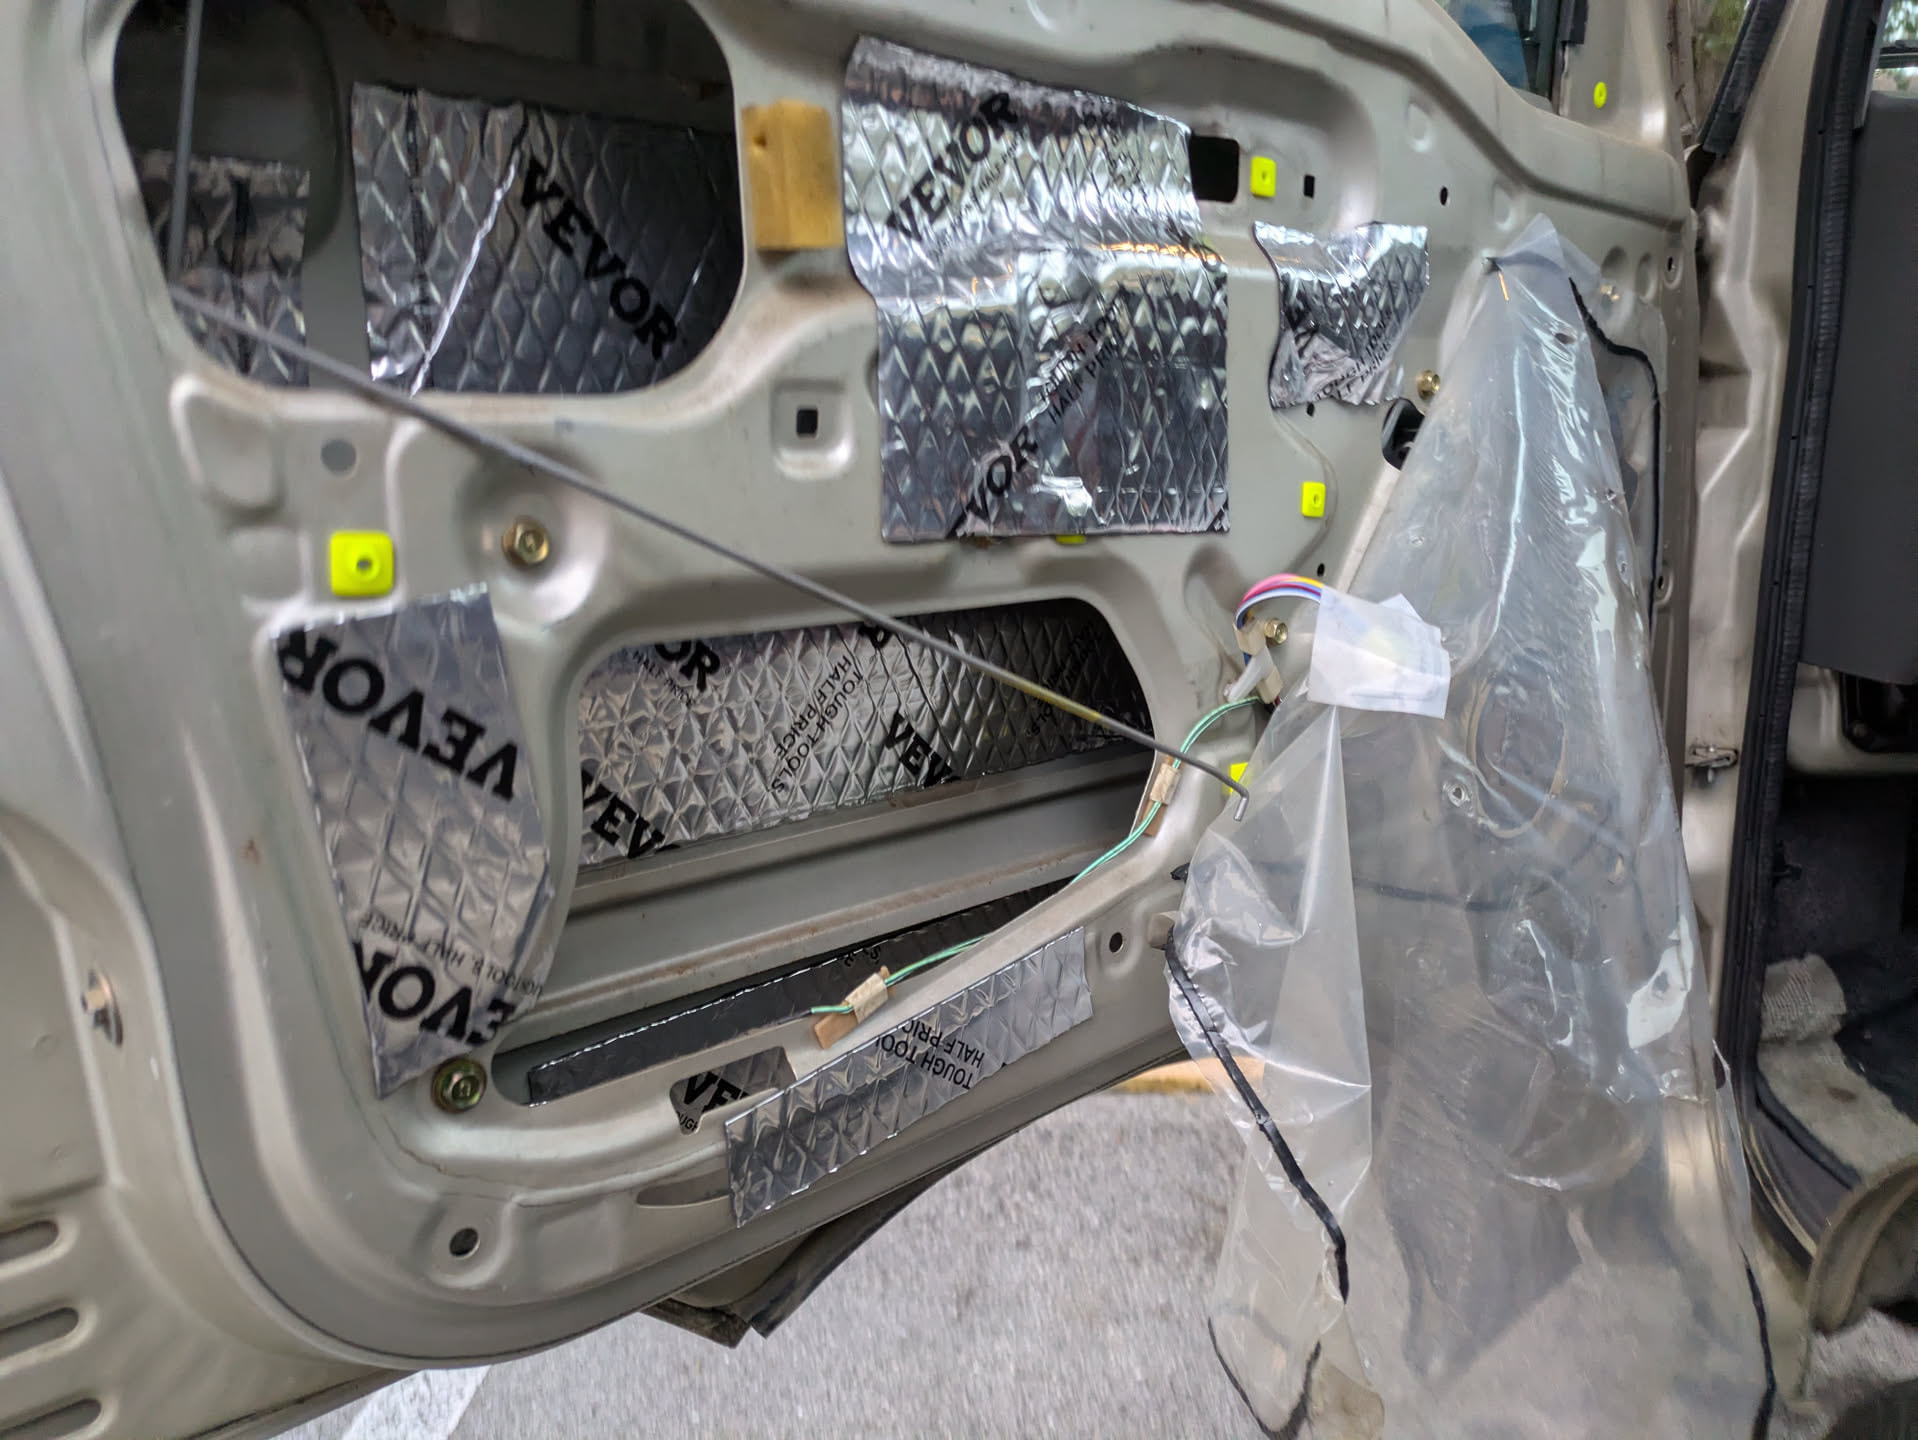
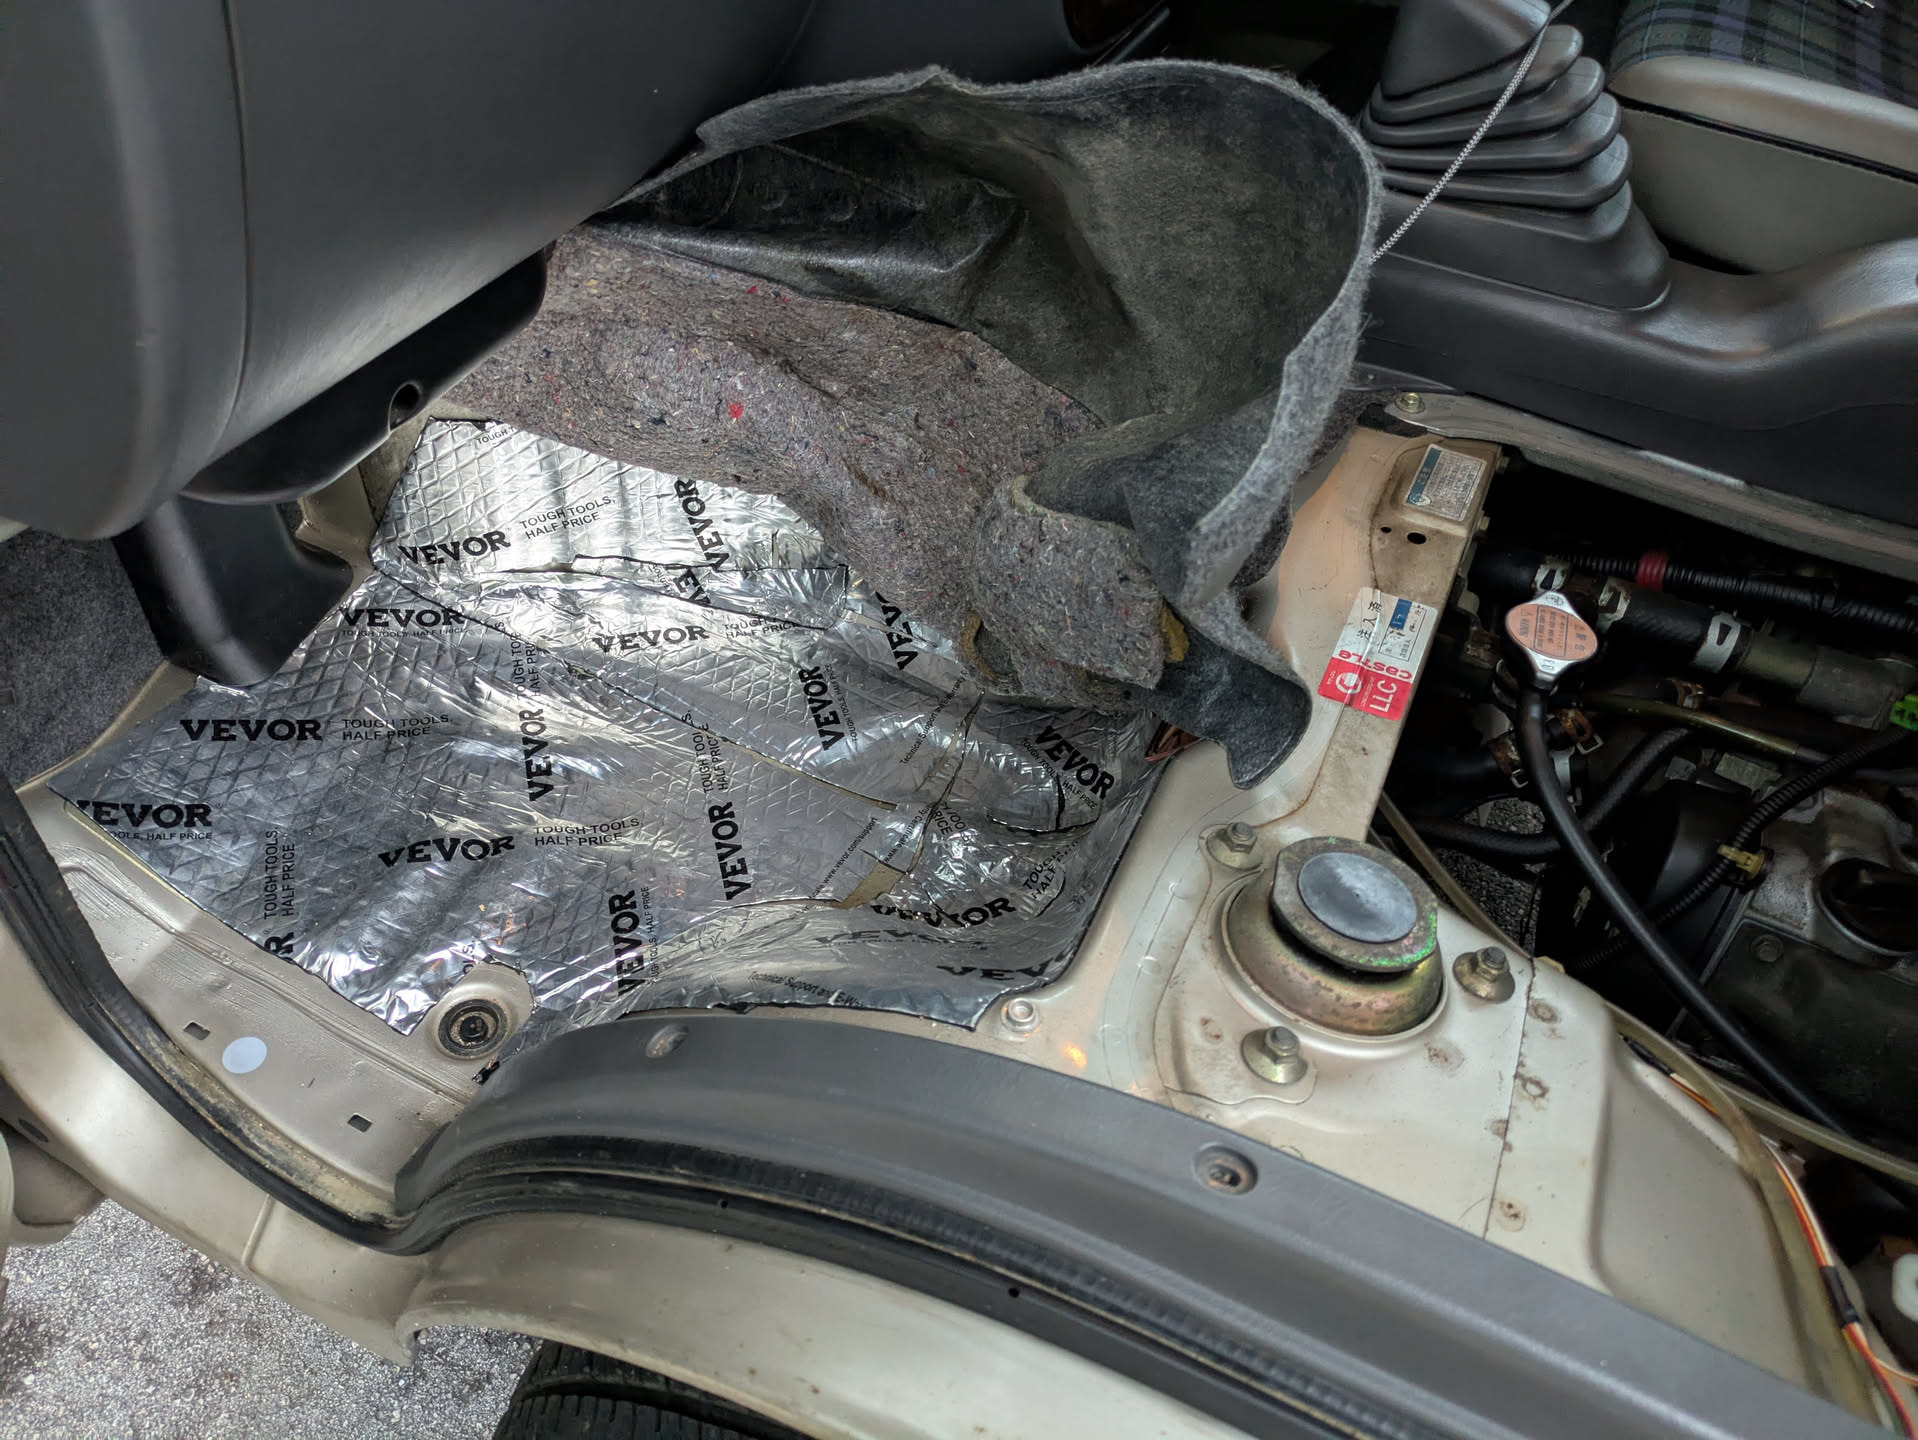
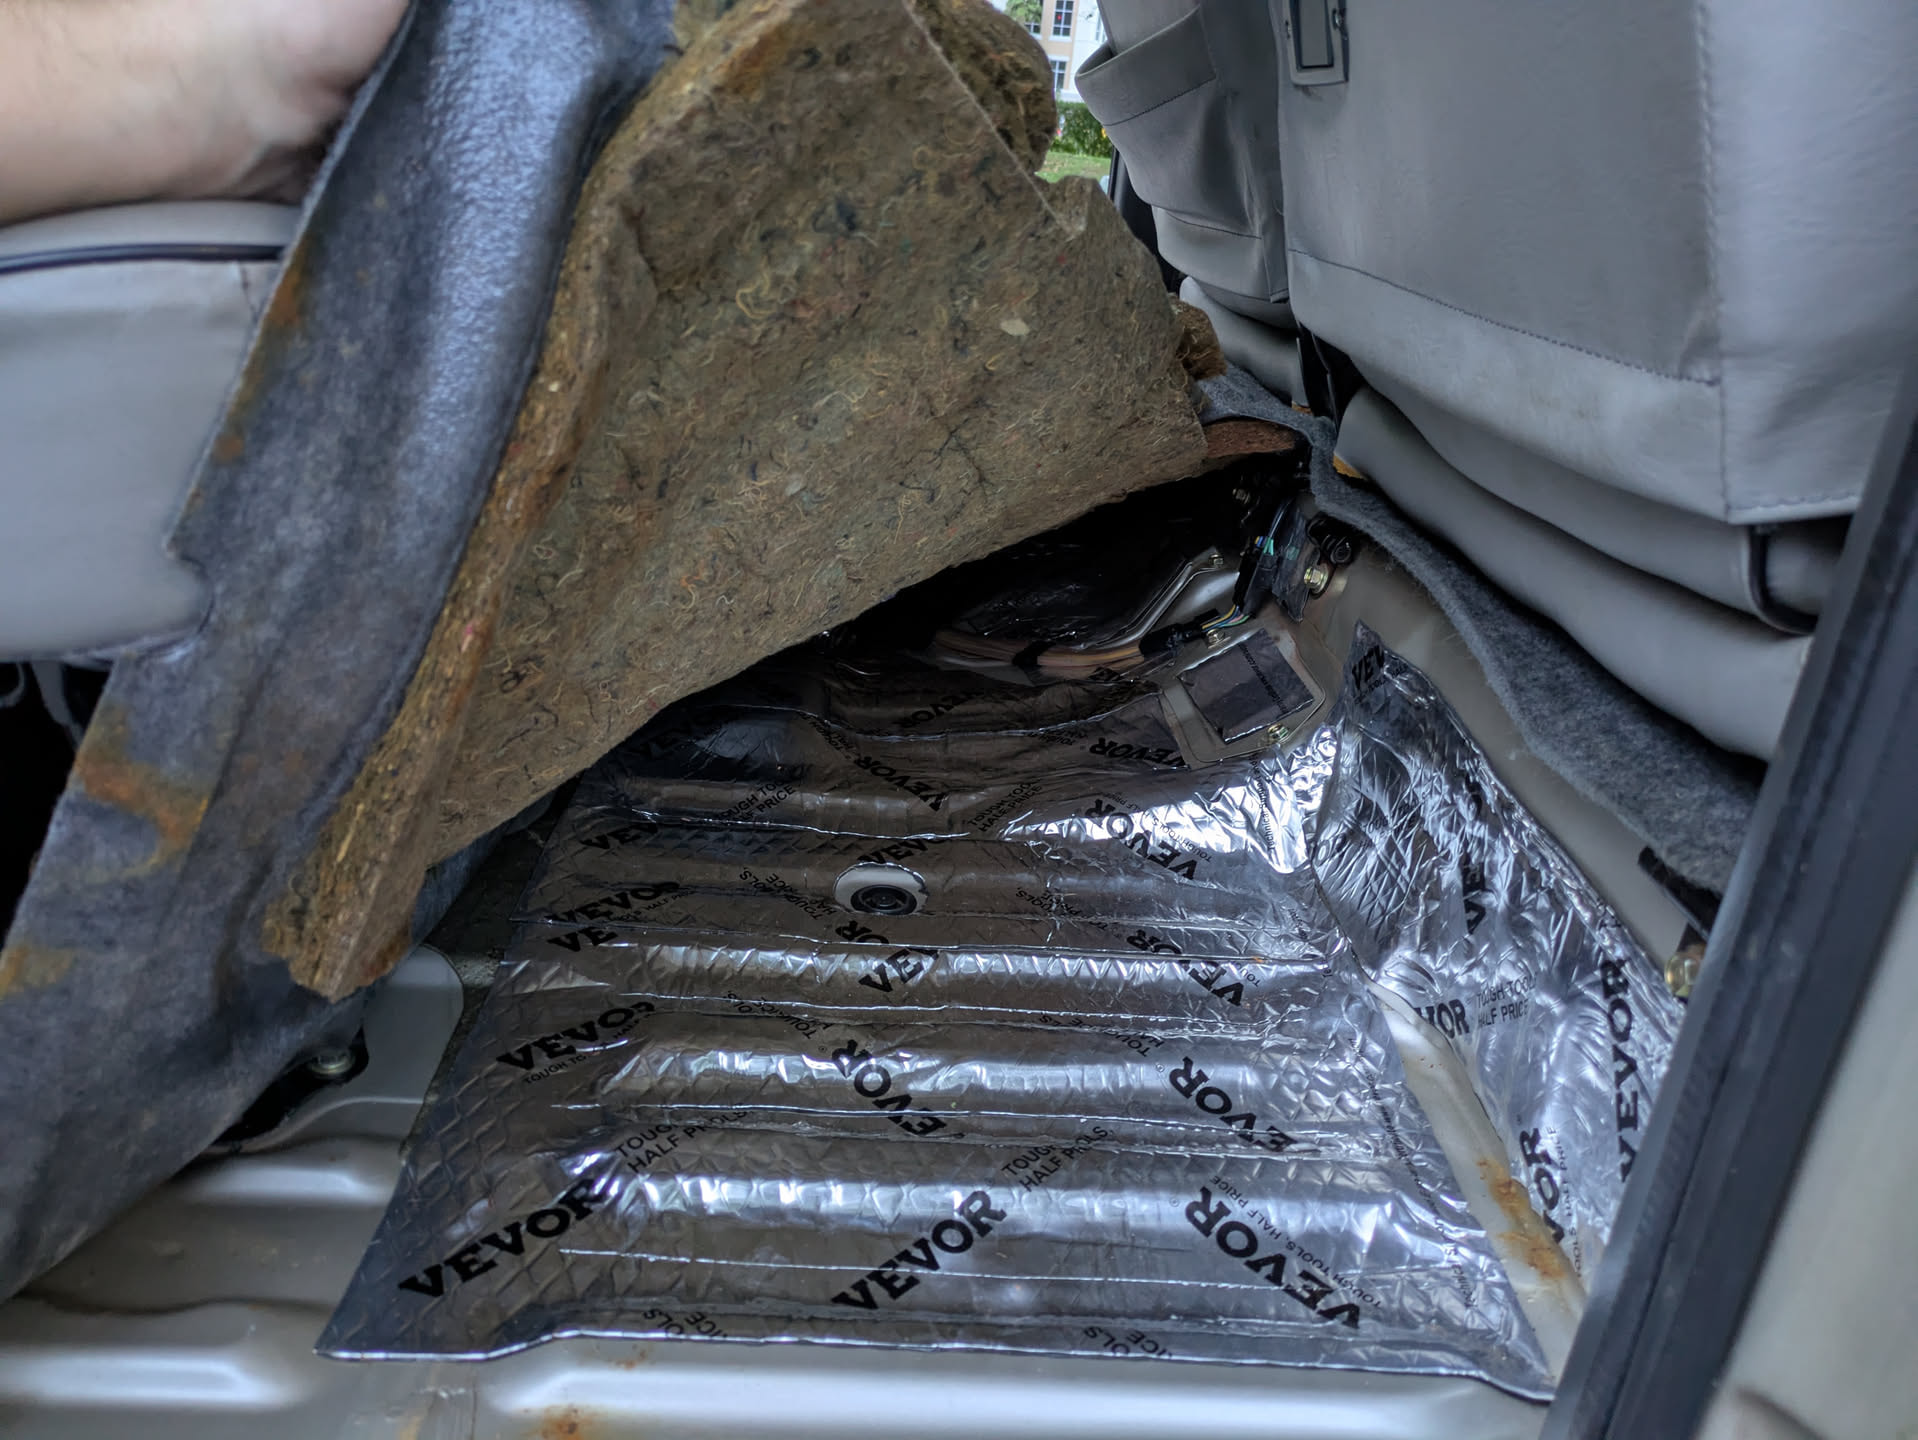
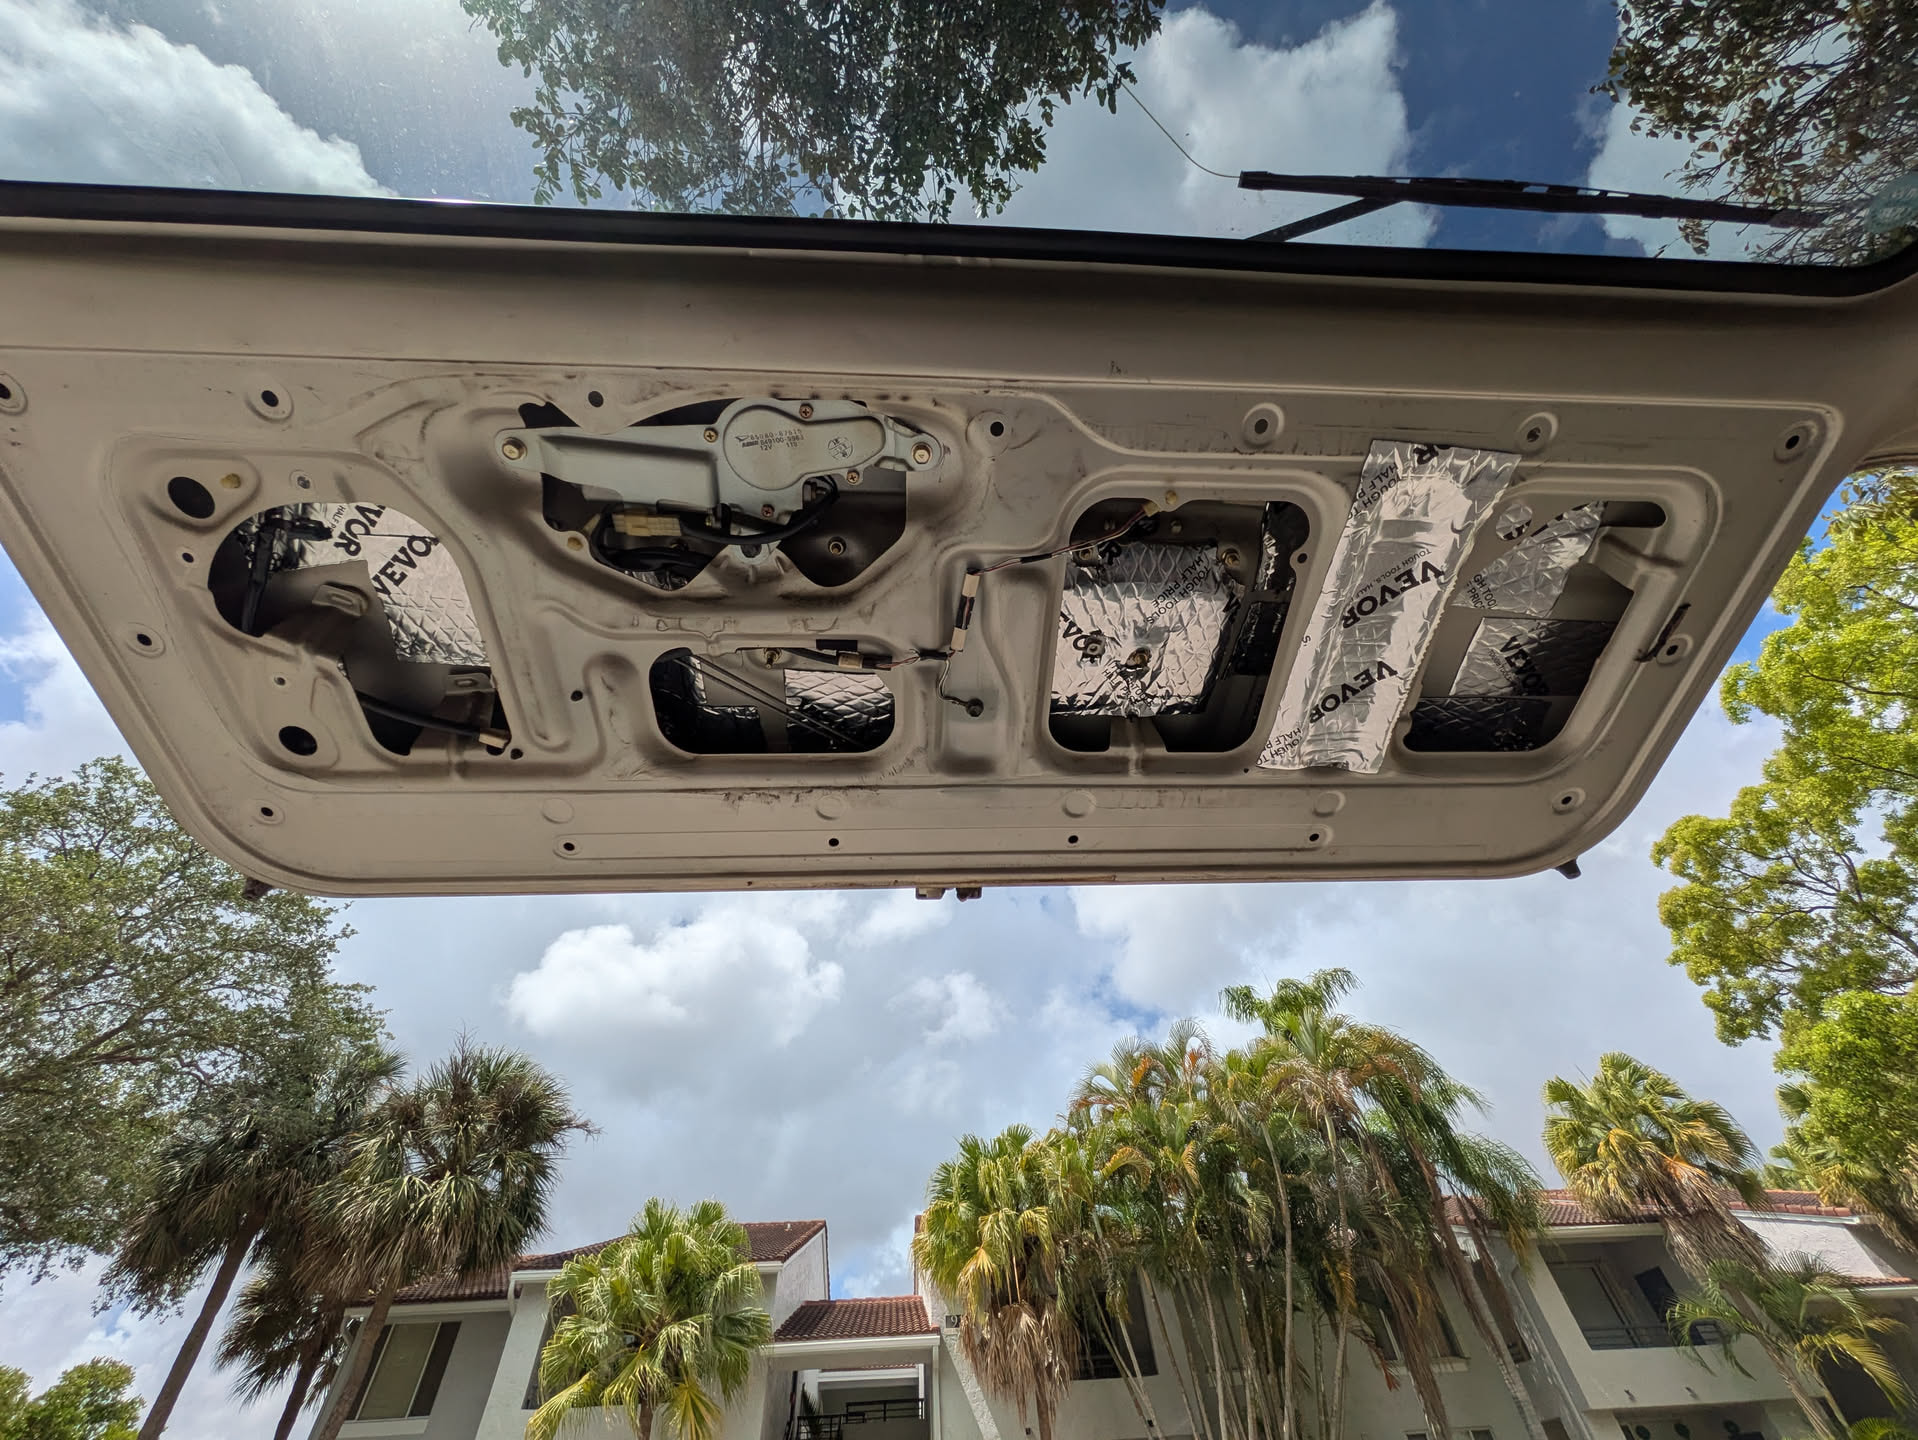
The next thing I did was sound deadening. 36 sqft of 80 mil butyl weighing 25 lbs.

A lot of these photos aren’t great because they were taken after the job was done but I have done:

Both of the front doors, inner and outer skin

The entirety of the driver and passenger footwells

The rear footwells and the worlds smallest firewall

Portions of the rear tailgate

I also did both rear doors to about the same coverage as the fronts, under the rear seats, a portion of the rear quarter panel, and part of the cargo area floor, but I guess I never took pictures. I could probably eat another 36sqft box but just this has made a pretty big difference.

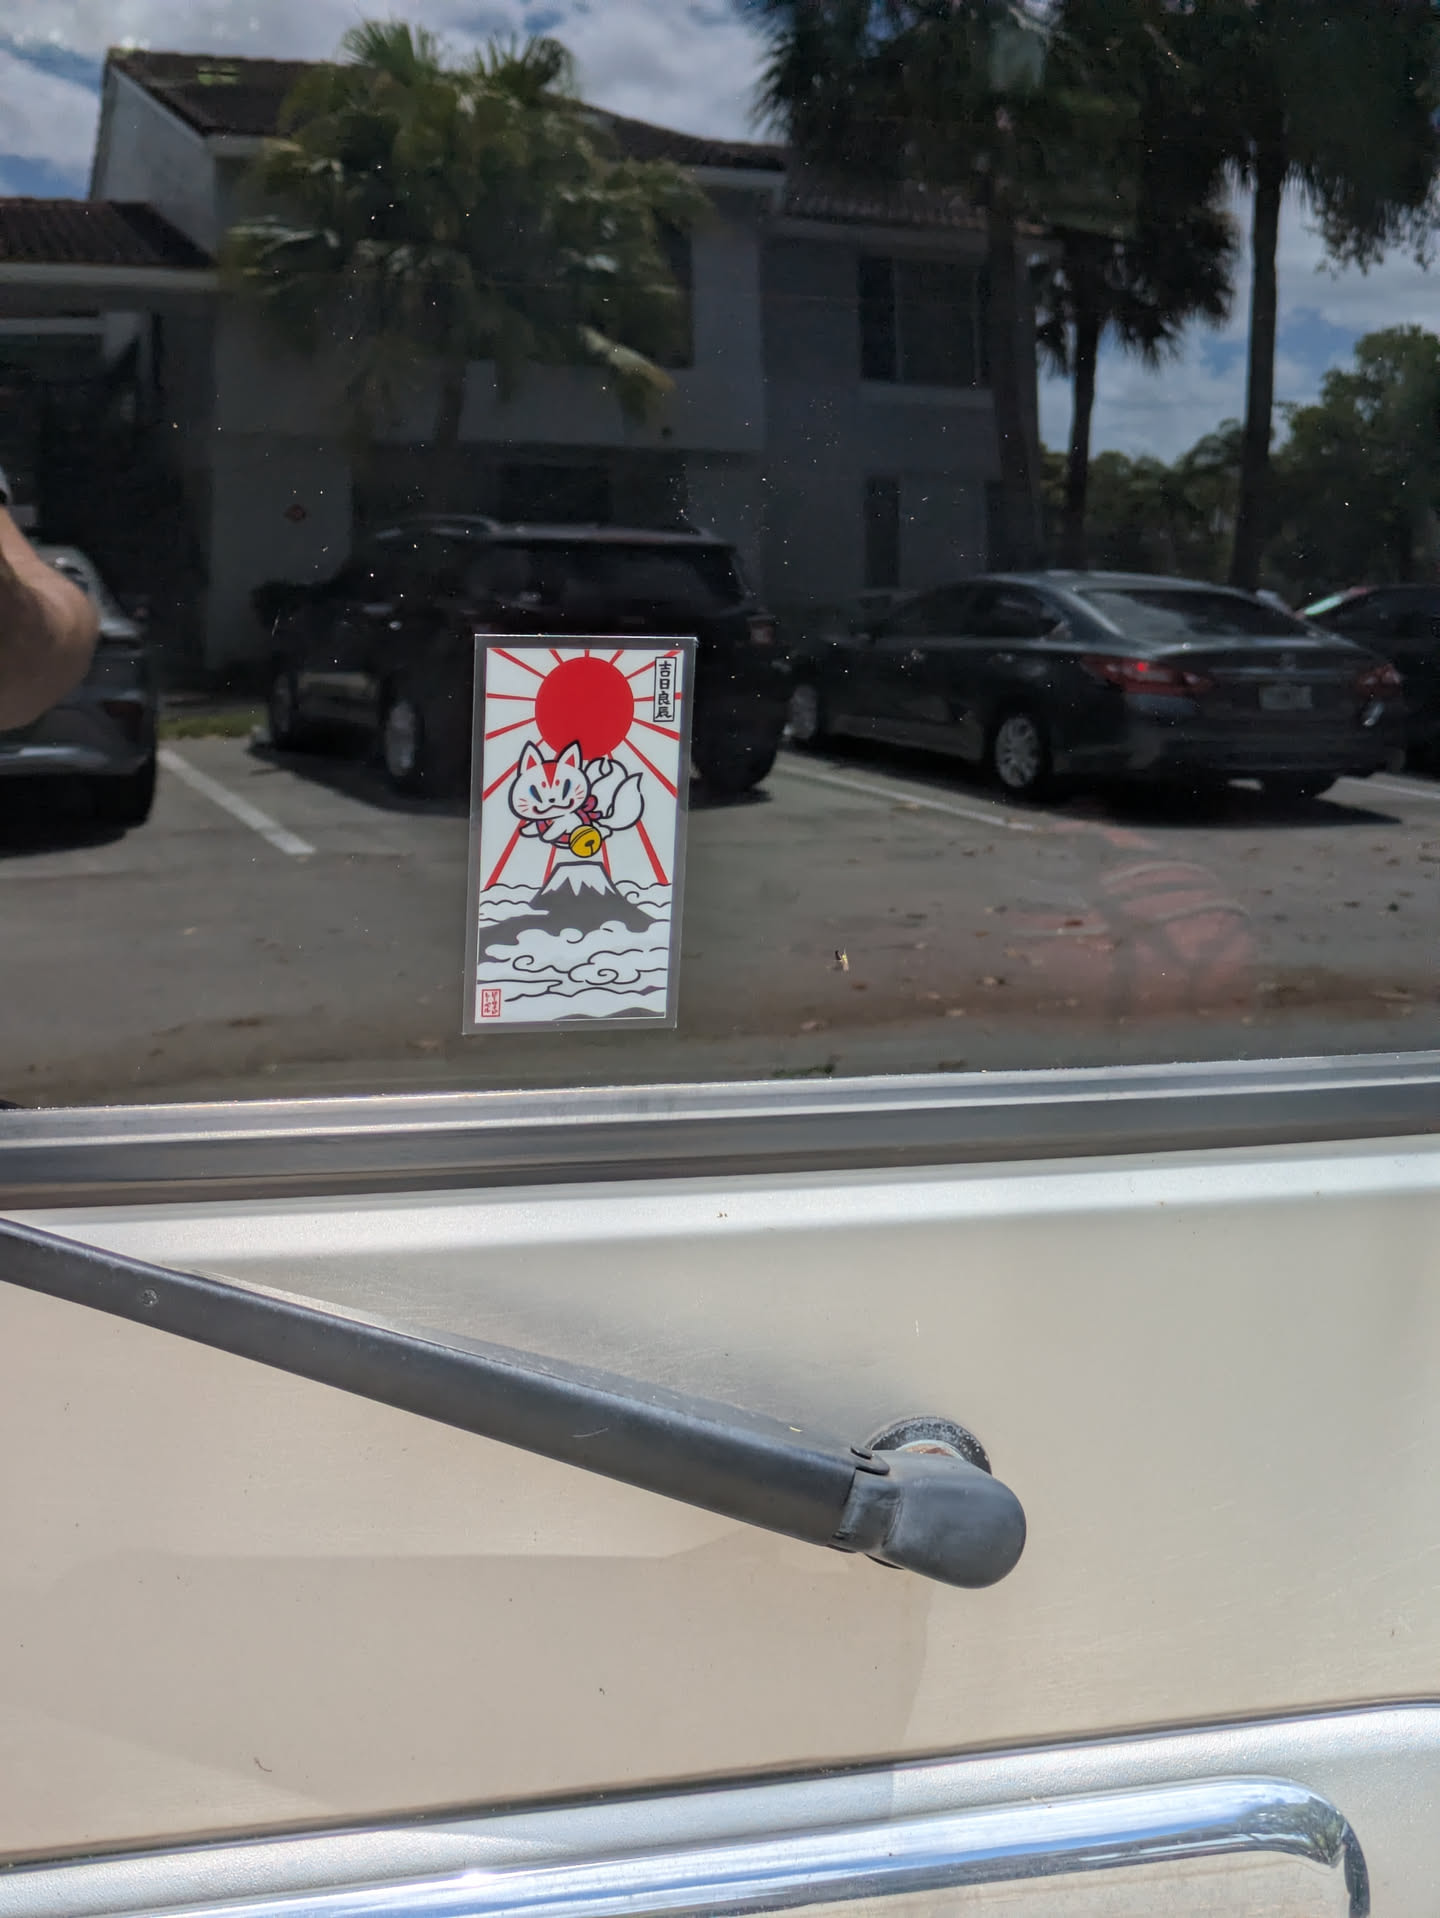
Bonus cute mount fuji sticker as I found out this car was from shizuoka prefecture!

3 Likes

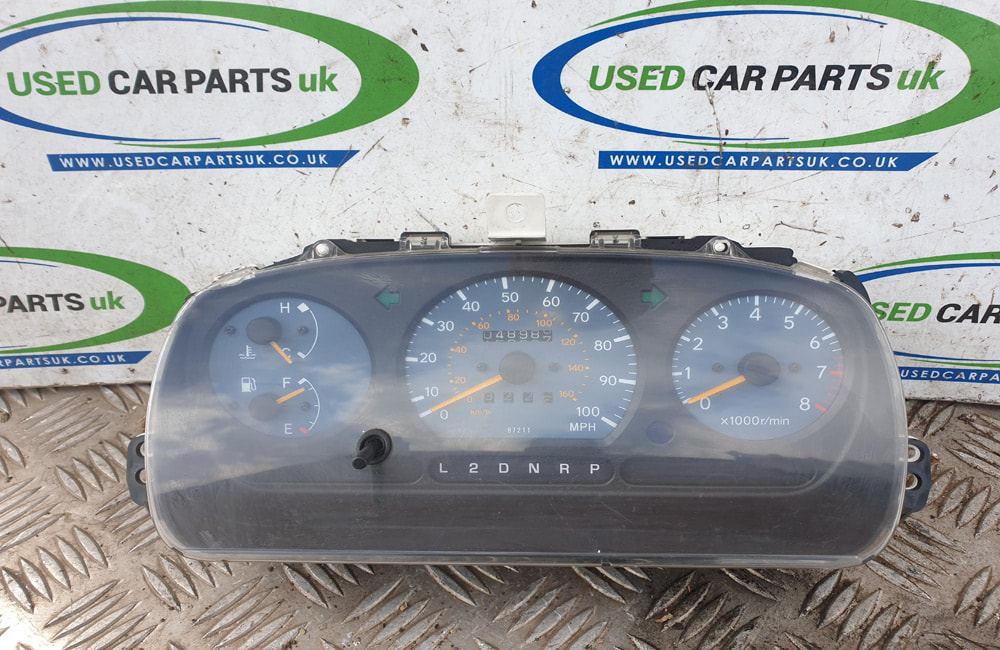
the mph speedo is for sale in uk if you needed

1 Like

I think I like the white dials more than not having to convert kph in my head :grinning_face_with_smiling_eyes:

Will keep eyes out though because having a tach would be nice!

1 Like

Should be same wiring.

adjust mileage
change new w5w bulbs
install and done

1 Like

Ok still plenty of catching up to do so here’s some more stuff.

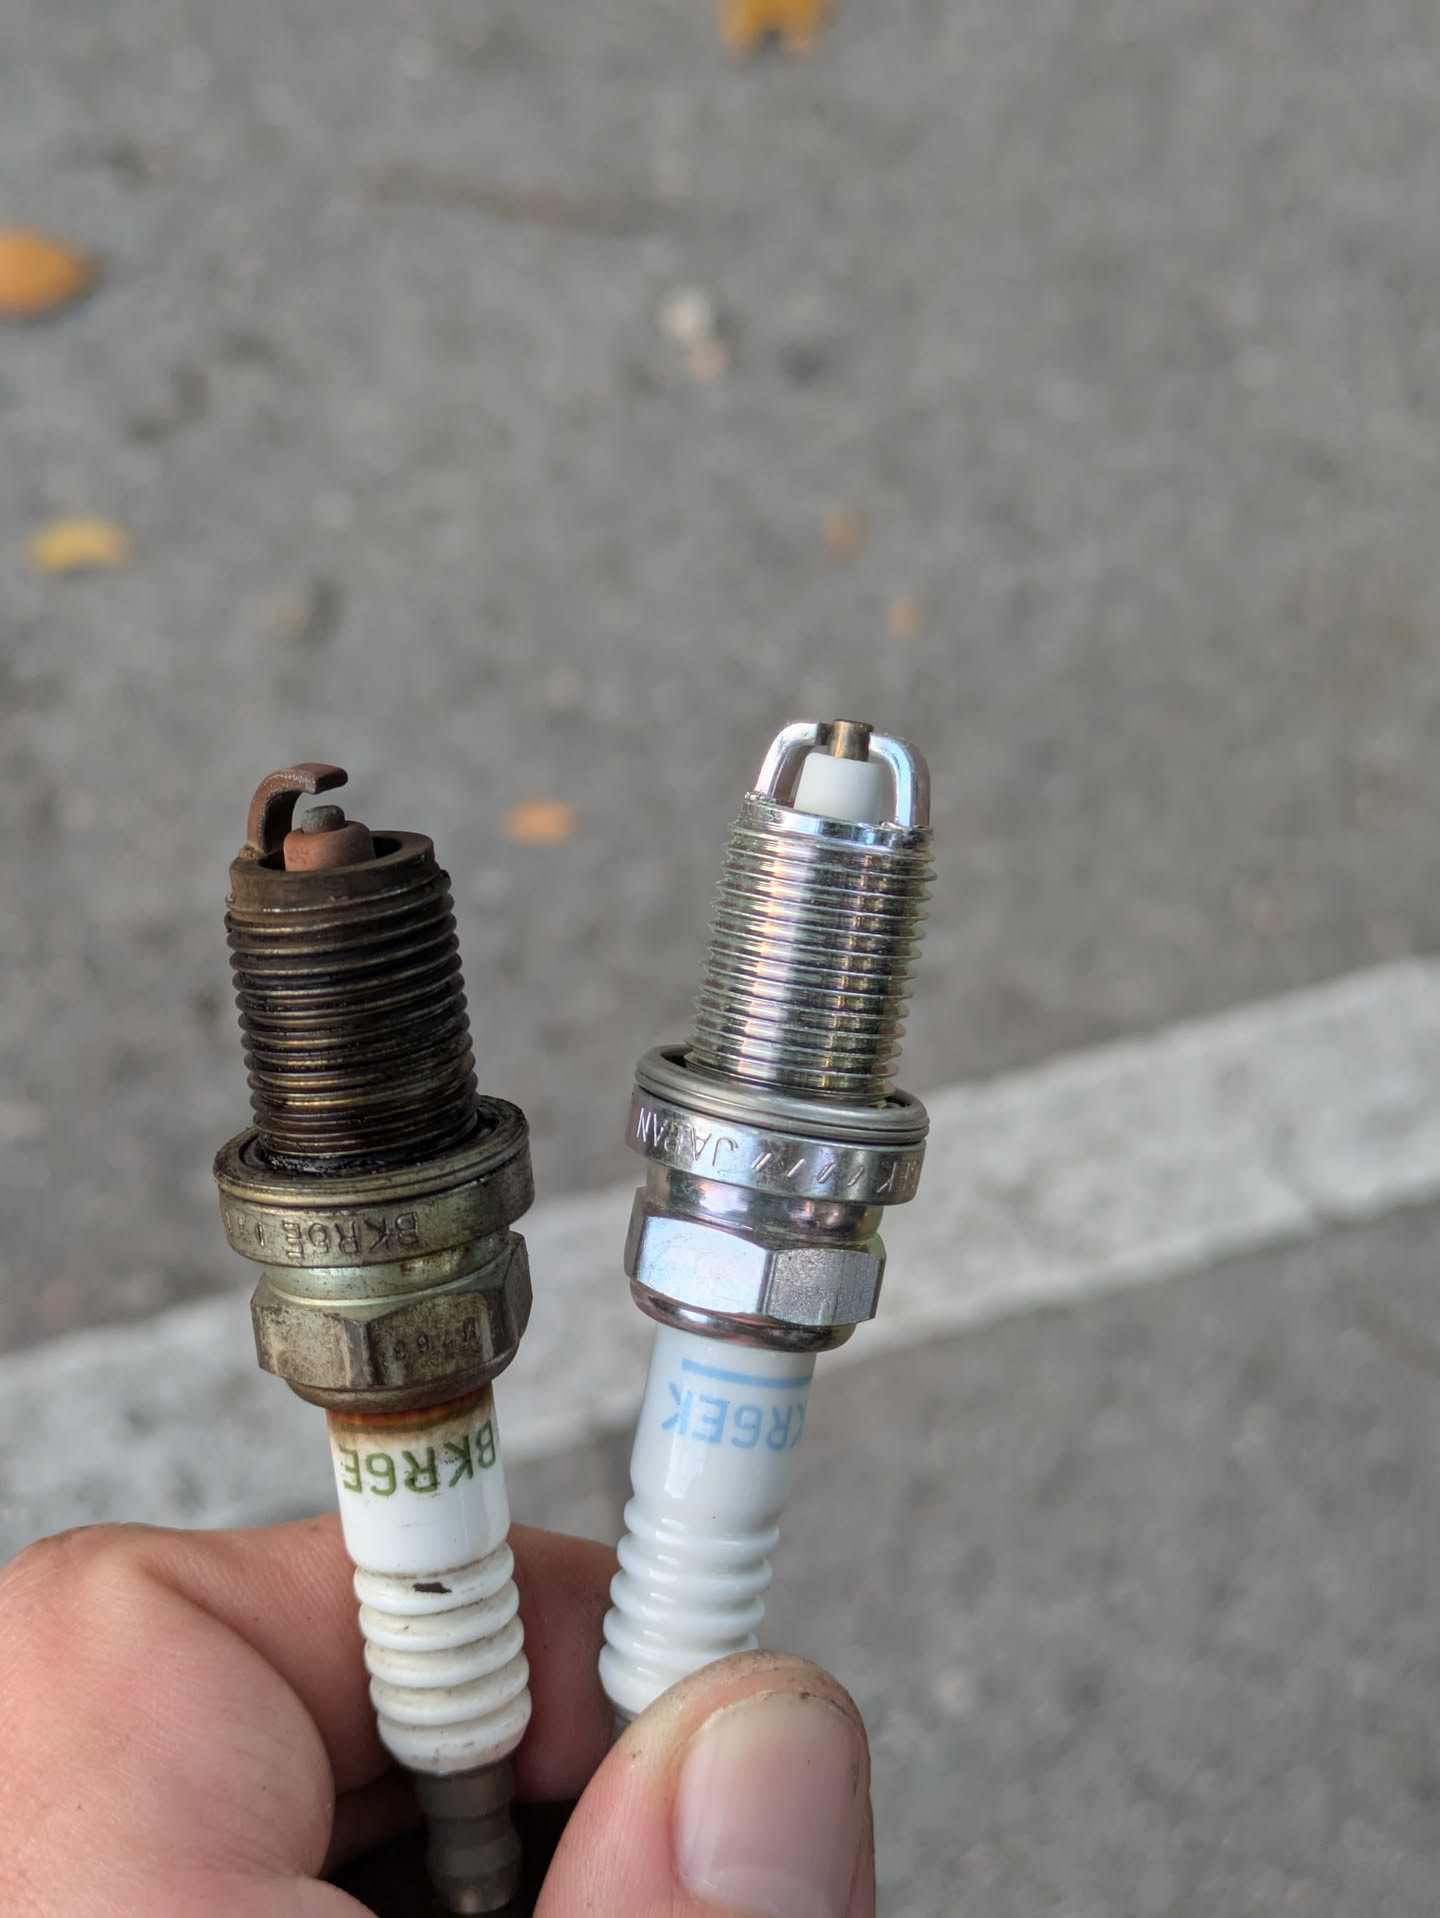
Changed spark plugs, more so I knew what was in it than to fix any problem. It had the right plugs, now it has new right plugs - but that wacky dual electrode stuff that probably does nothing that daihatsu wants you to run.

Maybe running a tad rich? The nose o2 sensor seems to think so, what do you guys think?

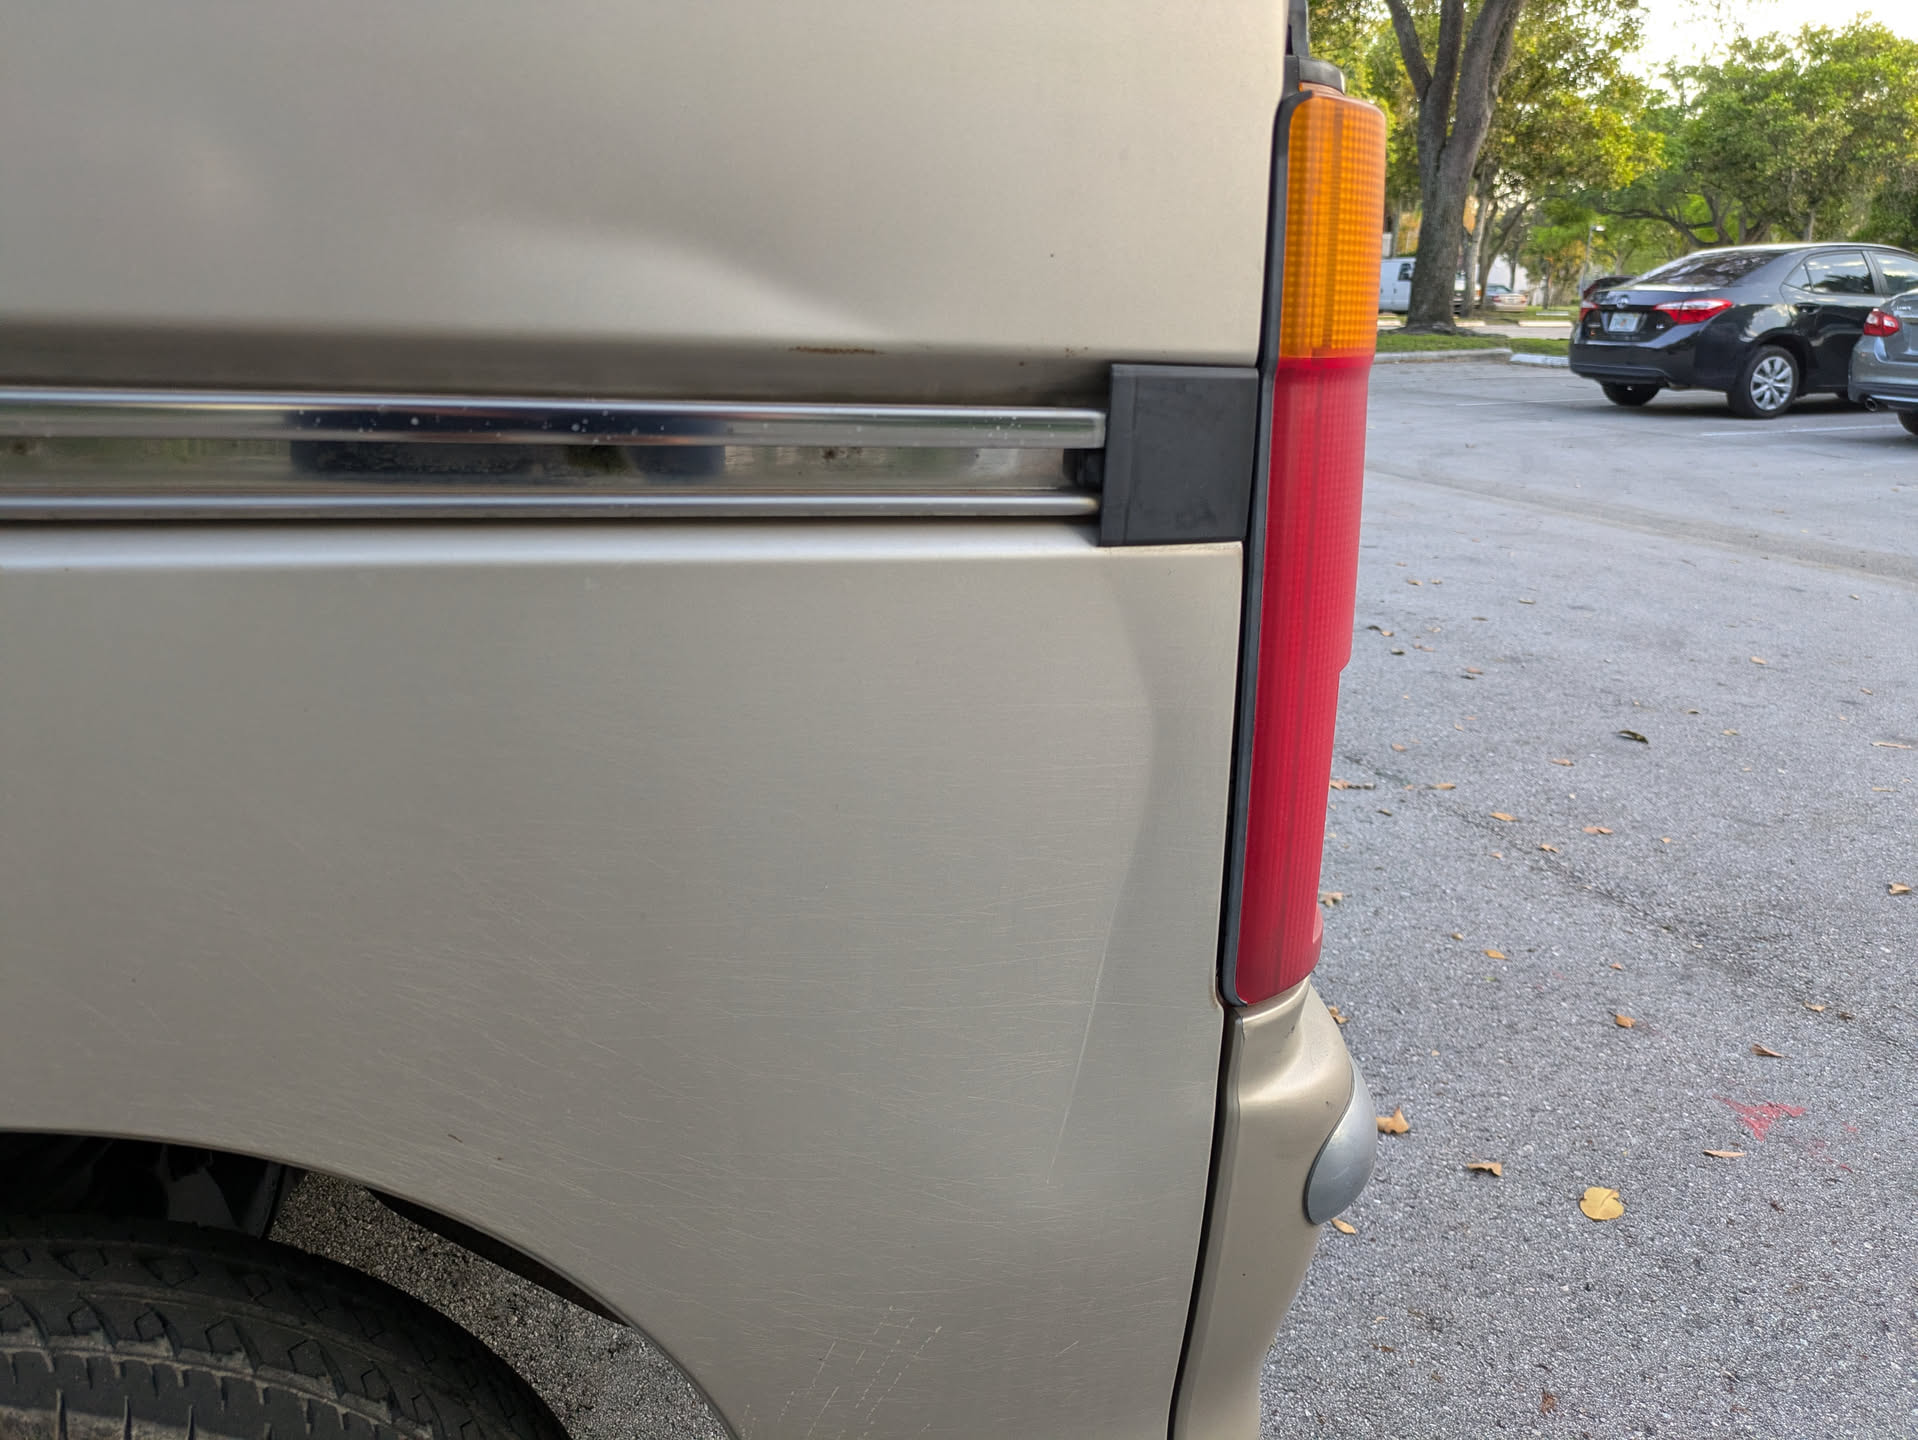
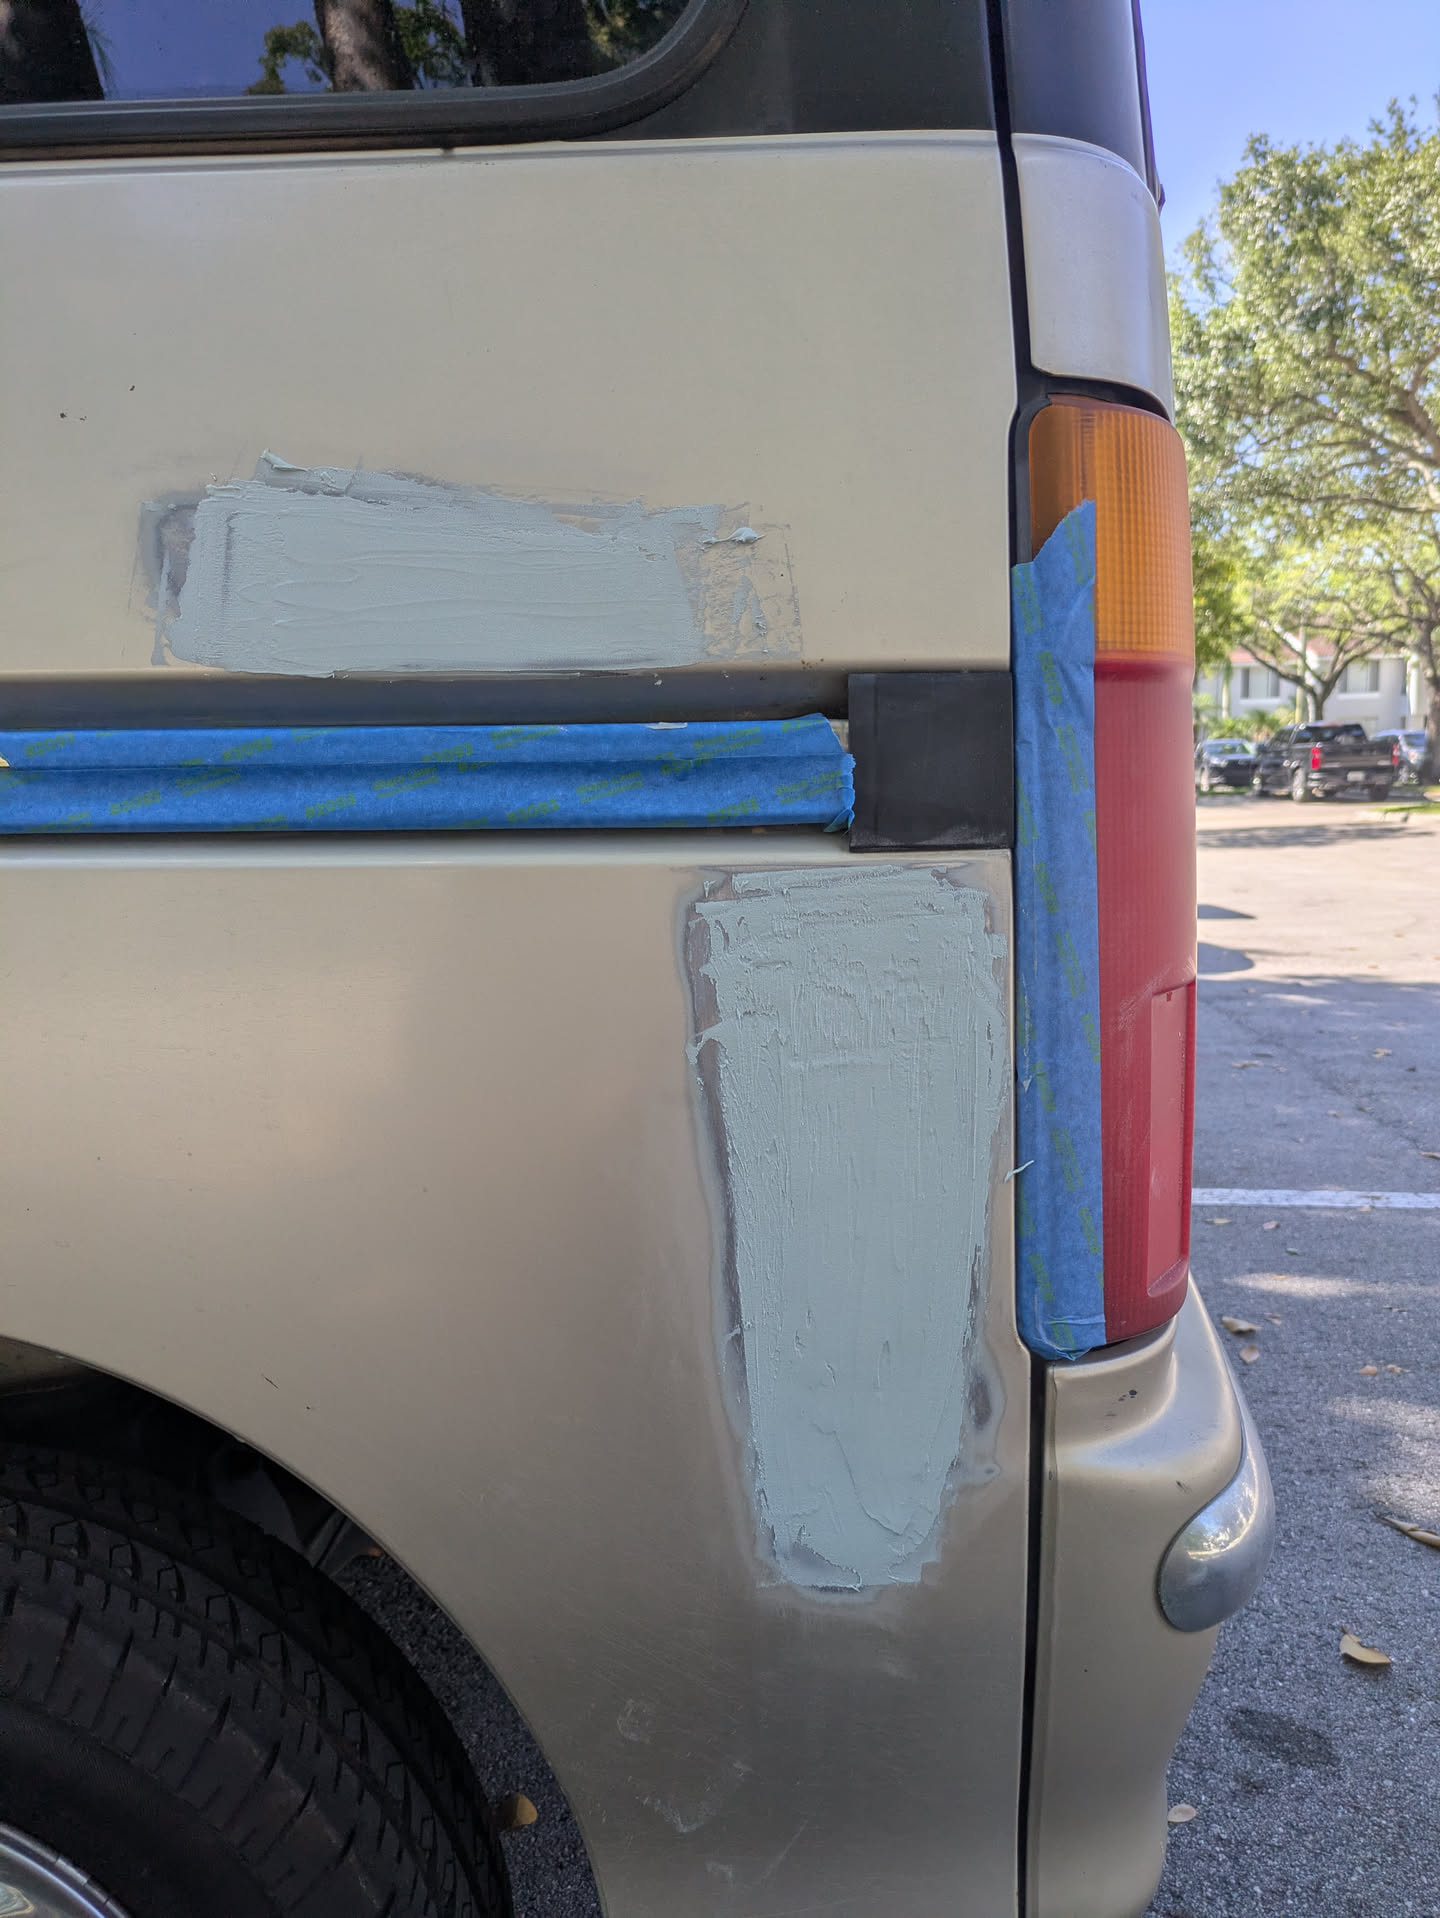
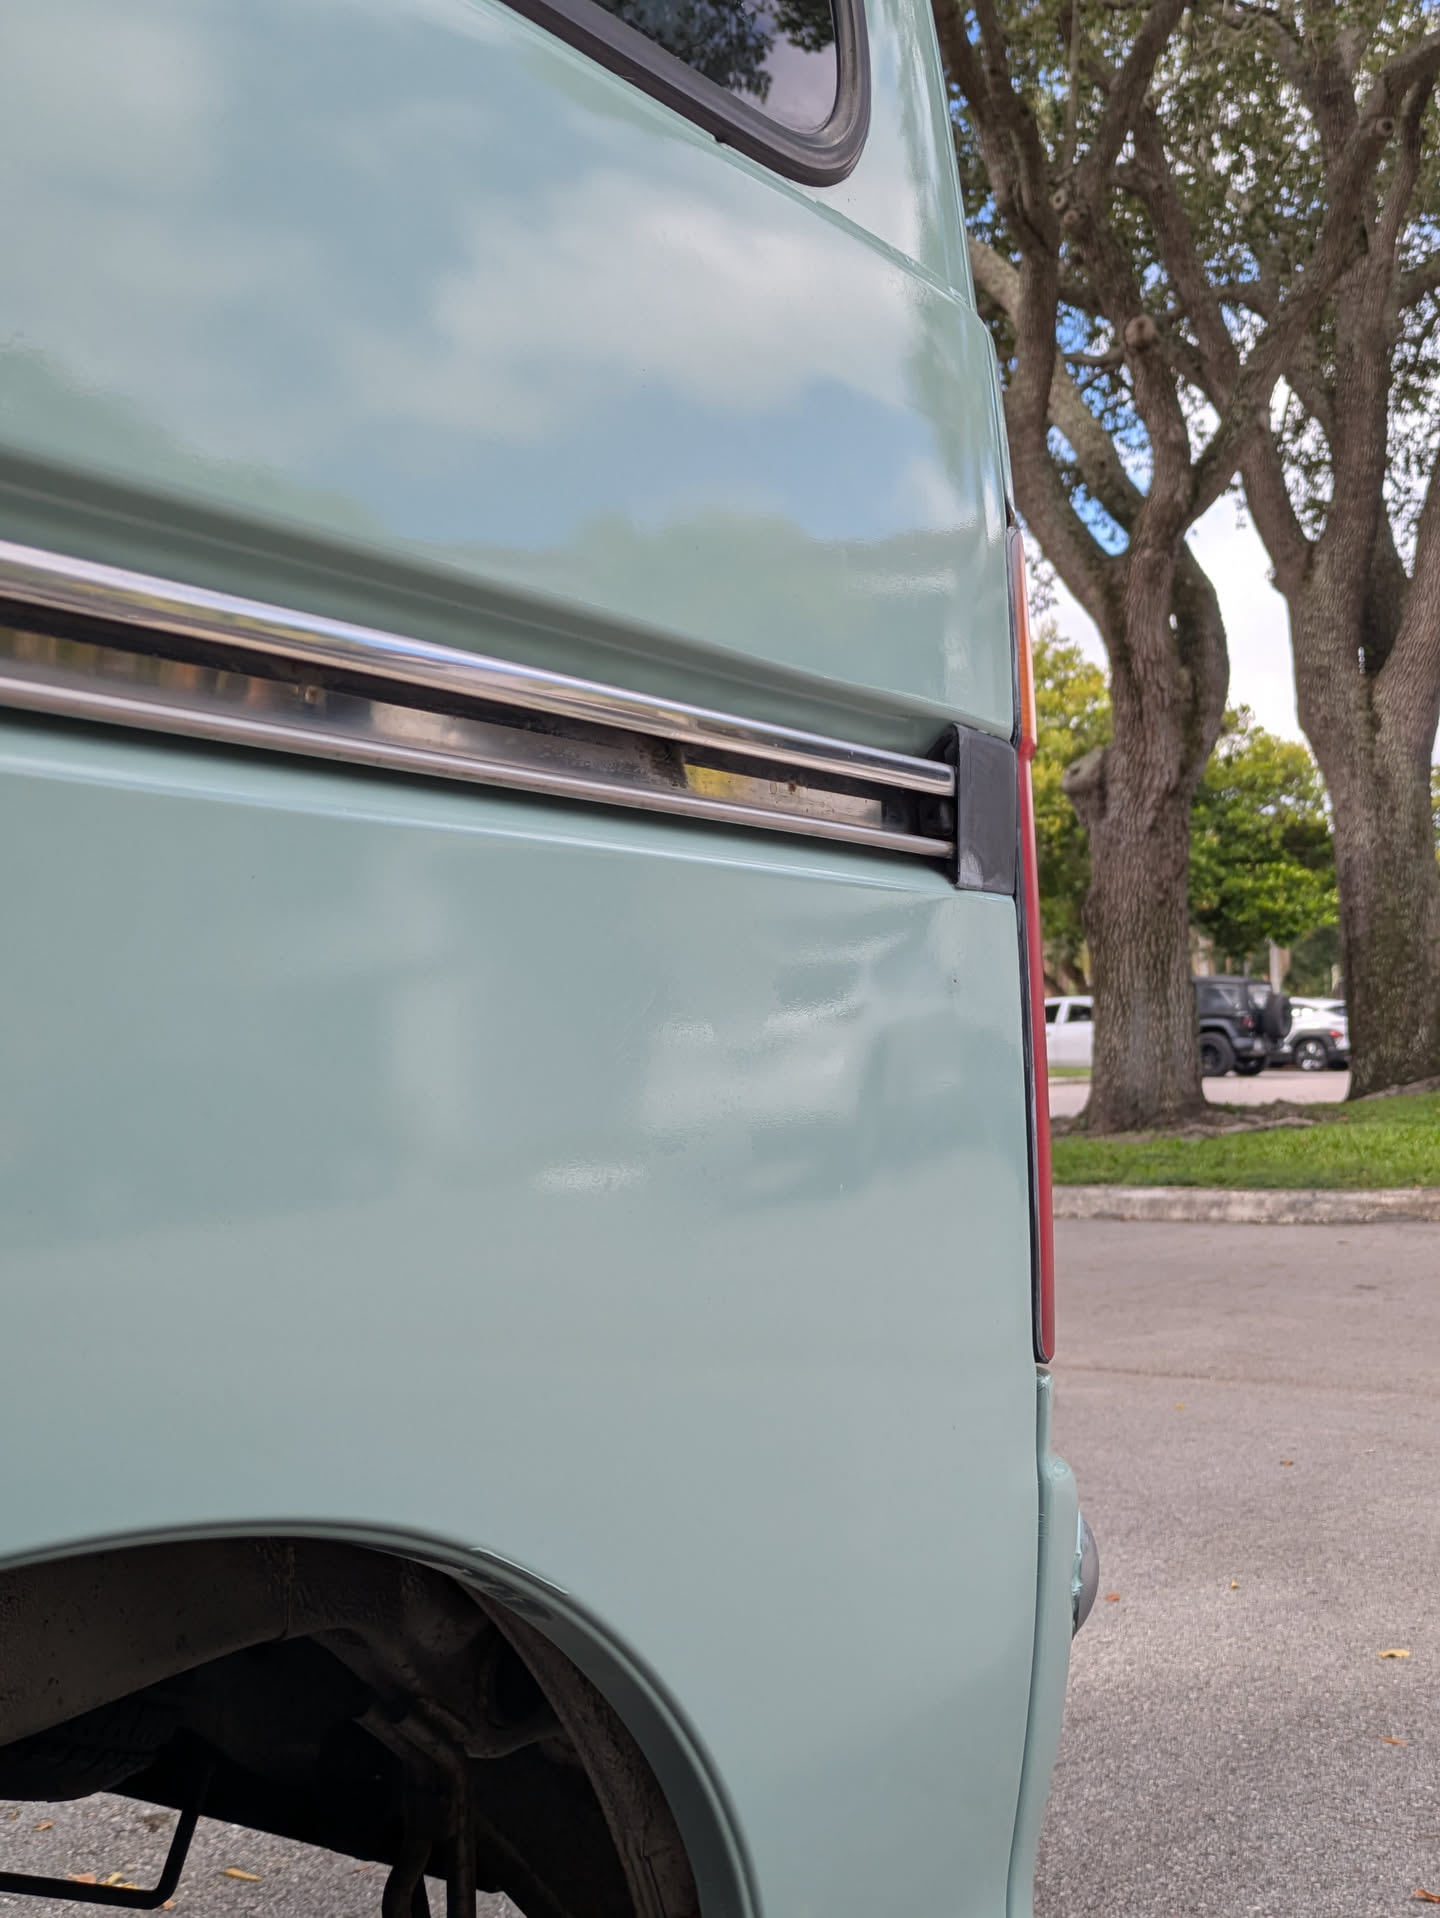
As good a shape the car was in, it did have 1 problem, a pretty big hit in the rear quarter panel. The PDR guys near me wanted $400 to fix it despite infinite access to the rear because they were scared of the body lines on the sliding door. So i decided to do it myself with bog. Its been 13 years since I’ve done any bog so it was good fun re-learning how to do it. Its a flat panel so it should be easy - right?

The first coat


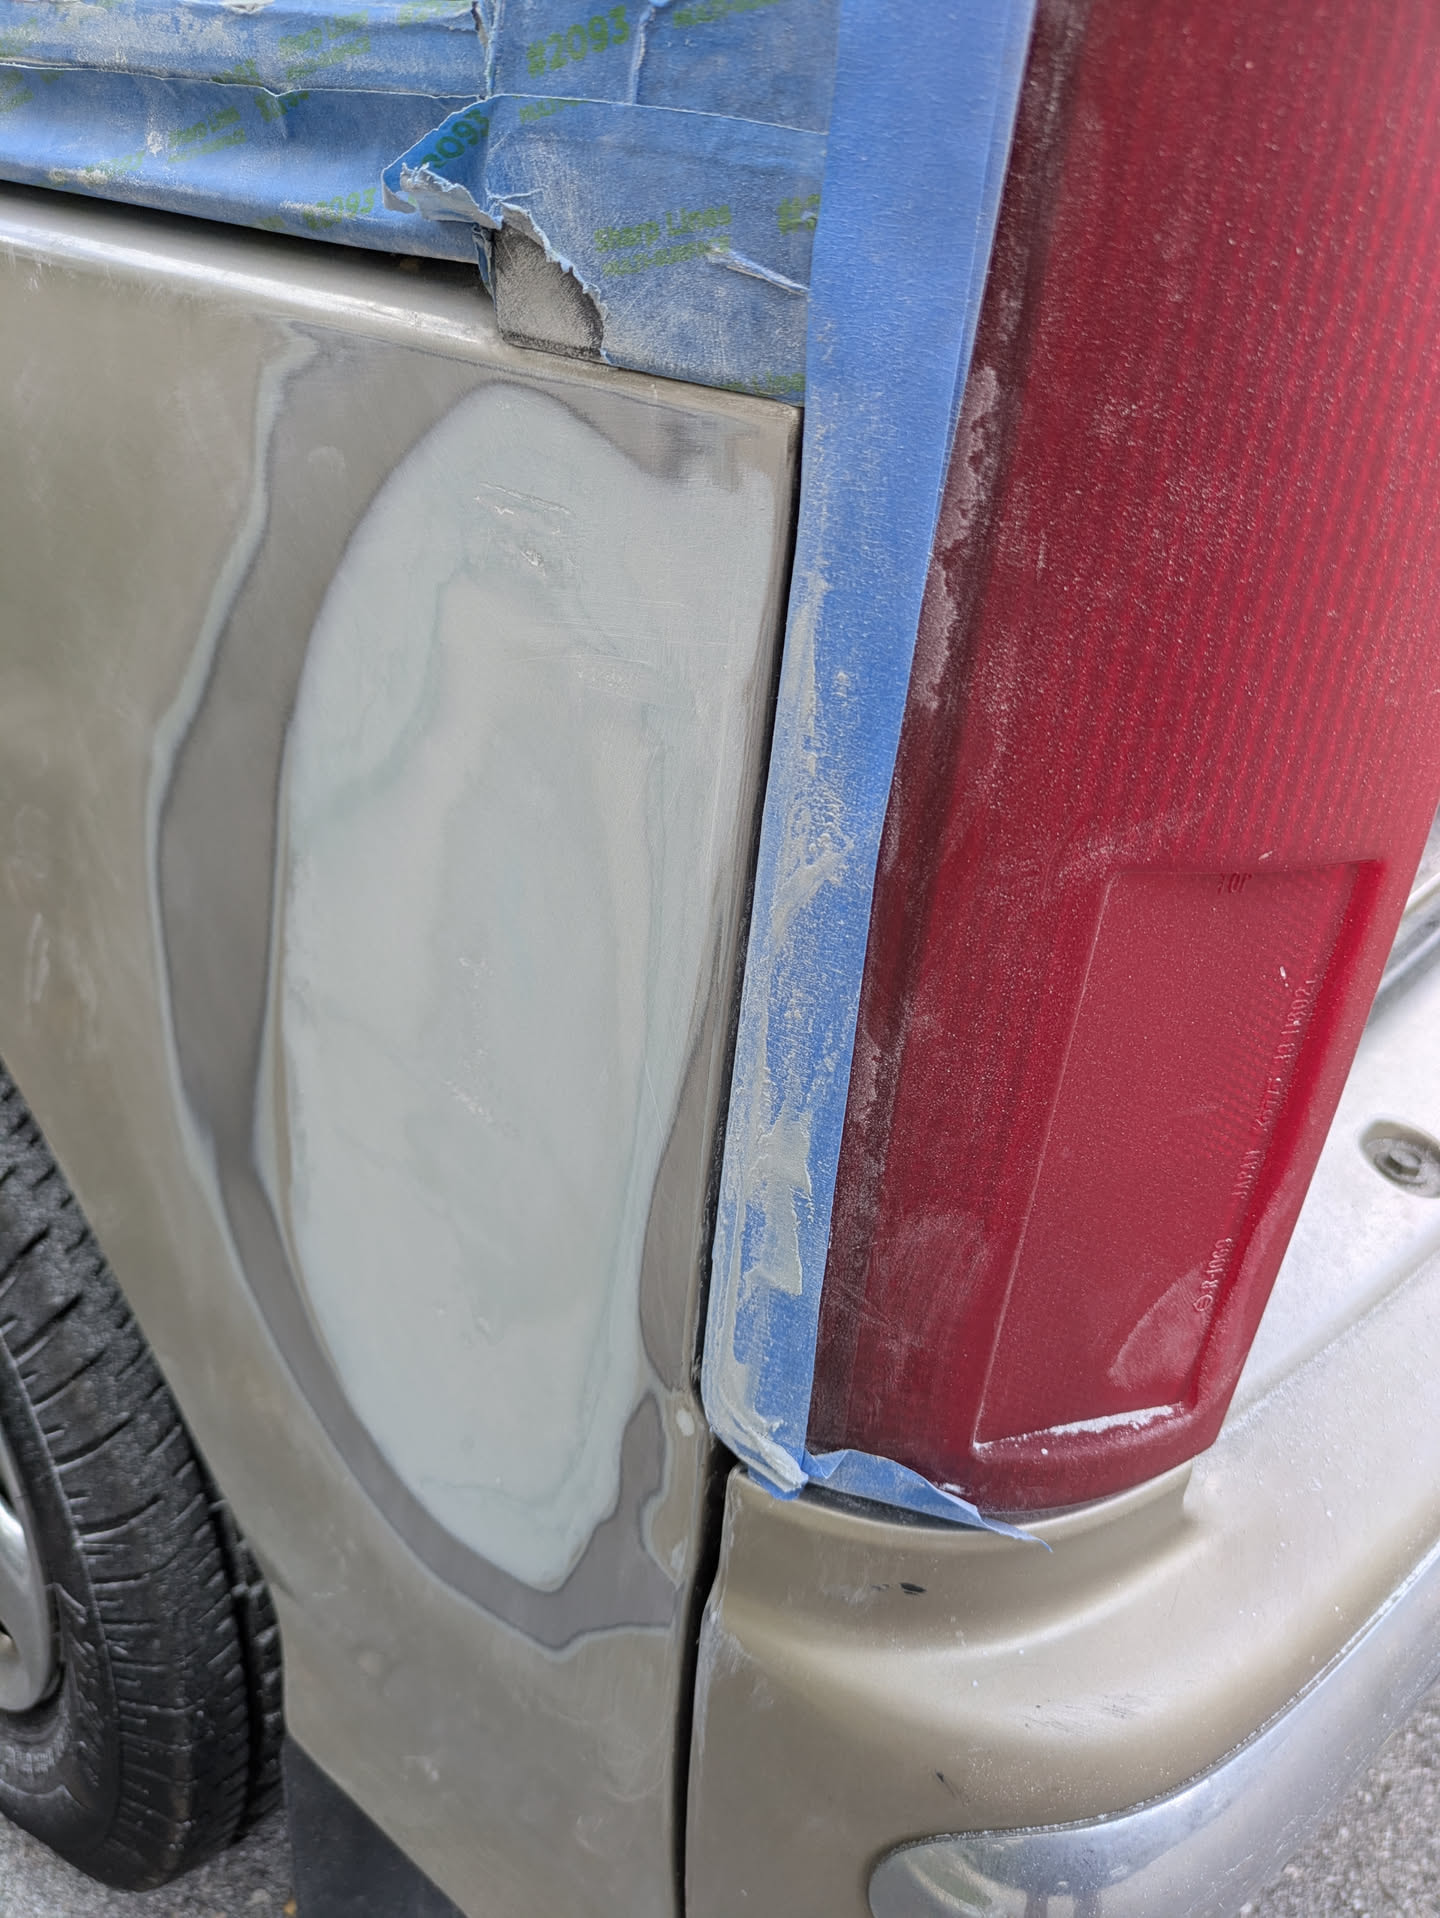
Many hours of sanding later and the last coat of bog. I think I used 5 or so coats in total.

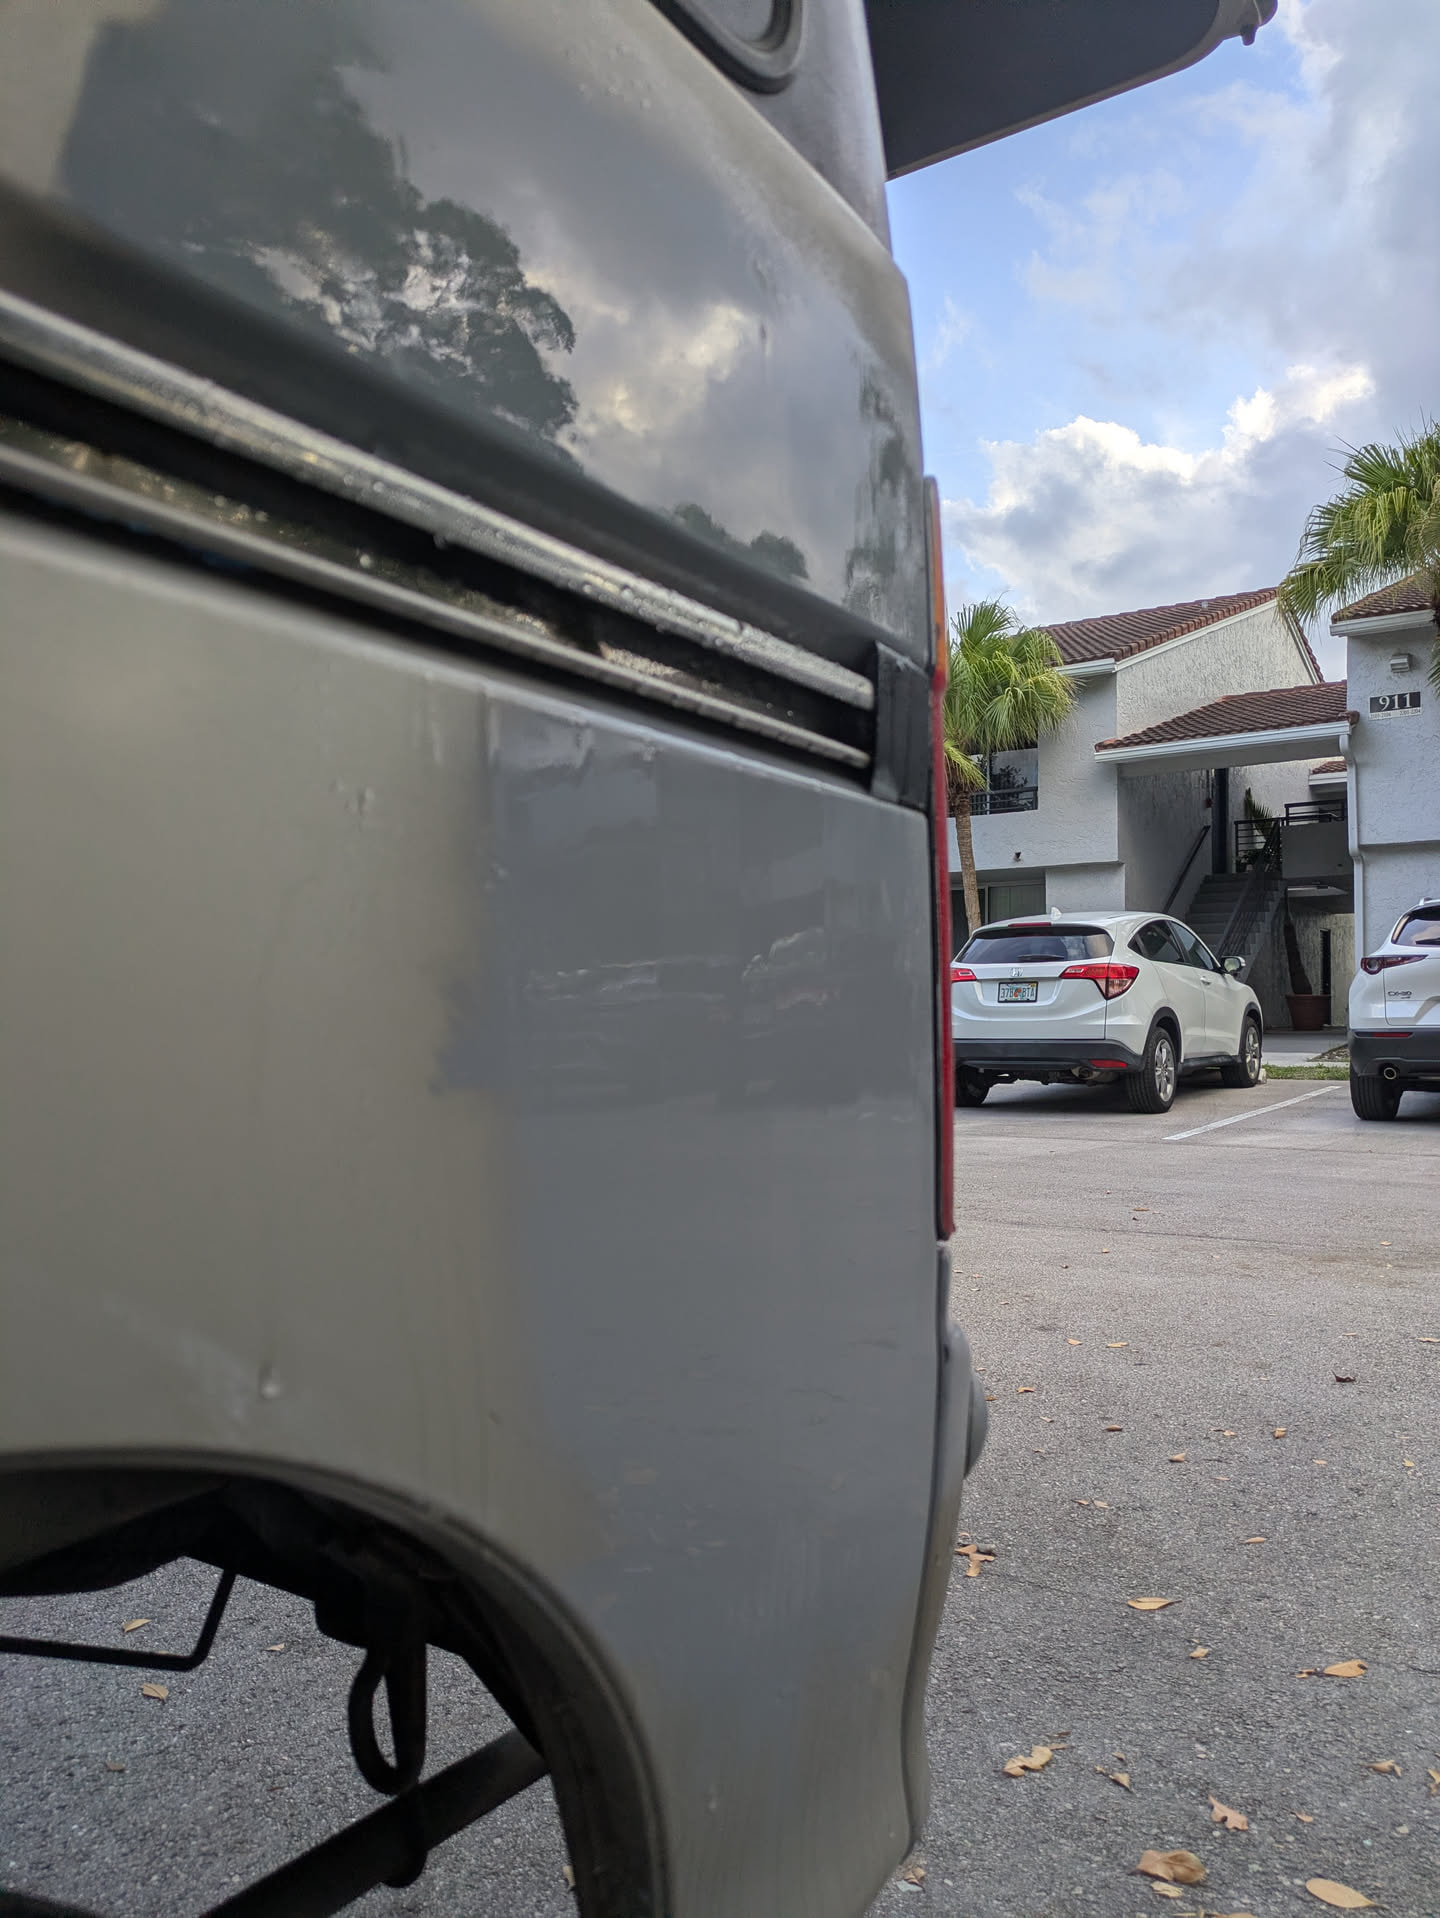
Even more sanding and Hi-Build primer on, wet sanding at this point. I underestimated just how low the dent was and probably could have gone 1-2 more coats of bog to get it truly flat, but it was getting hot and my wrap appointment was fast approaching, so I sent it. It ain’t perfect but its way better than it was.

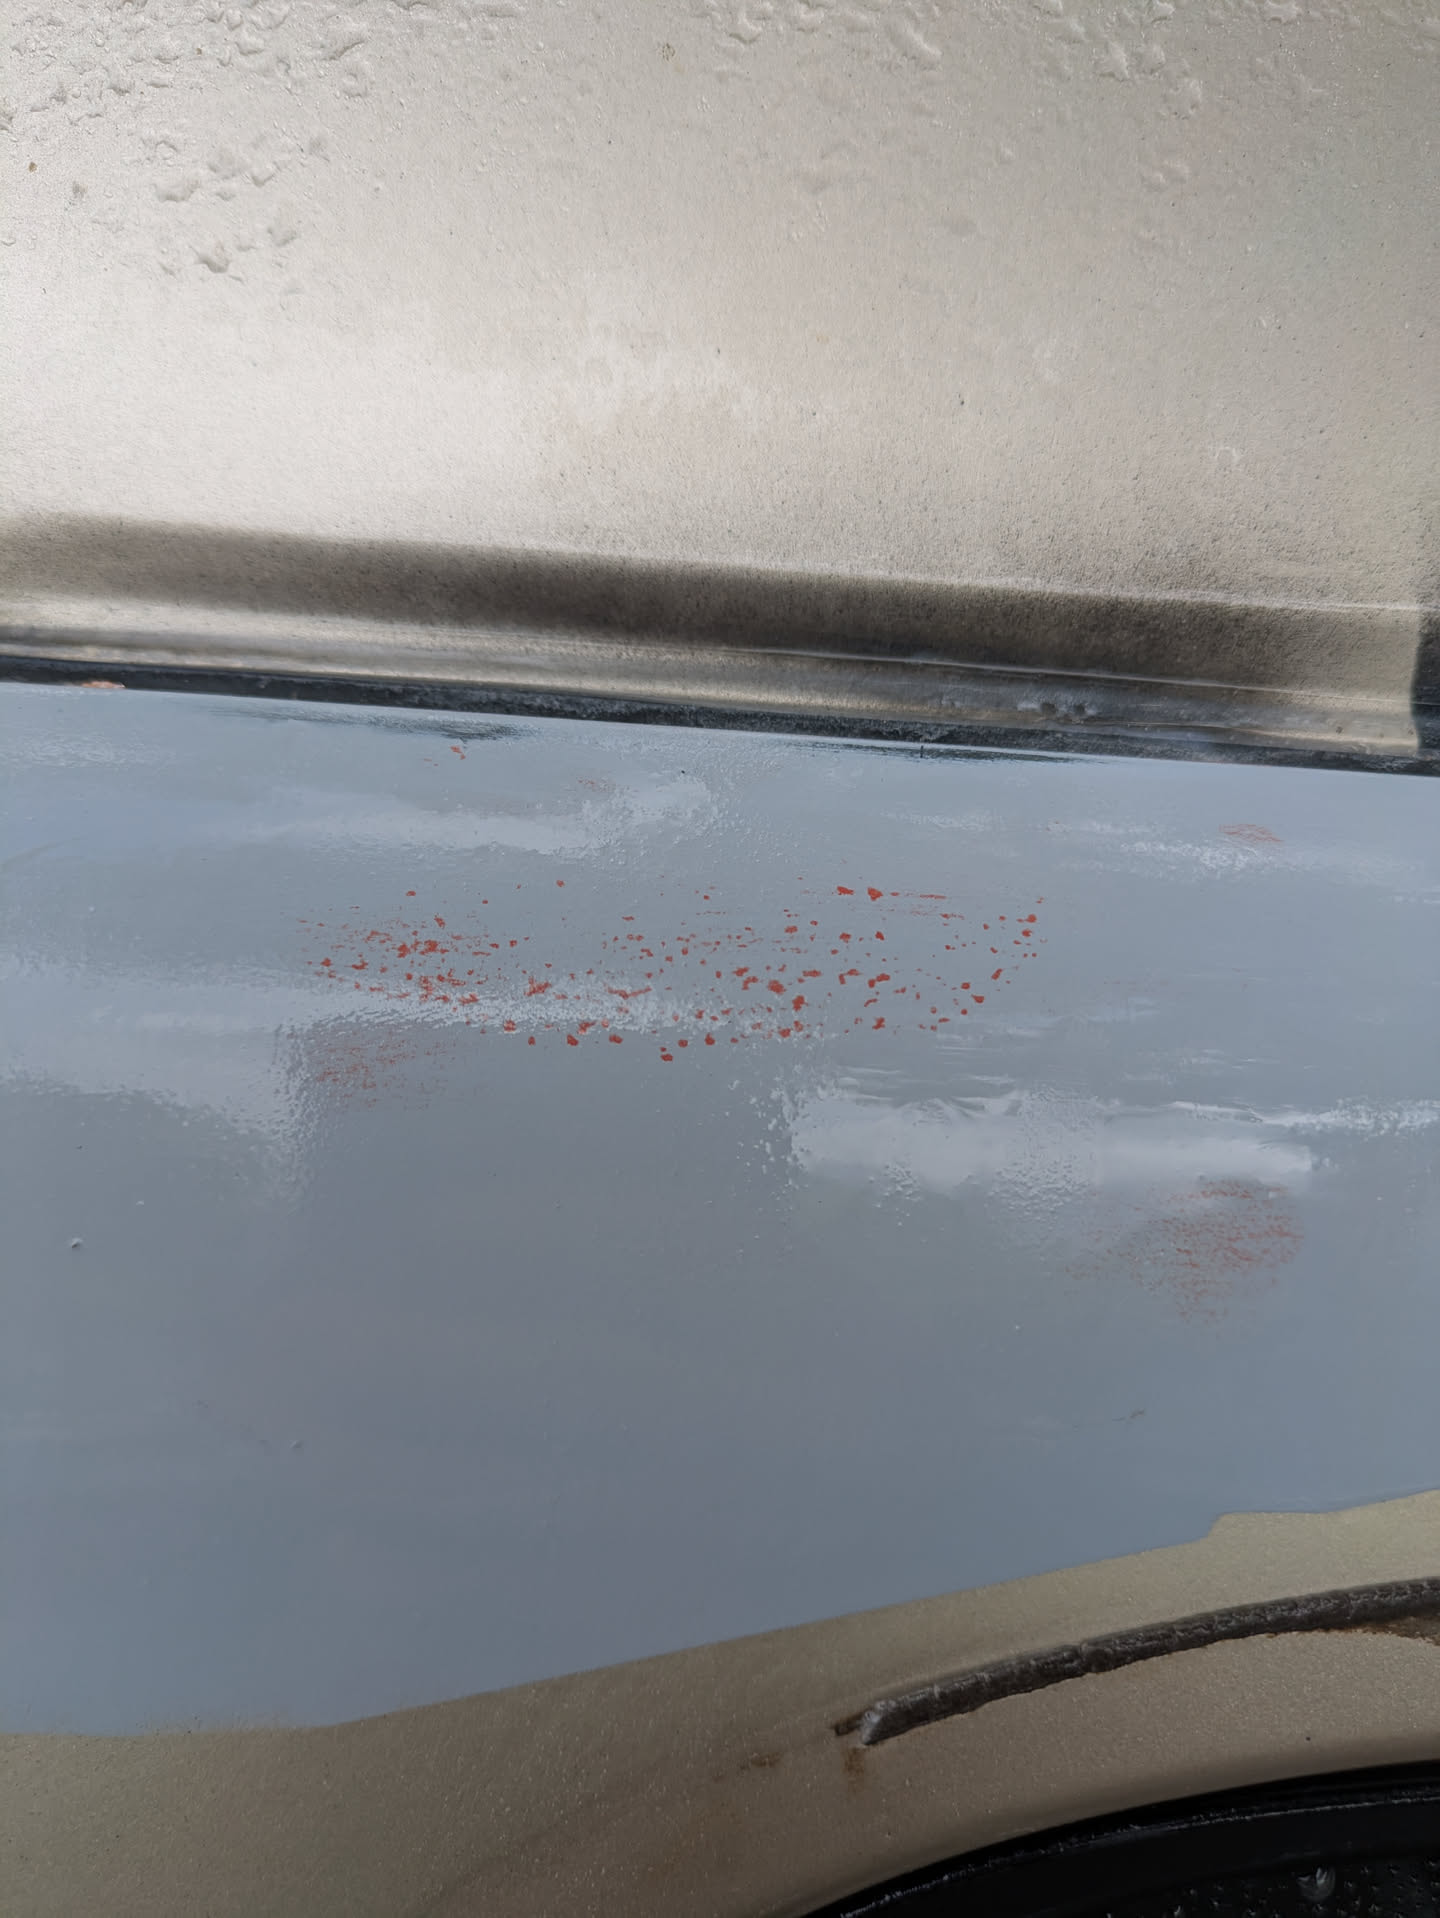
Pretty nasty pitting rust on one of the sliding doors. Sanded the paint, rust converted, hi-build primer, and finishing glaze took care of it.

In addition to the dent, there was also a pretty atrocious paint job on the driver-side rear sliding door. The same door that had the pitting rust at the top. As I was removing the paint around the rust, the clear coat along the entire top edge of the door was coming off in huge flakes - and I thought I was lazy with my prep work! On the lower half of the door was about 200 tiny runs in the clear. Just hit them with a sanding block and filled the resulting pinholes with bog and/or finishing glaze and a wet sand.

Pretty happy with the finished product. Could have done better, but you can’t see most of the repairs under the wrap, and the ones you can you won’t see unless you’re looking for them. Wish i had been more careful about protecting the plastics and rubber from my sanding block and done more to protect against overspray.

Glad I did it, even more glad I don’t have to do it again. Next post will be about the wrap and probably take us to present day.

3 Likes

I hope it wont misfire with those EK plugs.

They require more voltage

1 Like

Spark plugs at this point have been in for 3 months with no misfire. Alternator is very healthy as far as I can tell.

Now that the major bodywork is done, its time for the last post until we are at present day. I pulled off the rain guards and chrome trim and dropped it off at my buddy’s wrap shop and a week later picked it back up looking fresh.

Body is Avery Dennison SW900 Gloss Smooth Sage and roof is Cheetah wrap Gloss White

Still have to put the badges back on and get reproduction stickers made. Also going back sometime soon™ to get the B and D pillars as well as the section under the front and rear door glass done in gloss black like the factory had.

Here’s how my bog-job turned out, still some funky-ness but its hard to see. I also touched up some chipped black paint on the front grille.

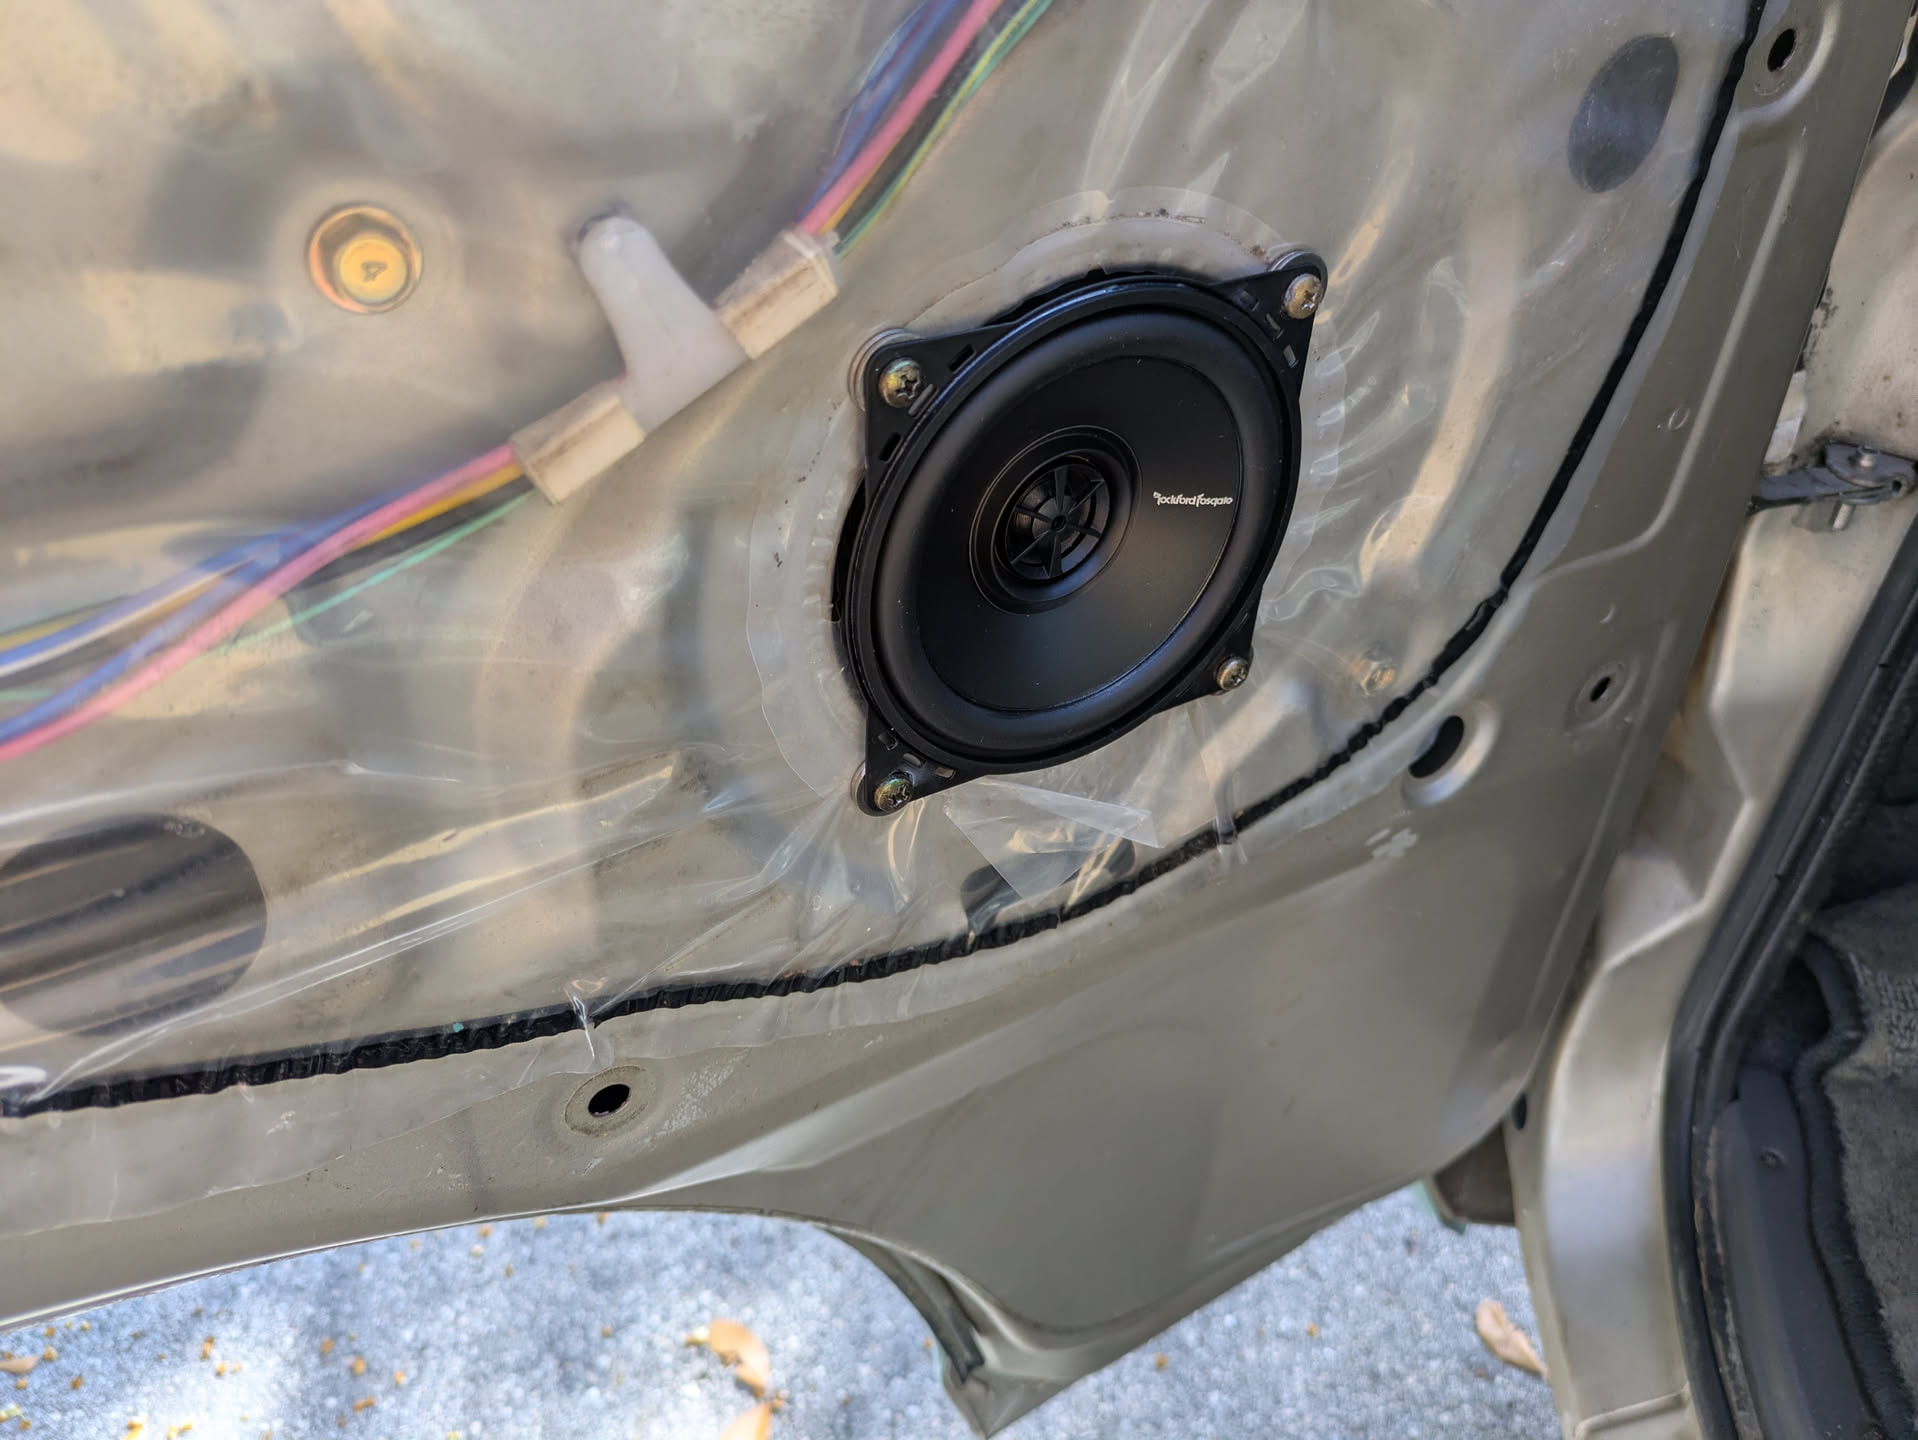
New door speakers, Cheap lil rockford 4" 2-ways. Just stacked up 2 washers to get the coil to clear the glass. Reinstalled the chrome trim and we are caught up!

To answer some questions I get all the time:

Why did you change color? Because the paint it had was pretty tired. In addition to the shitty drivers side sliding door with a mess of a paint job on it, several panels looked like they had been sanded in prep for paint just before the car was sold off. It looked good from far, but was VERY far from good.

Why didn’t you paint it? My buddy gave me a friends+family discount to wrap it

You should have done a mystery machine wrap! / You should but a busa motor in it! - stop telling me this, no.

Why did you pick this color? I wanted to do a powder blue or teal like the old VW surf vans, but high quality wrap is kinda shockingly limited in colors. A pistachio-ish green was my 3rd choice and I found this color. The white roof was non-negotiable.

Do you daily it? I try to drive it at least twice a week. Thank god the AC works very well.

Future plans:

Timing belt + water pump: parts en route from japan now!
Transmission + Diff fluids: Ill probably do this right after the timing belt
Speakers in the cargo area cards: waiting for the ones I want to go on sale
Reproduction stickers and finish the vinyl work: Been lazy. Will re-install the rain guards when this is done.
Suspension and wheels: I want to lower it after finding springs on Rakuten. Wheels are another question as its a 4x110 bolt pattern. If you know anything about hub converting to 4x100 from a S220V, let me know!
Check on valve lash and do valve cover gasket: Want to find a source for the valve shims before starting this, hmu if you got a source
Front plate: Found a site just need to decide what to put on it. Im thinking KEI-UTE or OH-KEI.
Steering wheel and shift knob to match the wood dash
Probably about a dozen other small things like redoing the carpet and getting new mats that I think of while looking at it and promptly forget about.

The goal of this car is a car I can drive drive every day but still take it to car shows to show off. The second goal is to get my hands dirty wrenching on cars again. It seems relatively easy to work on and I want to build skills that I can use in future, more ambitious car builds.

Despite not being anywhere close to “done” in my eyes, it got accepted to its first exclusive car show this weekend! Hoping it goes well!

2 Likes

OH-KEI gets my vote. KEI -UTE doesnt as its not a ute but KEI-VAN would get a vote also. also another good one I have seen here is 2 DAI 4 if you are allowed combos like that.