Derku's little red: Supercharged Franken-motor Mira

Cool setup mate :wink:

Awesome good to see you here Derku and your build thread :slight_smile:

I just moved it into Dai Street Life as the sub catergory for street cars under builds etc :slight_smile:

1 Like

Put my little red rocket on the dyno at Team Karam Racing dyno day. These guys are well experienced and the dyno operator is a leader in tuning for japanese imports plus more.

It made 48.9kW with a the supercharger, up from 25.2kW with the unmodified ED10 engine which I ran last year. It should be noted that when I had the ED10, it was a 4 speed gear box run in 3rd gear and the supercharged build uses the 5 speed, run in 4th gear.

Anyway, Im on the fence with the results as I was hoping to crack over 50kW. The dyno operator said it was pinging and obviously running very rich. On the road, it drives like a beaut but obviously a lot of improvement to be had - which I will take as a sign of encouragement.

A little more adjustments here and there before I decide on the next path.

Cheers,
derku

Staging for the dyno pulls

My favourite photo so far; car on the rollers with the dyno crew’s composure around the car really sets a nice atmosphere and focus to my build and all the hard effort that has gone into it.

Nice photo when parked just after the dyno pulls

Dyno sheet of the supercharger results

Dyno sheet of the ED10 stock results

4 Likes

very nice comparison mate. still surprised the ed stock isnt 25hp and not 25kw lol

2 Likes

Not really surprised, a standard ED makes between 29 to 32 kw. The average drive train lowers power to the wheels by 10 to 15 %.

2 Likes

Pretty decent result for running a standard ecu with rising fuel regulator and whatnot… I assume the next thing you do is get an ecu and get a proper tune. I guarantee you will get over that magic 50kW number with that…

Where are you located? Do you have access to e85? If you buy an ecu that is applicable to a flex fuel sensor and you run e85 you will be able to run heaps more timing and therefor more power…

I’va always allowed 30 odd percent, seems that with larger motors and autos

This is an awesome build! Love the way it’s going, I’m not too keen on the idea of an auto but that’s me and this is your car, you thought about a long ratio gearbox? That way lower gears would be more useful and obviously an lsd would probably improve your situation massively

9 months since last update! what… really… that is so pathetic…

I hope to catch up to document what has happened in case someone wants to improve on the build. Long story short is that I had since changed the supercharger to a turbo snail… which has recently suffered catastrophic failure due to a tuning run mishap.

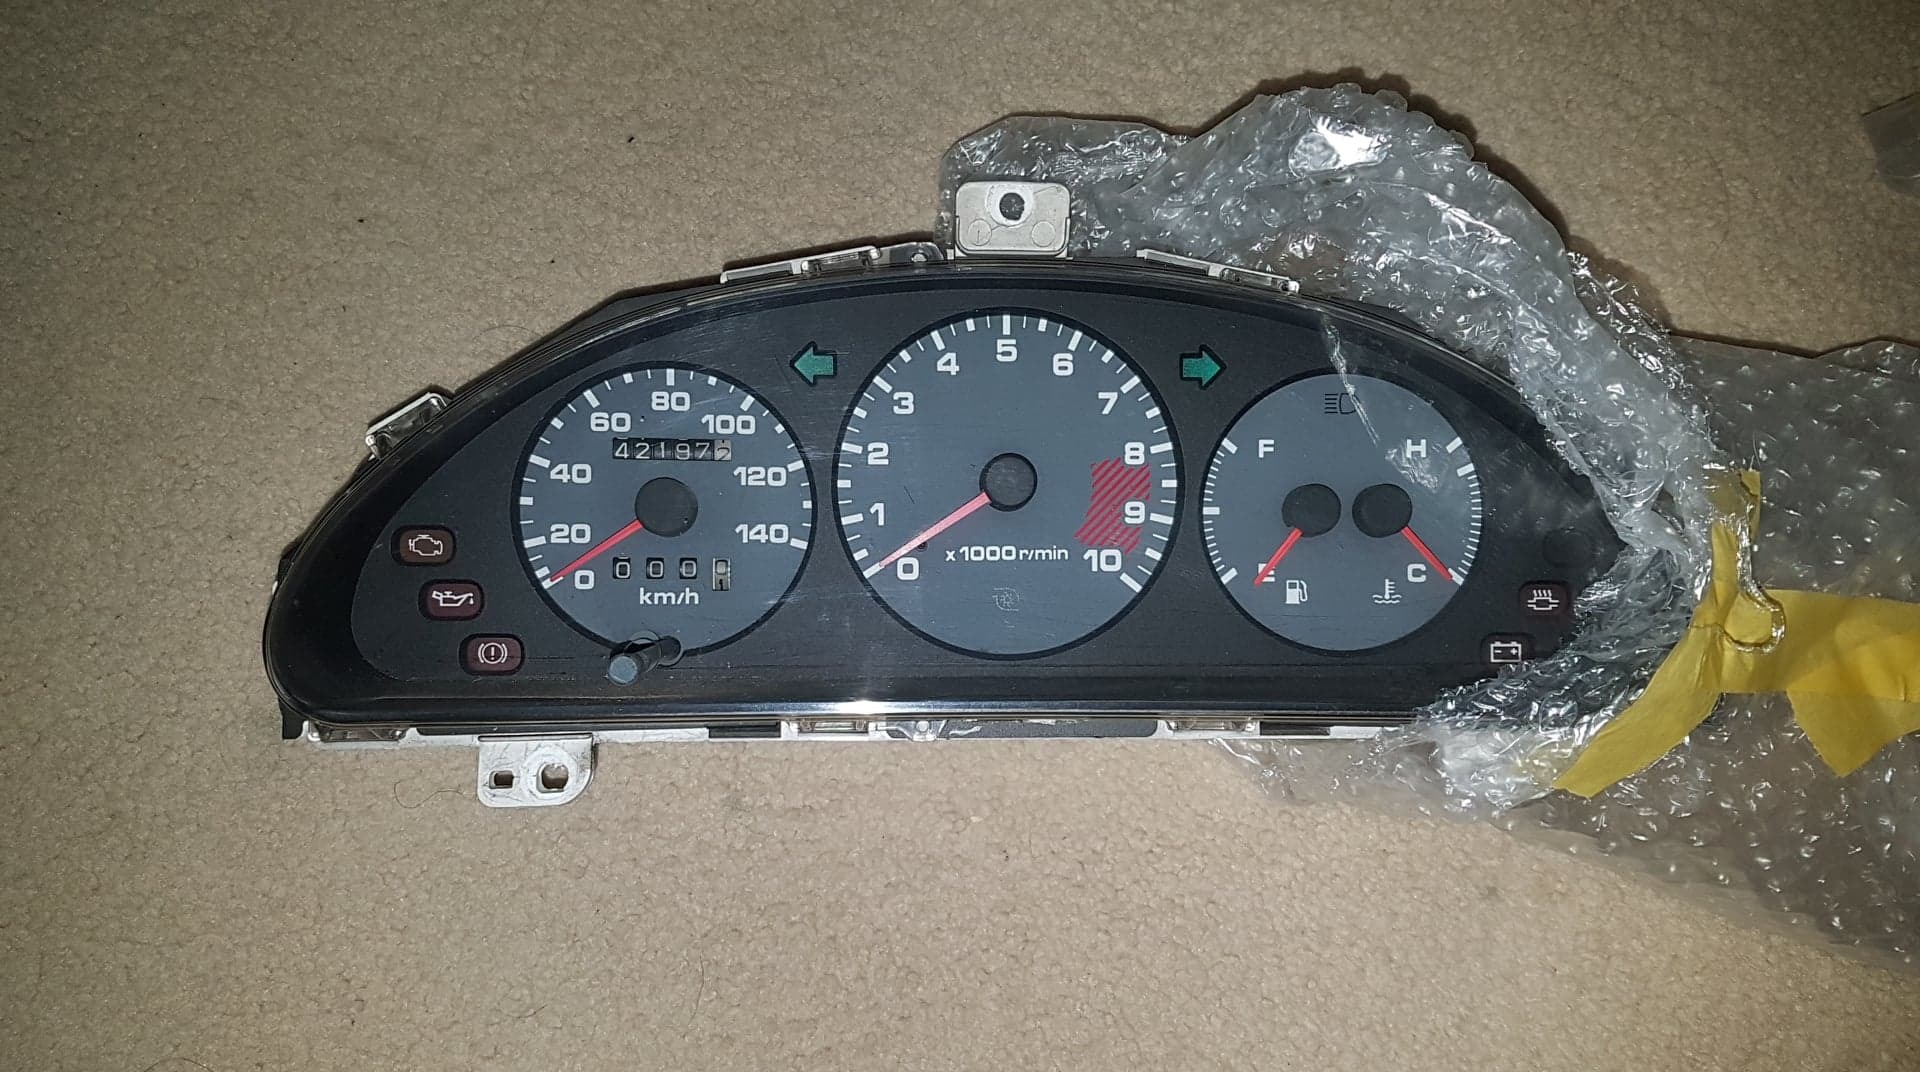
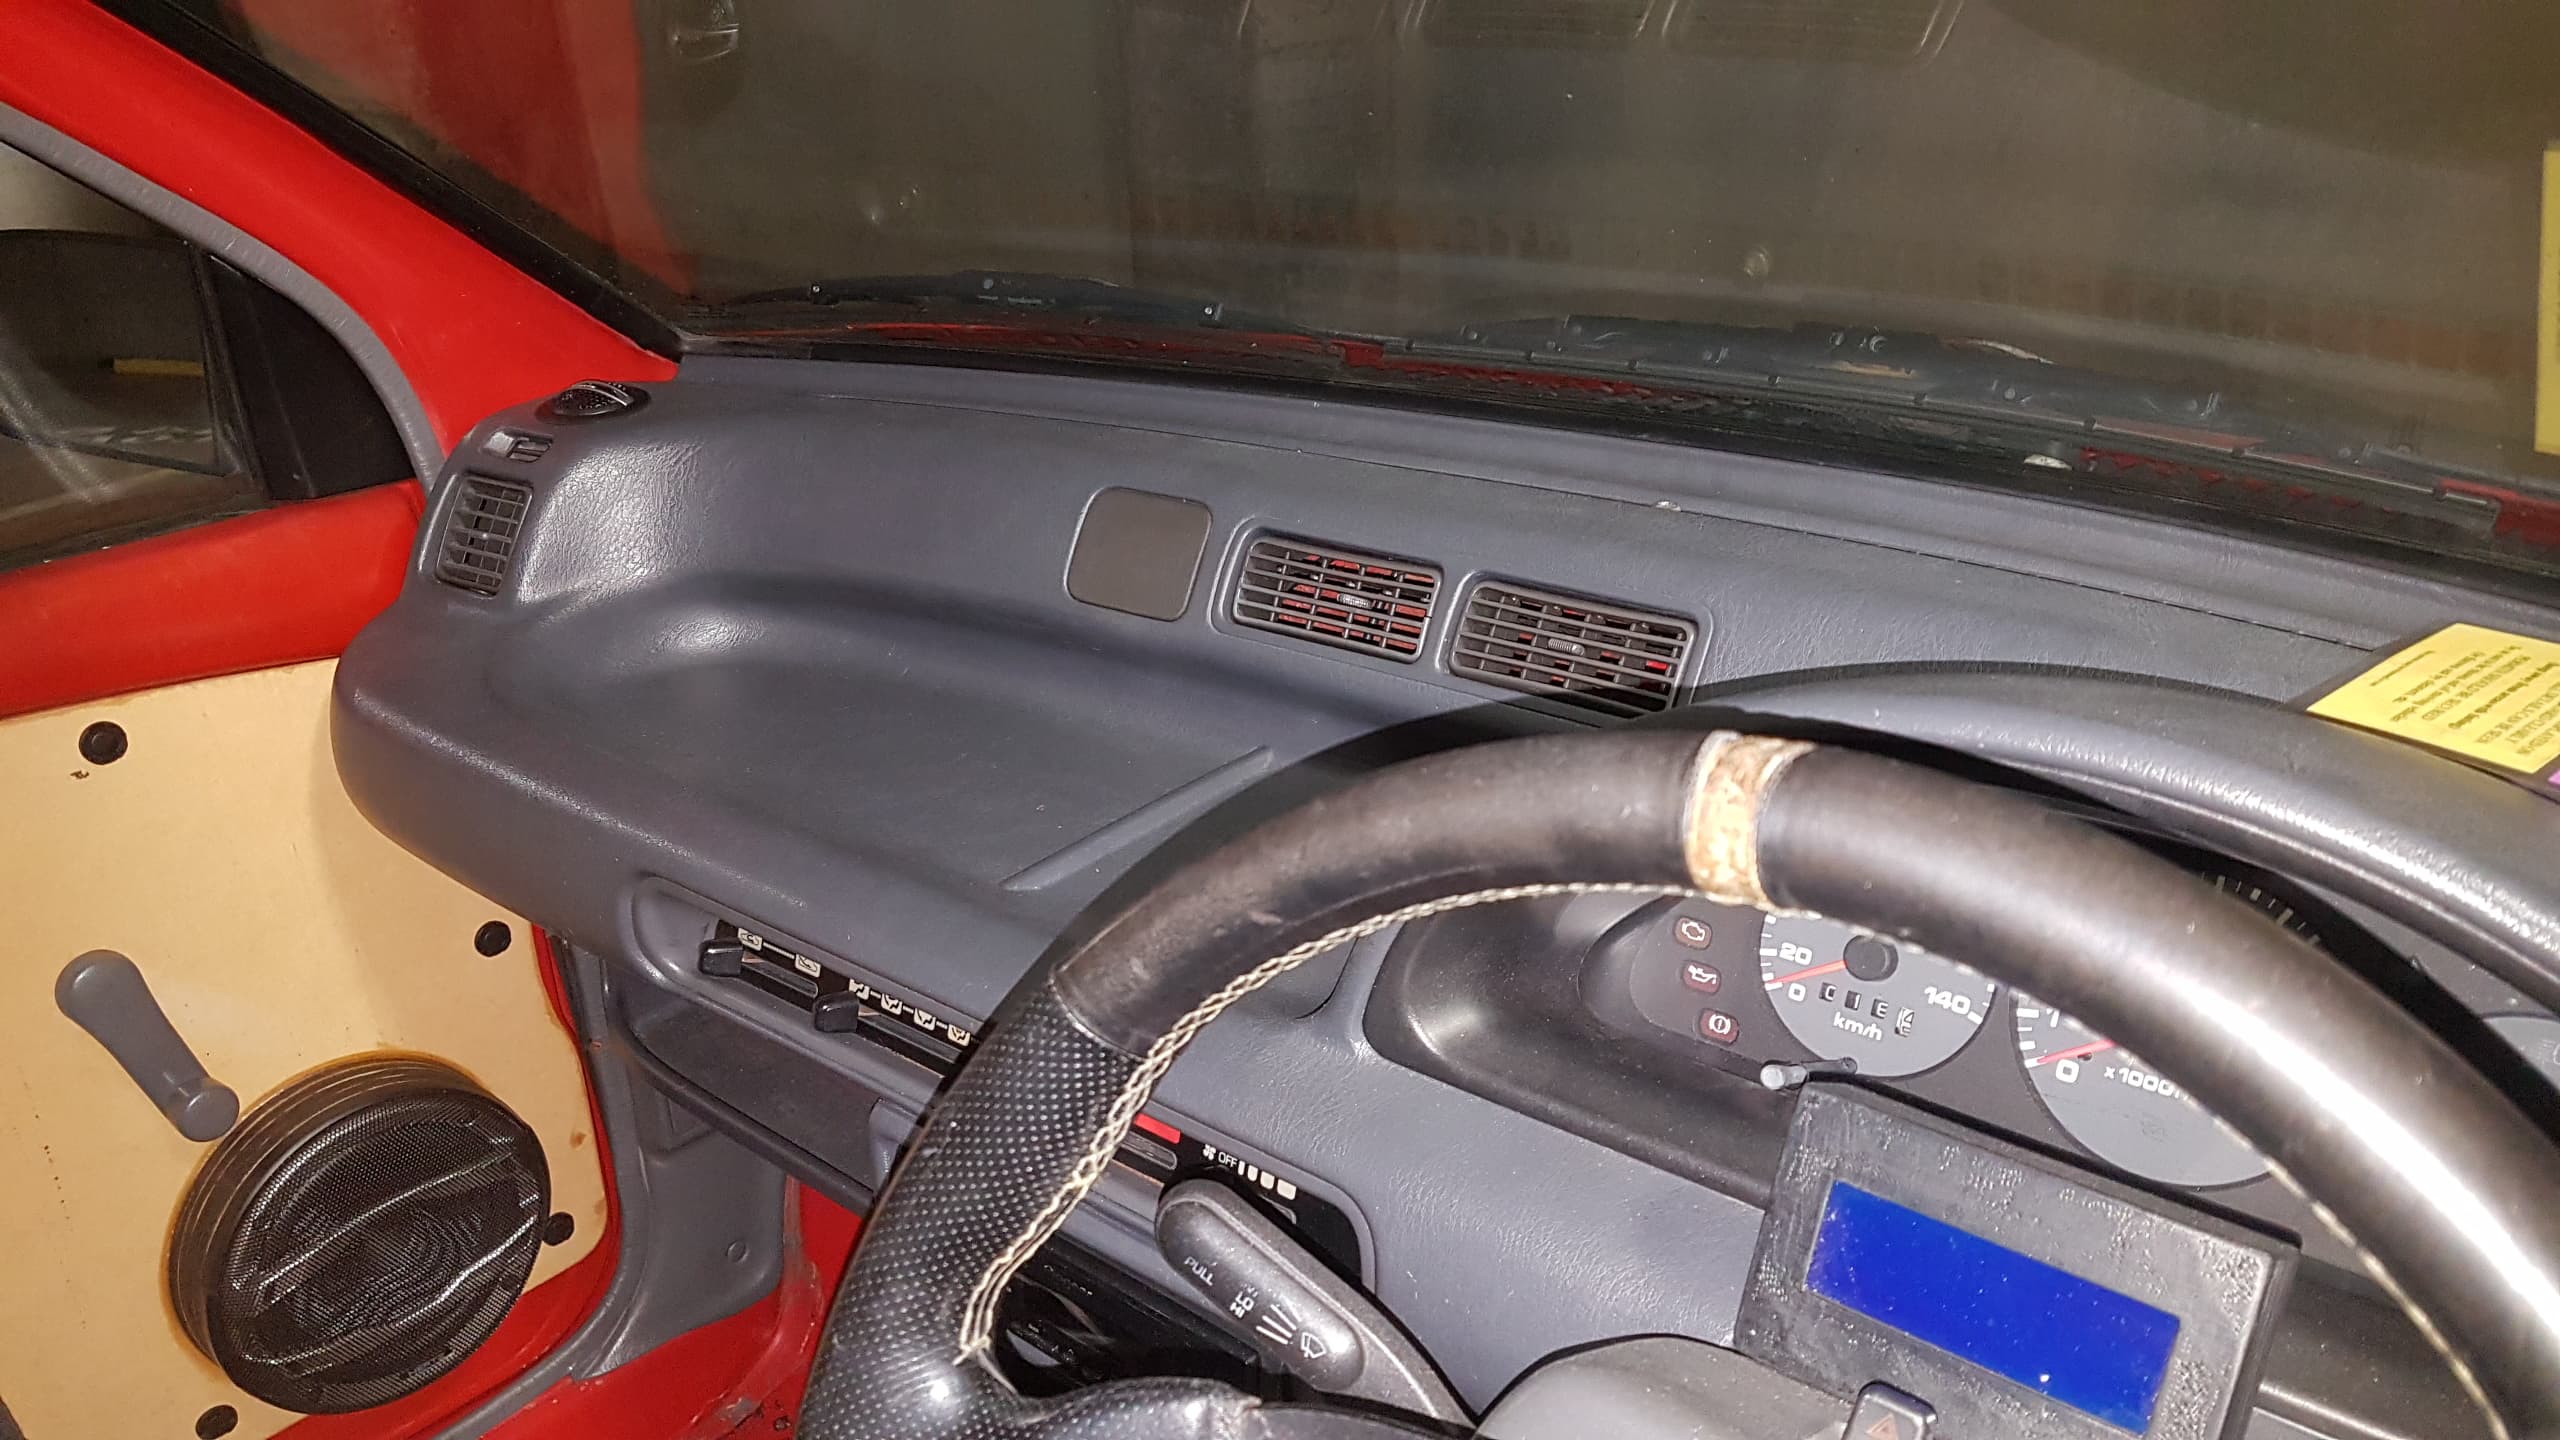
A few more snippets of the retrospective progress and essential pieces which led to (prior) glory; my favourite part… the TR-XX tachometer black-faced dash, straight from the land of Japan. Not to sound cocky but owning one of these truly transformed the Mira into an even more unique enjoyable ride and I couldnt imagine one withing this dash anymore.

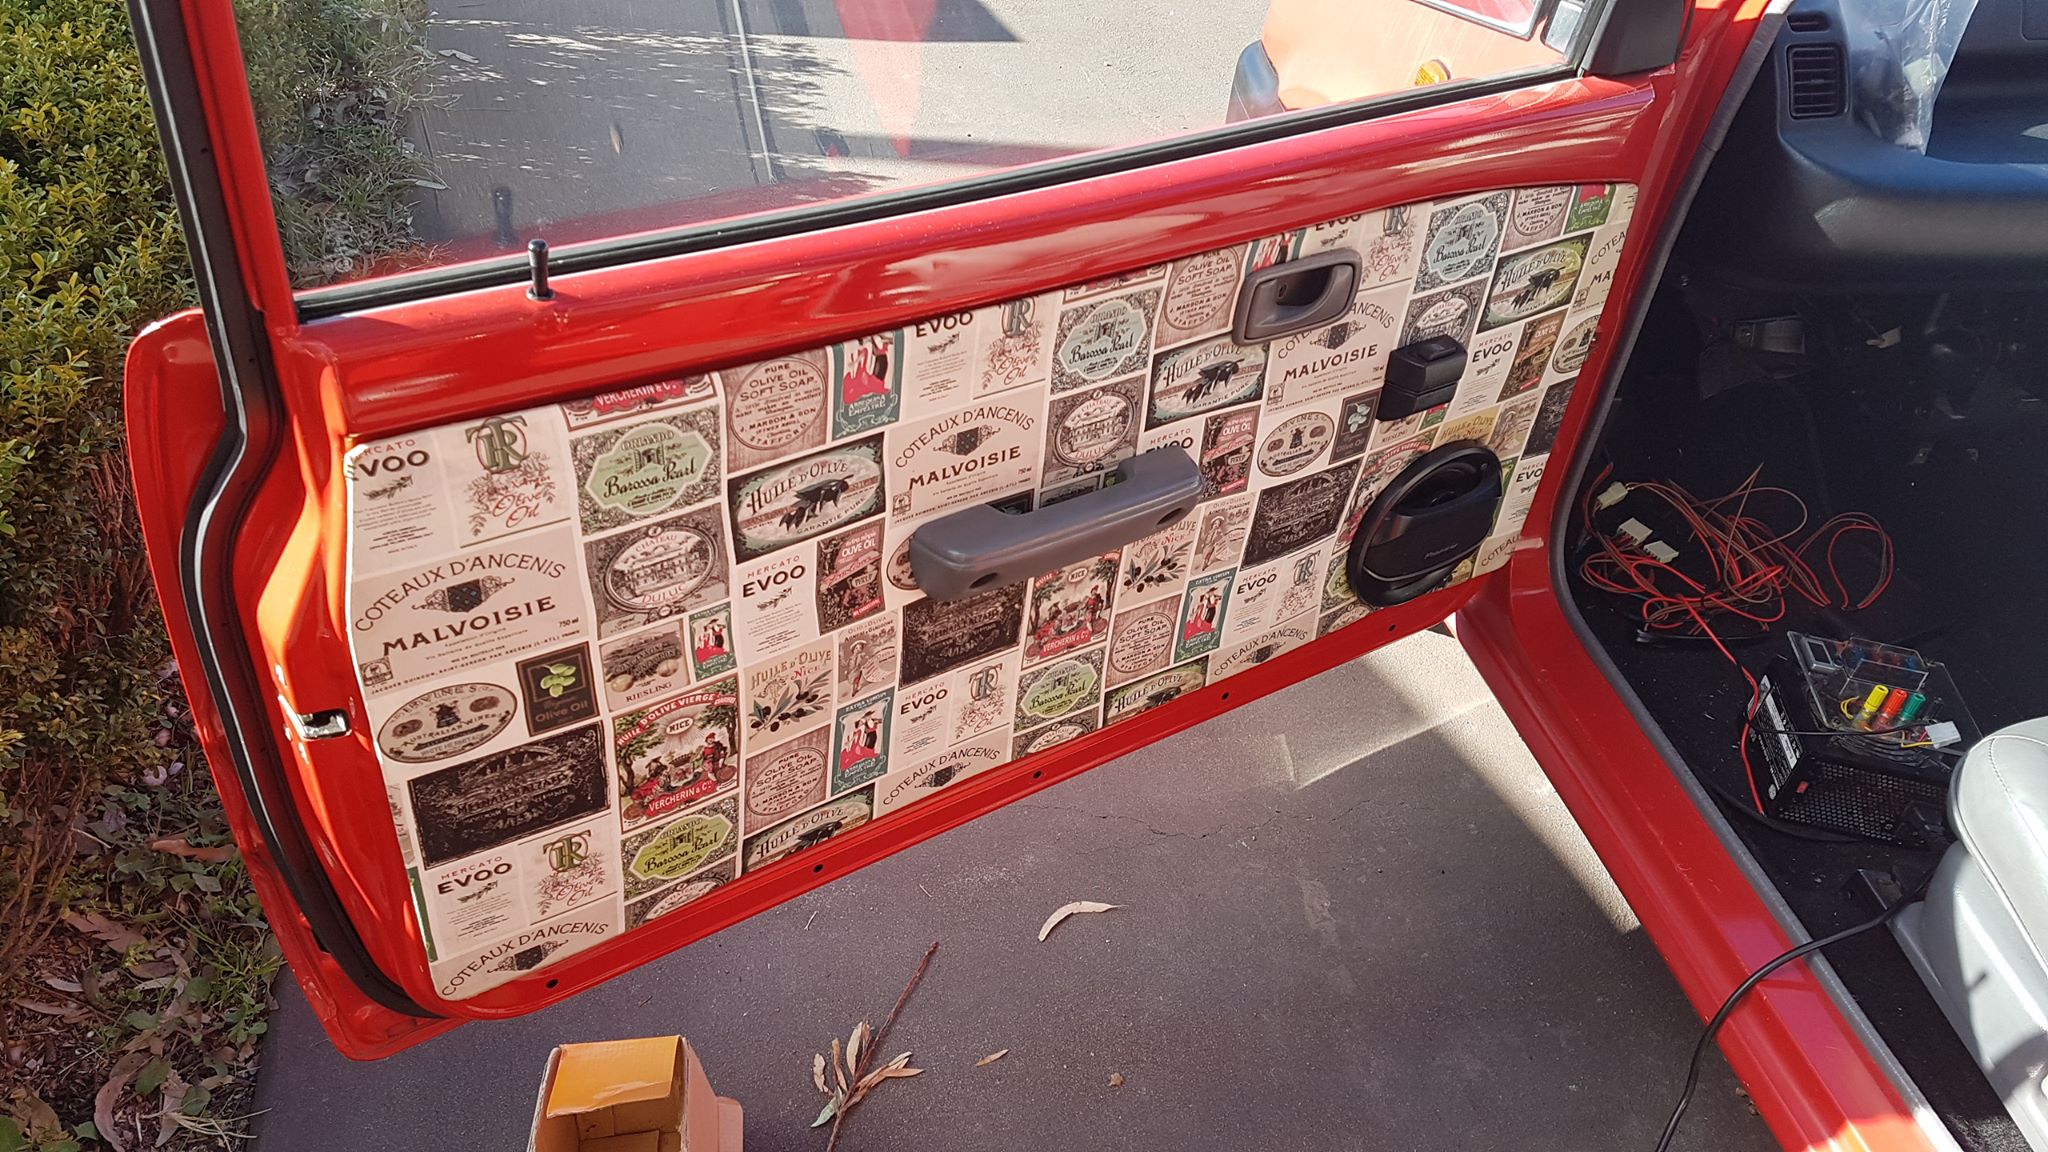
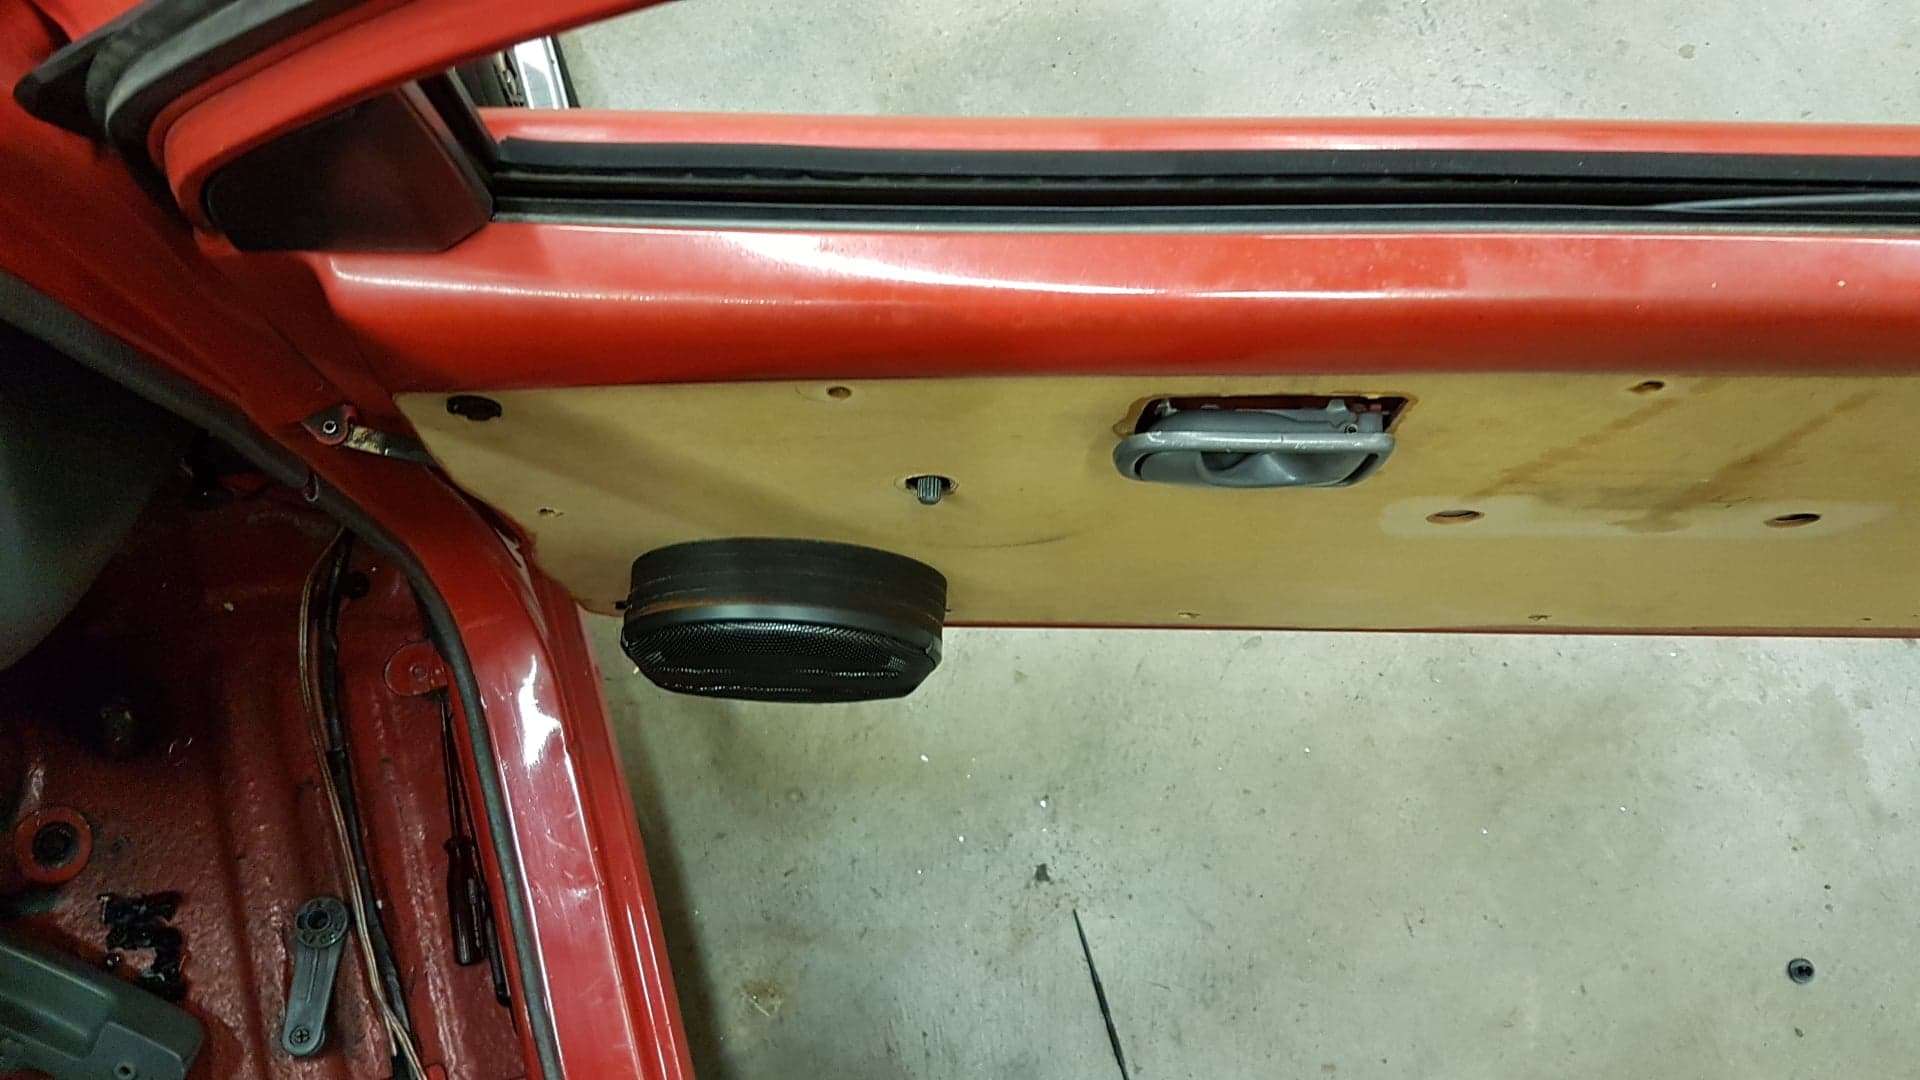
After the addition of power from the supercharger, I decided it was time to improve the ‘human’ aspect with additions of better speakers. They had to be custom mounted into the door card because the Mira front door speakers wells are quite small. I’d never done audio before so all of this was new to me and the specs and brand of the system was all recommended by more knowledgeable friends whom I trusted for advice.

Sticks out quite a bit…

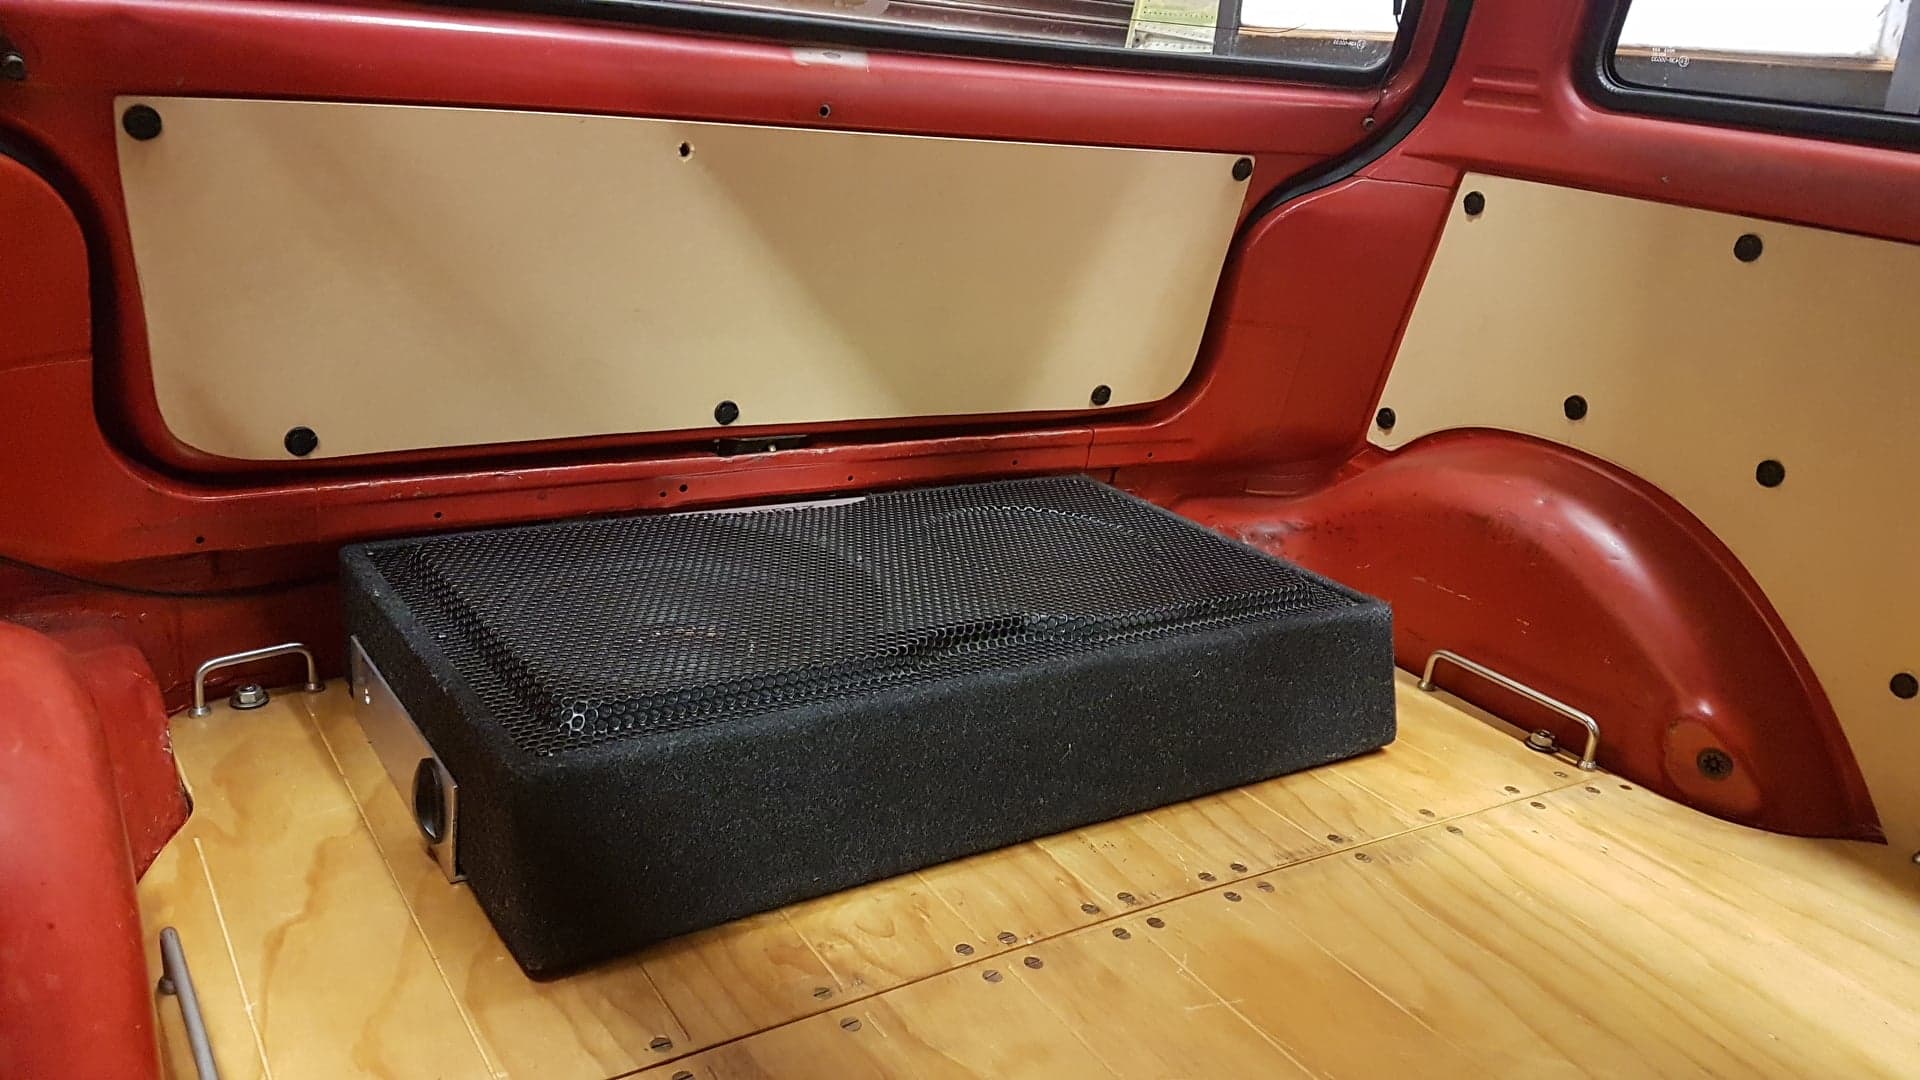
Subwoofer mounted to the rear tray

This was edited in after but worth showing .

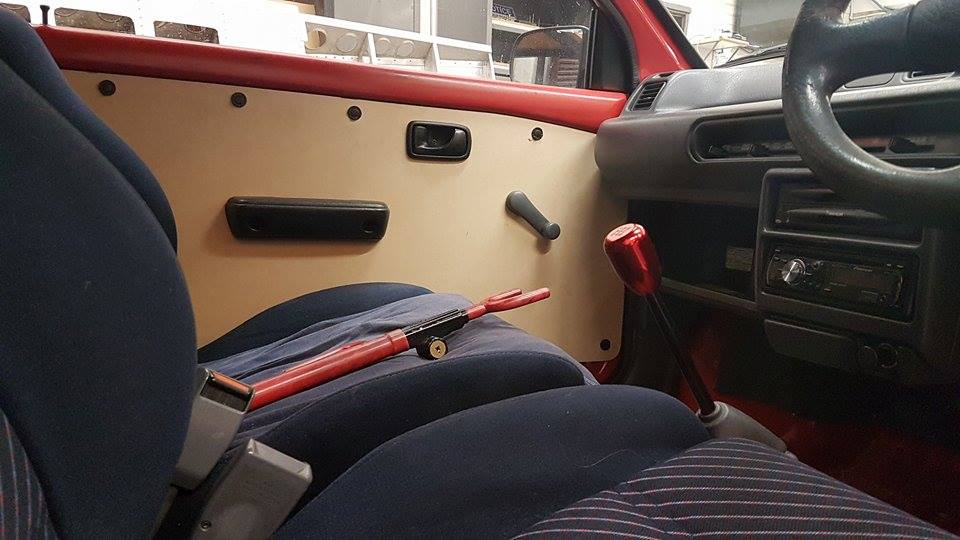
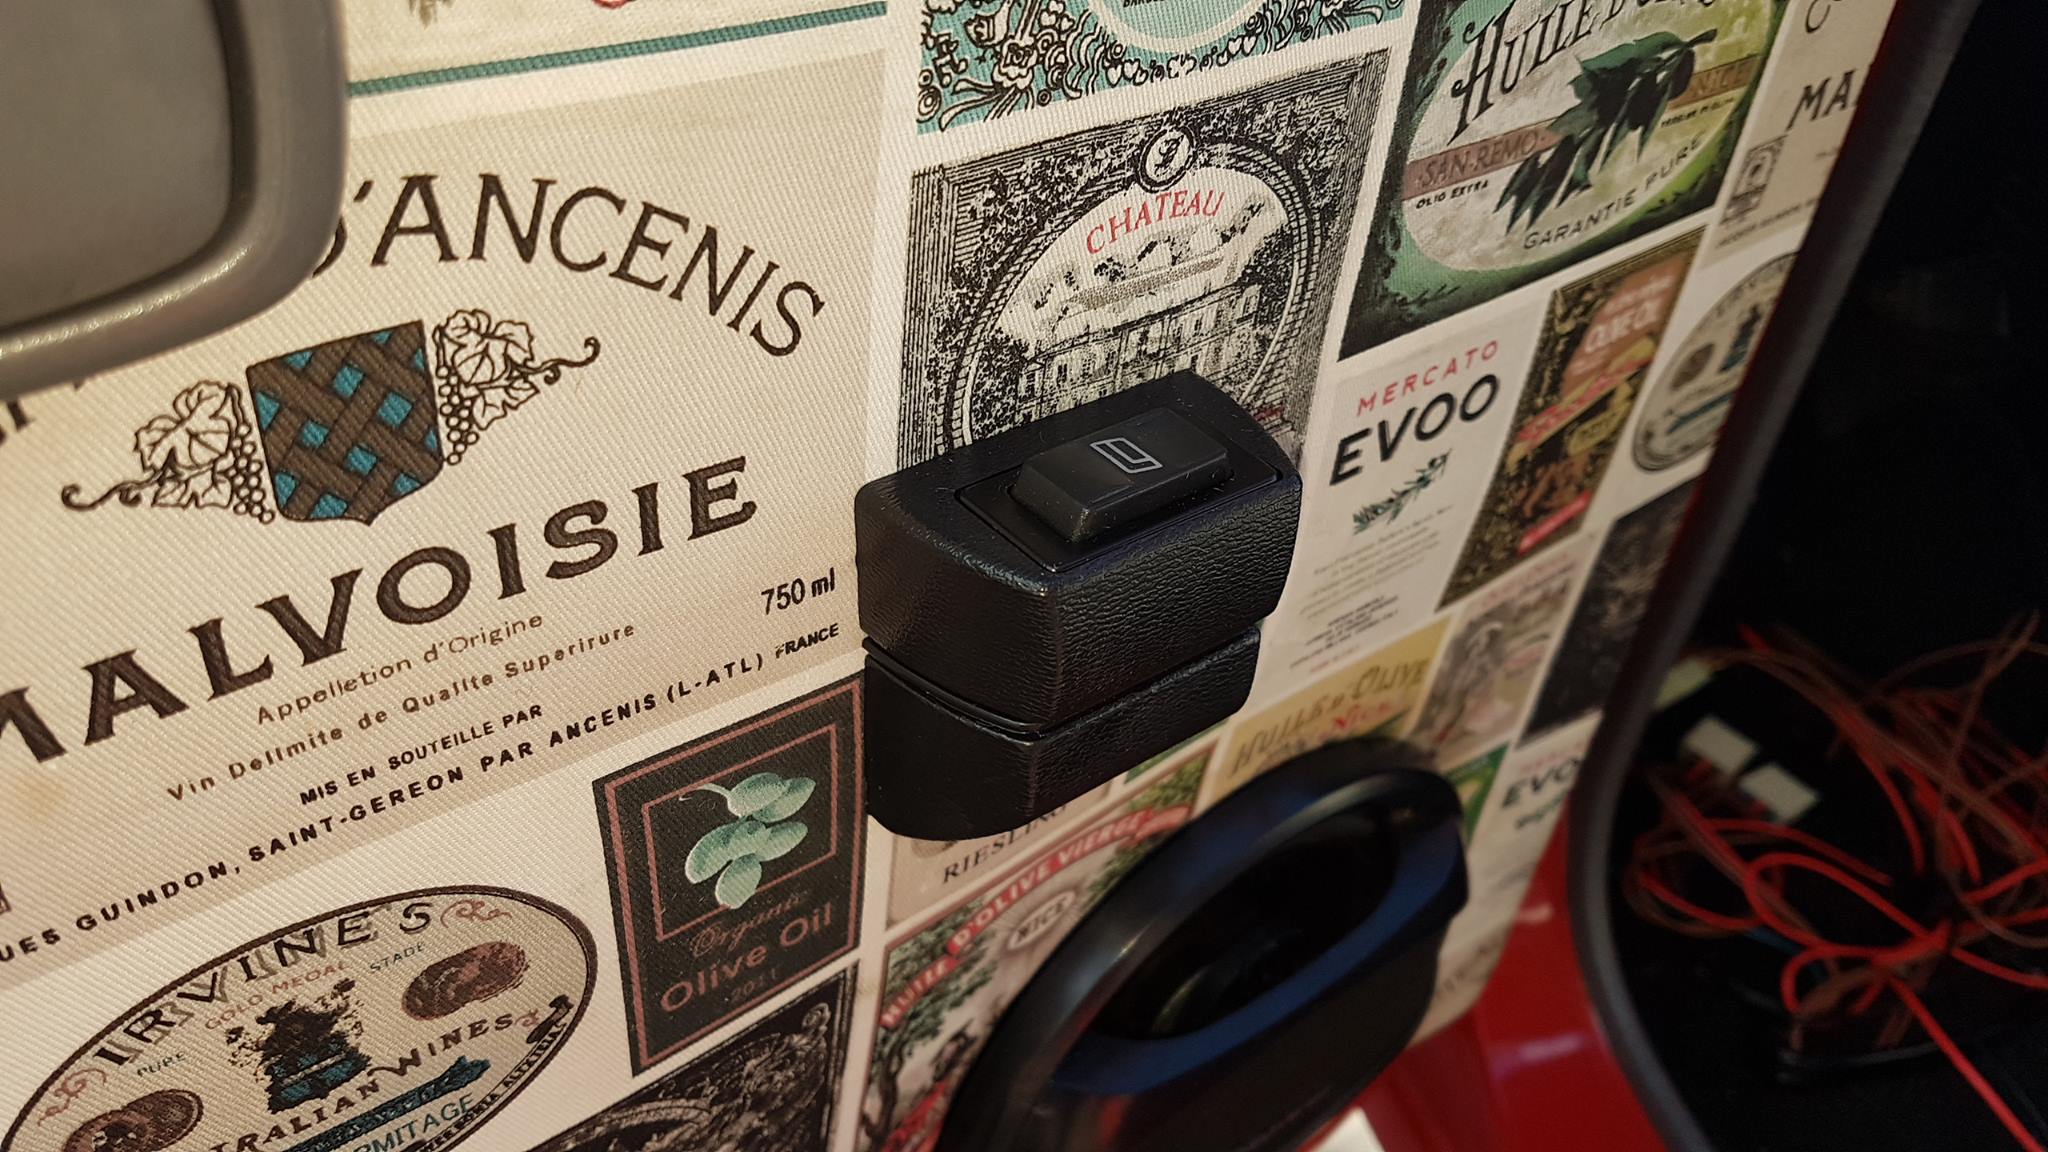
I made these for another red L200 I had. Same idea as the above mdf door cards but wrapped in material. I also installed an ebay power window kit to it as well :stuck_out_tongue: modern goodness :stuck_out_tongue:

5 Likes

Some details of the AMR500 set up:
It was over-driving it at a ratio of 2:1. That is, at 1000 engine RPM, the AMR spun at 2000 RPM. This was deliberately size because the redline of the franken-motor was 7500 RPM but it could be lifted but I chose not to. This would result in the AMR turning at 15000RPM which was its maximum recommended speed. Ultimately it meant that the potential of the AMR500 was fully extracted by the rev range of the franken-motor.

Why I decided to go turbocharger
So while the AMR500 supercharger was a great buzz, it was a constantly driven charger without a clutch-type pulley meaning I couldnt disconnect it. I couldnt see how an SC12 yet alone 14 would fit and my requirement was that ALL components must be within the stock body. Further is the difficulty in controlling boost. As it produced 8psi at 1500rpm with a simple blip of a throttle, it was no easy car to drive; yes it was a blast though! The timing and cam (I have an adjustable cam gear), was set to retard the performance higher up in the RPM range to combat the super-crispy response of this thing.

I’d describe the sound as being chased by a swarm of angry bees that are armed with circular saws! I actually loved it! With the bosche FPV BOV venting to atmosphere and the urgent build up of boost, it was a powerful orchestral symphony with the rhythm of the percussion controlled by the left and right foot alone.

This sounds great, until you cruise at 90km/hr+… the annoying supercharger whine is then realised. Most would live with it but it got the better of me and at the time I had a few commutes and it just wasnt pleasant. Now that circumstances have changed, I’d be happy to whack it all back in.

I guess finally another reason to go turbocharger was purely for the lust of most boost. I had maxed out the AMR500 which could potentially get 12psi peaks but really only 10psi. Note, I have a fairly well flowing exhaust… something ill detail later. A turbocharger was my solution to further the quest for power(boost).

Choosing the turbocharger
I hate lag. So that immediately leads to relatively small turbochargers. I am quite firm on fitting the smallest turbocharger possible because it yields the broadest power band. No point waiting for it to spool and bleeding off boost. Having a smaller turbocharger and running it red makes a car feel so much sharper and responsive.

I chose the TD025, and I am so glad I did.

Cute isnt it! Now, at the time, I didnt have the skills to fabricate a turbo manifold nor did I like any of the Malaysian ones because they would likely result in the turbo hanging out of the front bar… a nono for me. I was led to a place on facebook, keimotorsport… where I met John. This is a talented person who supplied a custom cast log manifold that suited my needs.

23376167_10214828207159684_825076436925815140_n

It came raw from the cast and holes had to be drilled out and tapped where needed

Done. It was also supplied with a flange of the TD025 which was laser cut from a drawing I provided.
23316588_10214828207439691_4227471962082483636_n

Will continue the updates of the turbo charger process soon. Thanks for viewing this far!

3 Likes

Great write up.

The AMR is a roots blower and “psi” for them does not equate to that of a turbo. They move a great deal of air but can’t make pressure without it bleeding back past the rotors, and this makes a lot of heat too. Not sure you’ve seen http://www.autospeed.com/ or know of Julian Edgar. He used to live near me and played a lot with the AMR. At one point he lead wrapped as much of the induction piping as possible to quieten the thing which he had mounted on a Prius as the thing struggled to get up Mt Tamborine. It would be interesting to look at the air temps before and after the blower to gauge air density. The turbo will be a much more efficient thing. All up you’ve done some nice thorough work.

Looking forward to “more” of your pics and story.

Because writing in retrospect… of course it’ll be skipping back and forth with information zig-zagged across time… hope it doesnt become confusing but I rather be comprehensive than skip key milestones.

So i’ll take the time to introduce an aspect which made forced induction possible for me anyway. With boost (basically more air), we needed more fuel. I initially toyed with the idea of both water injection and methanol… and the youthful me thought it would be a brilliant idea. This meant adding injectors in to support the different types of fluids and my solution to this was 2 extra injectors. Yep, 3 cylinder banger with 2 extra injectors making 5 total. While water and methanol were nothing novel, it was purely for academic gain. This young me idea was actually only a year or so ago… the complexity definitely overwhelmed and got the better of my ambitious ‘idea’. It was way over the top and stupid. None the less, I capitalised on the work to include the injectors to instead do staged fuel injection as boost came on.

Here is the injector and a boss turned on the lathe. The feed was just an aluminum injector rail cut down.

!

A barb was tapped into the end and a bracket made. The welsch(?) plug was punched out and the injector drilled and tapped in with 3 bolts, sealed with RTV.

!

Just look at that beautiful view down the throttle body! So the idea was that this injector sprayed methanol. This would go directly into the intake stream for best atomisation(?)… basically mix well with the inflow.

The water injection would have been undertaken by another injector under the throttle body. The original one was cut down, plugged up where the cold idle wax thermostat was with aluminum pressed in, and finally milled square.

!

Another view. Similarly you can see that another aluminium rail cut and tapped with a barb would feed it - in this case it was supposedly water… The more I describe this idea, the stupider it sounds now! haha

!

Another view

!

Back side view with throttle body sensor there.

!

In components laid out. You can see I also modified the factory injector rail which included a welded bung at the end. This deleted the factory fuel pressure regulator and allowed a proper return system (provided we add the adjustable regulator in future).

!

The intake! what a beast!

!

Of course, I hinted that the idea of meth and water was soon abandoned… It did however provide excellent means of staging fuel control. If your injector is too large, it’ll struggle to give a good spray pattern meaning your car(well engine) wont ‘drive’ smooth. An analogy would be like filling a drinking cup with a bucket… its not going to be smooth and very hard to control. Conversely, if you fill a drinking cup with a… say 1.25L bottle, its much easier to control while still having enough overhead to fill it quickly, if need be.

By using factory 660cc injectors on the original injector rail, it meant for a smoother idle and cruise due to their relatively small size. The throttle body injector and side intake manifold injector both used Sirion 1.0L factory injectors. Under normal operation, the 3 primary injectors are actually on batch fire. I simply staged the throttle body and side-intake injectors on sequentially as needed with a custom boost gauge and arduino.

I’ll get back to the turbo first but I’ve now presented the basic fuelling side. Oh it uses factory fuel pump and an ebay adjustable fuel pressure regulator. I’ll add pics of that next time. I got to collate photos exhaust first. The fuel and breathing must be sorted to accommodate performance gains.

Bonus photo. When the car was originally an ED10 carby. I made a 3" intake and it sounded so good. Carby was so crispy and a pleasure to drive because it was pure mechanical rawness. Its noted that this block was the donor to the franken-mira motor as noted in opening post.

Until next catch up,
derku.

4 Likes

Thanks for the encouragement. Sifting through photos is a timely task… especially when one littered them all over facebook which has no real way to collate everything. Hopefully this will consolidate the info and be of resource… perhaps.

4 Likes

I’m learning a lot by reading it. Keep it up!

Really getting interesting now. Seeing your fabrication and that you are doing your own design and research is fantastic - something that is going to make this thread one of the showcases within the blog. You have us on the edge of our seats.

Well I really have no idea where we left off so its just going to pick up from the photo folder I have in a disjointed order… so we’ll have to skip back to the AMR500 supercharger before dwelving back to the turbo… confusing eh.

Here is a pic showing the injector boss made into the side of the intake manifold. It so versatile in that if you ever need to, you can turn it on or off. Currently shown is a Sirion EJDE factory injector and that works for most boosted applications as it gives sufficient fuel. Of course you have to rescale the MAP sensor to adjust the fueling for primary(batched) injectors too.

This is just the initial photo when I ran a larger supercharger pulley which made around 8psi boost. It was just on the limit of not need an intercooler and I was able to duct it straight into the intake giving a super responsive set up. The natural downside is the that timing had to be conservative due to the intake temperature being higher. I actually ran with the direct route pipe for about 6 months and it was a blast. The reason it was shaped like so was that it sat inside the stock air box giving a it a more stealth… yeah right… appeal but also a more sedate factory look; you can find a picture of the bay earlier in this blog.

The AMR500 itself comes with a multi-ribbed pulley and I opted to change them out to a V-cog belt. While most is thinking that this is a downgrade, I never once experienced any belt slip. Shown are two smaller V-cog pulleys next to the original one. The two V-cogs are just off various alternators found in the daihatsu family of Miras. The modification involves opening up the diameter to clear the bolt and also adding a slot in for the key in the supercharger drive bolt. Now, you’ll see that there is a smaller and larger pulley… for now, lets call the smaller one 8psi and the larger 12psi. I’m going to let you figure out which is which and what size diameter they are. Cant recipe everything but with a bit of simple research, its no secret.

Foreword on the next part here. I have a personal despise of seeing brand new shiny photos of products, especially when people post them online flaunting and boasting what they have bought. Yes, I am a built not bought type of person who really prides the fabrication, design and art of building and crafting a car. One who just bolts on parts to make something is no master and will never understand how to fully bring out the most in something without trying to pioneer a solution from first hand. With the said, and itll seem hypocritical now, sometimes we have no choice but to buy or acquire parts because its not feasible to create yourself whether it be by skill, quality or purely time.

This leads to this section, which is one of the most important sections in terms of supporting mods. I always have the mentality to bullet proof the support mods such as braking, suspension and cooling before going power mods. Sadly, we see the opposite approach in most budget builds. In this case, there was no choice but to invest in some parts that is way out of my realm to fabricate. No shame this time around because I felt like the parts were chosen with a strategic reasoning.

The first needy part was a better clutch. You up the power and factory components which are not designed for it may soon give up. I found this out quickly as soon as I changed to the ‘12psi’ pulley and it just slipped the clutch at an instant. Sure, I could have changed back to the 8psi one but it would been inevitable as I could foresee it to slip regardless when it got tuned more aggressively, especially at low RPM. To give you an idea, the AMR500 can make 10psi static revving!

Here is the double clutch cover. At the time this was the most recommended item to begin with. Somewhat regrettably, this was not the best solution in the long term. I’ll get back to this later…

!

I went all out and bit the bullet for the best clutch disc the malaysians had to offer. This cost a few pennys but you can see by the solid construct and surface area and type of material, it would hold anything out little Dai’s could ever throw at it. The manufacturer rated this to over 350hp which is what they run in their record setting daihatsu’s over in Malaysia. Again, I hate being boastful but I opted for this because I anticipated intense torque from low down RPM and I couldnt affort the clutch to slip or all the effort would be in vain. This ensures that and to this date, (2 years later) it was money well spent.

Now this is where the blog gets confusing because Im going to transition back to the turbo build… sort of. It was actually a prelude as to why I converted to a turbocharger. I previously shown the direct route piping of the supercharger to the intake but with to allow more timing, one must first cool the compressed air charge coming out of the blower.

This lead to the the purchase of two other supporting items from ebay. A smaller bar and plate intercooler and a bigger aluminium radiator to keep coolant under control for more consistent performance. The radiator is the 40mm thick version and the intercooler is a 300x160 bar and plate with 2.25" ends. I had a spare 12" SPAL fan which I is not shown but that saves a lot of weight.

Somewhat off topic but I got one of these adjustable cam gears to also experiment with. More detail on this later.

Another important item is suspension (and above that, handling). These are zerone550 series custom valved with 7kg springs front and rear. It was a tricky decision picking such a high spring rate for the front but Its definitely needed to combat the lurching and squatting after adding extra power. To put it in perspective, the supercharger at 8psi doubled the factory power… The suspension naturally transformed the way the car handled.

A bit of a distance shot but you can see how it sits. These are in combination with 13x5.5(offset unknown) cheviot hotwire(?) wheels. I chose to run 165/70/13 strategically to get a taller ratio from the 5 speed box and it also suits the suspension better. The factory rolling diameter with 5-speed gearbox is simply too short for what we’re trying to do here. The thicker tire-wall ratio and 7kg springs still made for a pretty harsh ride but is acceptable for a ‘performance’ compromise.

Well, again I didnt mean to talk about all the products we could source and slap together as I meant for this to be more of a fabrication sort of blog but anywho, its is an essential part of the support mods towards the build.

Have to leave it there for now and heres a bonus photo of my red fleet. People have joked that I should start a school formal or tour guide service… ha! hmm well actually…

4 Likes

Absolutly fantastic write up.

I would contend though that extra power needs a softer front spring rate. 7kg is 400 in/lb, about right for the rear but insane for the front. Squat under power is fixed with geometry corrections. Don’t just take my word, do some testing. With coil over in the front should not be too hard to find some well priced 2.5kg which will be a bit more than the std rate. Factory front sway bar is enough. Testing my friend testing. Just like you are doing engine wise check the variables with those springs. I’ve done the long hard road of dozens of spring, ride height, geometry and damper combinations. My front struts are adjustable Koni and set near on “fast” with with either a Koni or Spax on the rear set on near “full slow”. 150lb front spring and 450lb rear. Add some castor too, and if you want more track type handling at least 3deg neg camber. Front toe zero or 1mm out. Rear toe 0.5 to 1mm in (rear bushes are super soft and need the 1mm toe, go to stiffer bush and 0.5 approx). Solid mount the front K-frame. The piste resistance’ is a quick rack. Oh, sticky tires too. Just my 2 cents worth. You could teach me a heap about engines.

If I have less power than you but can put it to the ground better in 1st and 2nd, then I’ll be all over you. Cornering wise same deal. My 80hp pulls out of corners with no wheel spin. I have not drive the Mira for a year, but I swear it feels faster than similar cars with more power - at least at road speeds that won’t get you arrested. At the moment I khanacross a lower power Subaru Liberty wagon with an elaborate suspension set up. We have cars turn up with 400plus hp. I ran fourth outright at the last event, even beating Porsche GT3s and other exotics. The event only runs 1st and 2nd gear. No point having more than say 300hp in these sorts of events without traction control. MotoGP bikes seldom use the max power available. Except in top gear they cut power and the fly by wire is used through the rev range to ensure smooth rideable power delivery. Gotta getta fwd to be puttin’ down power and not wheel spinin’.

3 Likes

So with added boost means added heat, no way around it. Prior to the intercooler on the supercharger set up, I was also still using the stock exhaust system which made healthy power. This was until you wanted to increase timing which resulted in a knock. Intuition knew that it wasnt excessive timing but more so the combination of excessive timing and heat due to not having any means of cooling the air. Time to free up the flow instead by giving it an exhaust the car deserved.

One thing about an exhaust system is that if you free up the flow, you may loose boost if the forced induction system isnt up to pressurising the air at the mass flow rate at which the engine consumes. Fast forward to results, I quickly found out that removing the bottle neck of the flow (the stock exhaust), reduced maximum boost. Remember that with a supercharger you only have 1 boost setting based on pulley. Its not all a bad thing loosing boost but the net result was that having a better exhaust lost approximately 2psi towards redline however it was allowed to rev harder, and also allowed slightly more timing to be added. So in the end, you get more performance with lest boost, which is always a win. Boost is not everything.

Enough talk, pics:

Here is a tig welder I borrowed off a friend which allowed me to craft exactly what was needed. The exhaust path around the back of the fuel tank and spare tire well is somewhat tricky but at least in a 2D plane.
50773231_913813762321125_1420198367408947200_n

The parts were all from best muffler in carlton. The owner is an old school guy who really knows his sh*t. He had given me advice on how to size exhausts on many other projects and I have had impressive results give just a little bit extra with his recommendations. Most of the time, its a lot smaller than what the average person would suggest but each time it has led to results surpassing anyones expectations.

The pipe work was 2" from front to the back of the front subframe which reduced to 1.75" into two hotdog type resonators and into out to a short 1.5" exit. All mandrel bends and V-bands at the front (hint: I was planning ahead to change the front for a turbo and hence a V-band was an investment)

Buzz buzz dip dip.
51234323_623962314704594_5585109930517463040_n

Im an ametuer welder but so far nothing has leaked and nothing structural has broken. The artistic side of it definitely needs improvement(practise) . I would like to note that none of this was done with purging and being stainless steel, you have to grind the internals due to the effects of the contaminations.
50778320_309717679676580_4612719263004753920_n

Working on the ground with scissors jacks lets you get the height just right and as close to the chassis as possible with good clearance. You need to account for rubber hanger sag too but thats dealt with when you weld the actual hangers to the exhaust.
50816683_1997788433854483_5240119199317098496_n

I used all hangers from the factory pic up points and this bend around the fuel tank and spare wheel well was obviously the trickiest.
50919539_250380732521706_2449562854139887616_n

Finished exhaust tip to tail sprayed in high temp exhaust paint for stealth. Despite being stainless pipes, the resonators were all regular mild steel so I just painted the entire thing. I did preserve the front where the flexi and one of the V-band was just because I knew it would be handled and exhaust paint doesnt like to be touched. Those parts up the front end were all stainless anyway so its fine.

I terminated the front end up into the manifold with a separate pipe with V-bands on either ends with intention that it could eventually be swapped into a turbo dump.
50766663_278844802786110_5071087892344864768_n

Another view. Its actually the stock cat chopped, shortened and merged down into the V-band. It was the easist solution at the time and it actually performed pretty well considering it would have been a turbulent mess in terms of flow inside there.
50728604_388481065057273_8470602396014215168_n

Another random supporting mod was the shift linkage bushes. Factory ones are rubbish. They are soft, flexible rubber and rattle resulting in a totally devoid of feel and poor confidence when slotting into gears. I spun some brass adapters and pressed bearings in to the shift lever bushes shown below.

I also tried short shifter mod but hated it so reverted back to standard throw due to preference. The regular throw was just better at getting into gears when shifting faster. Ironic but maybe its just the way I drive… dunno.

Another view.

Basically the same thing with bearings on the shift lever side of the gearbox

Also spun up a billet aluminium clutch cable end for the clutch fork side to make things tighter on that side too. Factory had two rubber bushings but this reduces any slack from that totally.

All in all, the shift and clutch side resulted in a positive and confident improvement to feel. Shifting slots in with a comforting direct feel and the clutch control never felt better. A great improvement to stock!

Bonus pic of two of my nuggets depicting the difference of series 1 and series 2 front.

Until next time. Thanks for viewing.

3 Likes

Yes, suspension is something I havnt been playing around with as much as I should. None of the L200s I owned had the ability to adjust camber unfortunately, so I resorted to minimum toe just to keep it straight and played with heights and spring load. I should mention the suspension were SSR300s you could commonly buy from Malaysia but were valved to suit the stiffer springs, maybe that allowed such a stiff spring to ‘work’… Definitely have a lot of room to improve in the handling department… I appreciate your advice on the settings and its well noted.

Solid mounting the sub frame is still in contention. Quite simple to do but I was worried about noise vibration harshness.

1 Like

Yes, “boost is not everything”. Air density!

Great write up, but such is your norm!

I can’t find or remember what pistons, headgasket and if any compression reduction?

A stiff front spring can’t work - properly. Chuck a std rate back in and the whole thing will smarten up. Set the toe to zero or minus one millimetre out but never toed in. The flex in the system goes to toe in under power. And my experience with the solid mounted subrame is that it corrected the lower control arm angle a bit (if lowered the outer ends should never point to the sky as through the bump travel you just loose good camber at a fast rate). To get it right I moved the pivots up about 40mm again. On the issue of vibration the solid subframe and near solid engine/gbox mounts are damn awful at idle, but smoother at revs. When I say smoother I am especially thinking about stopping the large movement/vibration of the suspended mass moving around in front of you. Engine balance and vibration off idle I found really good, and that is with a 2.5kg flywheel which does not dampen out vibrations.

2 Likes