Hail all. Here’s a lil background story to my Project: RED ROOSTA aka ANGRY BIRD
My parents bought this car from the dealer back in late 1995. It was 850cc carb with 5speed gearbox.
In 2000 my dad shipped in an EF-JL and did a complete engine and gearbox swap.
In 2007, the car was fully handed over to me and that’s where the evolution really started


4 Likes
2009, the car got a respray and a rebuild; my dad with his first DIY attempt at port and polishing (I personally have no paitience for that  )
)


A container came in with some goodies and I was lucky to get the front bumper and bonnet; missed out on the trunk spoiler and also the front and rear trxx disc. Also bucked up some seats at another parts place


Fast fwd another couple of years.
2E pistons were put into my EF block, rims change, exhaust manifold build and TD04-09 turbo installed


Fast fwd again Resprayed just the way I wanted it and crystal headlamps acquired

Now coming from my first drag meet. I damaged my 660 crank. I went through couple more cranks then tried the 850 block with the single 12v head. Was having a no luck. So I decided the next engine I bought would have to be shipped in from Japan. I got a complete EJ; unfortunately a chopped wireloom and no ECU was available so I used my 12V head and ECU and fitted 2.14" exhaust


Had some fun with that for some time; at the time I also used an APEXI safc and turbo starlet injectors. low boost 10psi, high boost 15psi. Best time at the drags was around 15.5 I think


3 Likes
So late 2015;I decided it was time for the next step of the evolution. Going standalone, decided to go Megasquirt 2 as it was the most affordable and my tuner was very familiar with it. I also decided to give the EJ head a try


My tuner and Electrician wiring in the MS

Exhaust manifold Built


Talk about teething pains; I went through it all for about a year
damaged pistons multiple times only to find out after over 6months my fuel pump was not delivering properly, then I lost two EJ heads; hairline crack in cylinder 2. Heck I did not go through this headache with the single cam head; so just went back to the evil I knew.
Having damaged pistons in the EJ block I went 2E pistons. I also changed the front wheel of my TD04 to the TD04HL-15t compressor, and kept my TD04-09 turbine side


7 Likes
Looks good fortis  Are you running a speeduino now at all? Thought i may have seen your car on the forum there.
1 Like
A speeduino?
It’s like a homebrew open source ecu, it’s a very interesting project that is gaining more and more support
Hahaha sorry mate isn’t you then. Your car looked similar to one i had seen there. Like fraser said another ecu project.
Hmmm; interesting. Tell me more
@welby that’s aight lol
So some details I should give on getting the megasquirt to work with my mira. On the EJ set up theres a 3+1 tooth trigger wheel and megasquirt does have a code for it. At the time I thought the code wasnt running well and decided make a 36-1 wheel and place it the same place. Worked out smooth for me.
On going to the single cam set up. It was either I do a trigger wheel on the crank or the cam. Wanted it on the crank pulley but the space was hell; I had these illusions at the time that i was gonna put AC in the car so I always did mods with the compressor installed.
Seeing that I was no longer going EJ head I machined the EJ cam gear, press fitted and bolted it into the single cam gear. Then made a mounting bracket for the sensor.
Other things I did to complete this set up was order some ARP Studs; they turned out to be studs for the main caps in a Nissan; the pitch on one side is correct for the block; so had to order the nuts differently
Using the single cam head with the EJ block, one has to block off the crankcase breather the EJ block uses from factory. So from past experience I had high crankcase pressure and my catch can would fill in no time. So I decided to copy the breather port that the EF/ED single cam blocks use and at the same time I decked the block just for good measure as in the past I lost head gaskets inbetween cylinders quite a number of times
Cam wheel and sensor

modified twin cam wheel; press fit and bolted into single cam wheel


Decking the block


My aim for 2017 was to have the car freshly repainted, refreshed engine, rewire and bolt on the EJ gearbox.
Dropped off the car to deal with some rusting at the back
My fabricator got his welding machine late December and wanted to try it out, so he seem welded the front of the car. Should’ve had him through the whole car but the body work and spraying process had already started
Ordered a clutch kit from Keicar4life. Sadly I got the pos disc which I disliked from day one; which would later fail me on the dyno (give you that story later on)
Also wanted to run the coilpacks from the EJ; seems I didn’t put a setting in the MS2 correctly. Ran out of patience and just went back to the distributor set up. Another time for those coilpacks


Rewiring done by Doyen Smith

Fabricator and electrician

RE: installing the EJ gearbox in my L501s; problems I encounter are:
1: Drive shafts had to be customized; left side shorter, right side longer. Had to use the cups that came with the gearbox; got away with using the balls and cage from my l700 and purchased L500 out CV’s
-
The shifter rod had a slight clearance issue with the subframe; it was so slight we used a 19mm socket and bent it against the subframe and all was well. My fabricator made and adapter to bolt the shifter to the body of the car; so when if need be I could go back to my original gearbox and shifter set up (which ended up being the case
-
The clutch cable is way longer, so custom cable to be made
I didn’t get the EJ flywheel, so I used my ED flywheel. I later found out it wasn’t all just that as the fork had to travel way too far; so some sort of spacer on the throw out bearing is gonna be needed in the future when I go back to this gearbox.
Custom shafts


Had to modify my exhaust as the shifter rod was in the space the exhaust would run


Race season was just about to start; the spray job was completed late and my customized fenders weren’t finished and ended up turning out shitty; which left little room for all the teething pain of the changes. The EJ gearbox wasn’t working out for me as the clutch system was flexing so it made it a fight to get into gear. Took it out and put back my ED gearbox; went to dyno and couldn’t get the boost past 10psi made only 94hp two weeks later I had a boost leak. Competed at drag and circuit and had fun;so it was just to iron out those kinks
Found some suspension at a used parts dealer; no idea what they came from but they were adjustable so decided I’d mod em and see what I could make of em.
Couldn’t use the top hats that I got with the struts so I moded the stock ones to fit


After finding the boost leak and prepping for the next circuit meet; my 3rd gear and input shaft for damaged; I decided to put back in the EJ gearbox; made a modification to the throw out bearing. Went on the dyno and as we went to 20psi the clutch disc started to slip #sigh
Was happy we got to tune it anyway; the disc died 3days later so had to fix my ED gearbox


5 Likes
RE: HEAD STUDS FOR SINGLE CAM
NISSAN YD25 ARP: 202-5803
NUTS: ARP: 300-8365.
One has to purchase nuts as the pitch that fits in the block is not the pitch for the nuts that come with the studs; so this means you’re going to have to install the studs upside down.
1 Like
Interesting. Eearly on your thread shows a twin cam gold tappet cover. But when you are talking about timing belt drive gears there is what looks like a pressed tin ef-el tappet cover. You are running an EF-EL aren’t you?
The EJ-DE with ARP M10x1.6 nuts would need a 14mm tube socket to tighten them. If I machine a socket down in the lathe far enough to fit in mine it is to weak to do the nut up. I’d have to machine the upper part of the casting to get a socket to fit? I have special order ARP studs with an M10 x 1.5 nuts, so there was perhaps no need to “special order” but I think it was cheaper to do that than the kit you list. But is your fit for EJ or EF. I’ve never check whether the bolt length is same between them.
Ohhh it’s the 12mm tube which I used that’s why I had good clearance, 14mm no space.
Ok i did use the EJ head first but the kit wasn’t used with that head. The bolts are noticably longer from the EF head.
So the config I have now is EF head on EJ block. My order did really end up costing me, but live and learn
1 Like
Ok some new developments in the last week. One year ago I modified and installed a honda civic 2 row aluminium radiator. This really improved my cooling. I’m rather fussy about operating temperatures as I’ve seen how it’s impacted performance. Nominal temp is usually 190F; while on the dyno my fan didnt chip in and my temp was about 200F; my hp fell by about 8hp.
So my reason for upgrading once again is due to the noted temp on track day. By lap 3 of the circuit im running 230F, according to the gauge thats the peak “good” range for the temperature. Ran without the bumper to see if it was.the flow.to the radiator and the same result.
Installing this radiator took only a lil modifying; move the outlet to the left side as on the right it rubs against the gearbox. The top tank I shifted that as I’m still running distributor and needed the clearance.
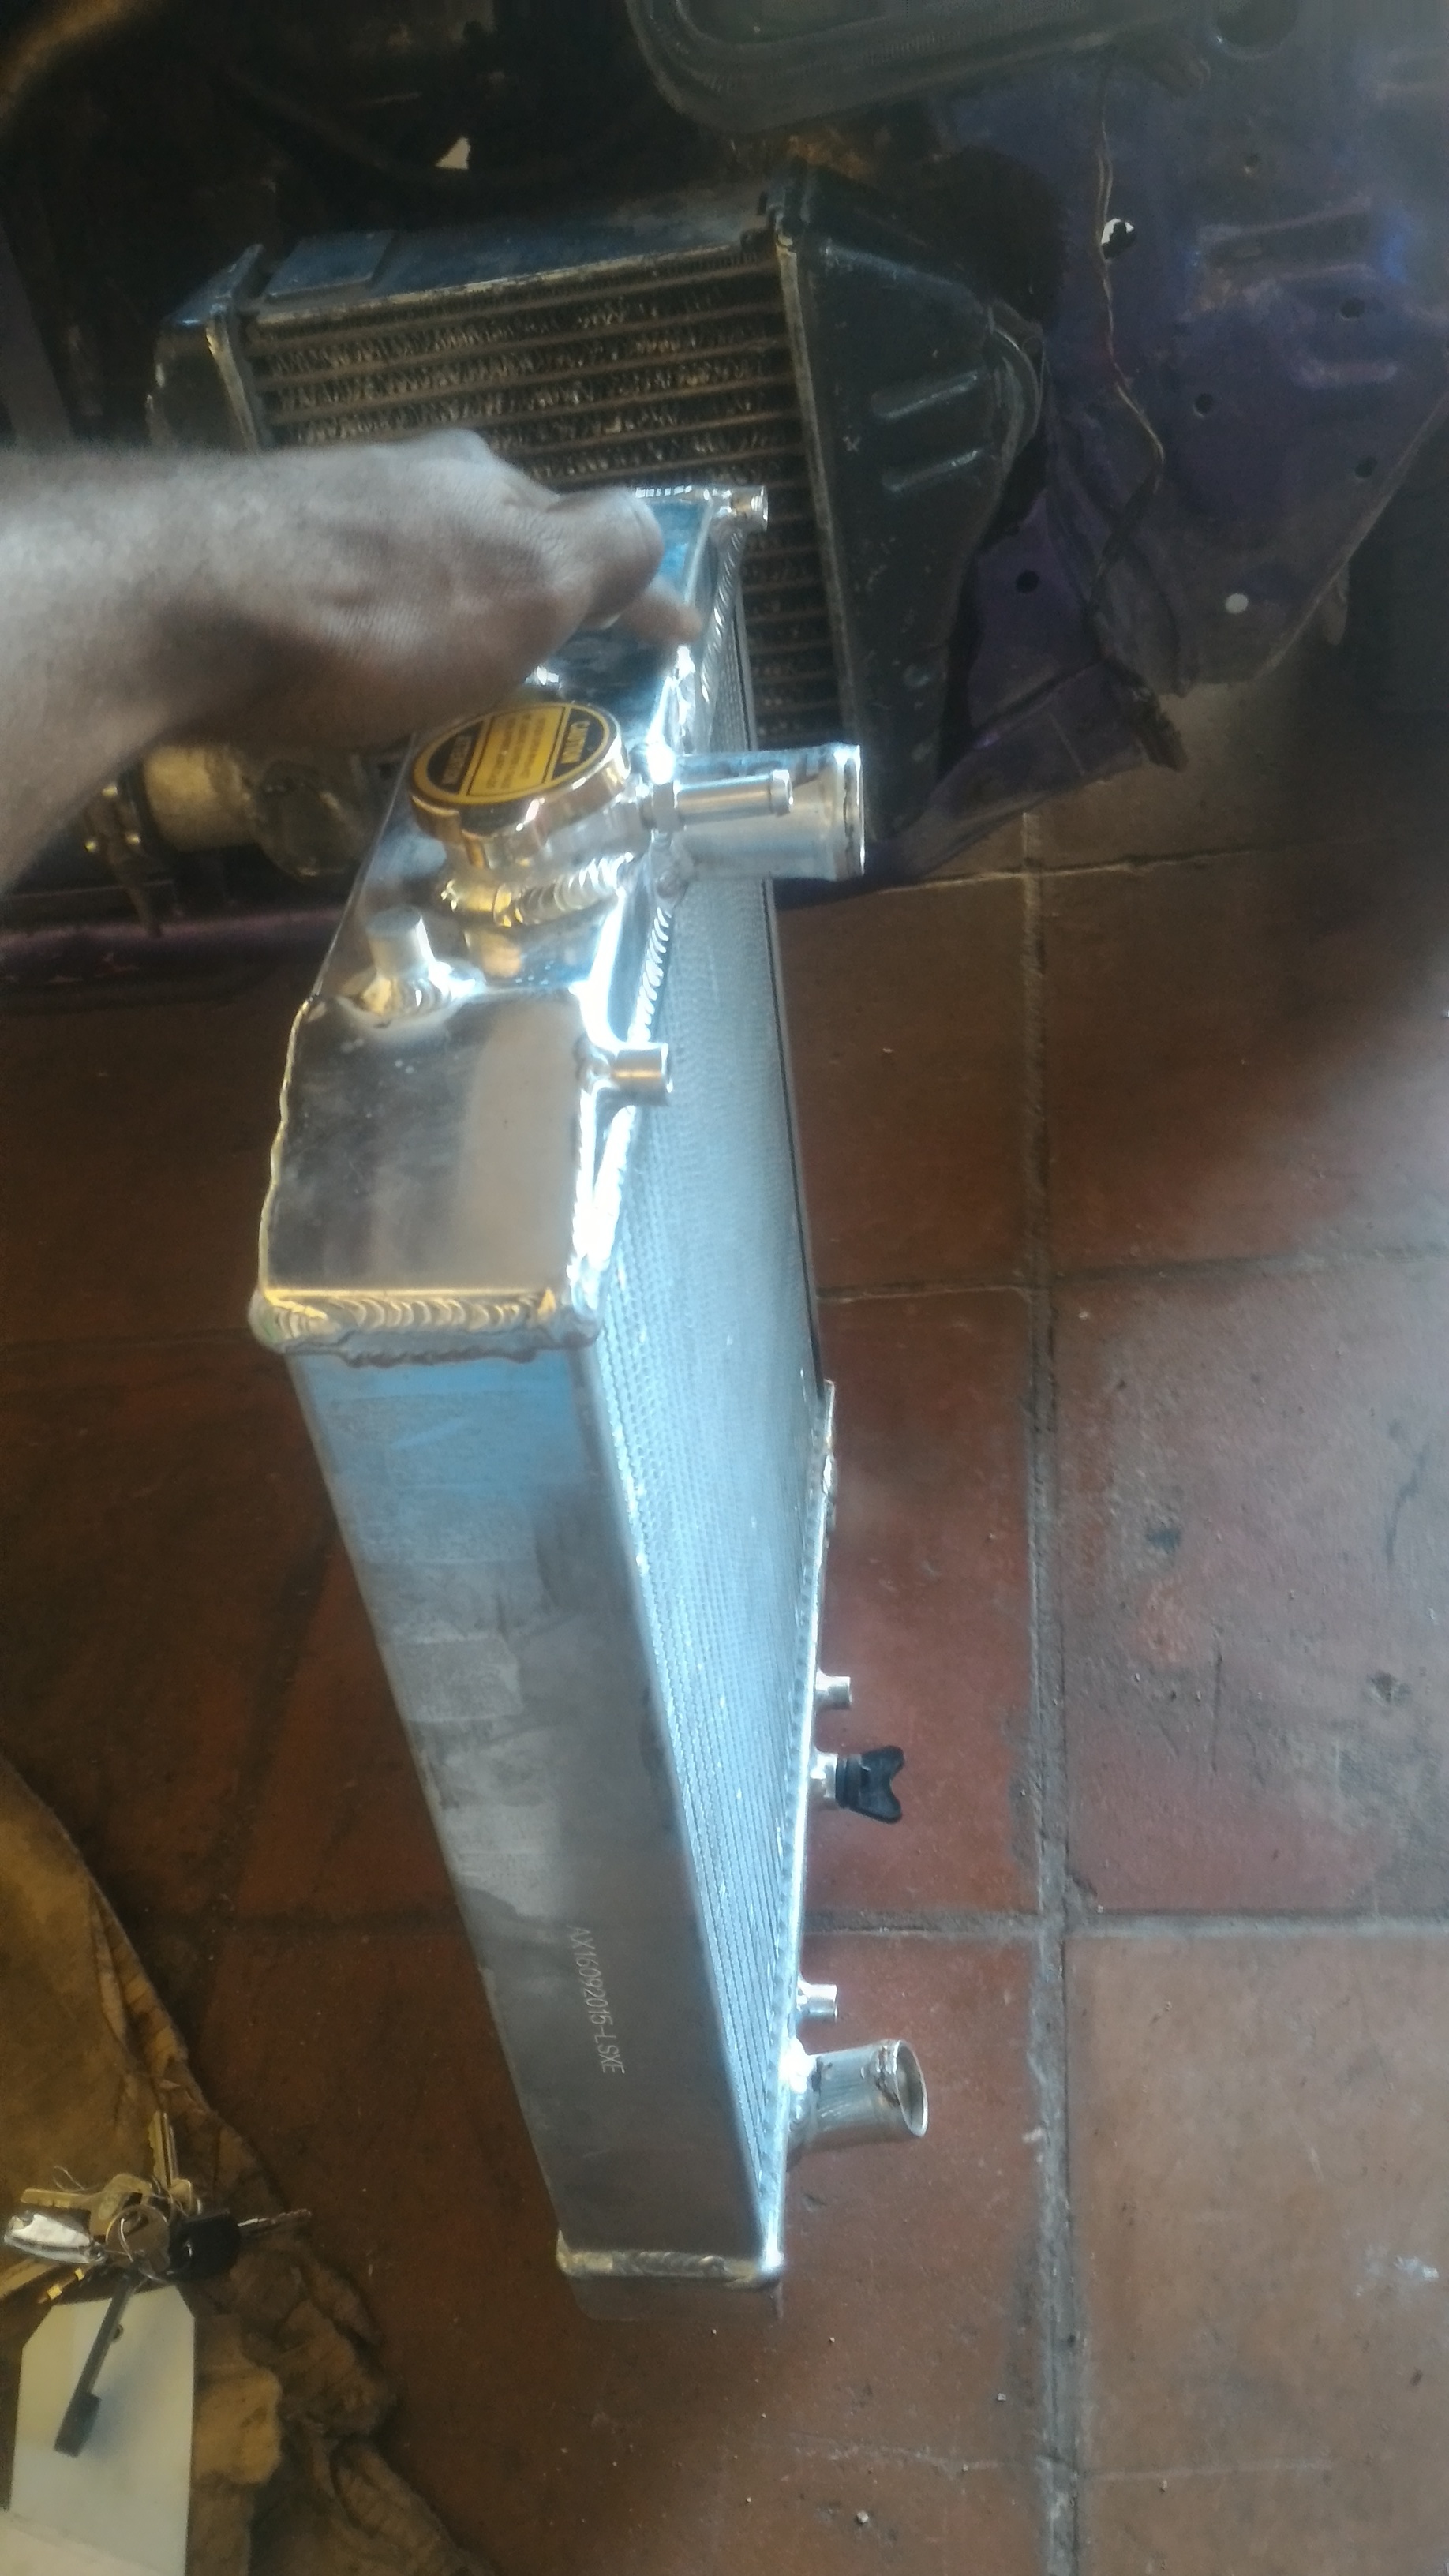
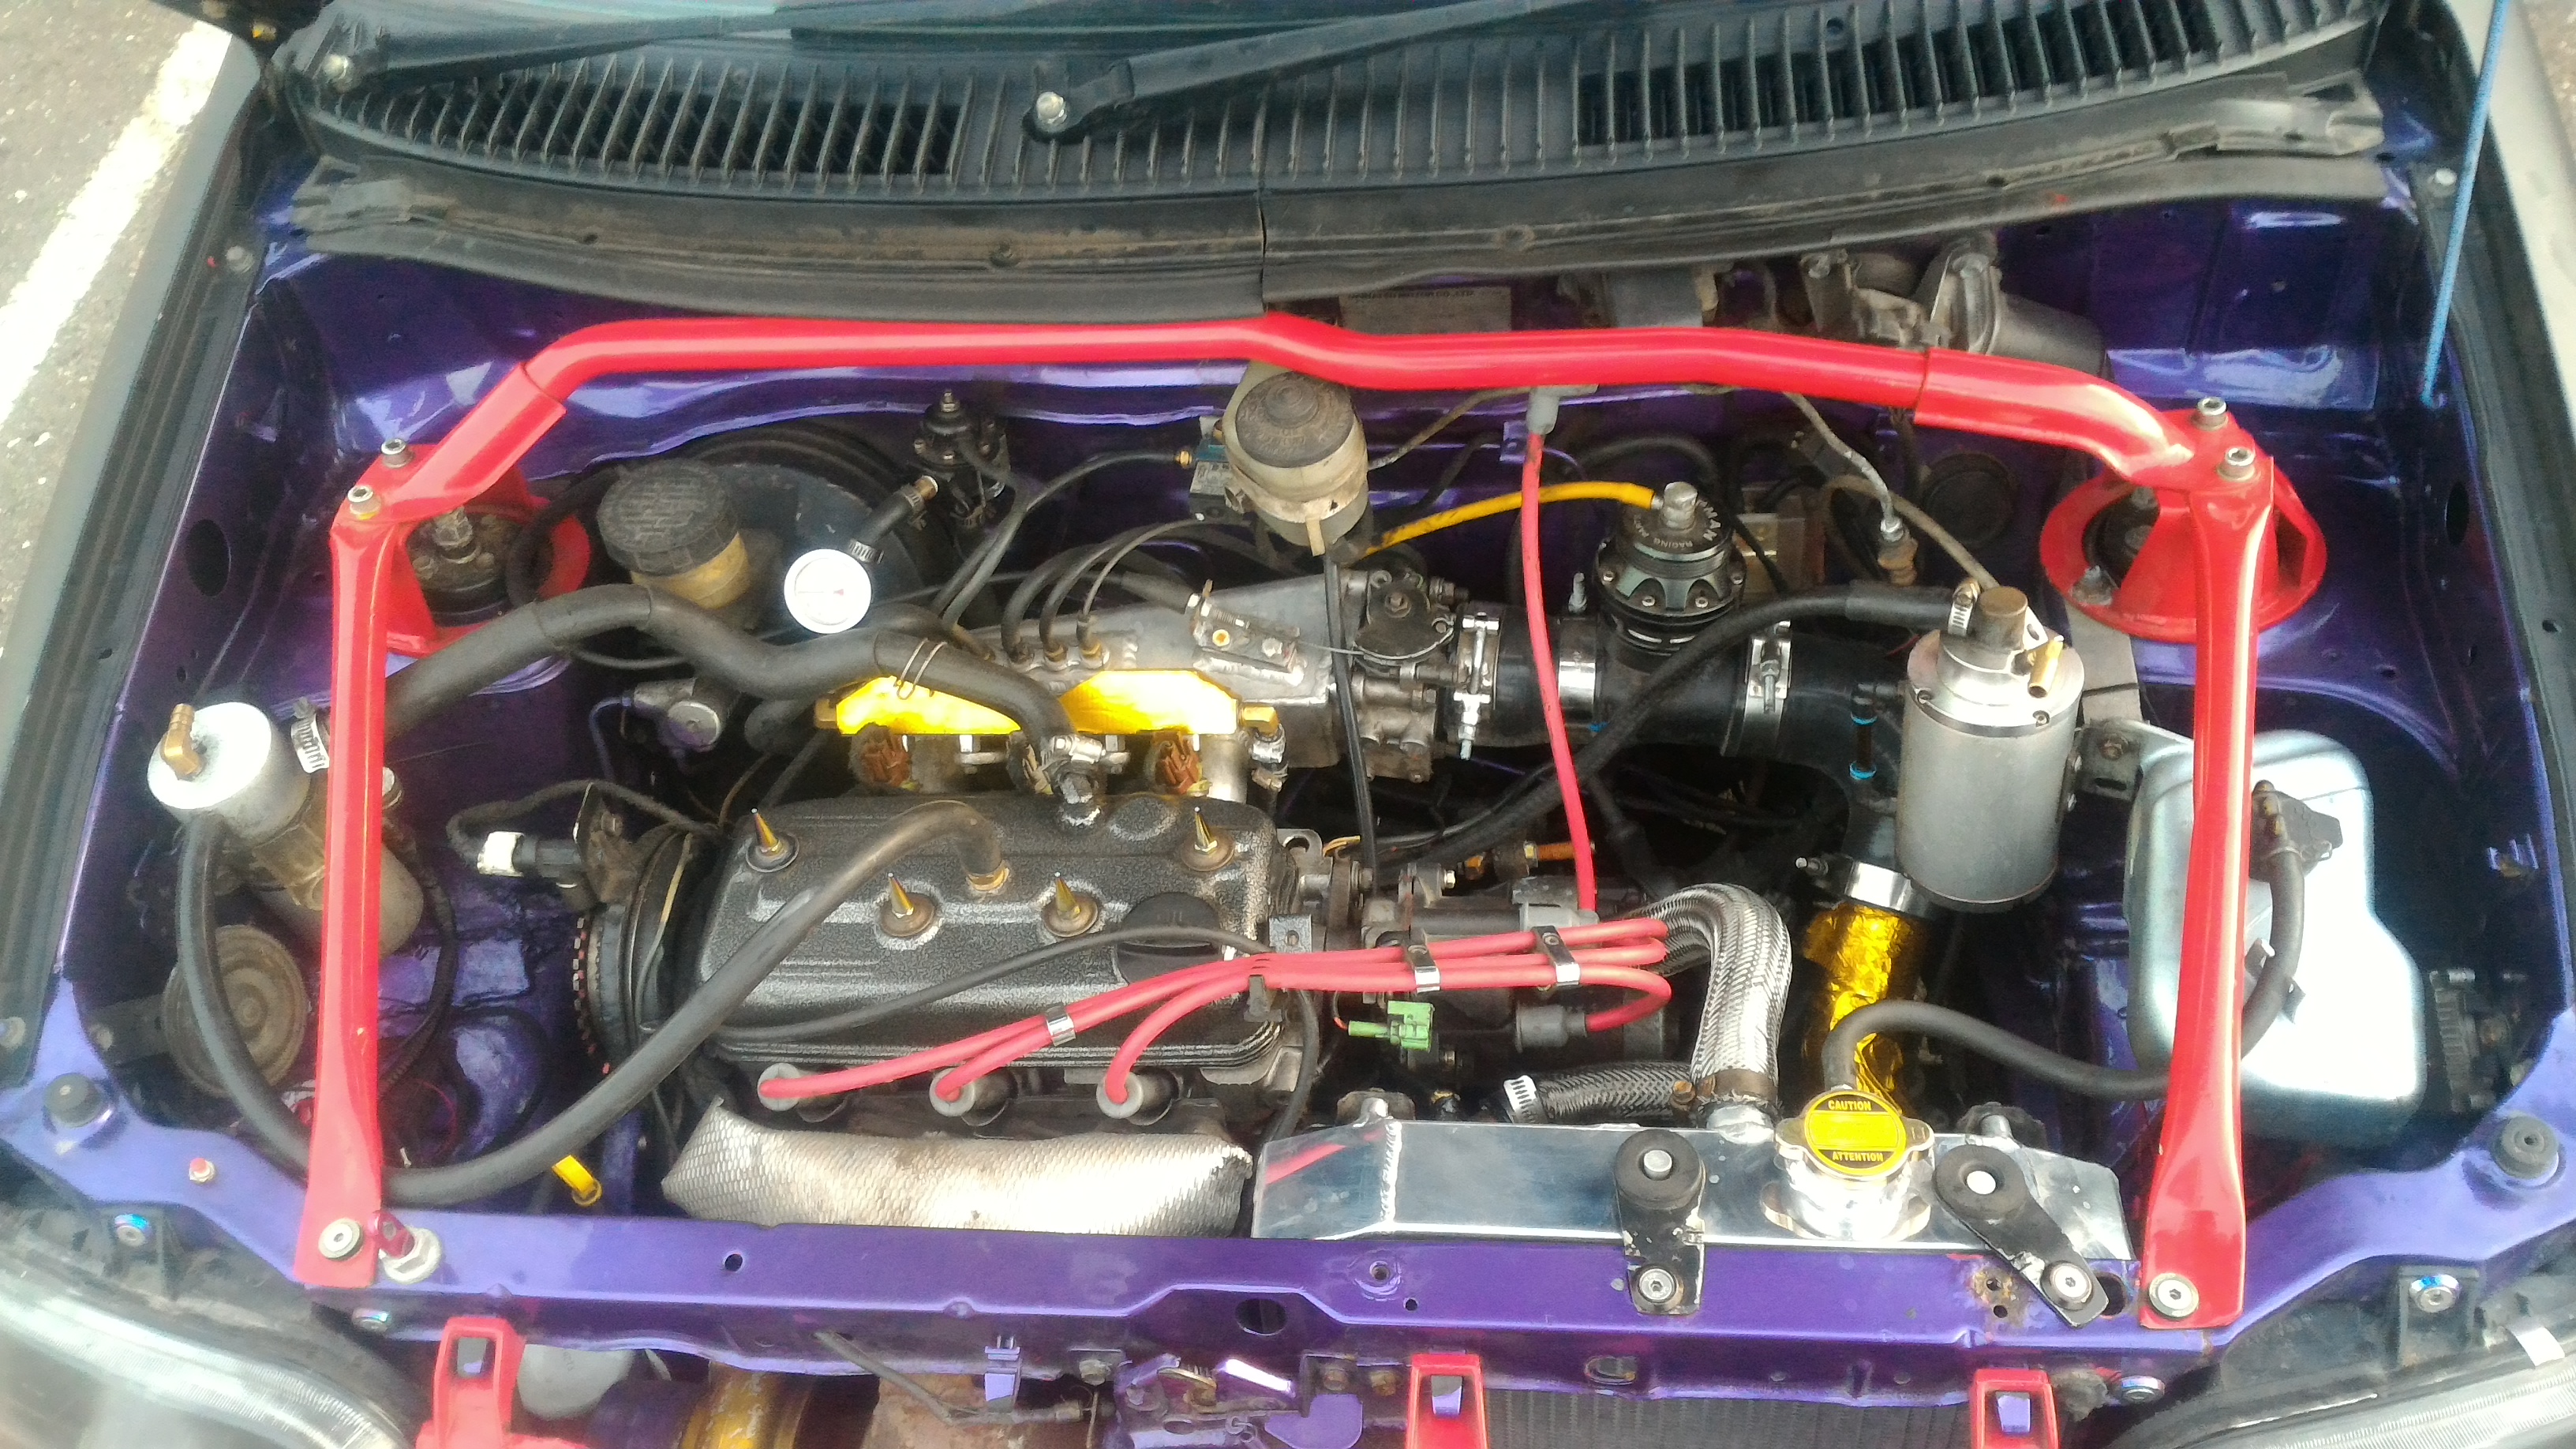
I also decided to increase the airflow to the radiator as I also have the intercooler is infront and though not wide its tall. I’d previously had to cut some platic from the grill area to increase the air flow as I was overheating once i started pressuring the car.
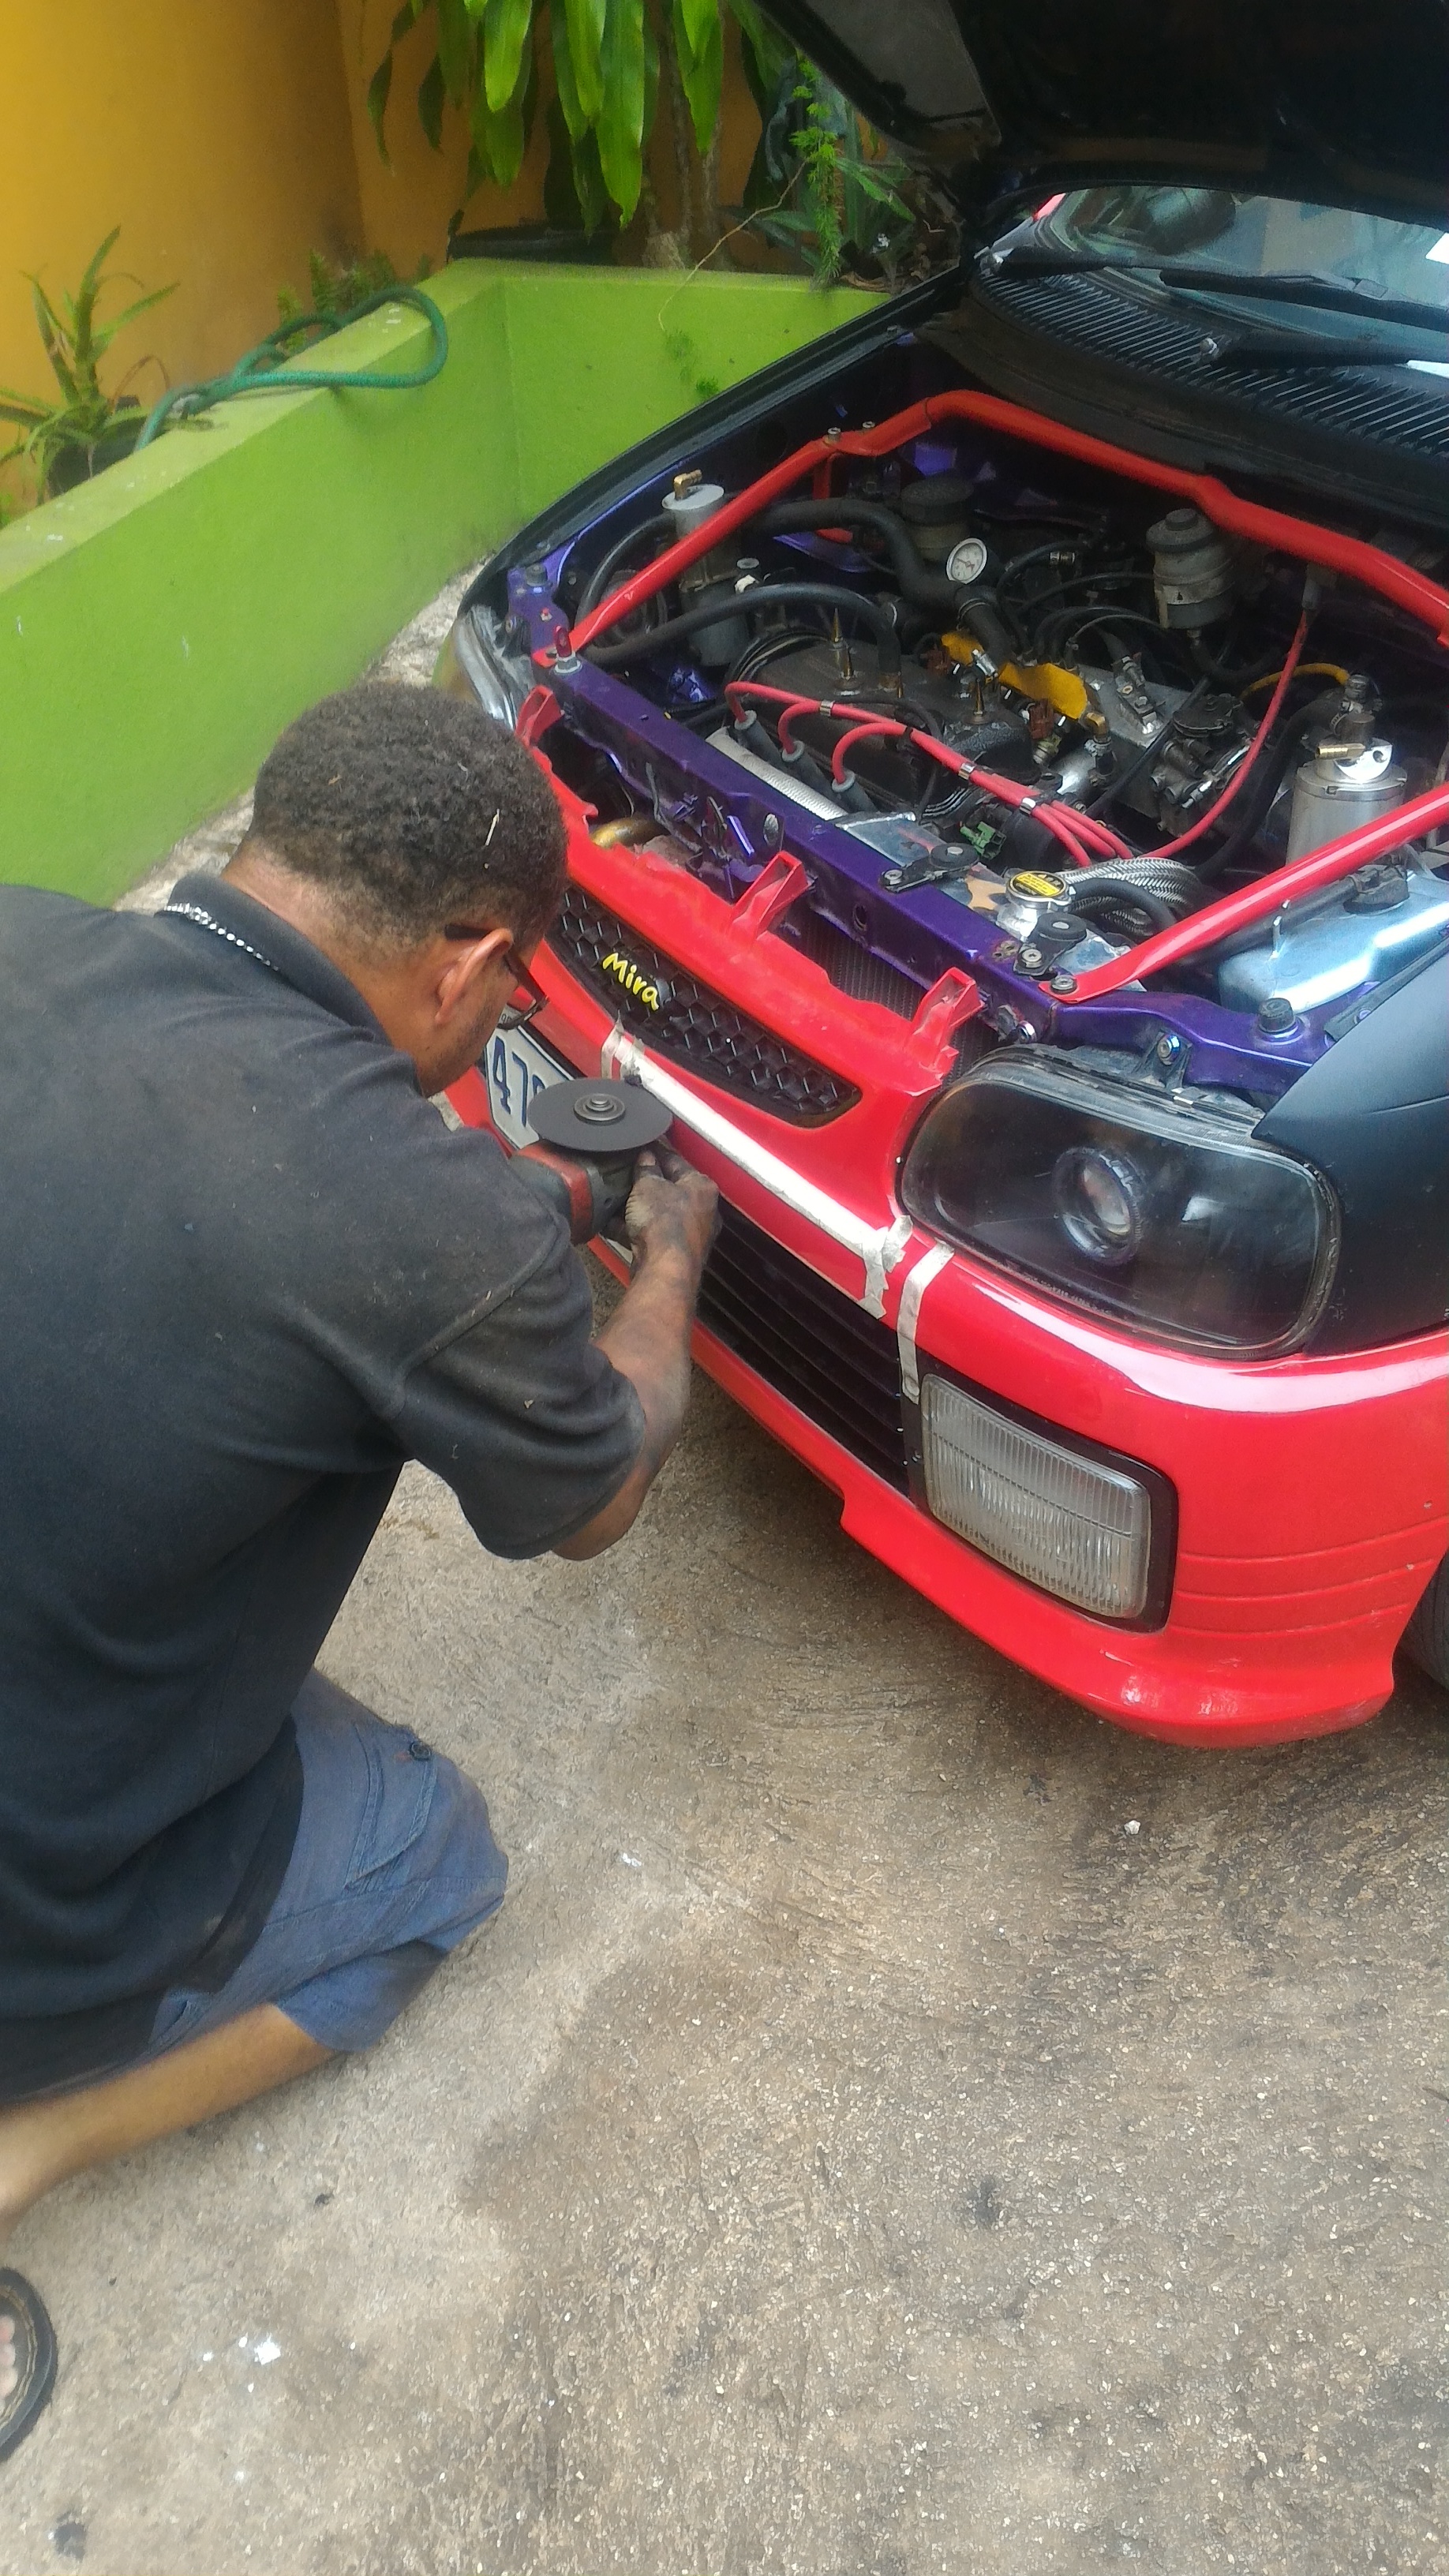
I was really sceptic about doing this as I want to keep the car looking as stock and neat as possible; but if one is to focus on racing; one just has to do what has to be done
Needed a steady hand to do the job so I went to the hills to my friend Peter John.
3 Likes
There’s a highway we have, I usually test there how long it takes for my temp to touch 200F; it still went there with the tripple core installed but as I backed off it went down, so I know there was some.heat soaking going on
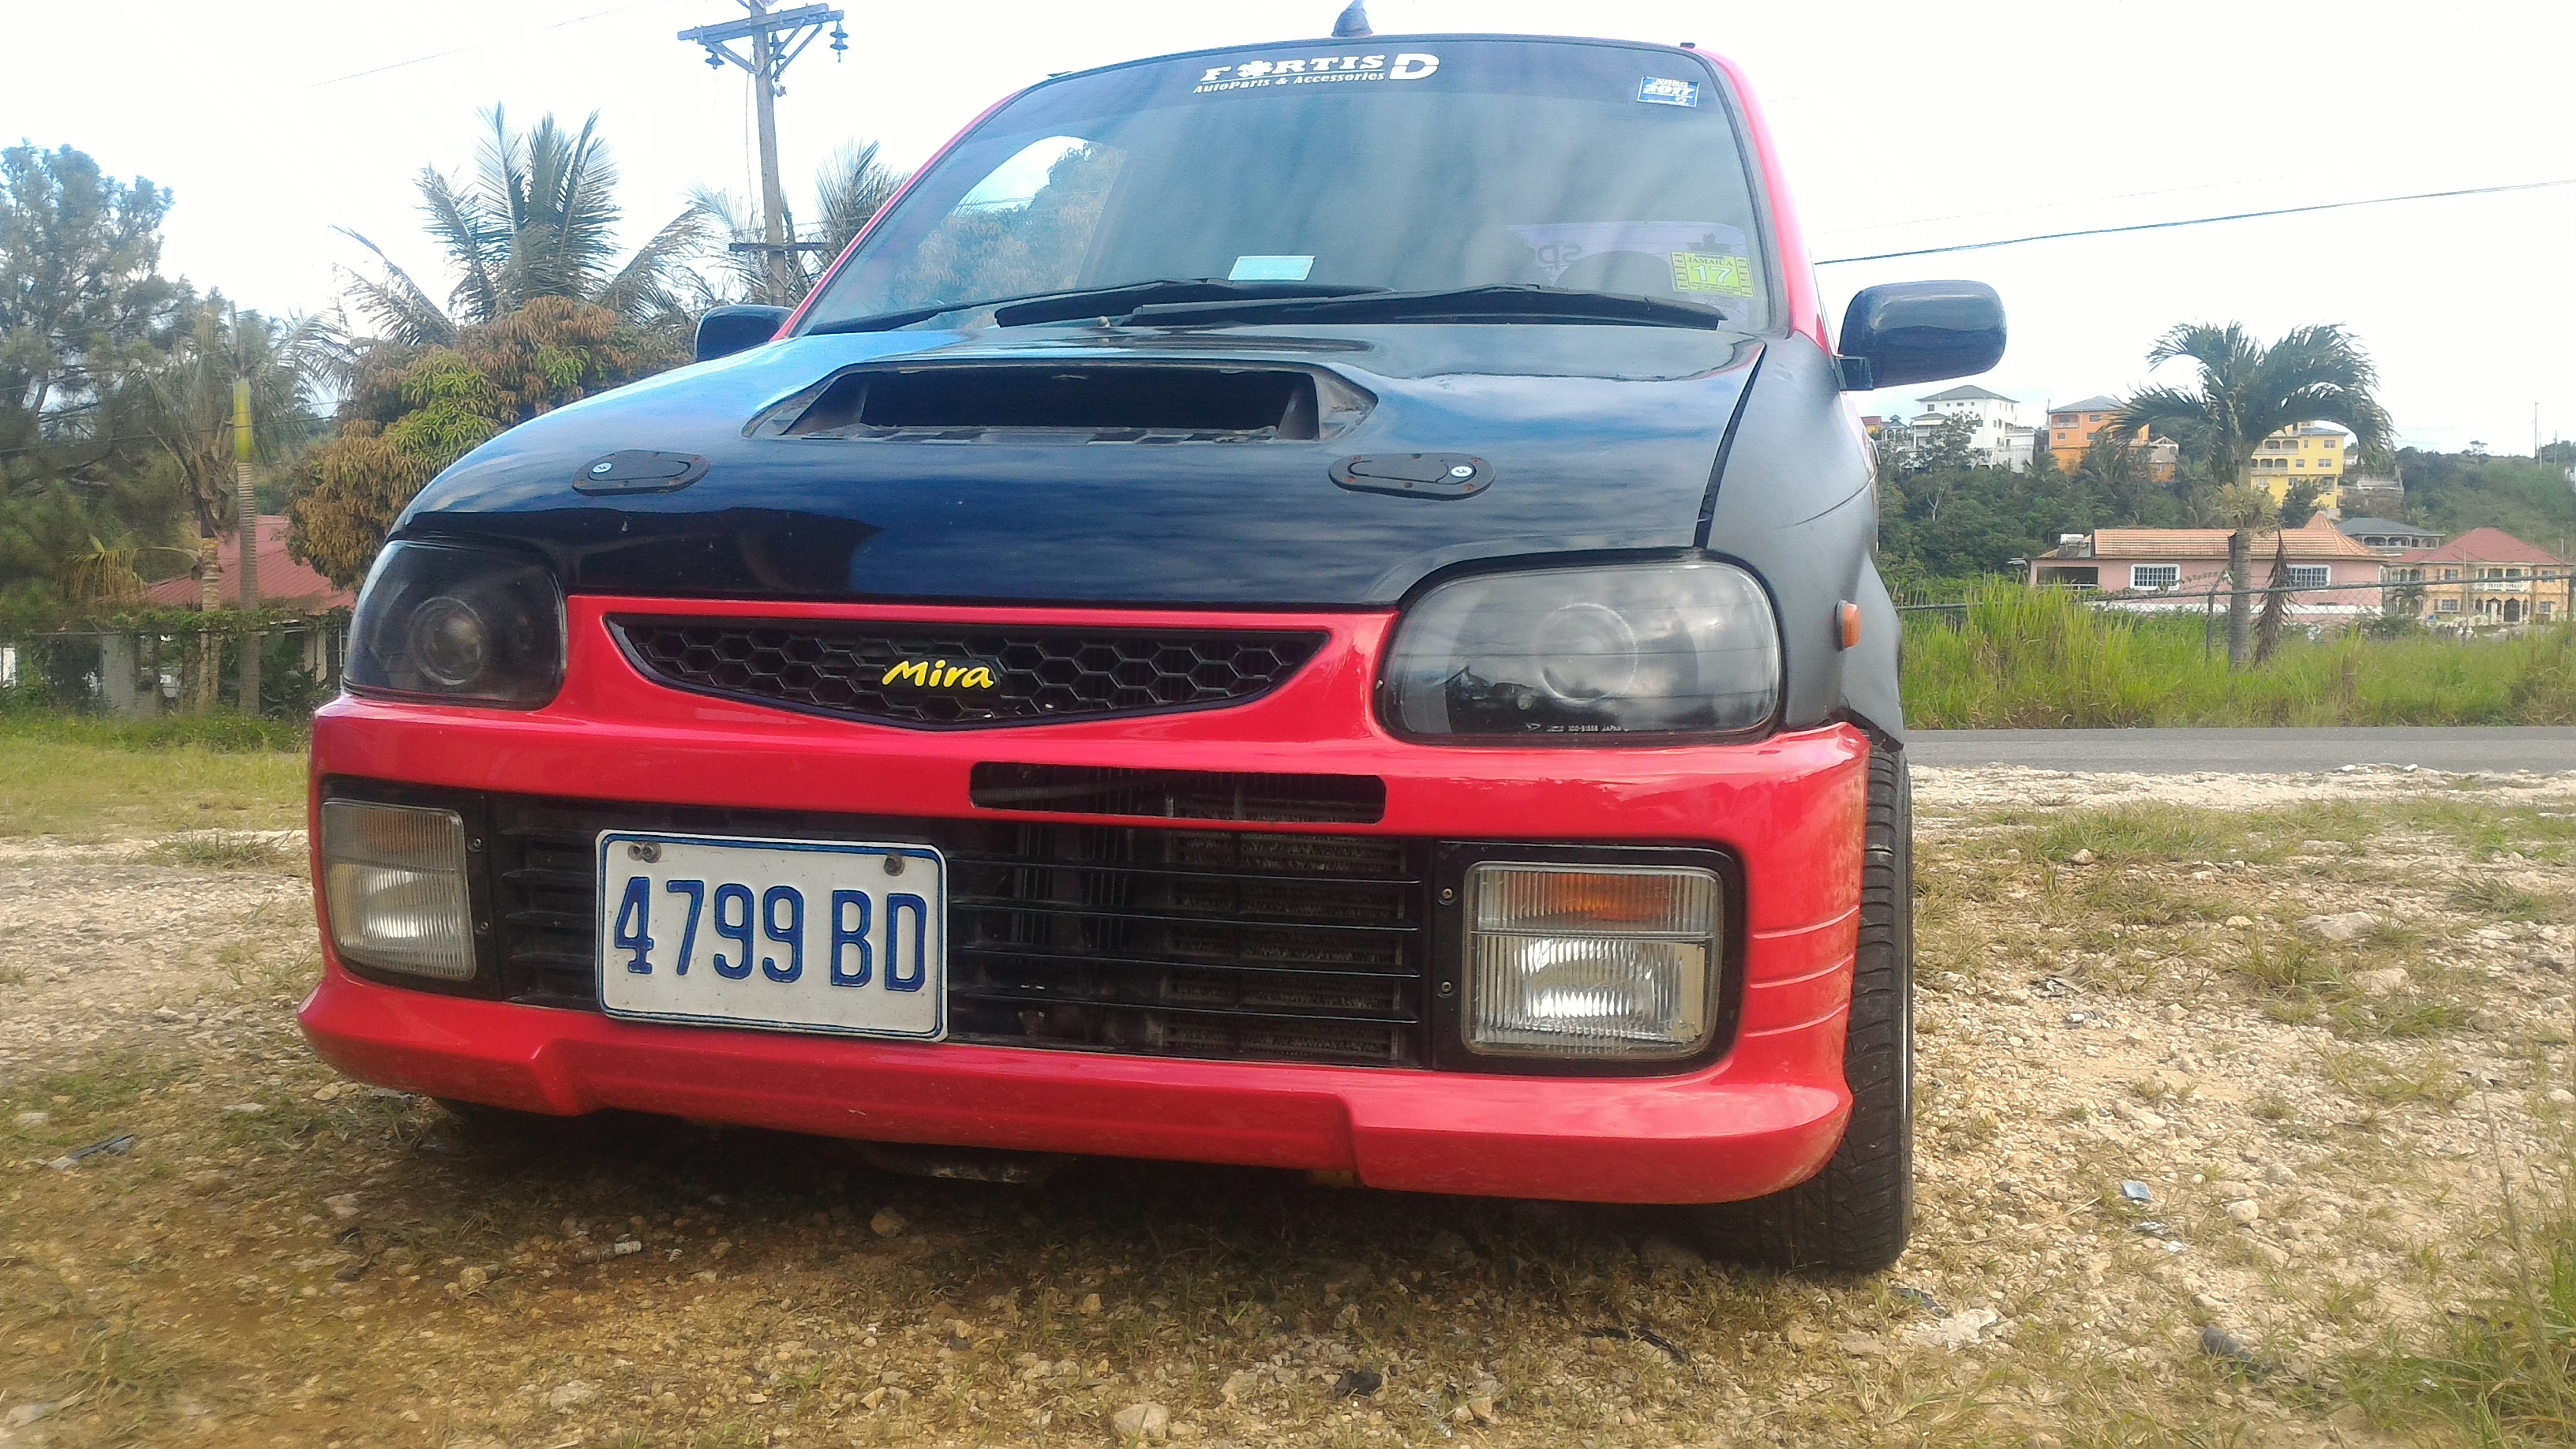
On my way back, after cutting the bumper. Steady 190F. Exactly where I want it.
Hope this is the same result on track day
3 Likes
Shrouding around the radiator is more important than having a big open frontal area. The frontal opening does not have to have the same area as the radiator, it can be smaller. Here is one of many examples of such.
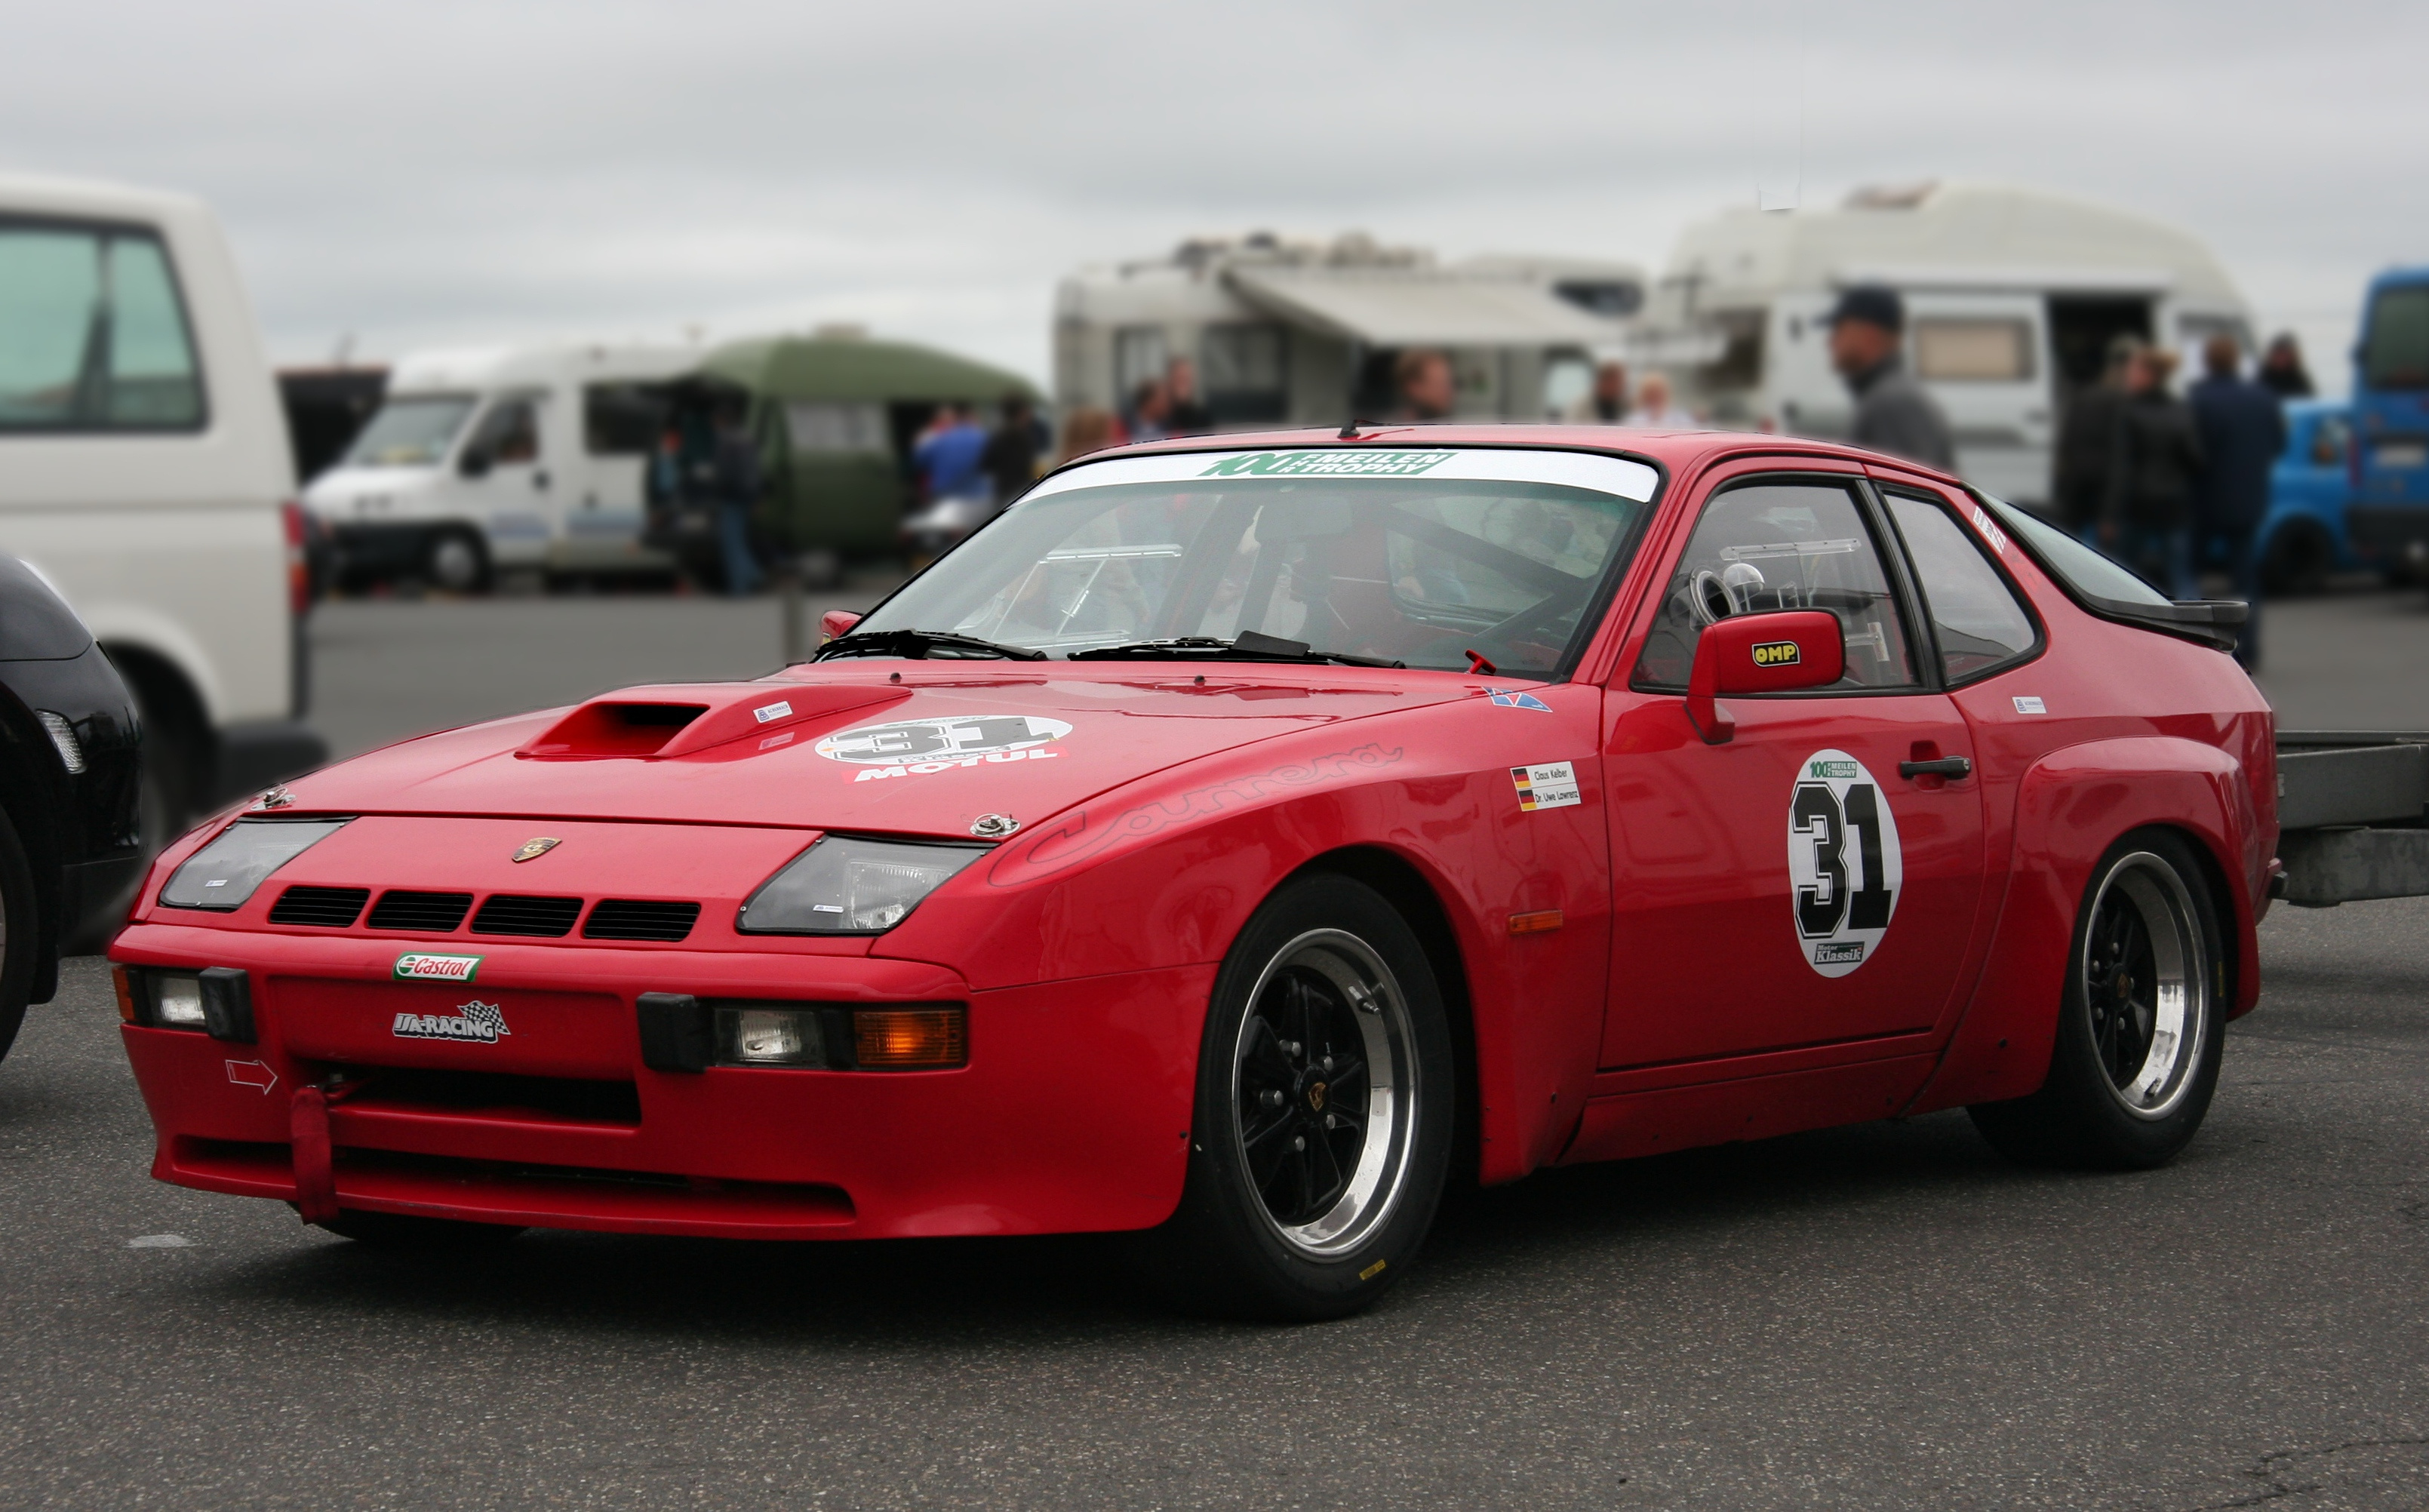
These old 924 Carrera GTs have a much bigger radiator than those frontal openings would suggest. With early turbo technology they made a lot of heat, but had no problems with good shrouding since the cooling air needs to be just that cool air. Without good shrouding one is just recirculating hot air. Some thought about where the air exits is also a worthy exercise.
2 Likes
That’s the next thing I was going to focus on but not sure what to use to seal the area I want to duct.
The design and whatever I use would have to be easily removable or attached in such a way to accommodate an easy pull down.
I do take off the bumper quite alot.
I was thinking of cutting to shape, some styrofoam and hot glue it to the bumper. That way whenever I remove the bumper it comes off with it
To the left under the headlamp I’m thinking of using styrofoam there also.


2 Likes
Another thing i’ll be looking into is having a vent installed on the left rear of the bonnet to ger out the hot air.
Design suggestions are welcomed 
No point guessing where to make holes. Find out where presure is high. Make a manometer, they are pretty basic being just a tube, backing frame (with a graduated scale) and some water with food colouring mixed in (I actually have two different Dwyer guages that do this, one is more sensitive for aero testing and checking under bonnet and under car pressure, and the other is for higher vacuum such as intake readings). Adding a splitter to the spoiler will force more air high and through the grille area and also more air over the car. With less air spilling under the splitter there will be less pressure underneath the car and hot air will escape that way. This is preferable to venting hot air over the top. Short side skirts will help this also. I love playing with this sort of stuff. I’m seeking to get the underside of mine as clean as possible and will one day turn the big cut out in the back bumper into a proper diffuser and balance that with some front air tricks.
One note on all of this is to not get carried away with thinking you can get much ram effect with induction or cooling. At really high speed, yes. Pressure increase is proportional to the square of speed. At low speed you are after cool air (not pressurised air - yes a you get a little pressure below speeds of say 100km/h but the power benefits are hard to measure as they are typically only something like 0.5% gains if not less) and need to create low pressure areas to move it away from things you want to keep cool.
3 Likes