A short how-to on repairing the OEM Daihatsu Remote Central Locking (RCL) fob. If you have a non-functioning RCL fob, its worth checking the fob before diving into the car-side bits.
Equipment you will need:
- Fob itself
- Jewellers phillips (crosshead) screwdriver
- Small stiff bristled brush (an old toothbrush is ideal)
- Small sharp knife. I used a penknife with a slim blade
- (Maybe) 2x 4mm x 4mm x 1.9mm Surface Mount SMD Micro Momentary Tactile Tact Push Button Switch 4Pin (microswitches)
- (Maybe) Soldering iron and solder
- (Maybe) CR1616 Coin Cell battery if needed
Time - Roughly 30 minutes.
You’ll want a clean working area, ideally a shallow tray to catch small things that ping off unexpectedly.
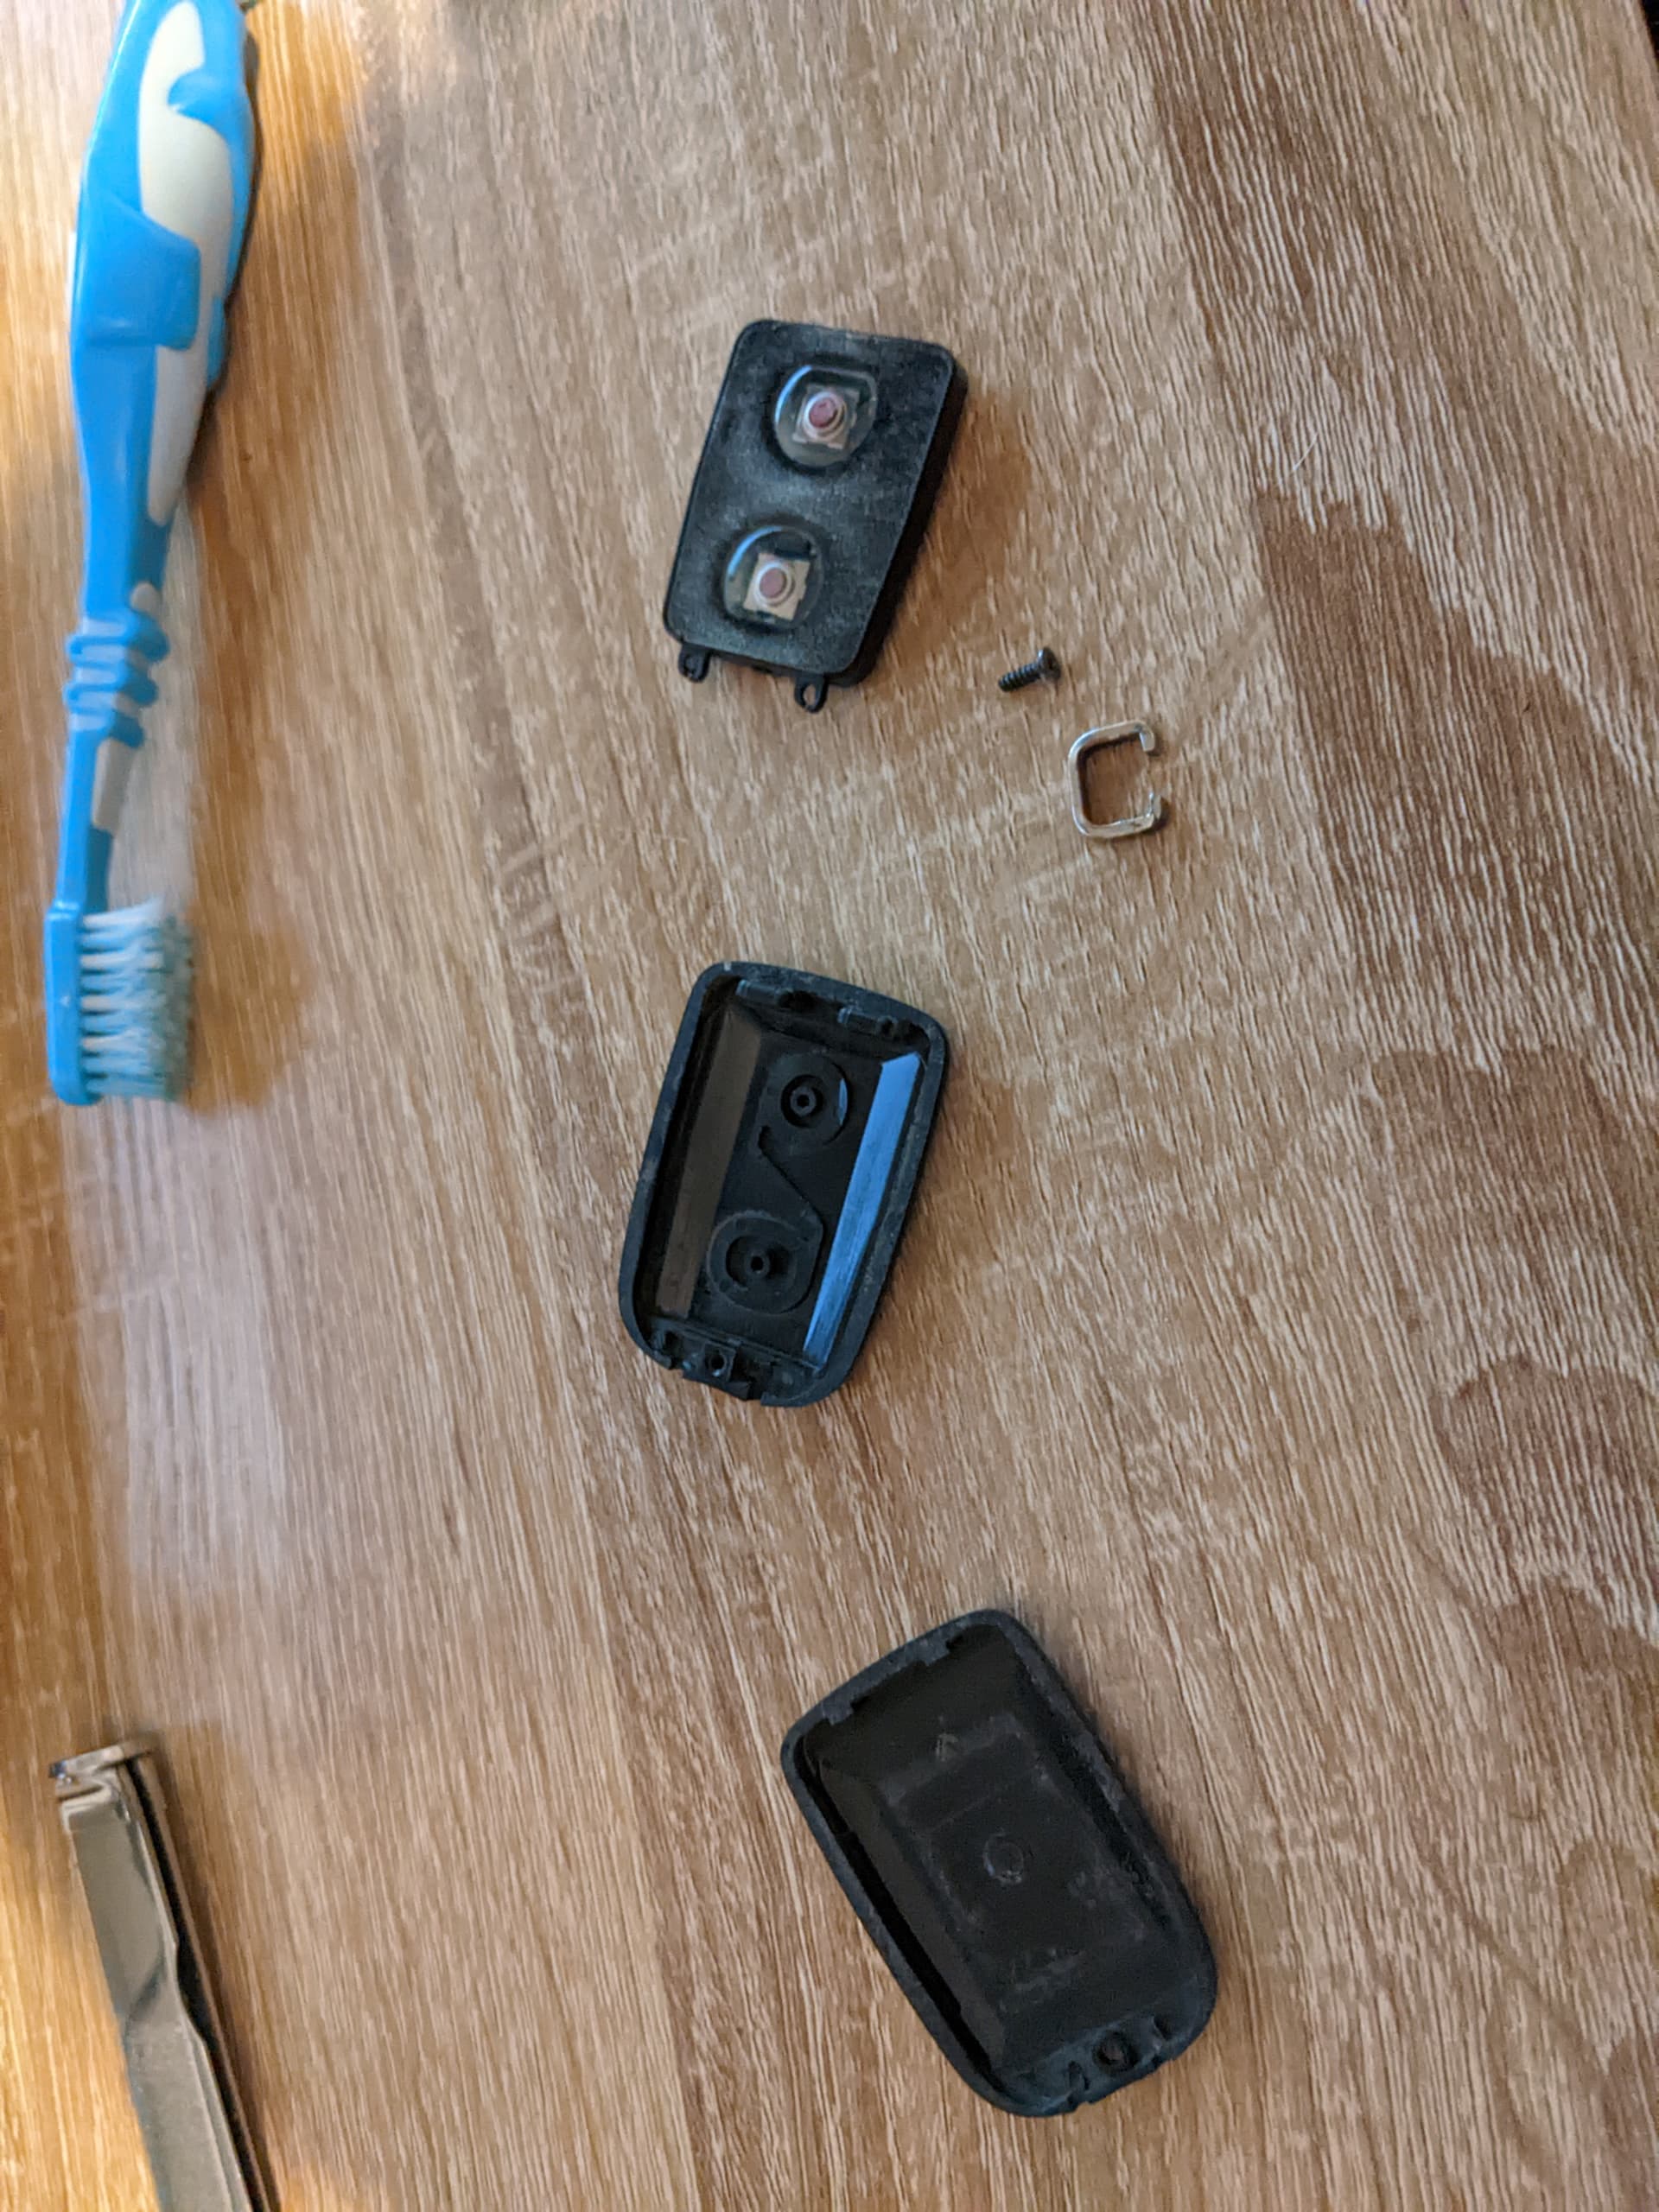
First, remove the fob from the keyring and locate the small phillips screw. Undo this with a jewellers screwdriver to allow you to separate the two halves of the fob.


The two halves should pop apart, but may need a bit of leverage with a penknife or flat blade screwdriver to get them to separate. Be aware that the C-shaped metal ring that secures the fob to a keyring can and will fall out now.

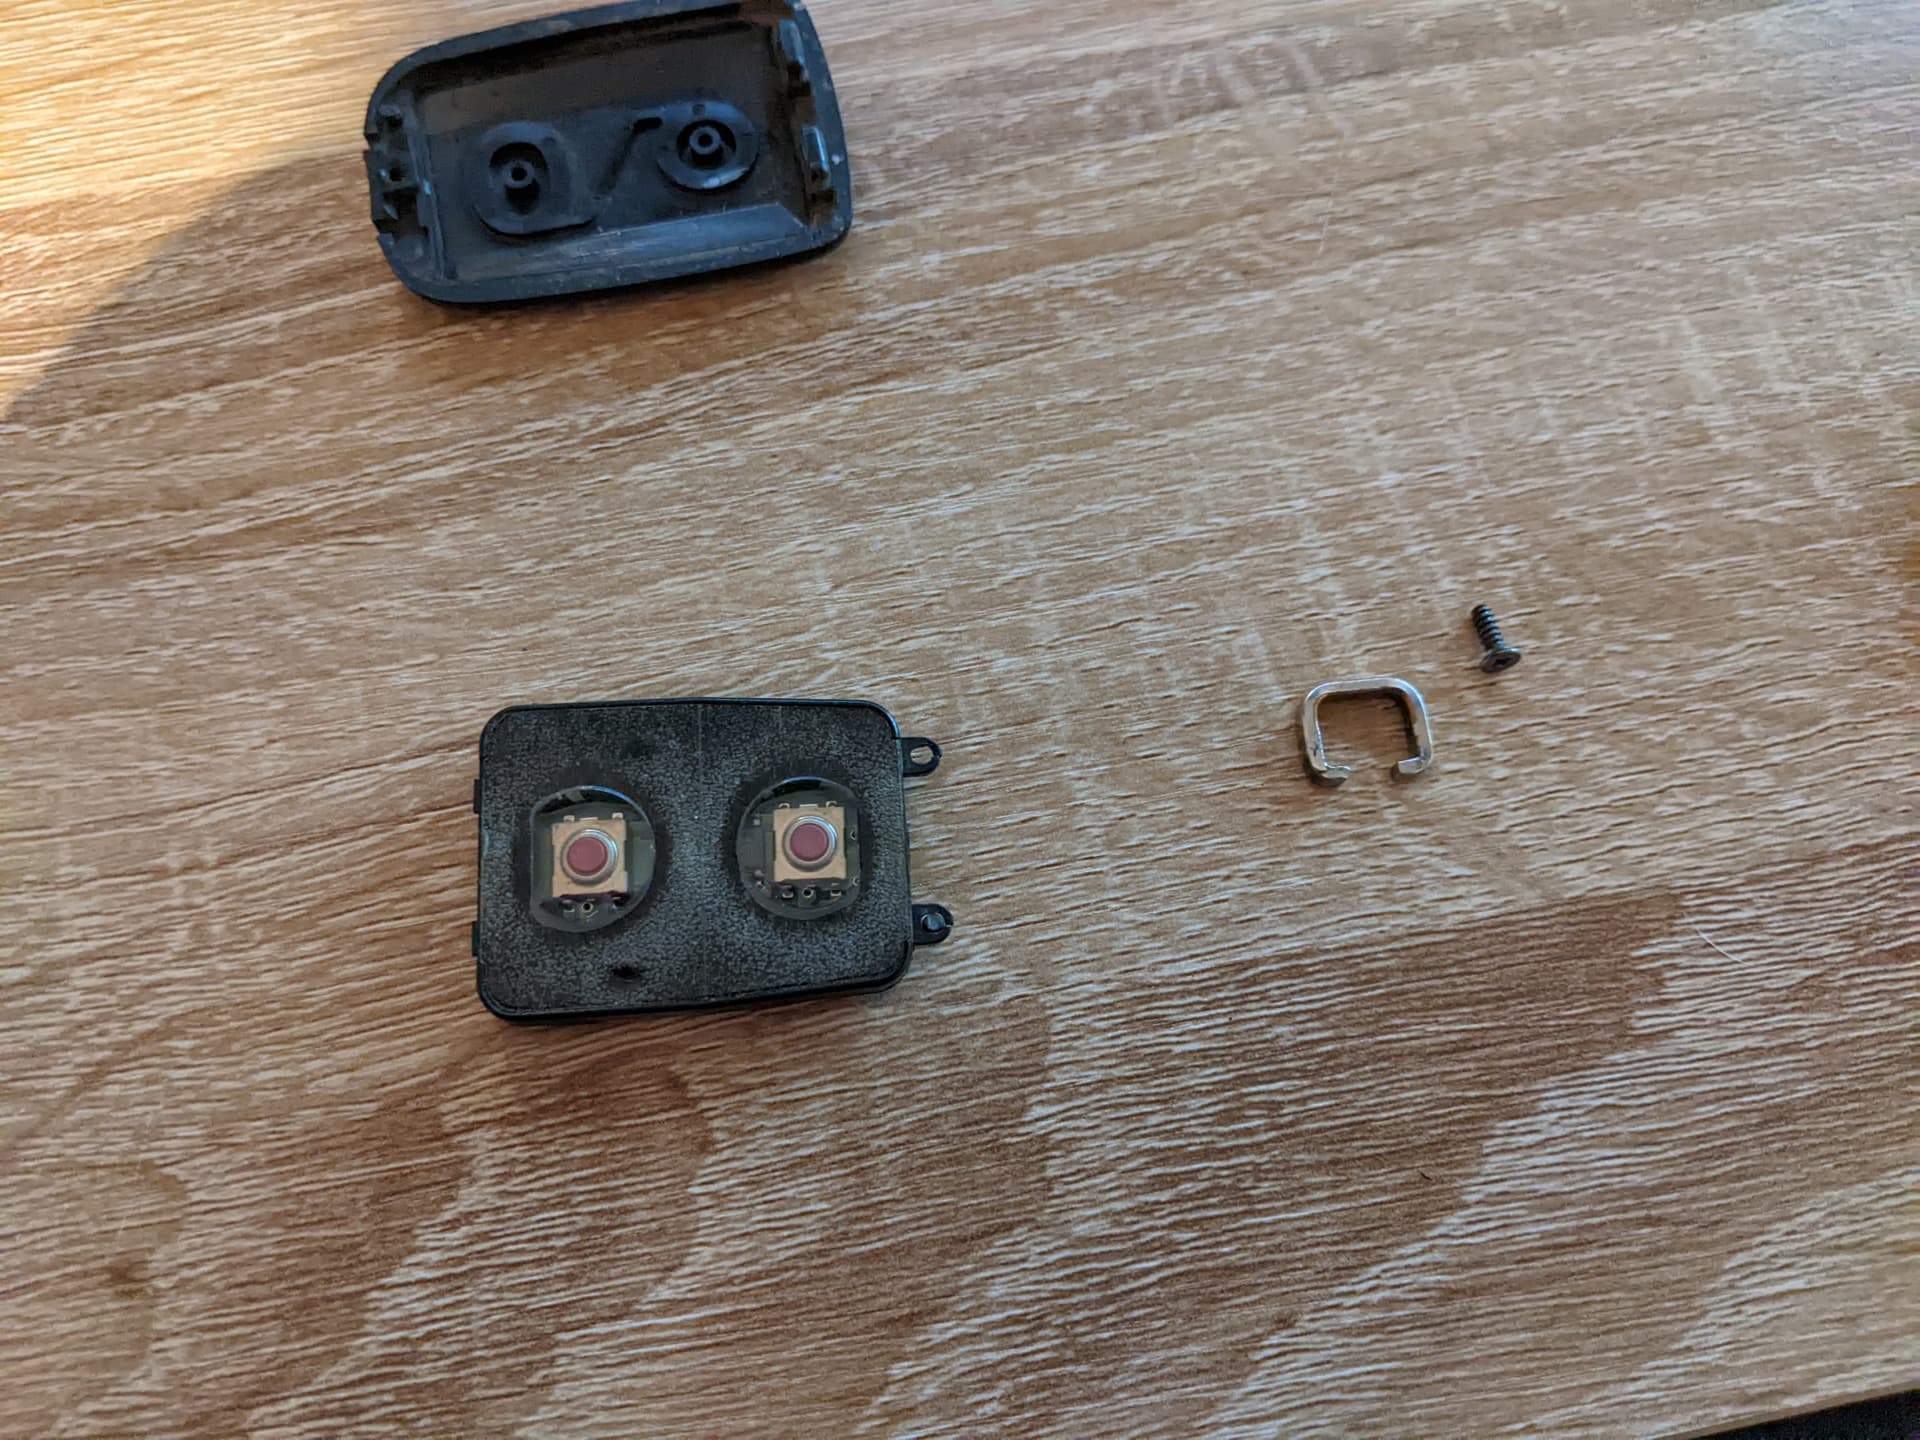
Next, use a penknife to very carefully prise the circuitboard out of the ‘buttons’ half of the fob. In the above picture, the circuitboard part is held onto the buttons side of the fob casing with two friction-fit eyelets on the left-hand side, and two click-tabs on the right. Be very careful with this because the plastic is very easy to snap. Once you carefully lever it out, the inner casing, containing the circuitboard and microswitches looks like this. Note the eyelets on the top of the inner casing.
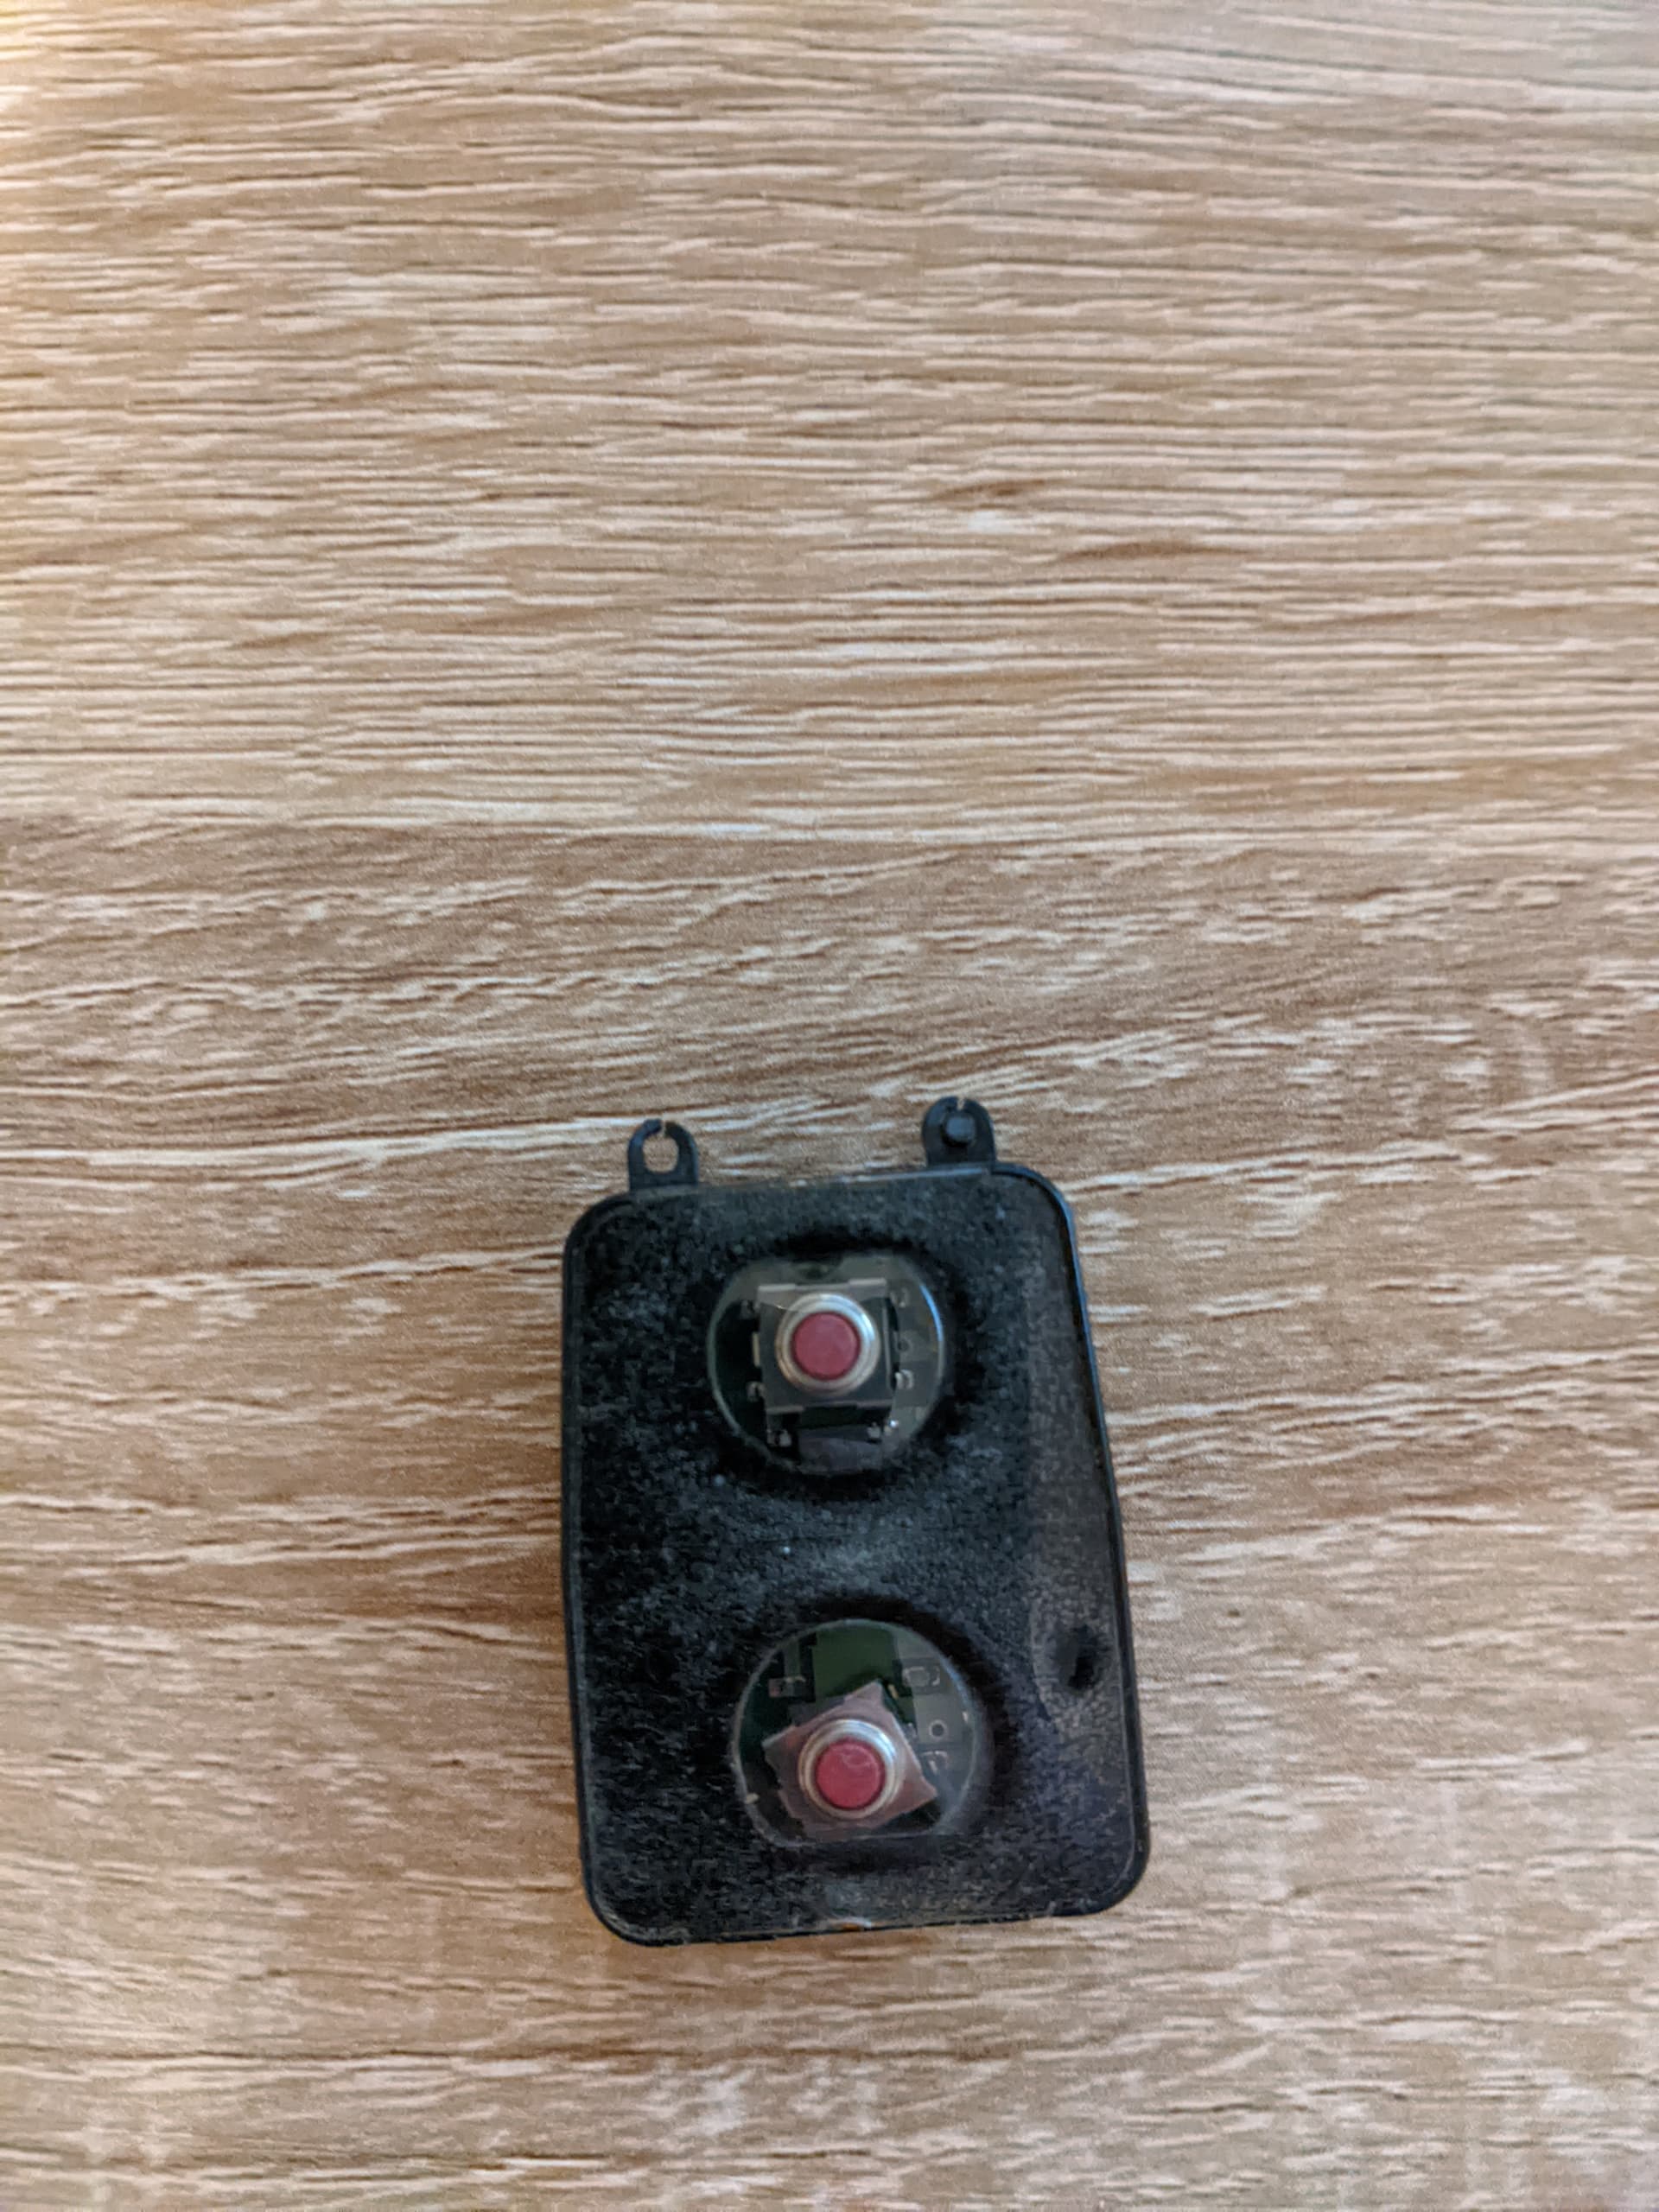
On my fob, the low (unlock) button had stopped working, and this is why. The microswitch had become dislodged from the circuitboard and the 4 legs/pins were not making correct contact with the receivers on the board. It ought to have been in a central position, as per the top (lock) microswitch.
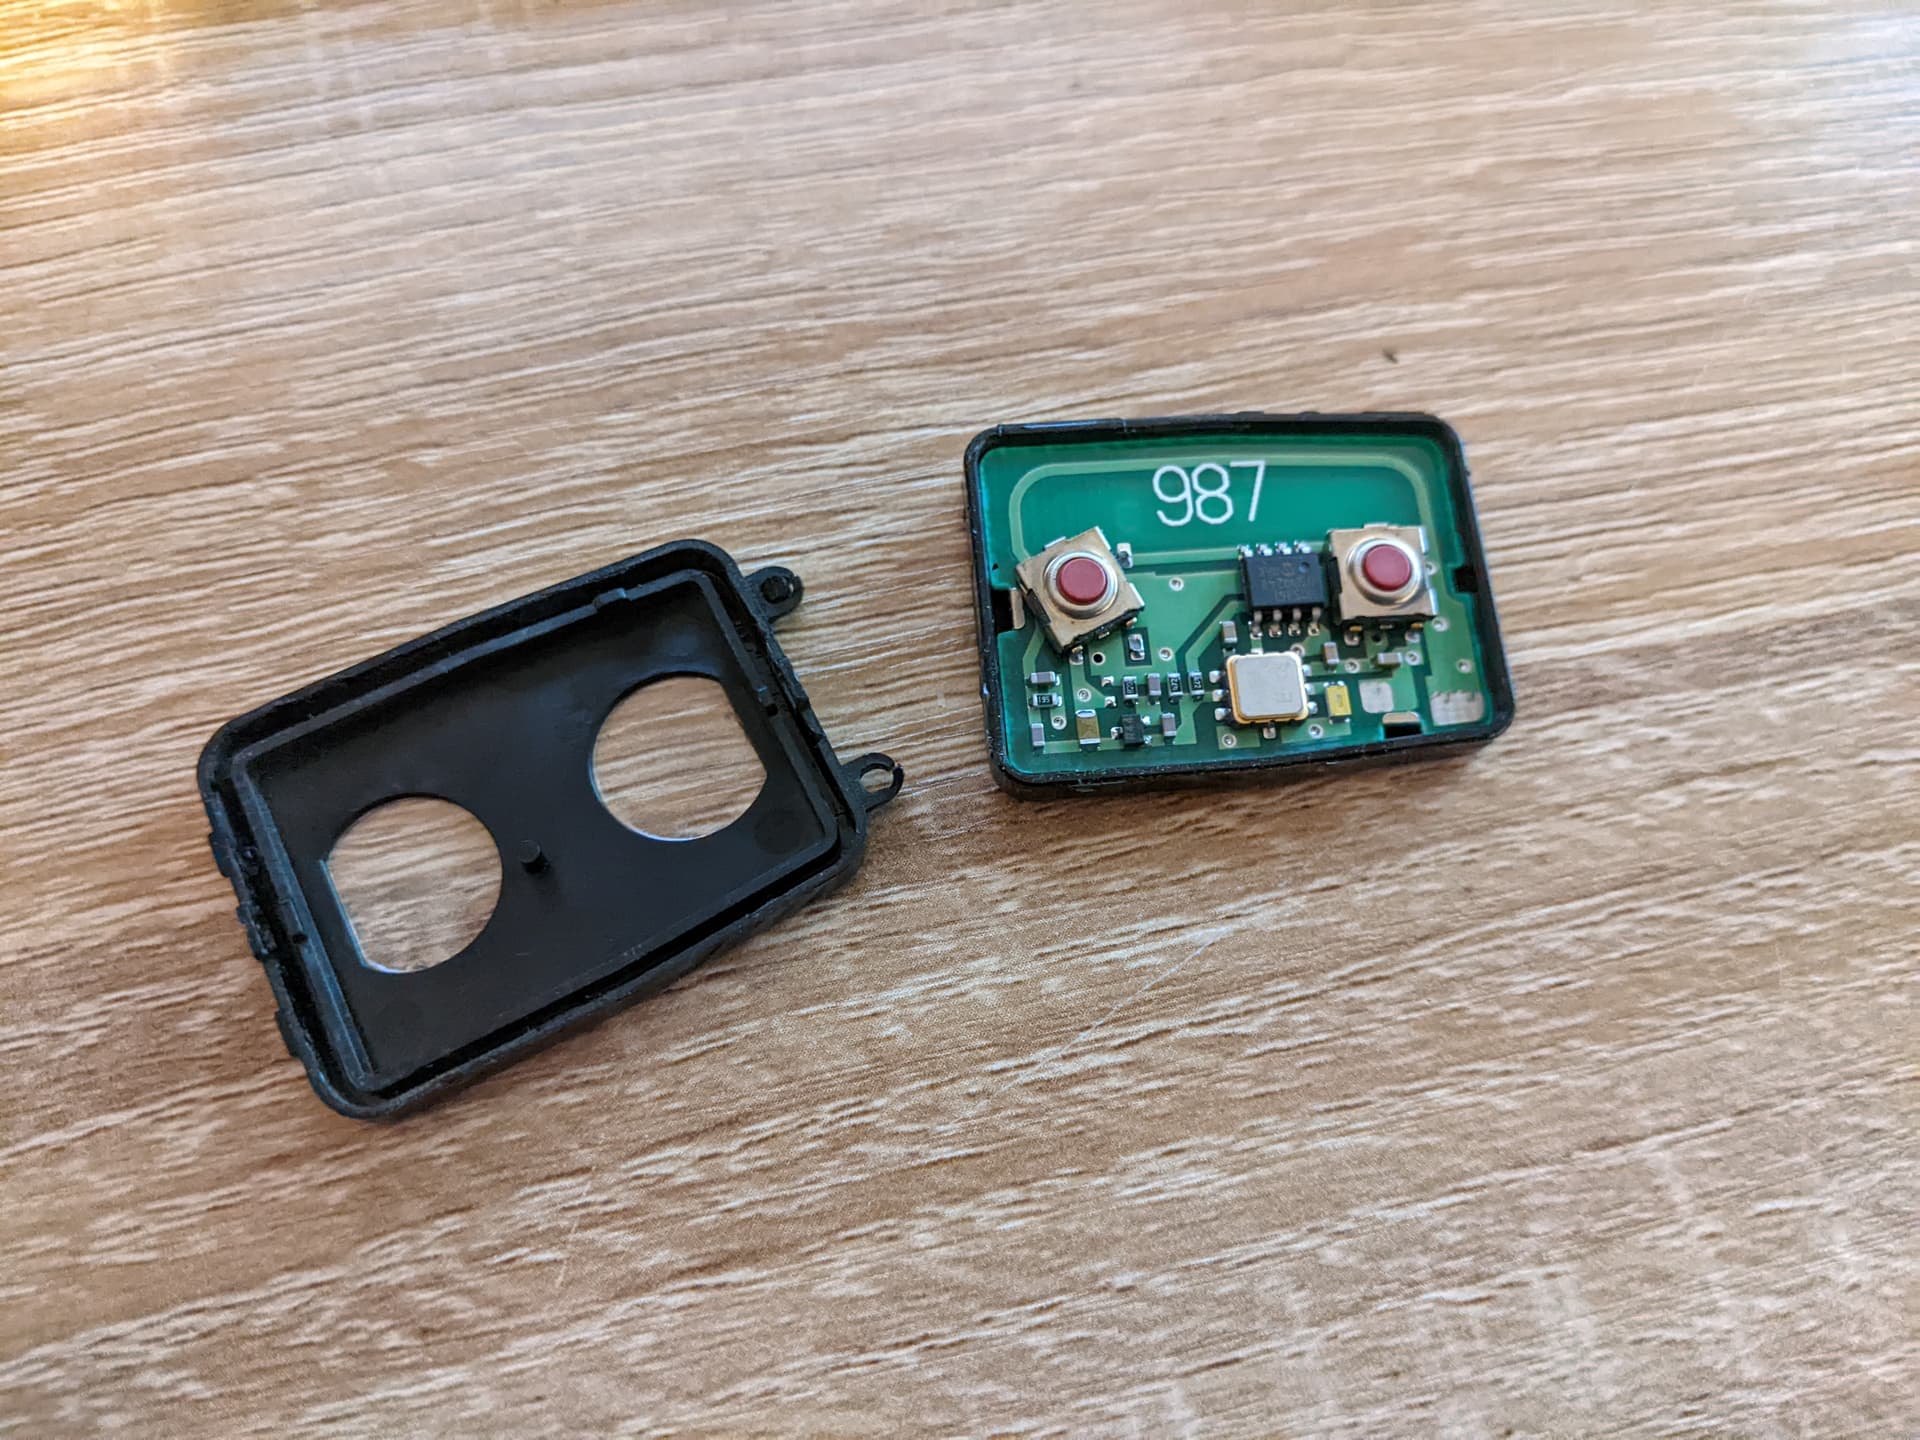
The next step is to very carefully split the two halves of the inner casing. This is done by sliding a penknife or slim blade into the overlap between the two halves and gently twisting the blade to lever them apart. DO NOT try and do this in one go. Work your way around the perimeter of the inner casing, gently prising the two halves aside. My fob seemed to be glued together with some light adhesive, working around slowly I was able to break the bond, trying to do it in one go risks cracking the casing and/or circuitboard. With this one, the buttons fall out and you get access to the circuitboard
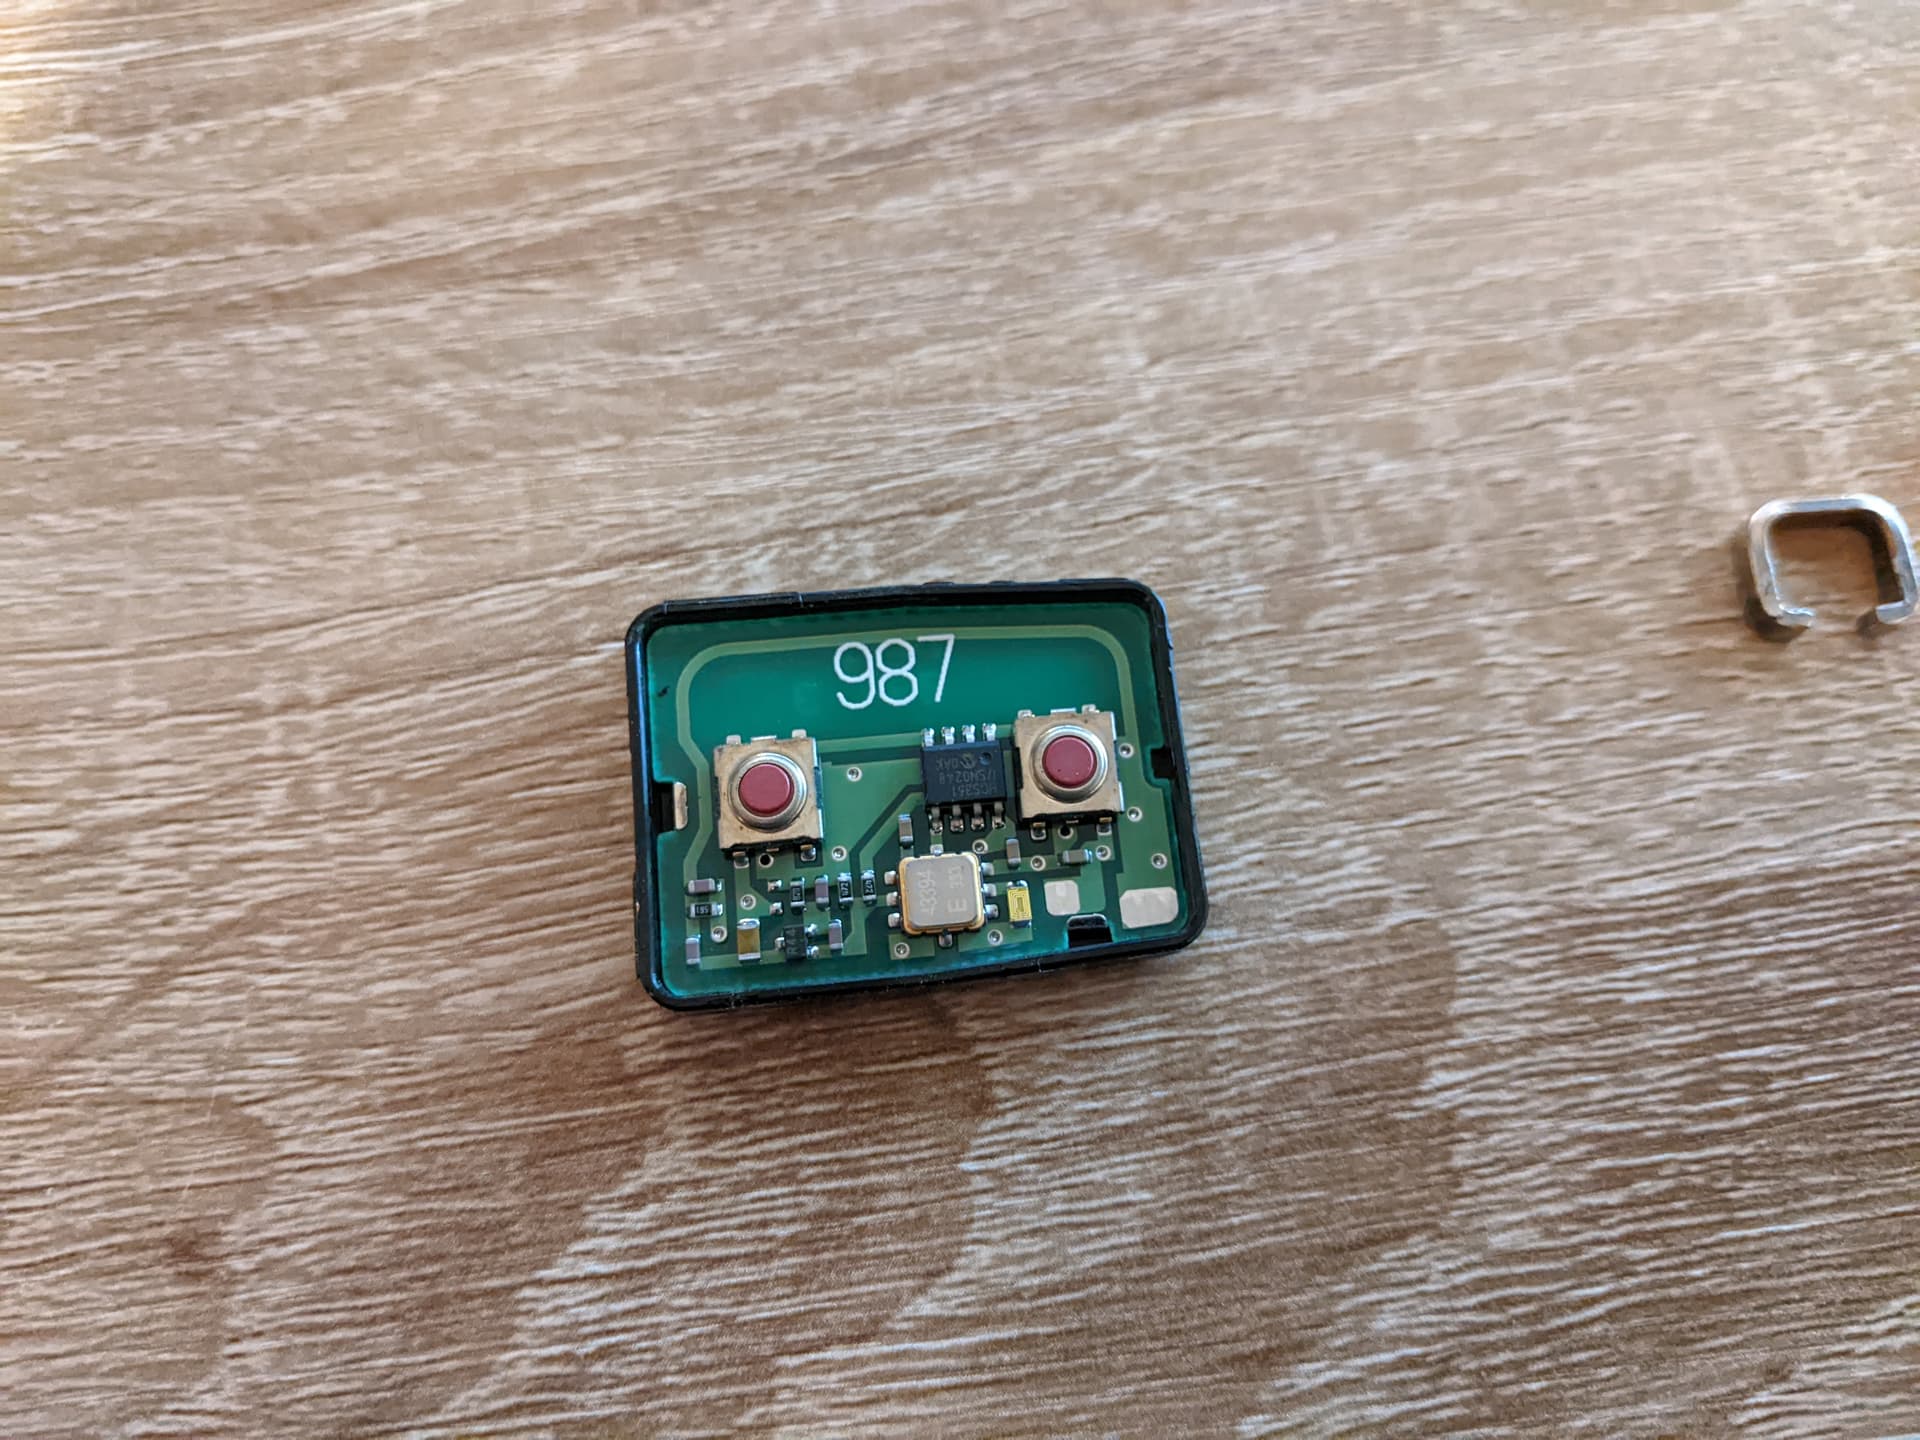
I was very fortunate that while the microswitch had become dislodged, it still worked. I was able to gently press it back into position on the board, ensuring the 4 legs made contact with the appropriate receivers on the circuitboard.
What you may find that the microswitch is damaged, necessitating replacement. If so, the microswitch should lift out with gentle pressure, or it might need to be de-soldered. You need steady hands for this! Re-soldering is the reverse, but you need miniscule amounts of solder to get the legs of the microswitch to adhere to the receiving pins of the board. If you are able to, just press-fit it GENTLY home.
And it should look like this
With it all apart, you can now try and push the exposed microswitches to check if the RCL on the car actuates on both lock and unlock buttons. Be gentle with it, but it should show if its working or not. If neither button works, and while its all apart try replacing the CR1616 battery and see if that helps matters. If it still non-responsive then it may be worth checking the receiver side in the car.
The last thing to do before reassembling it all if to give it a good clean. In theory the multi-layer casing should keep dust and muck out, but the insides of my fob casing were encrusted with fine dust. I used an old soft toothbrush on the casing - NOT THE CIRCUITBOARD - to agitate the dust off, then used a can of compressed air to blow the crud away.
first the inner casing, then refit the inner to the outer, making sure the microswitch stays in place on the board
Then to finish, clean the inside of the outer casing with a toothbrush and compressed air, drop the C-Clip back into position, clip both halves of the outer casing together and refit and tighten the small phillips screw.
You ought to have a freshly working RCL fob now.