Great to here your story, sorry for you loss. Hope things brighten up soon and that you are feeling well again.
1 Like
That paint work looks amazing! It’s great to see all the effort going into this build. Let’s hope the paint gets delivered quickly. I’m sorry for you loss, sometimes life is really shit.
Ps: I don’t know if everything was sealed when you sanded and painted but make sure there is no grit inside the gearbox etc. Would be a shame if it grinds to a halt after all this work. Dust with small grit gets everywhere.
1 Like
I kind of sealed the bottom with tape, but because of the weird shape near the diff, it wasn’t exactly airtight  . I’m going to make sure everything is clean (enough) before I put it all back together.
Sorry for your loss, hope the time you get to spend on the 3SZ will be able to take your mind off things. Keep going 
1 Like
That’s so sad to lose someone so young, my condolences to you.
1 Like
Hey there partypeople, you missed me? I bet you did. I bet you were Dai-ing to here from me again .
First of all, thank you to all the people who sent me messages or replied to my last post with your condolences. I really appreciate that!
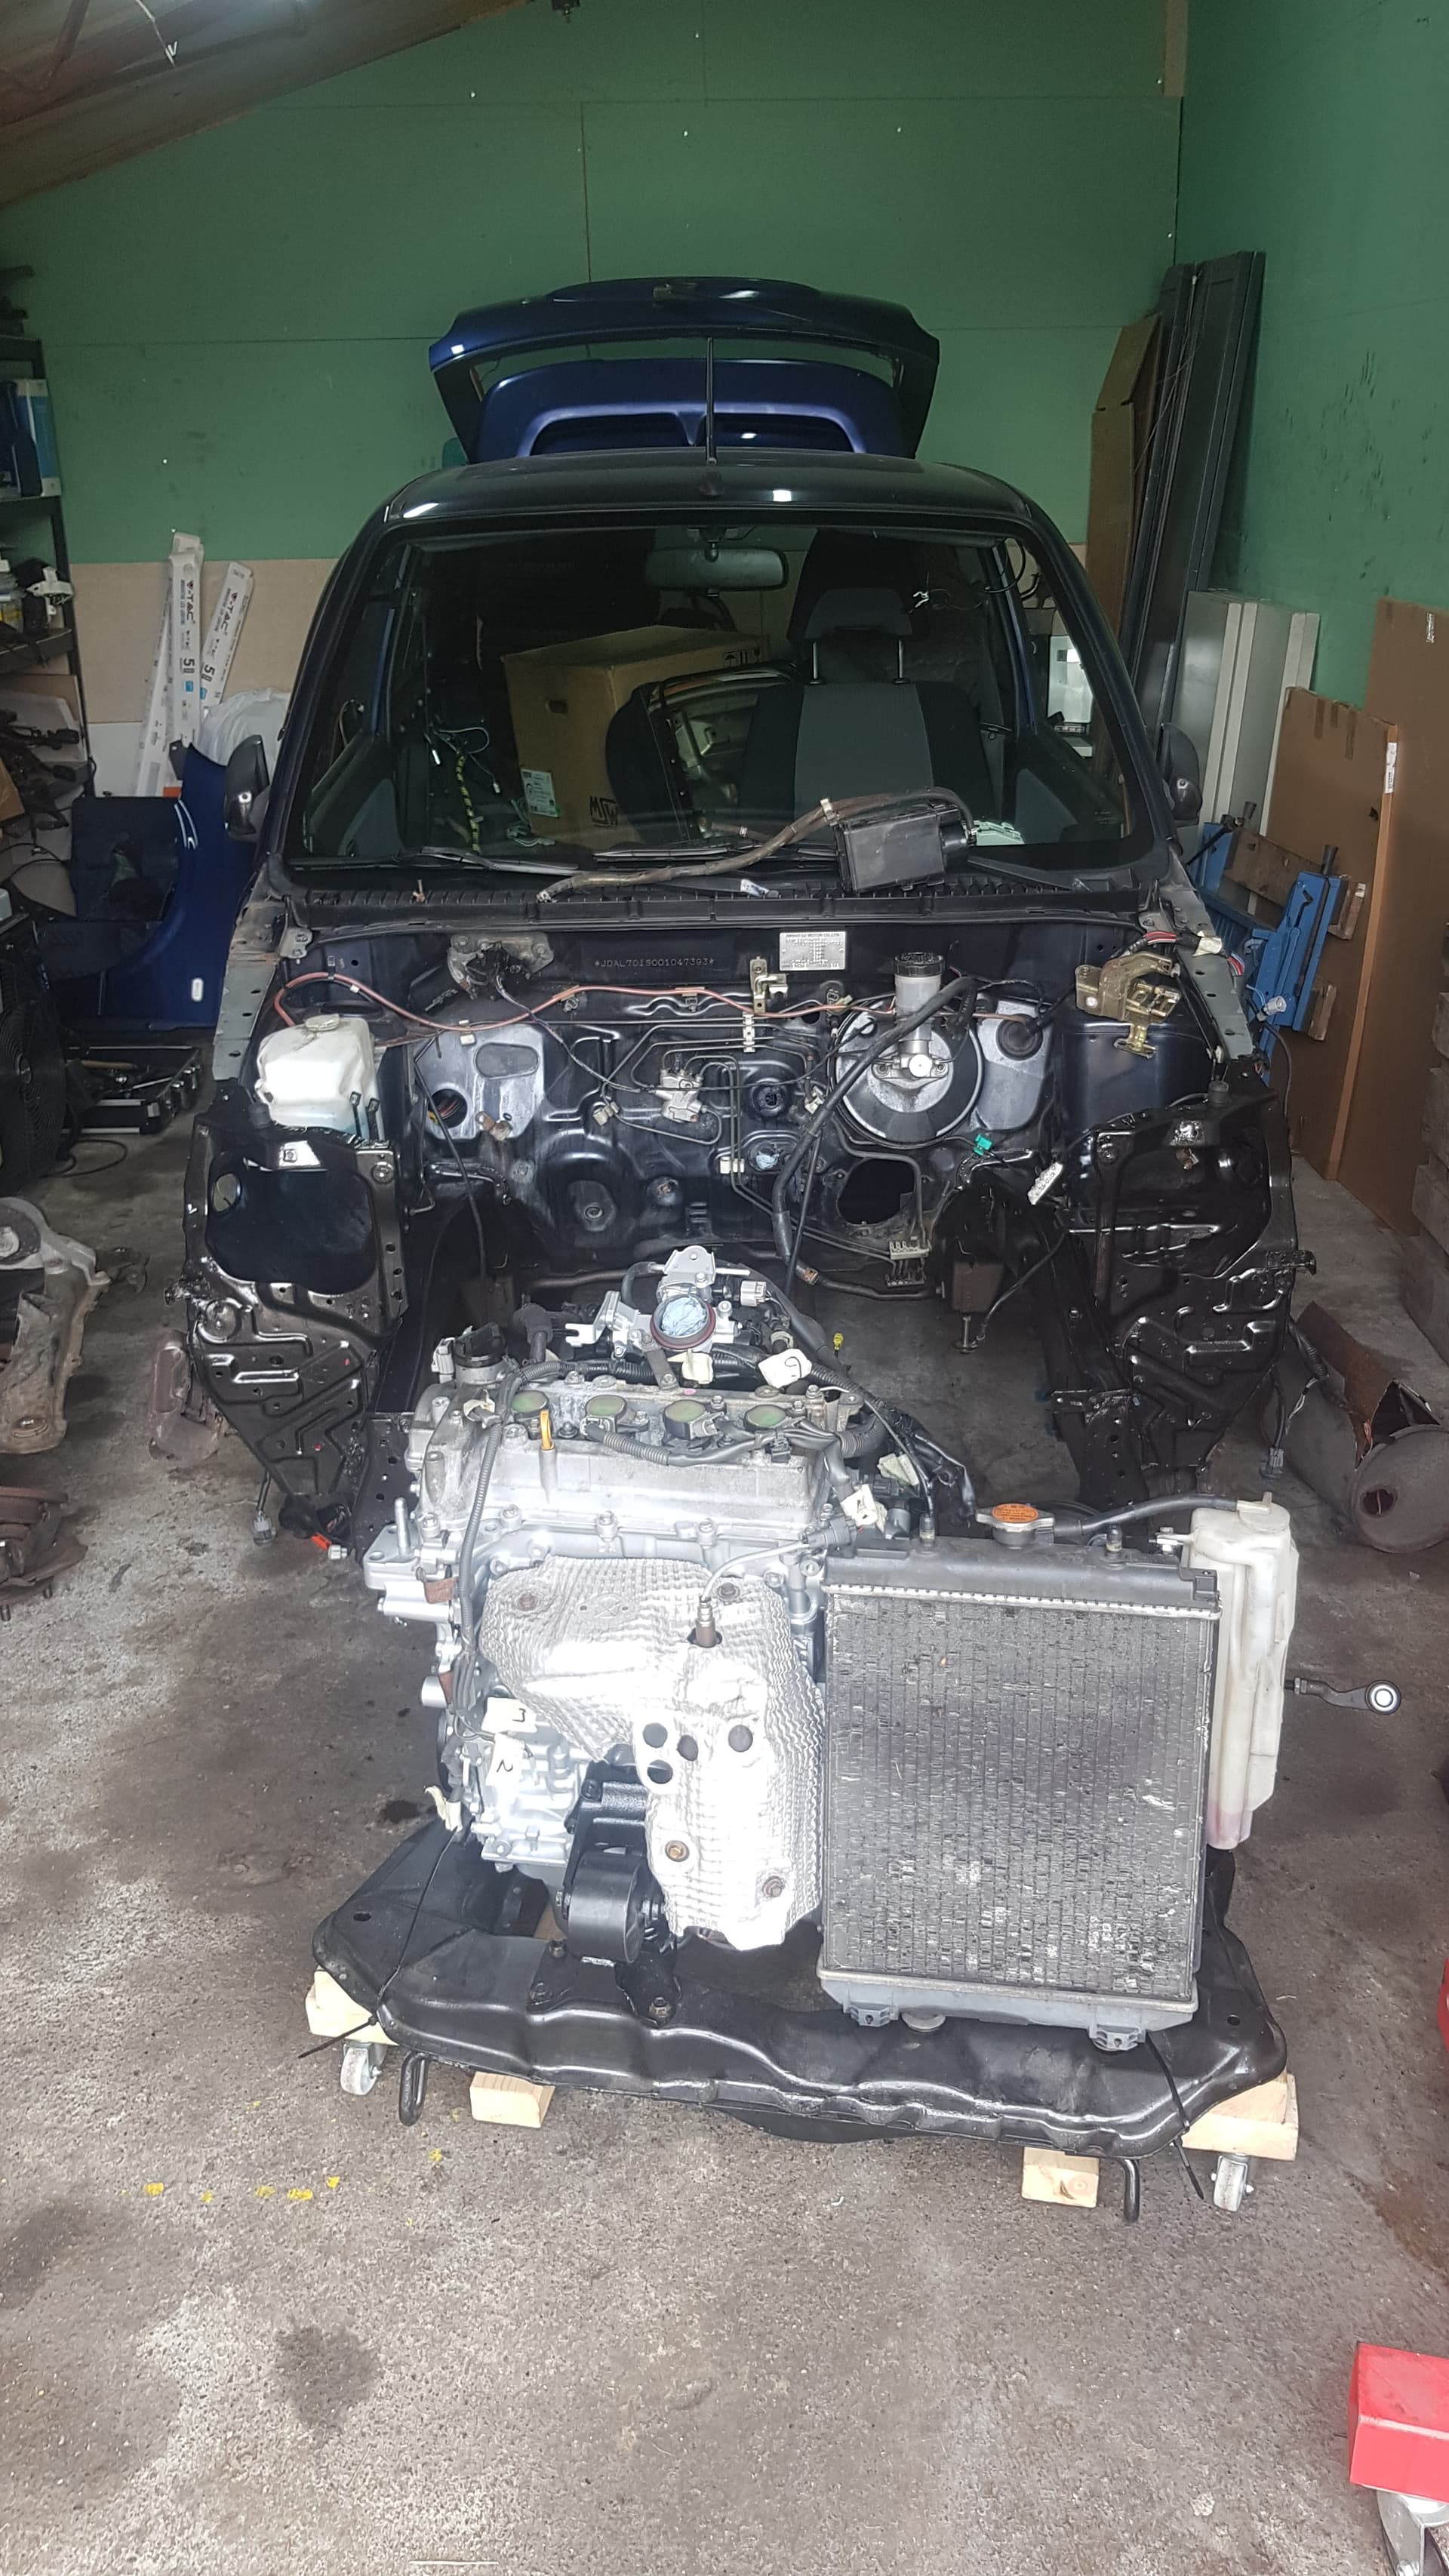
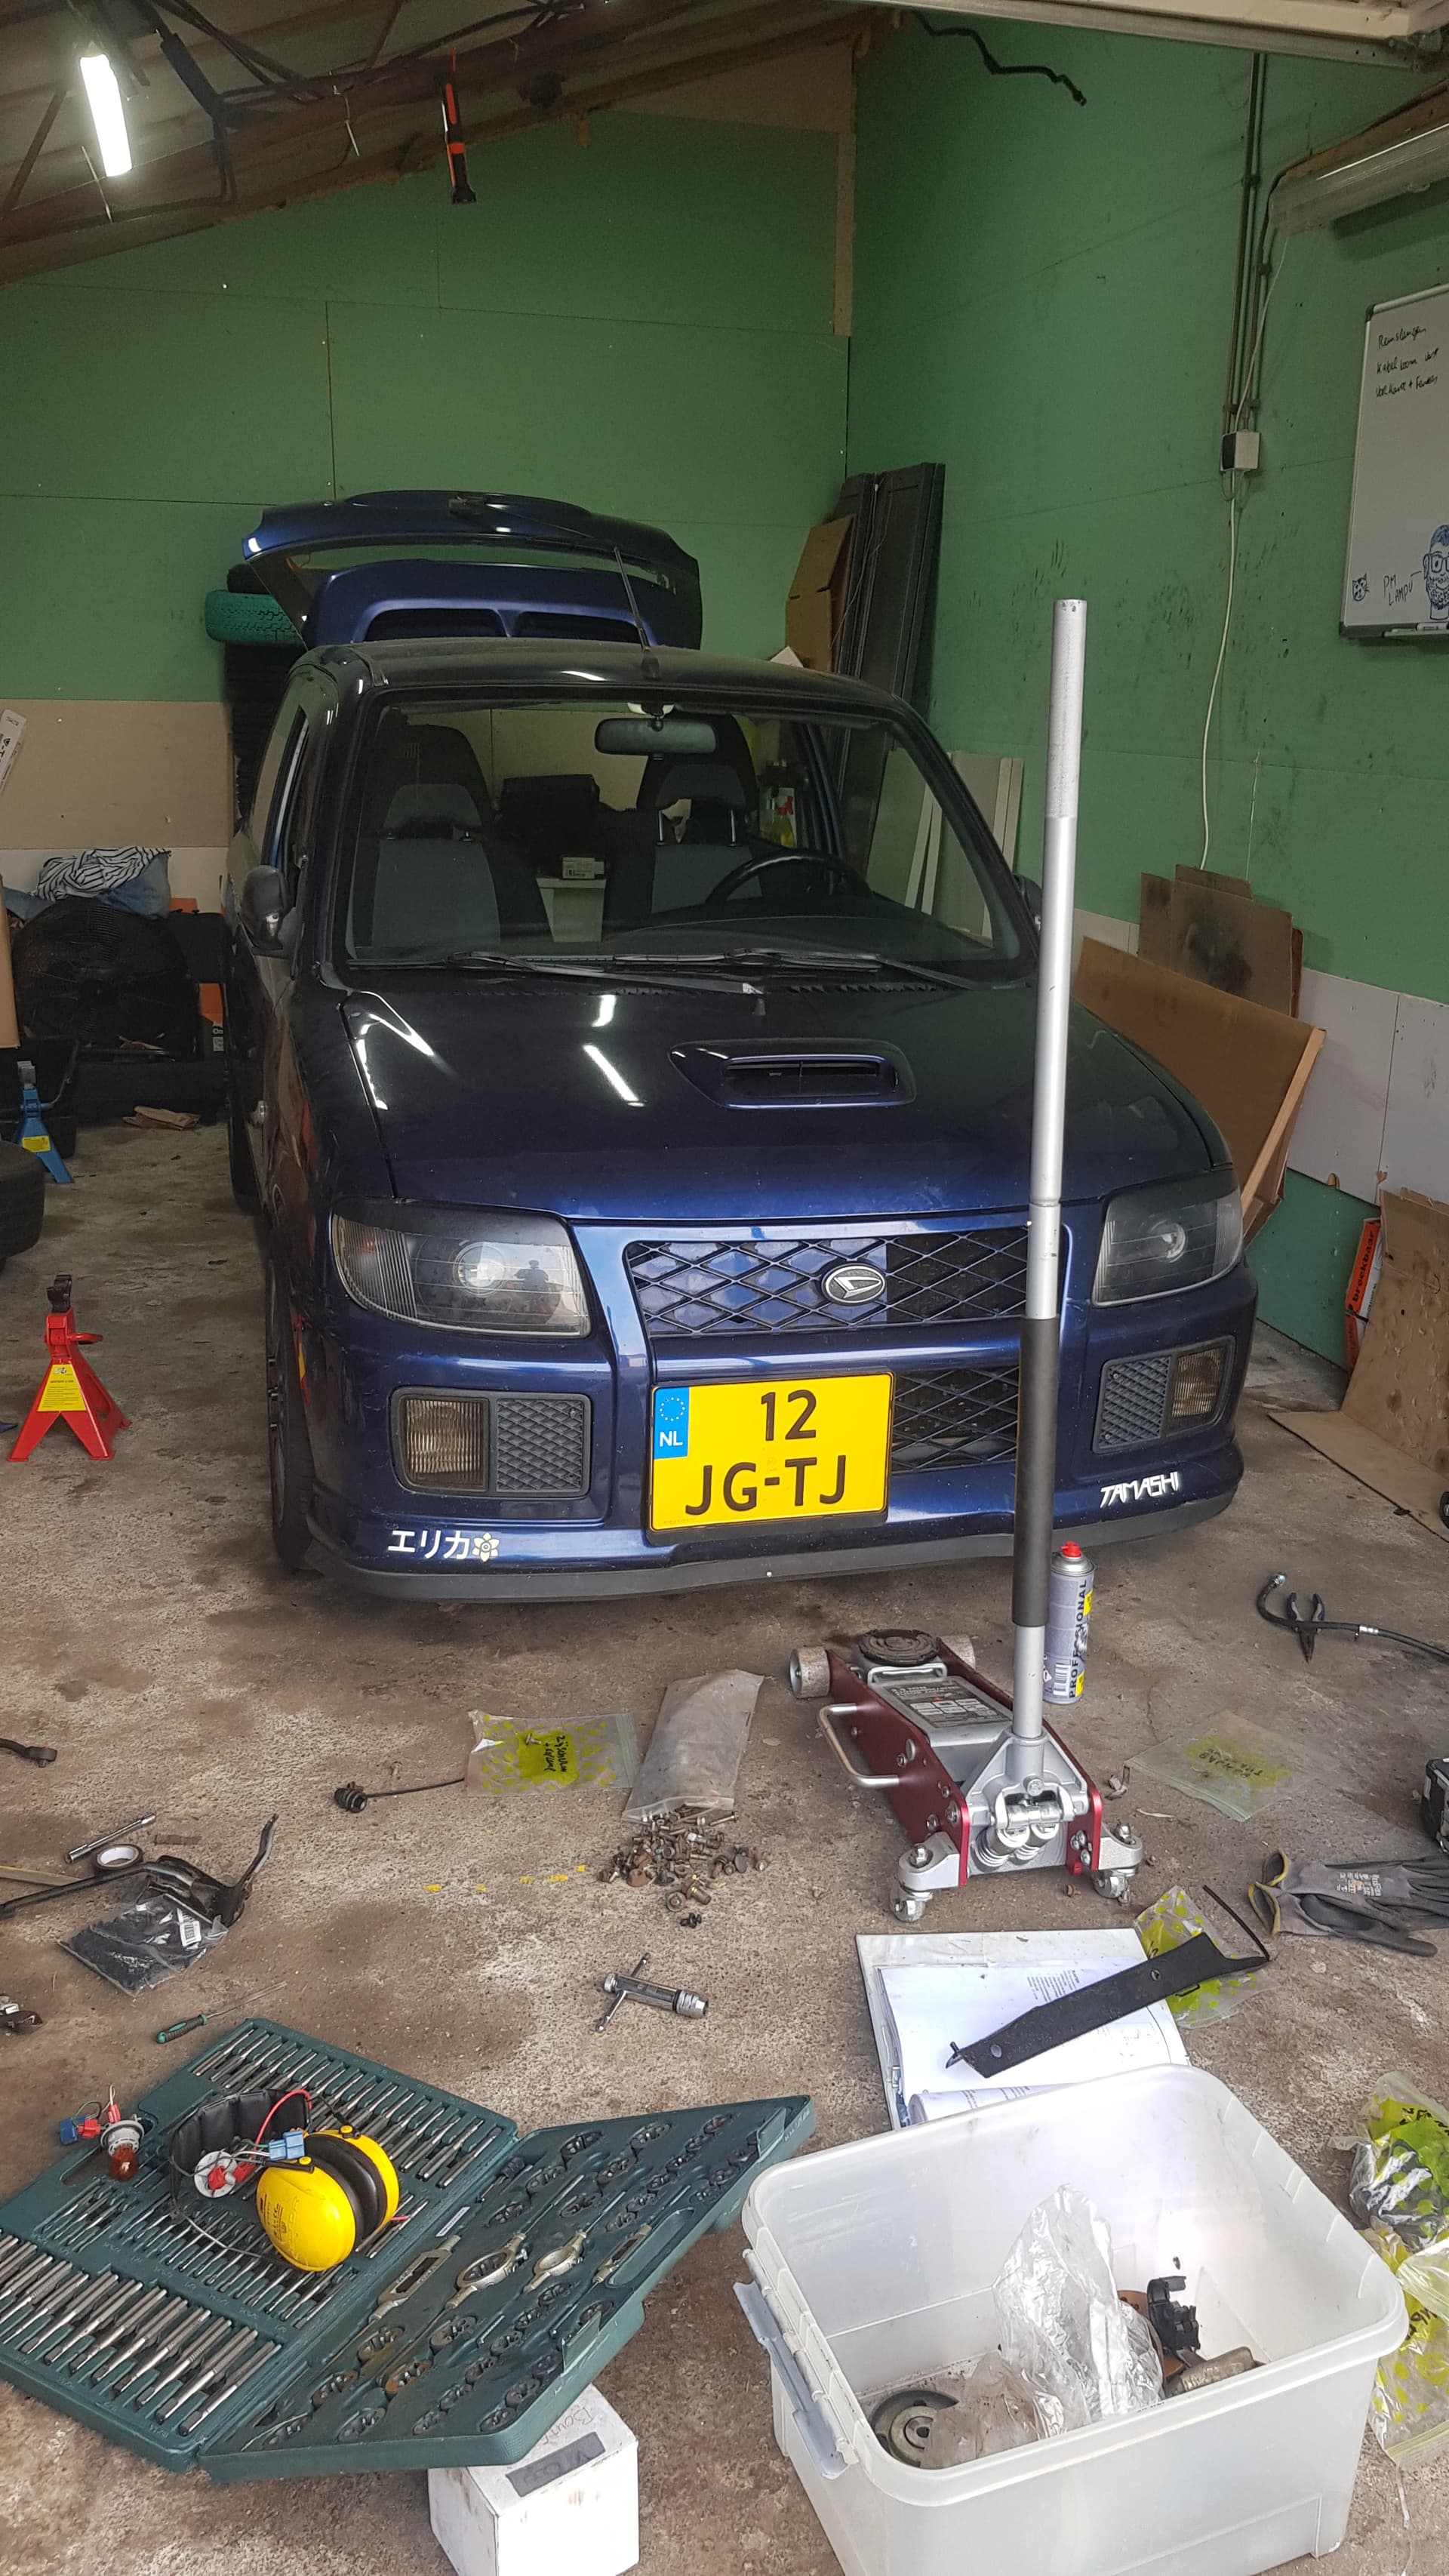
Right, let’s talk 3SZ. I thought it would be cool to make the next post once everything was bolted to the subframe, but that still has to happen. I think that by the time the engine and gearbox are actually mounted to the frame, I don’t have any time left to make another post before the swap starts, so that’s why I decided to make one now.
END OF SCHOOL
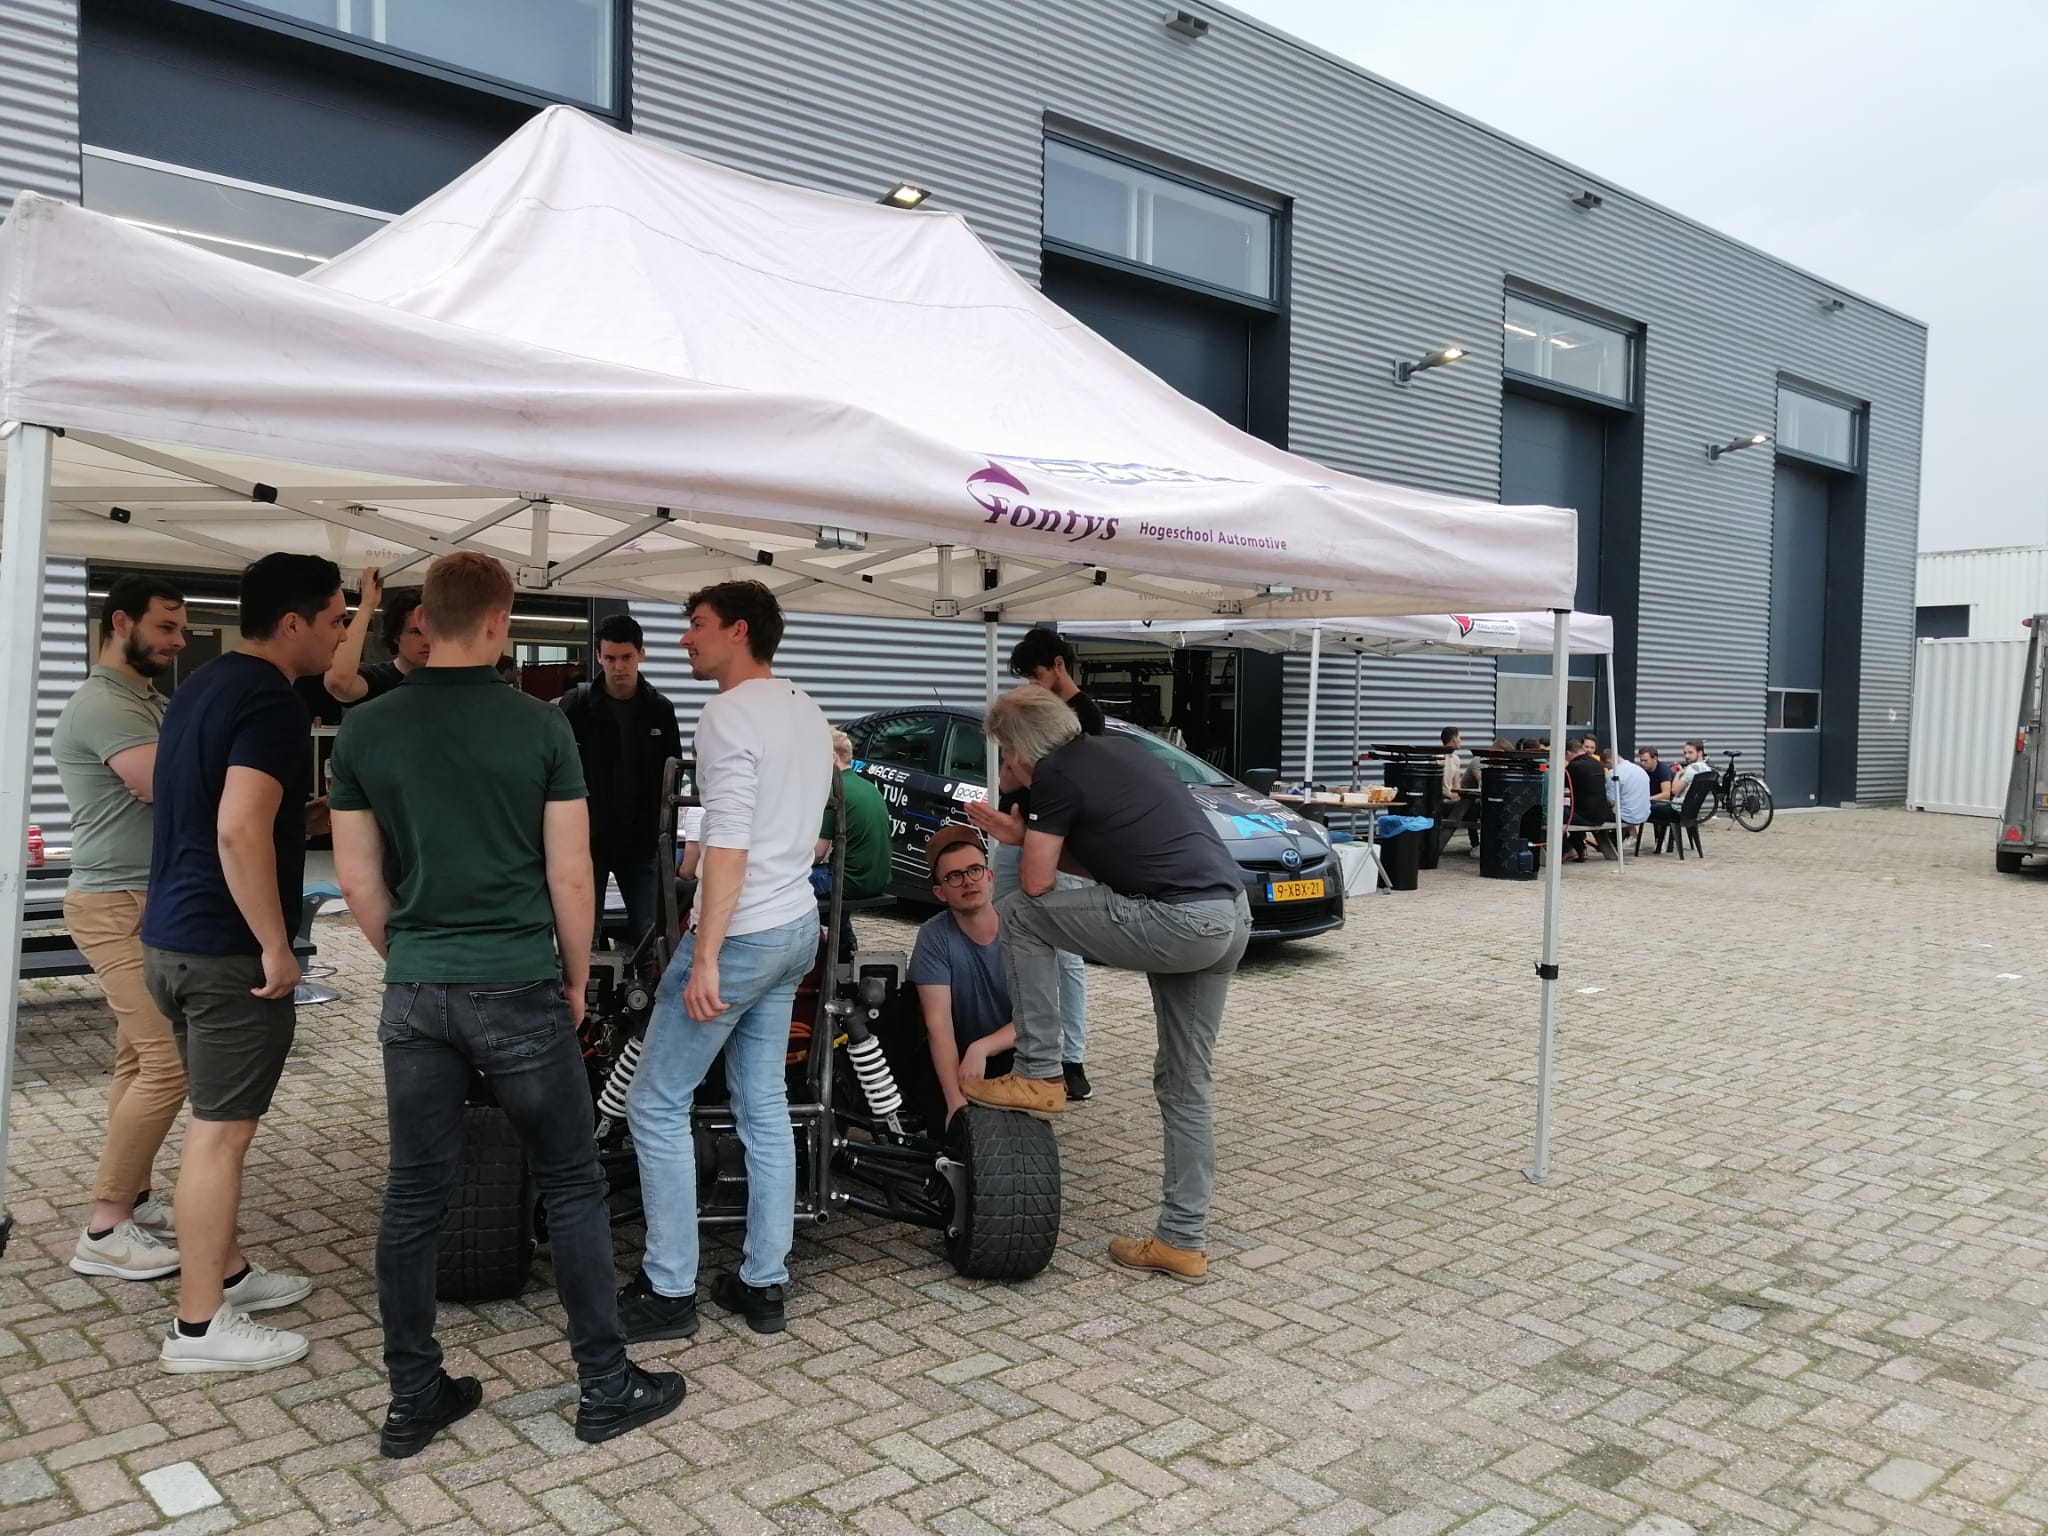
July 13th was the last day of school for the year, which meant our project came to an end as well. My teammate (who came up with the project in the first place), worked his ass off to get it finished in time, and boy, did he pull it off. To summarize: the idea was to build an electric crosskart, of which I designed the entire rear suspension. Pretty happy with how it came out!
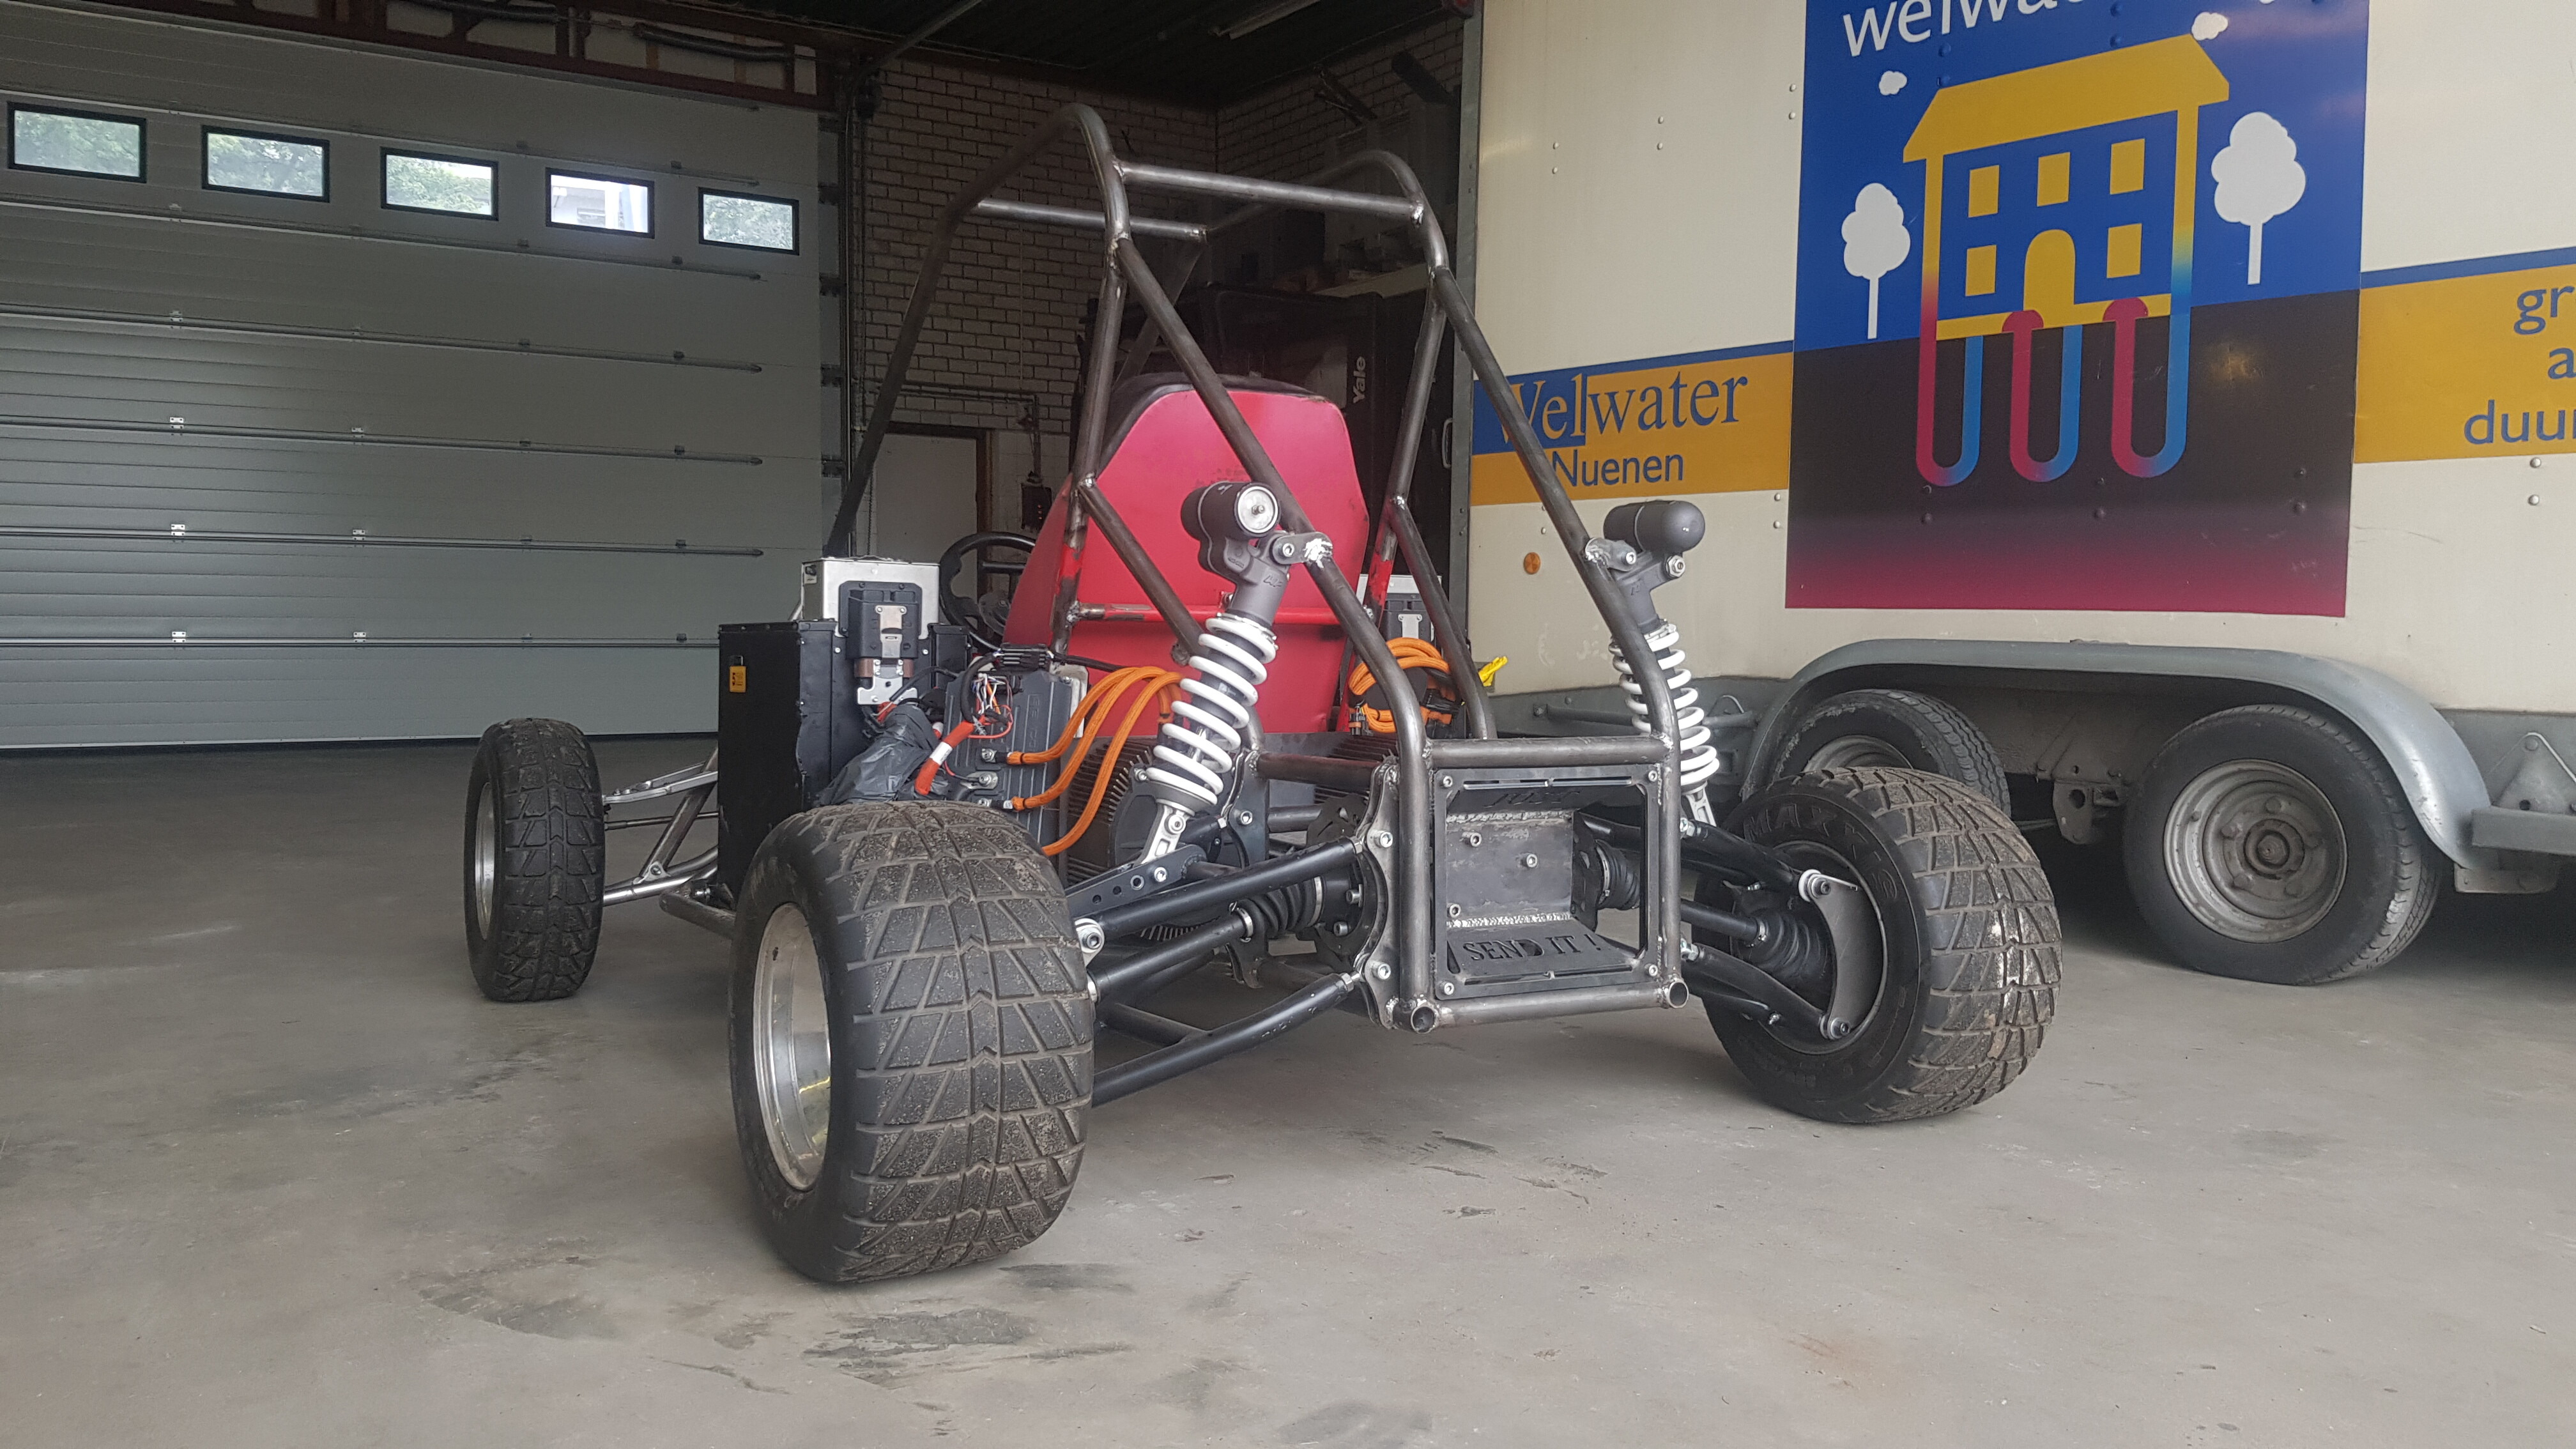
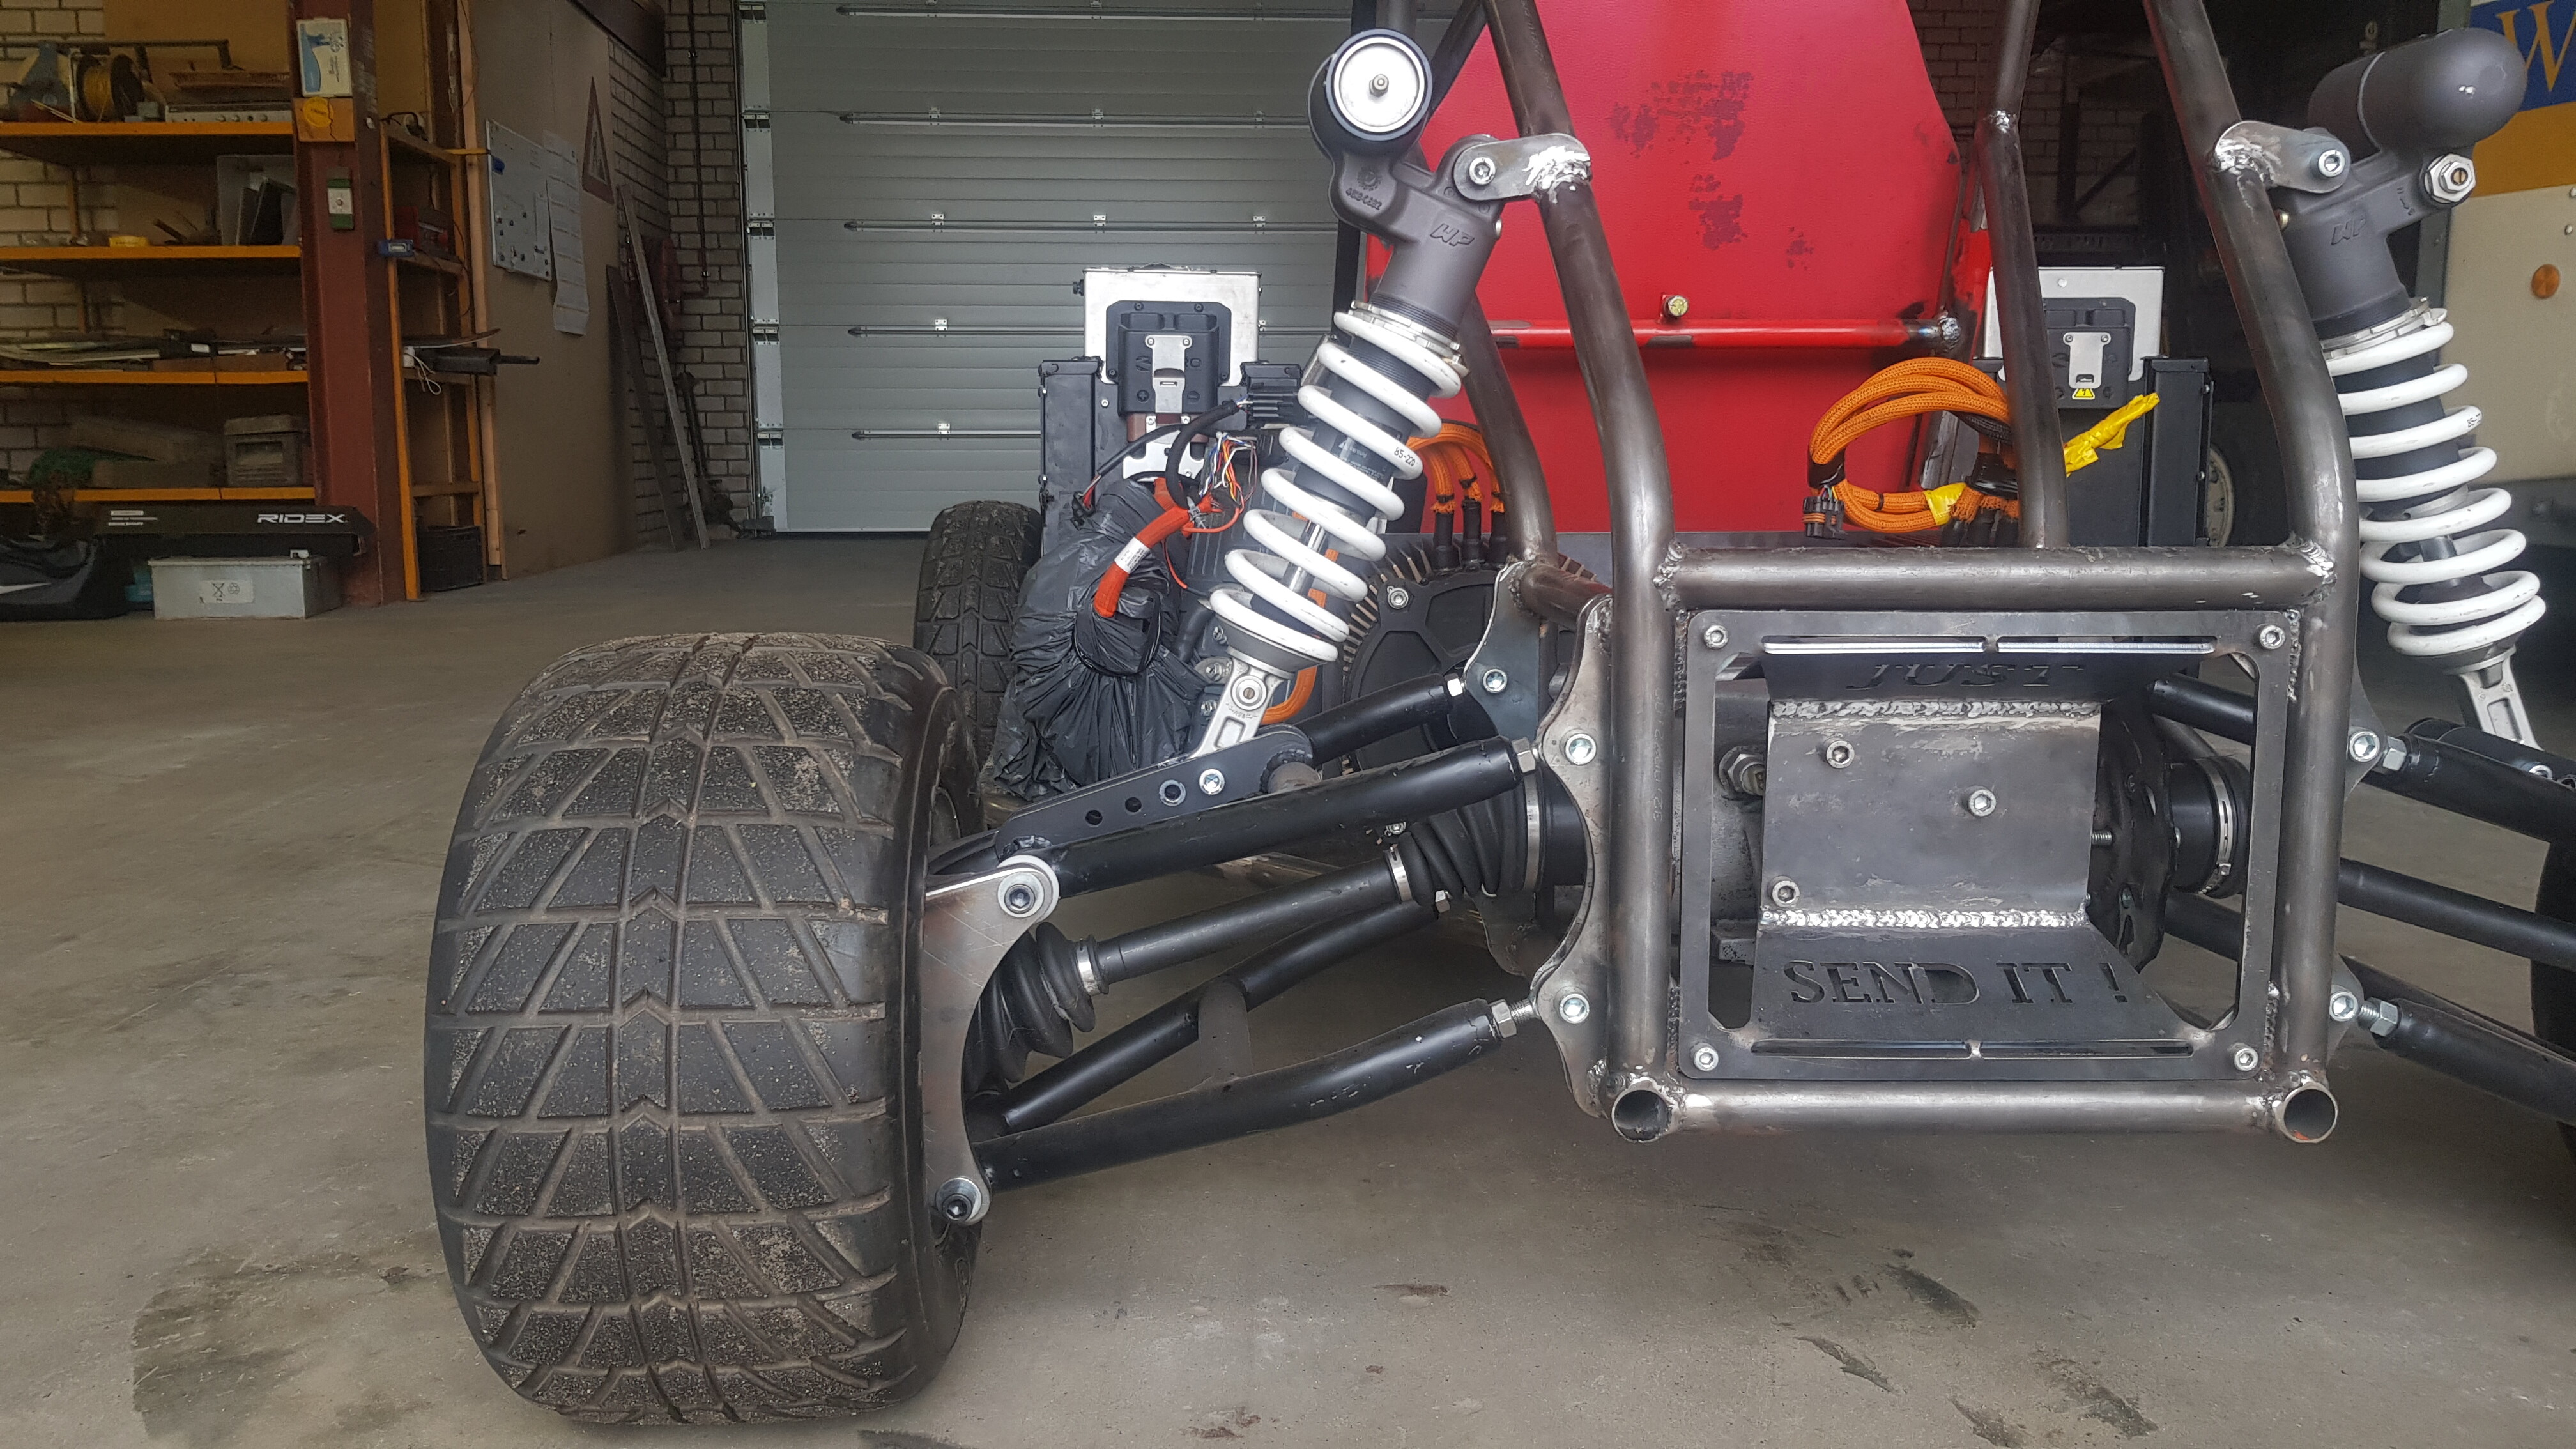
that’s me on the ground, behind the wheel ^
With that done, I could finally work on the 3SZ as much as possible!
FINALLY
In the last post I told you about how my order got delayed, which meant I couldn’t paint the engine. A couple of days later, I decided to call the folks, to ask how much longer it would take.
Lady: “Yeah we expect the paint to be back in stock by the end of the month (July).”
Me: “… end of the MONTH??”
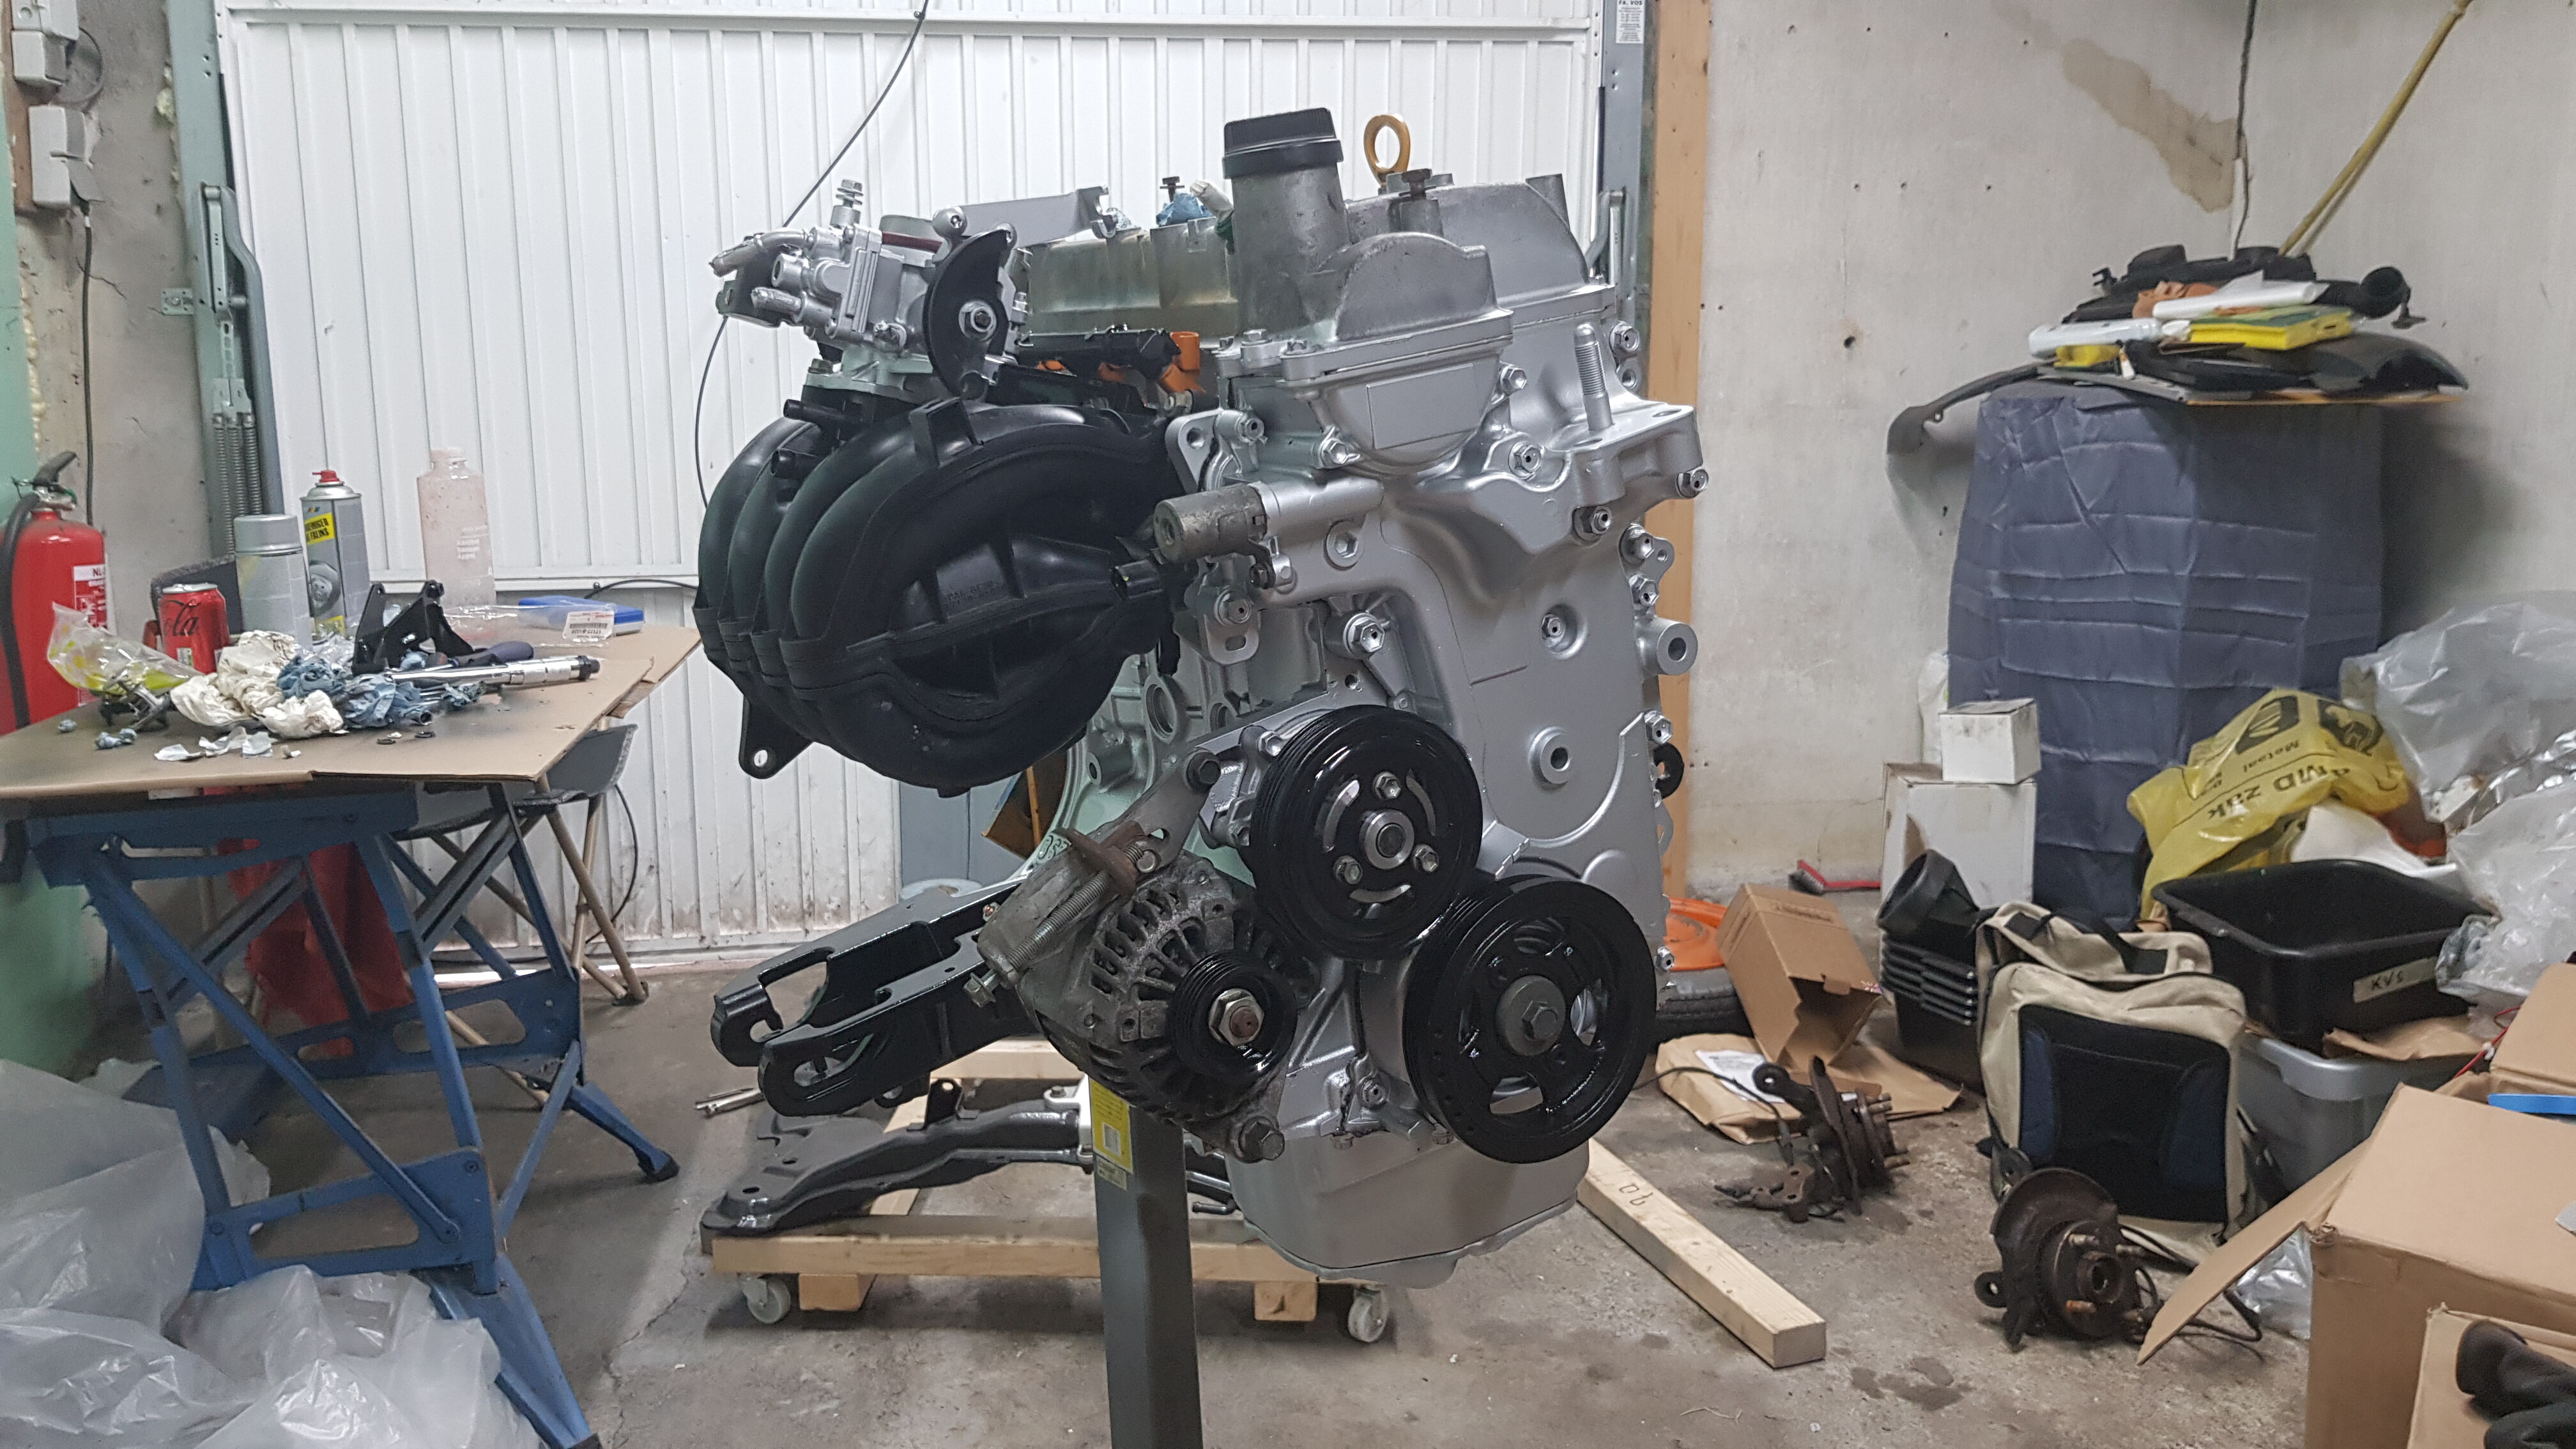
I couldn’t wait 2 weeks for paint, so I cancelled my order, and ordered the paint somewhere else (for less money actually). One of those “should have done that earlier”-moments. Oh well, I got the paint 2 days later, together with 12 cans of brake cleaner, so it was time to get to work!
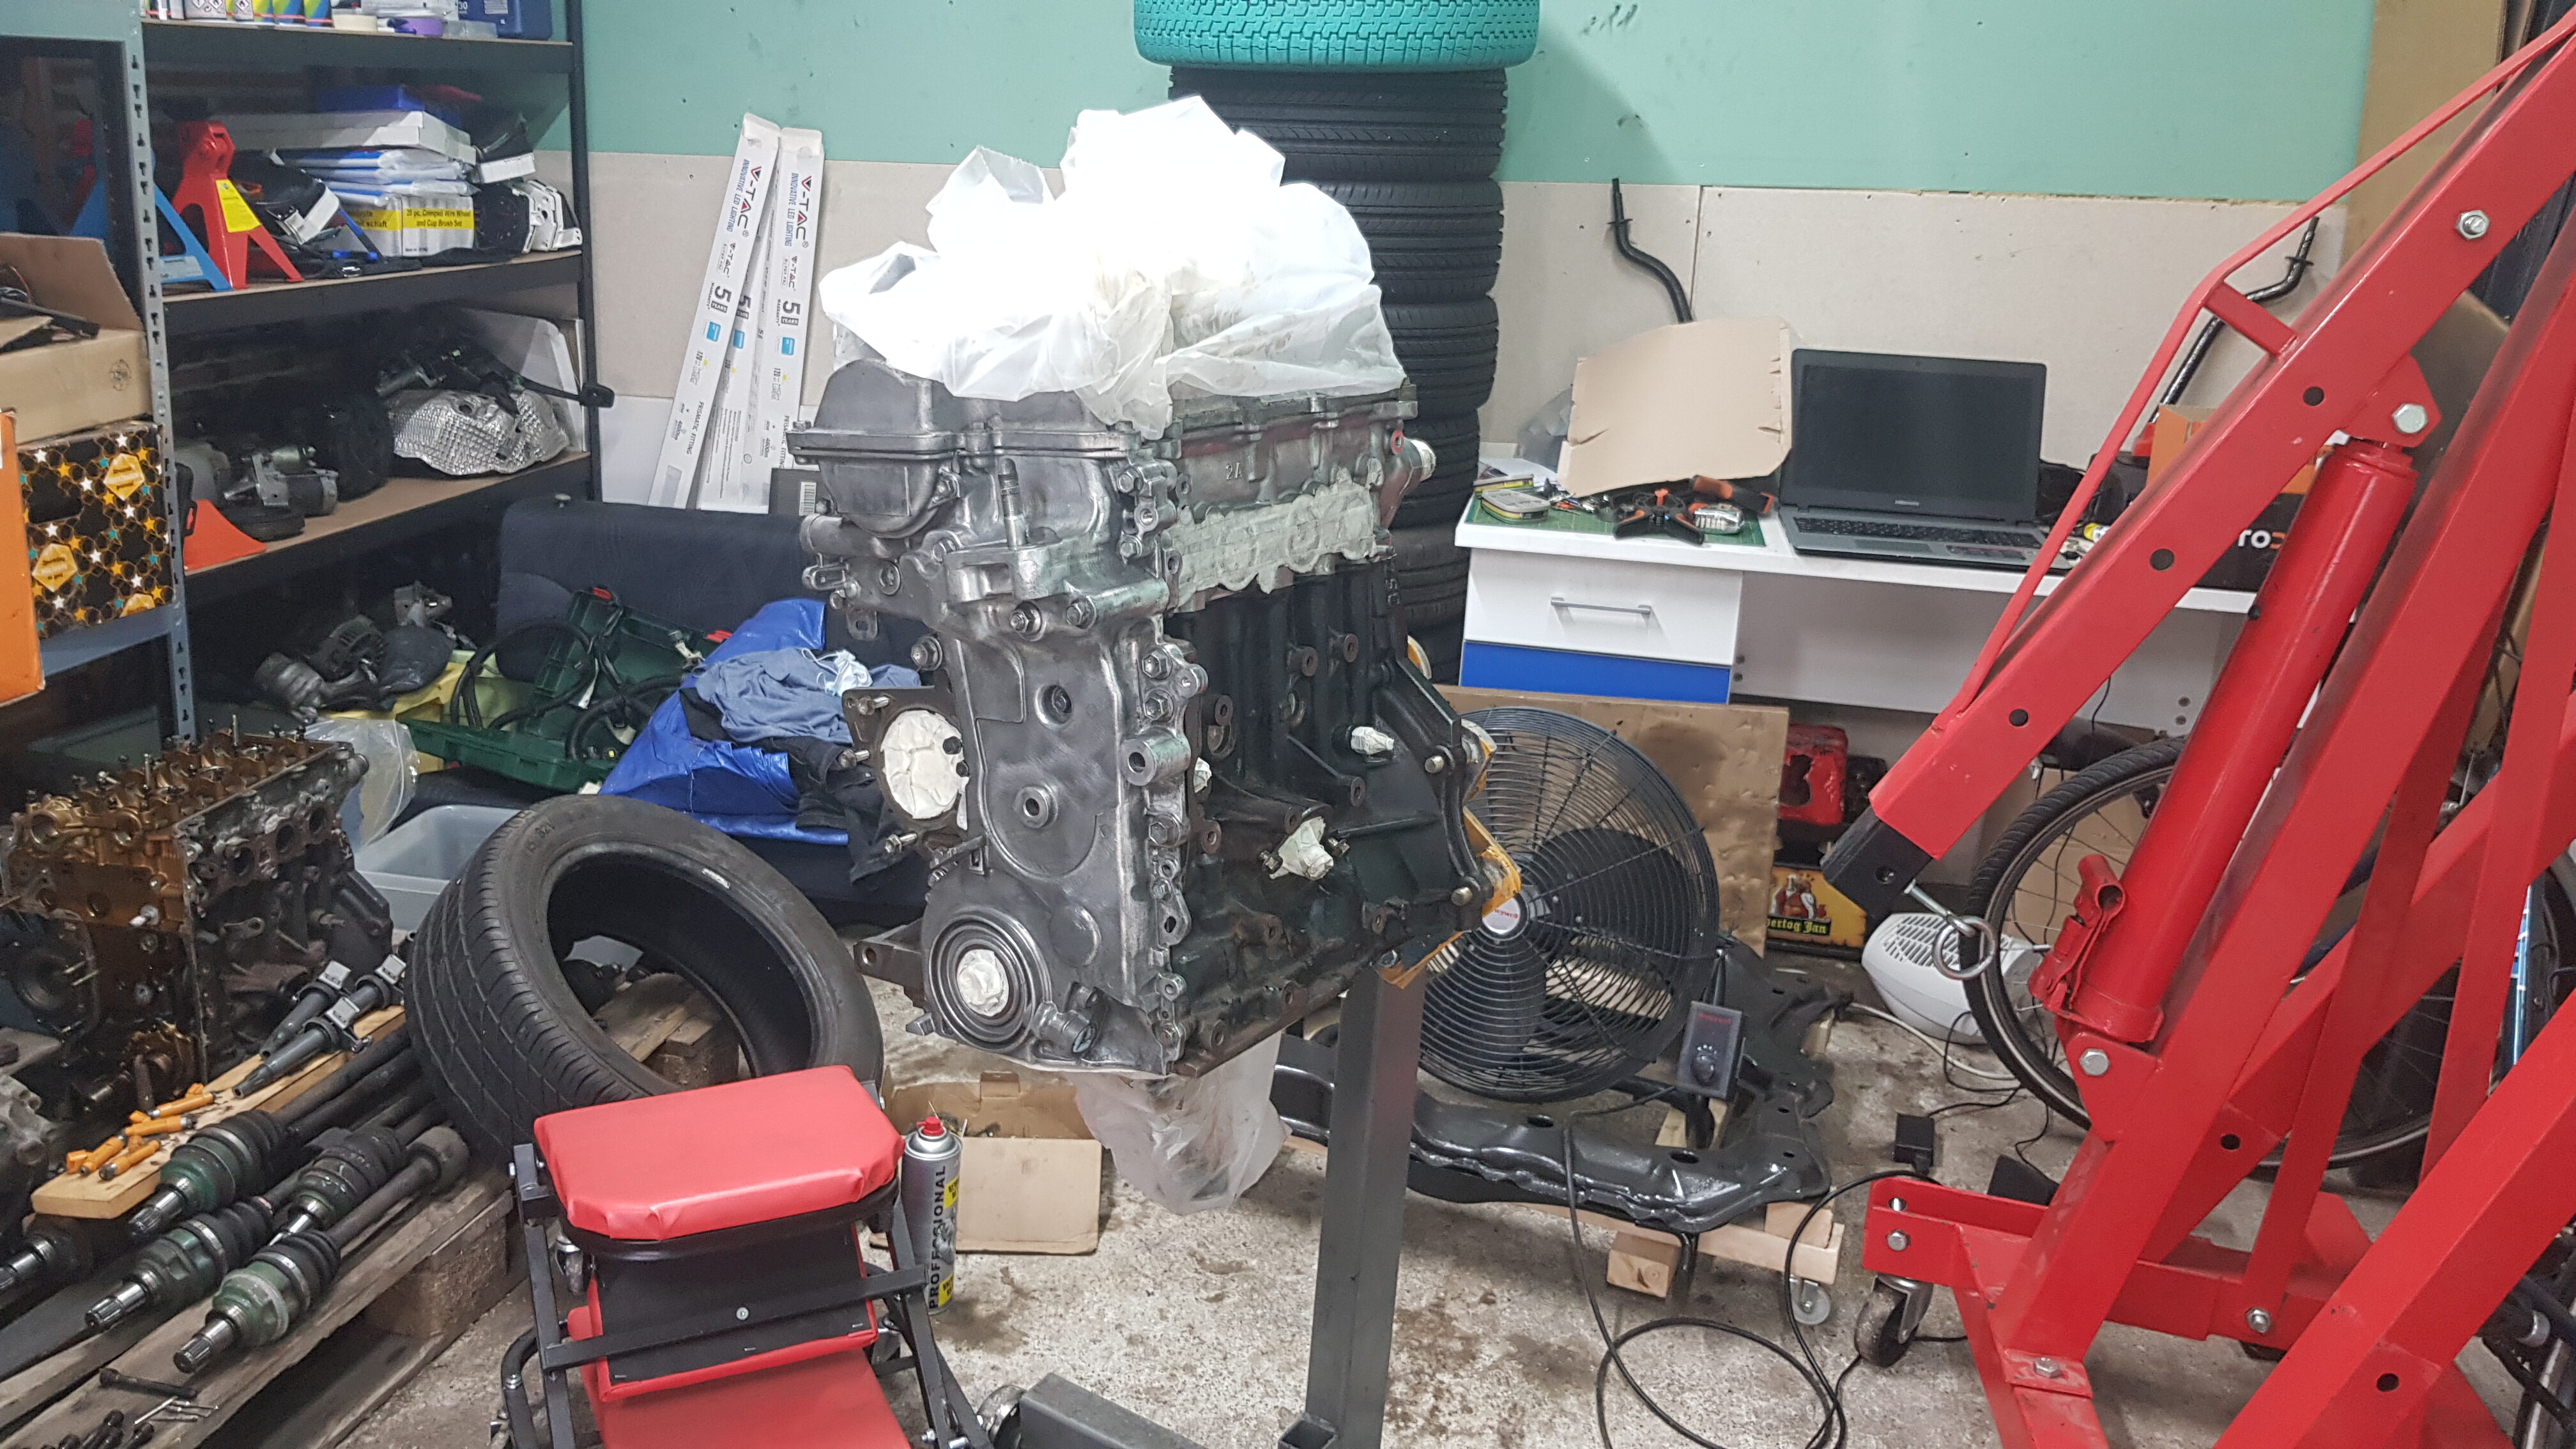
I got to borrow an engine stand from a friend, which made the job of cleaning the engine block a whole lot easier!
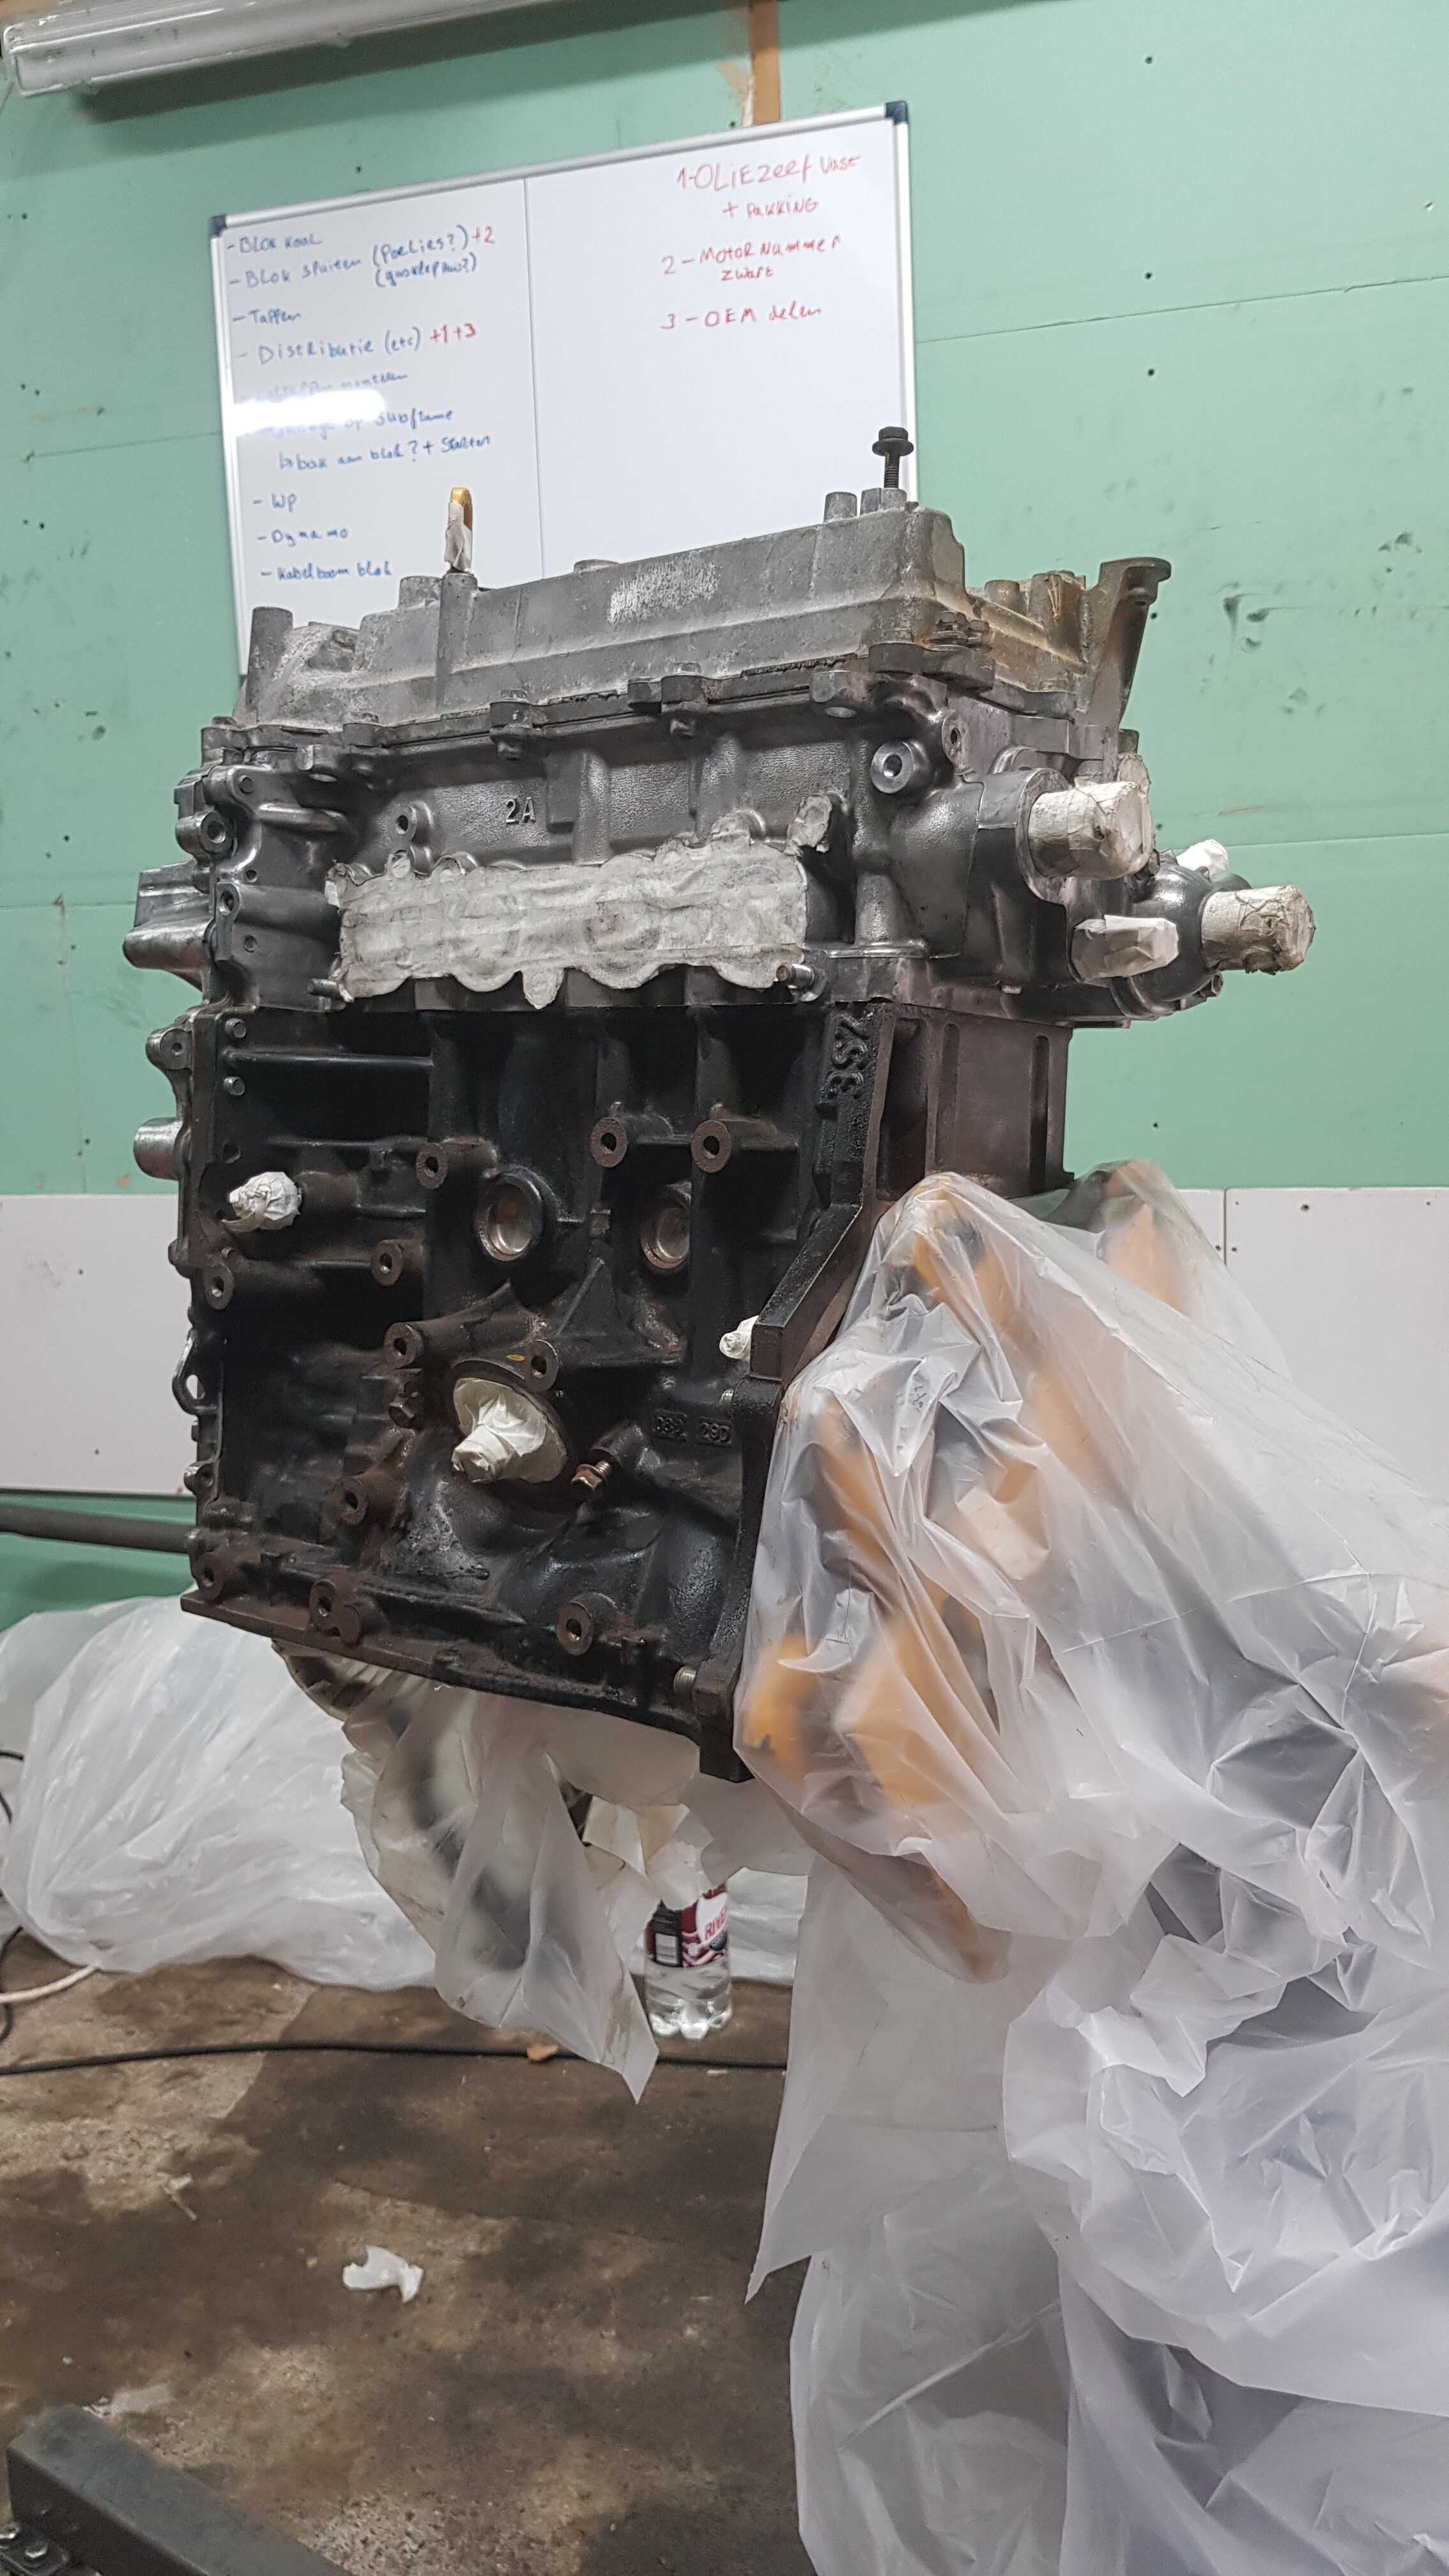
Ready for paint
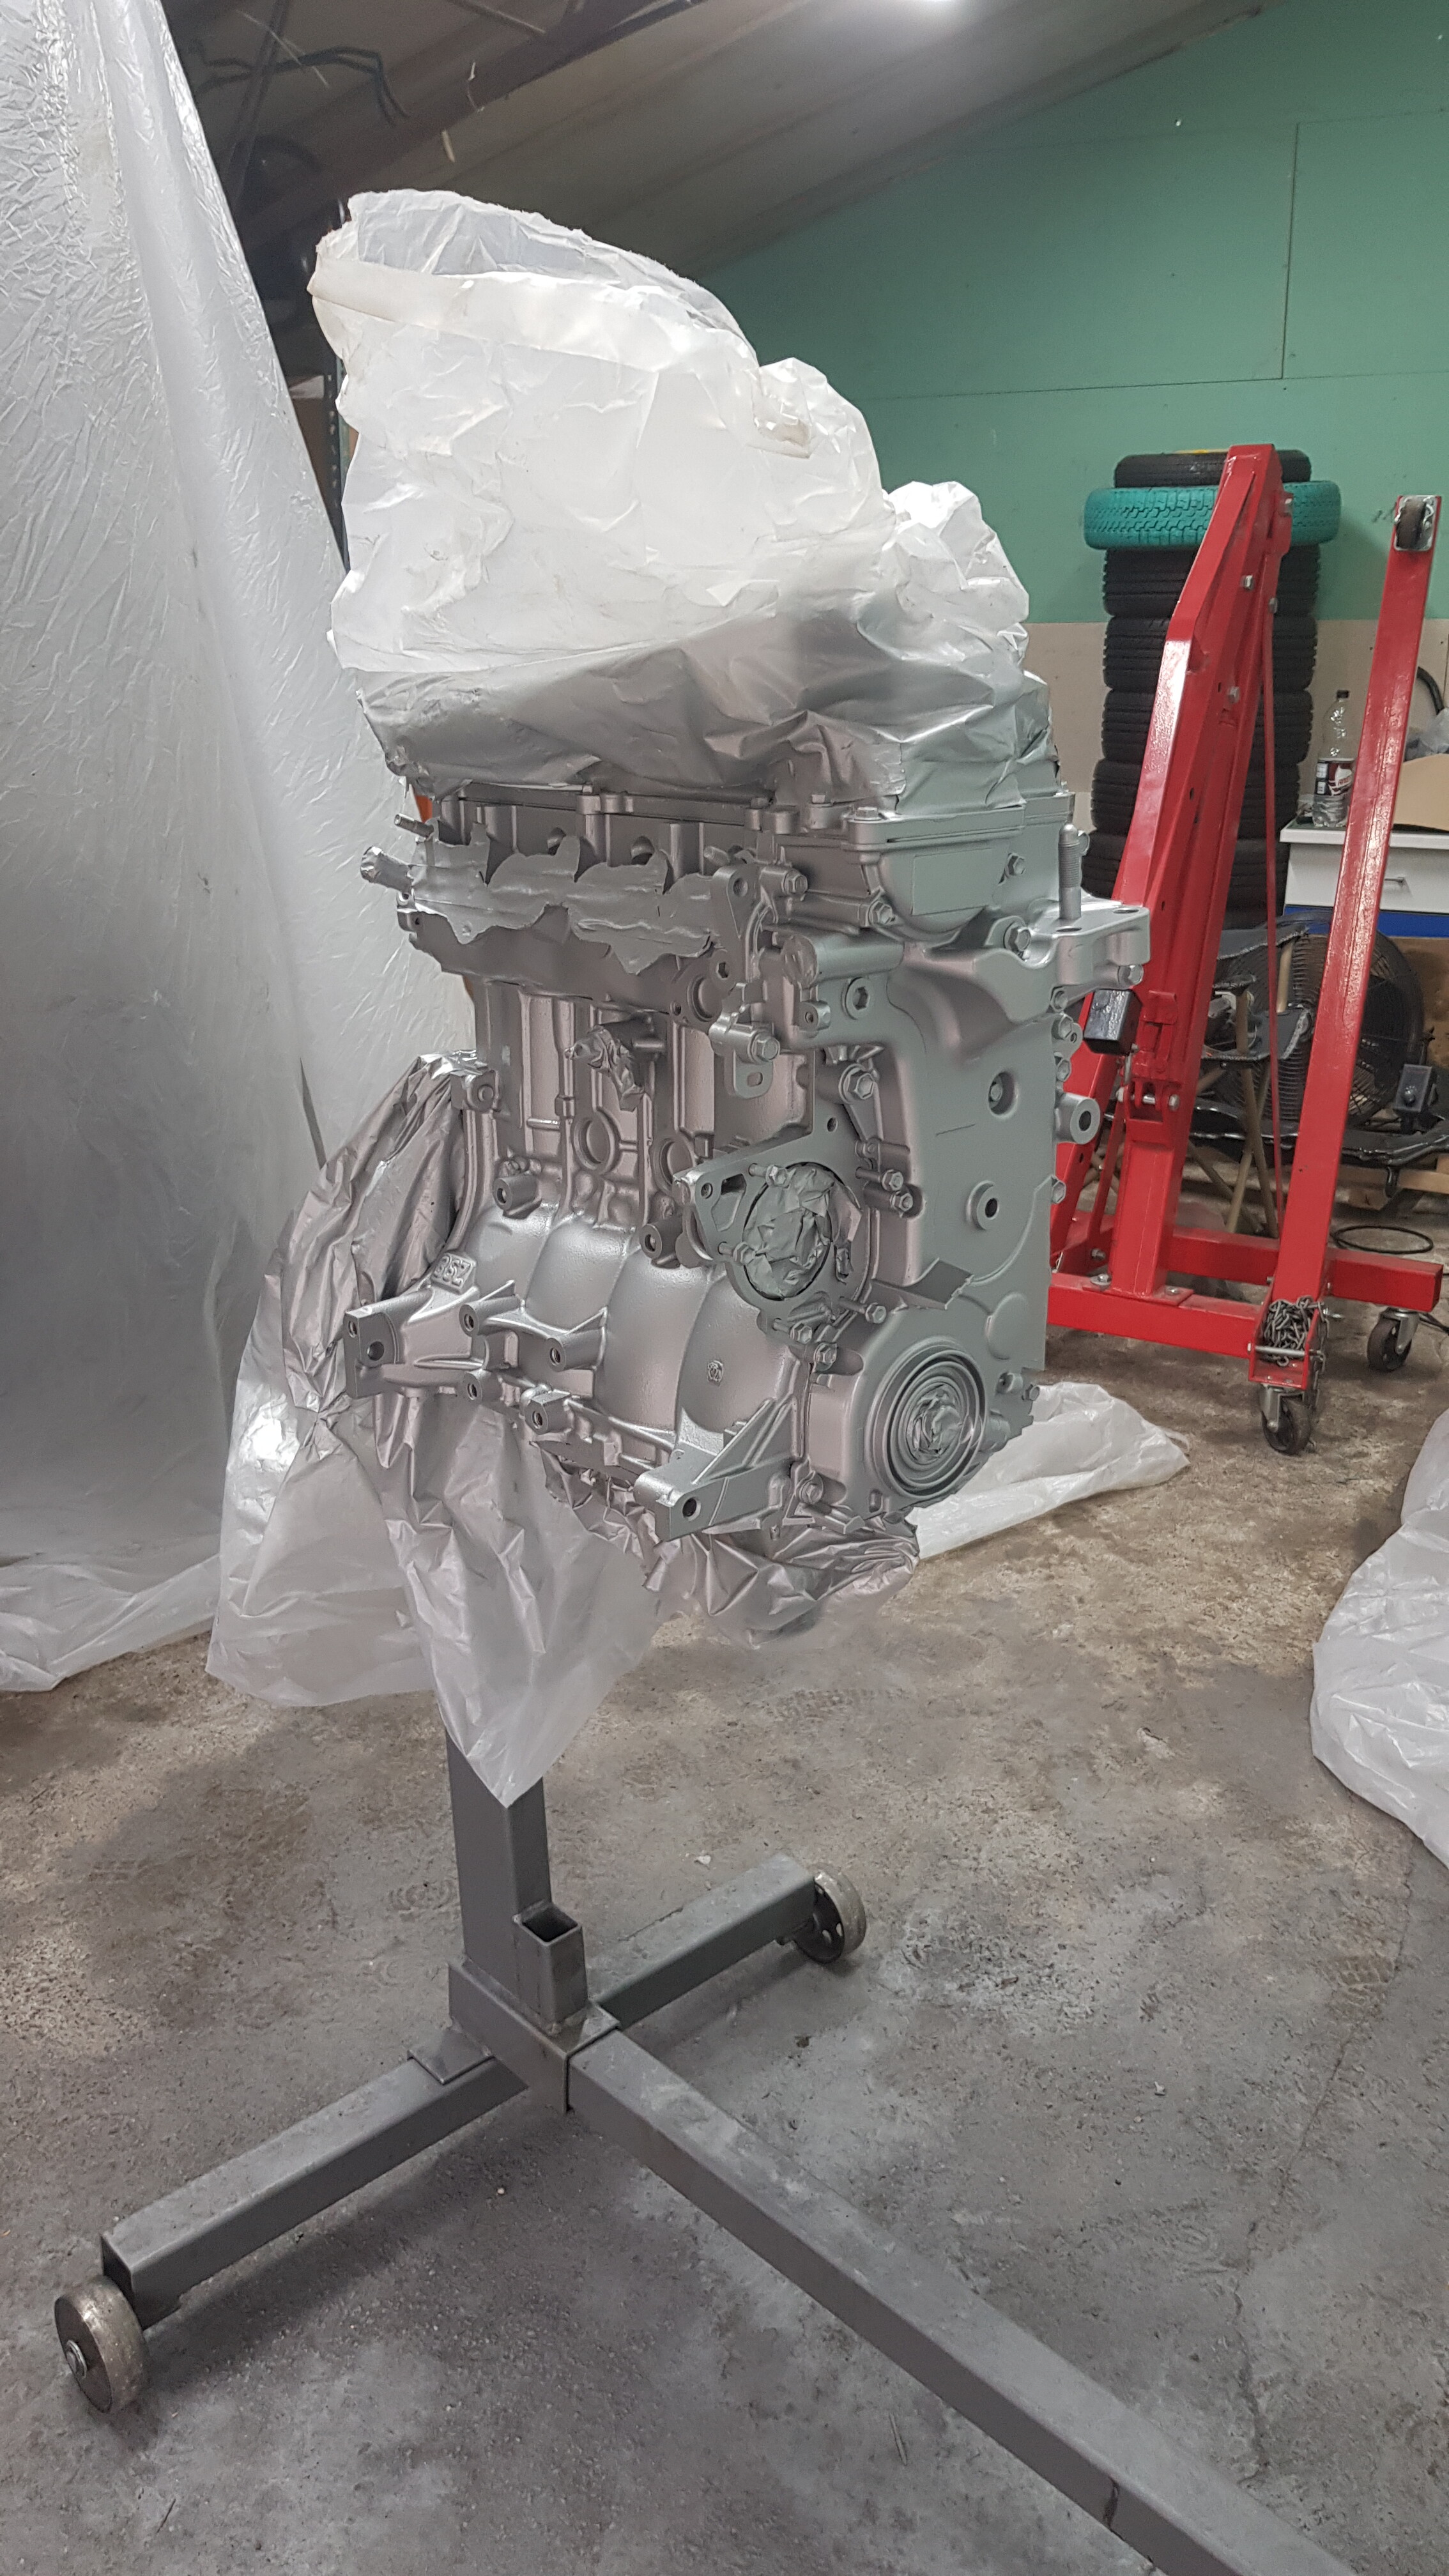
Done! Pretty happy with how it turned out, considering the process of cleaning/painting was, let’s say, ‘DIY friendly’.
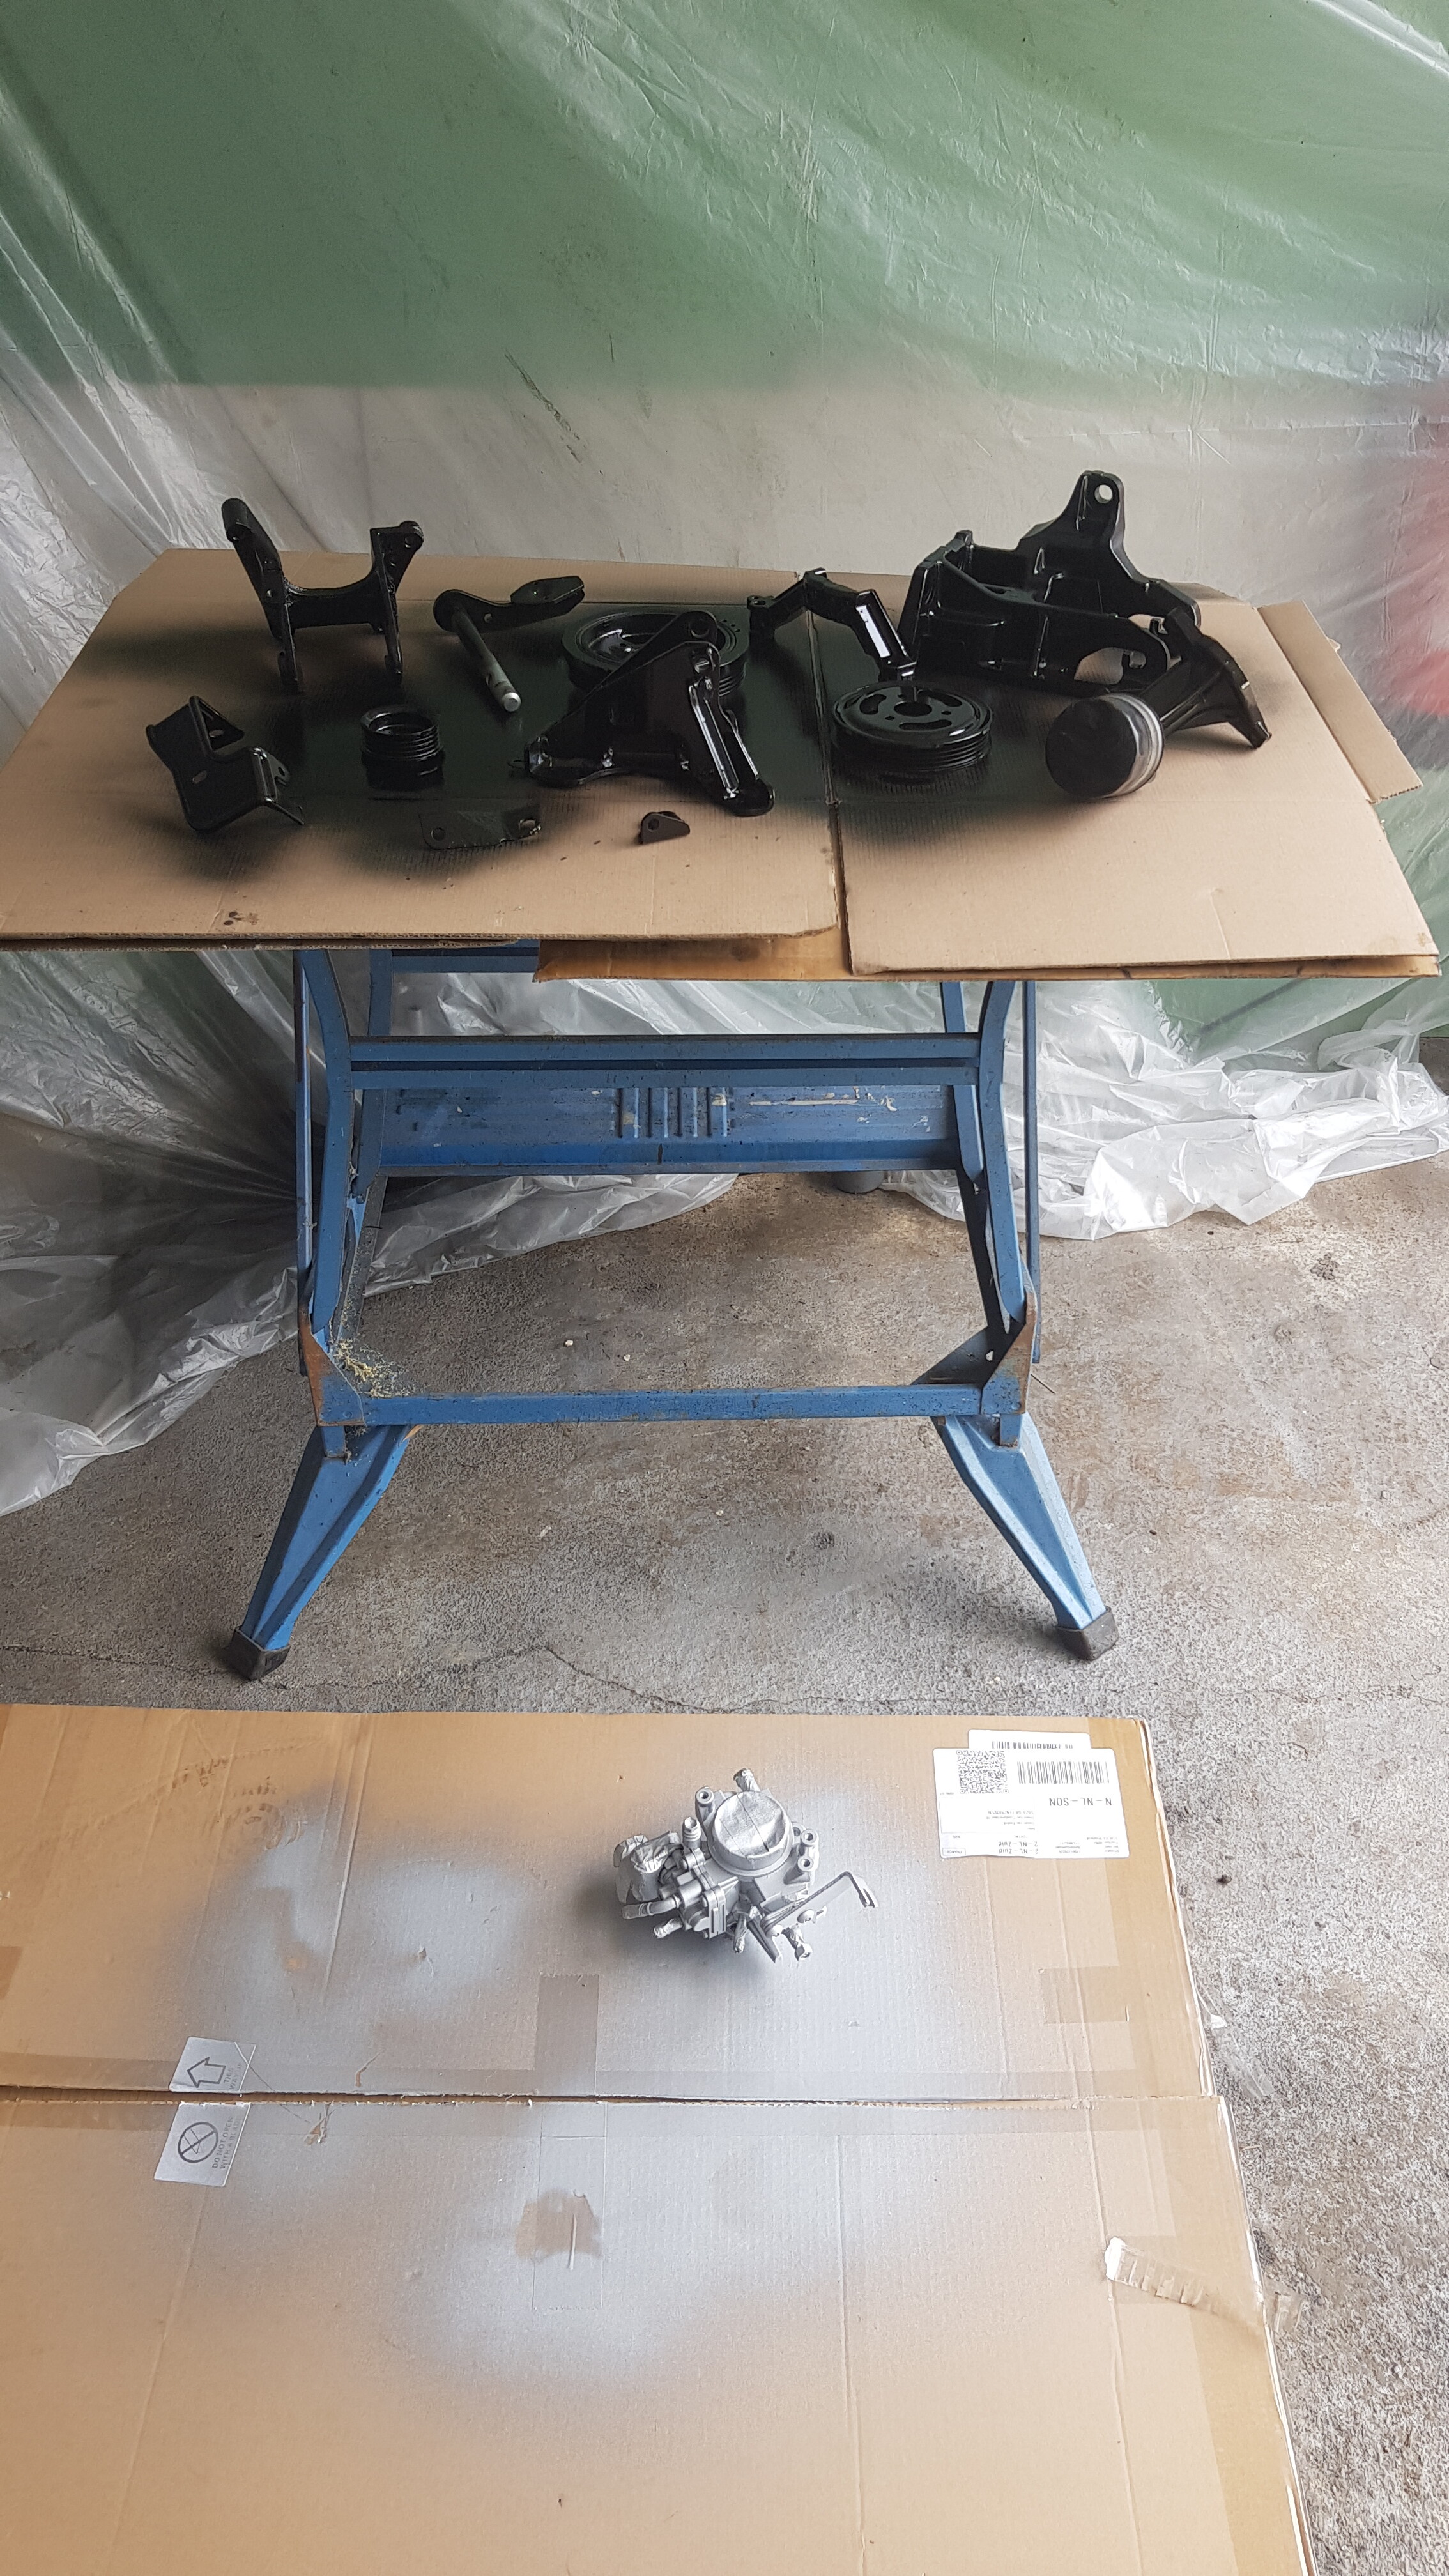
Painted the throttle body, some brackets and pulleys as well
ASSEMBLY
Everything that had to be painted got painted, which meant it was time for the fun bit: assembling all the bits! I began by changing the timing chain, since I wouldn’t be able to change it once everything is assembled. Some pictures I took during the process:
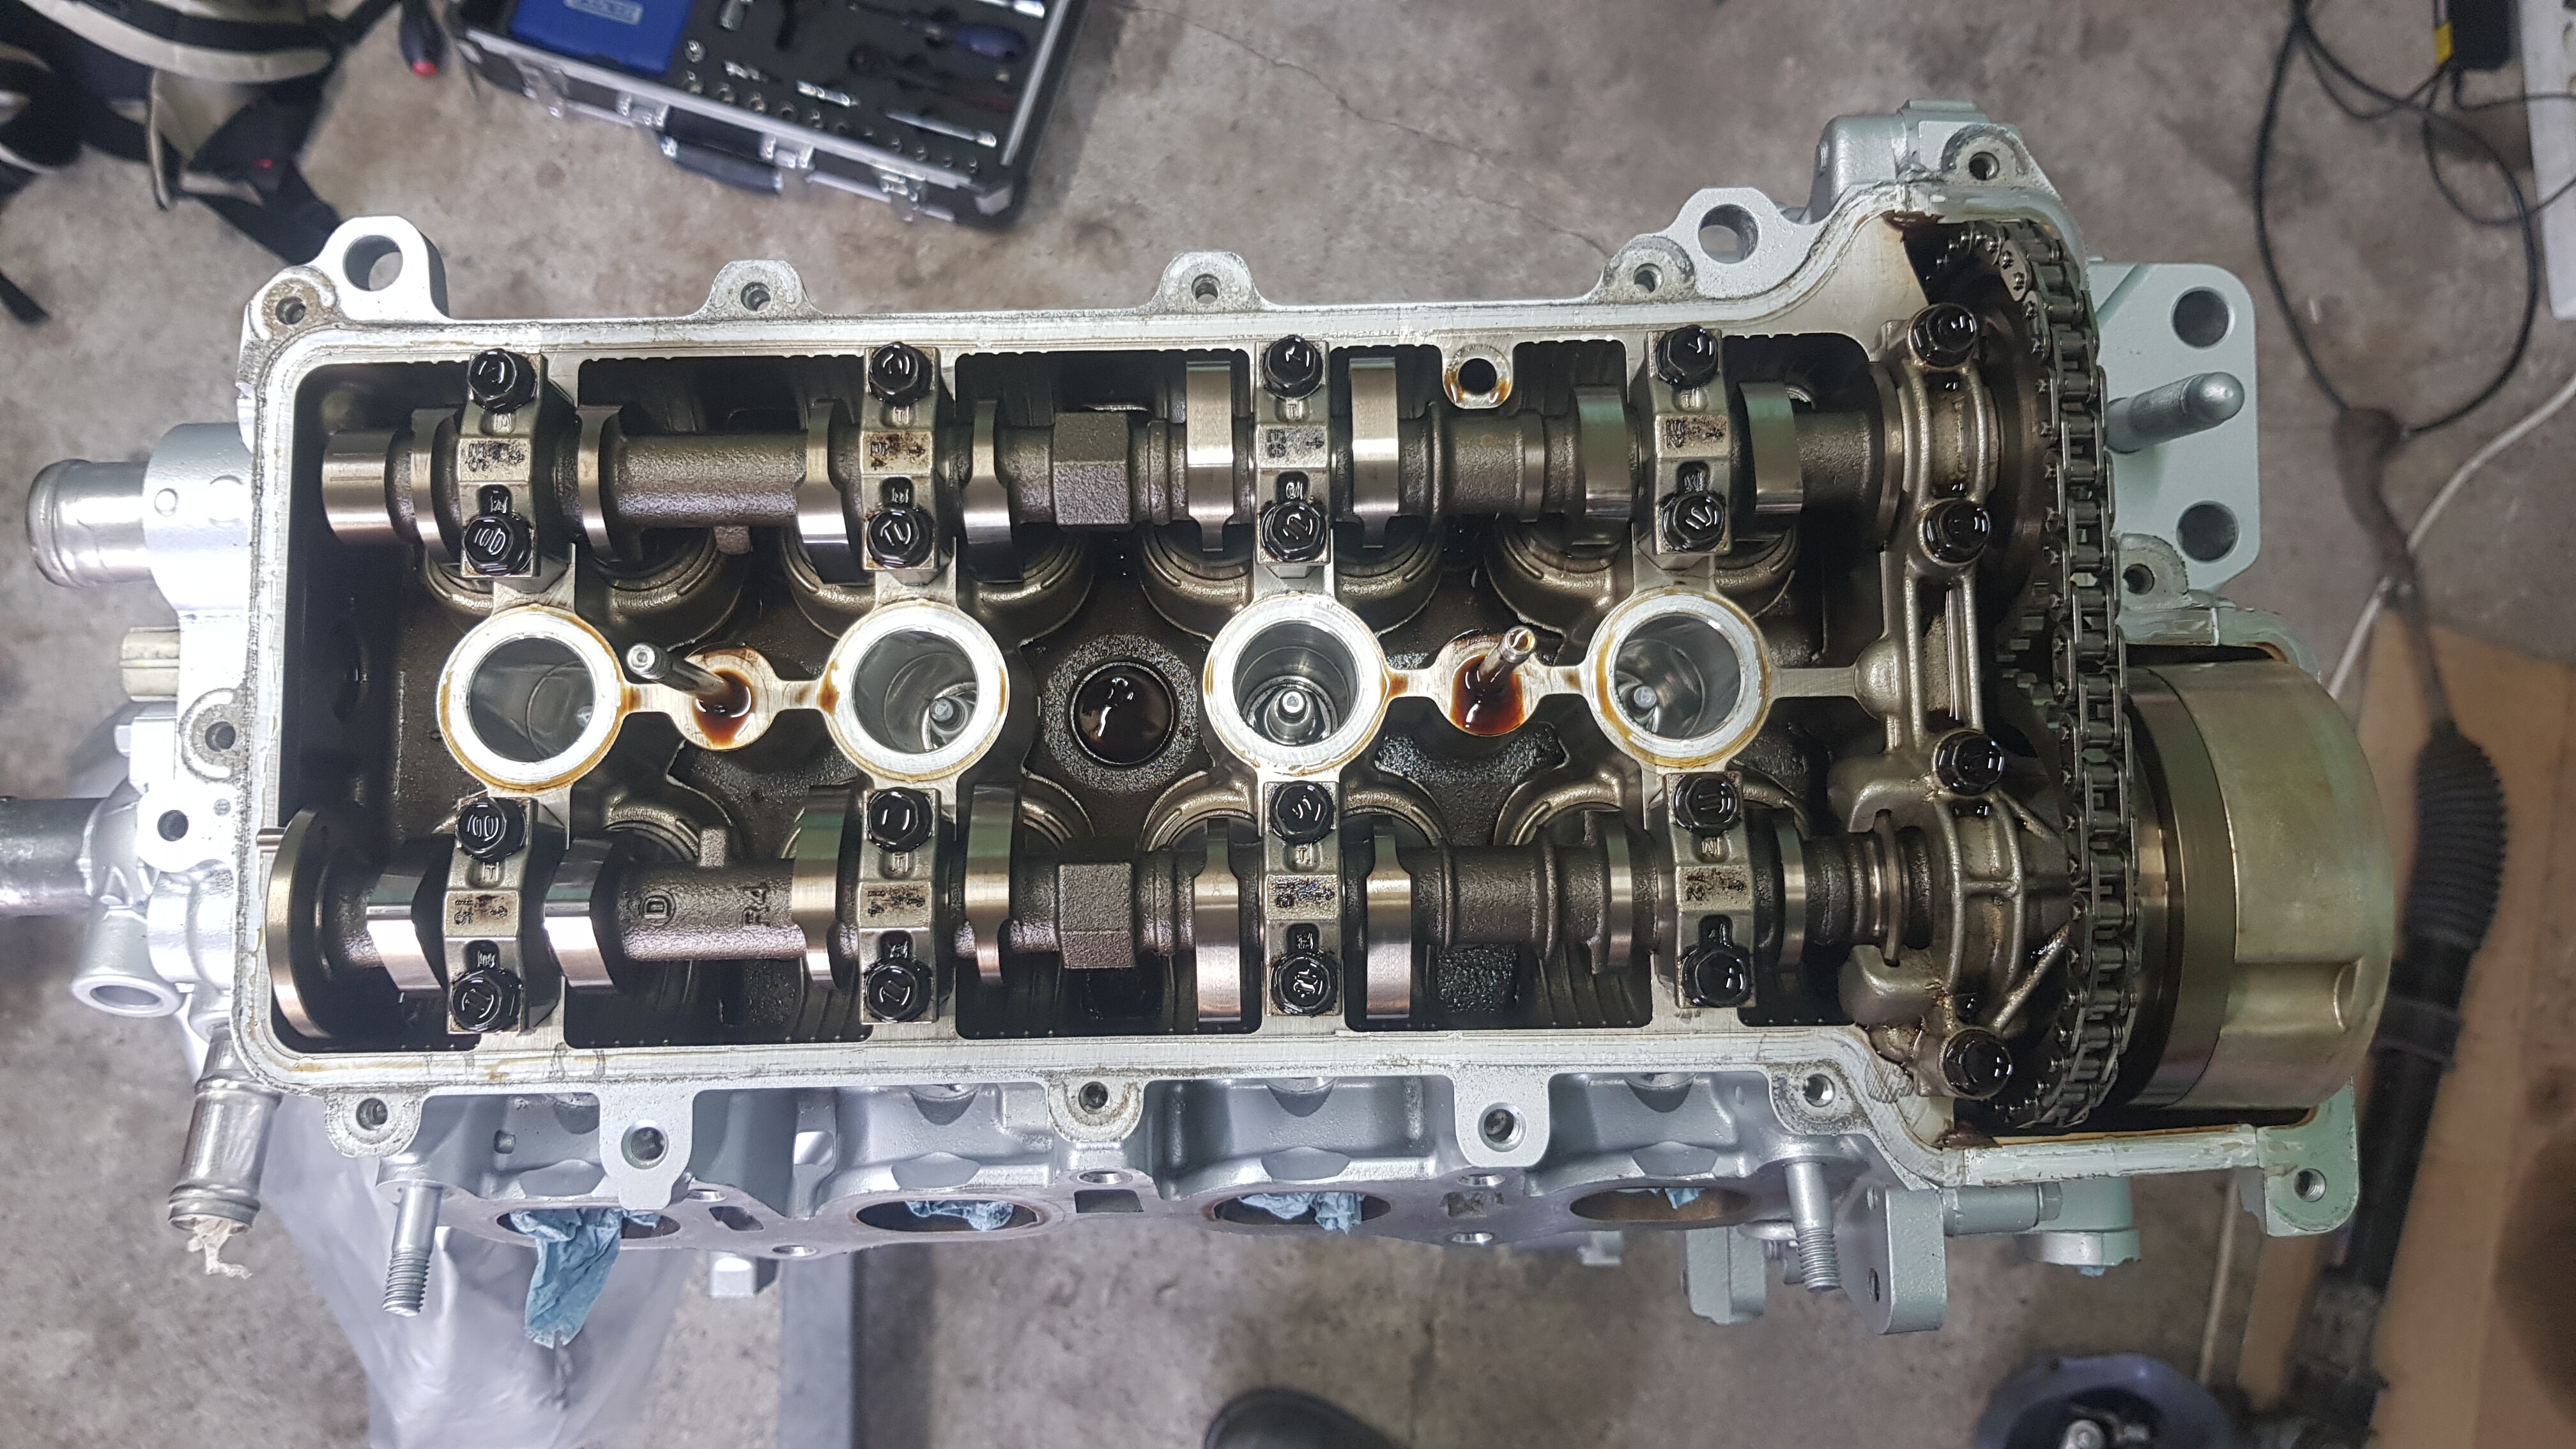
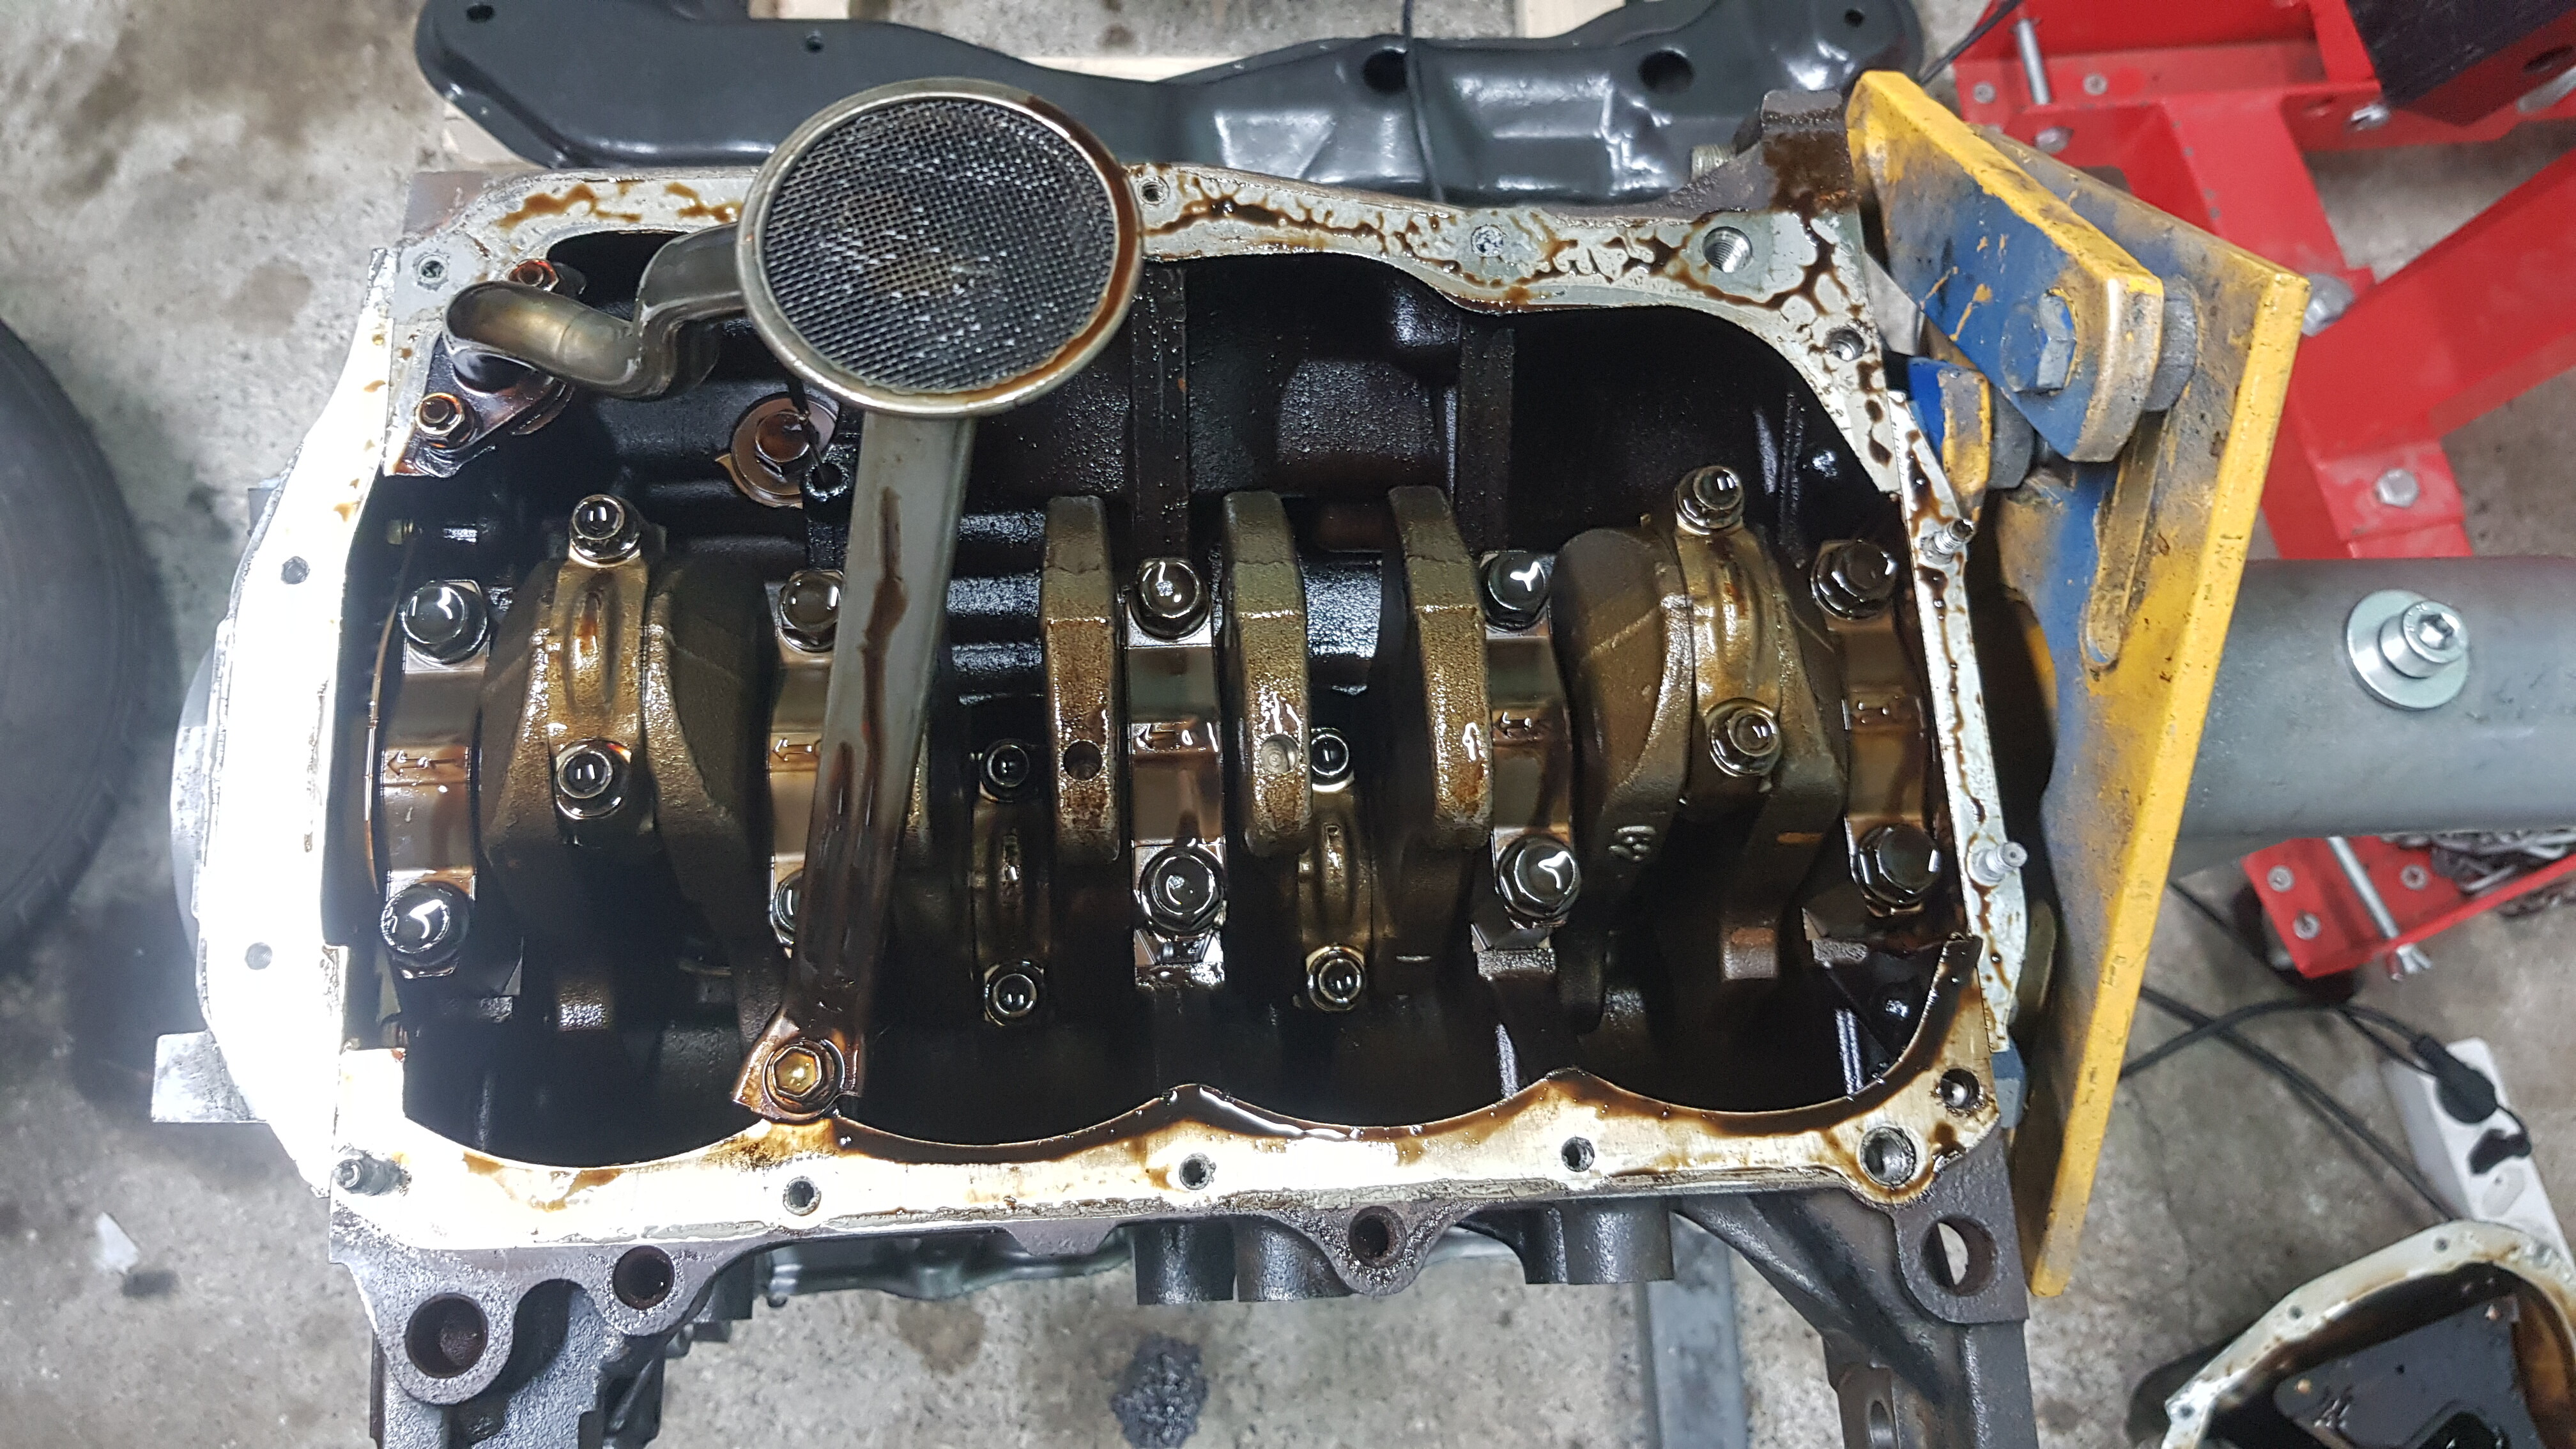
Both the top and bottom look really tidy. Happy me
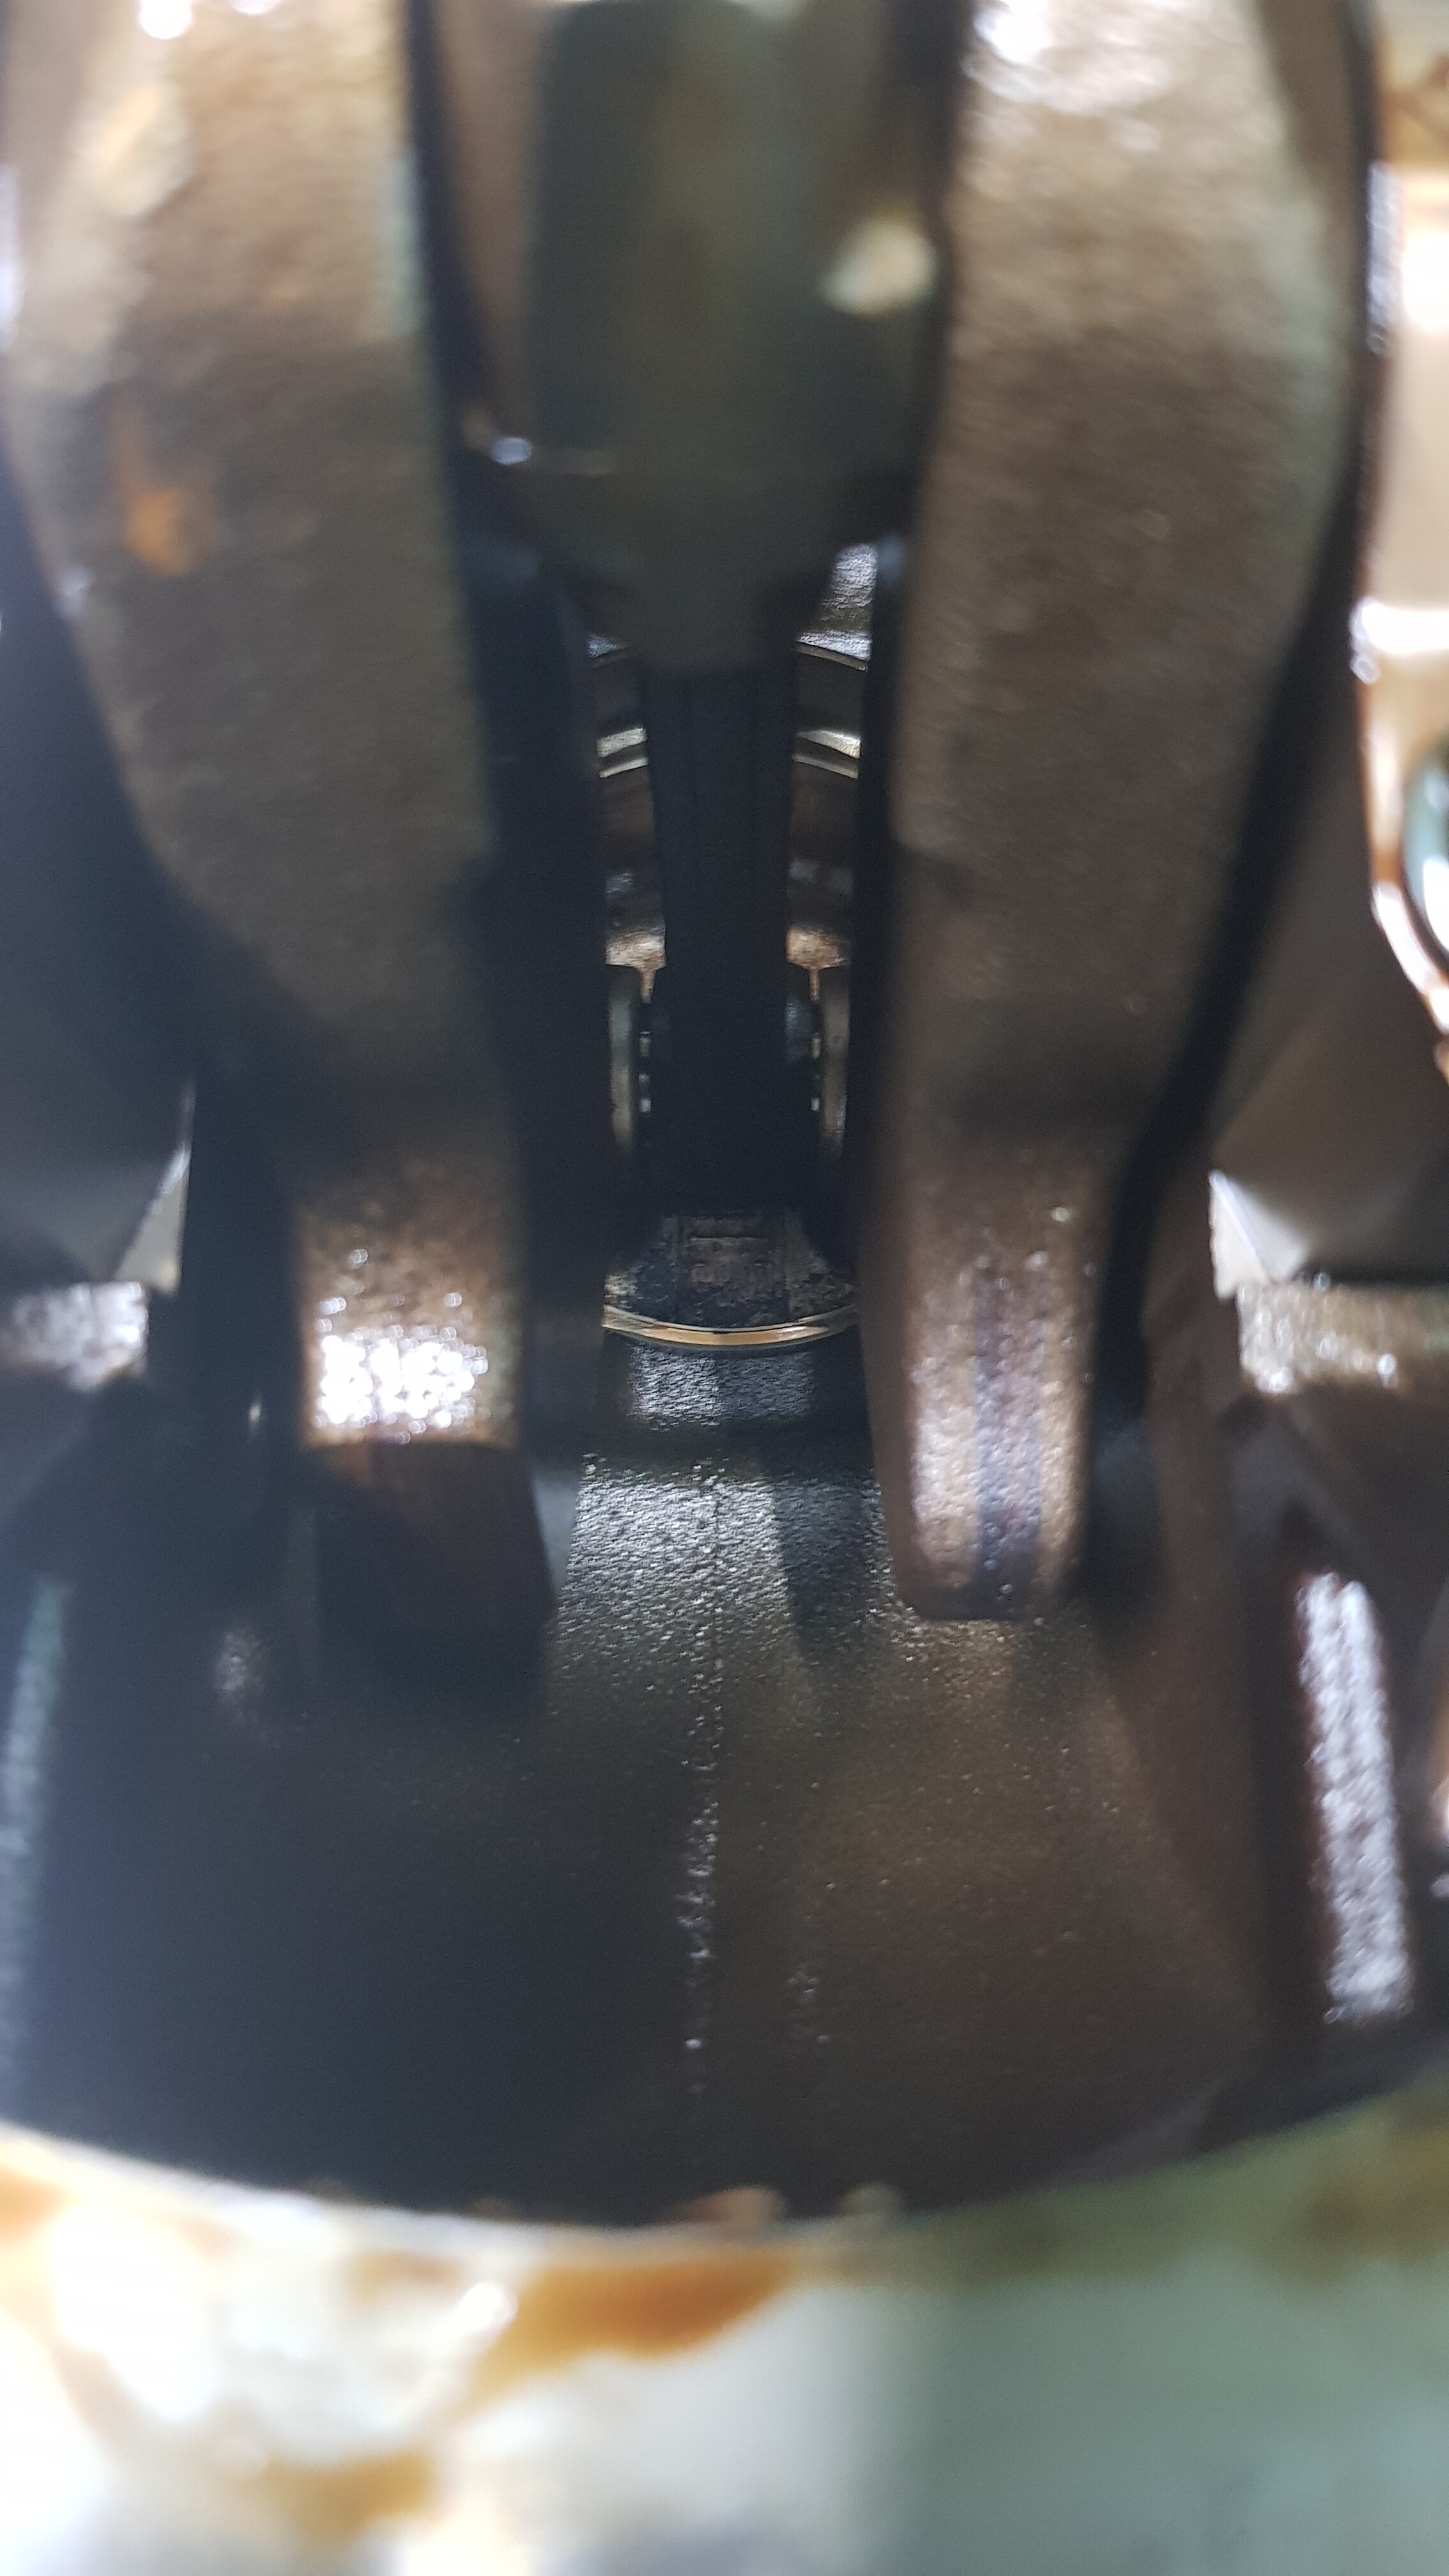
For those of you who’ve always wanted to see the underside of a 3SZ piston
Old bits off
New bits on
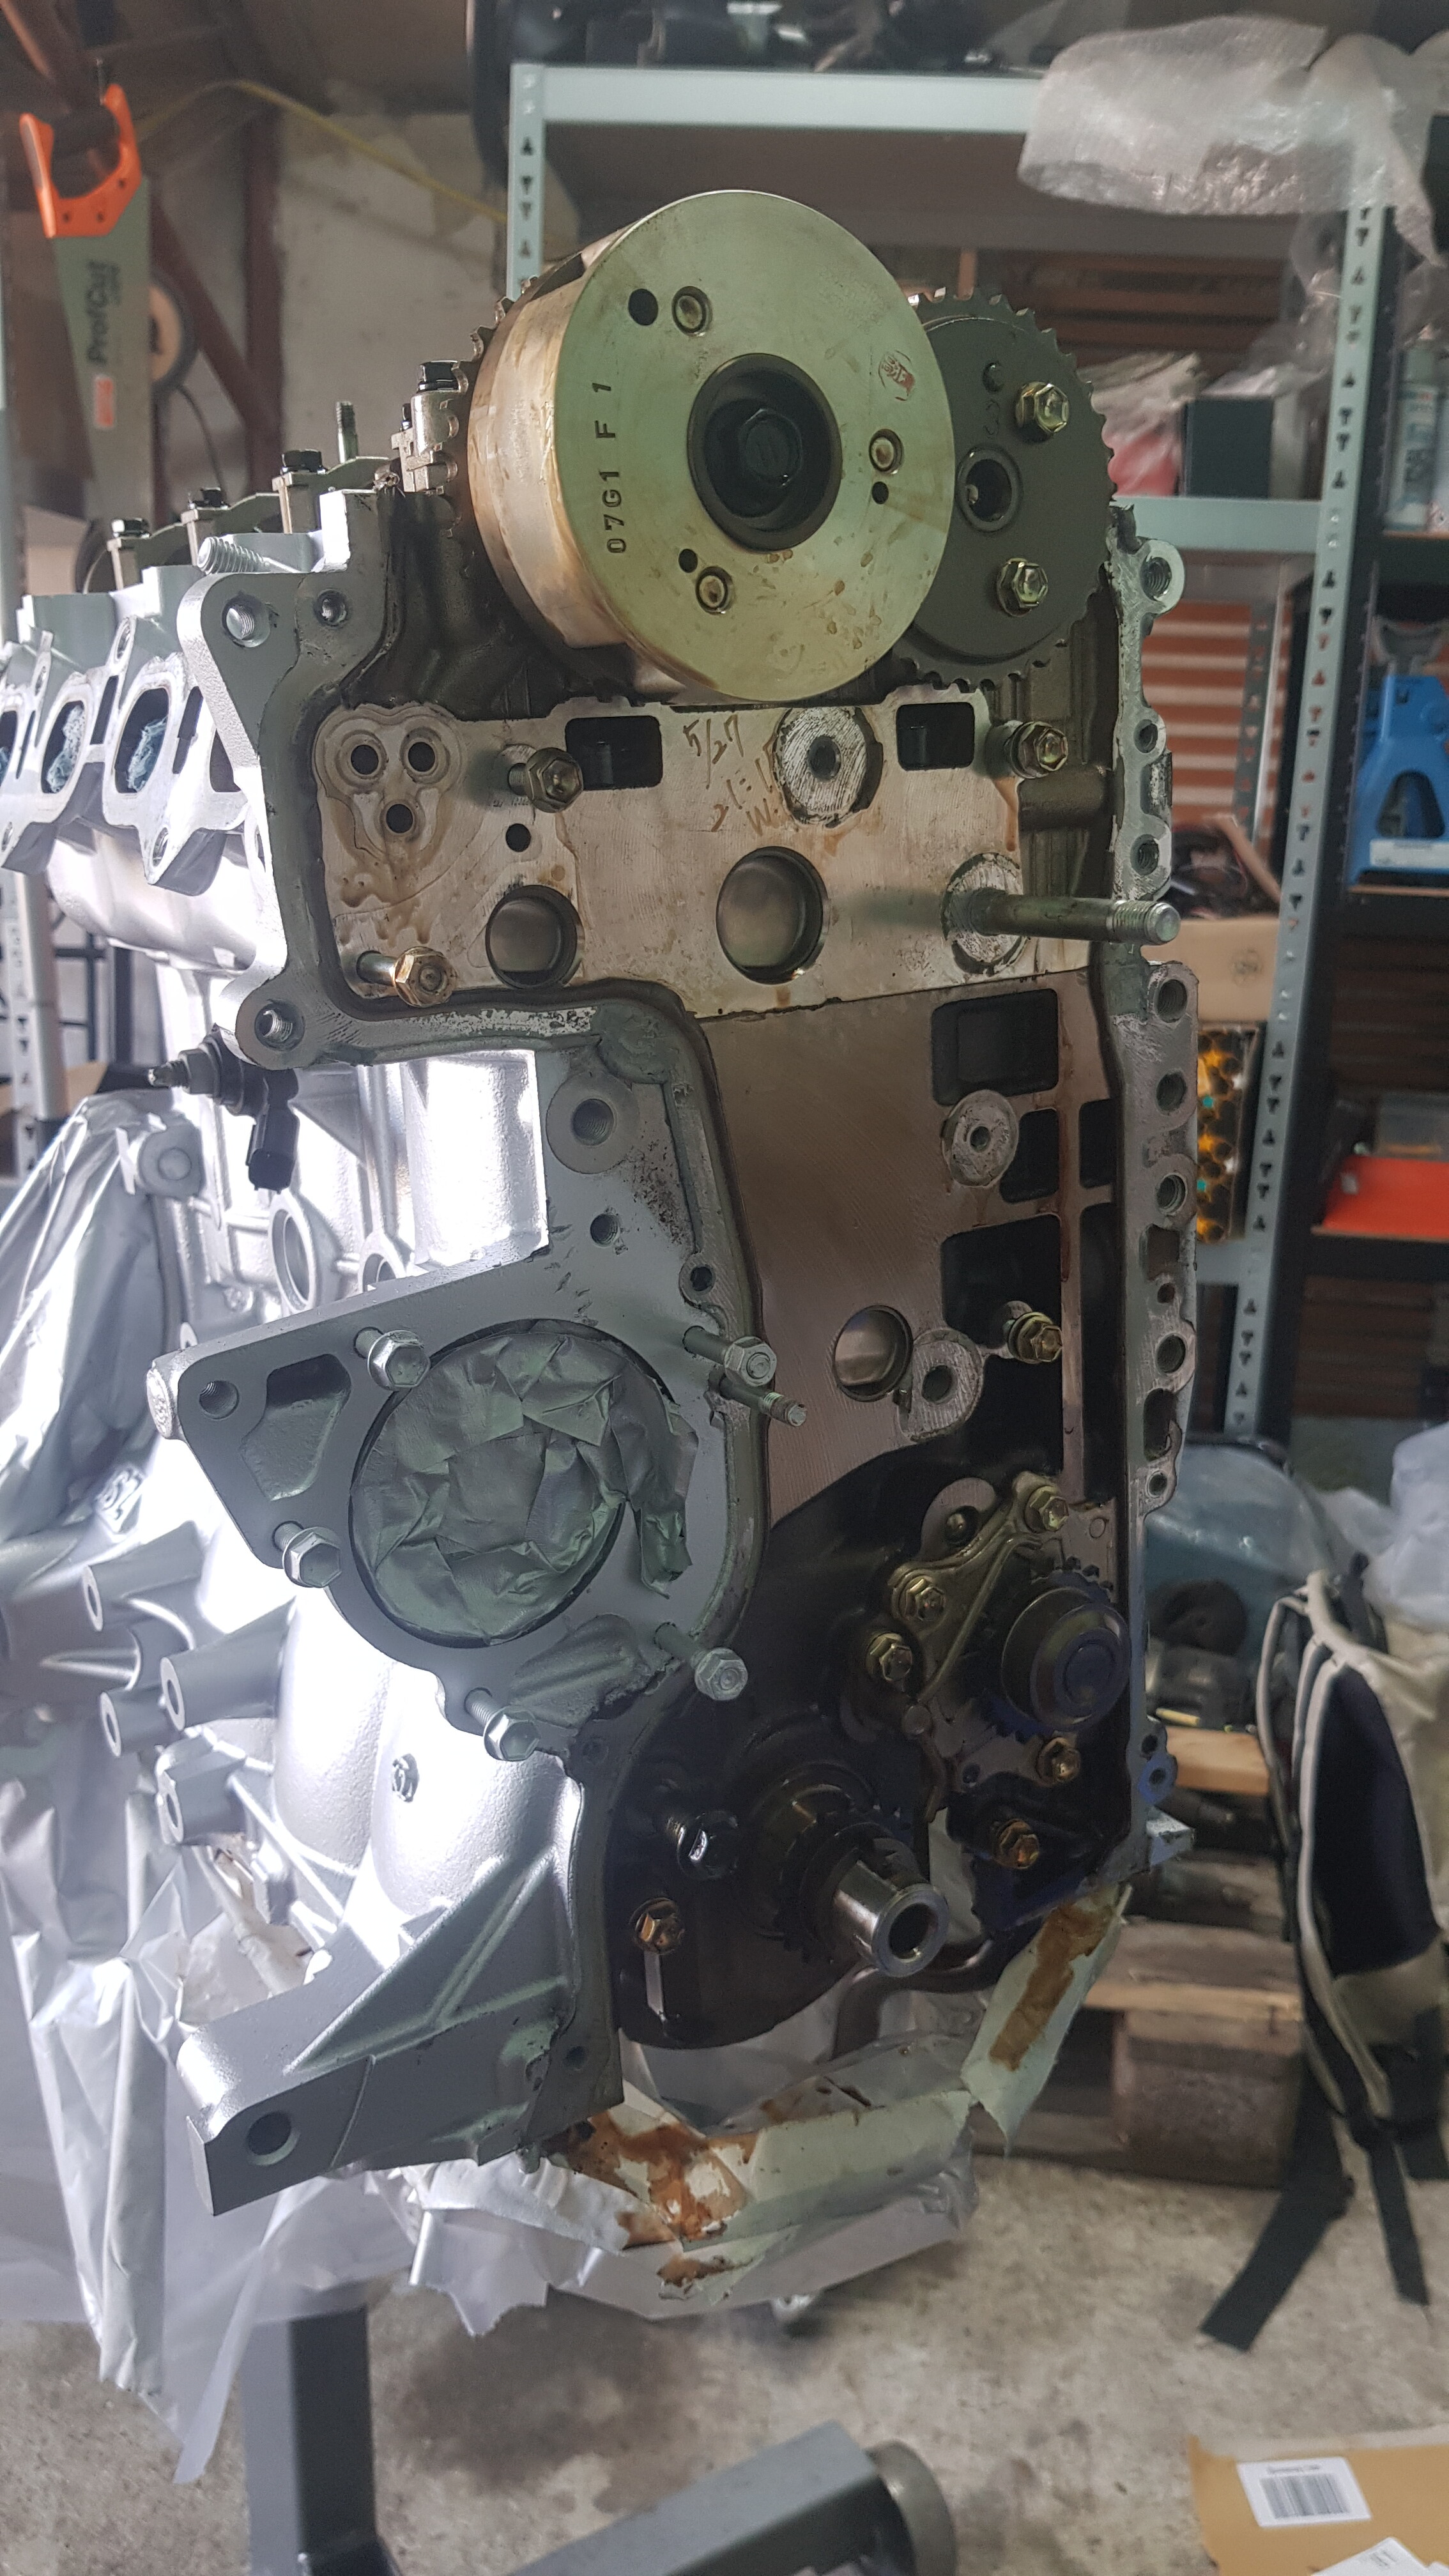
When I took off the timing chain cover, something I had been wondering about got confirmed:
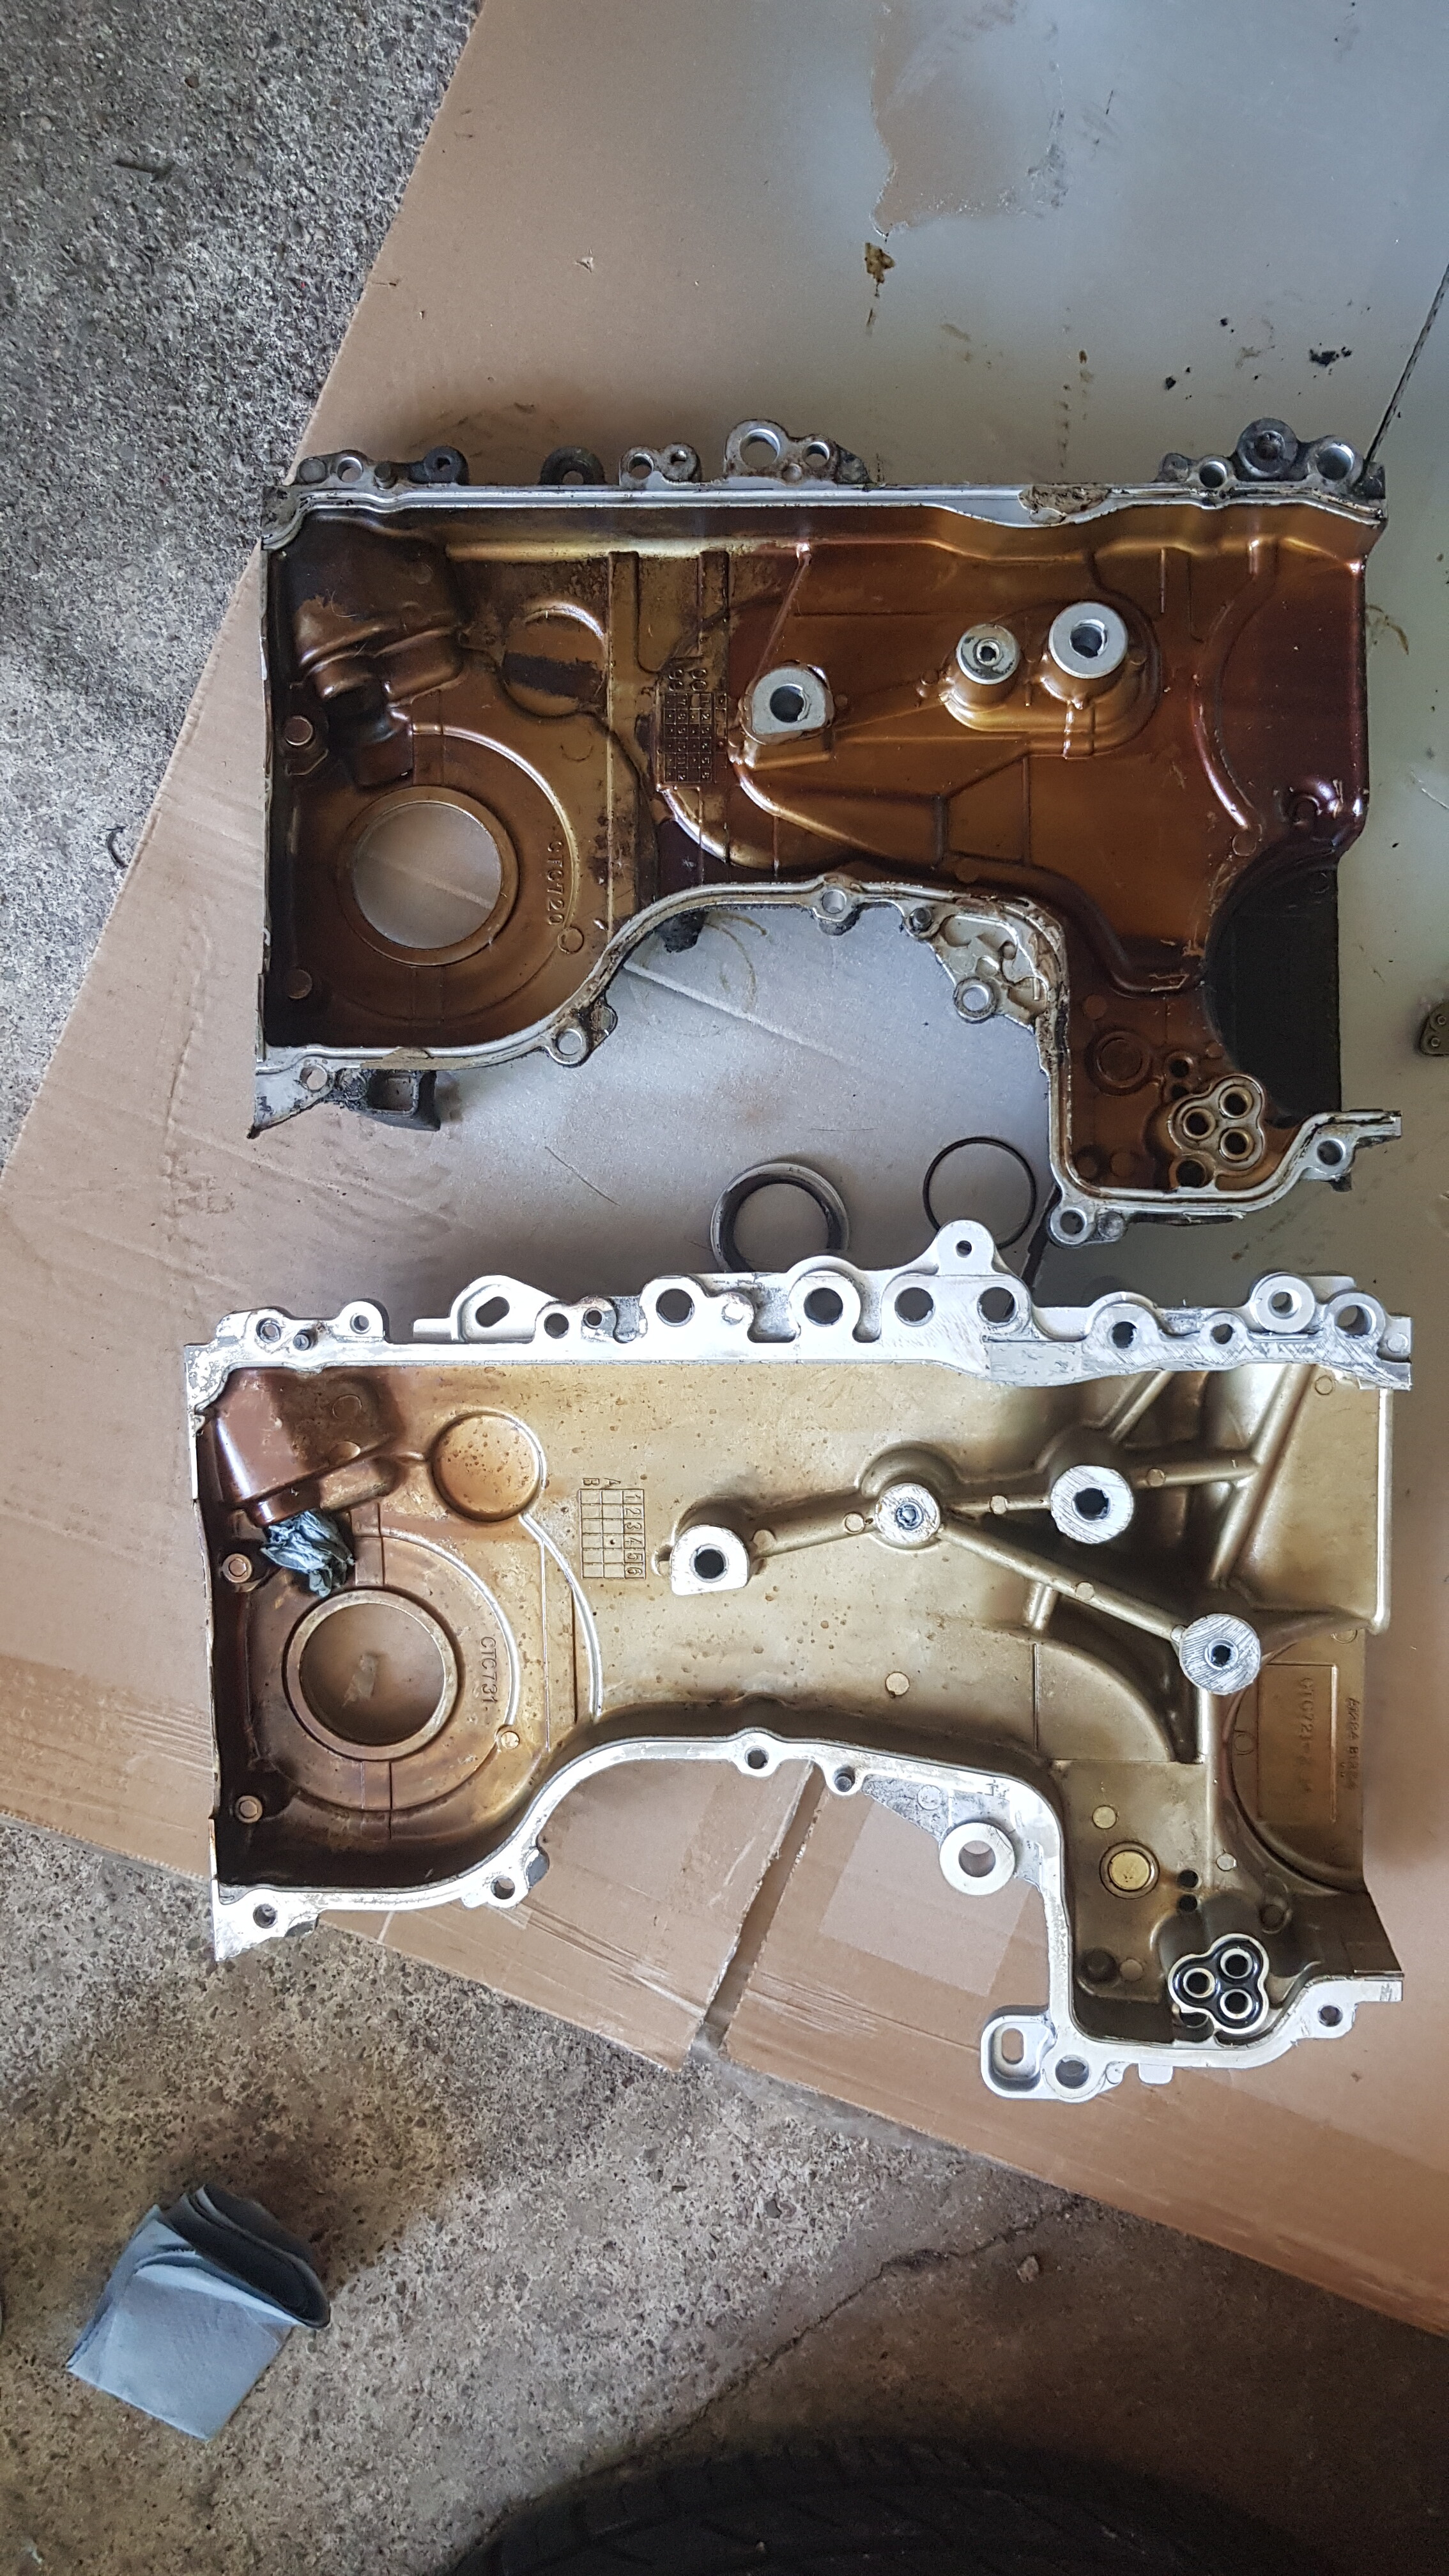
This is the 3SZ’s cover (on the bottom) next to the one from a K3VE. What’s special about it, is that it’s taller. Since they share the same cylinder head, this means that the engine block is taller as well. It makes sense because the 3SZ has a larger stroke, but I just assumed Daihatsu/Toyota would find a way to make it work using a K3 block, to save money. Guess I was wrong! I’m really happy I have all these K3 bits laying around, because that gives me the opportunity to test a few things, and compare the two engines. Really cool!
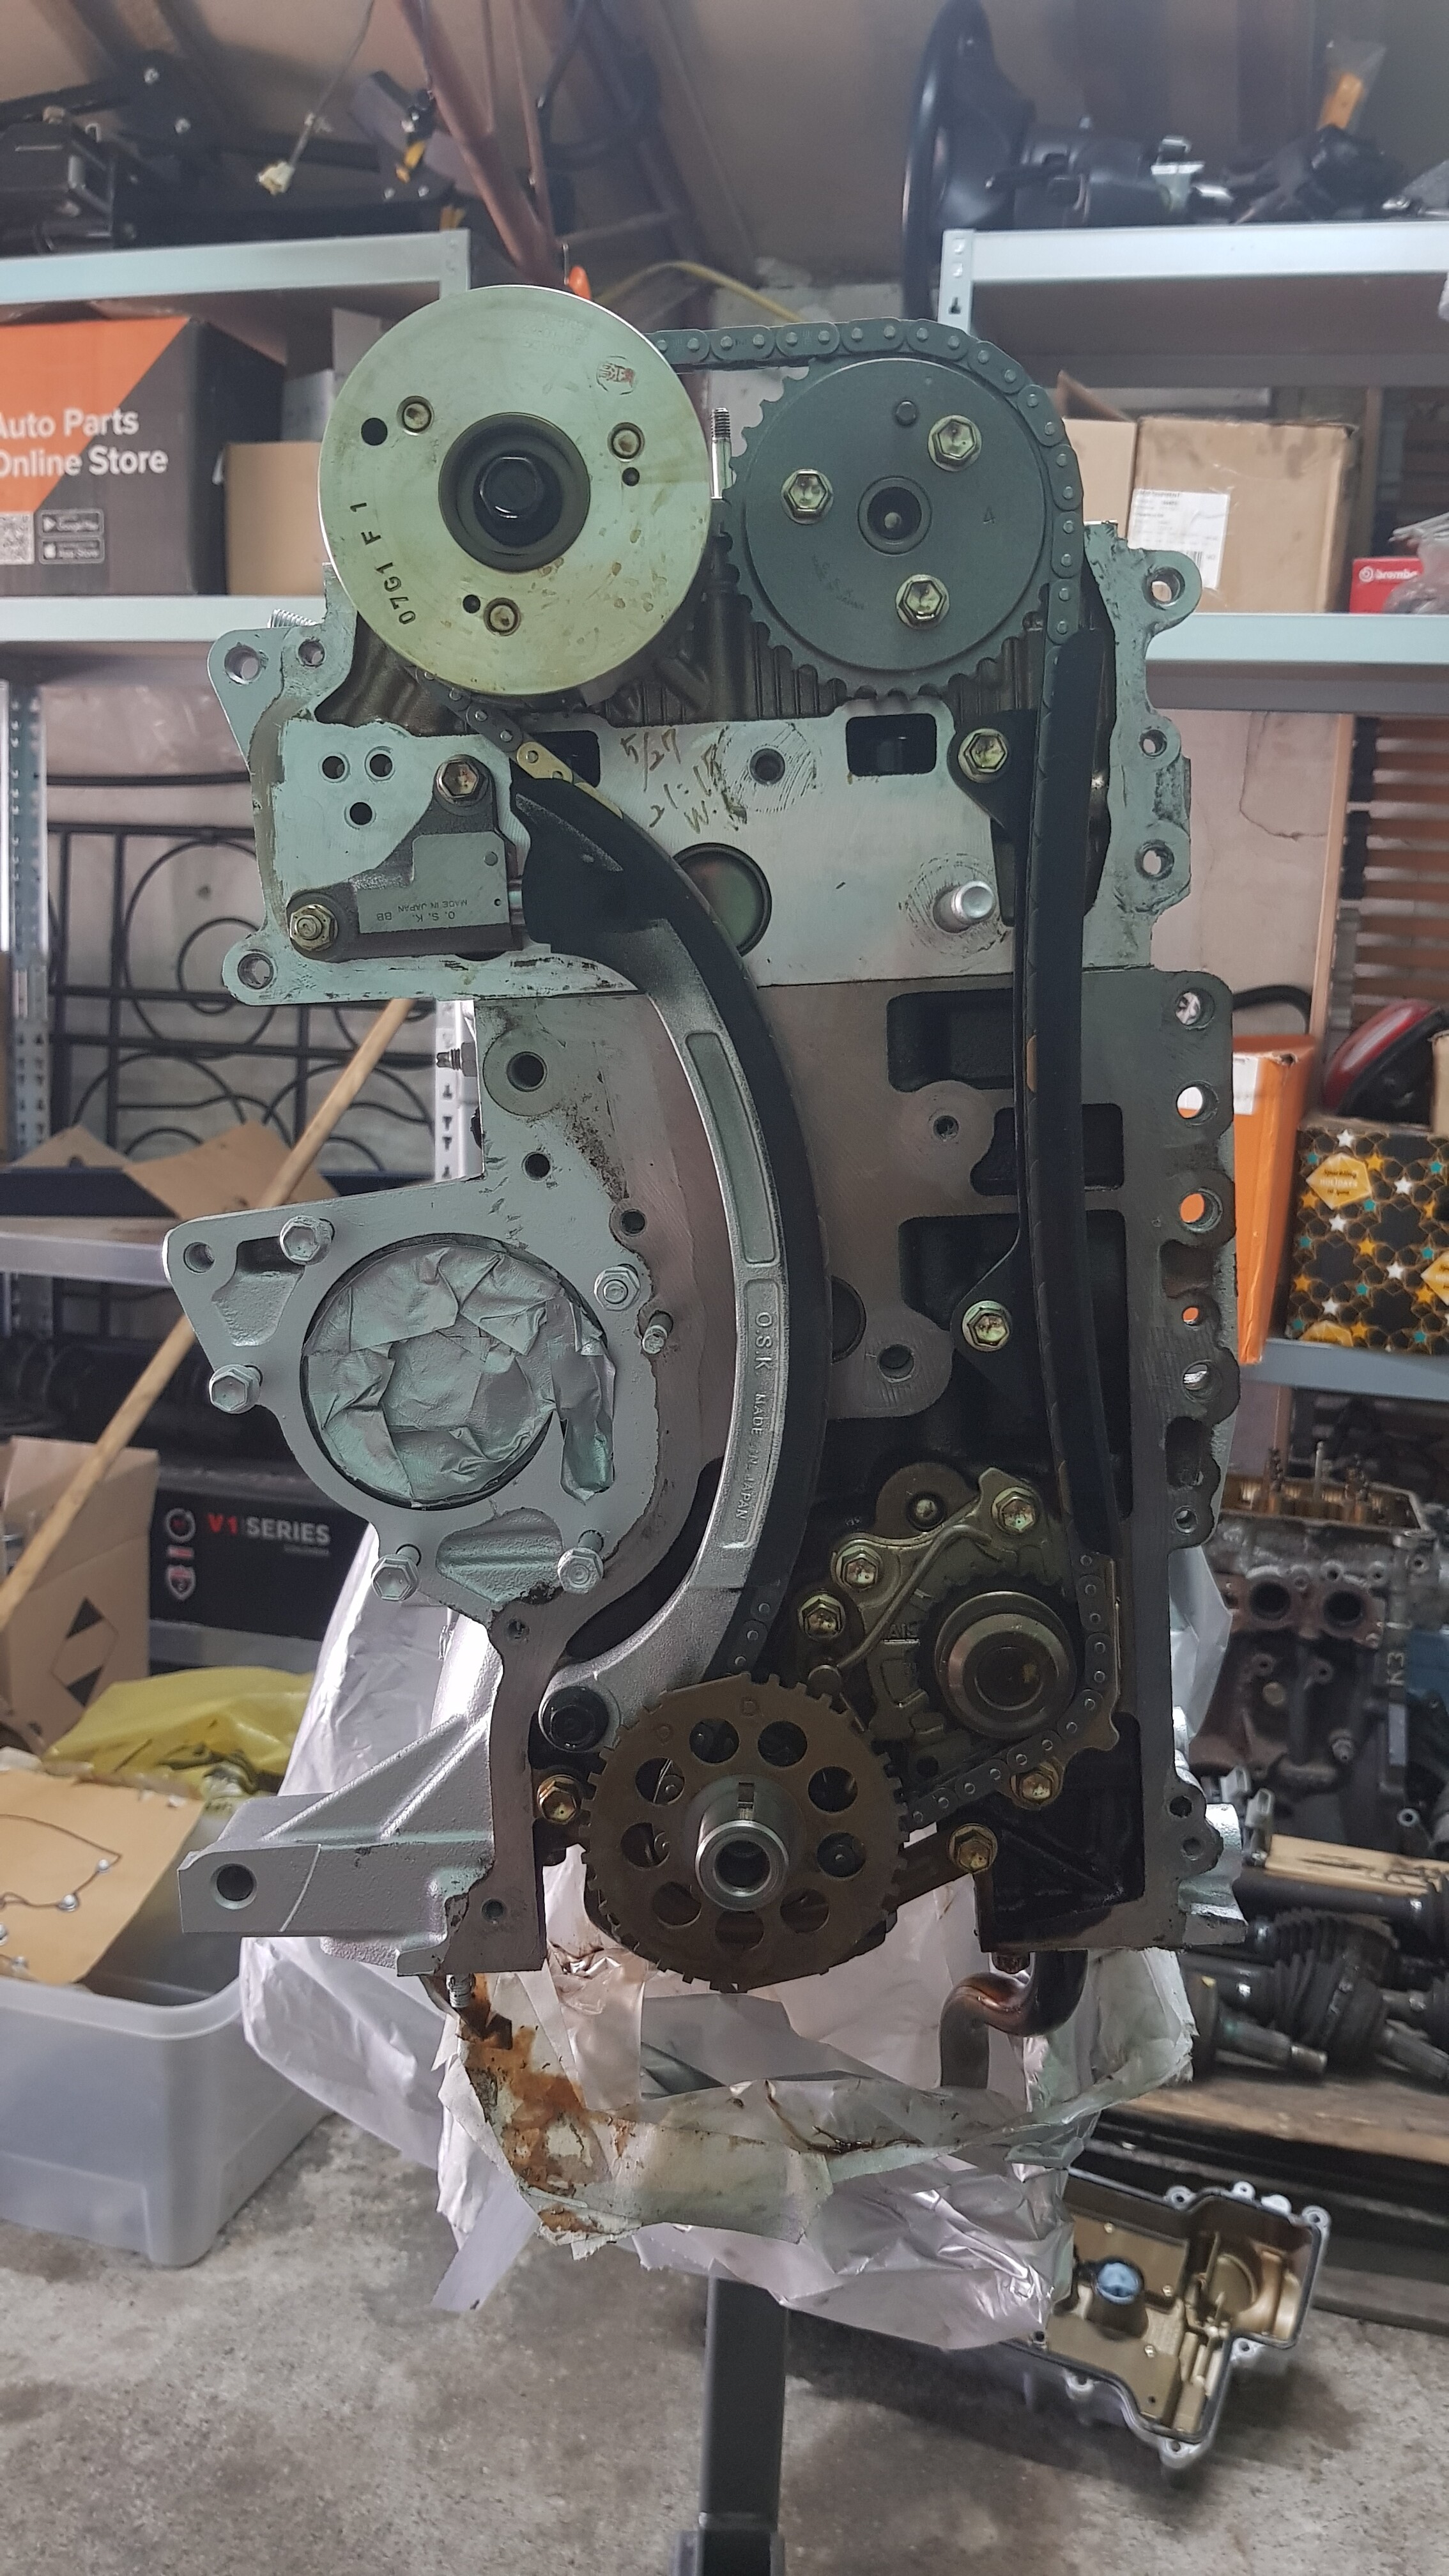
After that, I fitted a lot of things, of which I didn’t take any pictures, so here’s what it looked like in the end:
I fitted a lot of parts and a shitload of gaskets/o-rings, and I think it looks pretty cool.
I replaced the old spark plugs as well, which turned out to be a clever thing to do.
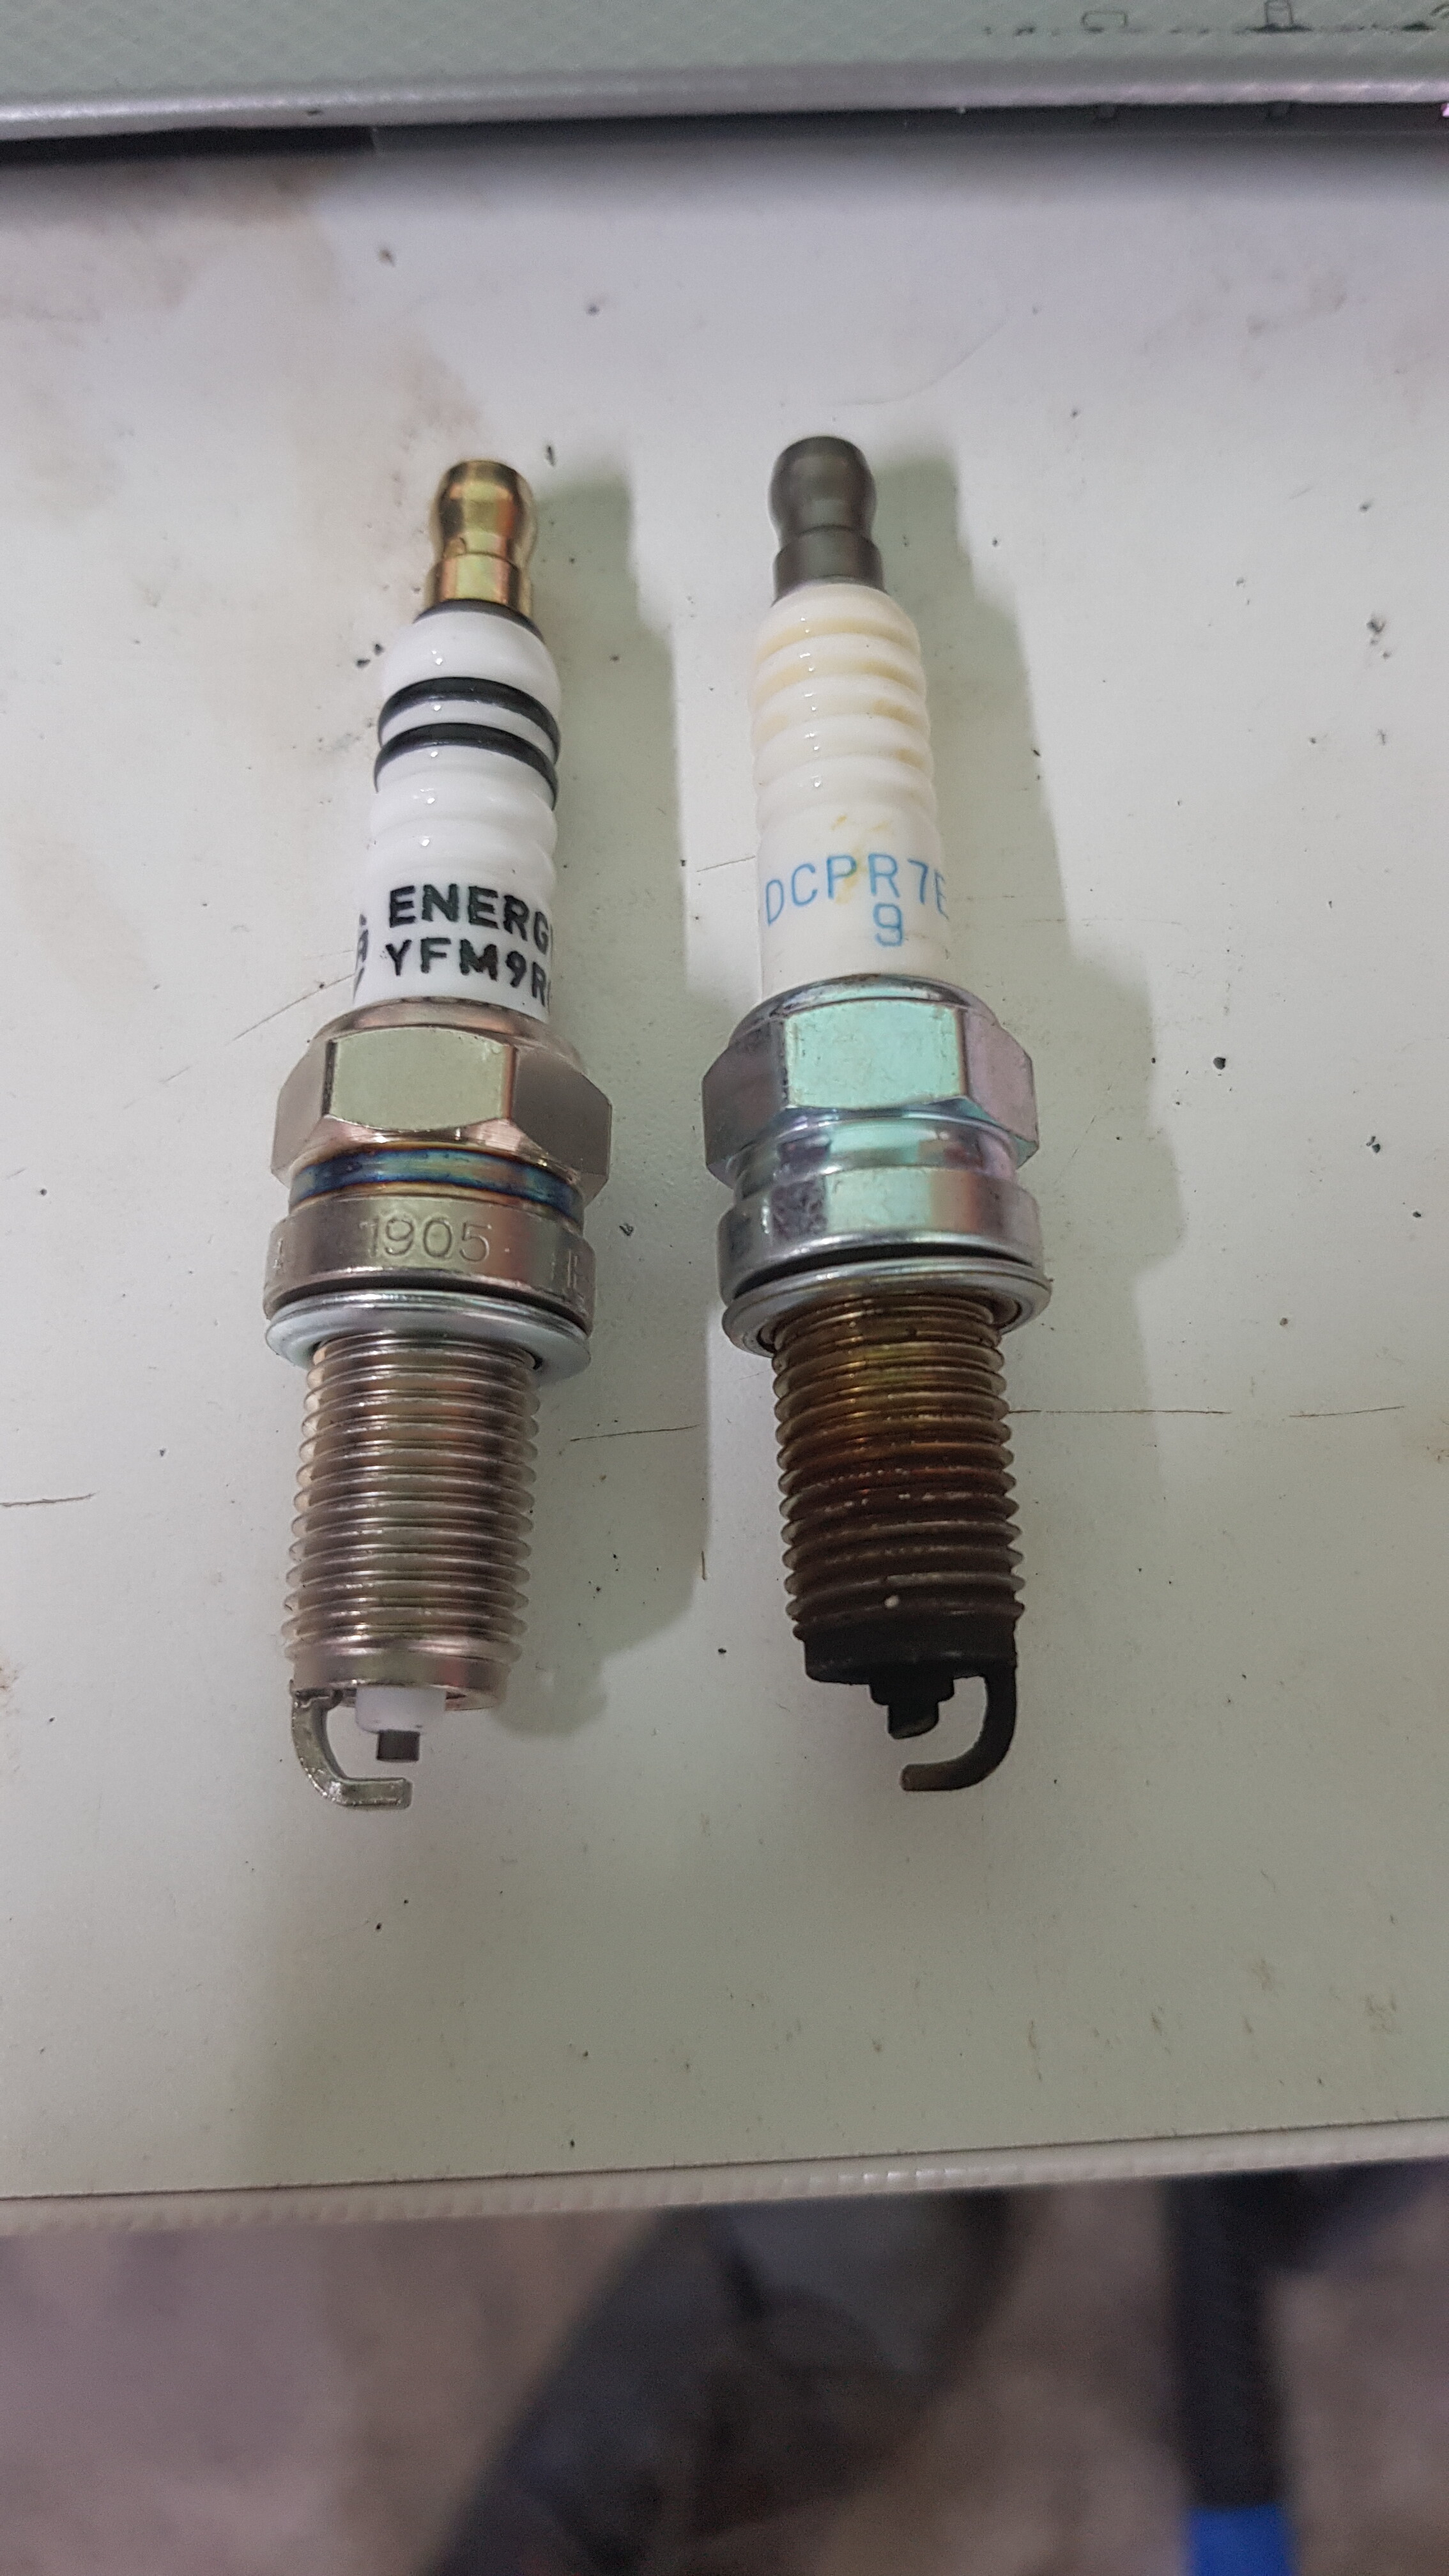
The gap should be 0,8/0,9mm which was around 1,2mm on the old plugs. I think it would’ve ran fine, but it’s nice to know that the values are correct now. Installing the new plugs was… interesting. The manual says they should be torqued down to 18Nm, which meant I had to use my 1/4" torque wrench. Unfortunately, the socket had a 1/2" fitting. Time to get creative.
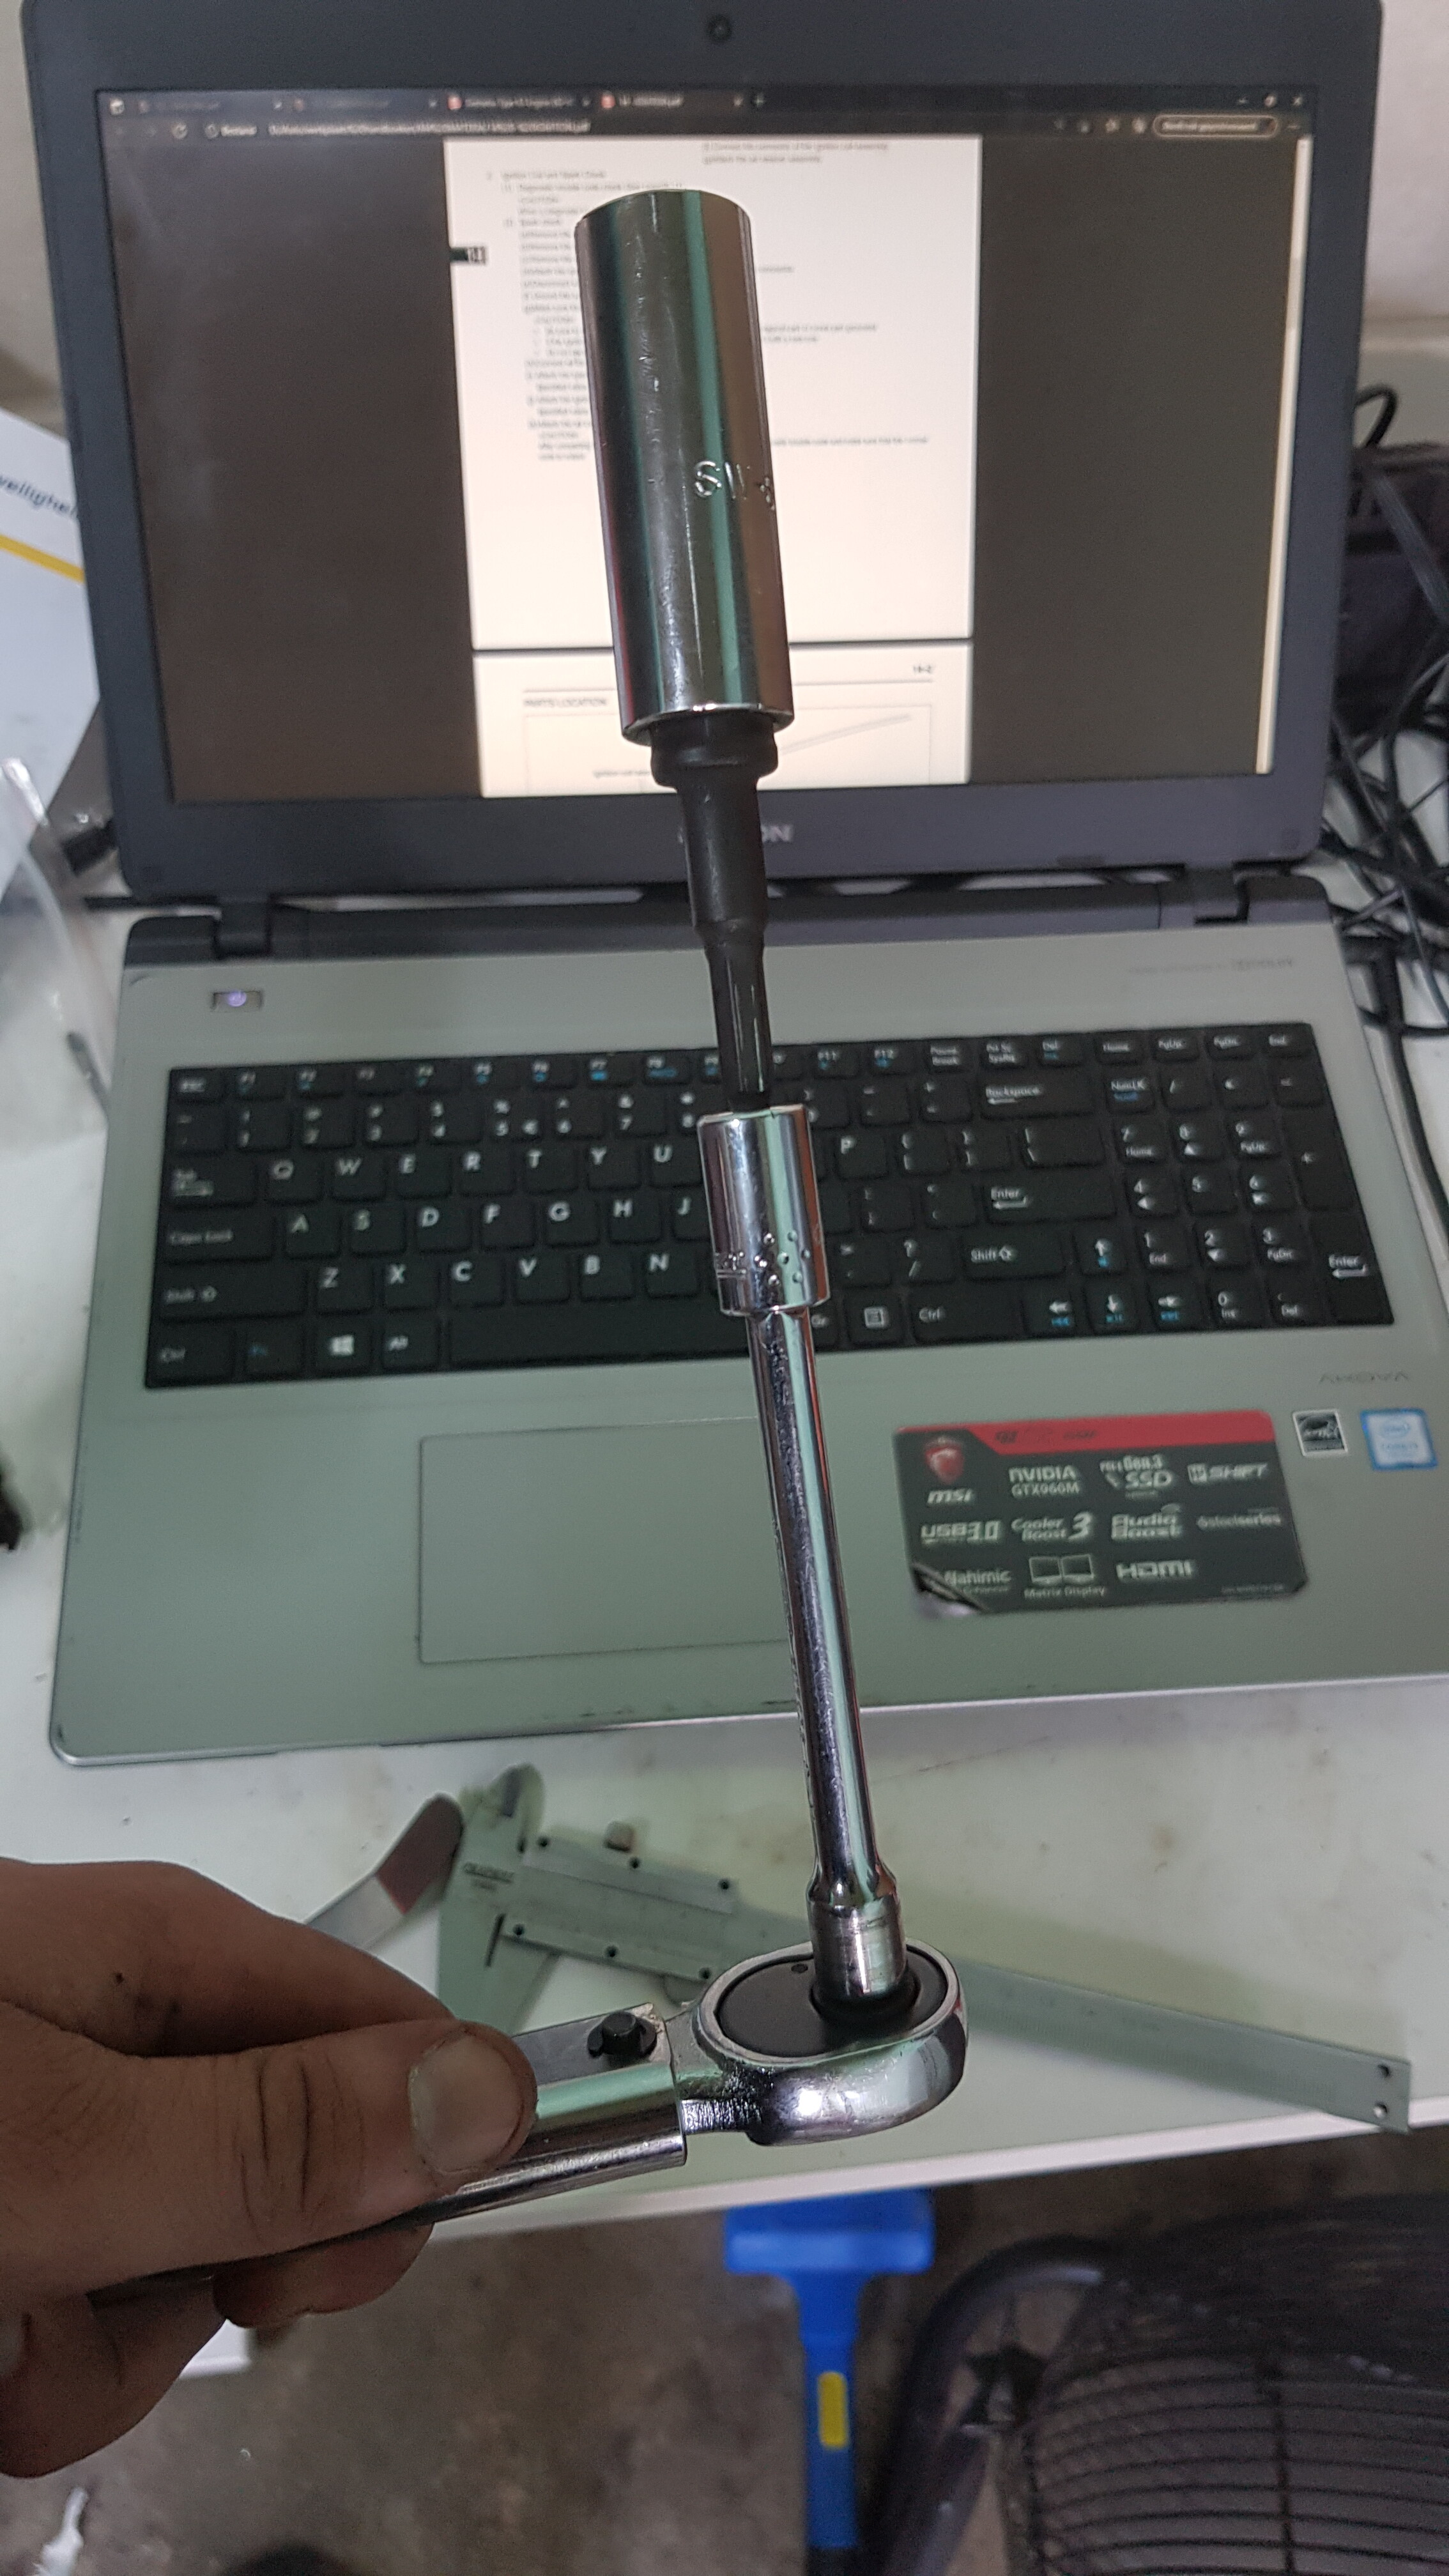
“If it’s stupid but it works, it’s not stupid”
Still stupid though. Speaking of stupid…
DO. NOT. LOOSE. FOCUS.
Did a thing, didn’t go so well. I wasn’t sure if I wanted to post this or not, but stupid mistakes are part of working on cars, and it might prevent someone else from making the same mistake.
The reason why the engine is still on the engine stand, is because I had to get a new timing chain cover. When I replaced the timing chain and put back all the covers, I somehow spaced out. In order to put back the valve cover correctly, you need to tighten the bolts in a specific order. I knew that, so I started by putting all the bolts in place, and tighten them by hand. Or at least, that was the plan. Instead, it put bolt #10 in its place (because that was the one closest to me), and tightened it with a wrench.
“Wait that’s not right”
I undid the bolt, to do it the correct way, but the damage was already done. I started from the beginning, but when I got back to tightening bolt #10… ‘PANG’.
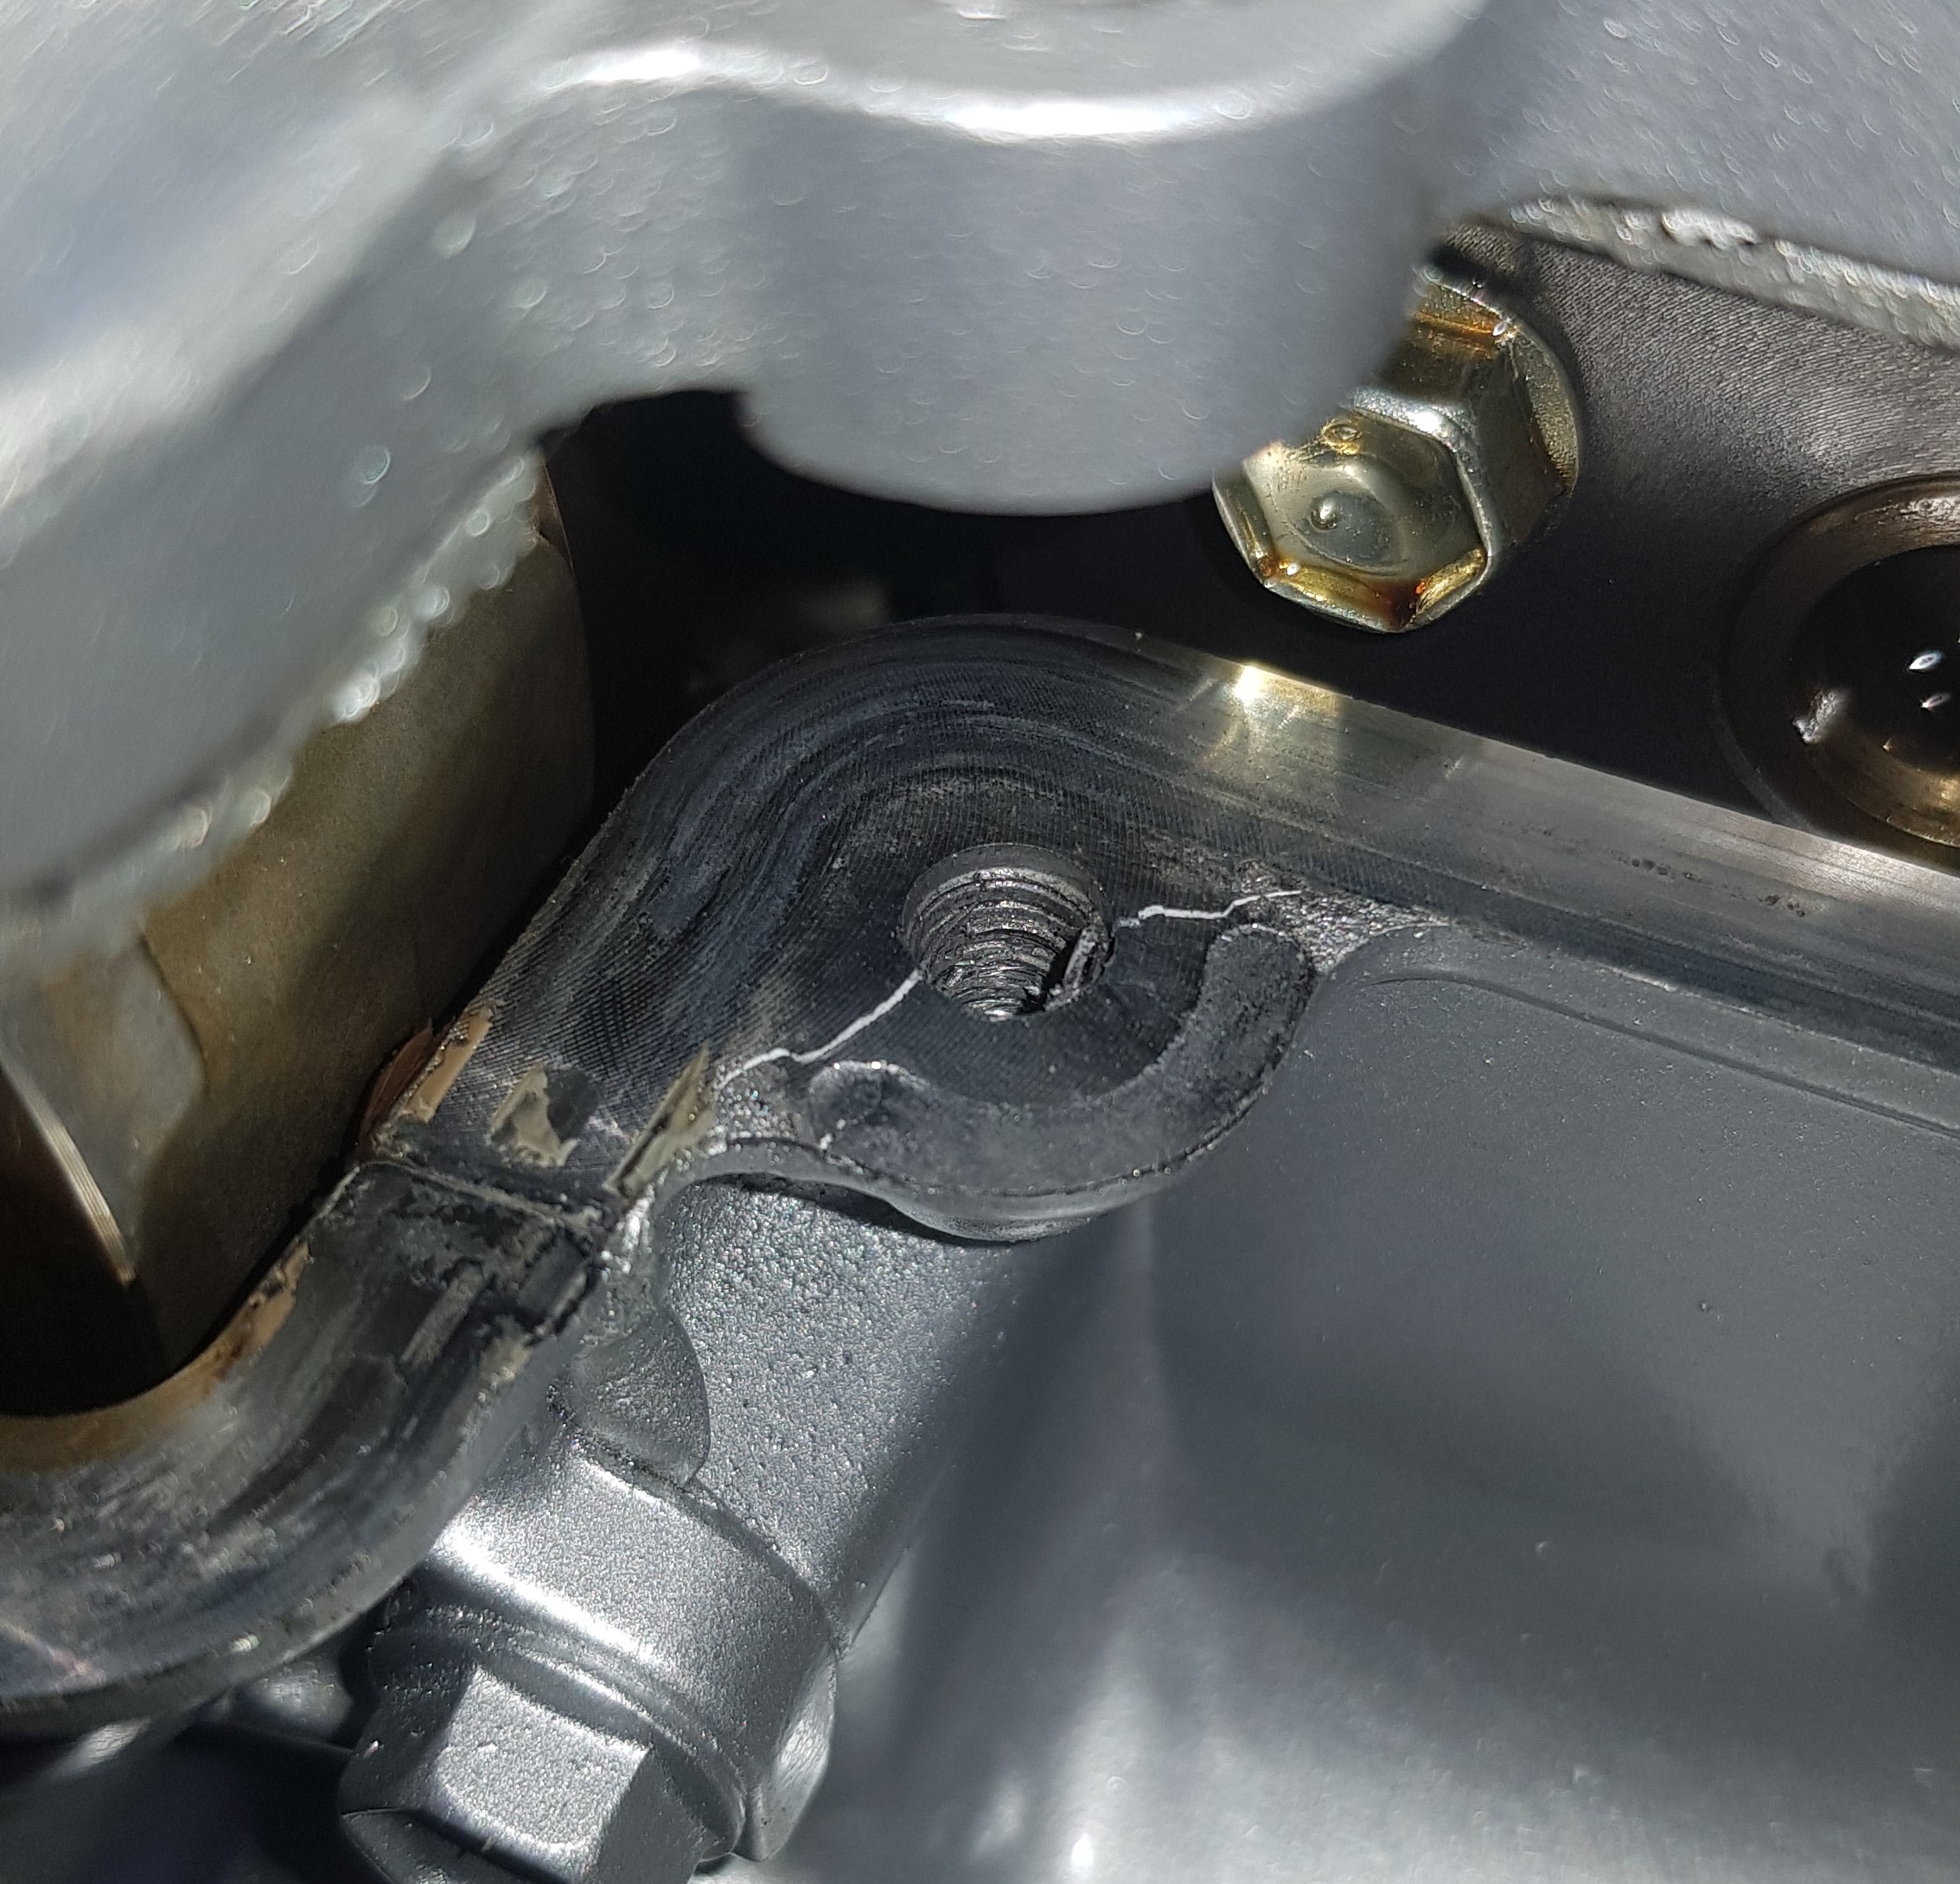
It’s safe to say, that that day was a shitty day.
By tightening it down with a wrench straight away, I put all the weight of the valve cover on that bolt, which didn’t hold very long. I felt incredibly stupid, and considered to lay on the ground and just cry, but in the end I just continued mounting bits. Knowing that the cover had to come off at some point, I mostly fitted parts that wouldn’t have to come off once the new cover was ready to be fitted.
Note: the cover is made from aluminium
WHAT’S NEXT?
Today I got the new cover, so I cleaned and painted it, which means it’s ready to be fitted. However, I’m going to take a little break, because I’ve been working on the engine non-stop, and I also have to wait for the valve cover gasket to arrive (since the other one immediately decided to disintegrate after my little accident). Things I need to do next week include refurbishing the steering knuckles and brakes, mounting the clutch and gearbox, fitting the hoses for the cooling system, sorting out the wiring loom, and a few small things here and there. After that, it’s pretty much ready to go in. Wish me luck, and I’ll probably post a new update once the engine is in. 'Till then!
11 Likes
regarding the underside of the piston pic, would that be classed as an upskirt shot 
3 Likes
Scheiß, I hope not. Seems pretty NSFW and I don’t think that’s allowed here 

3 Likes
Nice project! Seems like a lot of work.
Was wondering about the front brake calipers: you mentioned 52mm diameter.
What kind of calipers are those? Copen? Materia?
Thanks! At the moment, it is a lot of work yes 
The Materia 1.5 and Sirion 2 1.5 came with 254mm brake discs and 54mm piston calipers
1 Like
HUGE UPDATE
It’s been too long guys, but there’s a good reason for that. I really wanted to make my next post when I sorted things out with the 3SZ. So the fact that you’re reading this, will tell you enough  . But let’s not rush into it, and start at where I left last time. Get ready, because this will take some time to read.
FINISHING THE ENGINE
Last update I told you about the ‘new’ timing chain cover and the order I placed, which (amongst others) included the valve cover gasket. Well, just like the paint I ordered for the engine, this order was delayed by two weeks. Which sucked. In the end I just did what I could without the parts I ordered, which meant I re-used the valve cover gasket. Not ideal, but I have an extra cover ready to be painted, so once I switch covers, I’ll install the new gasket as well. It’s fine
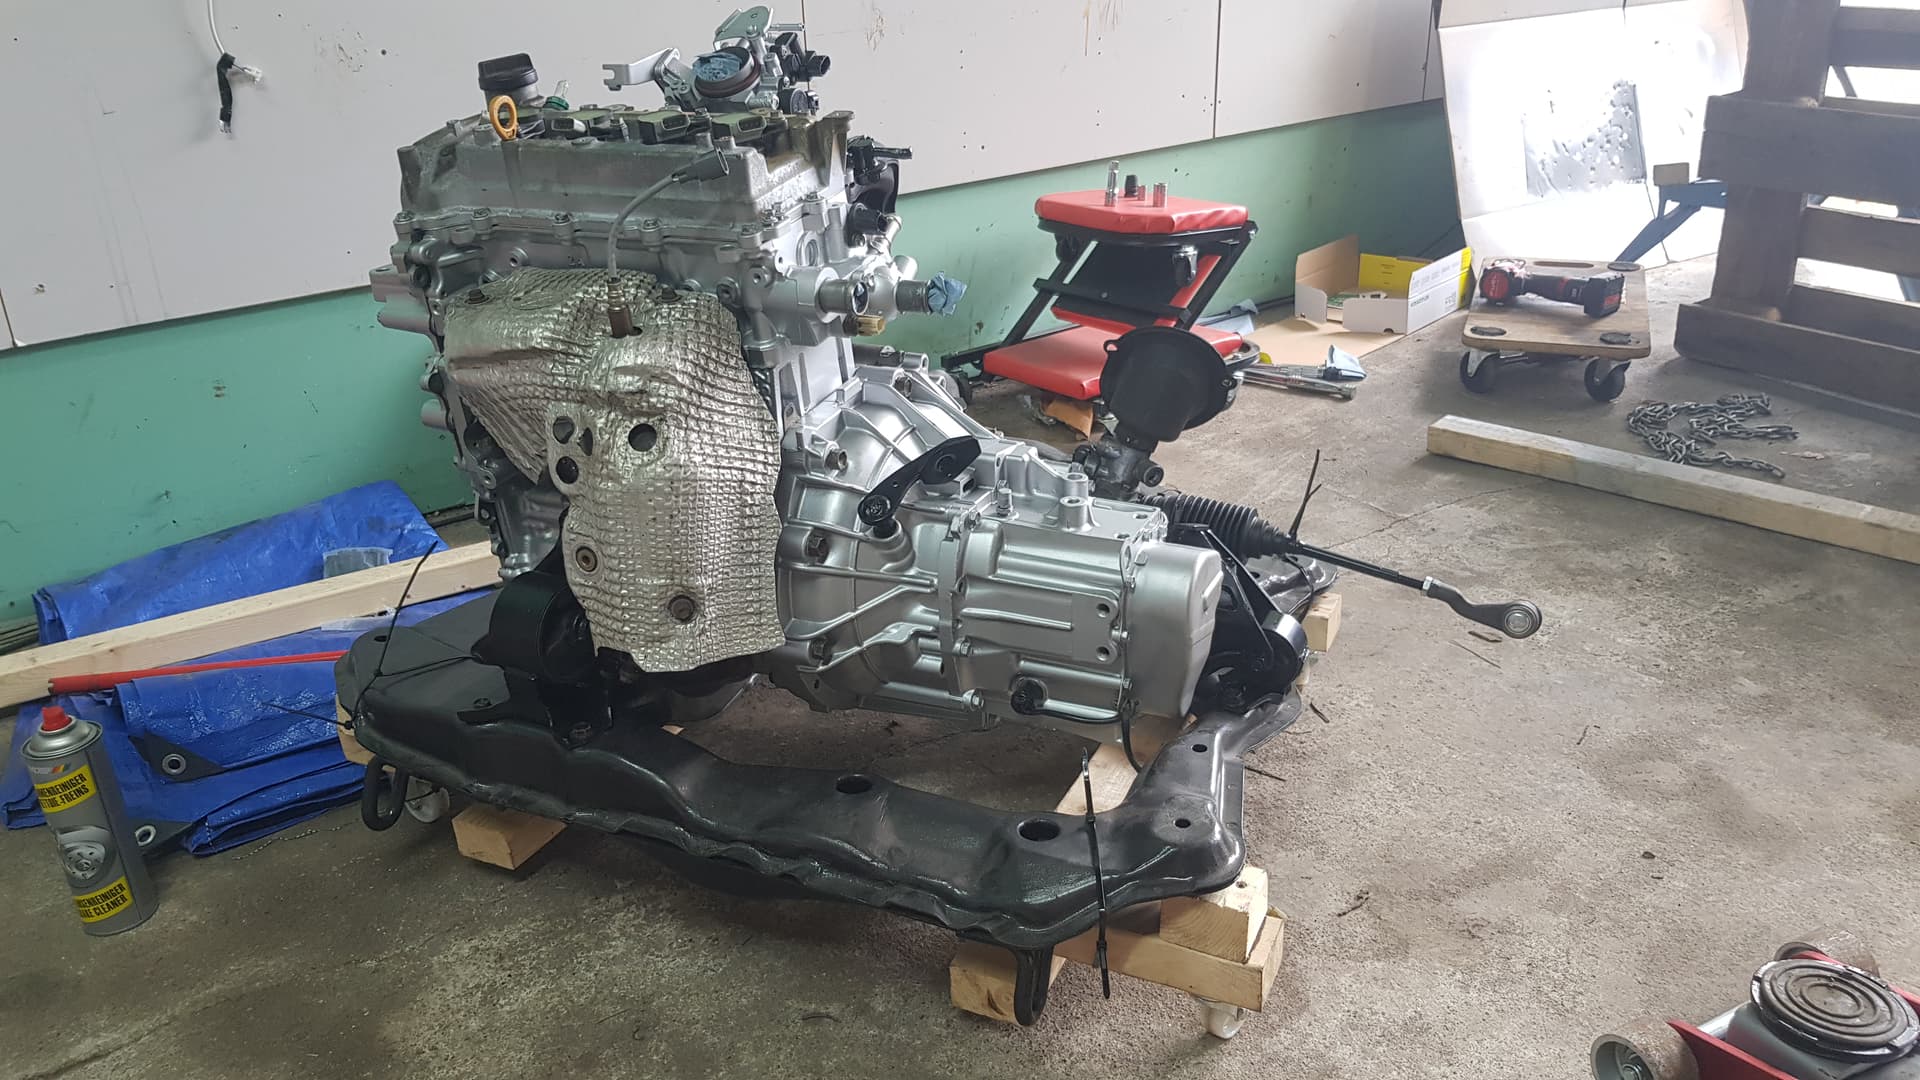
Tada!
To be honest, it’s been over a month since this picture was taken, and as I didn’t take that many pictures at all, I’m not sure what I did to get to this point. What I do know is that I sent this picture to a few people, and that one of them replied with: “you put some loctite on the bolts of the flywheel, right?”
s h i t, I did not.
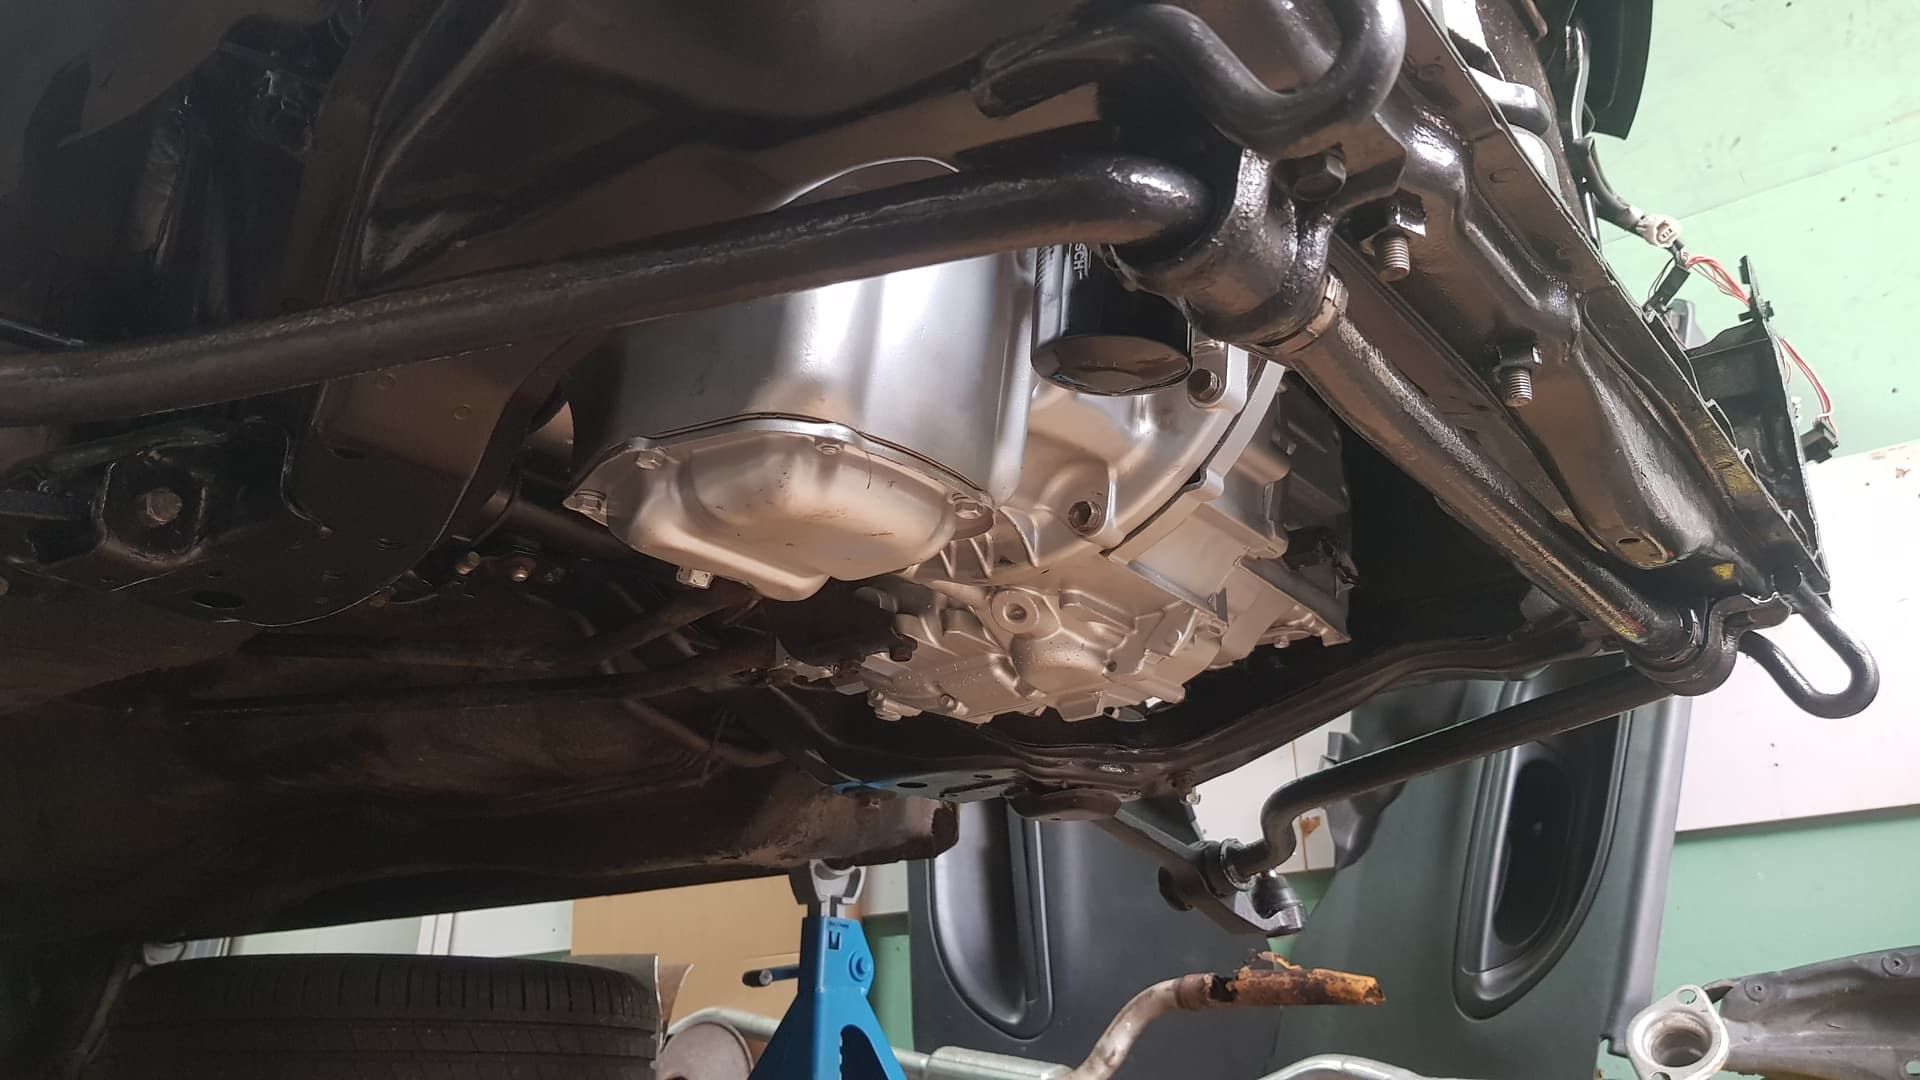
A week later he came by to help me refitting the gearbox and flywheel, but this time with loctite. Naturally, I forgot to put on the metal plate that sits between the gearbox and engine, so we had to do it twice. 
Finally, parts!
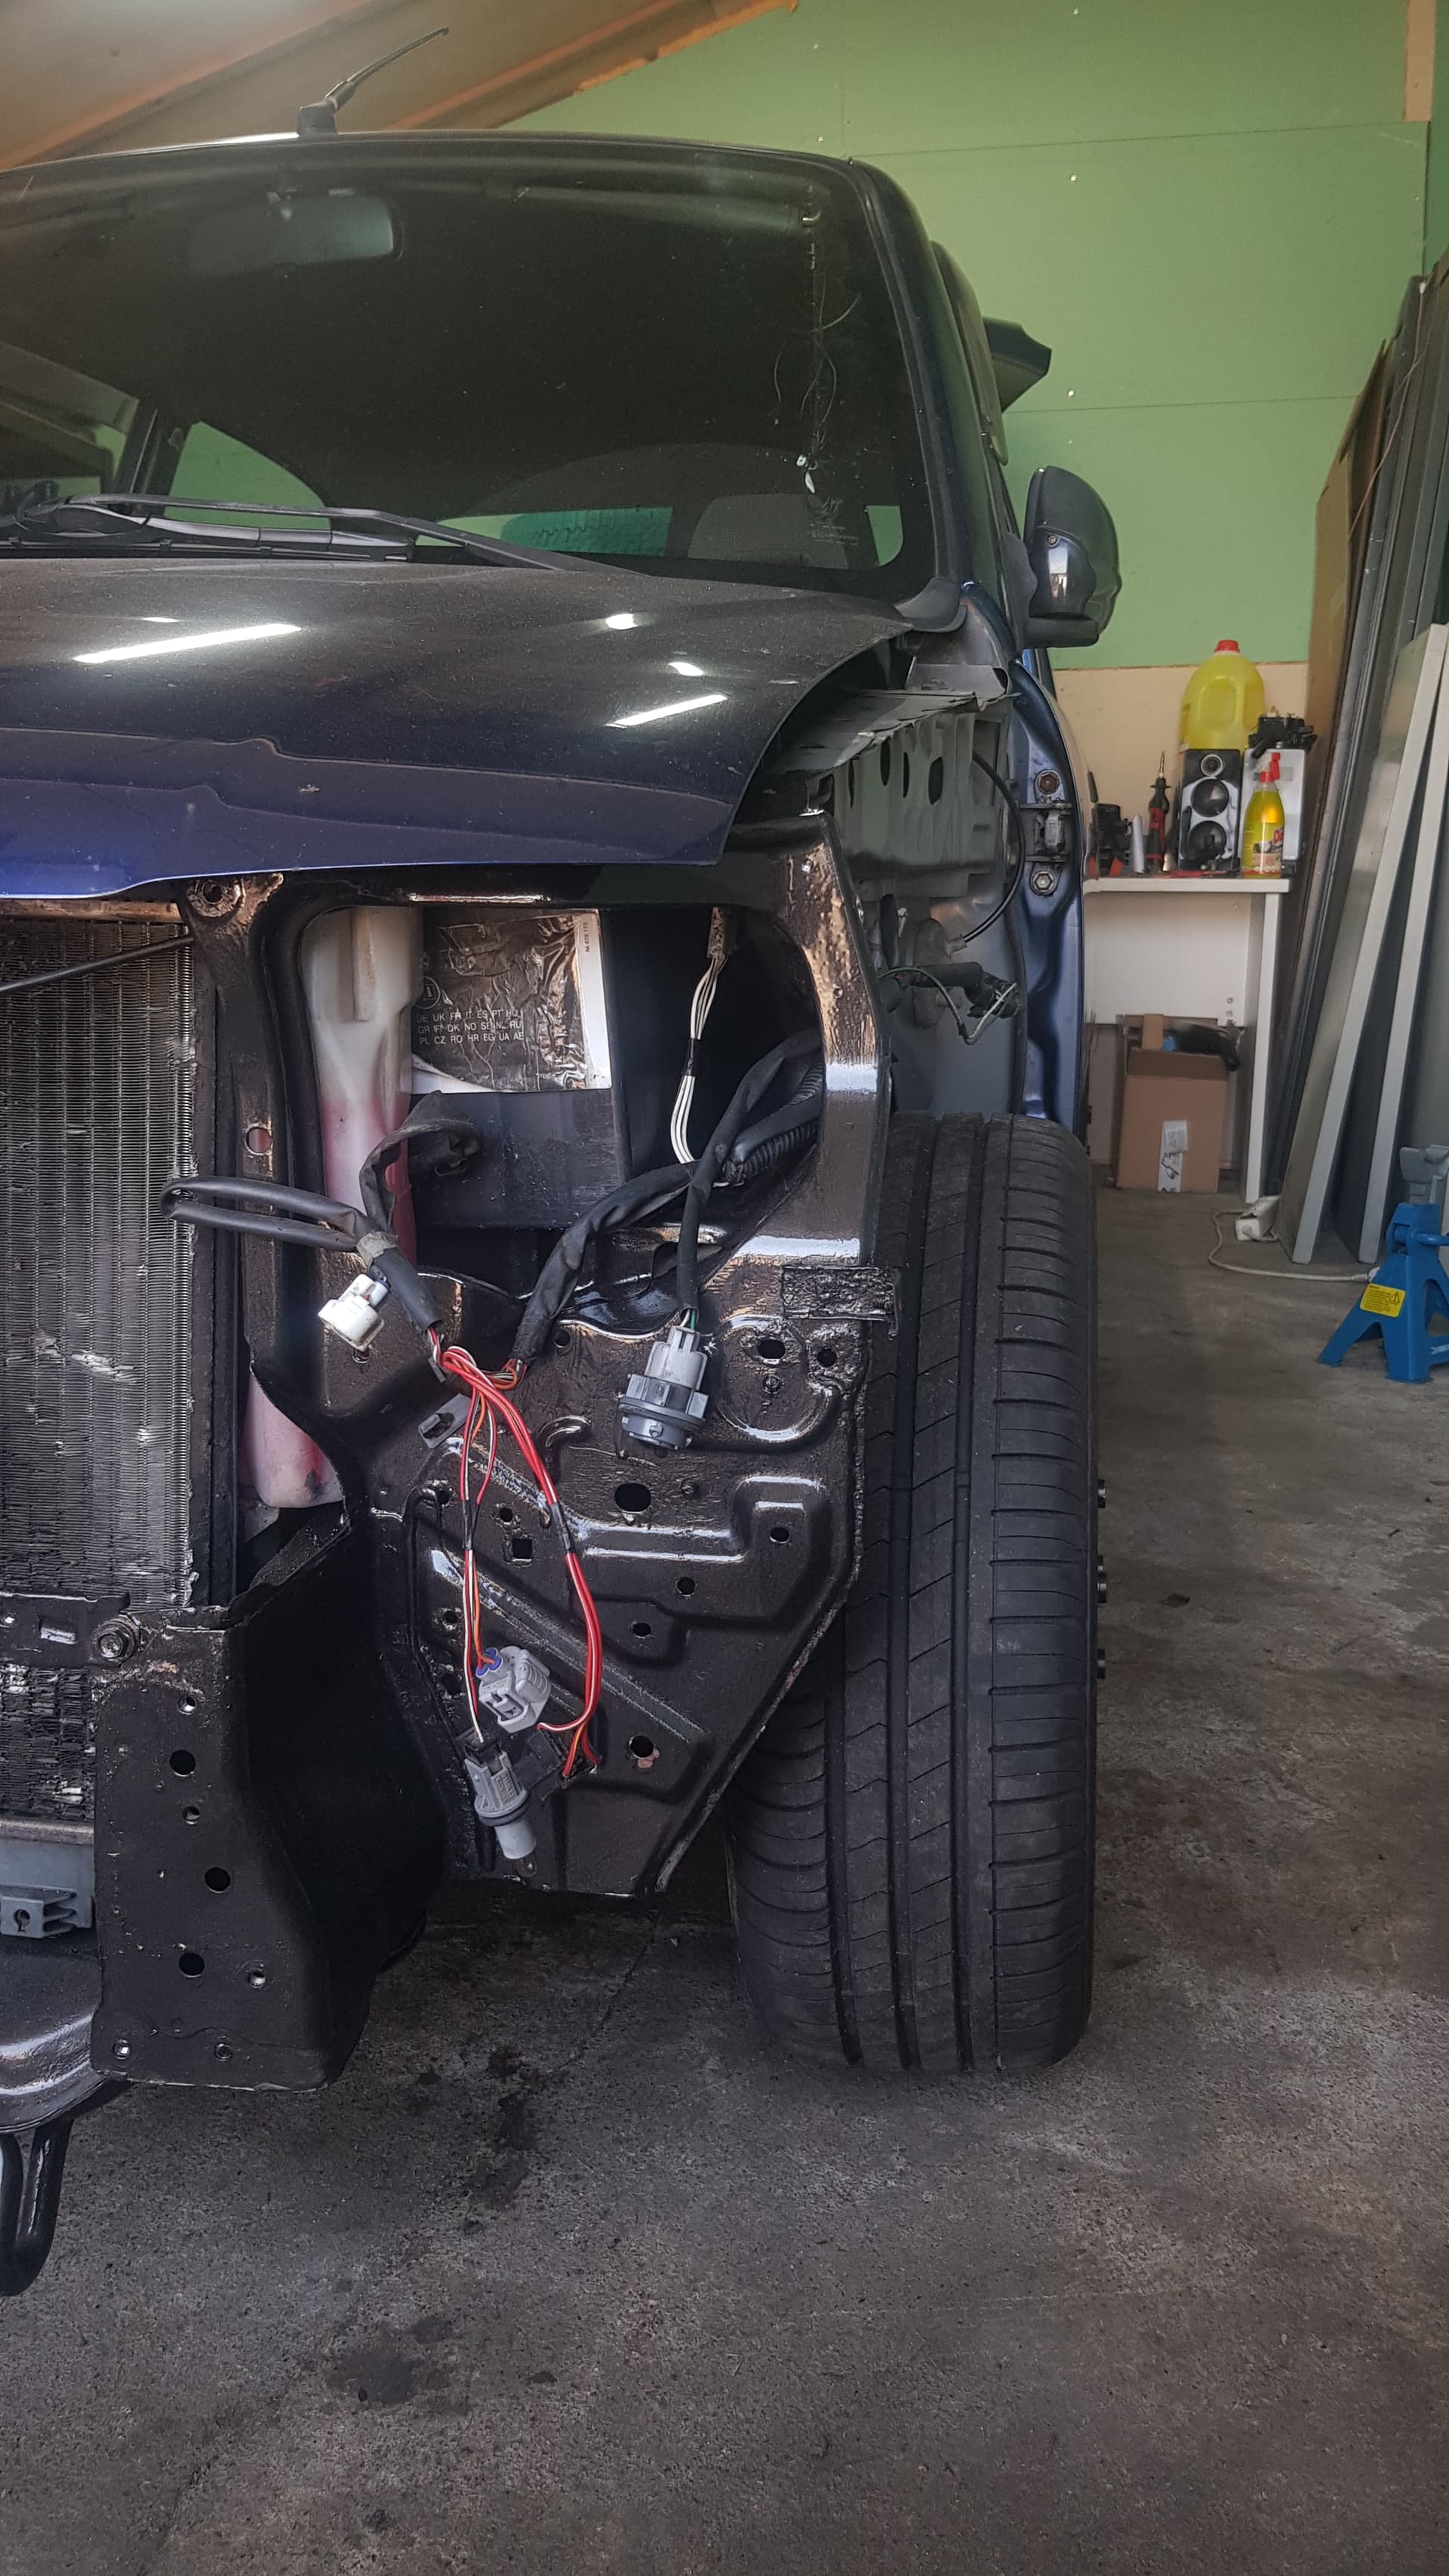
I ordered some exhaust bits, an oil filter, an alternator belt, a valve cover gasket, and some flare nuts for the clutch system (more on that later). Luckily I took out the glove box a few days earlier, because that space was exactly what I needed to fit the exhaust diagonally in the car. Like a glove.
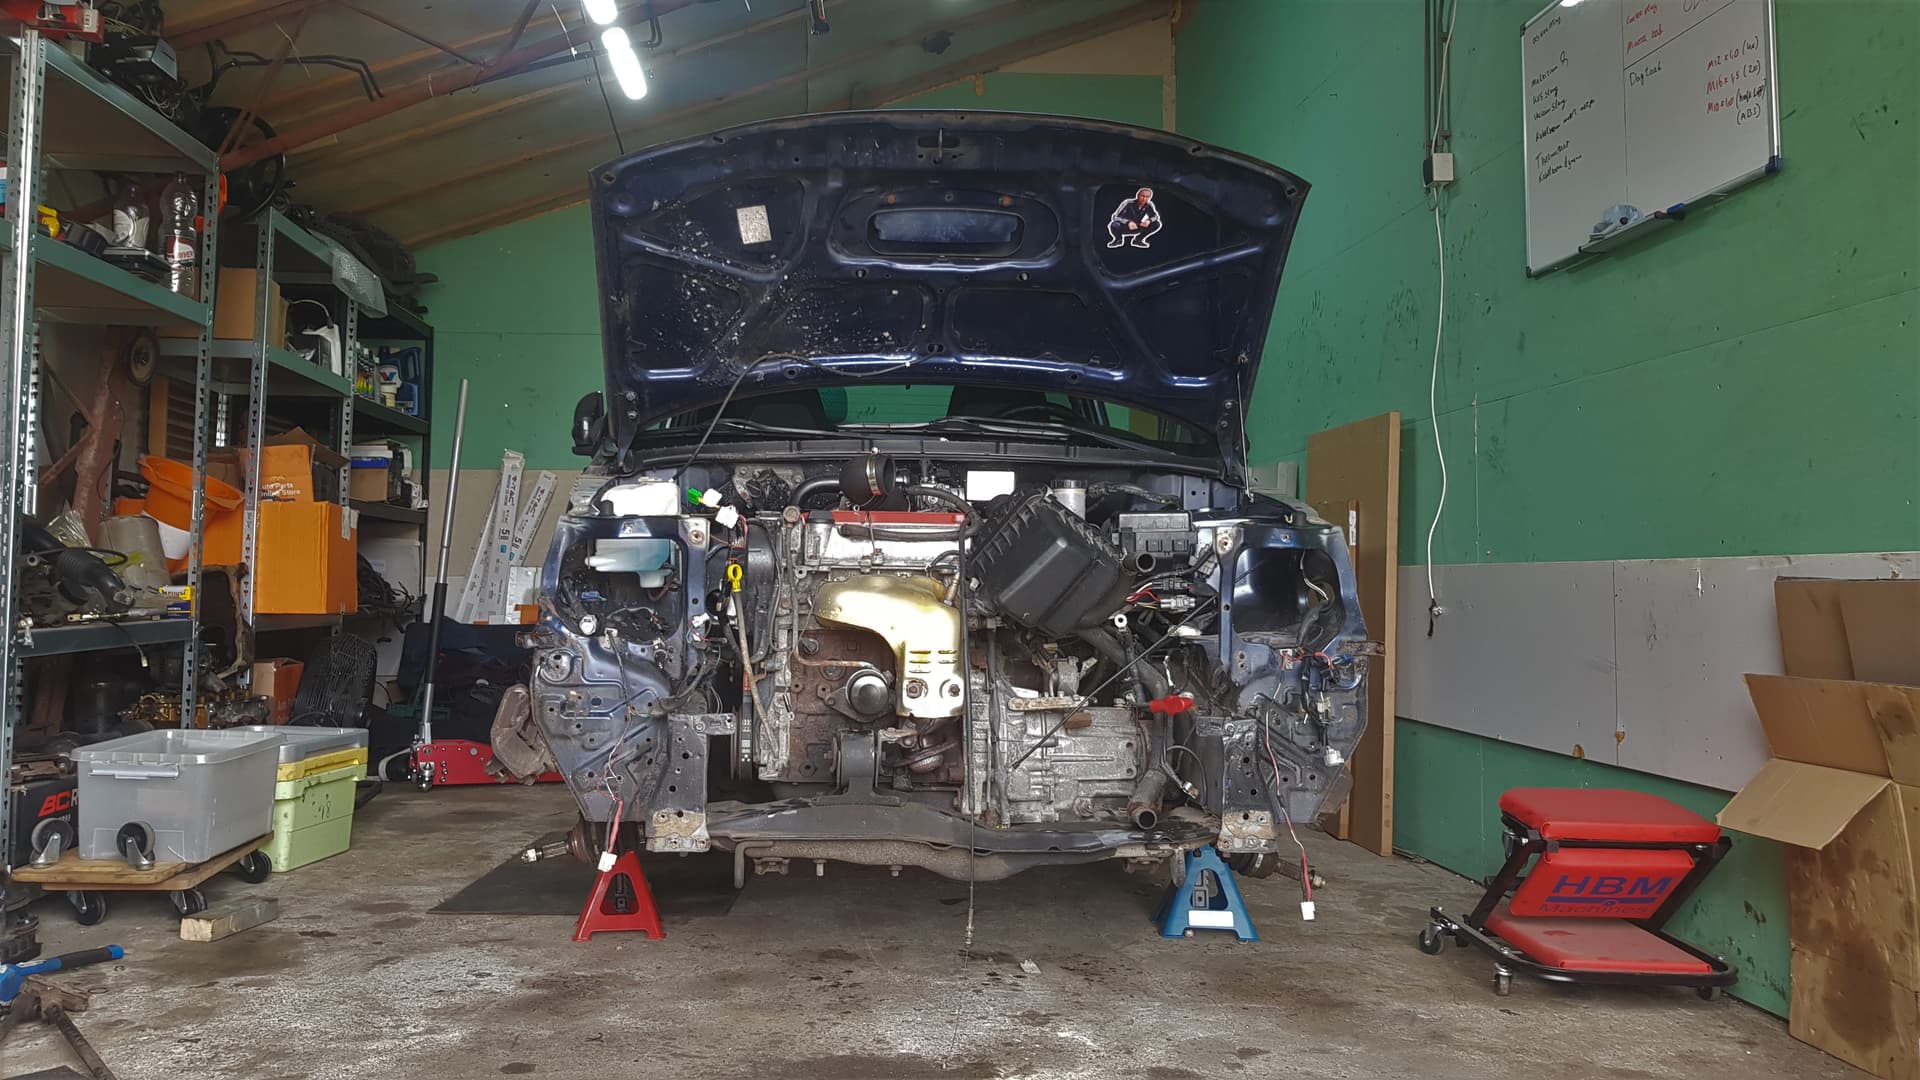
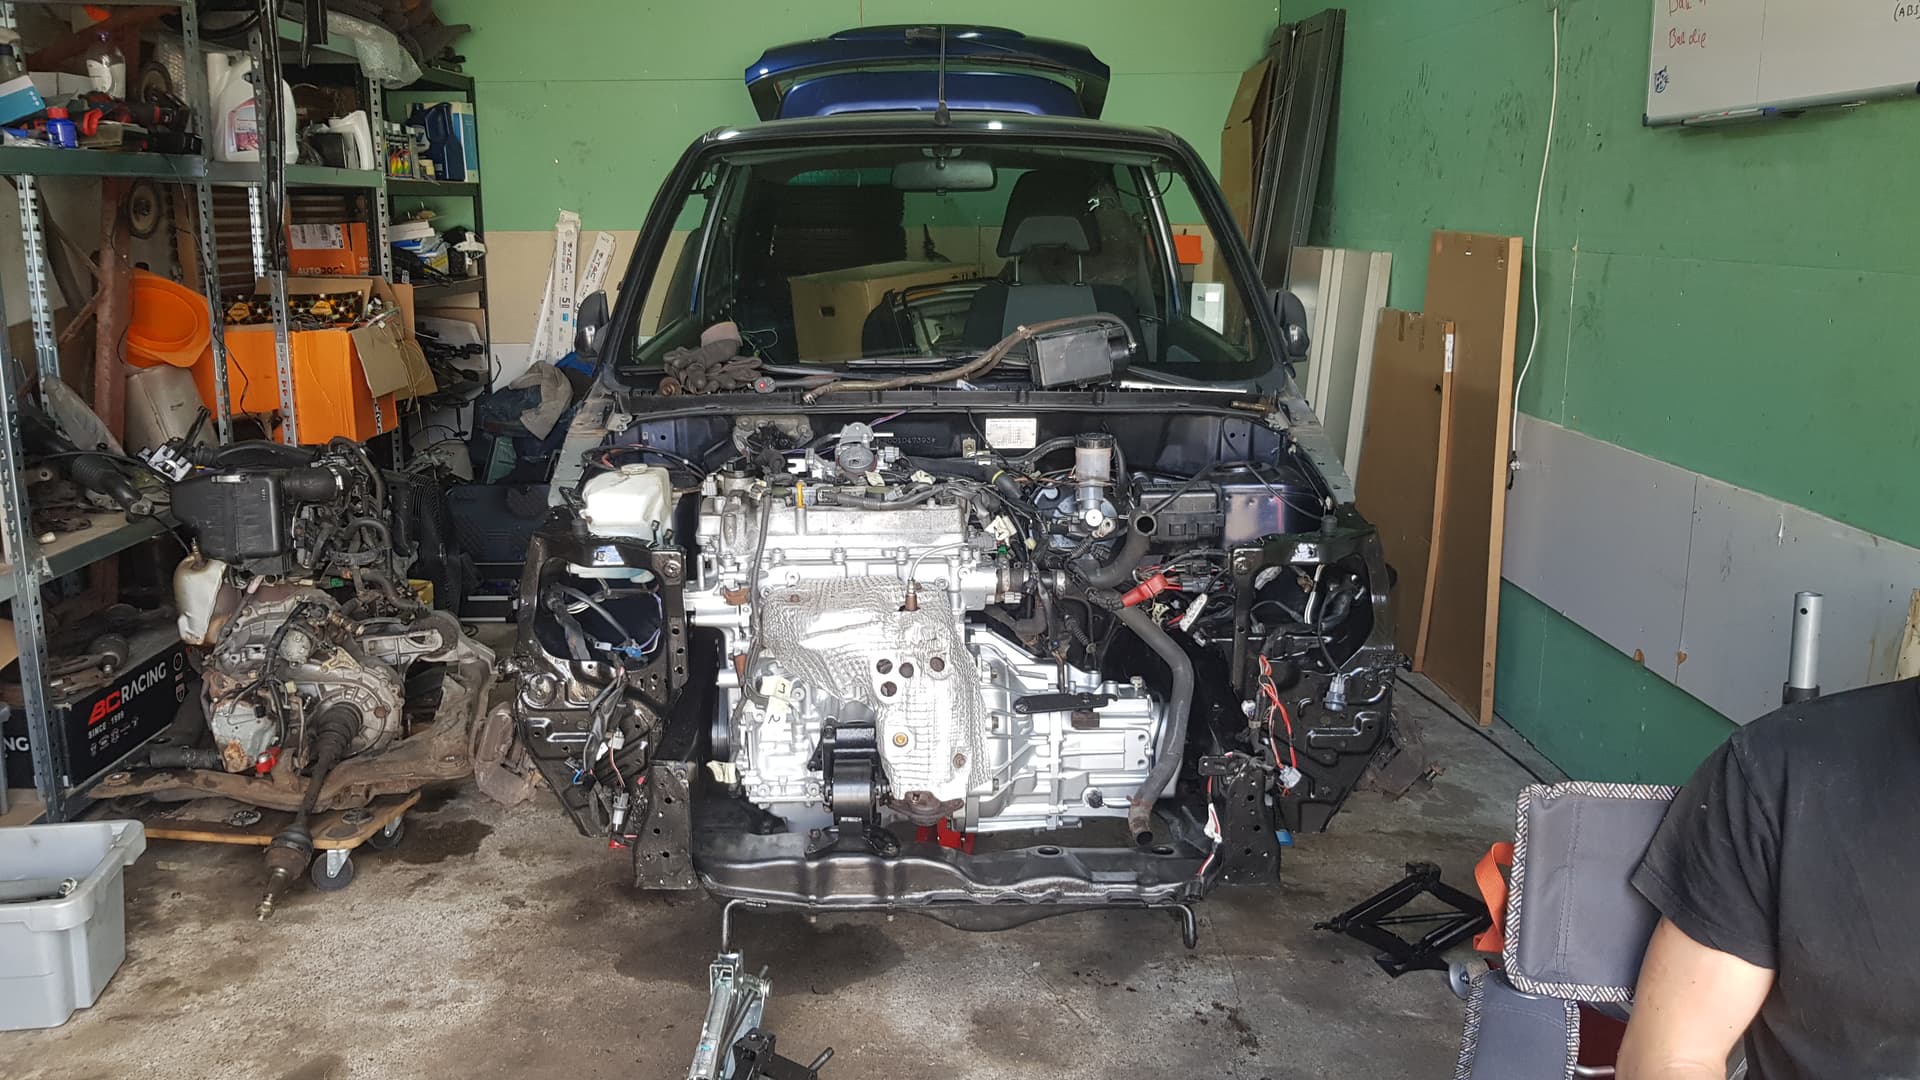
Like I said, it’s been a while since all of this happened, so I’m not really sure what I did after I put the engine on the subframe. This is the last picture I took of the car, before the next big step…
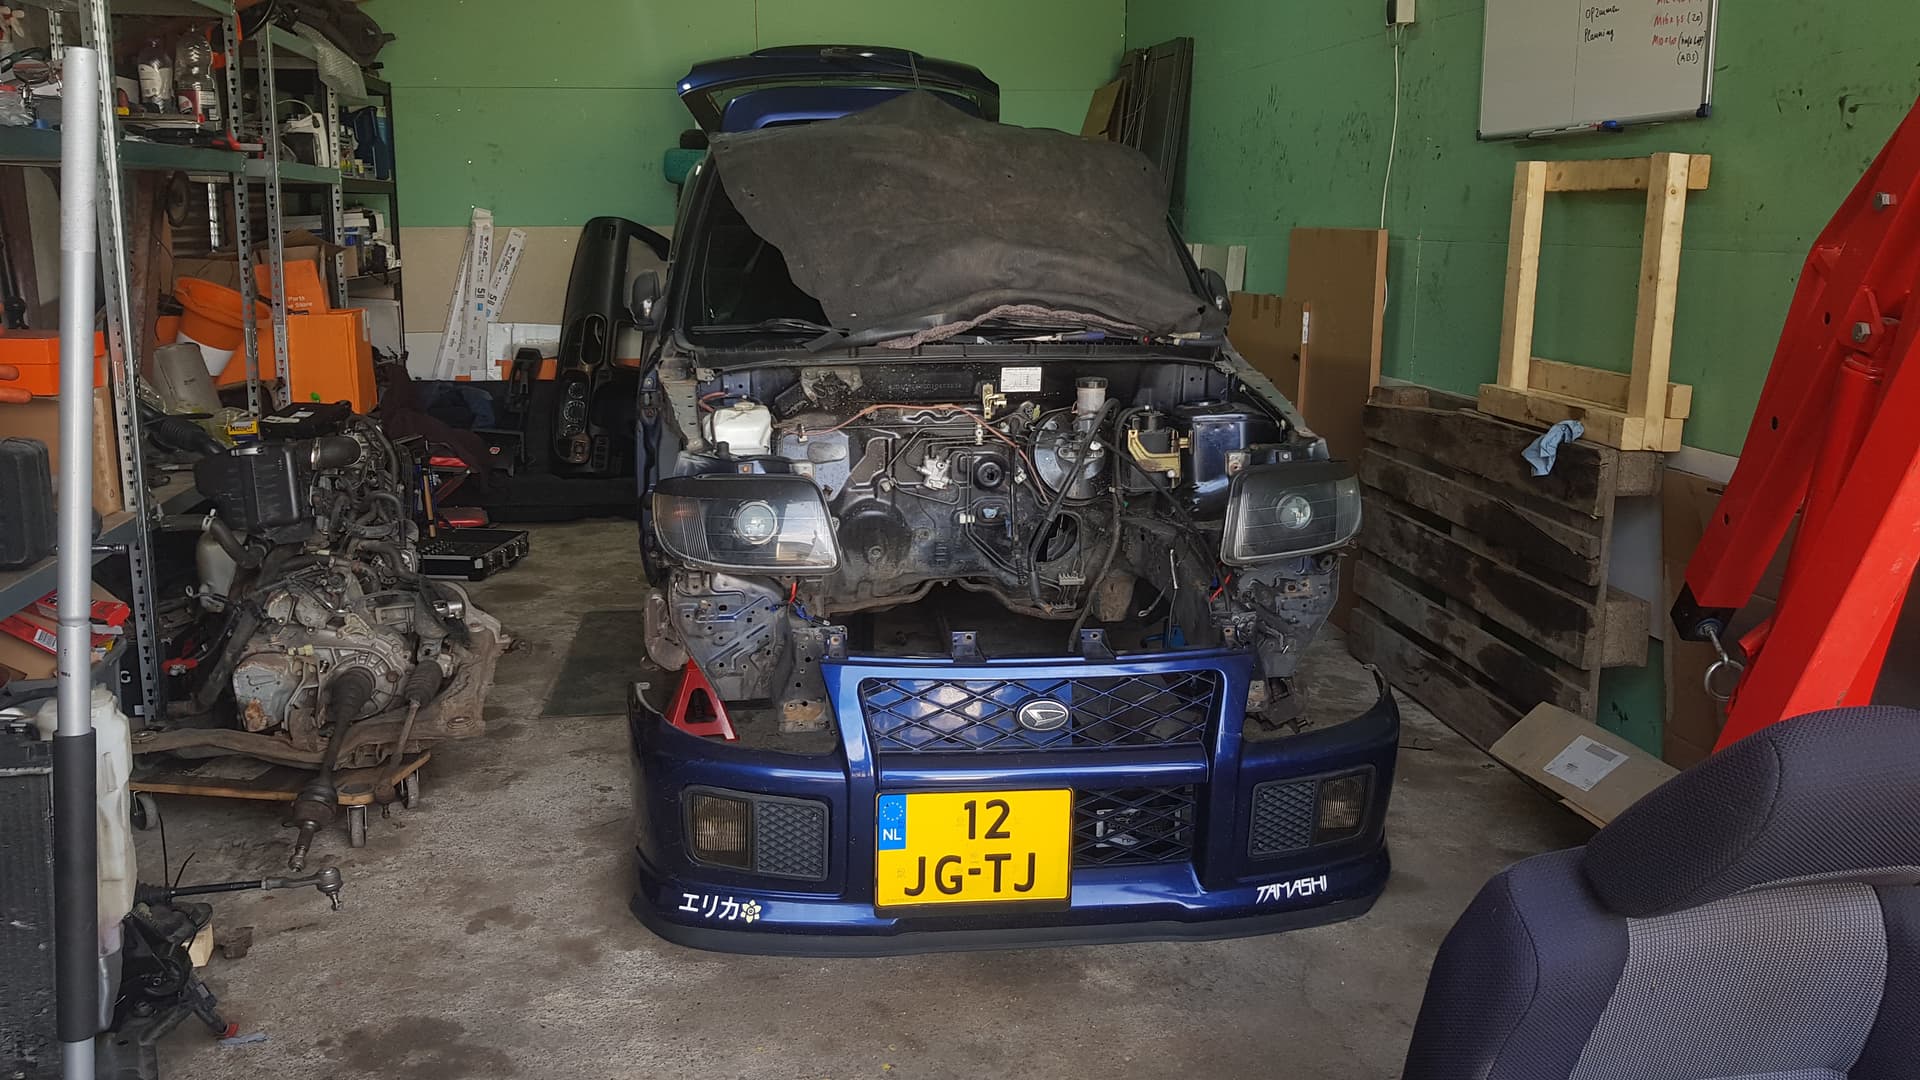
SO LONG, THREEBANGER
Scary, but also exciting: time to take out the EJ!
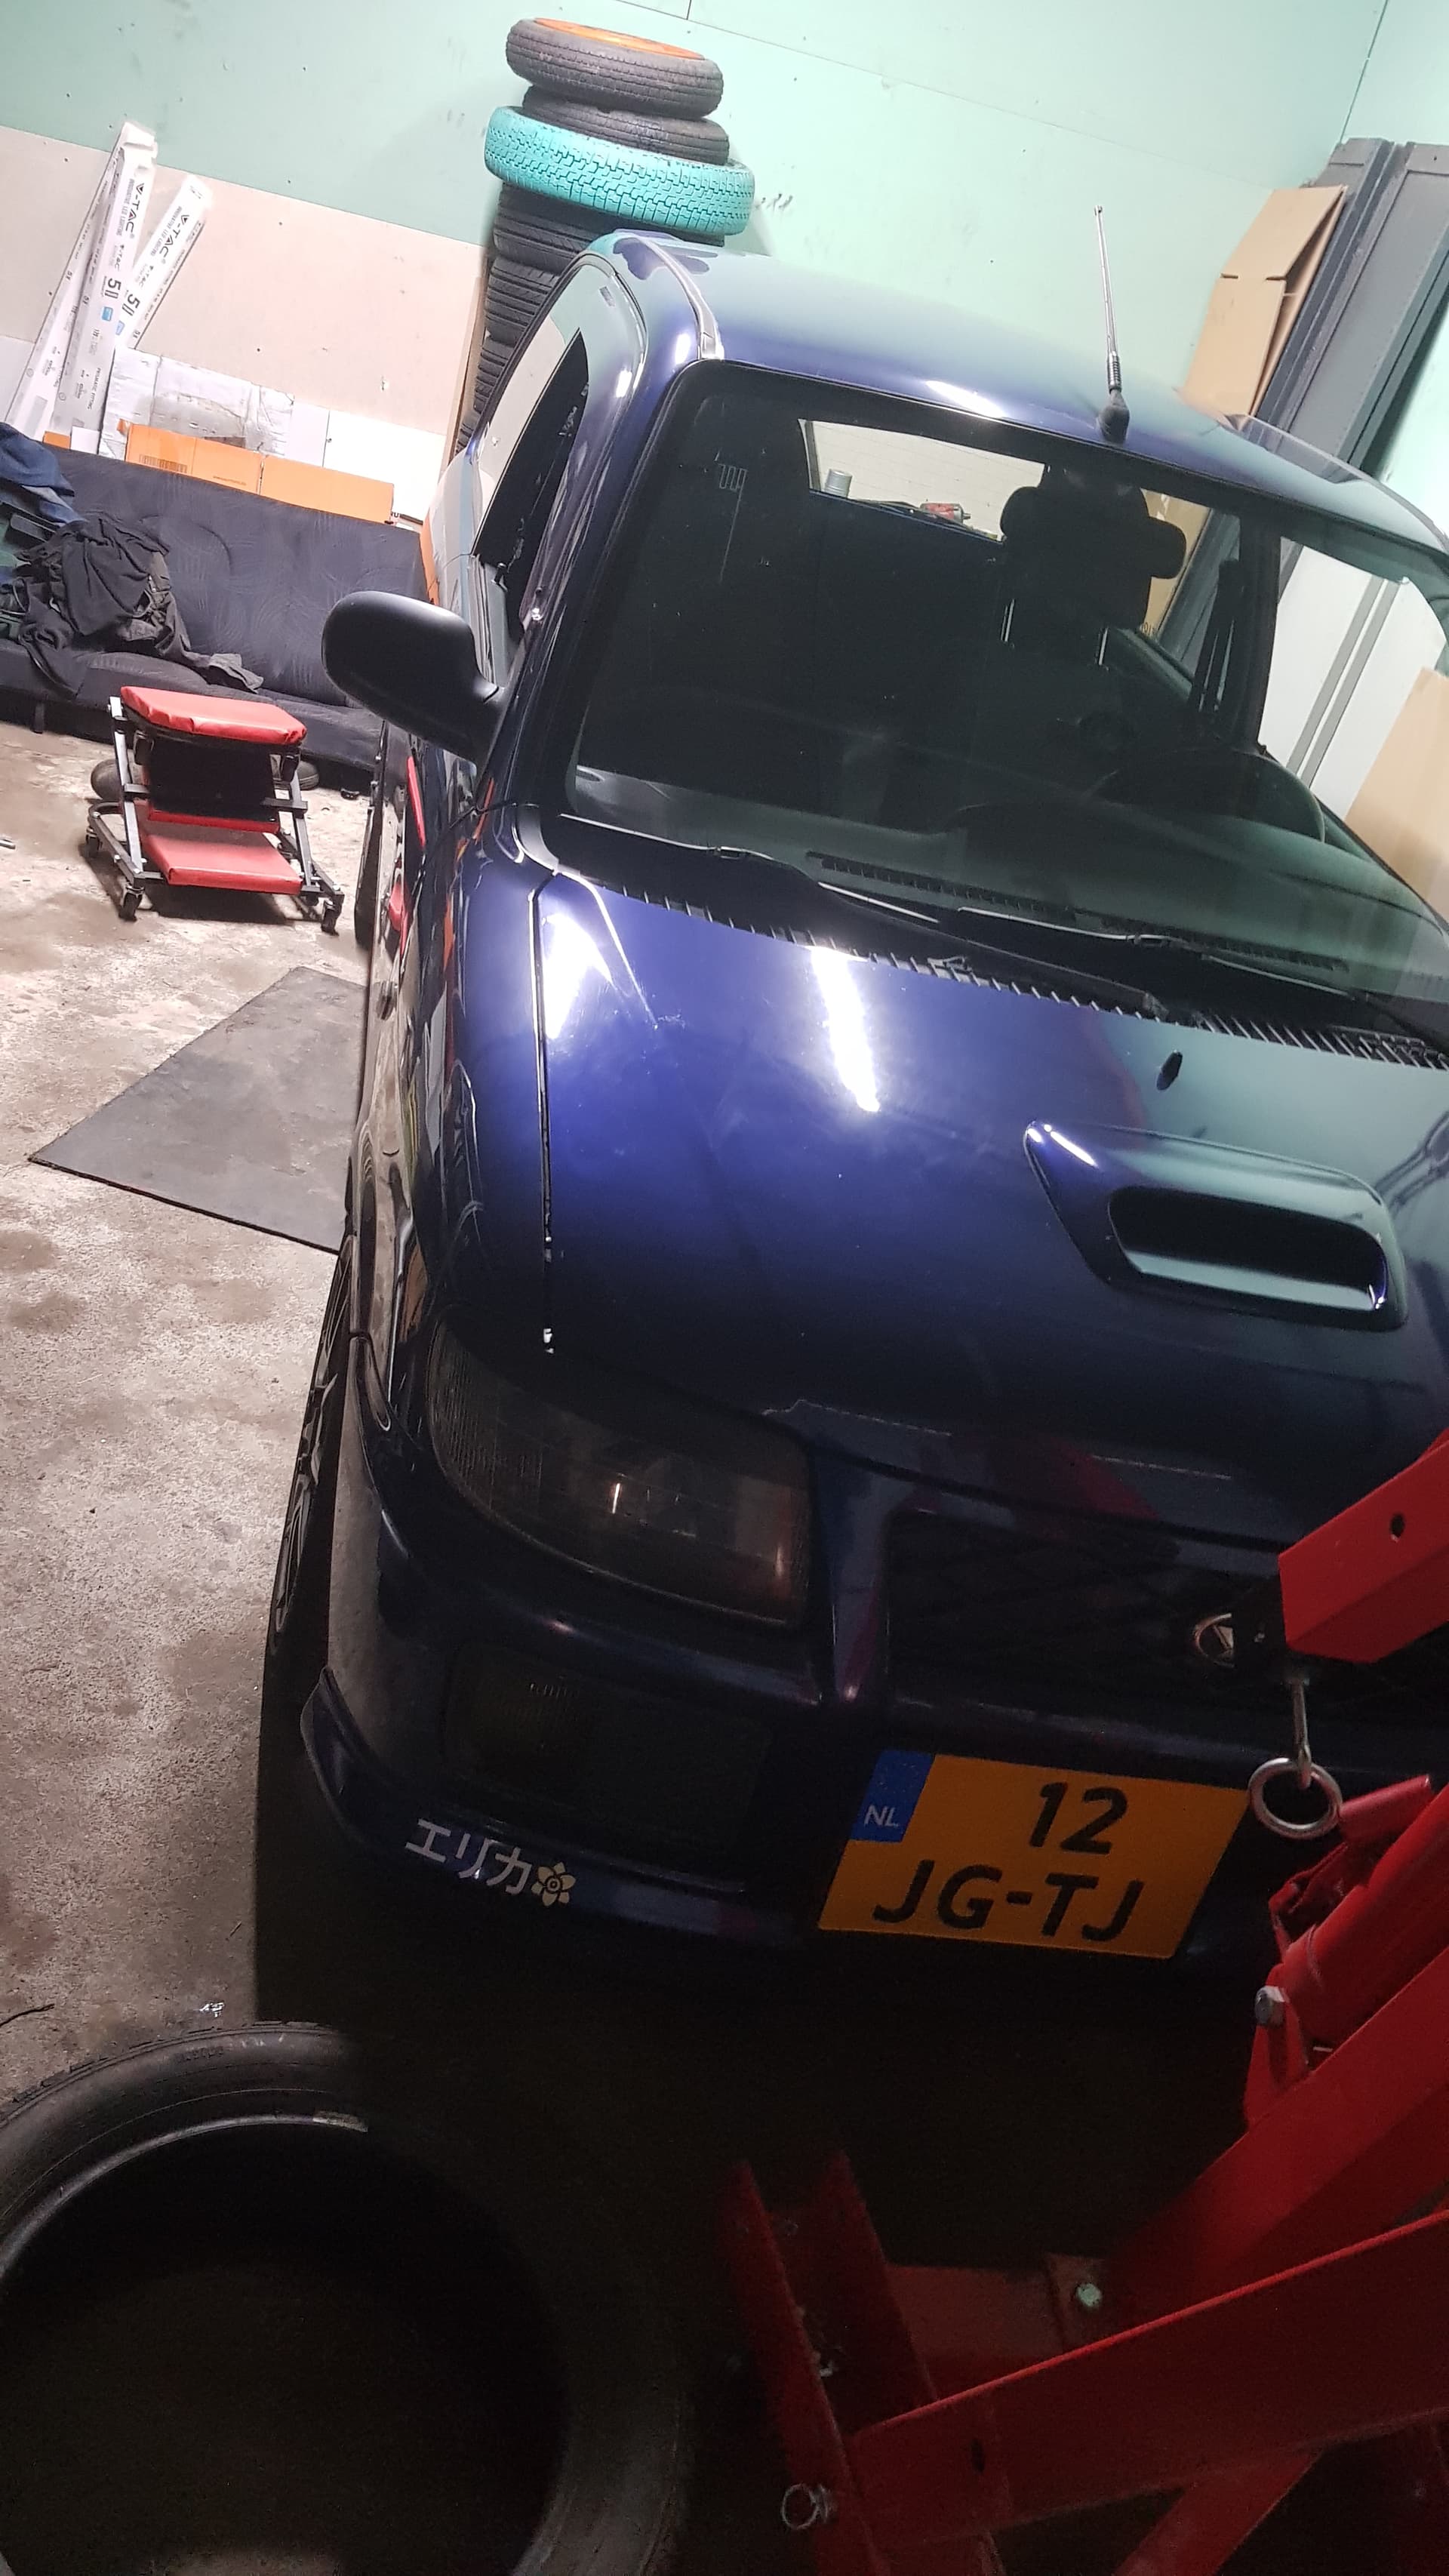
This whole project consists of almost nothing but ‘firsts’, but taking out an engine that works perfectly fine and not knowing when you’ll drive the car again, was scary as hell. However, I do have to say that the EJ is the perfect engine to take out, if you’re new to this. You can see all the hoses/cables/wires that need to come off, which makes life a lot easier. Oh, and don’t forget the steering rack, because we did. Whoops
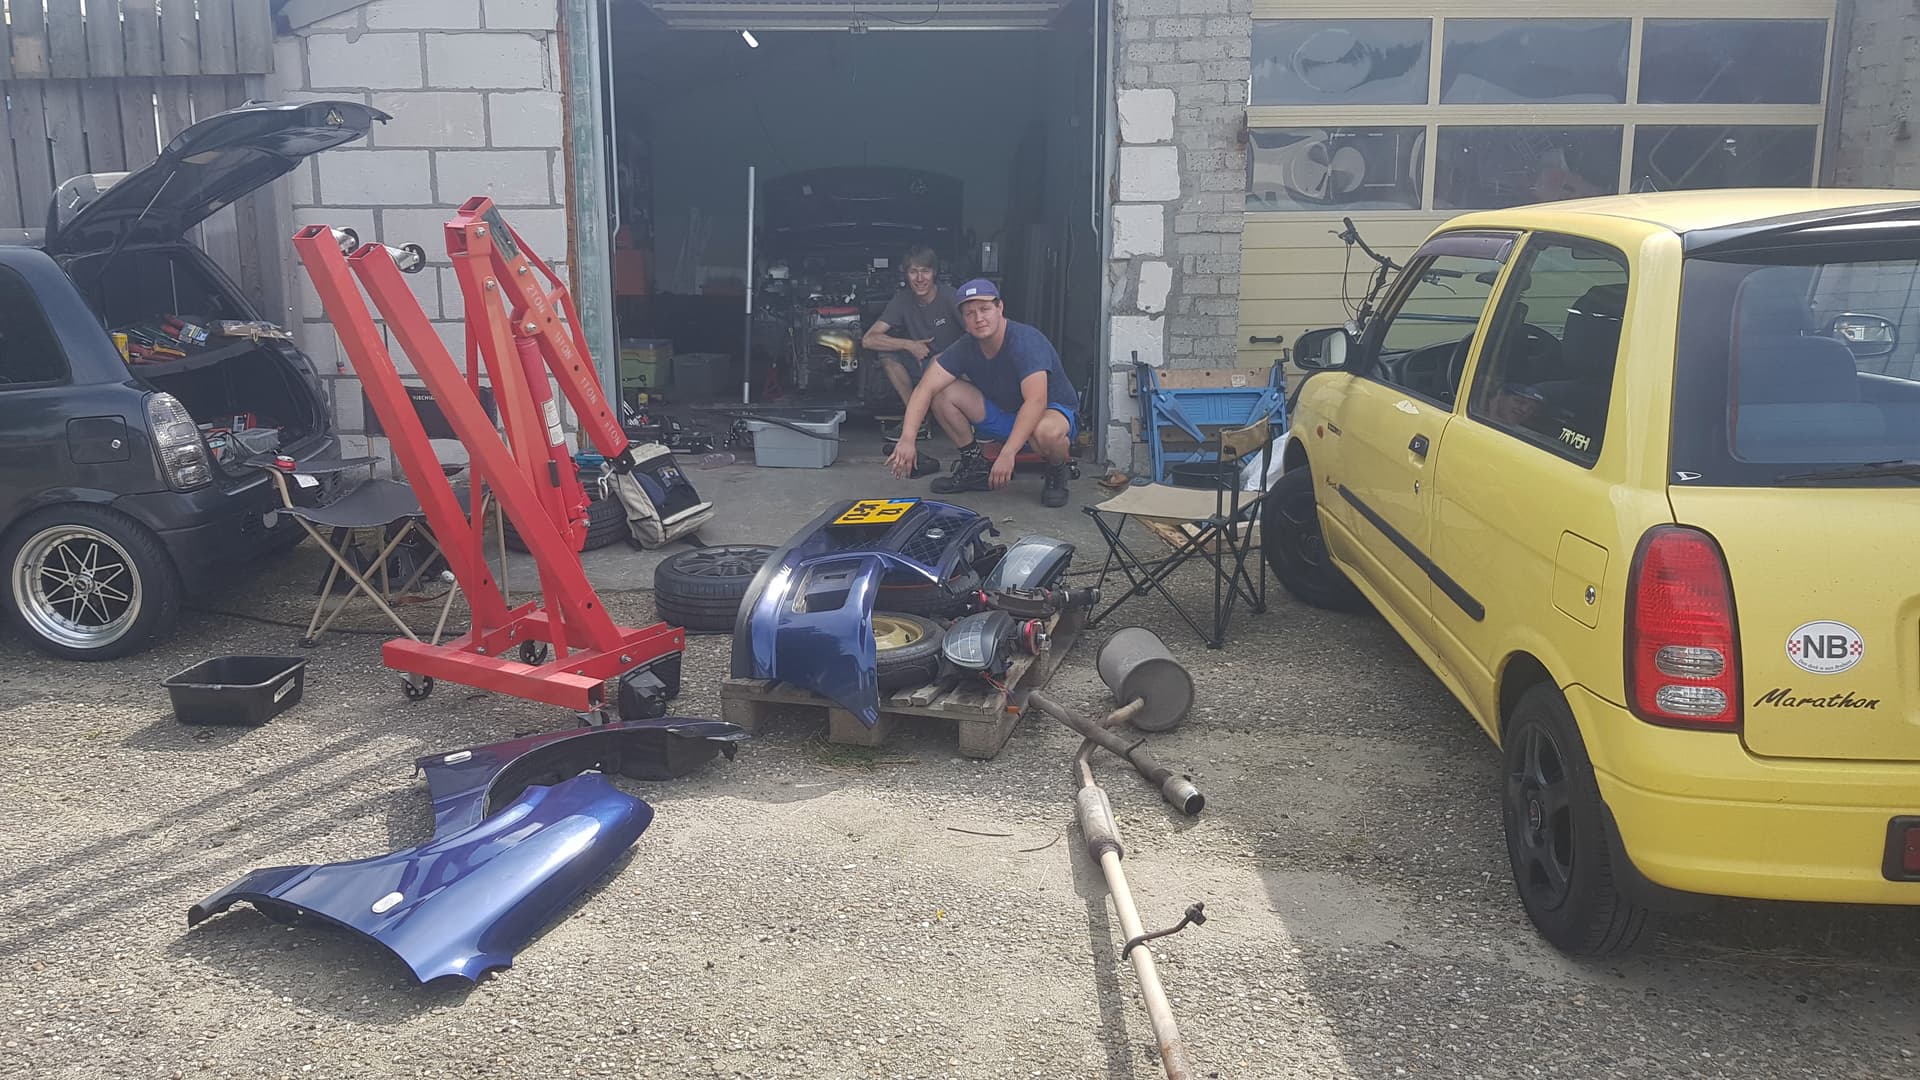
the bois
Out with the old, and in with the ne-… no that’ll take a bit longer. But the EJ-VE is out!
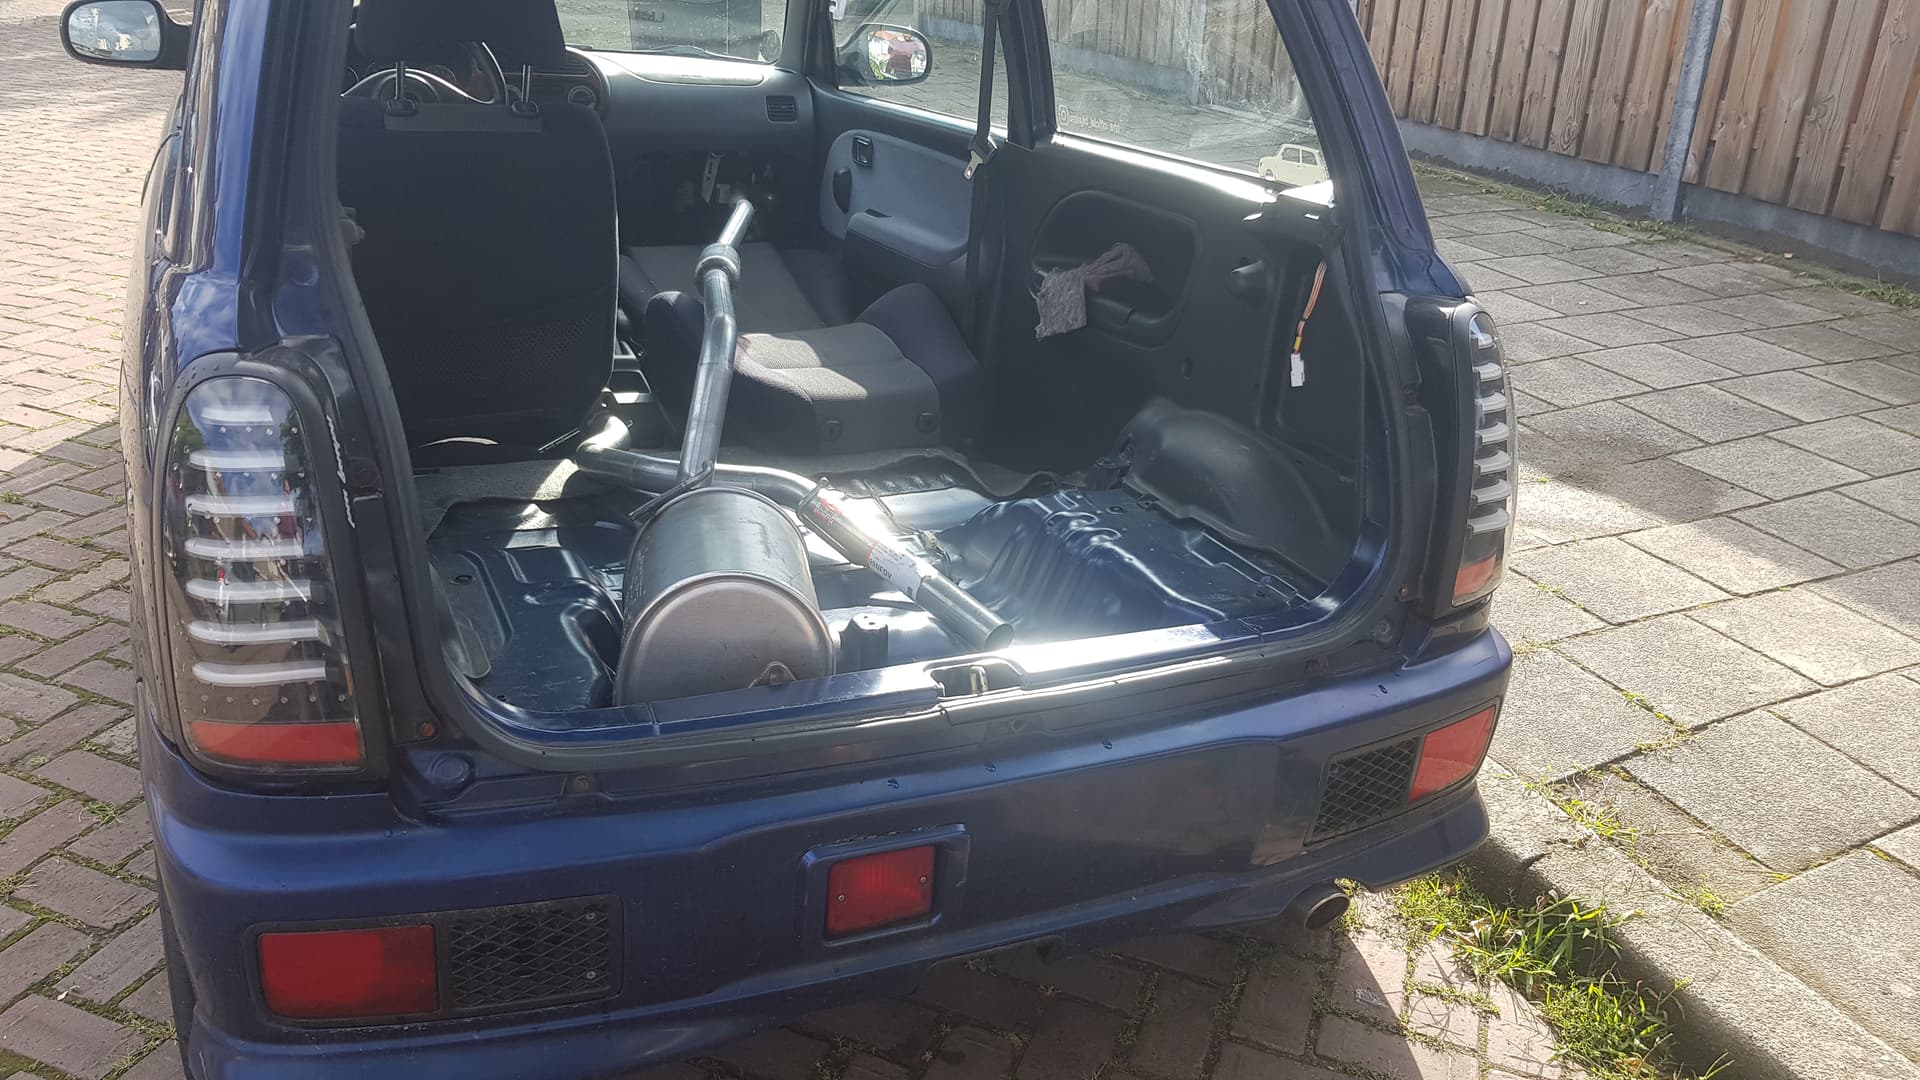
Of course we had to take off the exhaust as well. I needed a bigger exhaust for the 3SZ anyway, but I would’ve replaced it no matter what, because it was rattling like crazy. Since I wasn’t going to use the exhaust anymore, I decided to take a look inside. Good lord.
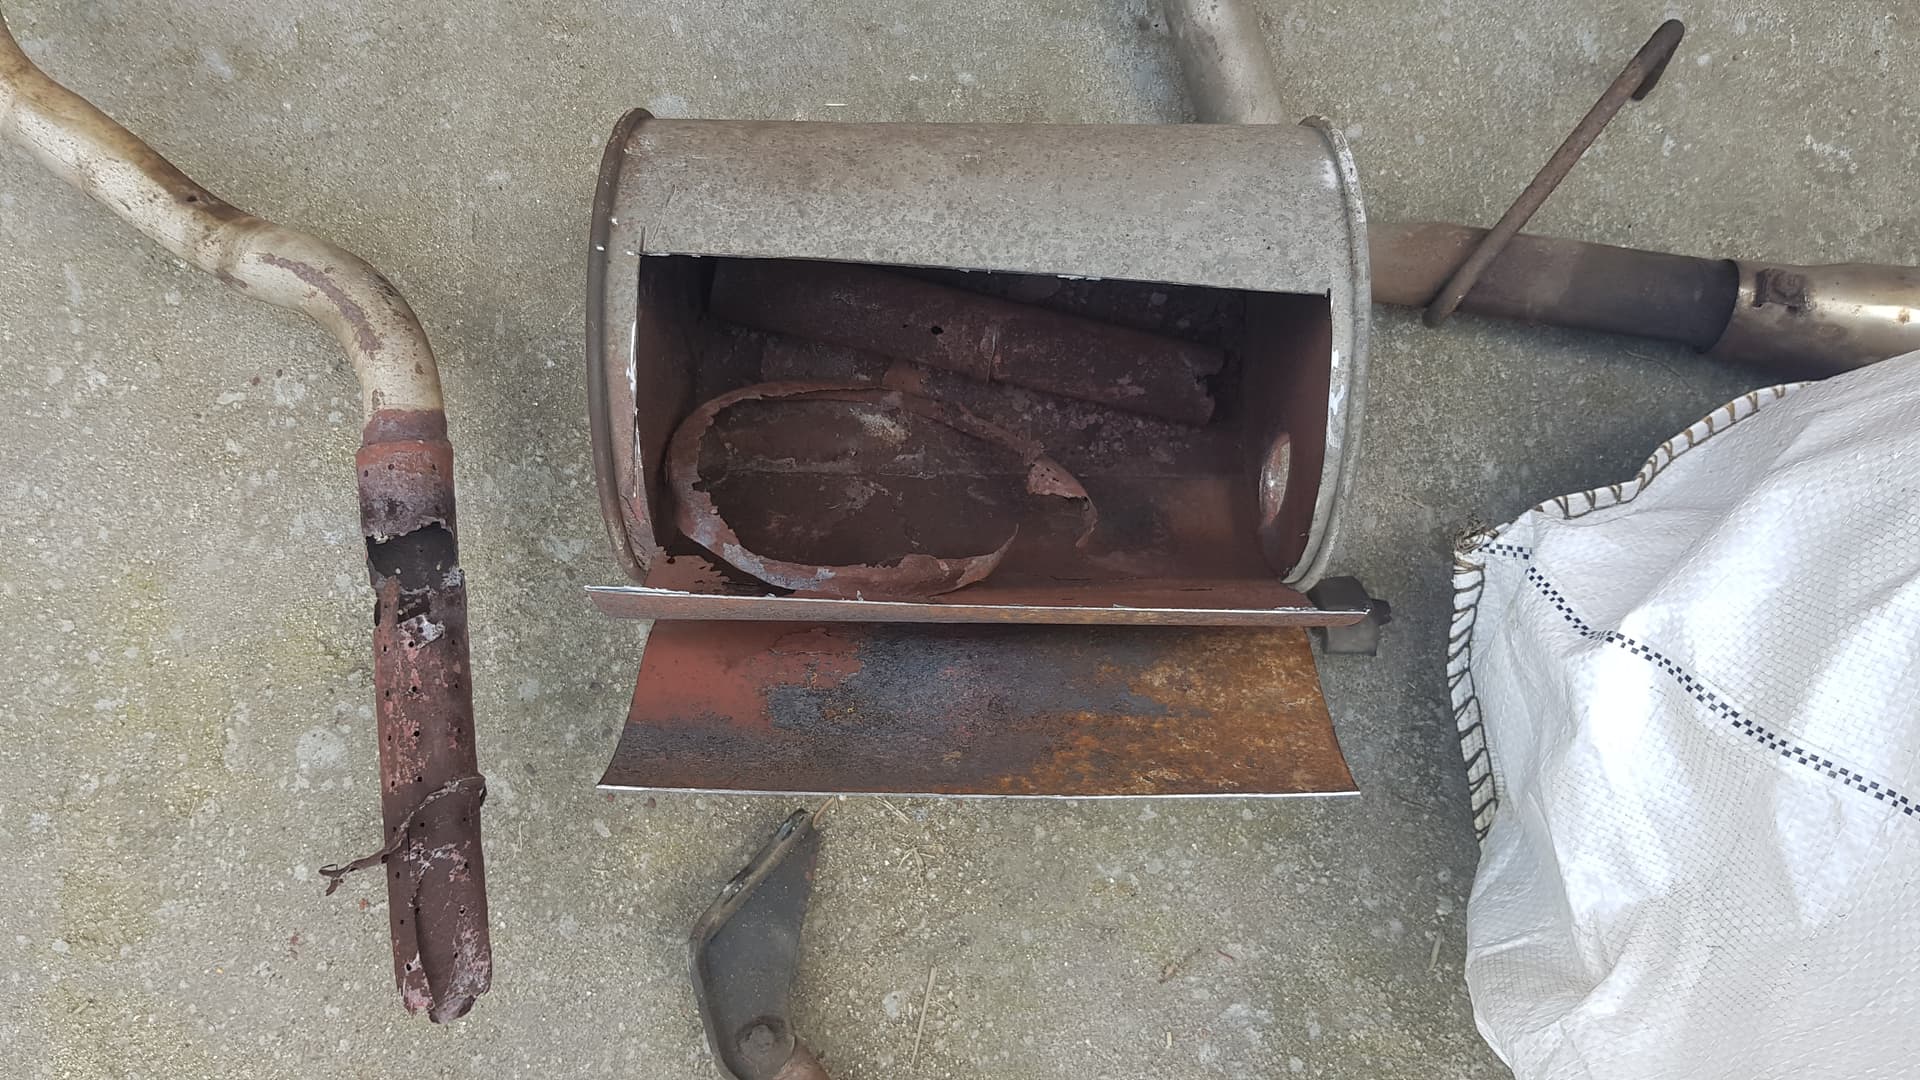
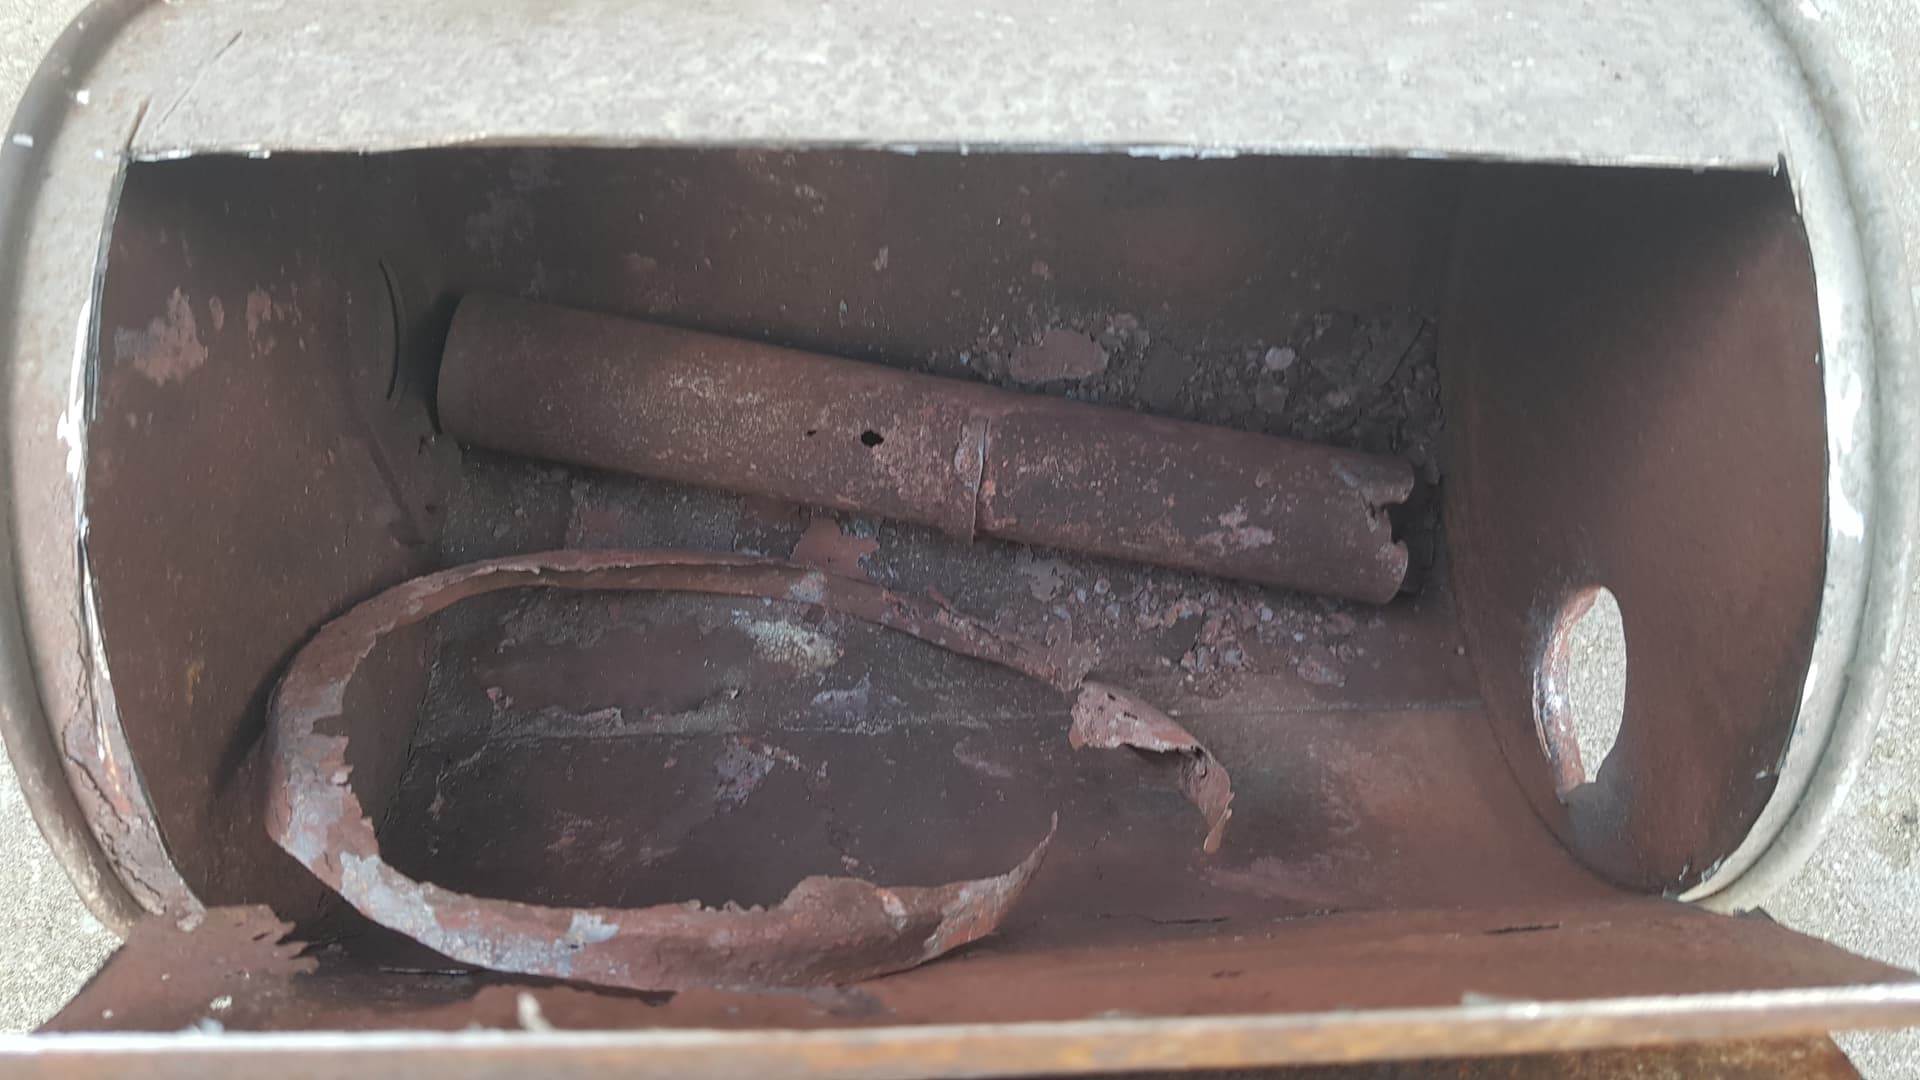
I am not even kidding. I just separated the pipe from the muffler, and cut the muffler open with an angle grinder, and this is what it looked like. Good thing I ordered that new exhaust
.
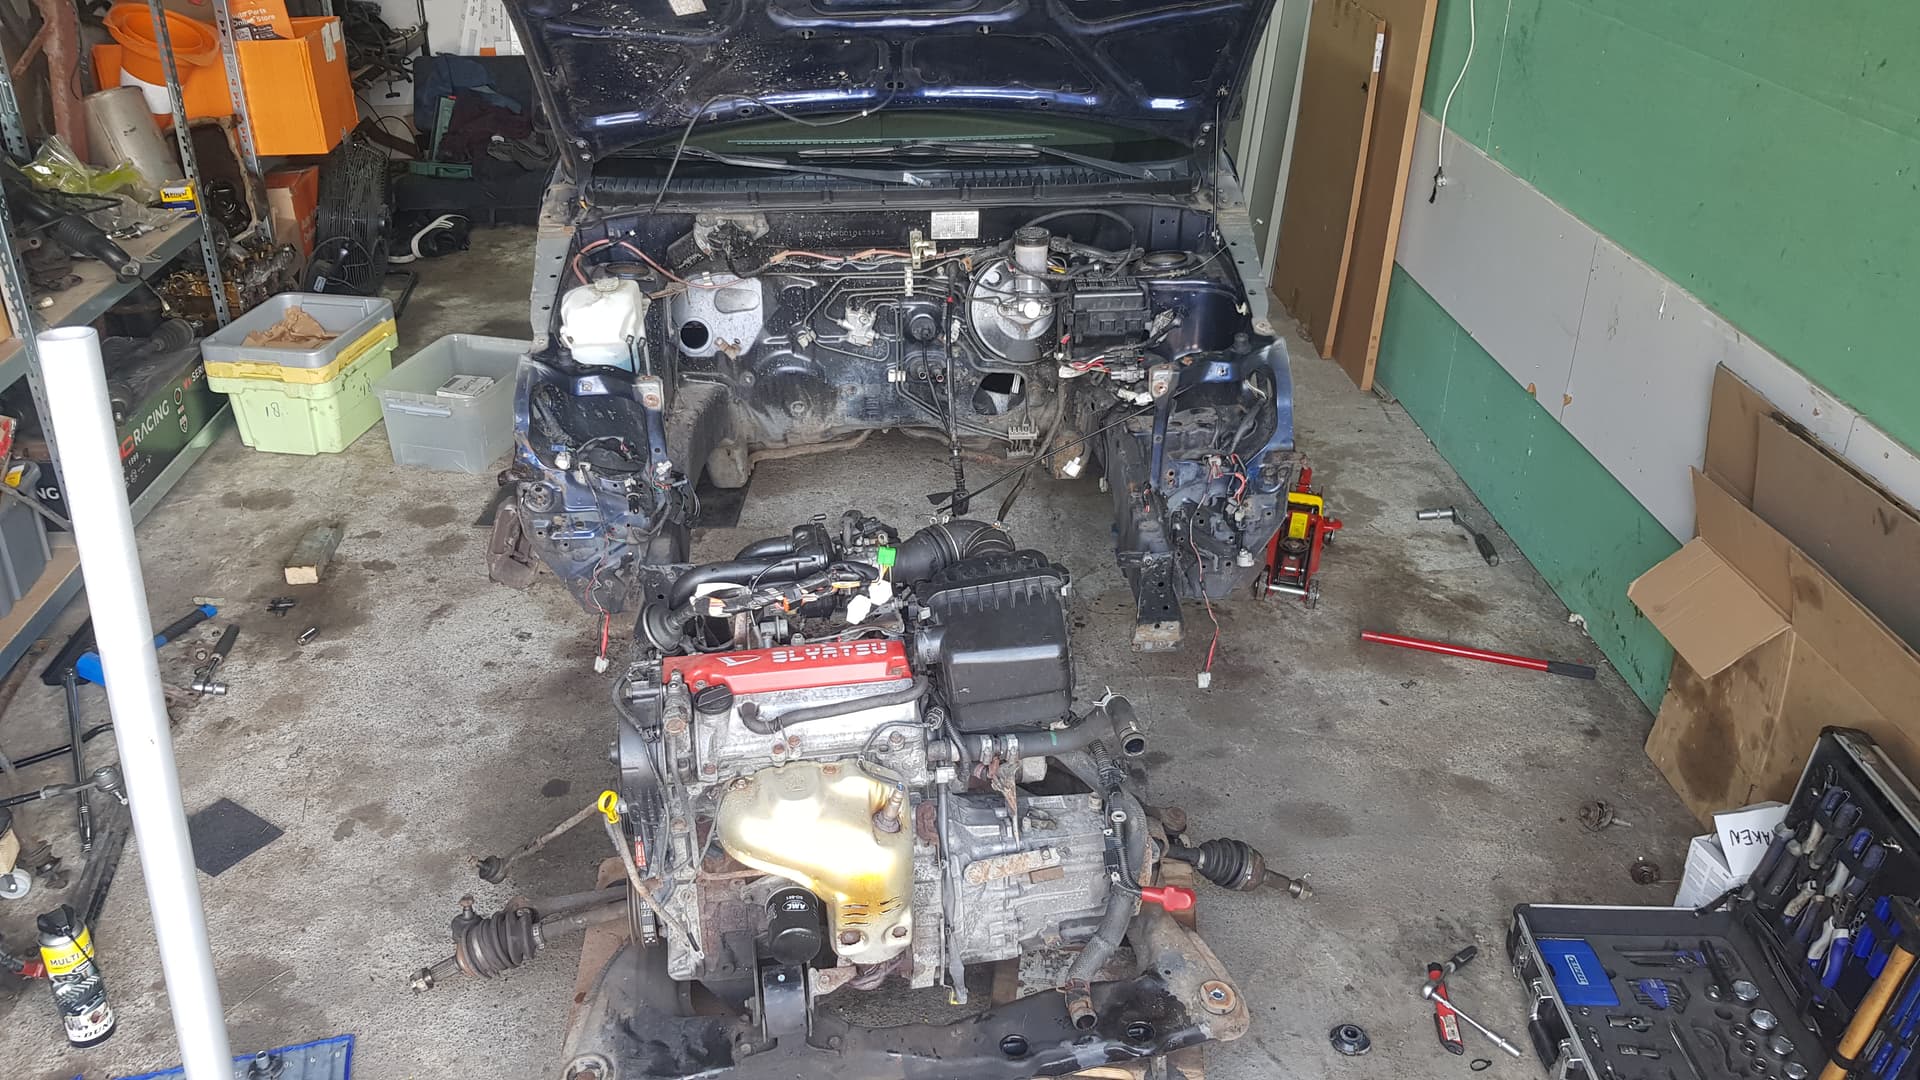
PREPZ 4 SWAPZ
I devided my to-do list into 3 main tasks:
- preparing the subframe (engine harness, steering rack, clutch bits)
- preparing the car (stripping the inside and outside, cleaning the engine bay)
- sorting out the wiring harness
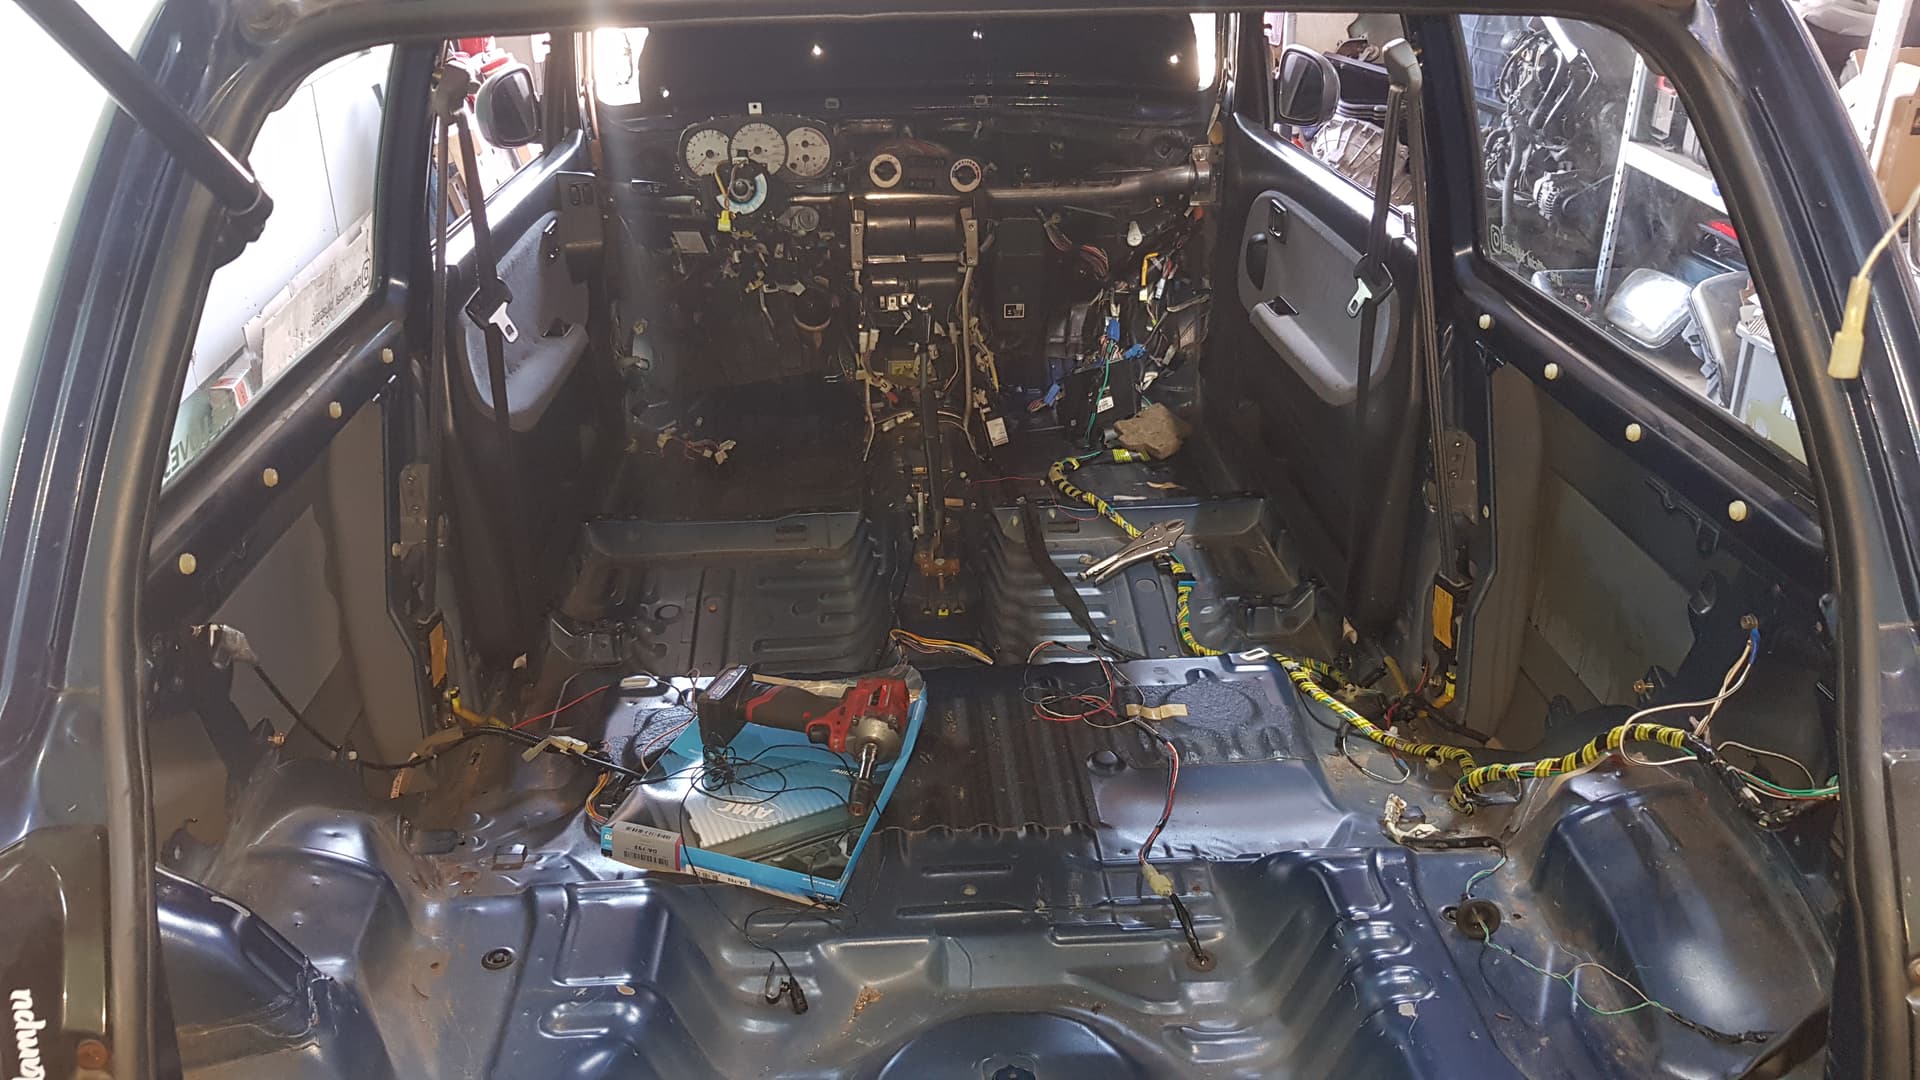
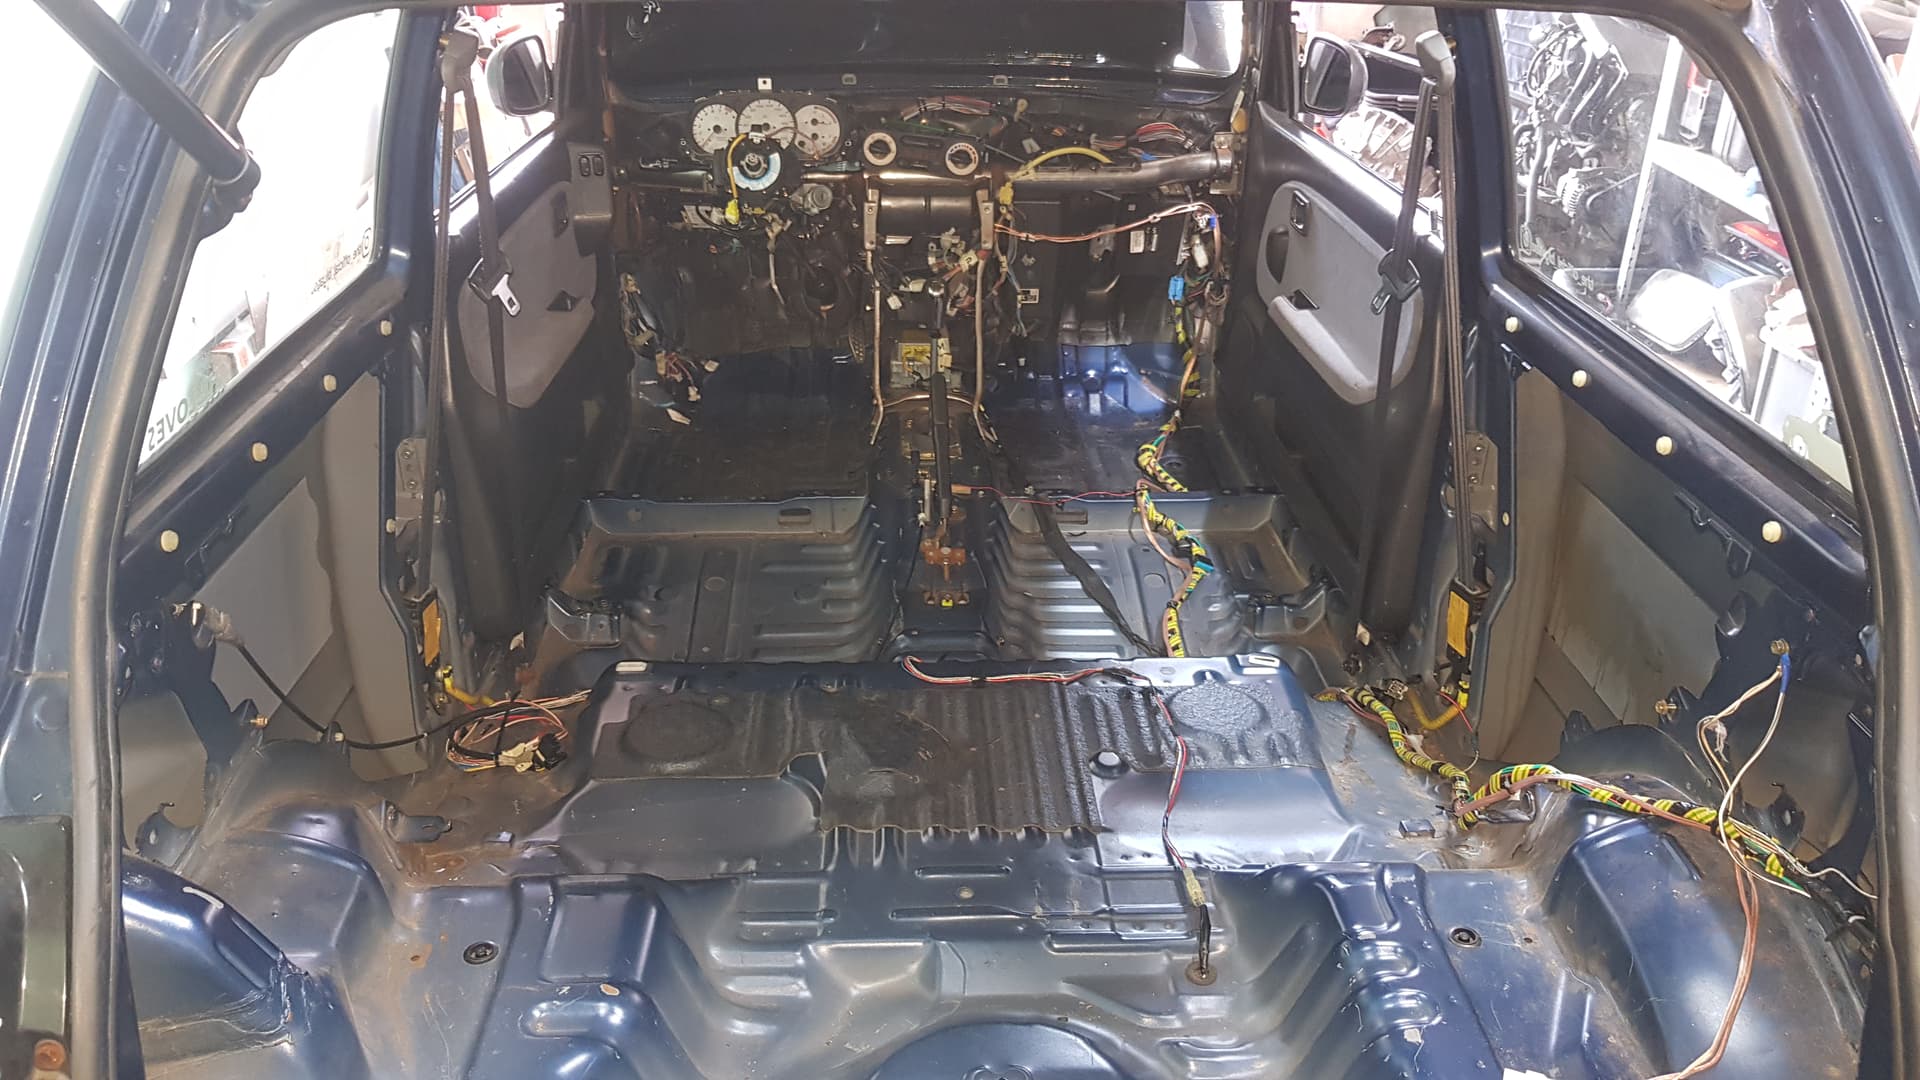
The first two tasks were fairly easy. The biggest challenge was to find a space in my garage to store parts, while maintaining enough room to work on the car
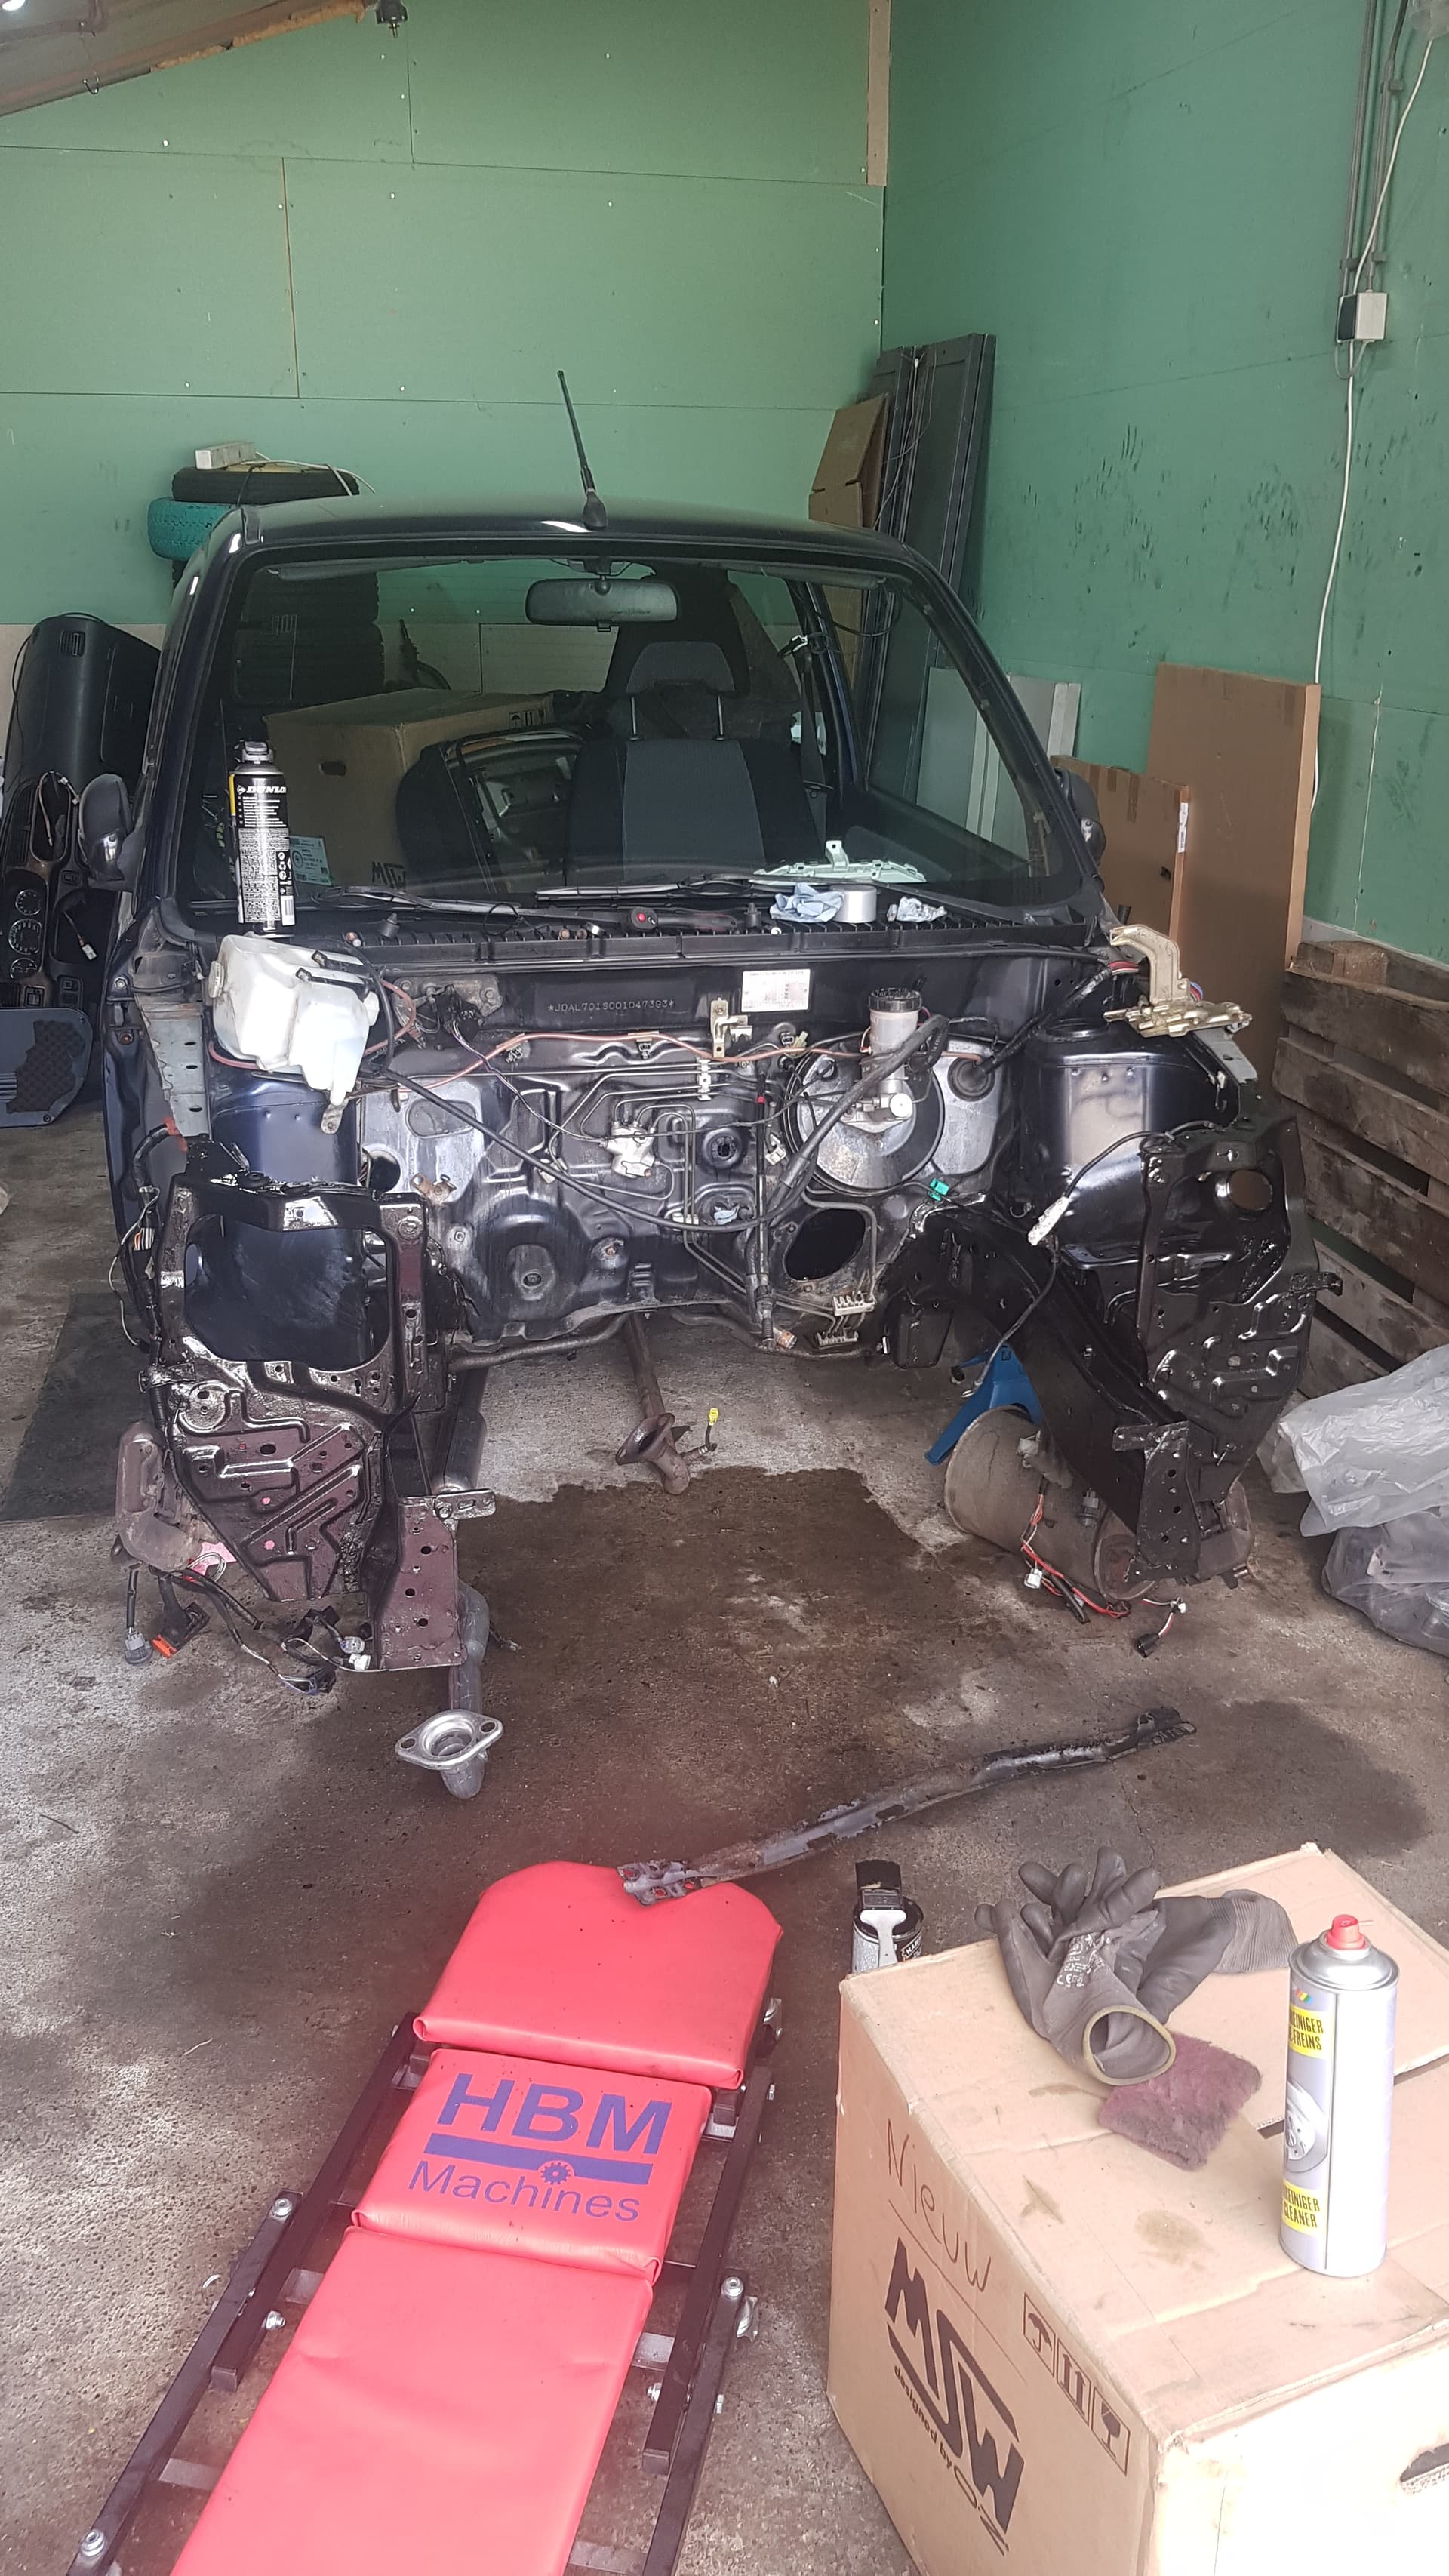
A bit cleaner
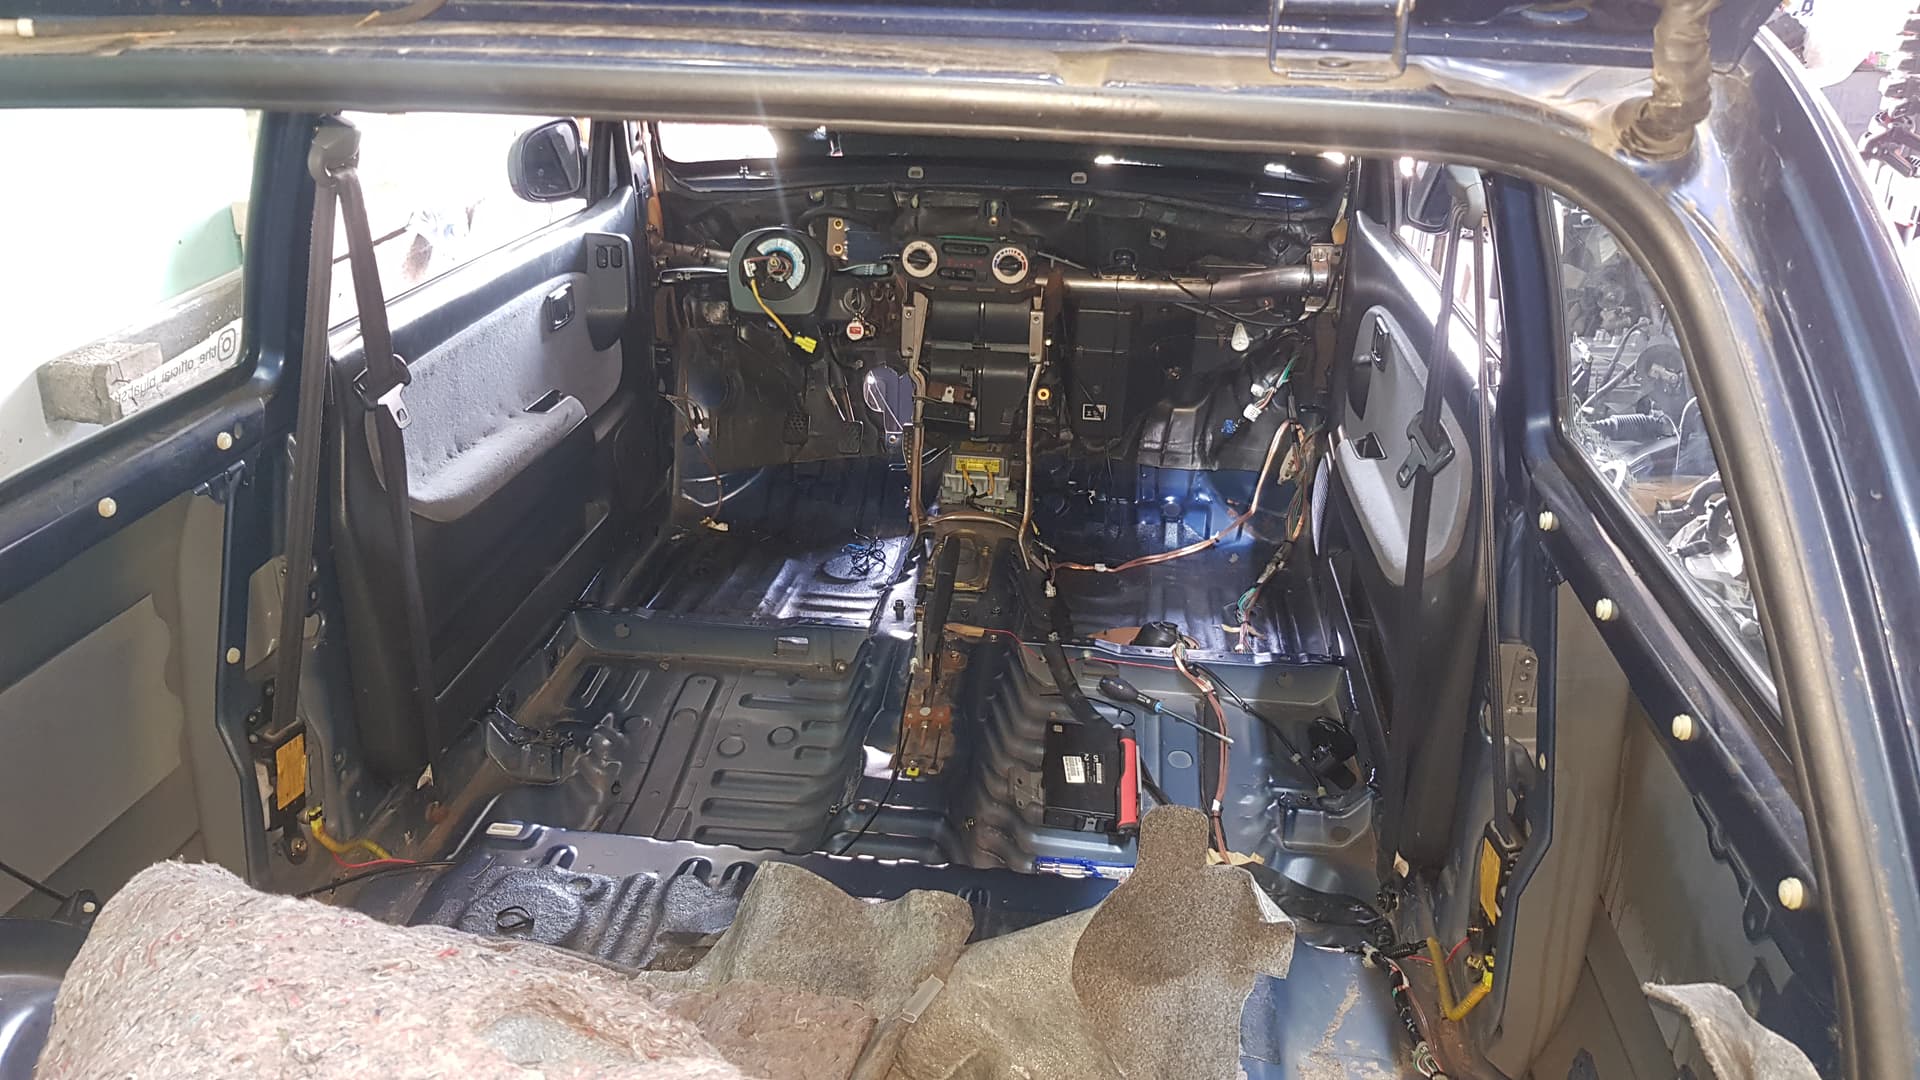
I’m looking at this picture thinking “damn, that used to be really tidy”.
Because the next step caused a bit of a chaos, to say the least.
WIRING HARNESS
To be honest, I really love going over all those wiring diagrams and connecting all the wires in the nicest way possible. Real nerdy stuff. Sadly, it was a real pain in the butt sometimes. In the end, the only places I didn’t have to swap wires, were in the doors, the roof, and between the taillights. Apart from that, I changed the entire network of wires. Before I explain why, it’s good to know what car uses what code (I forgot what it’s called), because I’ll be using them along the way:
L7 = Cuore (1.0)
M2 = YRV (1.3 in this case)
M3 = Sirion 2/Boon (1.5 in this case)
For the engine, I was going to use the M3 harness it came with. It only needs to connect to the ECU, so there’s no reason why I should use the one from an M2. However, I did need to swap the front part of the wiring harness for 2 reasons:
- standard K3 swap things, like the fuseboxes, gauge cluster, and (in this case) ABS
- the M2 harness comes with a few nice extra features, like remote controle central locking, a light for the ashtray, and an extra heater blower speed. Not really a reason to swap harnesses, but it’s nice to have.
ECU
This is where the nightmare began. The first thing on the list, was to fix the ECU plugs on the M2 harness. The M3 and M2 use different plugs, so I had to take out all the wires on the M2 plugs, and put them into the M3 plugs. Luckily, I already did the pinout a few months ago, so I was more or less just a matter of putting the plugs on the right spot. Or so I thought. The pins on the M2 harness were not the same as the M3 pins, which meant I had to solder every wire. Apart from the fact that I just don’t enjoy soldering, I didn’t like the idea of fiddling around with such a crucial part of the car. Ideally, I would’ve fitted the M2 wires with new pins, which would fit the M3 plugs. But I didn’t know what type of pin I was dealing with, and I didn’t have the tools or time to get it right. So, fingers crossed, and soldering it is.
Once I was done with that, I discovered that there was a 3rd plug that goes straight to the interior harness. Not all the wires were the same, so I dove back into the diagrams. Turns out that the water temperature sensor on the 3SZ has 2 pins, whereas the ones on a K3 from the M2 have 3. That 3rd pin is for the temperature gauge, which an M3 doesn’t have. But my car would, so I had to fit an extra wire and a different sensor, which was annoying. I also ran an extra wire to the plug on the side of the thermostat housing, which the 3SZ didn’t have, but the M2’s K3 did. I wasn’t sure whether it was necessary or not, but better safe than sorry, as it would’ve been a lot harder to fit it once the engine was in.
REAR PART AND DOORS
With the ECU plugs sorted, I put the front part of the M2 harness in the car, which presented the next issue: the plugs that go to the doors were different, and the plugs that go to the rear part of the car were different as well. Both weren’t really that big of a surprise, but still. The doors were pretty easy, since I was able to just relocate most of the pins to different plugs. The only soldering involved was for the central locking wiring. The rear part of the harness was a different story. Since the plugs weren’t the same (or even the same amount), there were 2 options:
- to make the L7 rear part fit the M2 front part
- to fit the car with the M2 rear part as well
The first option appears to make more sense, but since I will use ABS in the future, I needed to make sure I included all the wires to the rear sensors as well. Rather than having to undo 4 plugs of pins, I decided to go with the second option.

You can tell how thrilled I was.
I’ve been whining about the wiring harness for a while now, so I’ll summarize all the wires/plugs that didn’t fit in the rear:
- doorswitches (for the courtesy lights)
- fuel pump
- rear lights (because the L7 has 1 plug, whereas the M2 has 2 sepperate plugs)
- rear fog light
- rear hatch
On the plusside, I now have central locking for the rear hatch. Which is useless, since you can only open the hatch with the key or a lever next to the handbrake lever. But, I want to fit a handle to the hatch in the future, so then it will be useful. Another one of those “I’ll do that later”-things added to the list.
Moving on
THE CLUTCH
You might be wondering why I’m covering this now, but the reason for this is a last minute change. You might have read that I was going to fit the car with the hydraulic clutch system the M3 came with. However, this gave me so many headaches and sleepless nights, that I decided to go with the cable system after all. And a last minute change it was, because the next day would be the biggest of them all…
THE SWAP
I didn’t sleep that well the night before.
I was really nervous and really excited that day, but most importantly: I enjoyed the process of fitting it to the car. And now, without further ado:
Oh boi oh boi oh boi OI BOIIIIIIII. Even looking at it now, I still can’t believe this is my car, and that it now has a 3SZ hanging in the front! We connected all the wires, hoses and cables, so then it was the time to turn the key and start the engine! Except that it didn’t start. Fuck.
Compression was good, we heard the fuel pump, so we checked the ignition. Guess what? No spark. That moment I instantly had a feeling that it could be an immobilizer related issue. When I read all the manuals in preparation for the swap, I covered the immobilizer bit as well. I didn’t quite understand everything, but I read something about certain codes that were stored in the immobilizer ECU, and something about communication between the two ECU’s. I kind of guessed that the immobilizer would send a ‘HIGH’ signal to the ECU once the key was recognized, but it turned out that the key, immobilizer and ECU are paired, and that the ECU has a chip with certain codes as well. I’m not going to explain how it works, but in the end I needed the key that was paired to the 3SZ’s ECU.
I sent the guy, from whom I bought the engine, a message, asking if he still had the key laying around. And for once, luck was on my side, because he did!
While I was waiting for the key to arrive, I did a few other things. Like brakes!
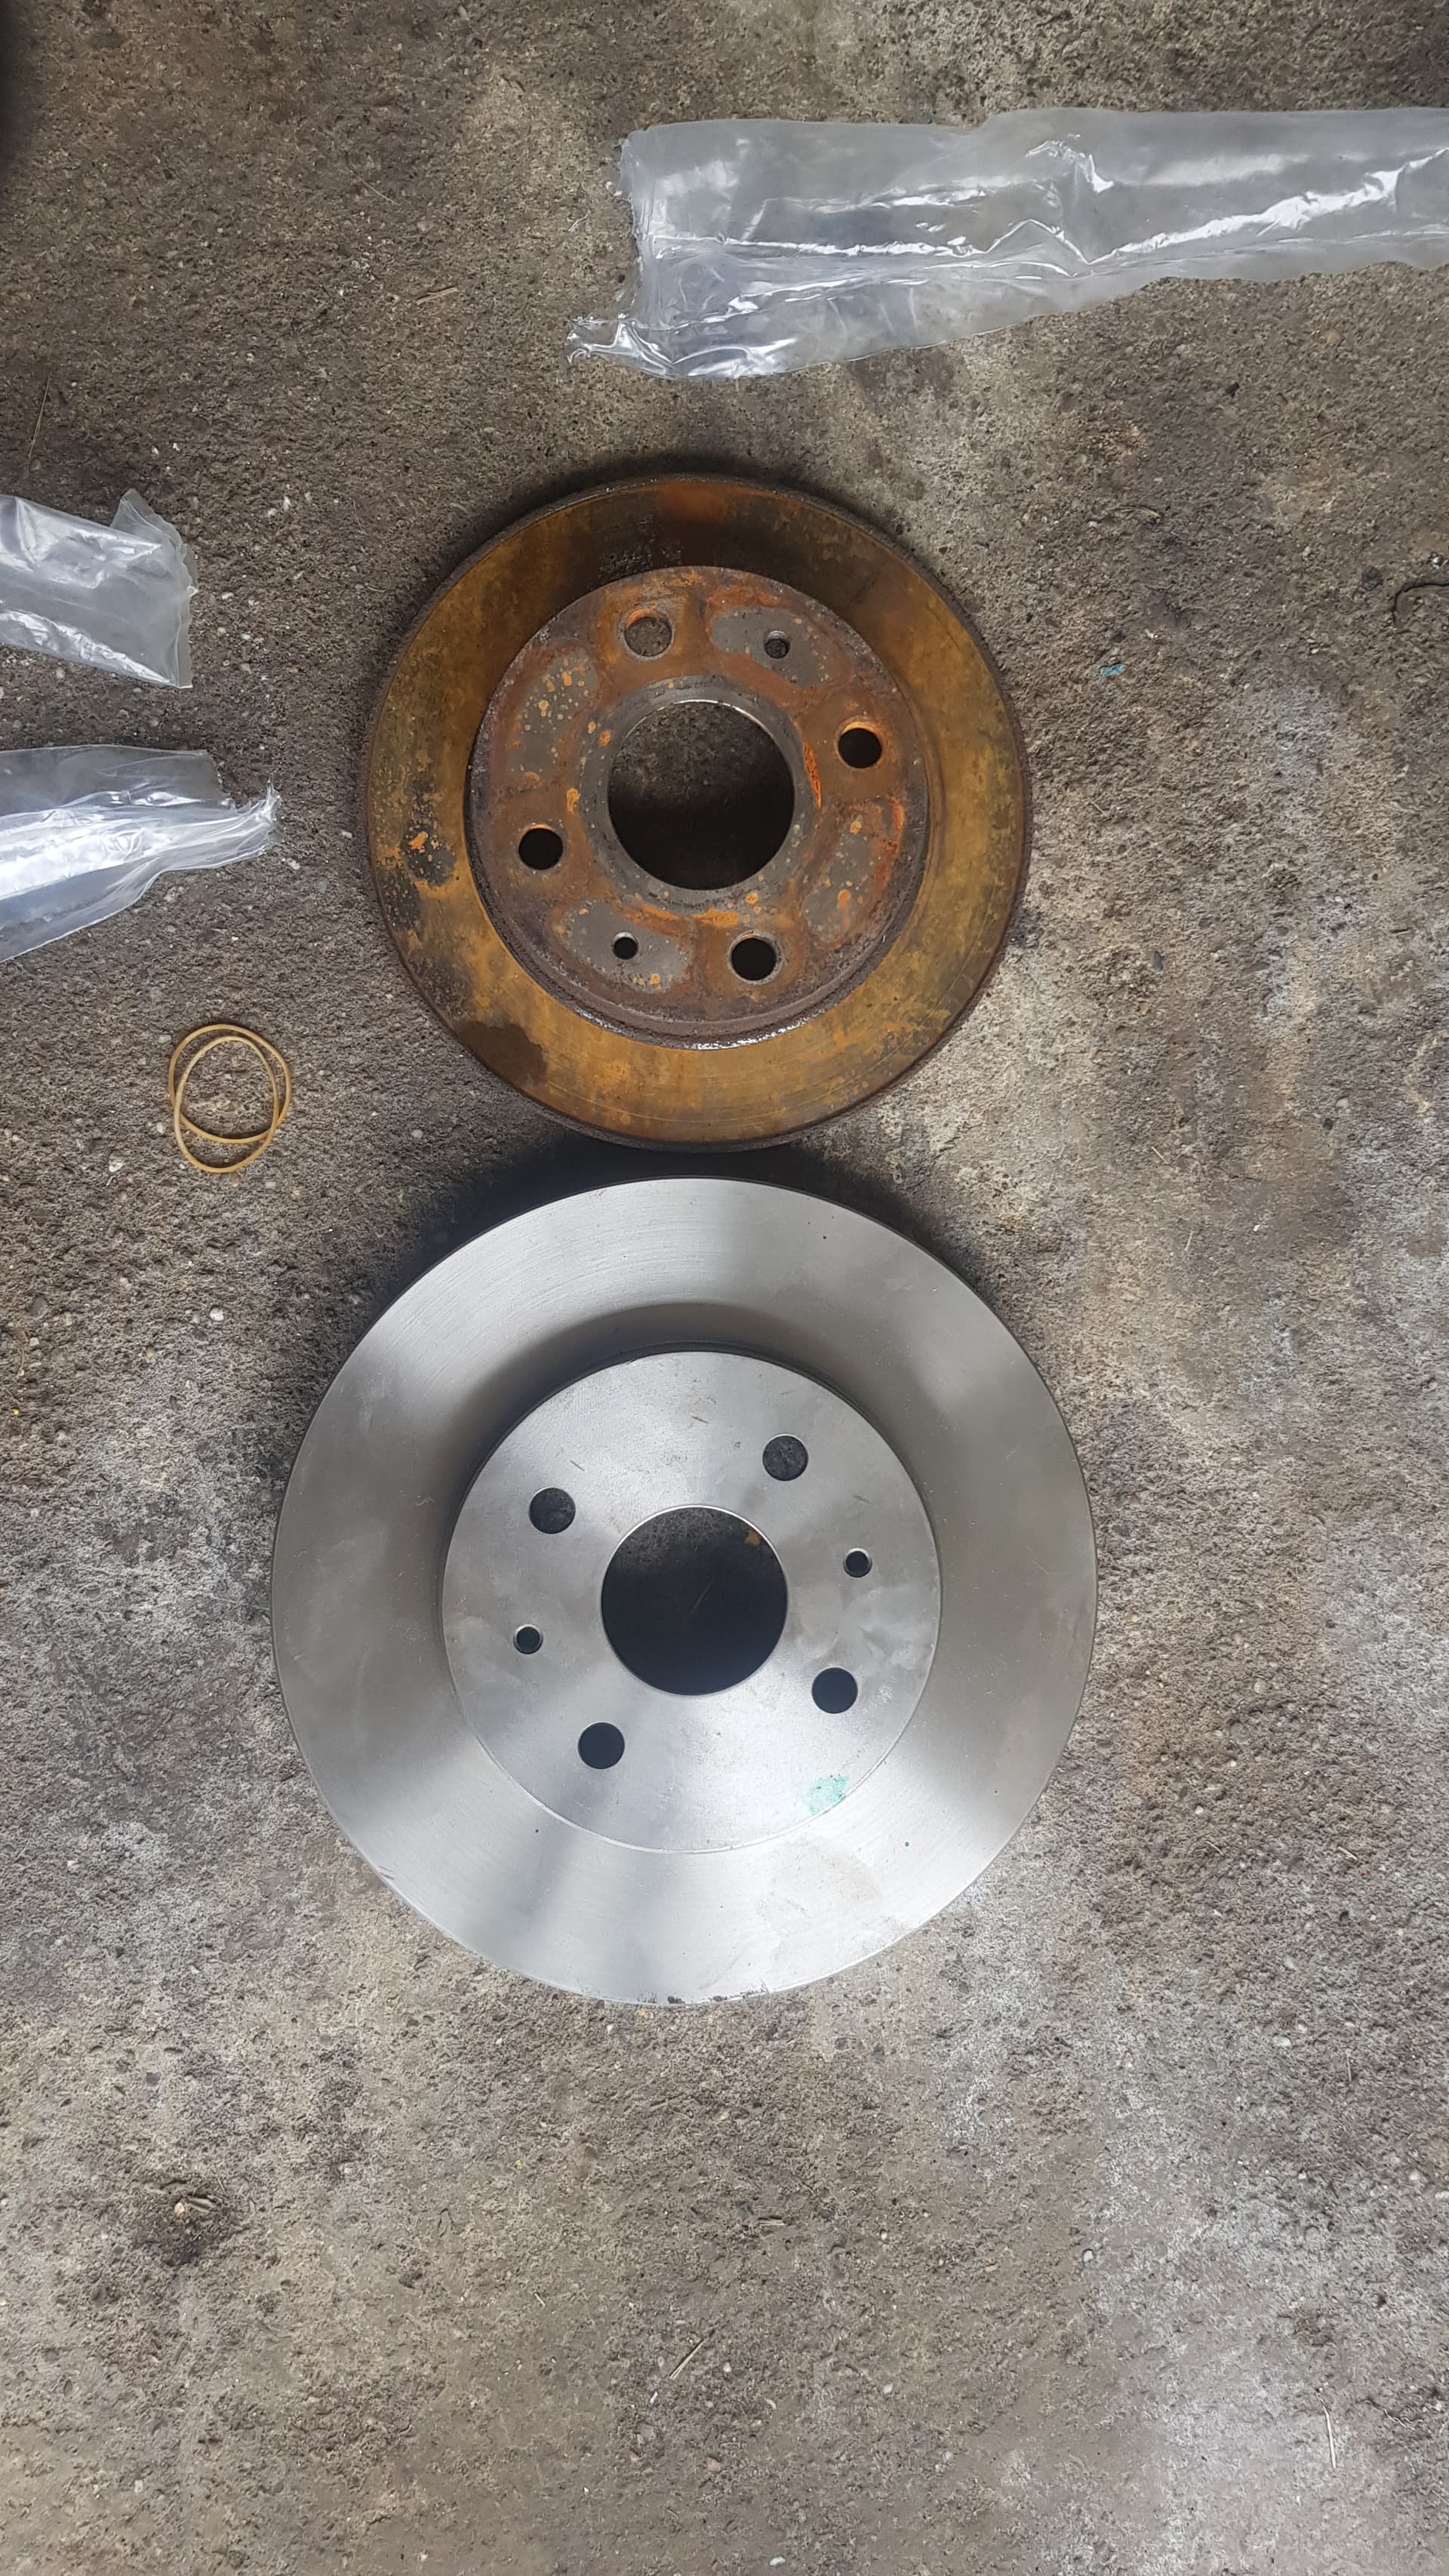
Way too big, but it’s too late now

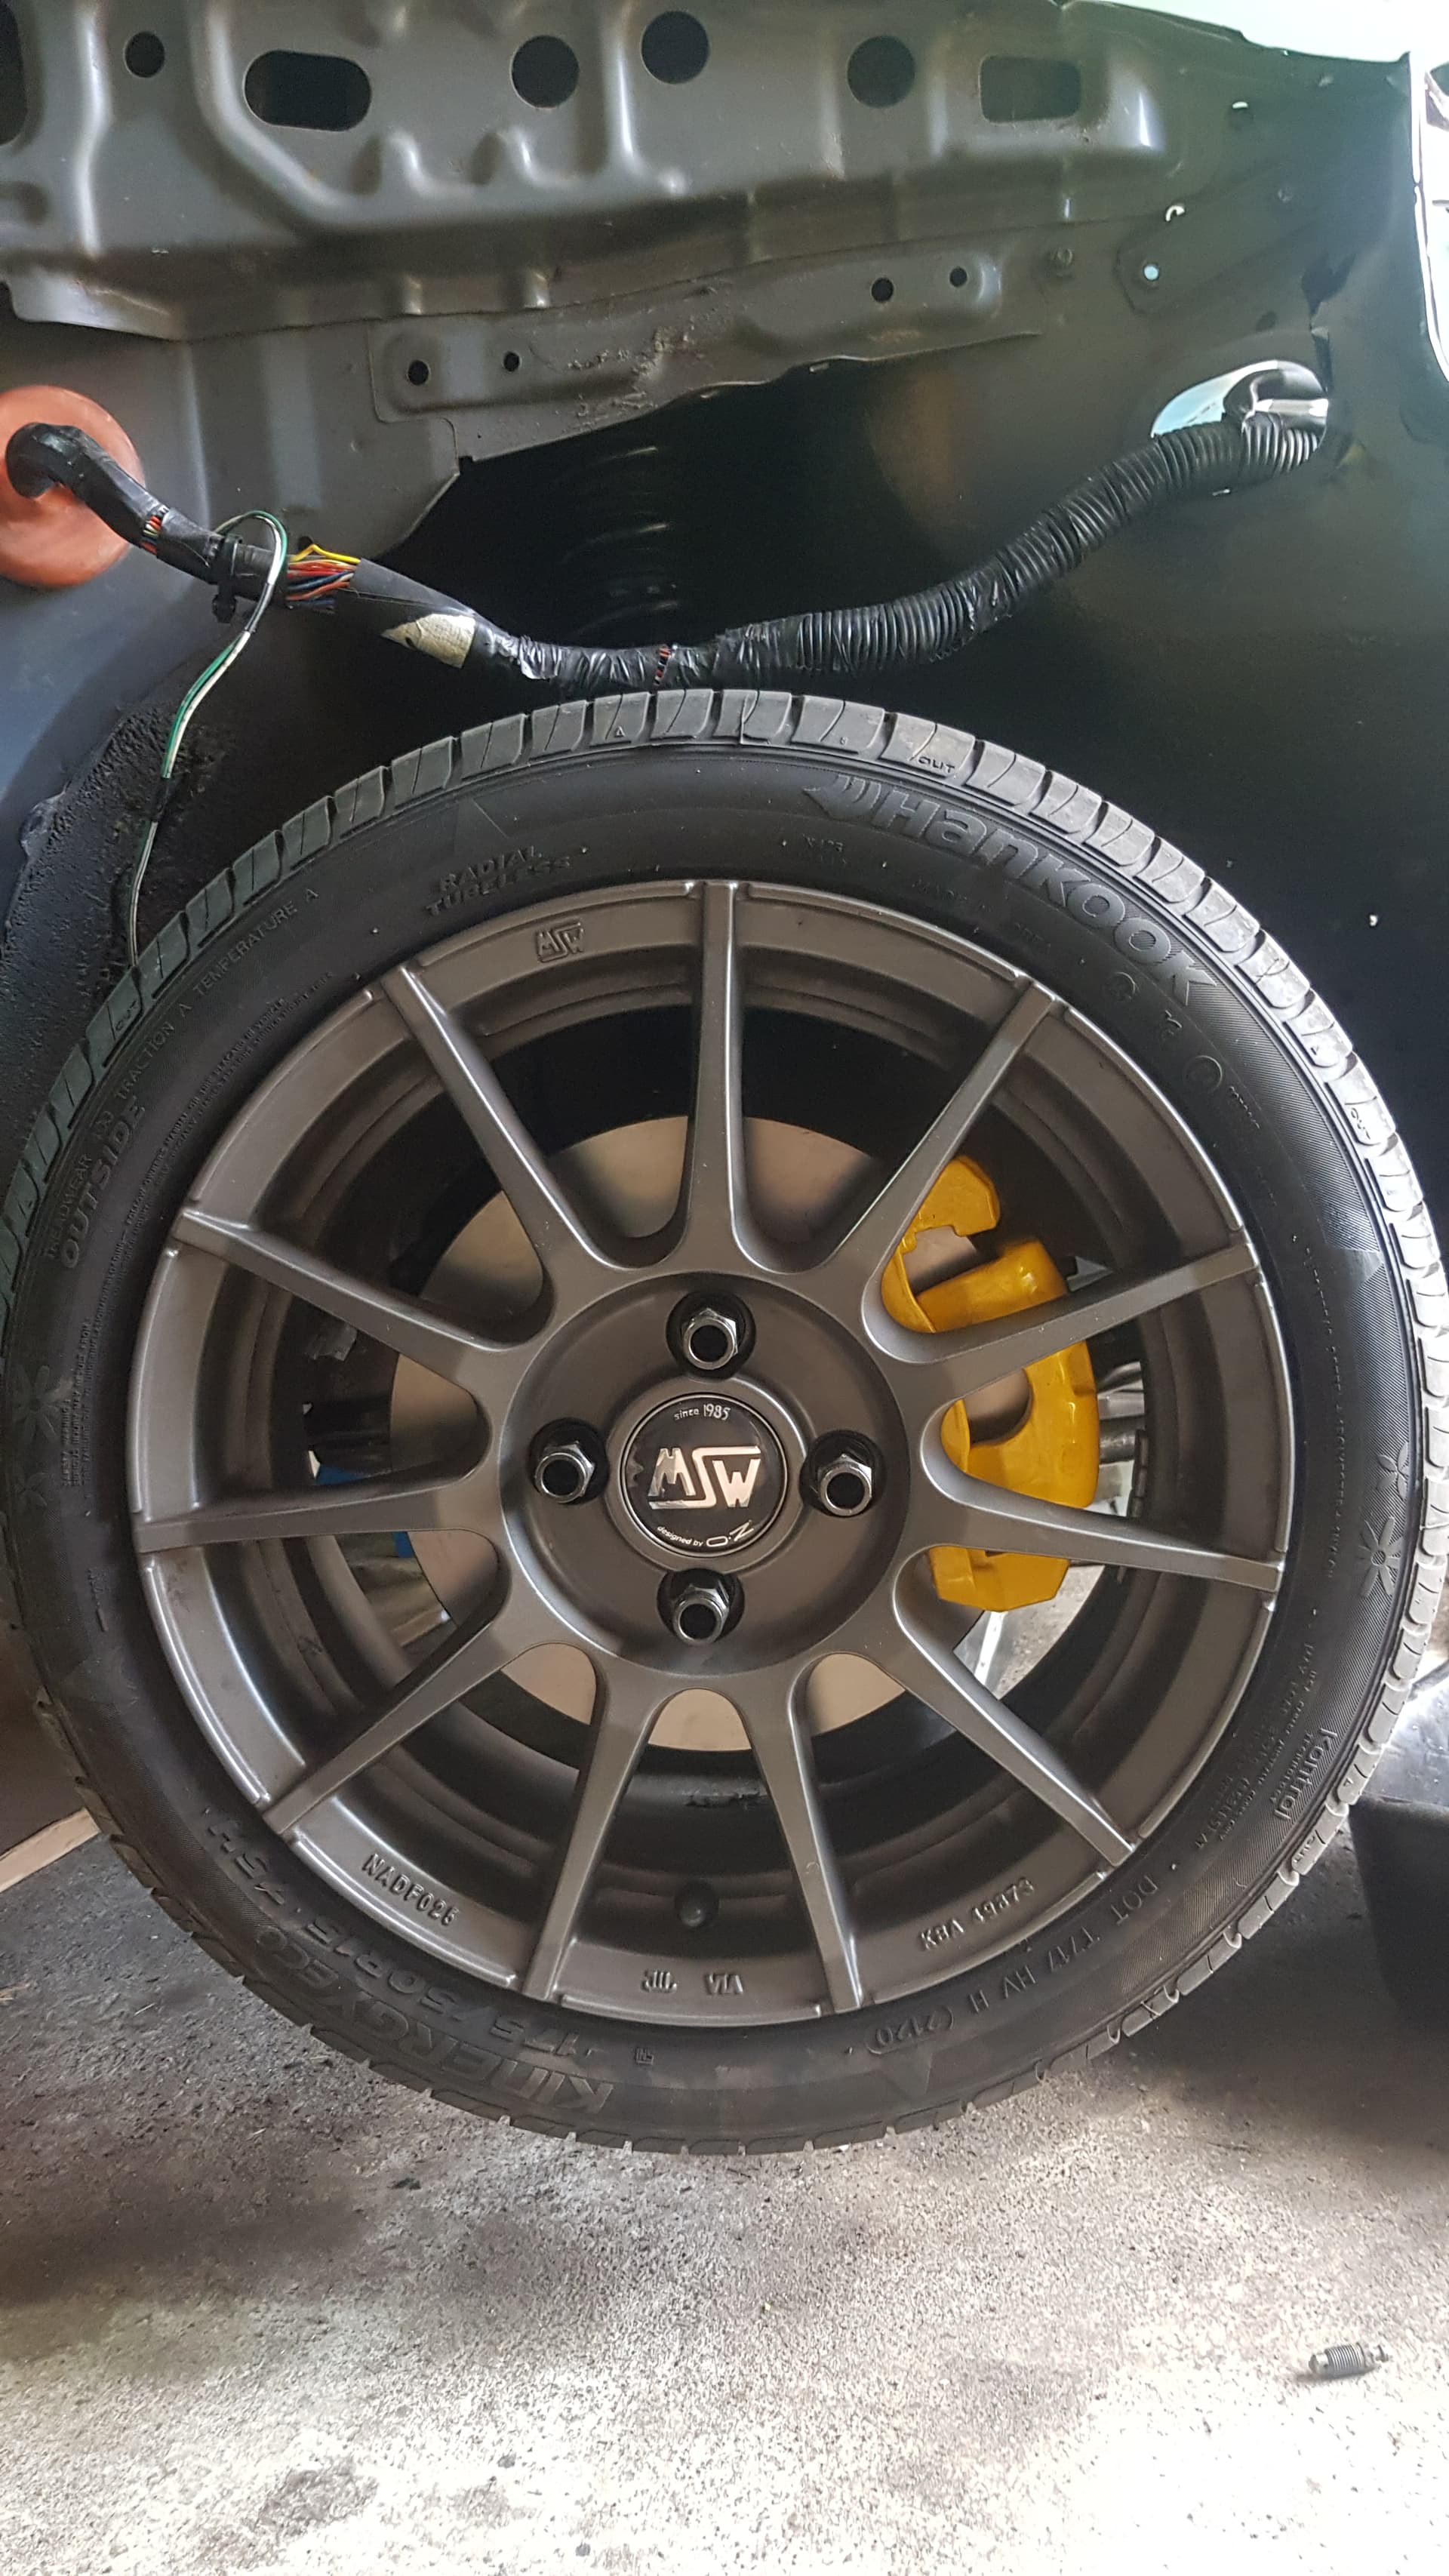
I have to do a bit of fiddling with the brake hoses, but everything else fits perfectly!
The next thing I had to deal with, was the steering column. Which didn’t go as planned, of course.

Because I’m using the M2 steering rack (without power steering btw), I needed to change steering columns as well. To be more specific: the shafts. The only problem is that the M2 shaft is about an inch longer than the L7 shaft. Because of this, the brackets that hold the shaft in place, didn’t fit. I was getting tired of all the things that didn’t quite fit or wouldn’t quite work, so I thought about how I could use this to my advantage. My solution was: repositioning the brackets on the shaft. Why does that work to my advantage? Because that way, the steering wheel is about an inch closer to the drivers seat, which is a good thing. In my opinion, in a stock L7 the steering is too far back and too low, or the pedals are too close (a bit of both), so I figured it was a pretty good solution! I didn’t take any pictures of how it turned out, but I’m happy with the result.
SECOND ATTEMPT
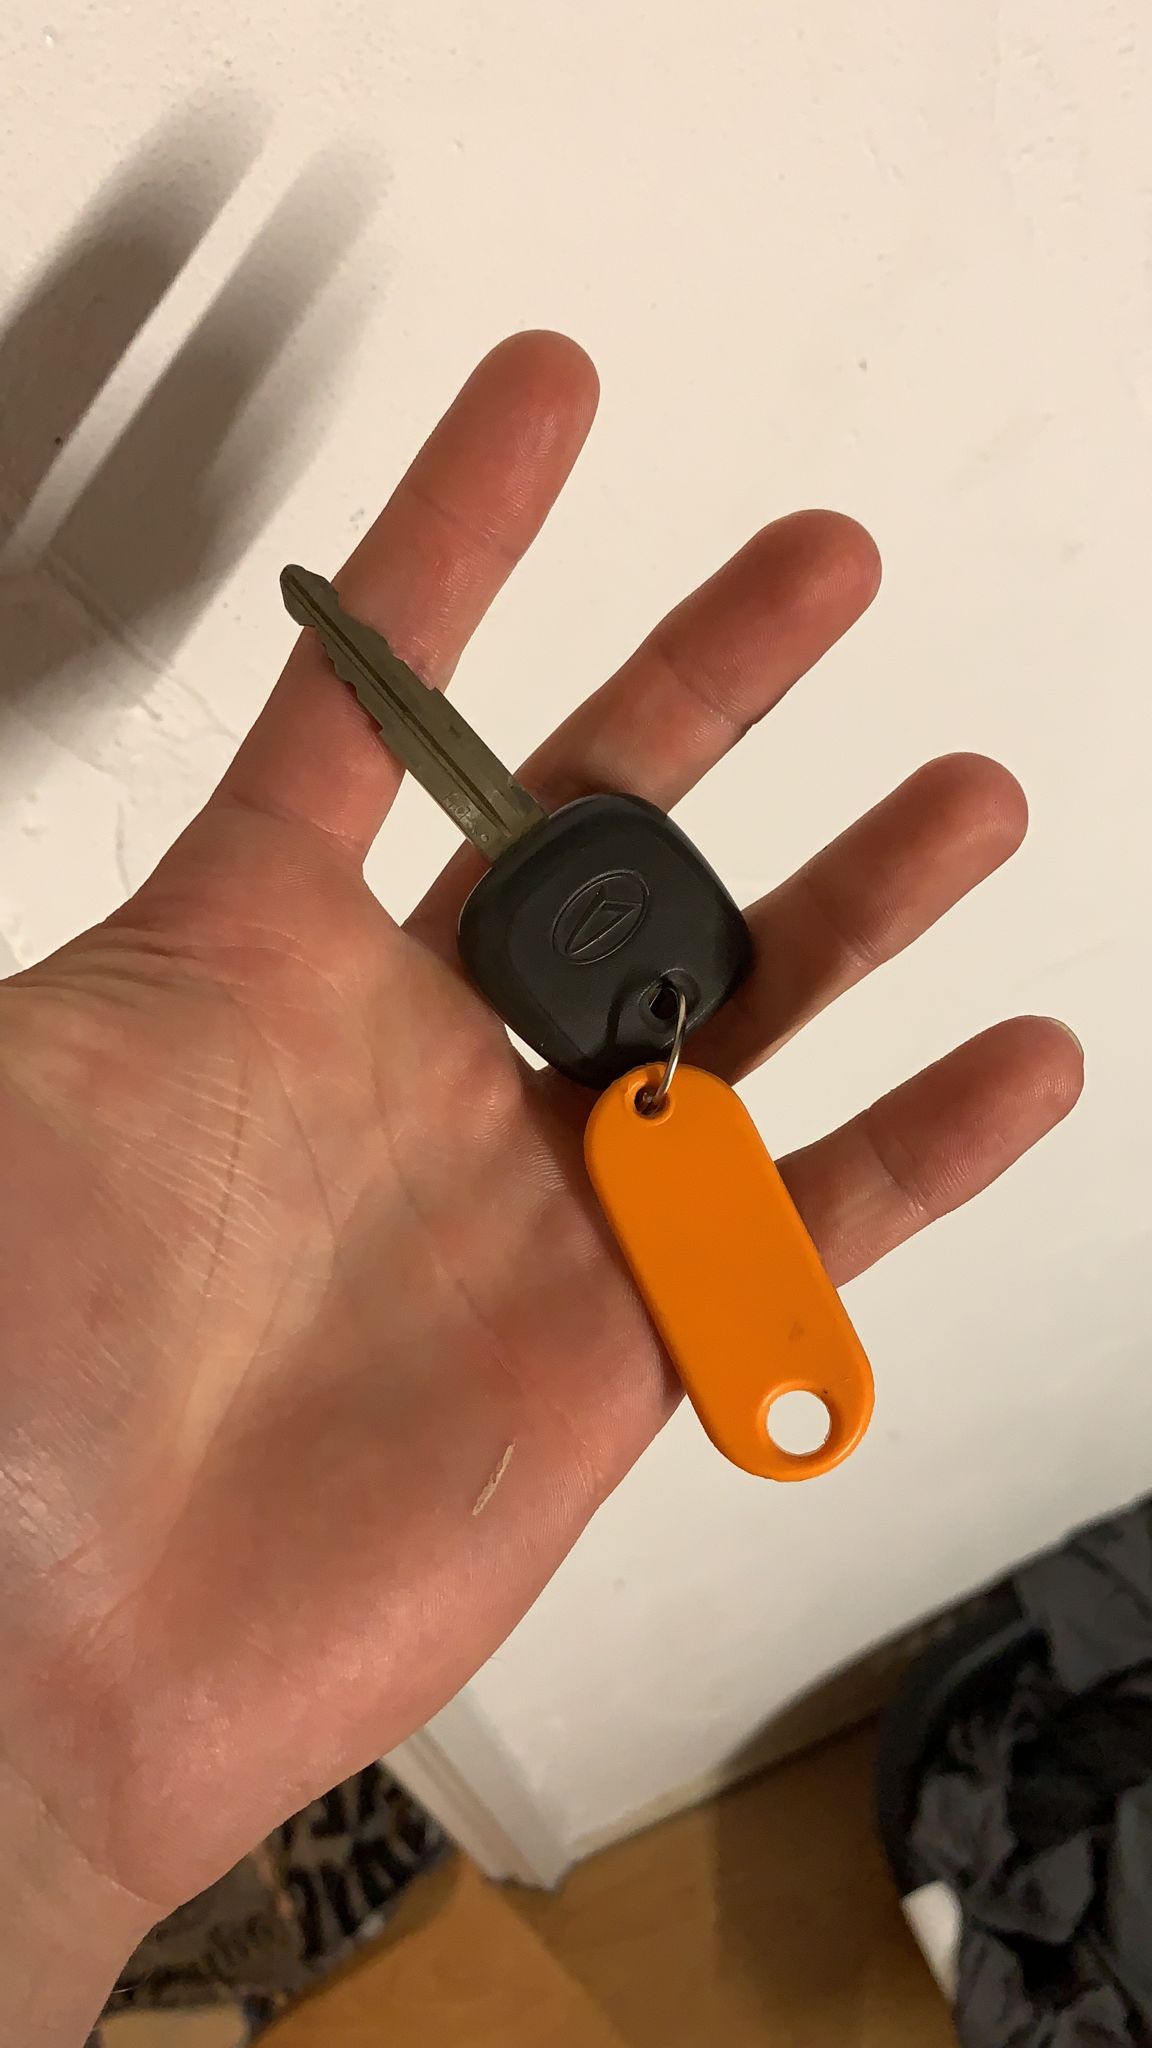
There it is, the key!
Almost two weeks after the 3SZ was raised into the car, it was time to (hopefully) fire it up for the first time. I already made a new plug to fit the M3’s immobilizer, so I taped the key to the key cilinder, and tried to start the engine. I actually came alive almost immediately, but I heard a weird noise so I shut it down instantly. As it turned out, the axles were spinning (even tho the car wasn’t in gear) and the brake rotors were not properly in place, hence the weird noise. I took off the brakes, and tried to start it up again. It took a few tries, but in the end, the 3SZ really came alive! Unfortunately, I can’t upload video’s here, but I posted a video on the L2D facebook page (look up “3SZ”) and on my Instagram, so go check that out!
What bothered me, was that it didn’t really want to start every time I turned the key. My guess was that it was still reading the L7’s key, instead of the M3’s key.
You see that black plastic ring around the cylinder?
That’s a coil, which energizes the transponder inside the key. I took it off, taped the M3’s key to it, put it away from the L7’s key, and now it works perfectly fine.
STILL HERE?
That was a lot of reading! If you’re still here, thanks for taking the time to read it all. I really enjoy documenting all of this, and maybe it might even help some people someday. I found out that there’s really not that information to be found on 3SZ’s, and especially not this kind of swap. I might make a separate topic on the entire swap to spread a bit more information, but the 3SZ isn’t just a stroked K3. Especially not the K3 that came in the YRV and Sirion (GTVi). There are a lot more differences than you’d think, and I’m not sure if I’m able to get it all documented properly. We’ll see. For now, I’m going to try and make it ready for the next car event, and then I’ll make another post once it’s finished. Cheers guys 
15 Likes
Good work on all, esp figuring the transponder. Yeah, steering wheel generally too far away.
1 Like
Happy to see another L7 3SZ swap! Welcome to the club.
here is my 3SZ swap Perodua Kelisa (L700)
Currently still running NA setup. But I’m in the process of building my spare engine as a Turbo setup. But both will still running on Auto transmission due to my ankle injury.
Looking forward to the completion of your build!
7 Likes
Awesome! Great write-up. It seems that I need allot more skills (and friends) for when I’m going to swap the engine xD
Really stoked for you and I hope I’ll be able to see the Blyatsu in real life some day.
1 Like
I’m hoping to have my car ready for GO Japan on September 18th, so maybe you can spot me there?
1 Like
Nope still on holiday  Have fun!
1 Like
ONCE A SHITBOX…
It’s been quite a few weeks. Putting back together all the bits and pieces just took some time, but getting it to drive properly proved to be quite challenging. Let’s go back a few weeks.
NICE 'N TIDY
I didn’t take a lot of pictures, but it’s not like there’s a lot to show. Fixing and fitting the wiring harness properly took by far the most amount of time. But, now it’s all nicely strapped and tucked into place, and I’m pleased with the result.
Before
After
Then I put back the dashboard, carpet, and seats, which made it look a lot more like a car!
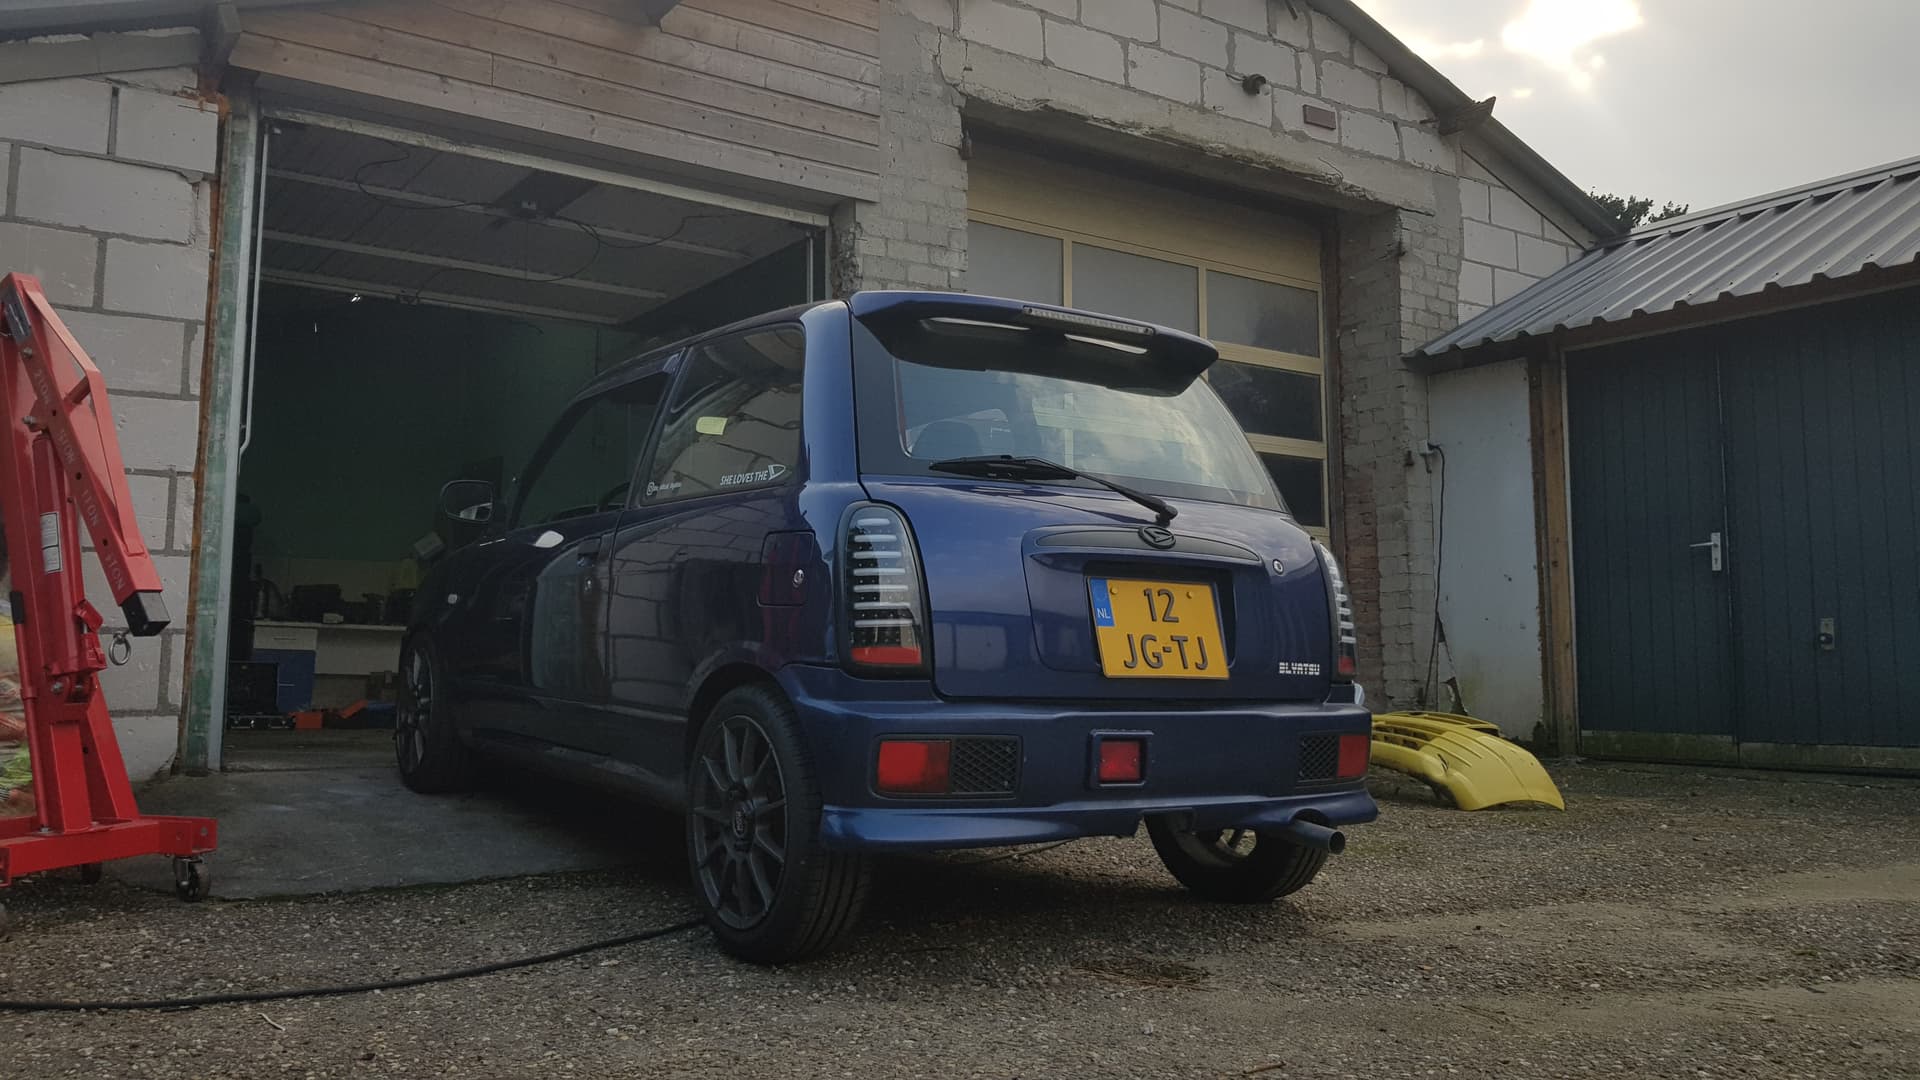
After that, it was time to move to the outside of the car, and eventually put it back on its wheels for the first time in a month  .
.
Bwoooaahhhhh
Fitting the last parts was pretty straightforward, fortunately.
The only thing that kept me from taking it out for a drive, was that I first had to bleed the brakes and the cooling system. I didn’t want my car to fill my garage with exhaust gasses, so I decided to turn the car around, which meant I had to drive it outside, for the first time in weeks! 
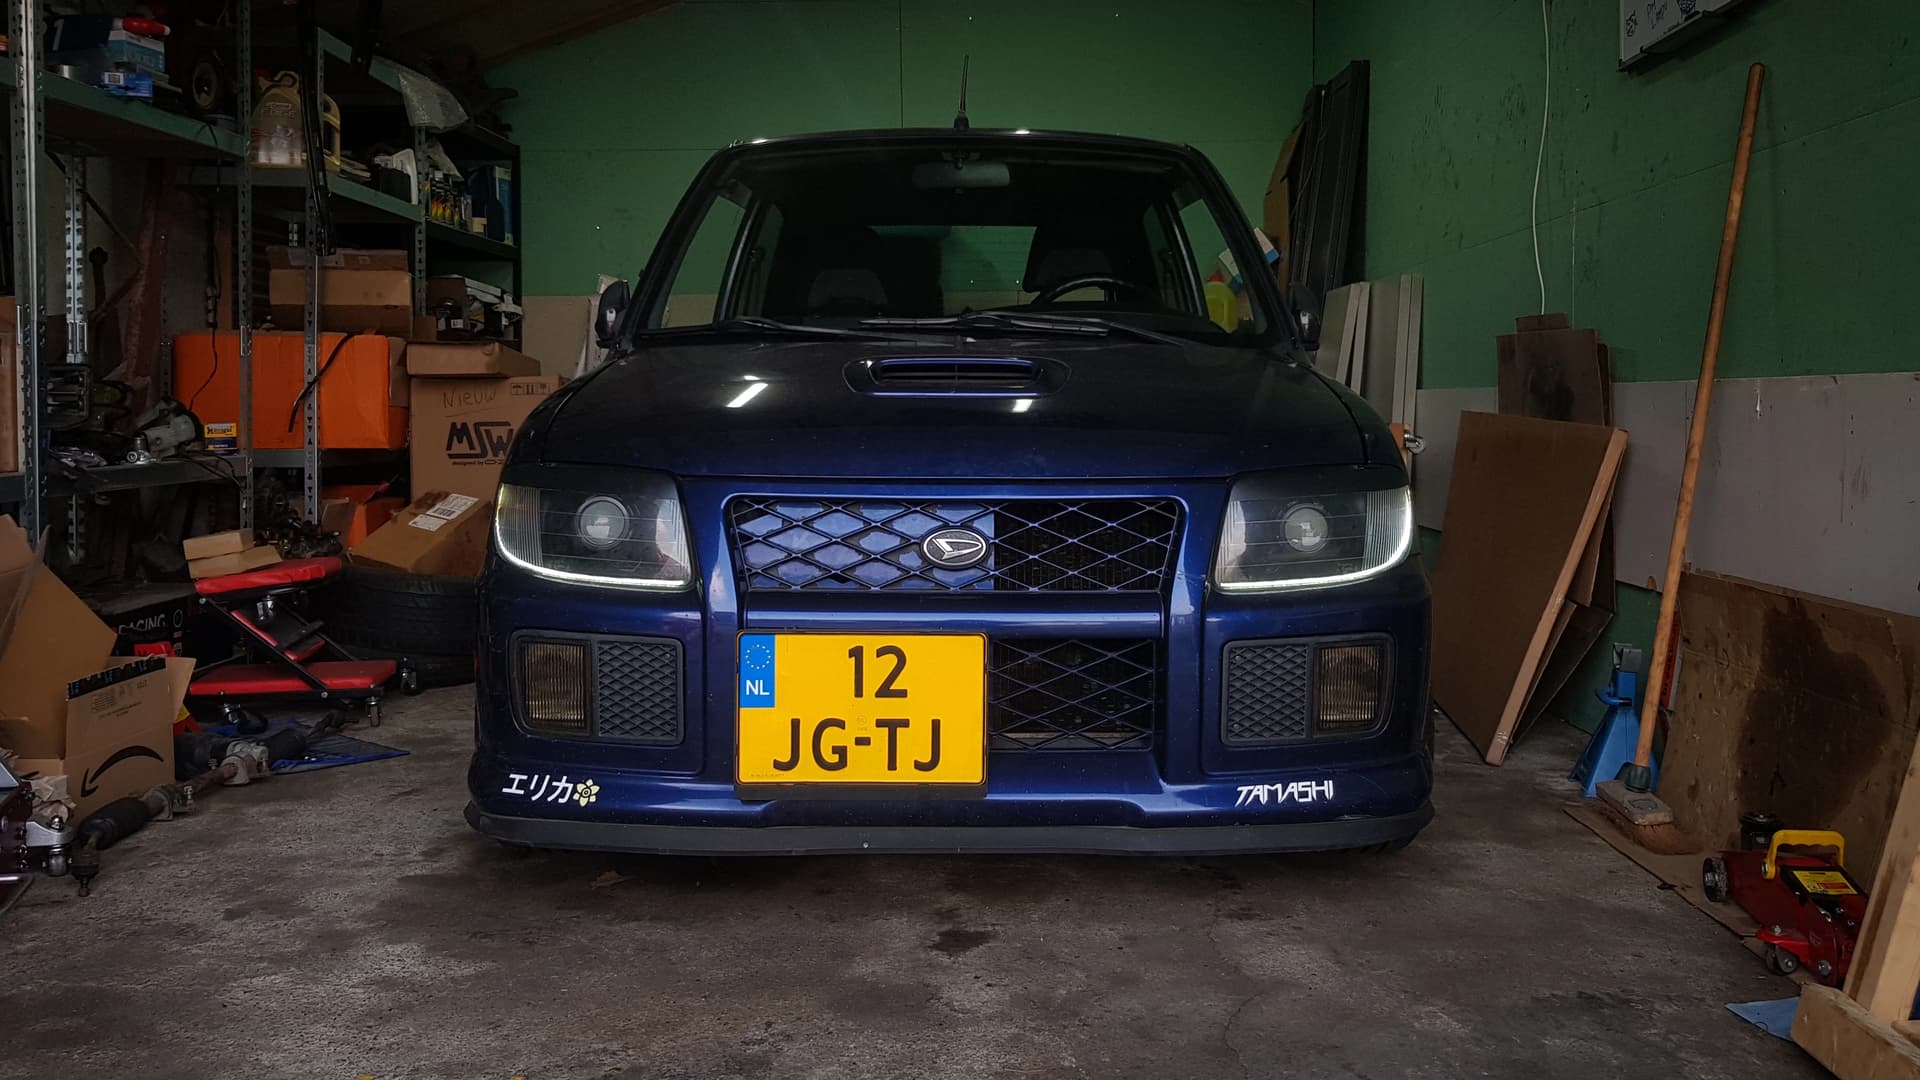
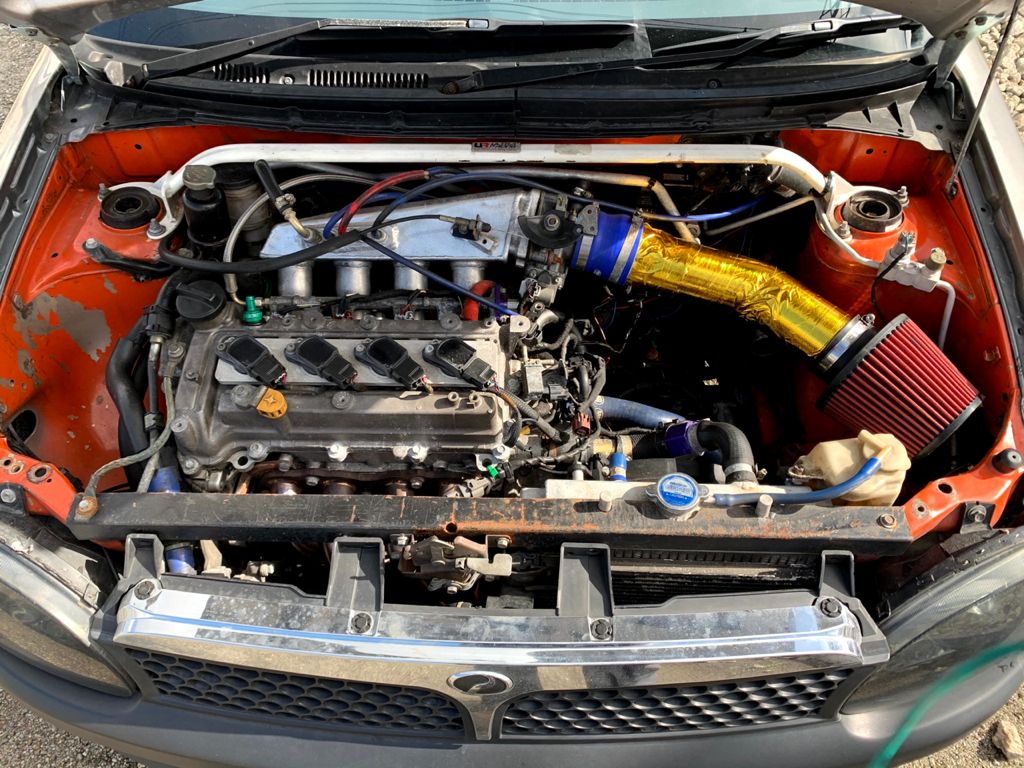
You can’t even tell there’s a different engine under the bonnet
I mooooooves!
Driving the first few meters came with a lot of smells and noises, but everything felt solid.
FIRST DRIVE ON THE ROAD
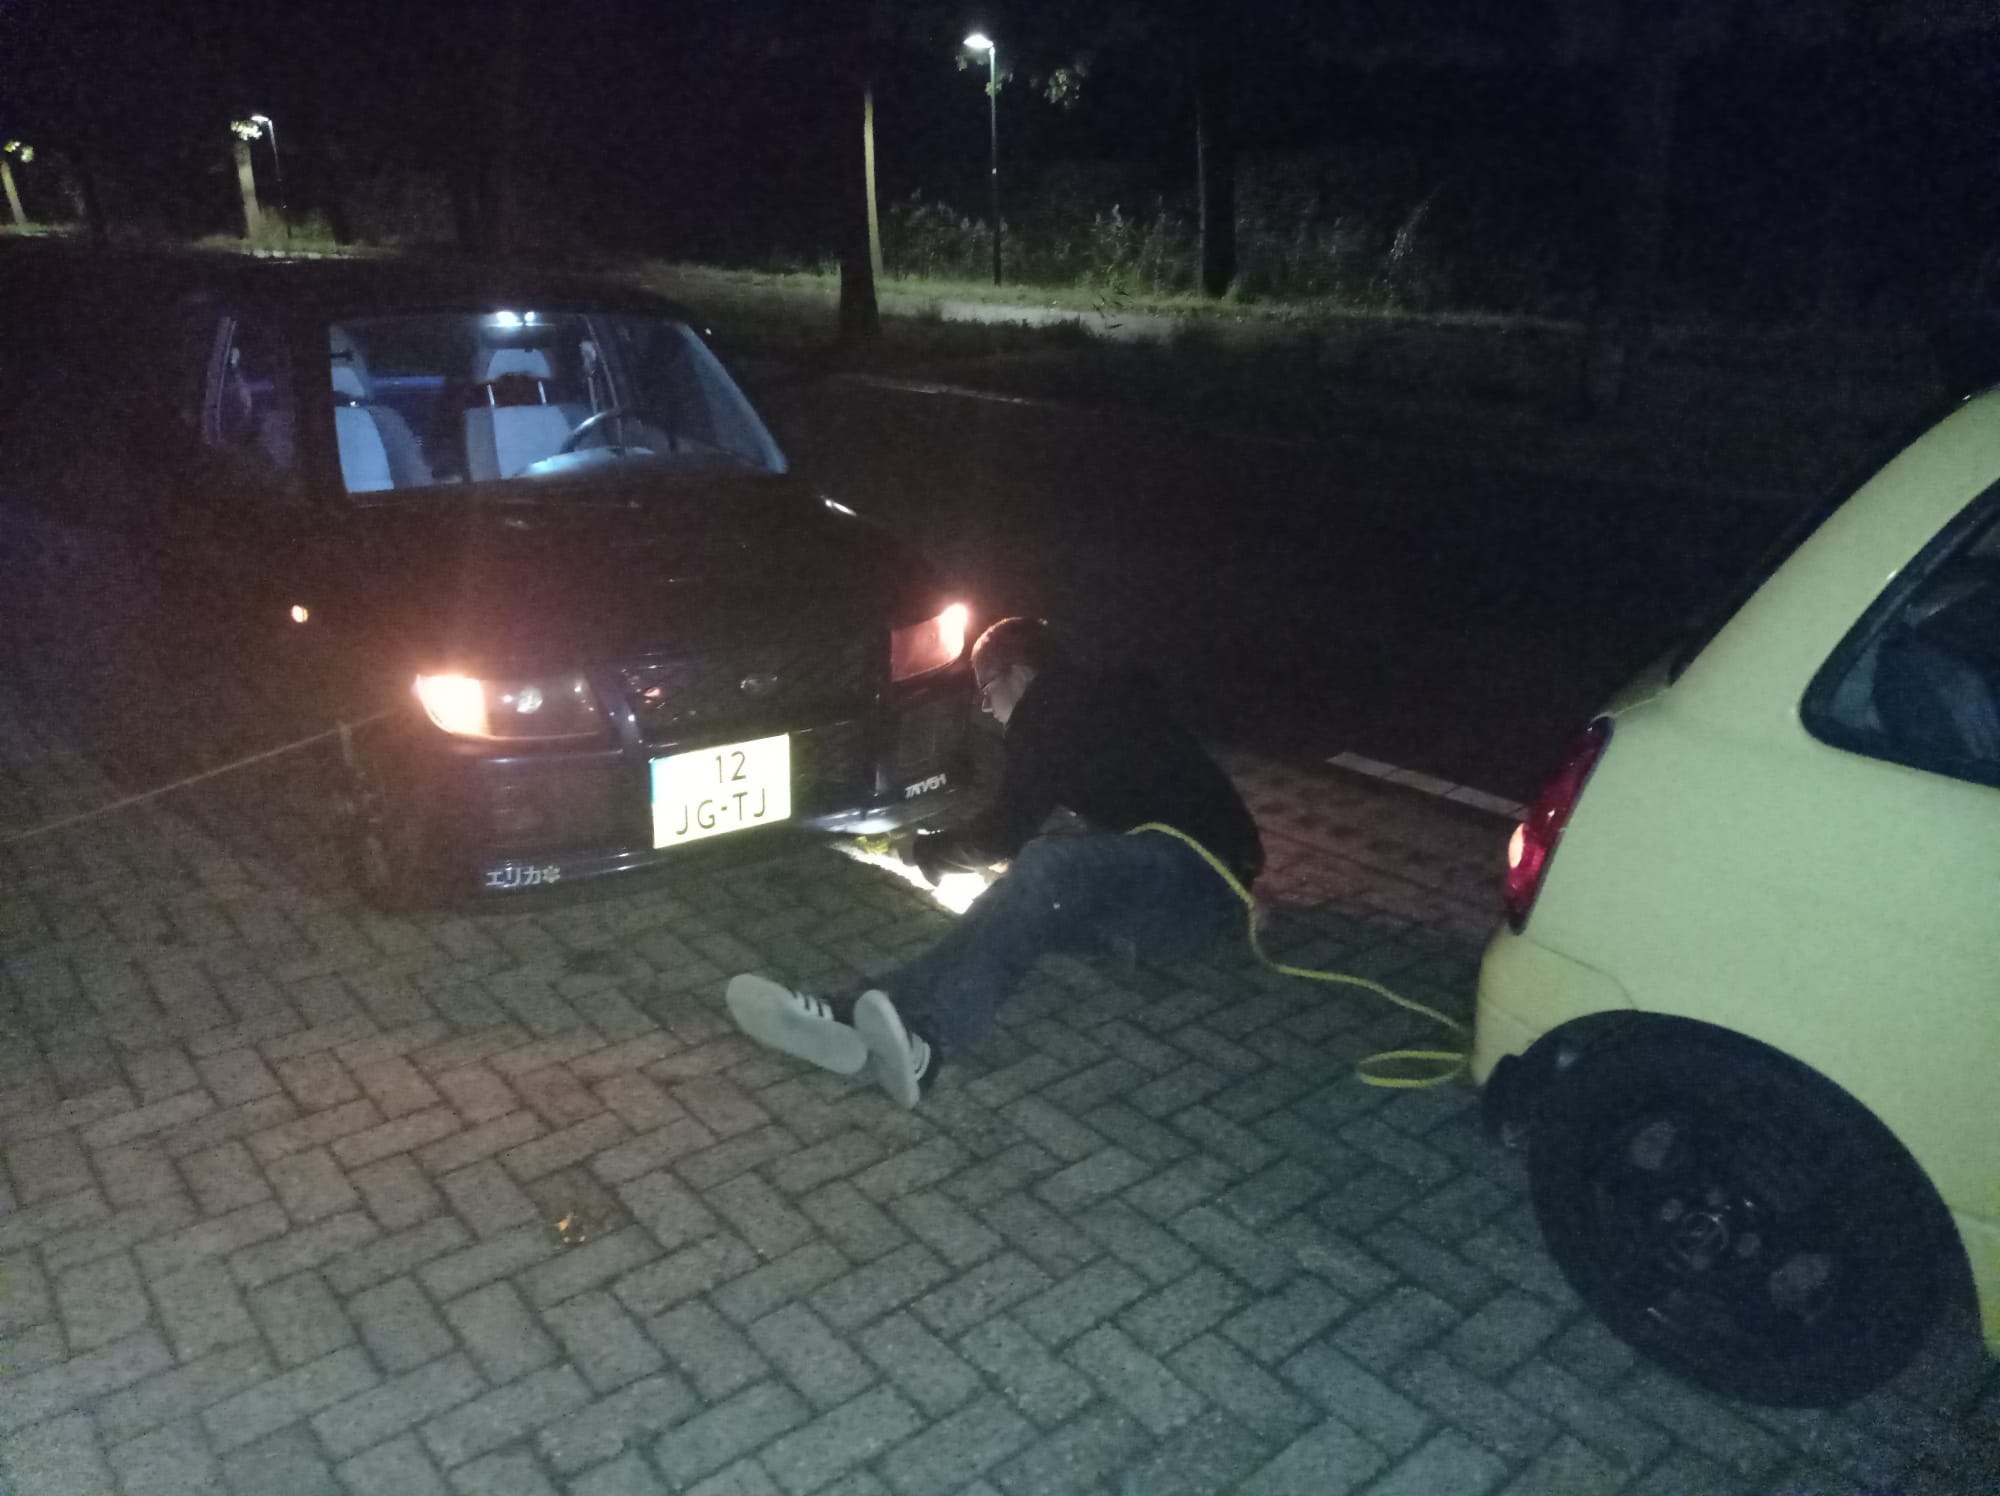
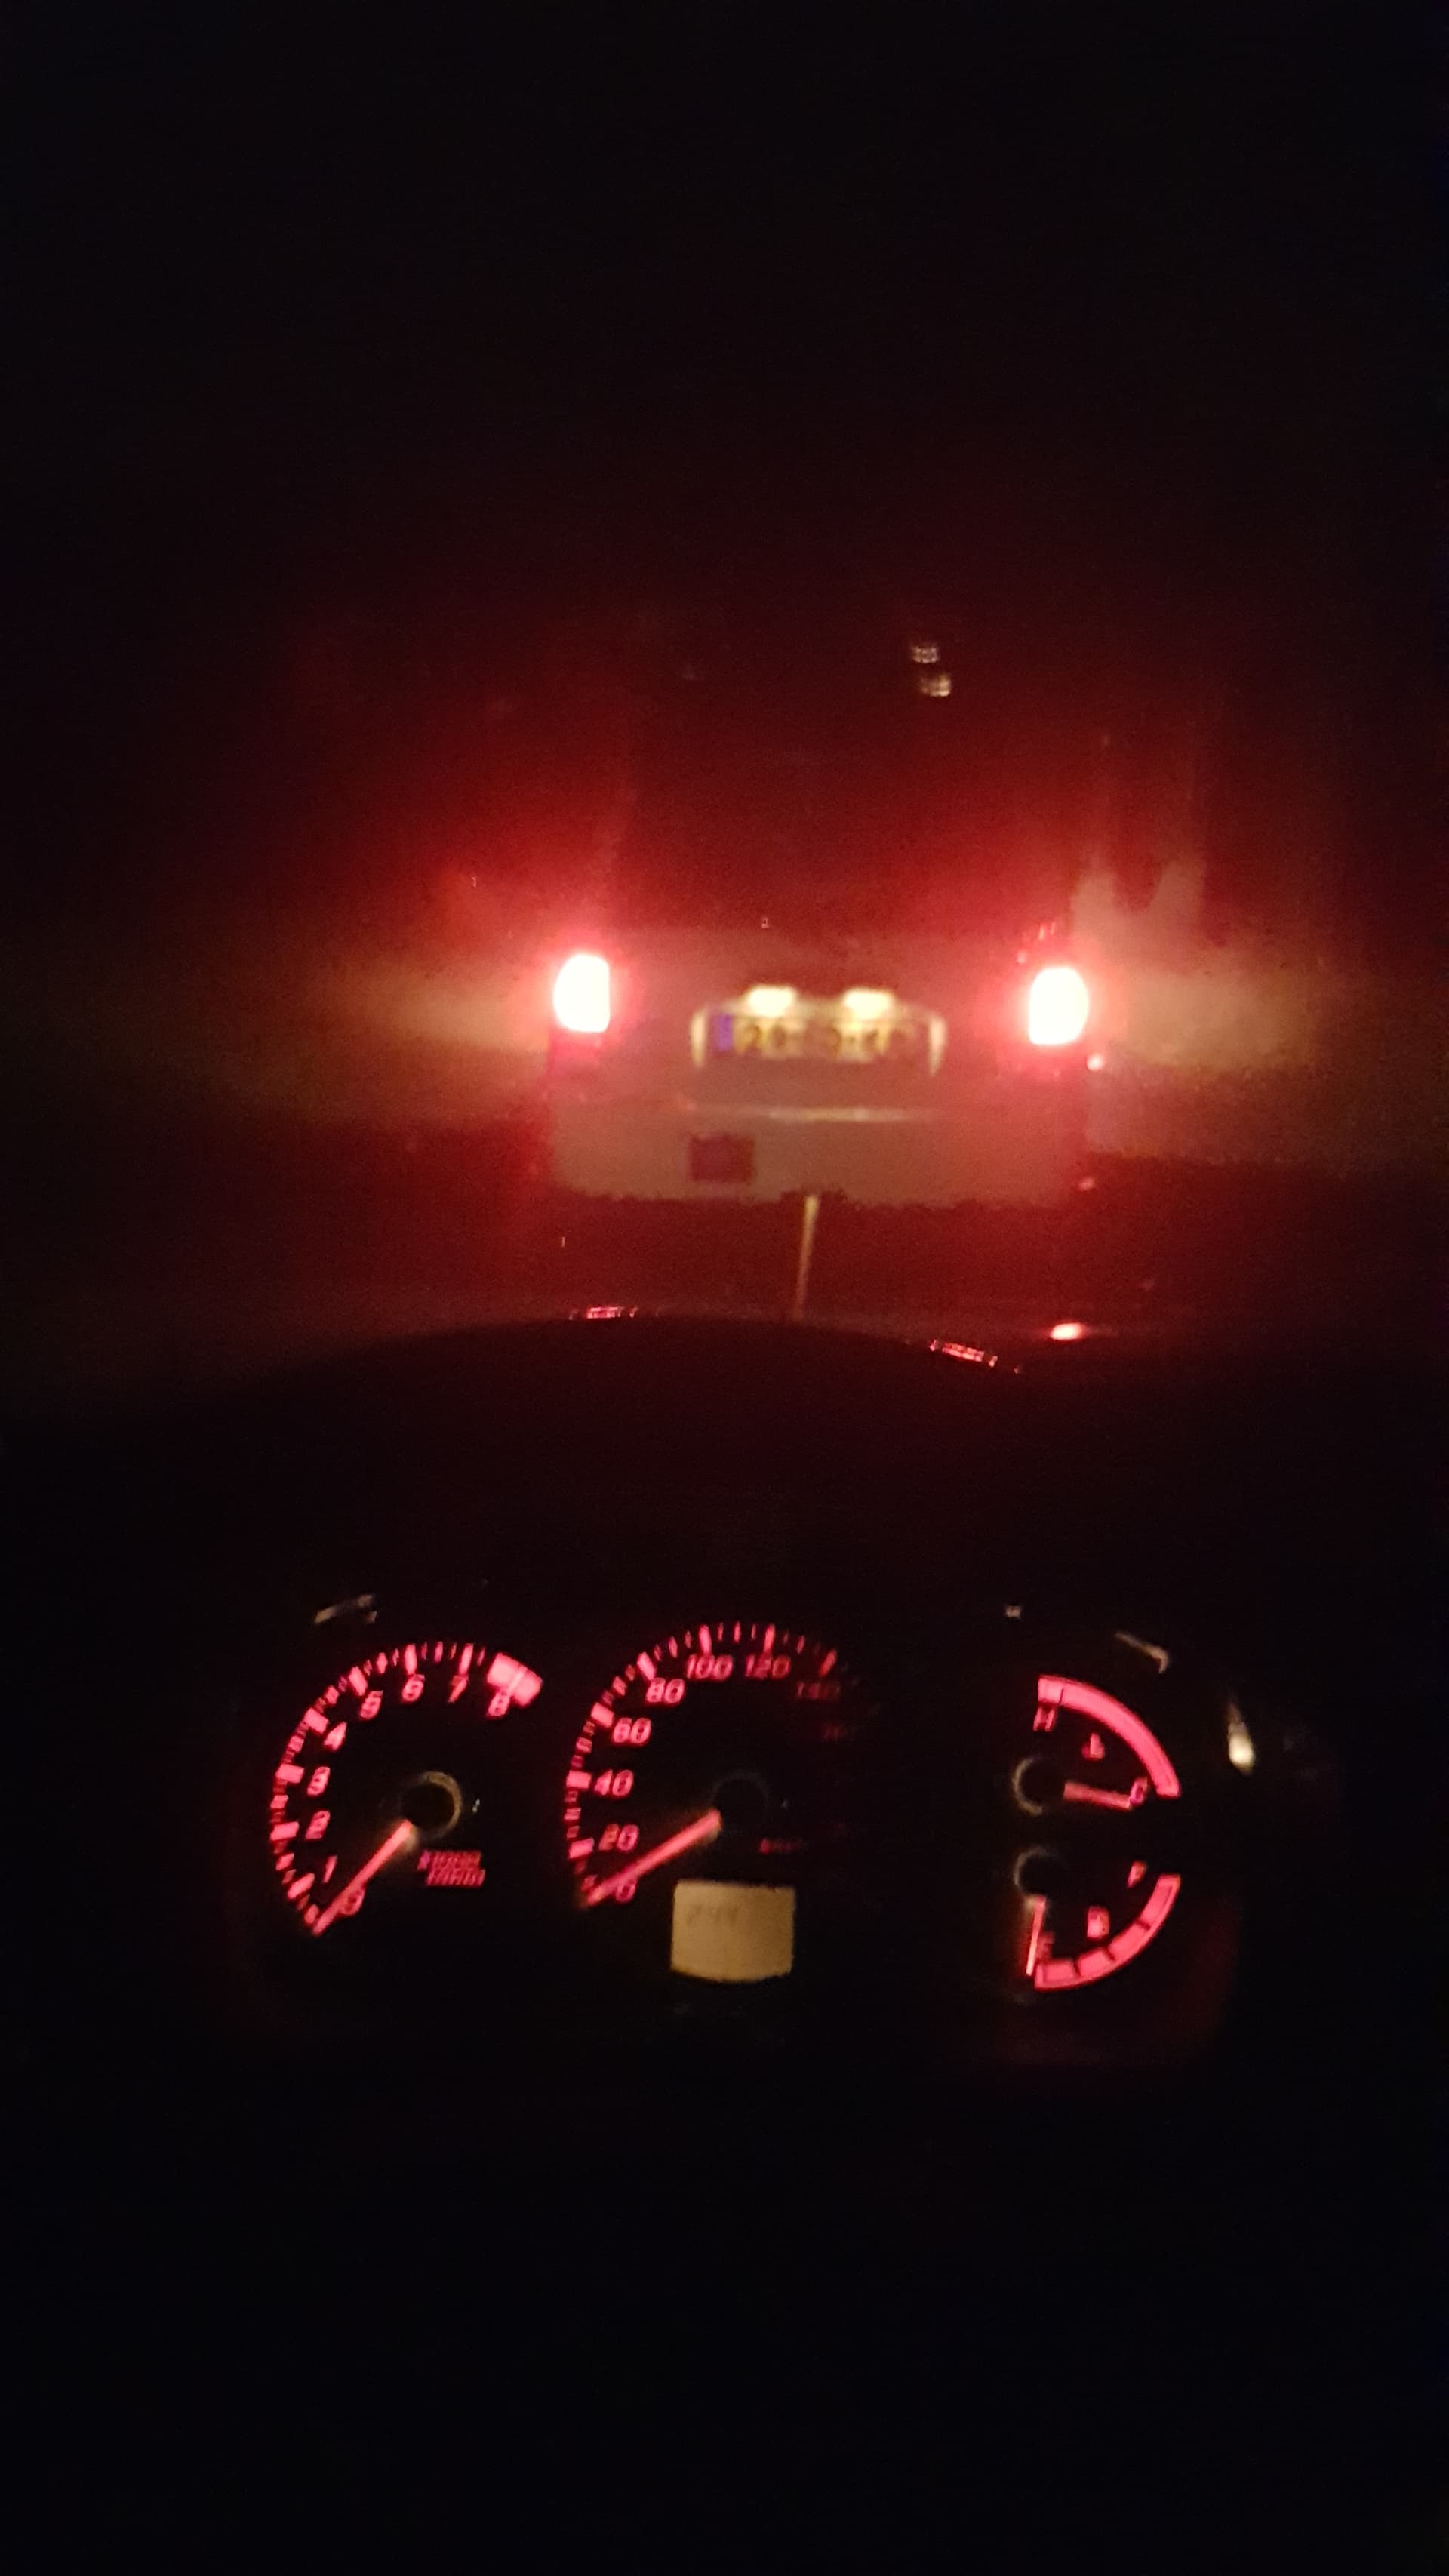
A few days later, a couple of friends came over to help me bleed the systems and tighten everything properly. It took us a couple of hours, but at around midnight, it was time to take it for a drive. Which went well…
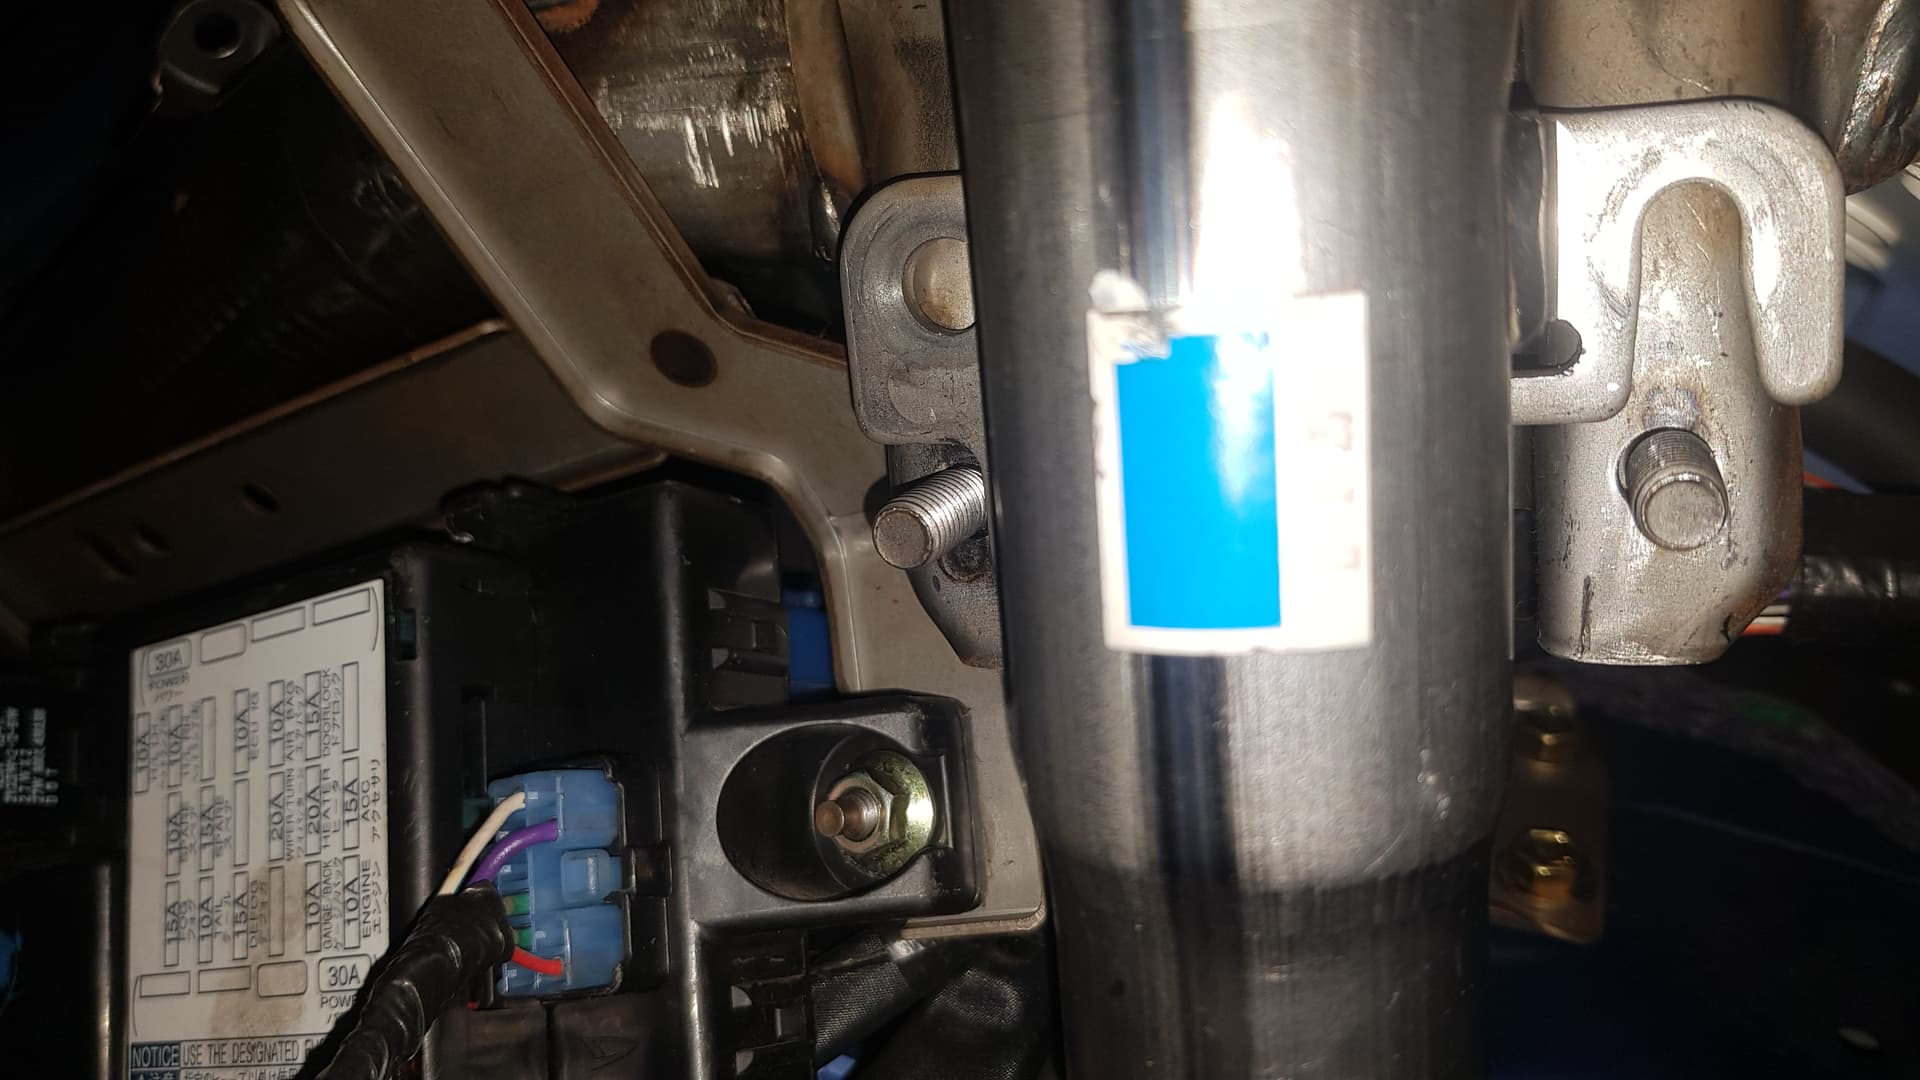
We drove about a kilometer before we decided to stop for a minute. When I turned left, there was a loud-ish rubbing noise. I had a feeling it was the alternator hitting the chassisrail, because it changed along with the RPM. We opened the bonnet to have a look, and after a minute or so, smoke. And lots of it.
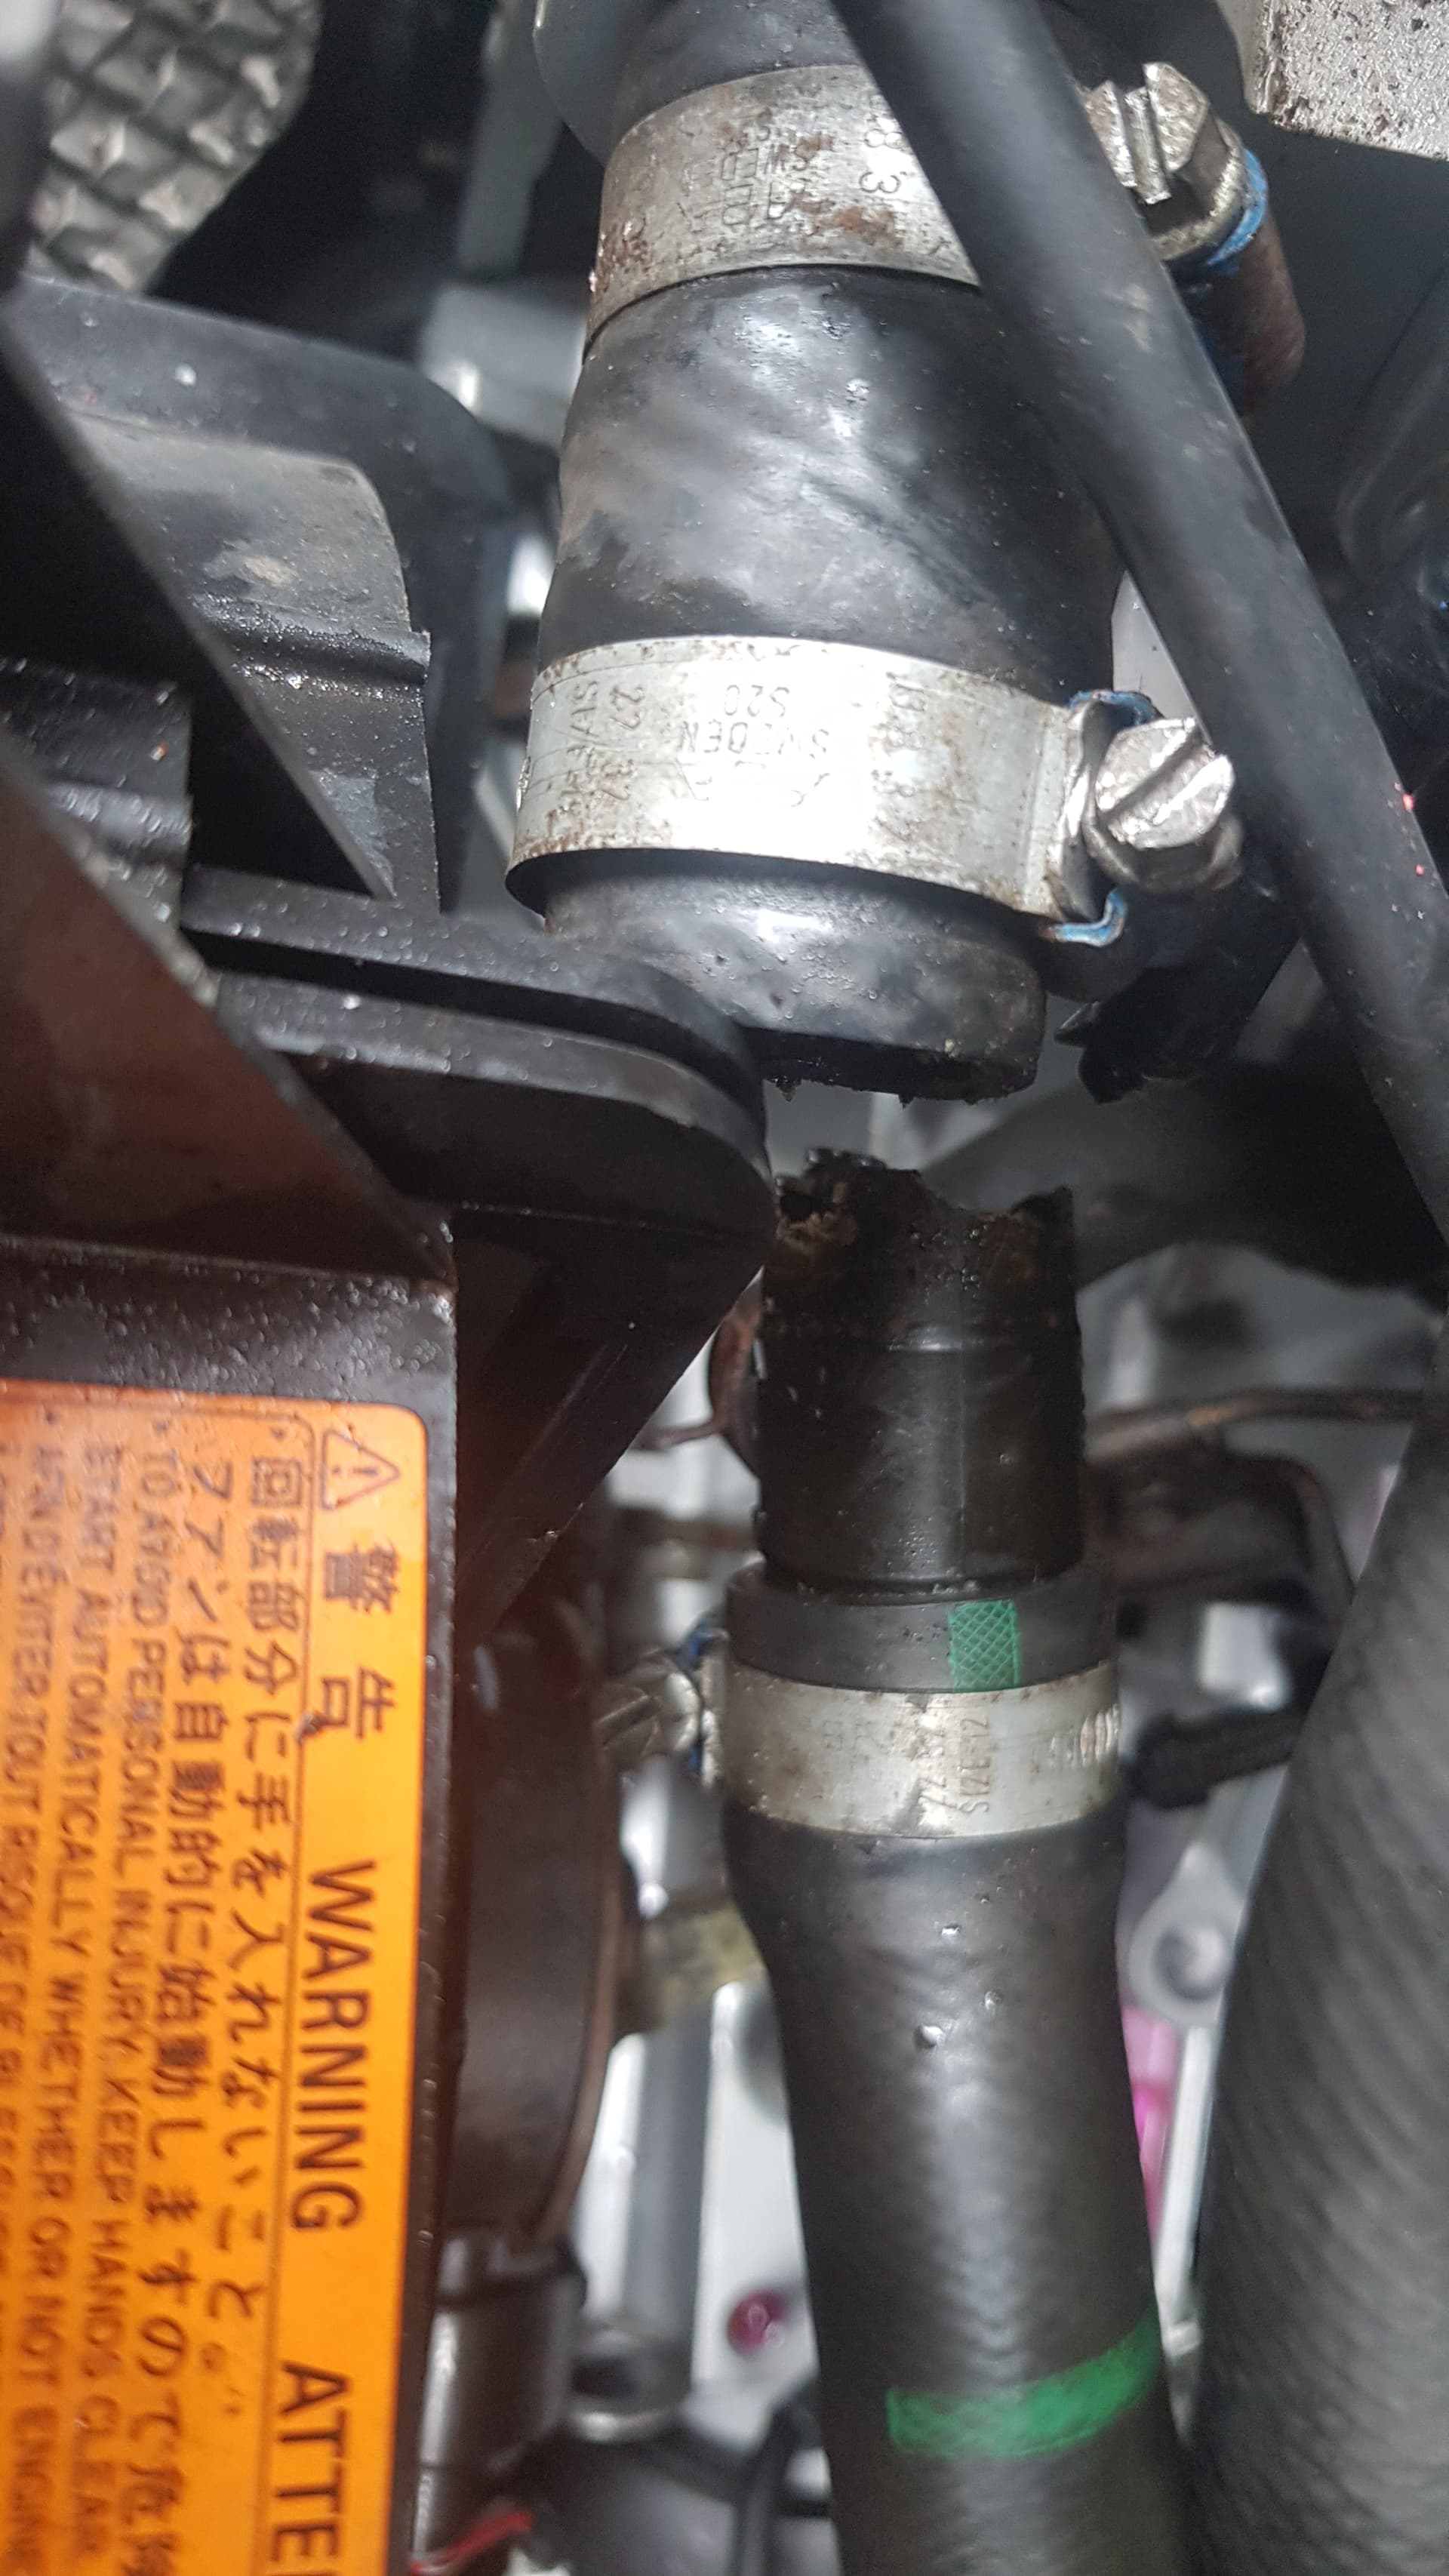
The T-piece on the upper radiator hose decided to fail
I’m lucky to have such good friends
In hindsight, I knew the upper radiator hose was touching the fan frame, but I really underestimated how hard it was actually pushing against the hose. The T-piece was made from plastic and was very brittle. Combined with the force of the frame pushing against the hose (and T-piece), probably caused it to fail.
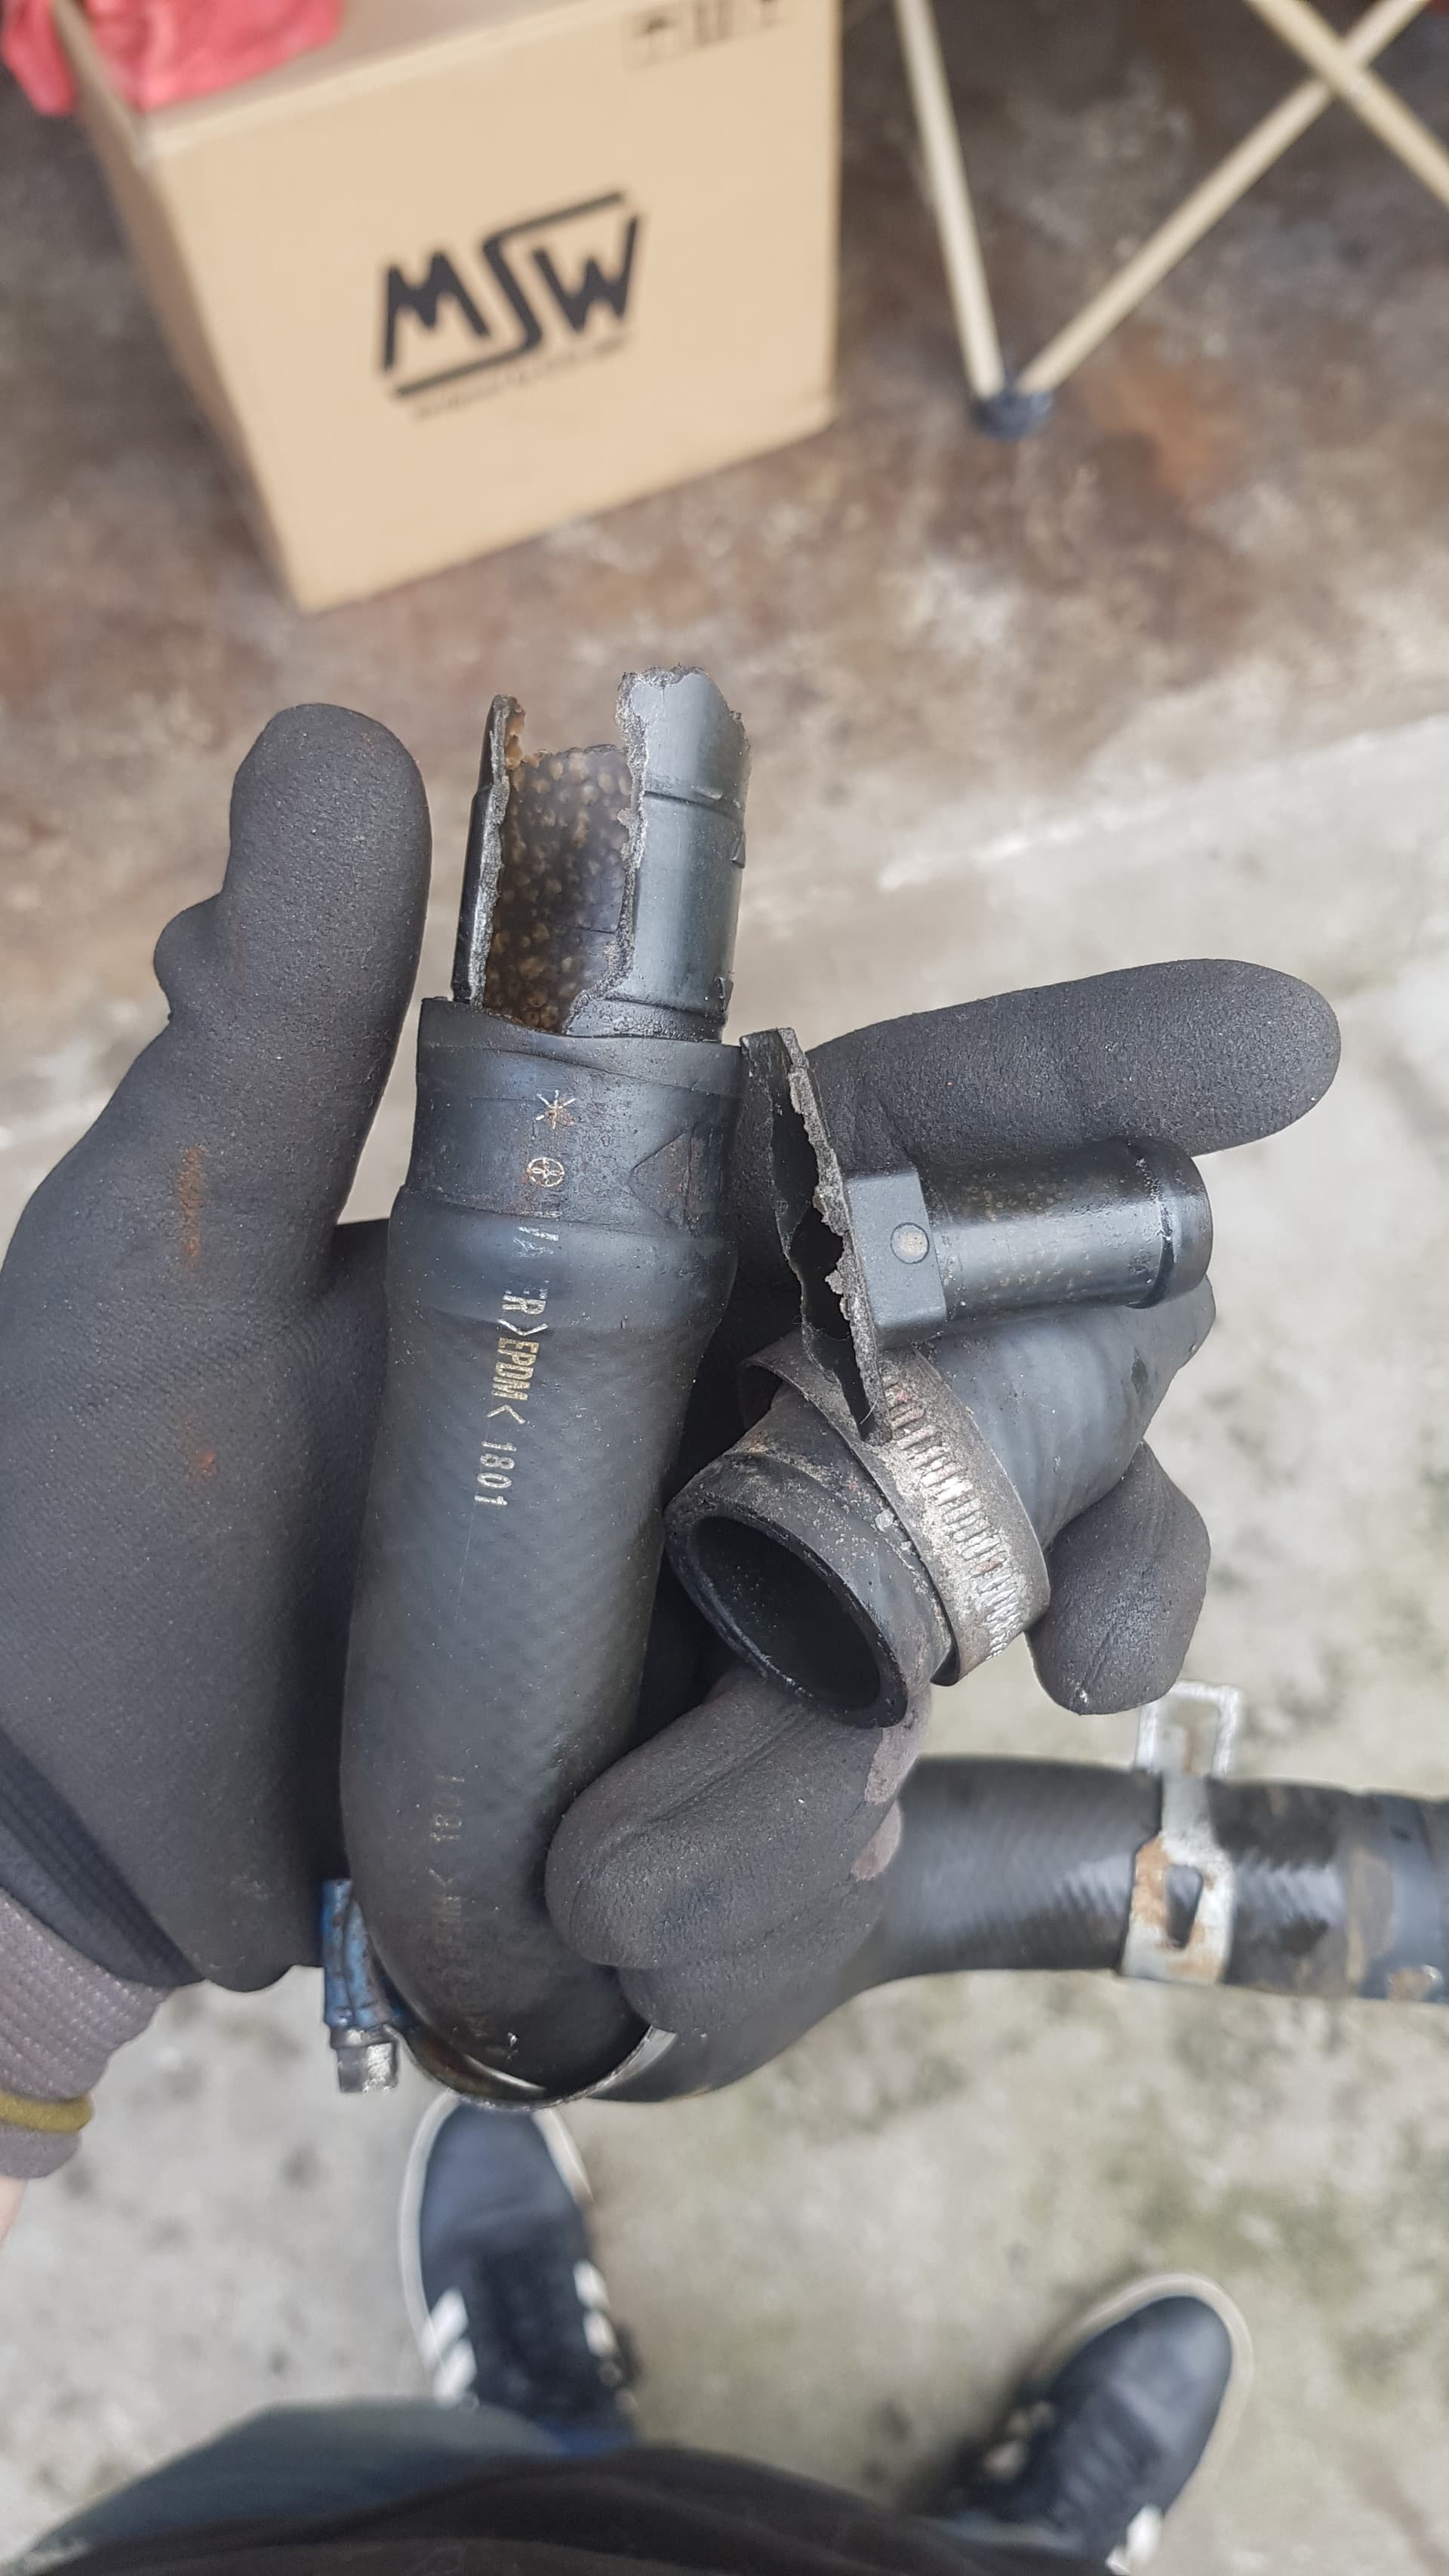
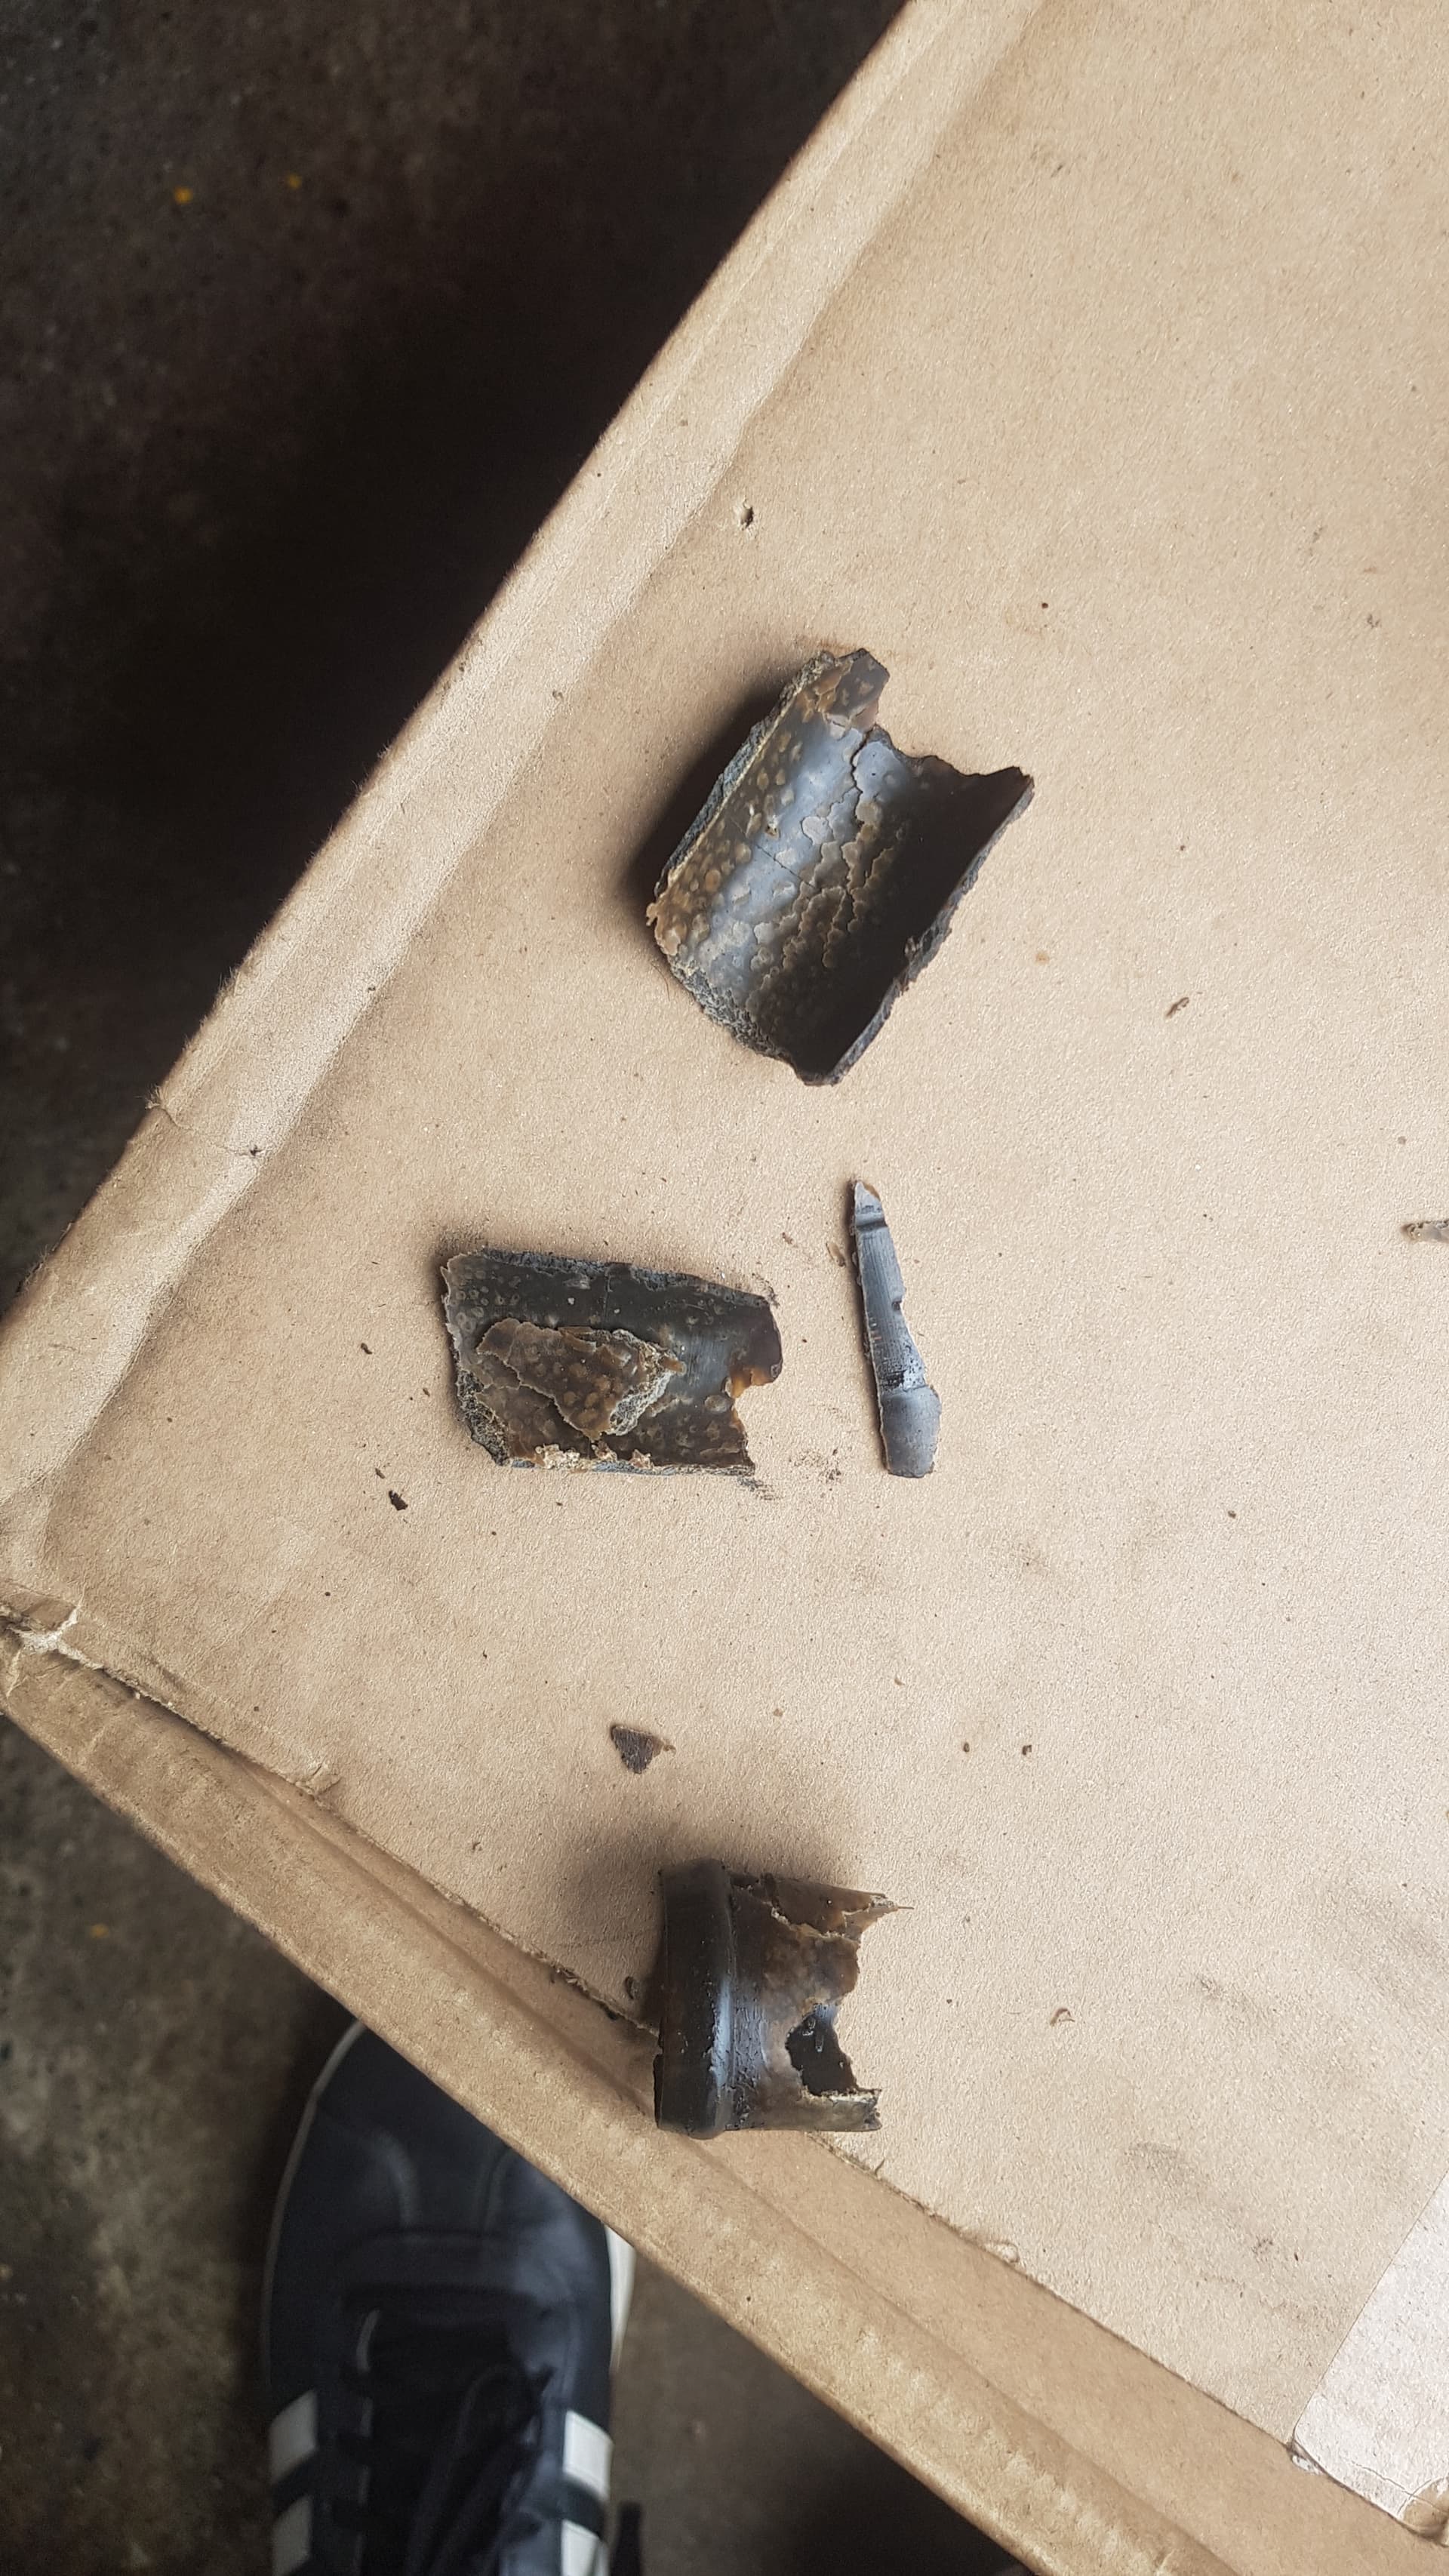
The plastic broke into pieces just trying to remove it by hand, so I think it was just a matter of time before it would’ve failed.
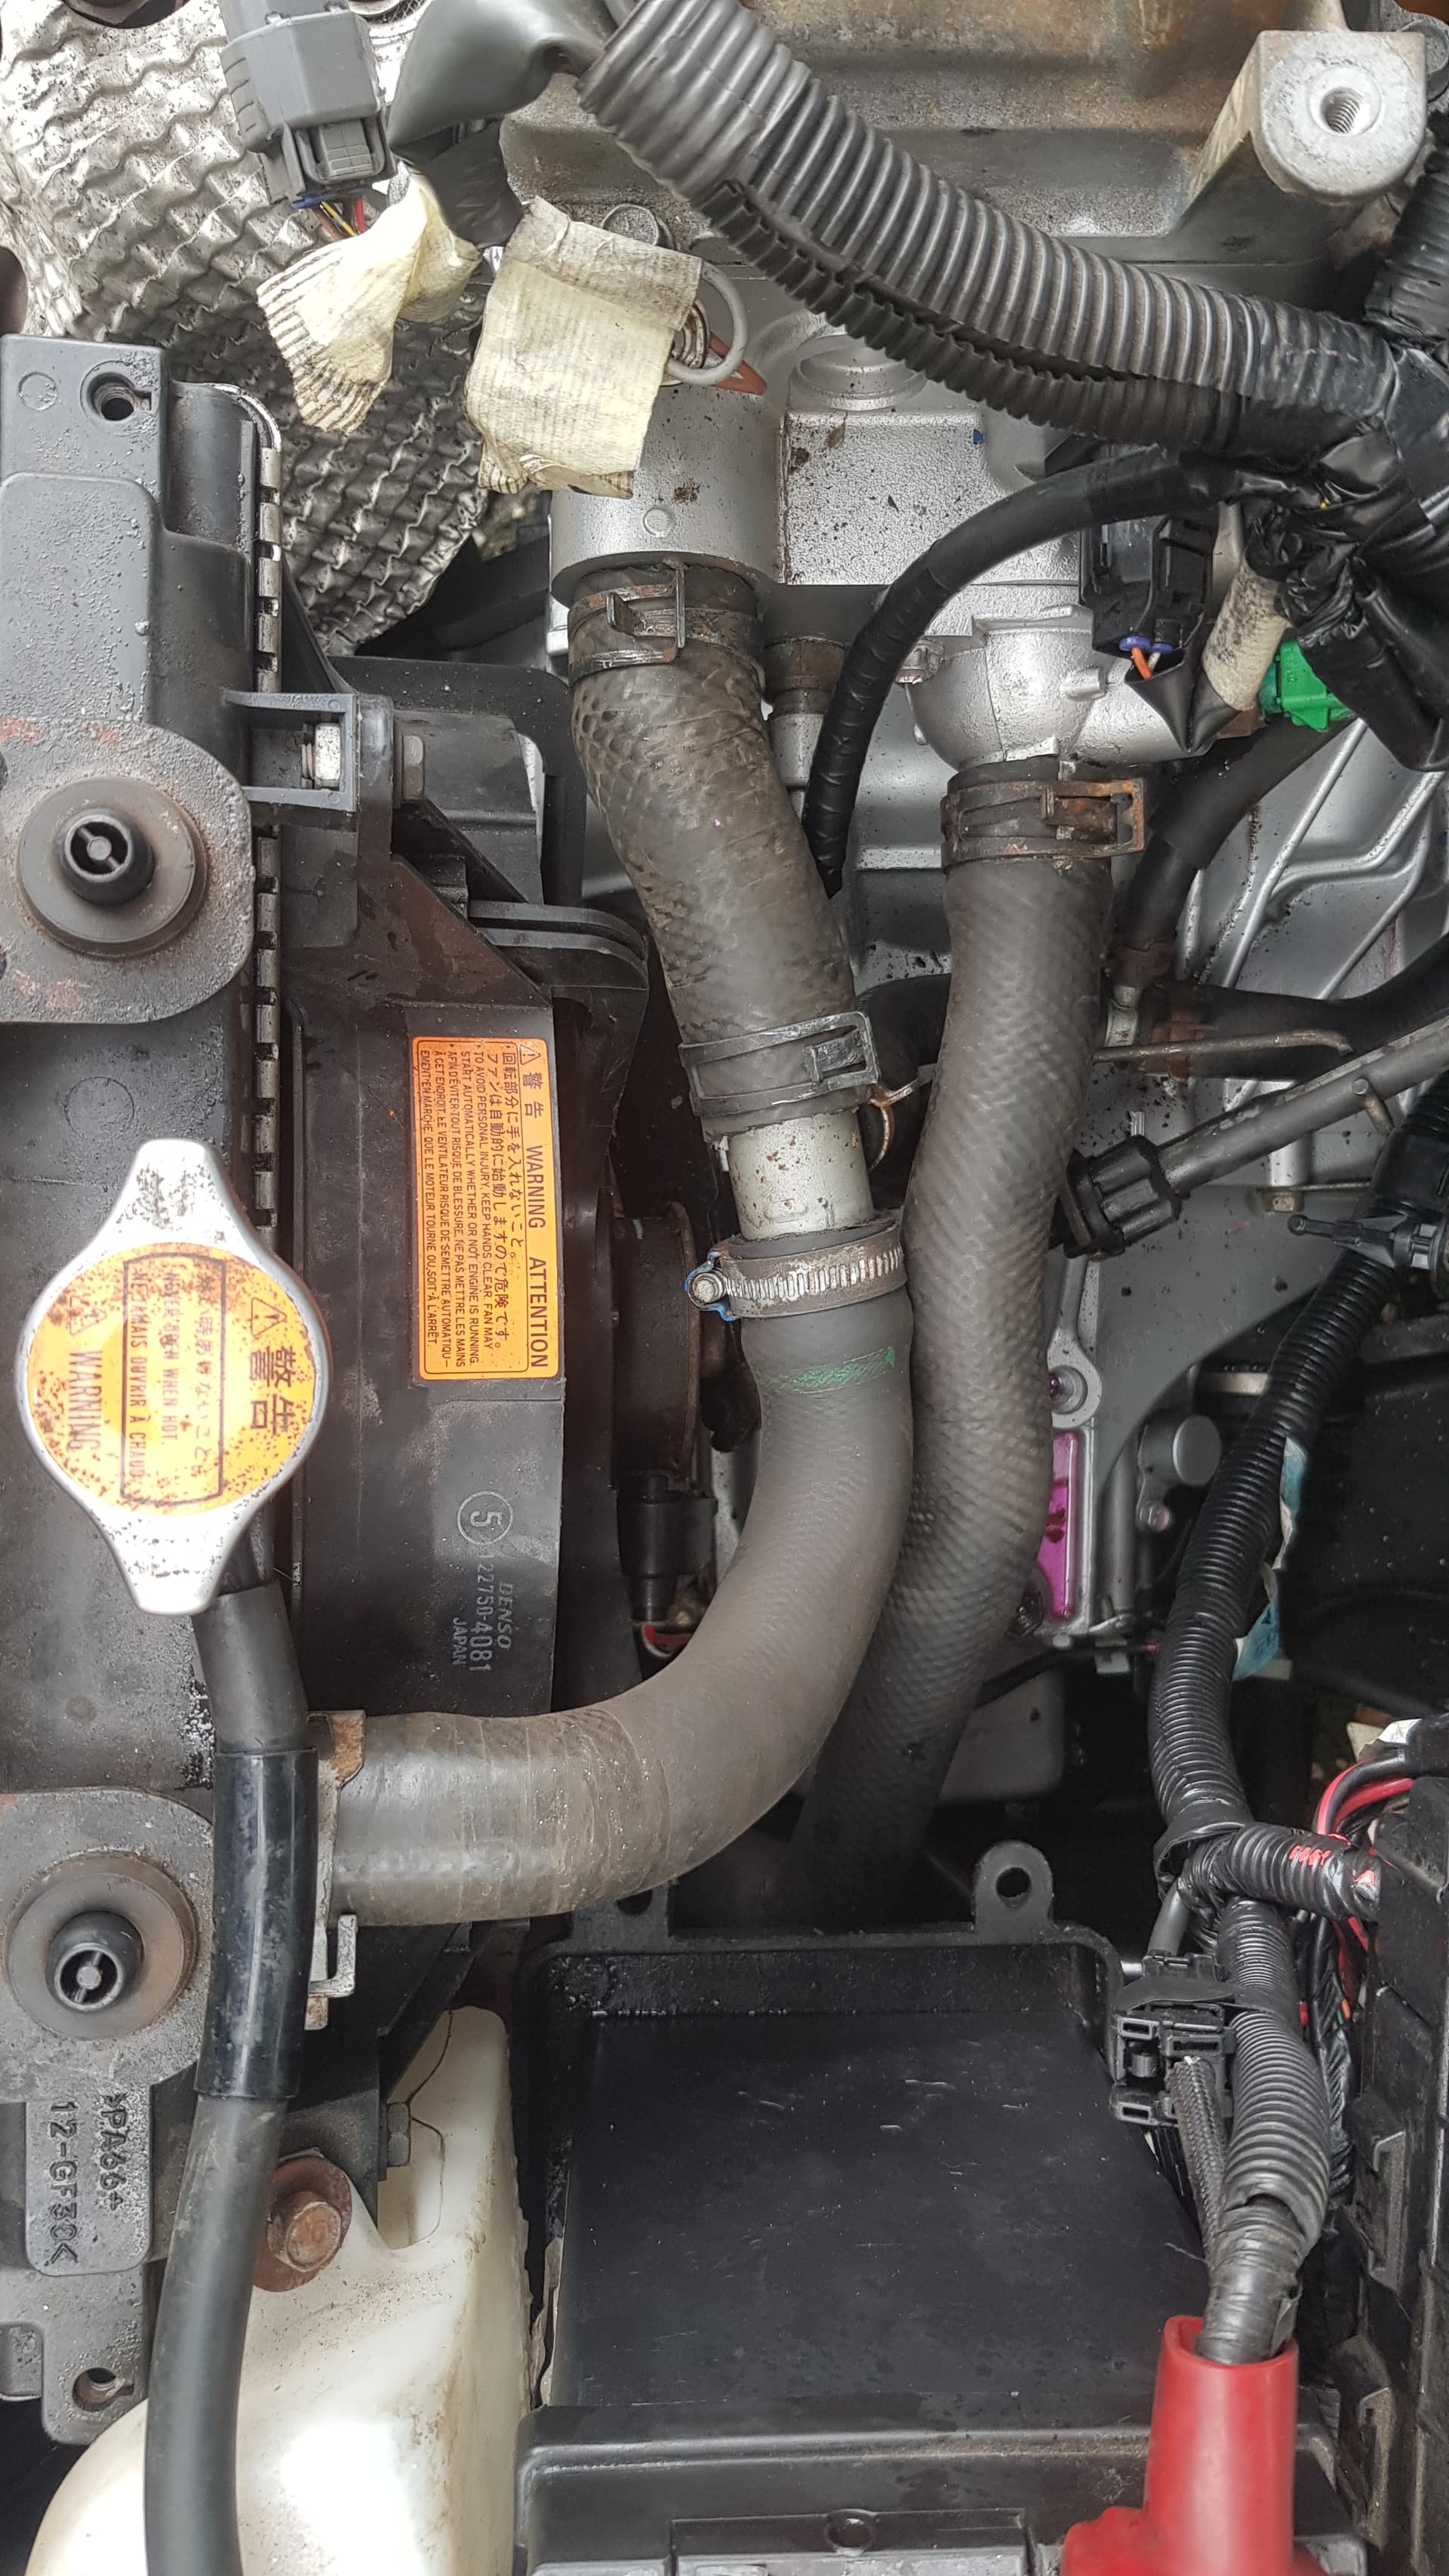
I replaced the T-piece for a metal one
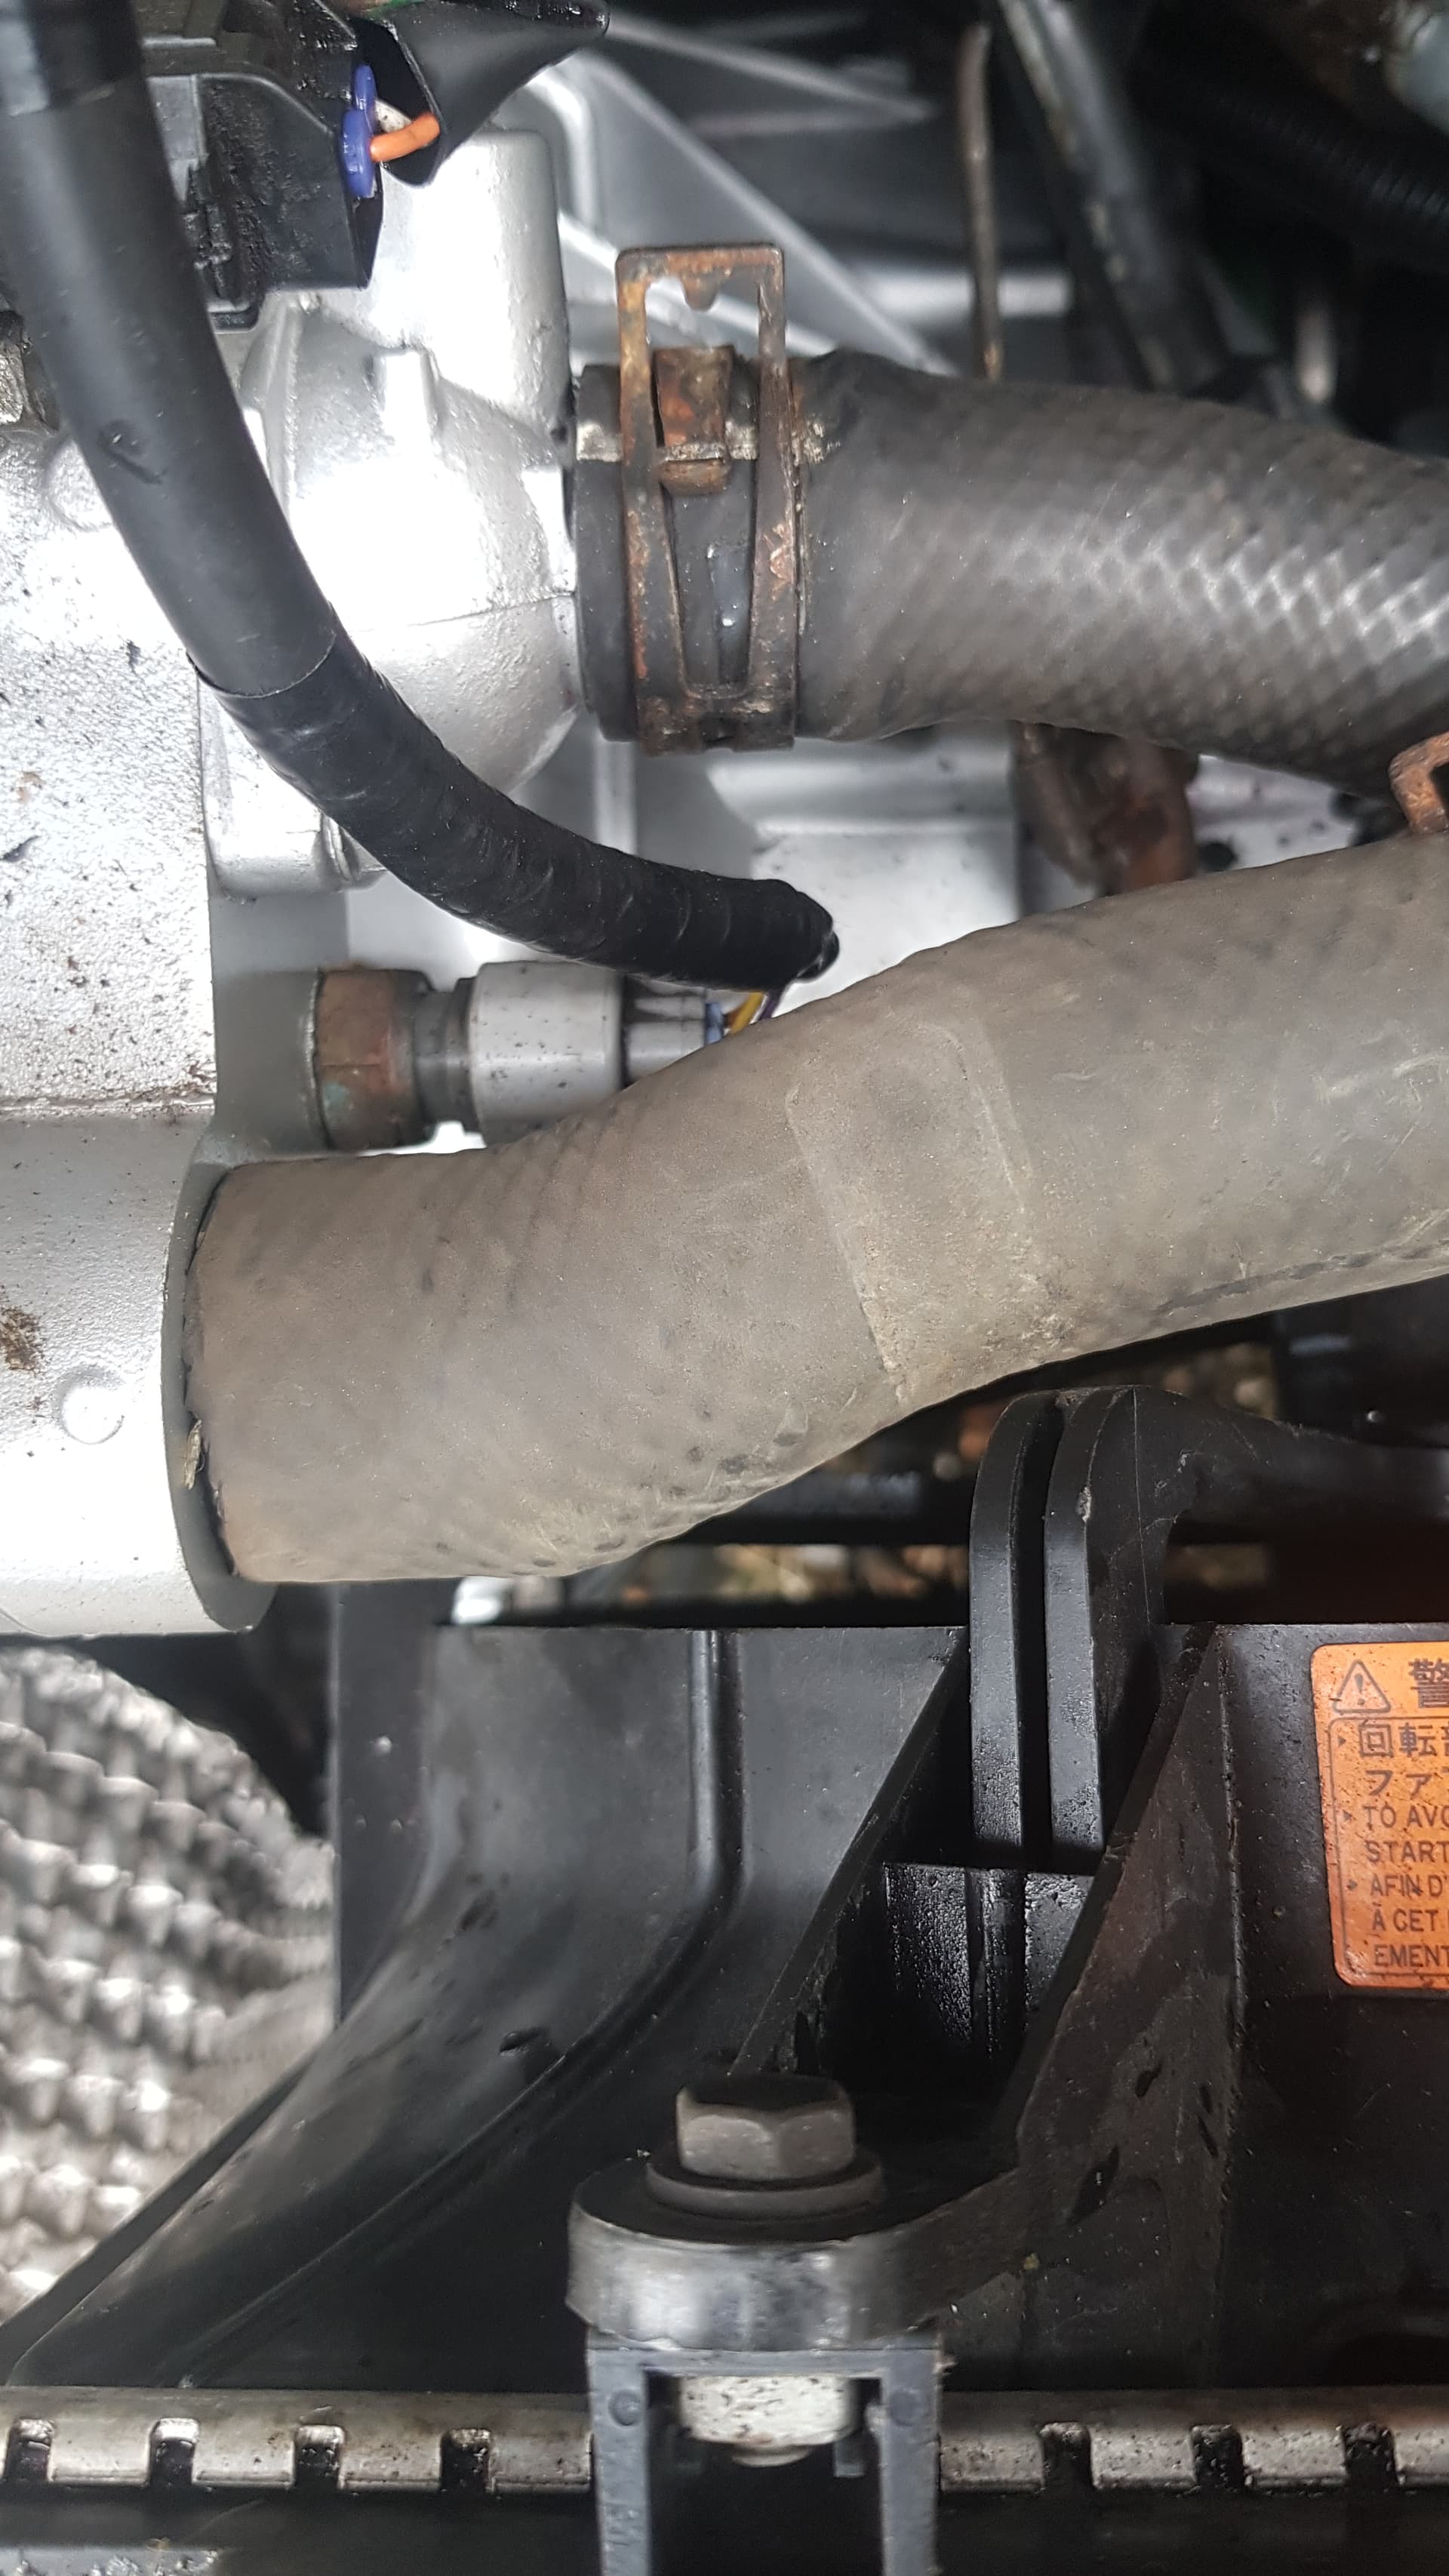
I found a hose which had a bend, so I cut it to length, and boom: clears the frame of the radiator fan perfectly.
FIRST DRIVE, SECOND ATTEMPT
I bled the cooling system again, and took it for a drive. Everything seemed alright, so I decided to take the car home for a thorough testdrive. Apart from a wacky alignment, everything felt alright! The engine runs smoothly, and it pulls like crazy  . I wanted to fill up my tank while I was at it, but that didn’t go as planned either. I started filling up, but after a while I looked down, and noticed I was standing in an ocean of fuel. The fuel filler hose and the breather hose had come off. Great. I later fitted some new hose clamps, which hopefully prevents the hoses from coming off again.
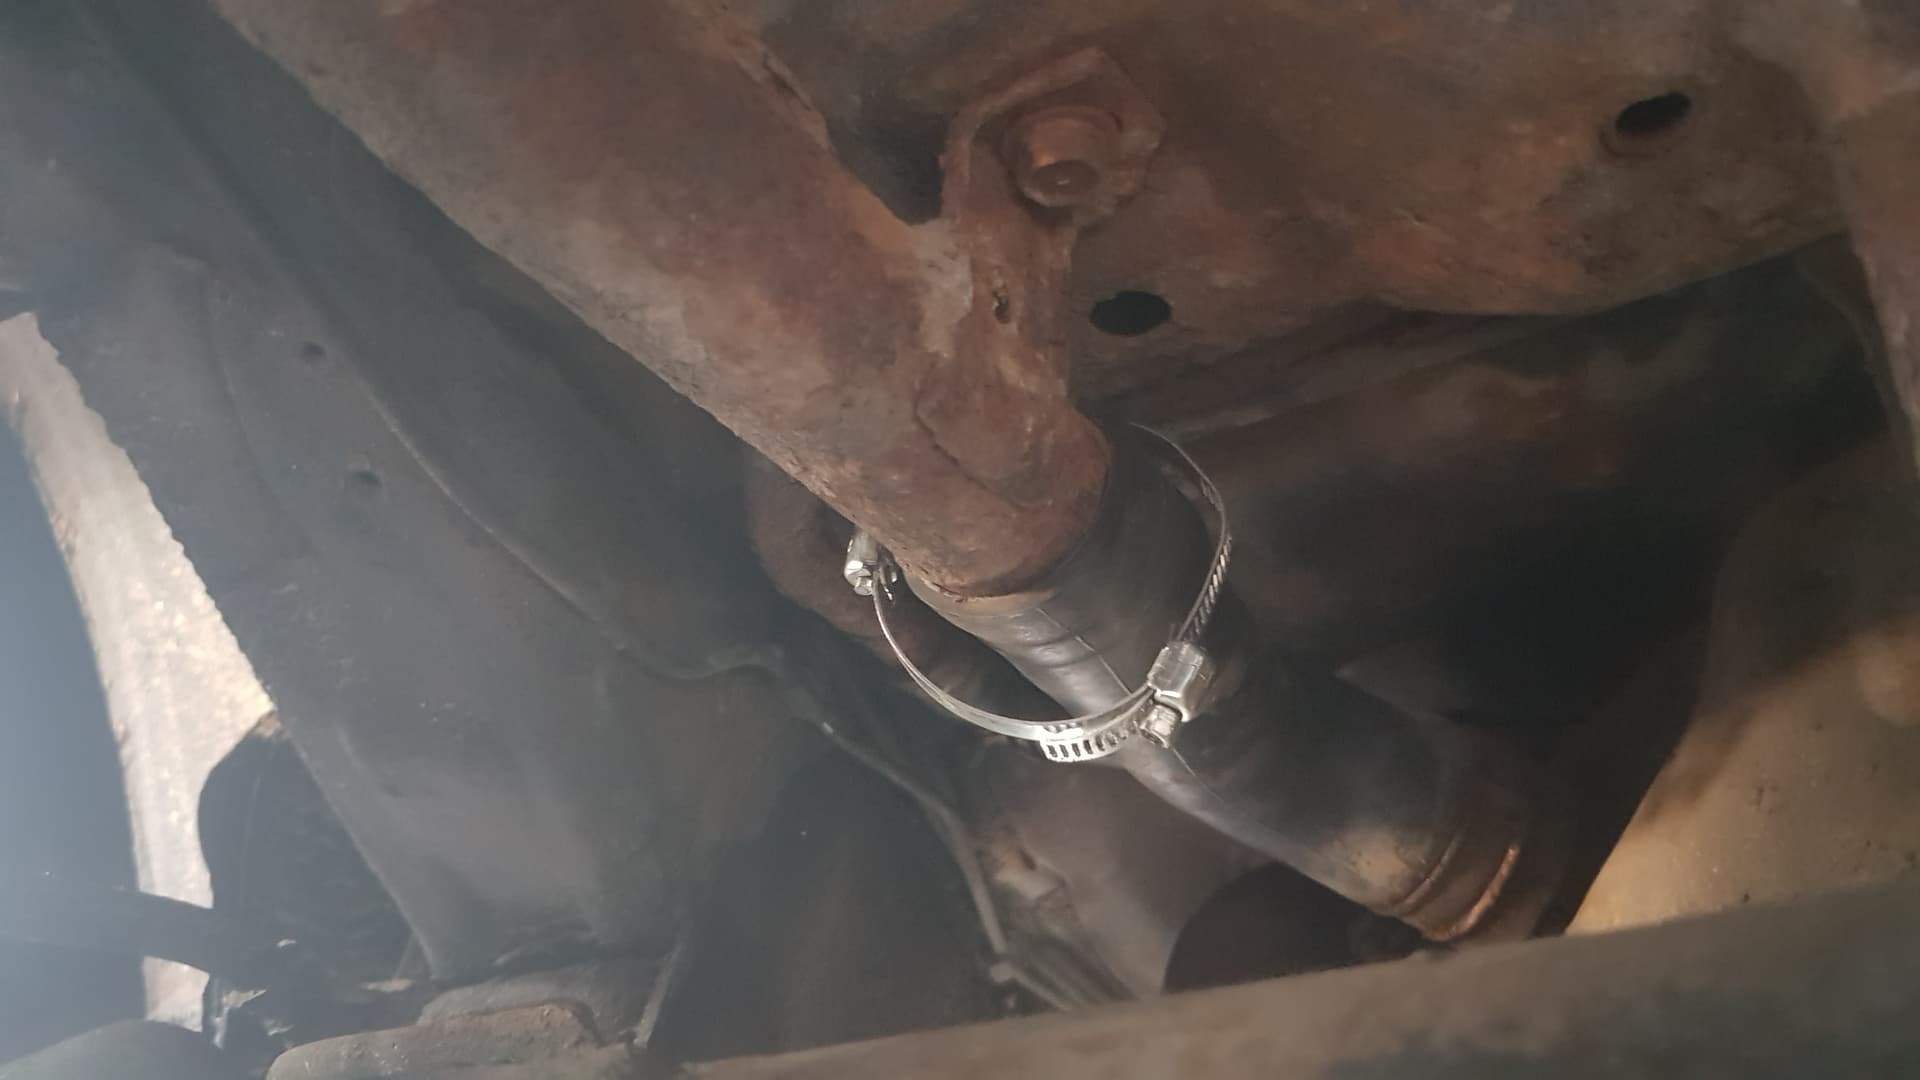
The hose clamp was fully stretched as well
Even though the car ran great, there was one thing that bothered me. I heard a weird noise coming from the gearbox. It’d disappear when you pressed the clutch, which was weird. I don’t think it was a bearing issue, since the noise already came back when the clutch was engaging, not when it was fully engaged.
When I fitted the gearbox, there weren’t any studs to center it properly. Which was weird, since I saw those on the K3VE I took out my donor YRV. I don’t know why I didn’t think it through at the time (probably because I was under pressure to swap it in time), but I wanted to fix it. I got the car aligned, and drove it back to the garage, to think about what I was going to do. I wanted to go to a car event the next day, but decided to leave my car at home and just enjoy the day, instead of having to worry about whether or not my car was going to break down.
BRB IMMA TAKE OUT THE ENGINE REAL QUICK
So, the gearbox is making a weird noise, and the alternator is rubbing against the chassis. What to do? Well, I didn’t want to do it this way, but I knew the best option was to take out the engine and gearbox, and fix the issues. So, we got to work.
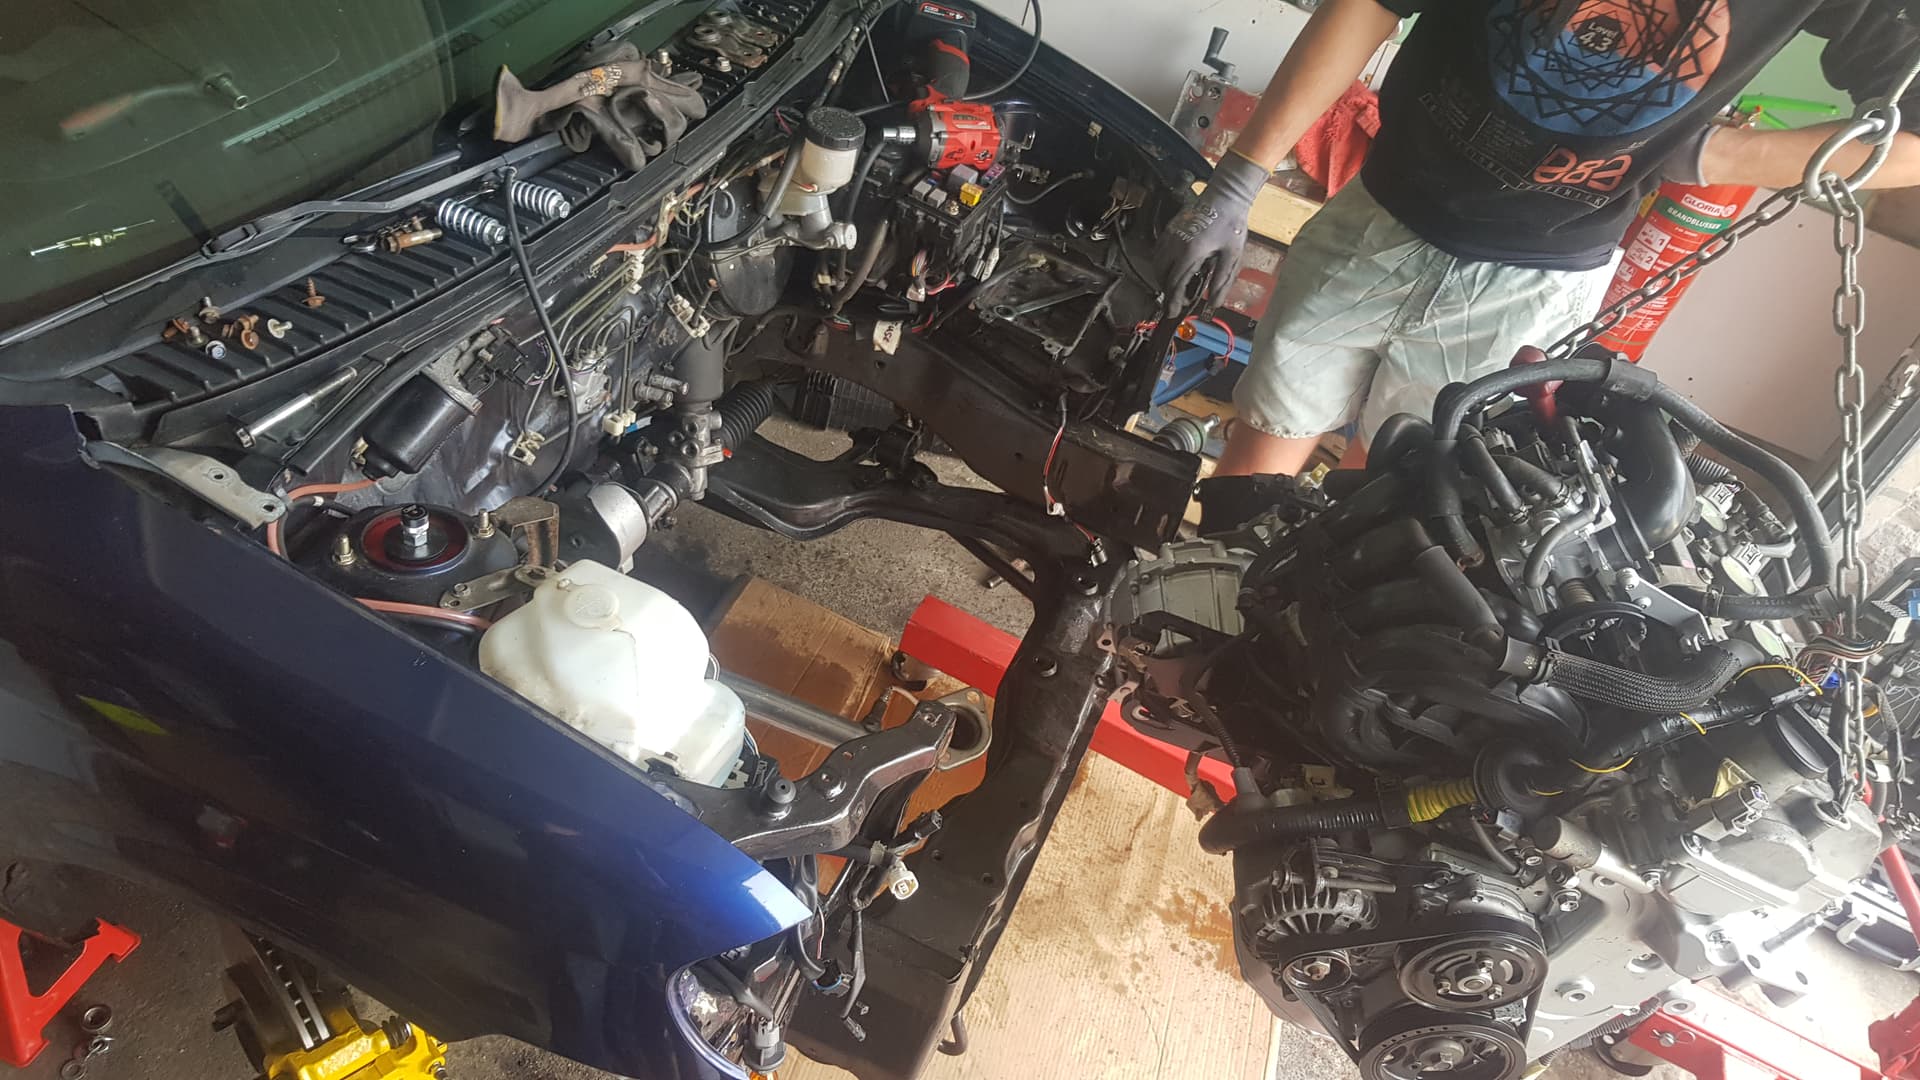
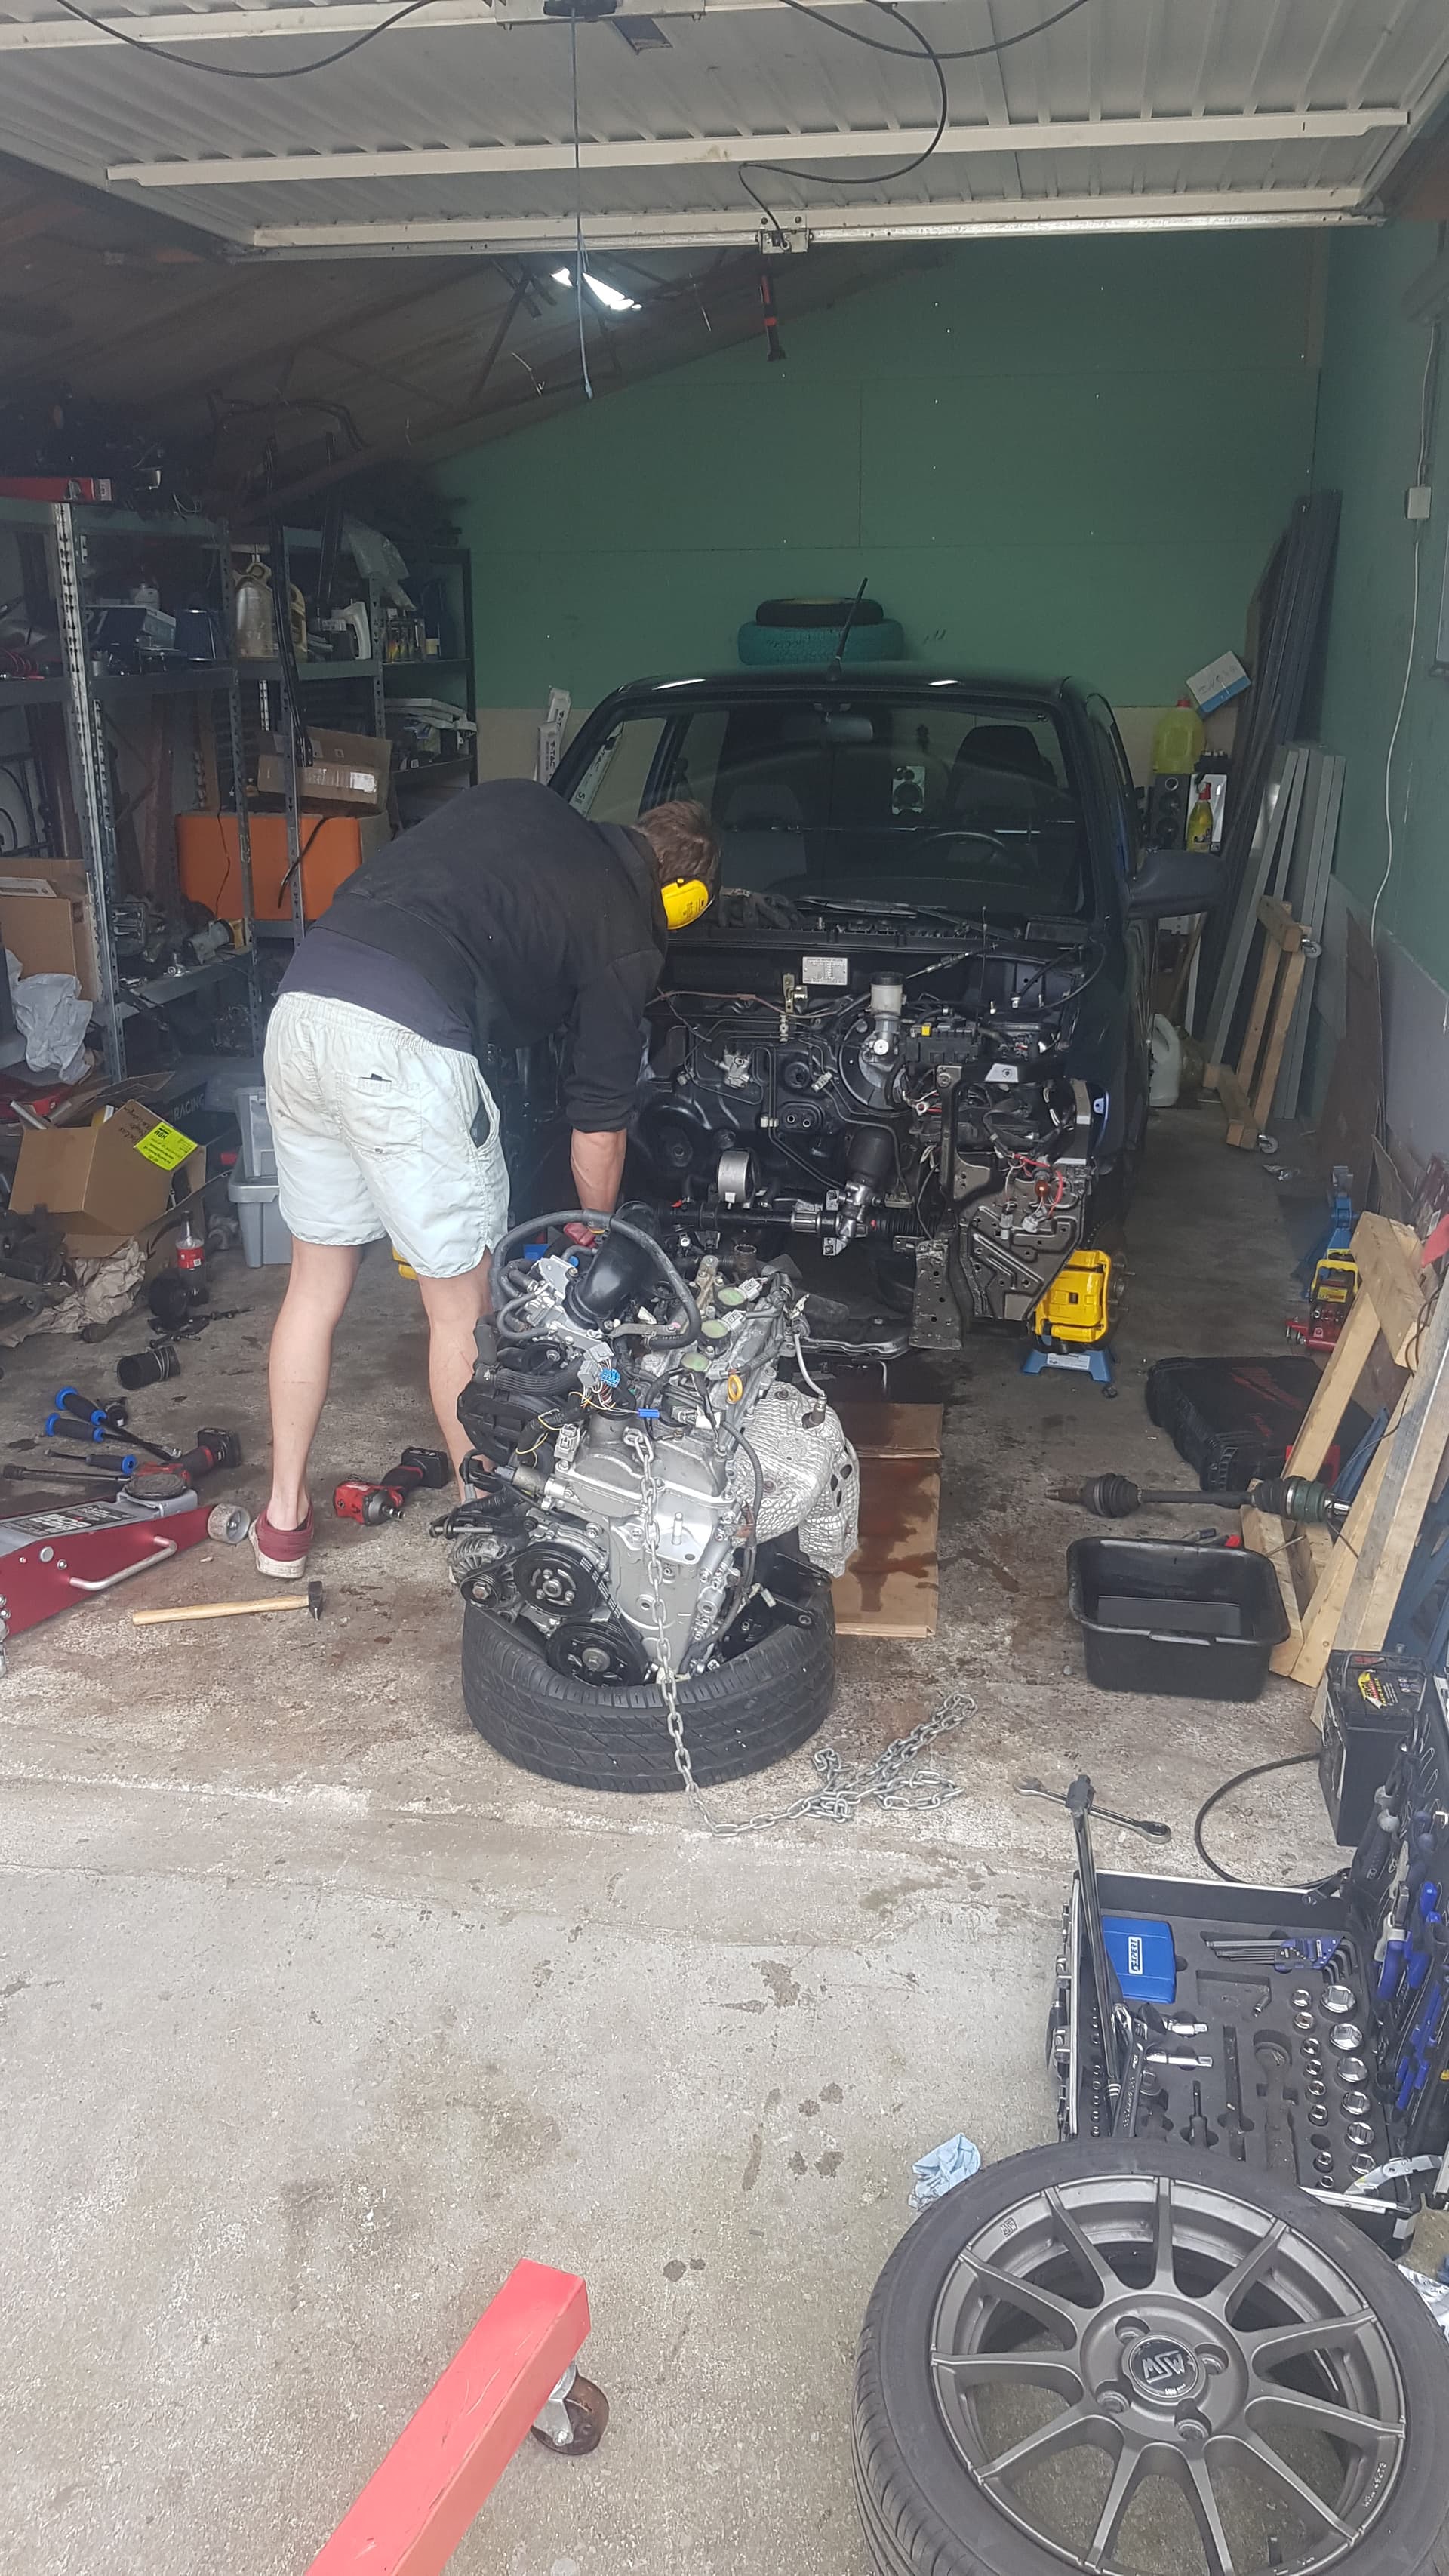
I only took us 5 hours to put the car on jackstands, take it apart, take out the engine, take off the gearbox, fit the studs, put it back on, put a dent in the chassisrail, and put everything back in the car. The next day we mounted all the small bits and tightened it, bled all the systems again, and took it out for a drive.
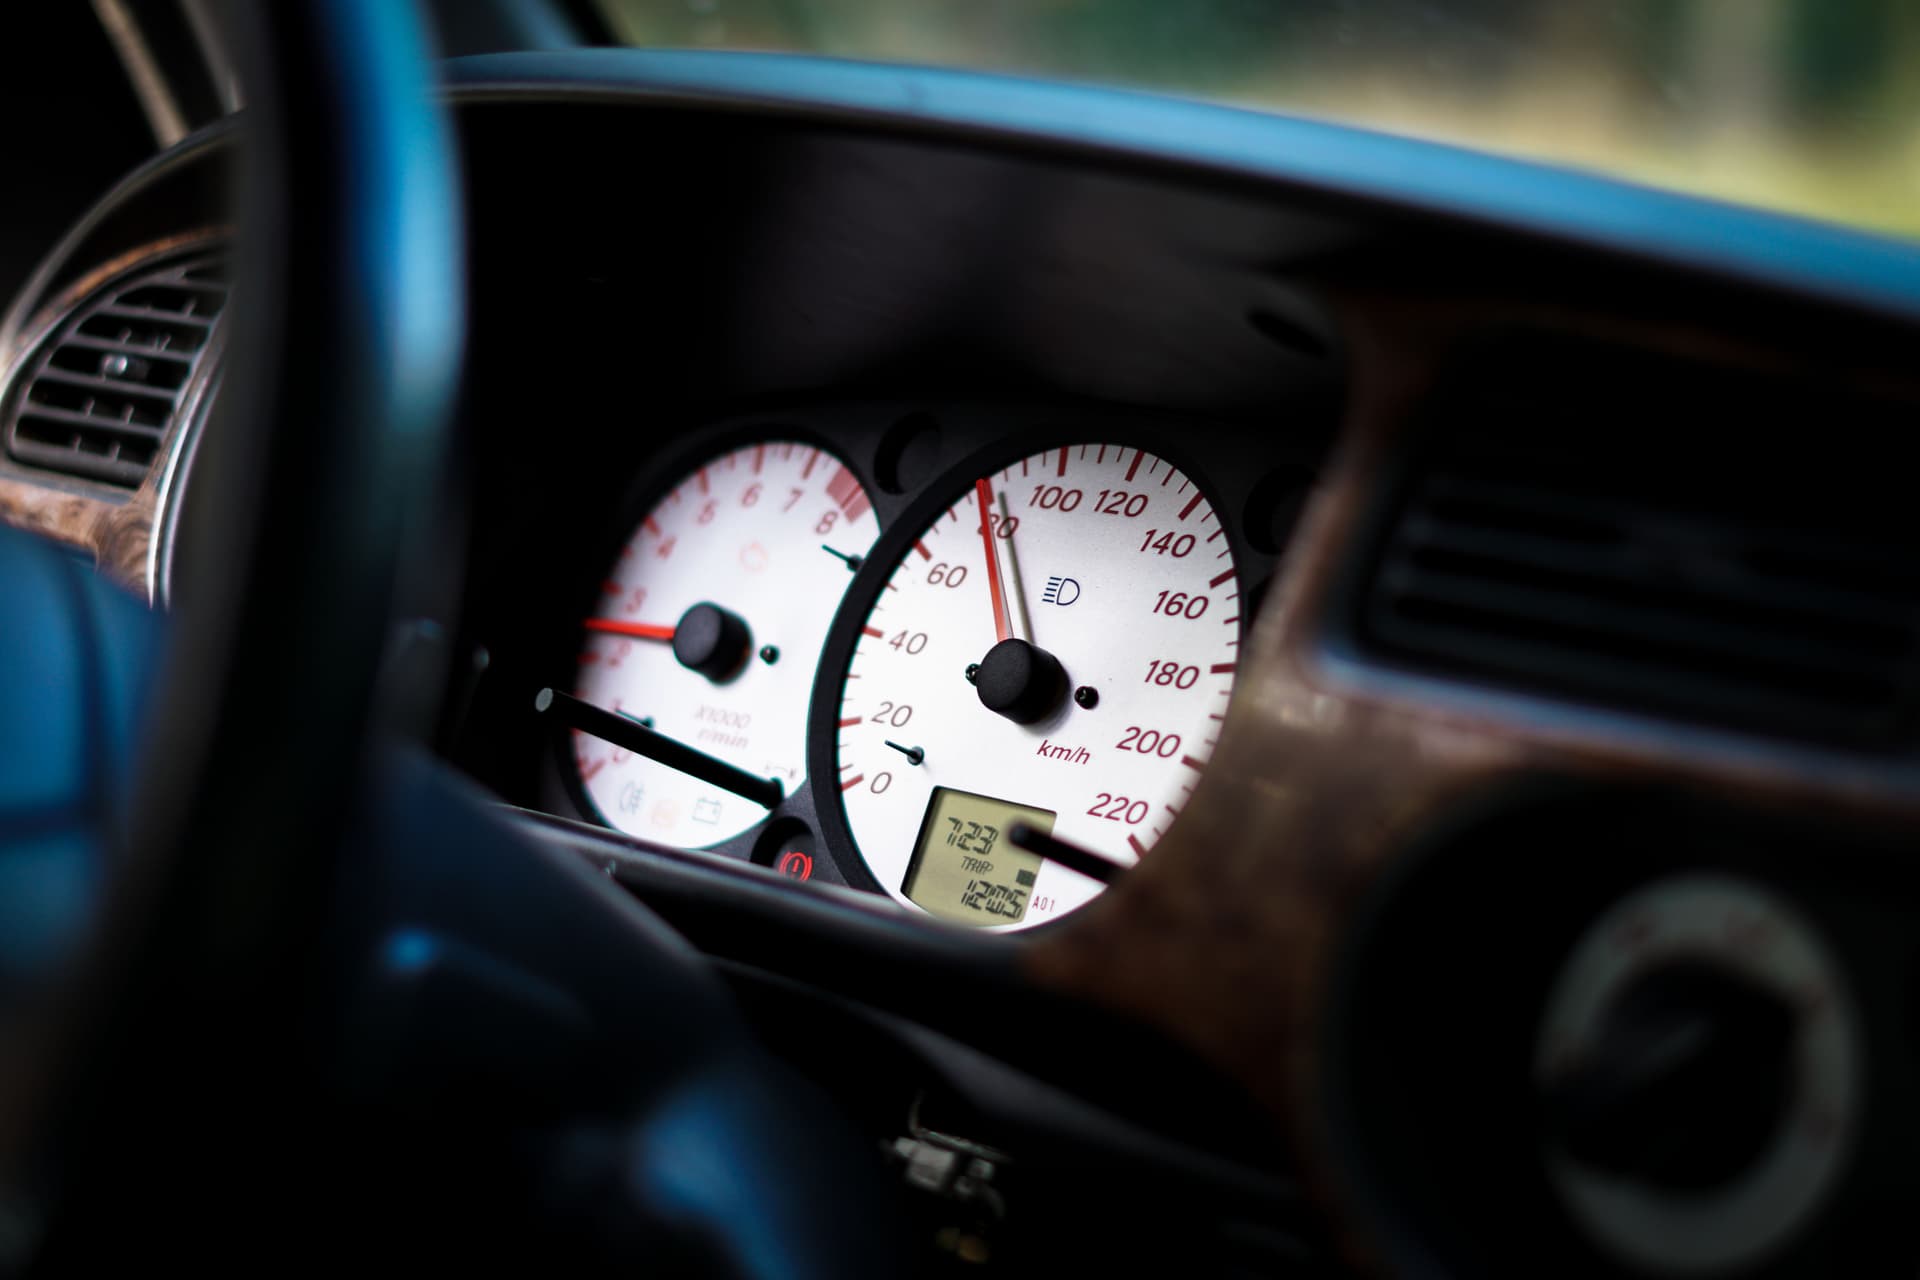
This was the first time I was confident enough to really drive the car. That also means flooring it, and boy is it quick. And yes, the car used to have 58hp, so any improvement would be noticeable, but it really feels quick! Most of all, it has plenty of torque in the lower revs, which (to me) was one big advantage over the K3VE2.
I still need to sort out a few things, like the Christmas tree on my dashboard, but at least I can drive the car again without any mechanical issues. Happy me.
10 Likes
Love the passion. Great work.
4 Likes
Great work! Can’t wait to see it at the L7 meet tomorrow! Deserved applause 
2 Likes
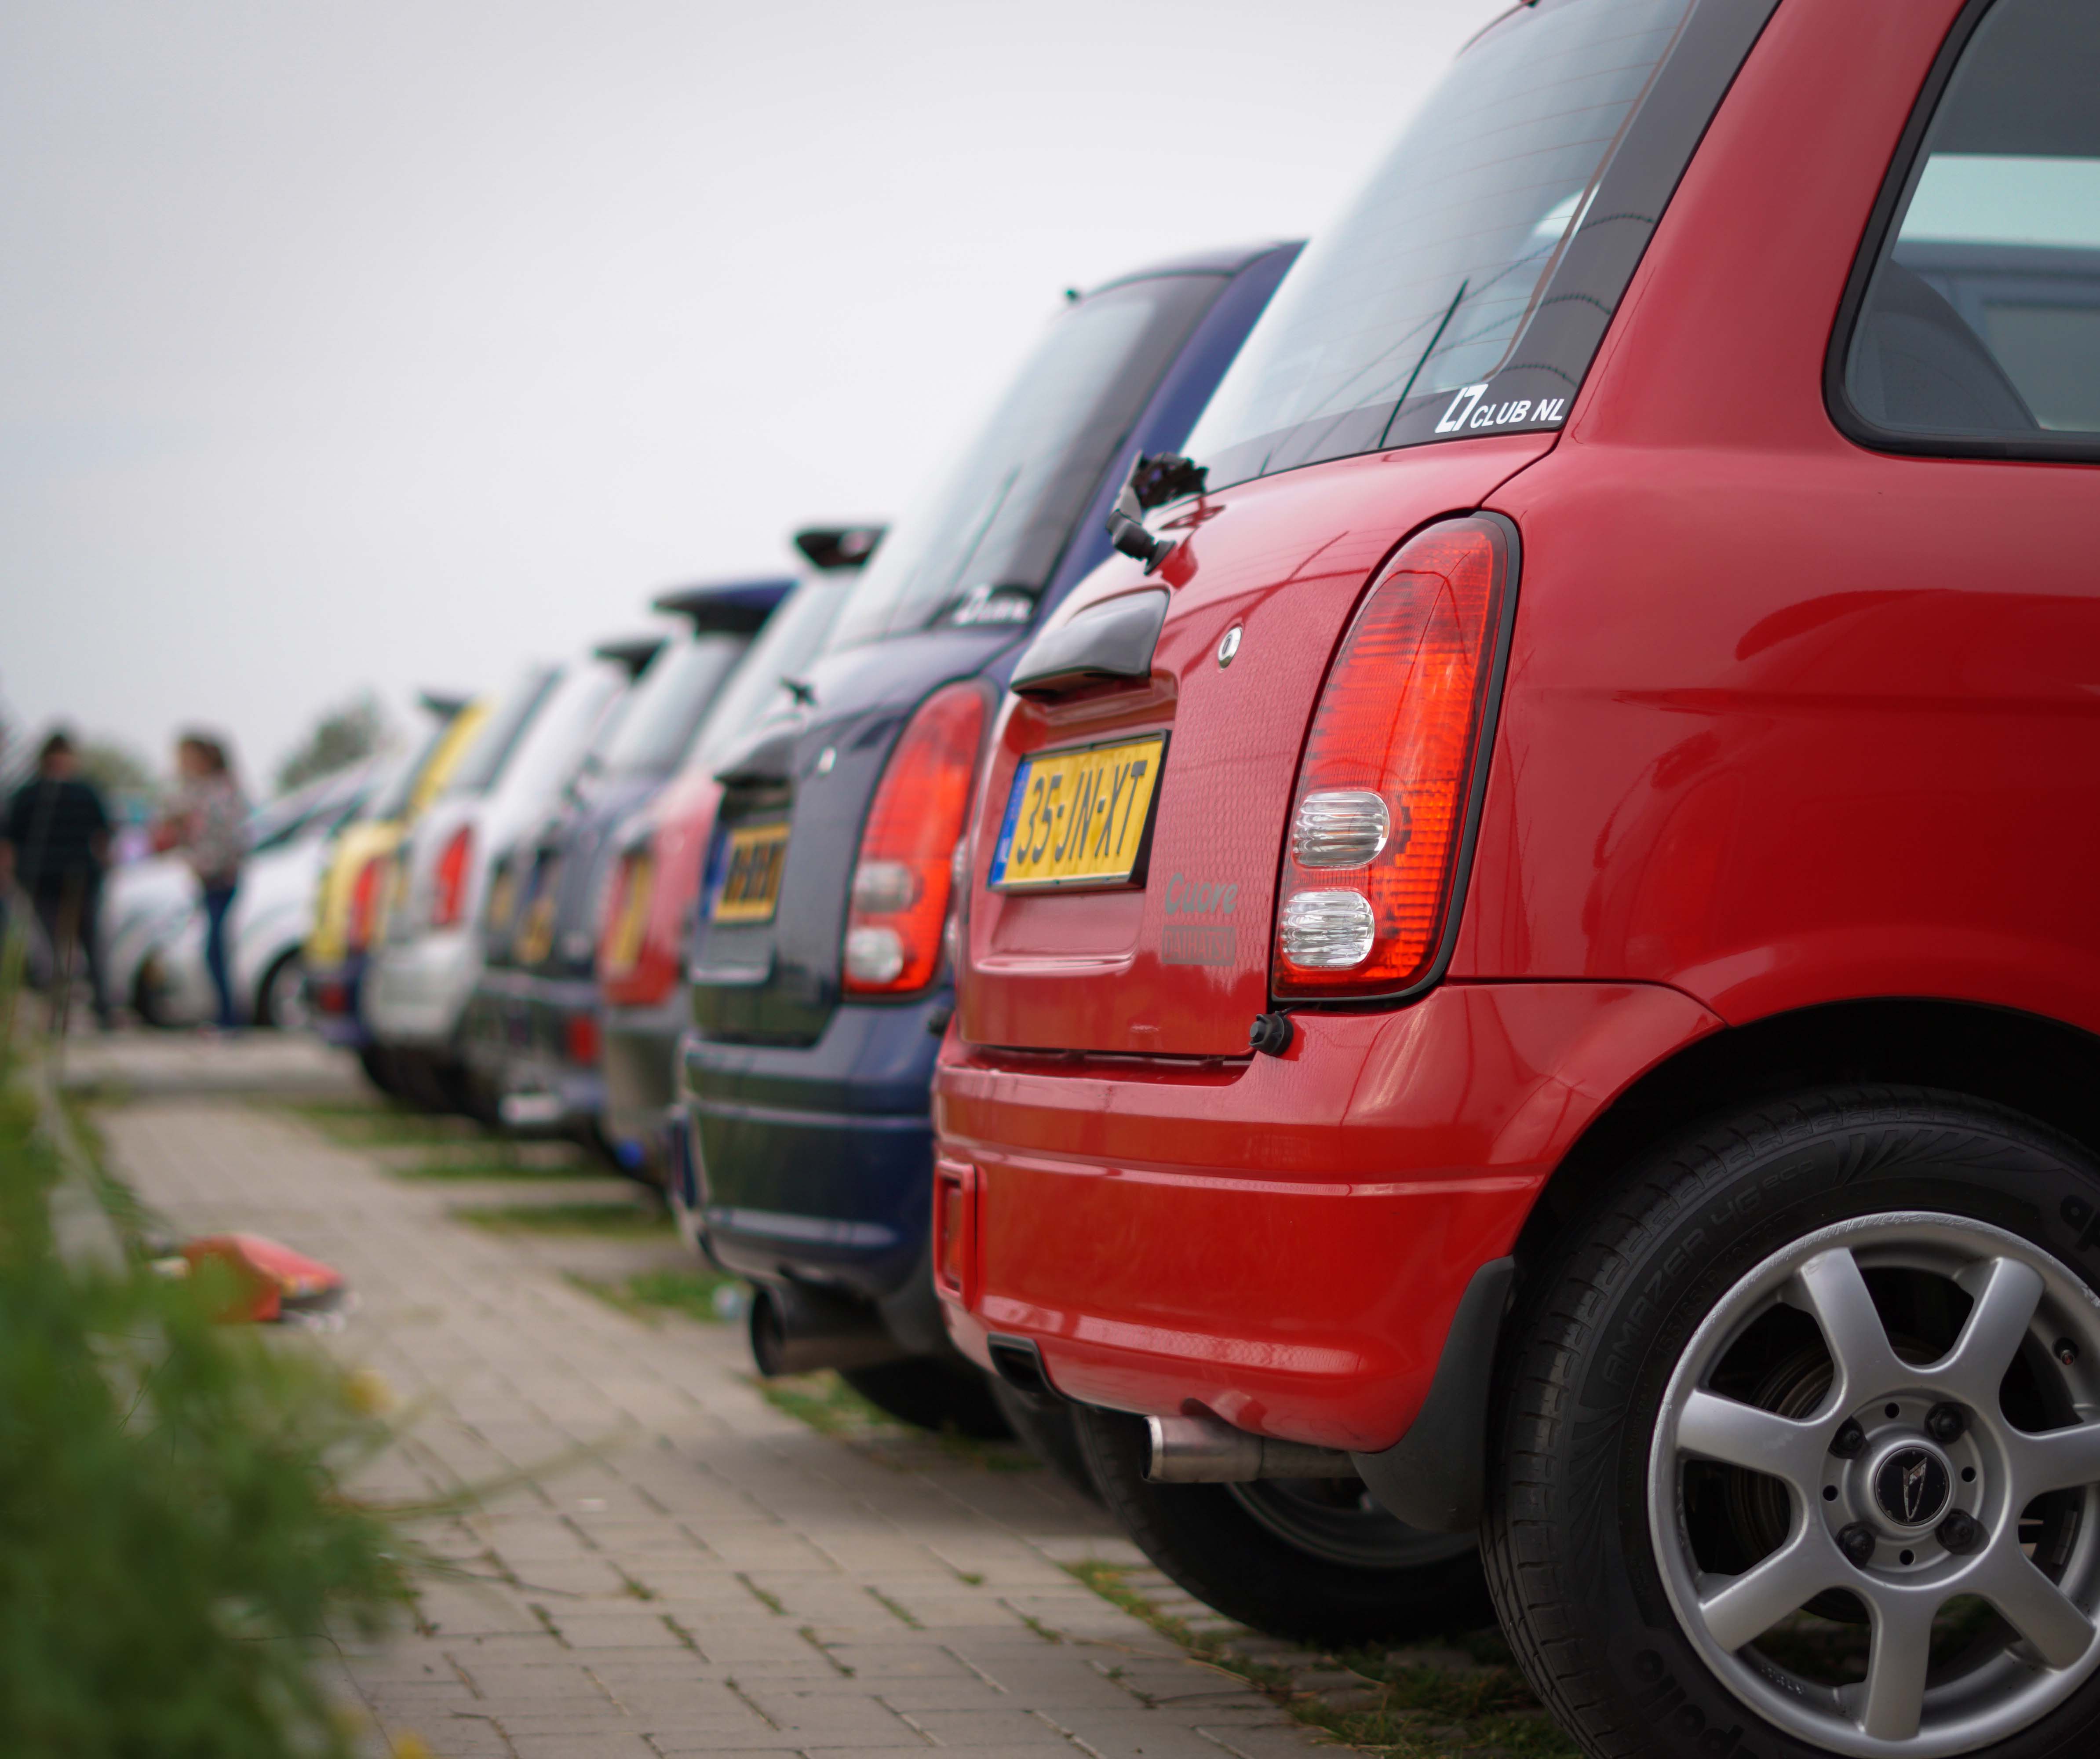
L7 CLUBMEET
One of the reasons why I wanted to finish the car last week, is because we had organised an L7 meeting! We gathered at the end of the runway of my ‘local airport’, then drove about 30km’s on a nice scenic route, and then drove back to the airport. At a certain point, there were 16 Cuores lined up next to each other! I had such a good time, and the car performed wonderfully! Here are some pictures:
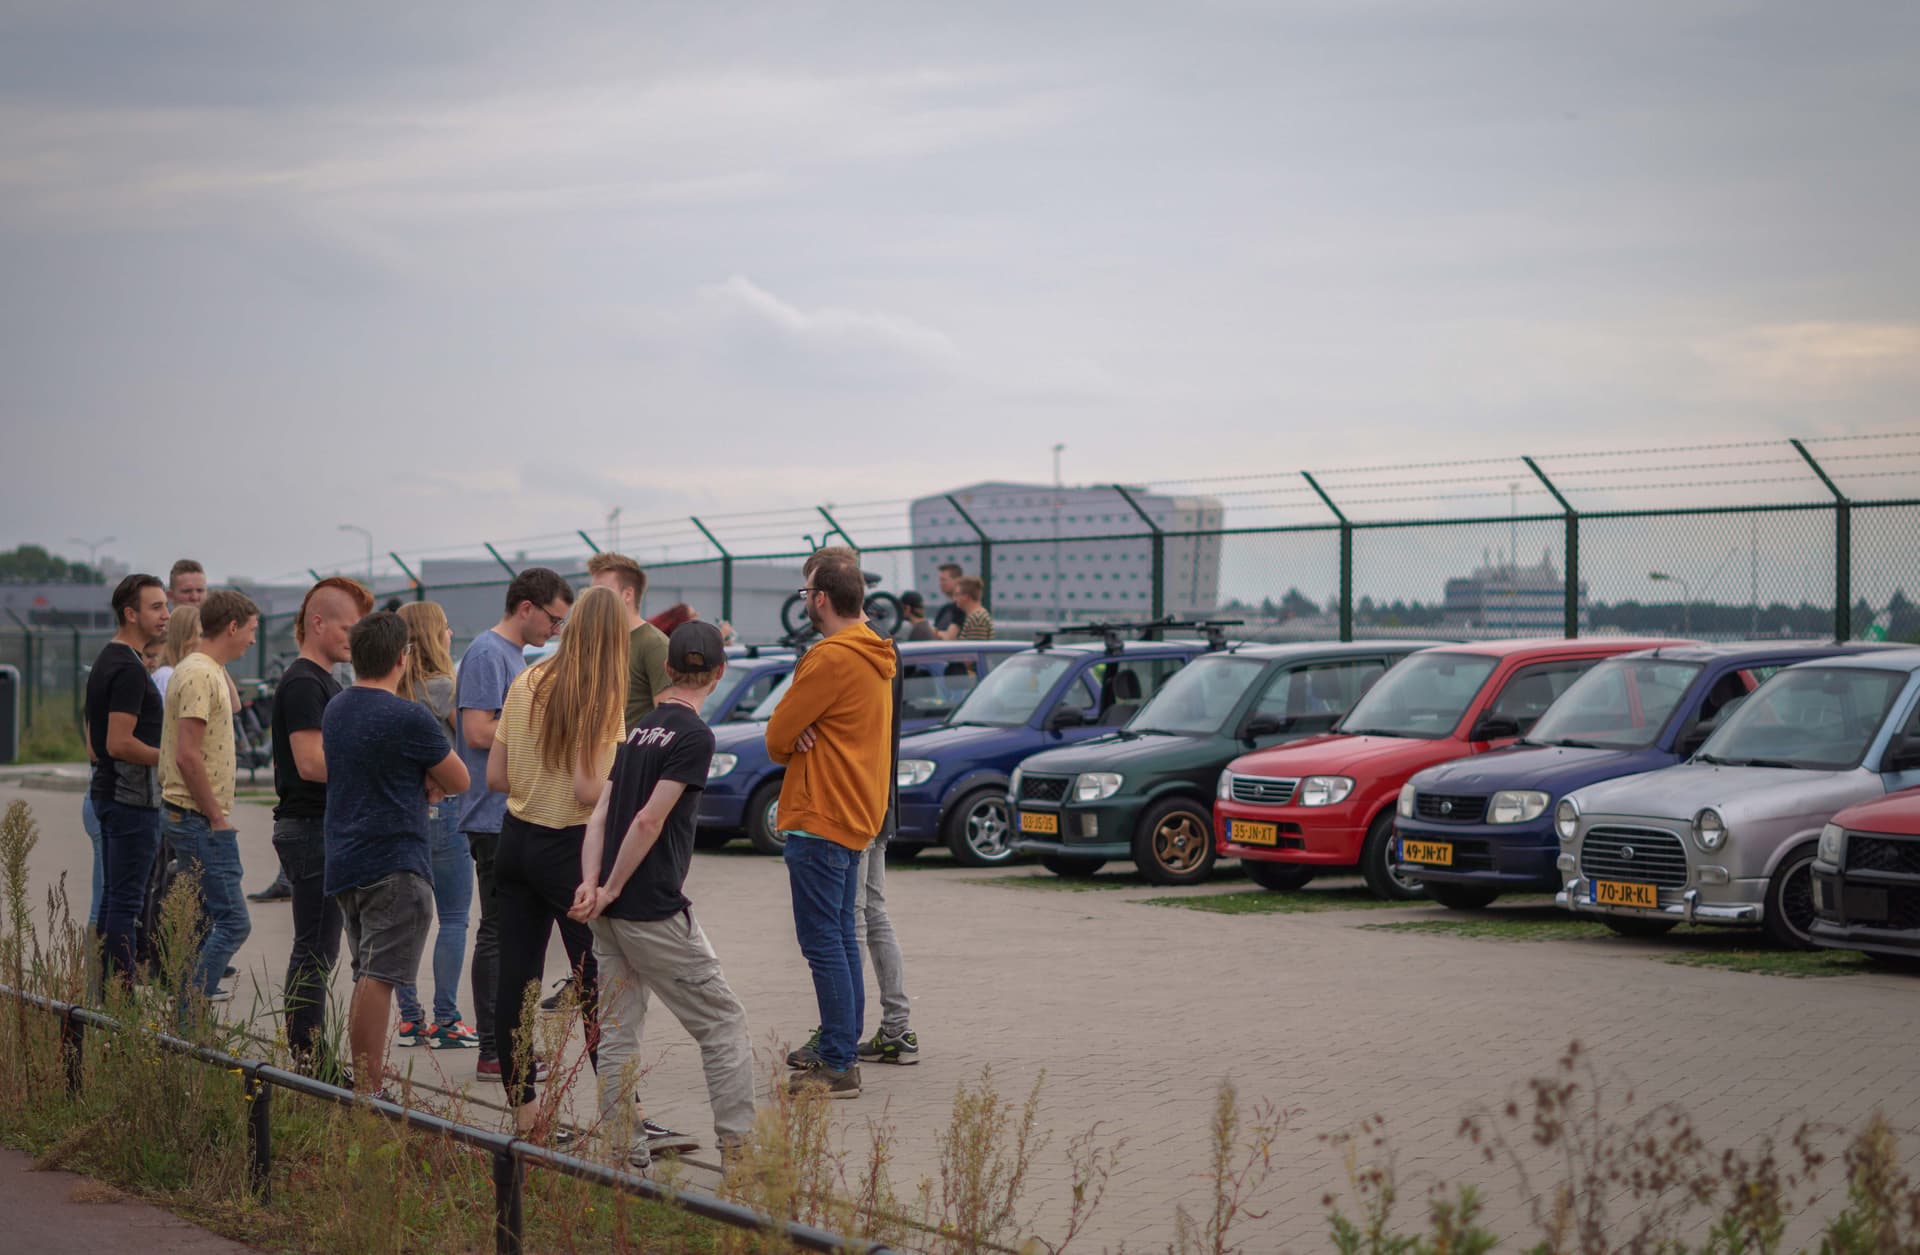
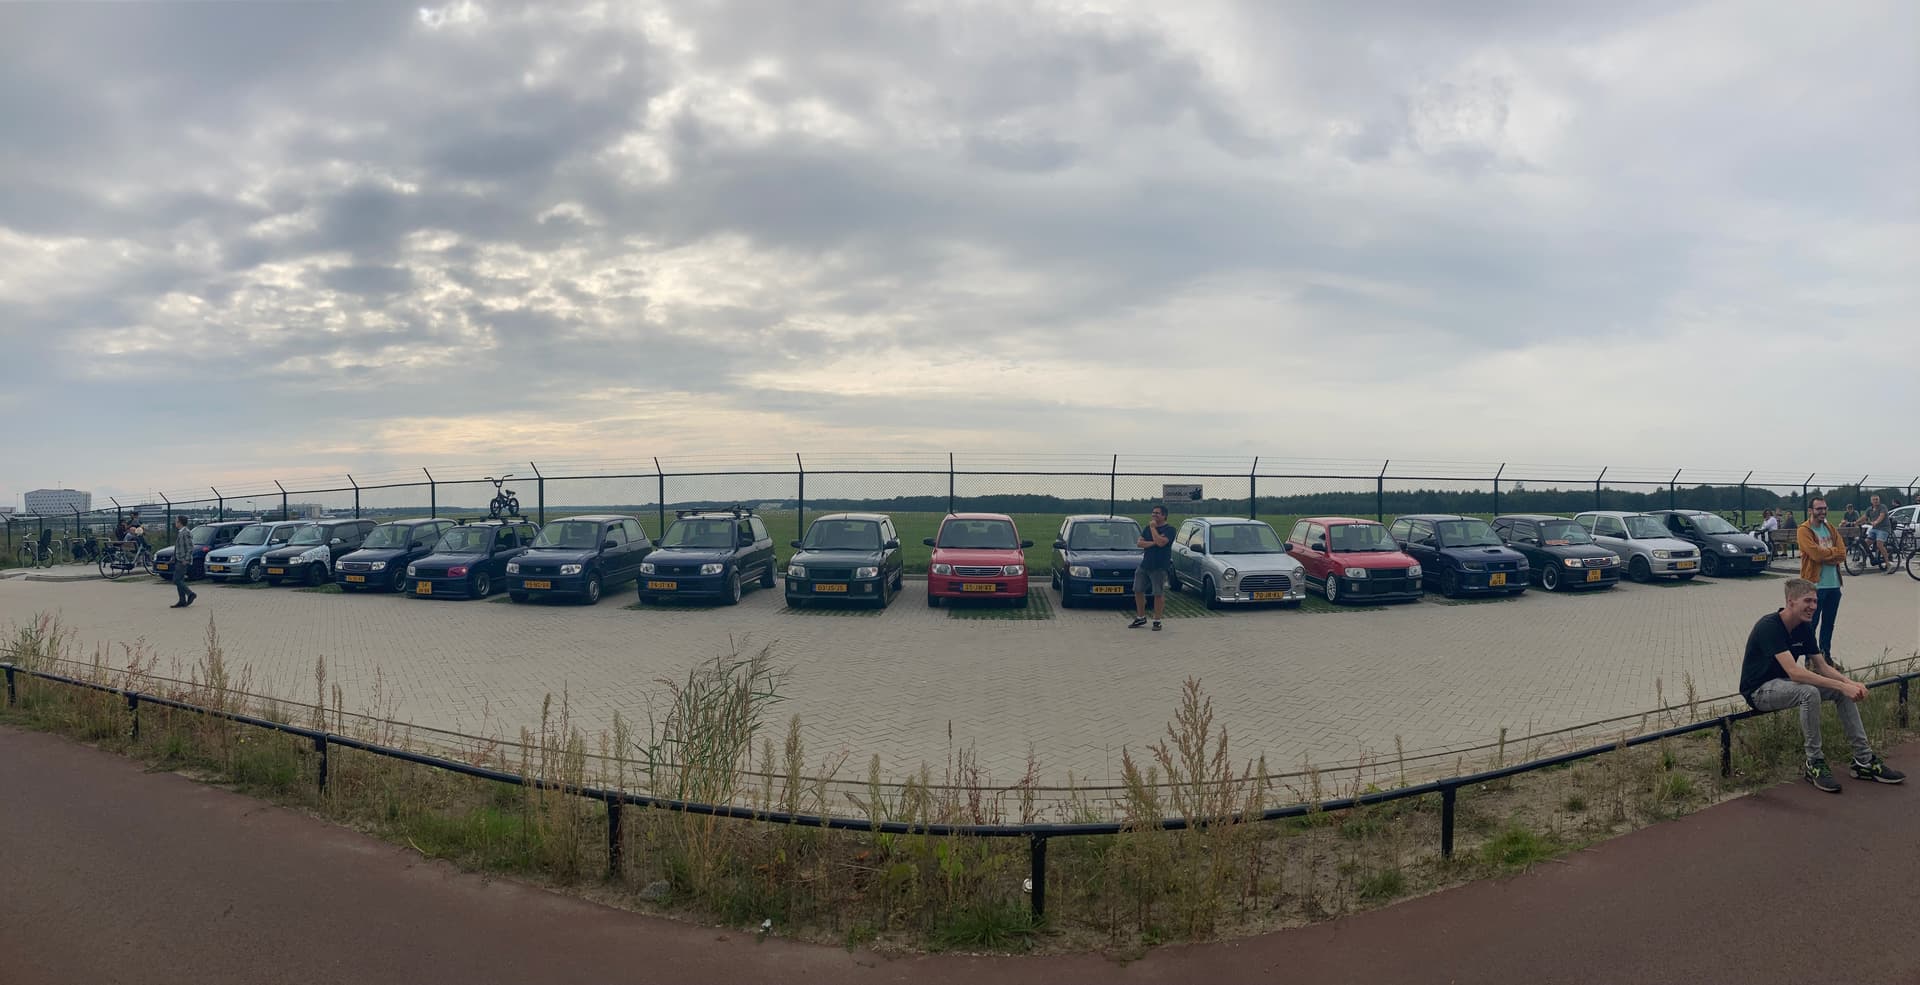
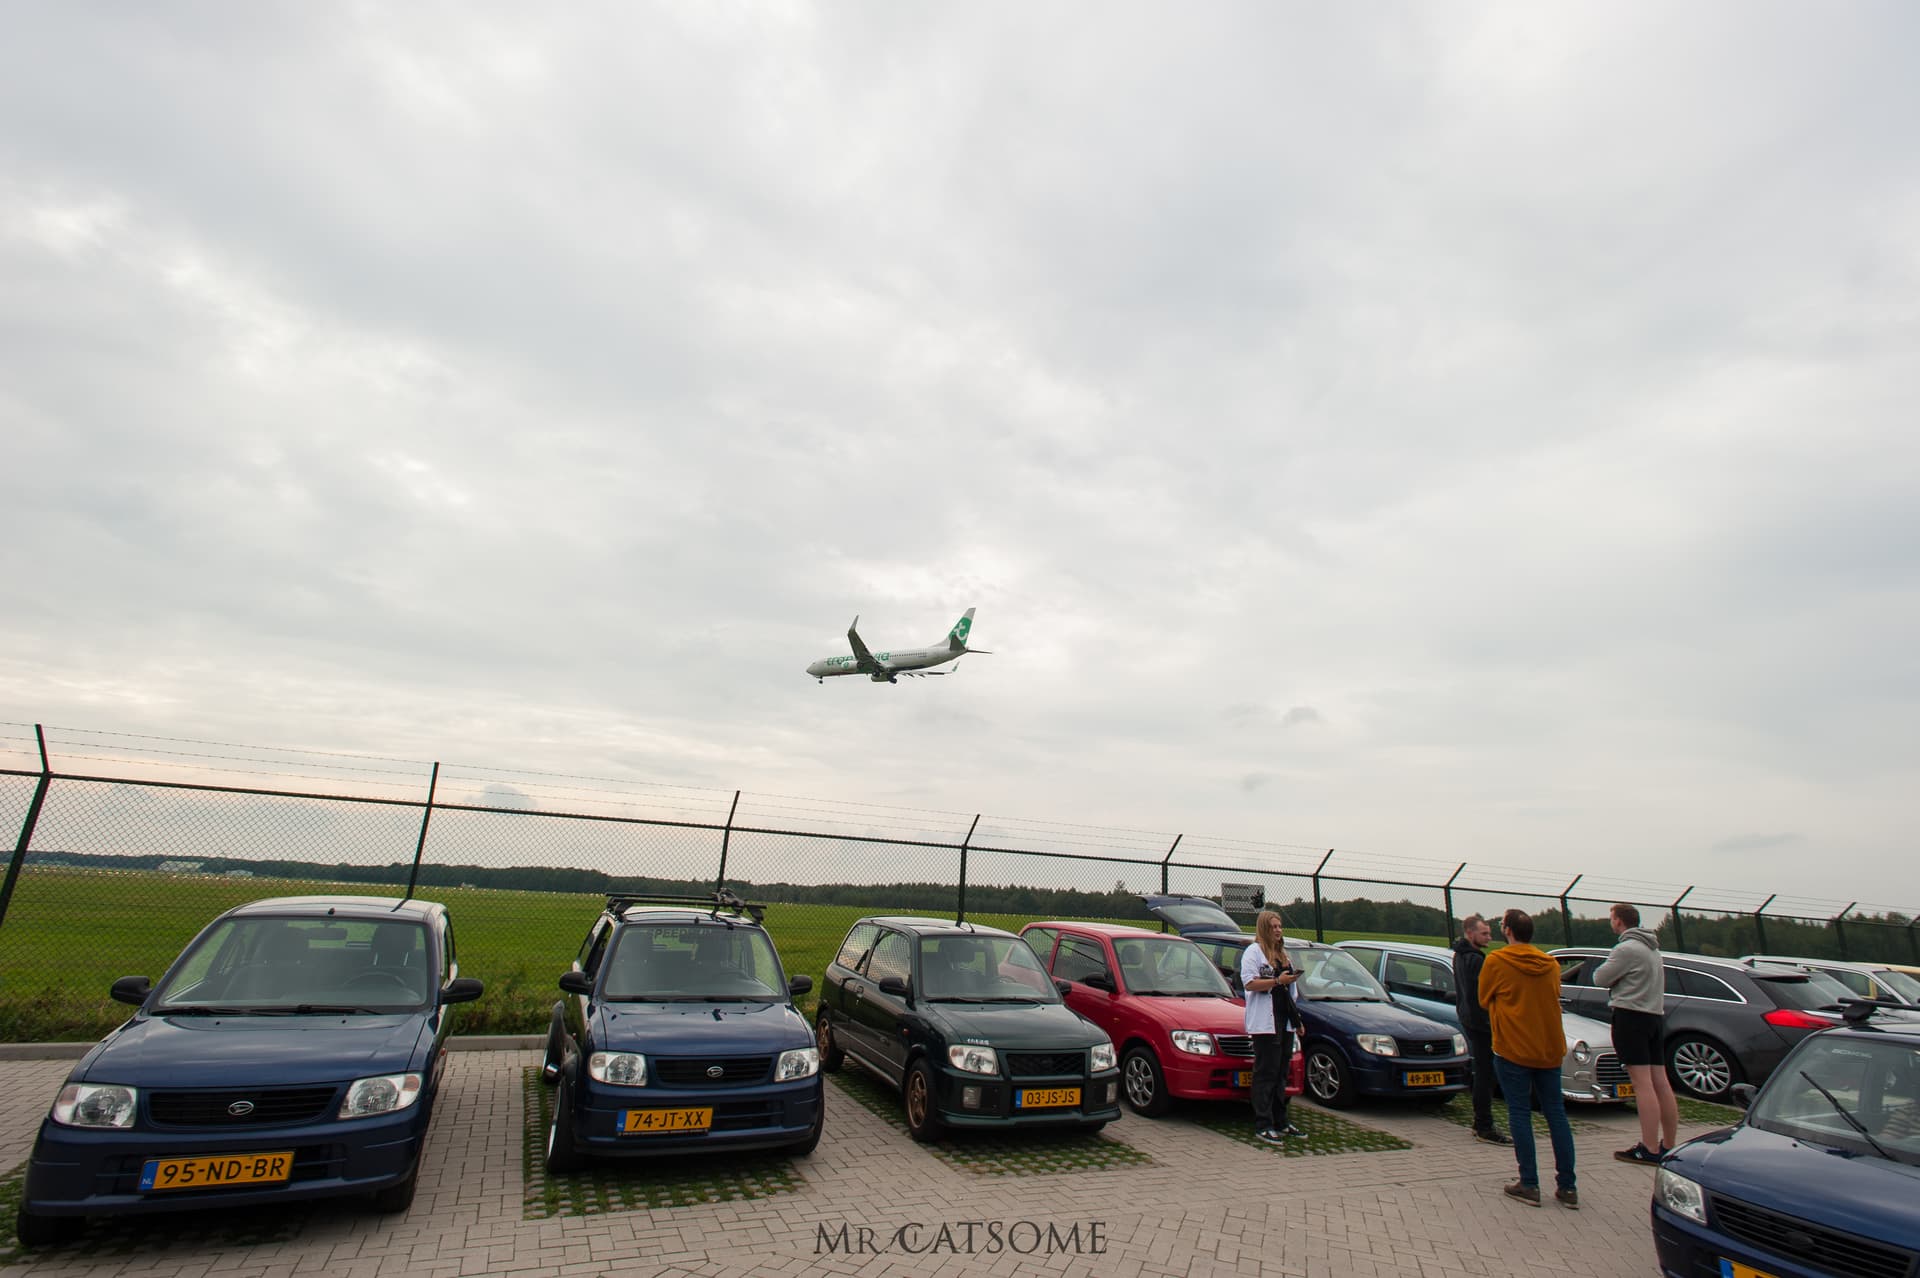
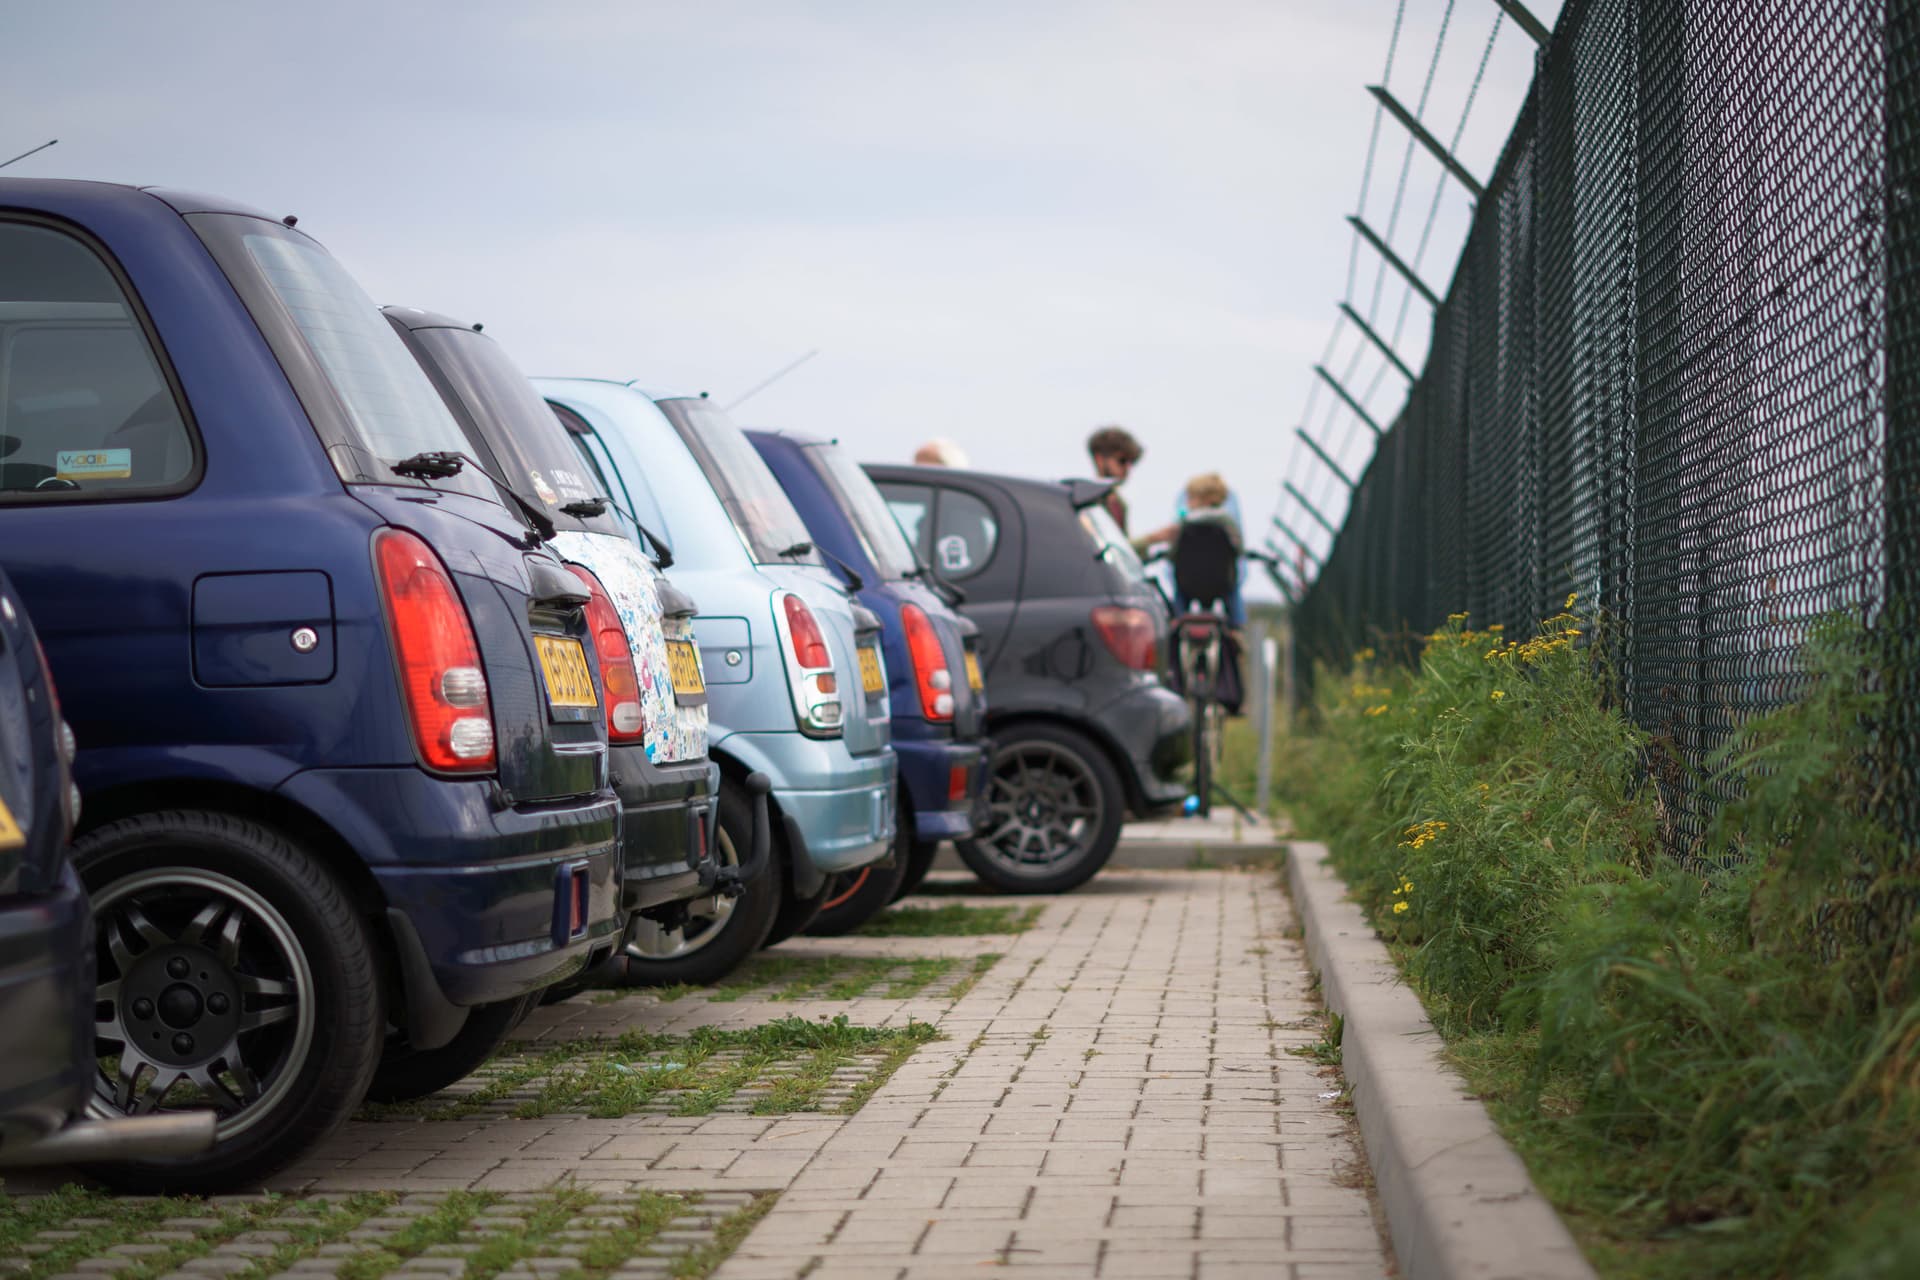
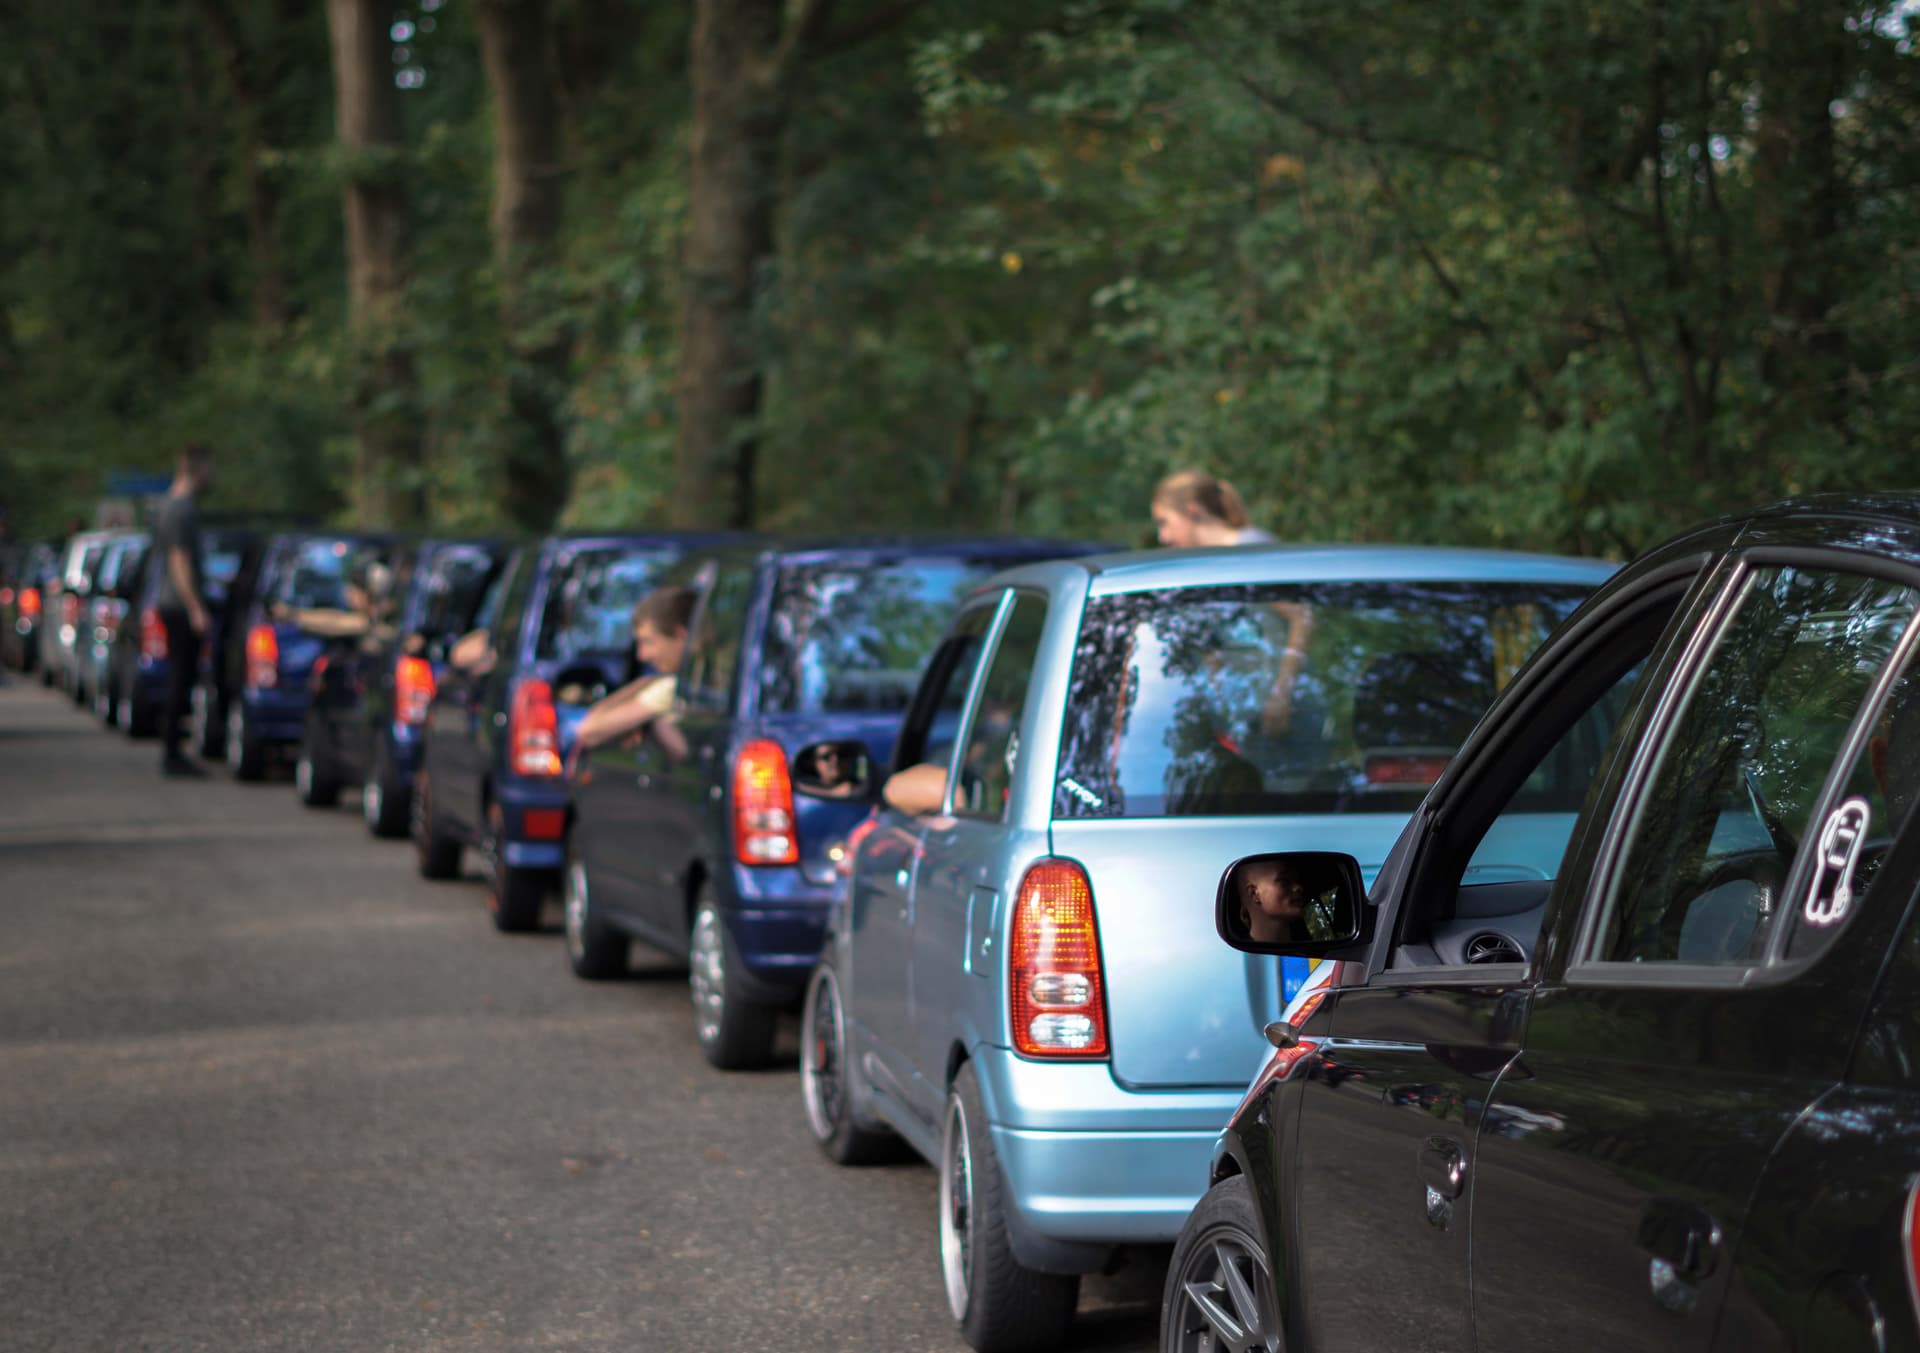
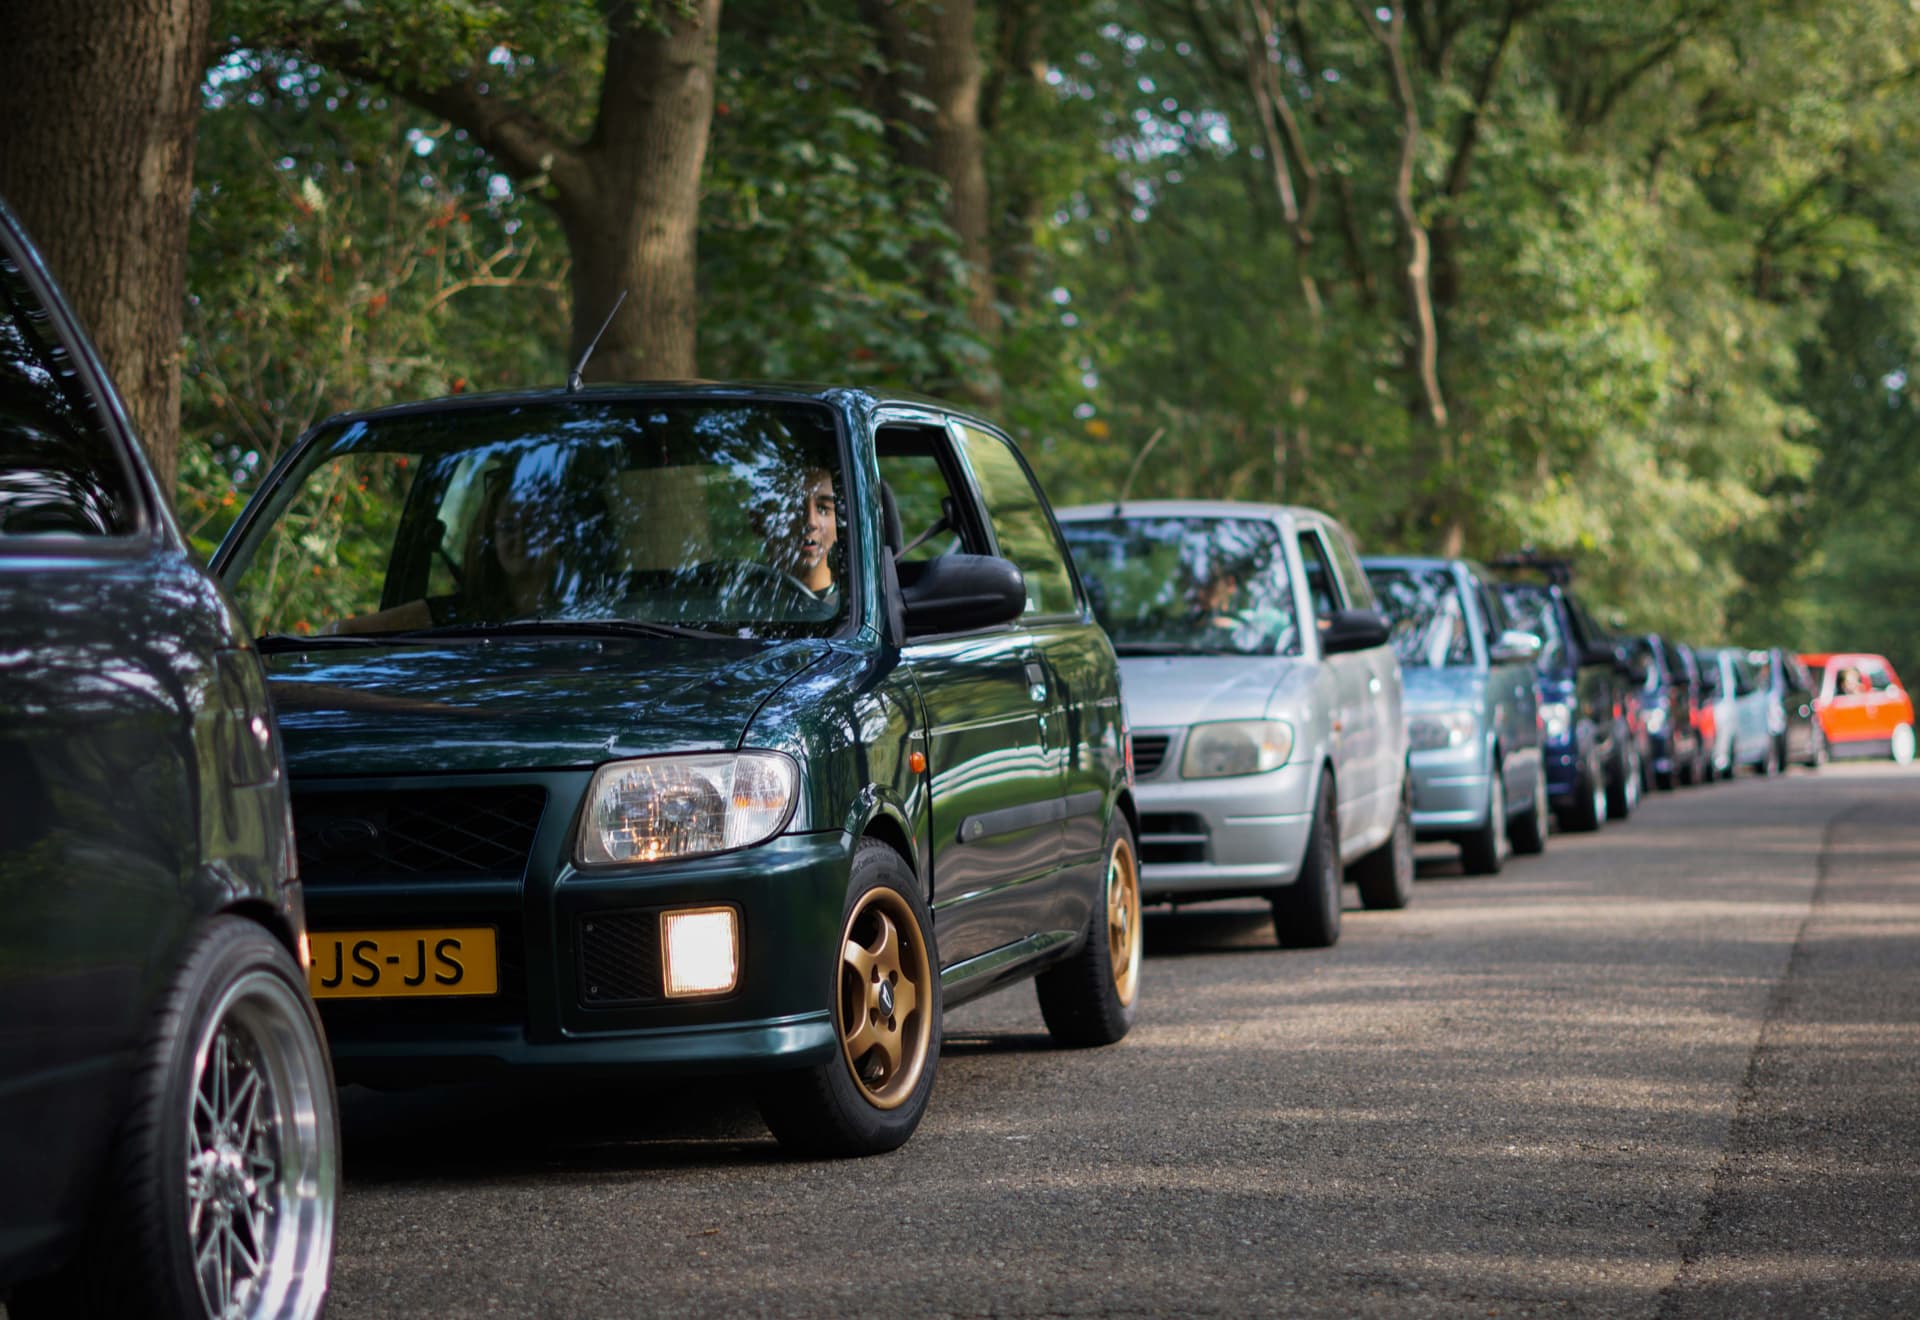


2 years ago me and 2 friends started this little club, and it’s one of the things I’m most proud of in my entire life. When I got home, I couldn’t stop smiling, because we got to give so many people an amazing time! I love how everyone has a different take on how to modify their car, and that it is encouraged by all the other members. (cheesy statement incoming)
These cars started life as cheap economy shitboxes, and now they’re even cheaper, modified, rusty shitboxes, causes of headaches, and smoll moneypits, but most of all: they are a reason for a great group of people to come together and enjoy each other’s company and shitboxes.
15 Likes