seems to be a worldwide thing with the lack of maintenance on most Dai’s 
5 Likes
yesss, come to the M1XX Chassis Side…
100% a universal thing of the large % of people buying them for commuting not fully looking after them to the degree they should.
2 Likes
Typical of something produced 1998-2004.
1 Like
Hahahahah I figured you’d like my new daily ;p. I’ve always wanted to own one just for the sake of it, and on top of that, I think that this would be the best chassis to put a bit of power under the bonnet (rather than to just throw a K3VET in an L7. THERE. I SAID IT). However, I’m not completely blown away by the car (yet). Since I love all Dai’s, I can be fairly objective about this. It seems to have an even worse seating position than the L7, which I think is weird considering that there is (in theory) more ‘room to play with’. Also, I don’t get as much of a ‘yay’-feeling I get from a stock L7. Maybe this engine isn’t what it used to be anymore, but there’s a certain lack of enthusiasm (maybe it’s the EJ’s rumble?). Having said that, I am quite impressed with the stock suspension. The damping in the rear can be a bit harsh sometimes, but overall I’m pretty pleased with the way it covers bumps. Certainly a lot better than our Hyundai i20  .
.
Enjoy the review you didn’t ask for 
@Mr_Gormsby boy am I lucky to have only owned cars produced between 2000 and 2004 so far
9 Likes
UPDATE ON TOM AND THE BLYATSU
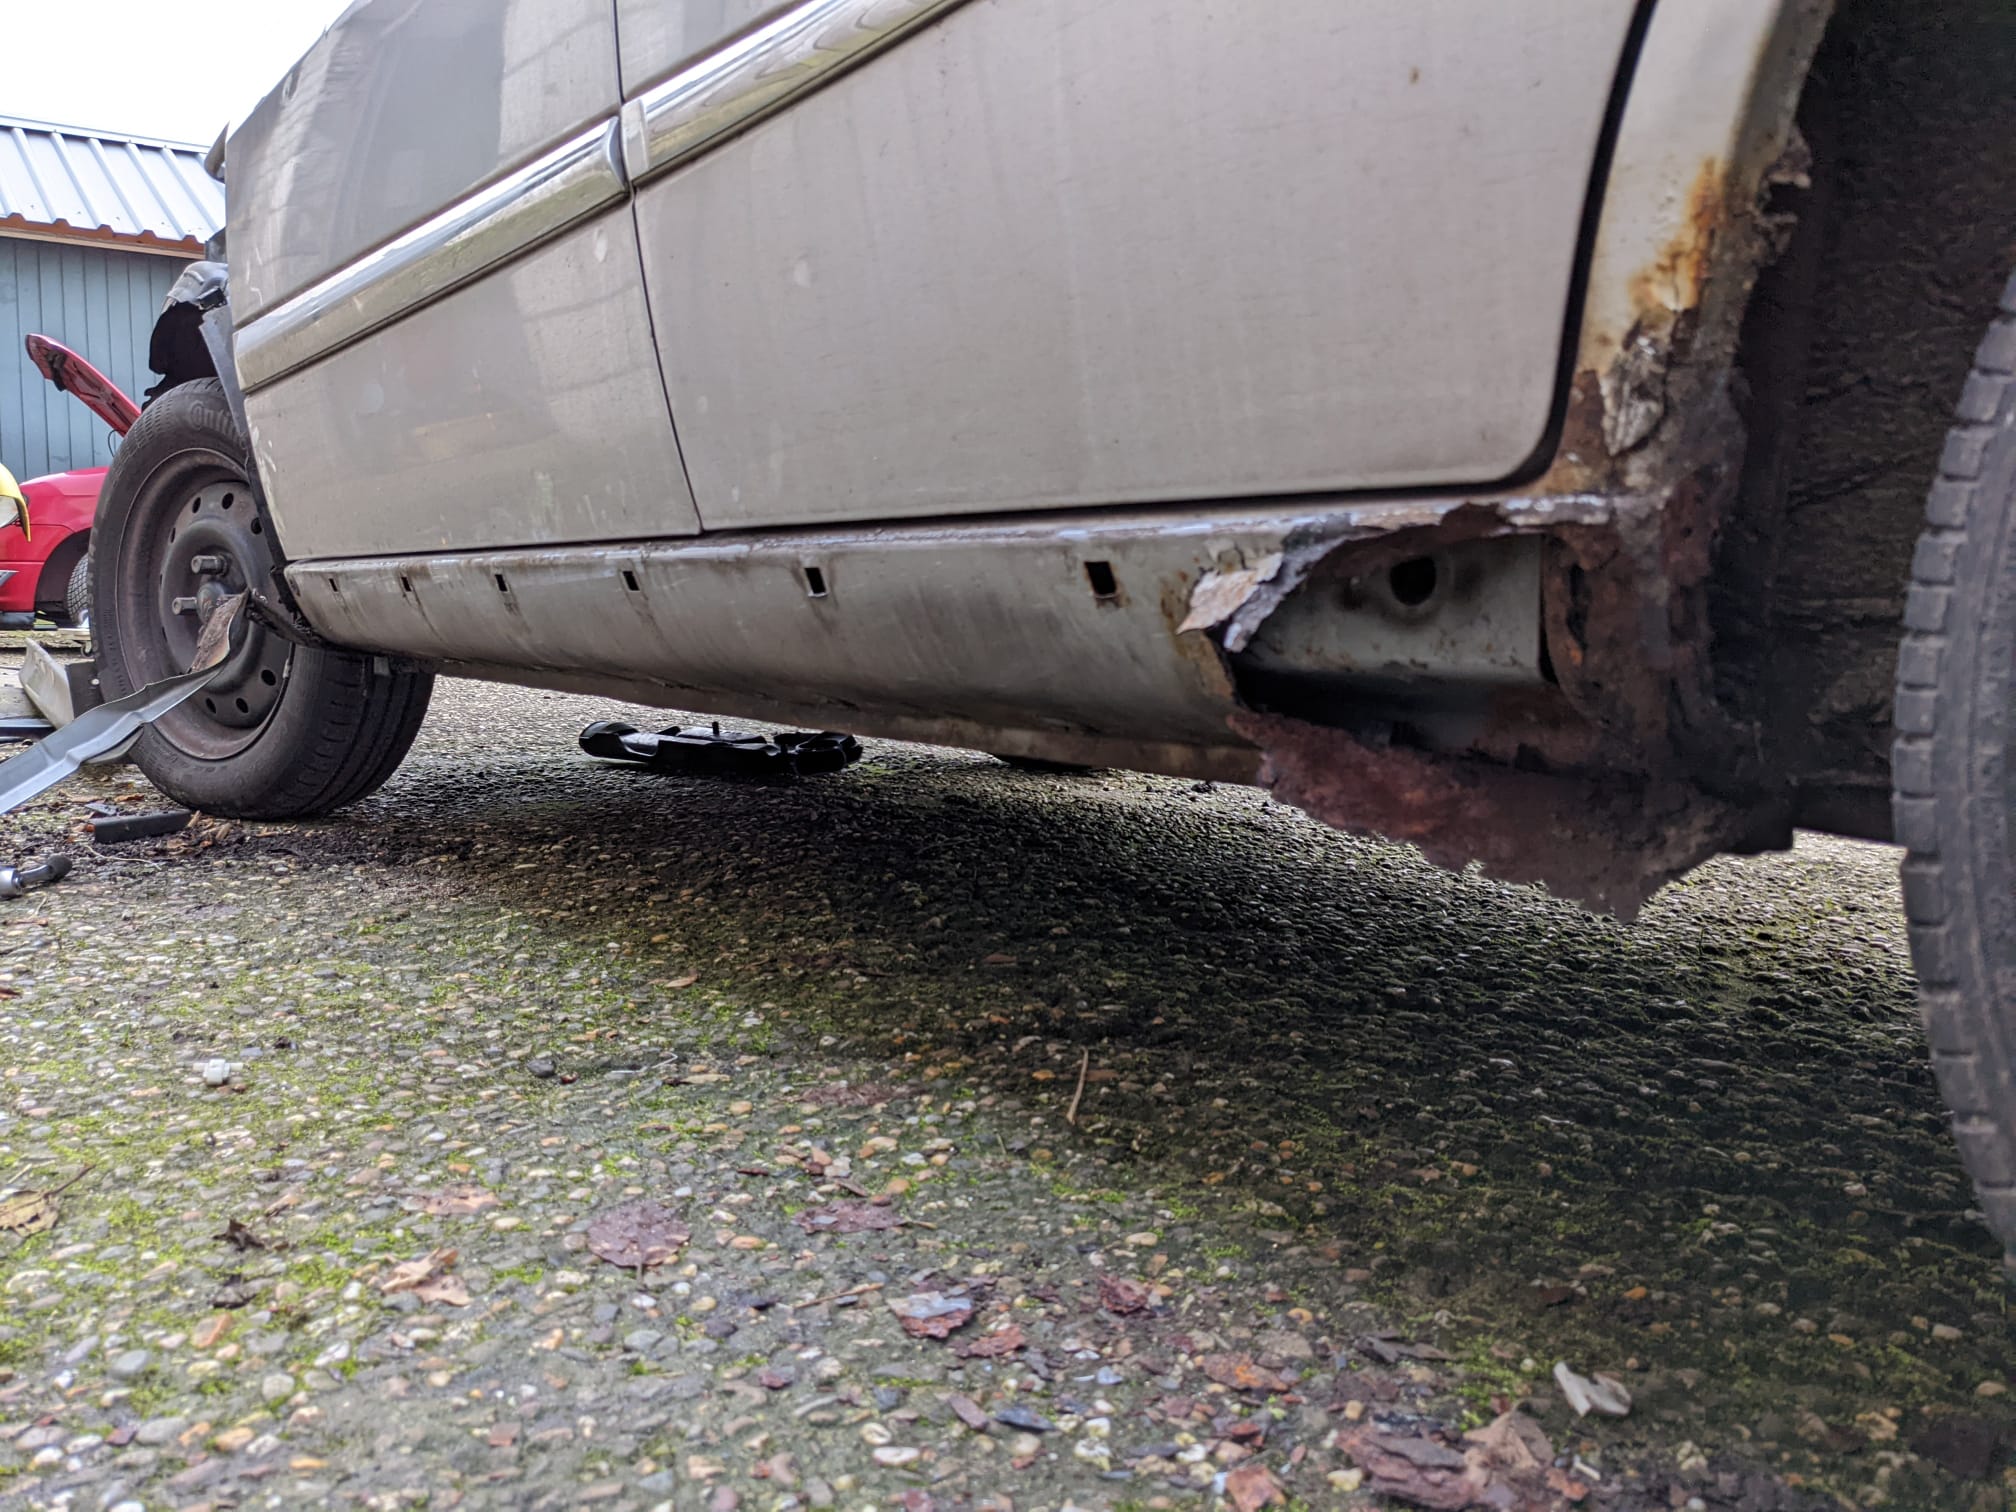
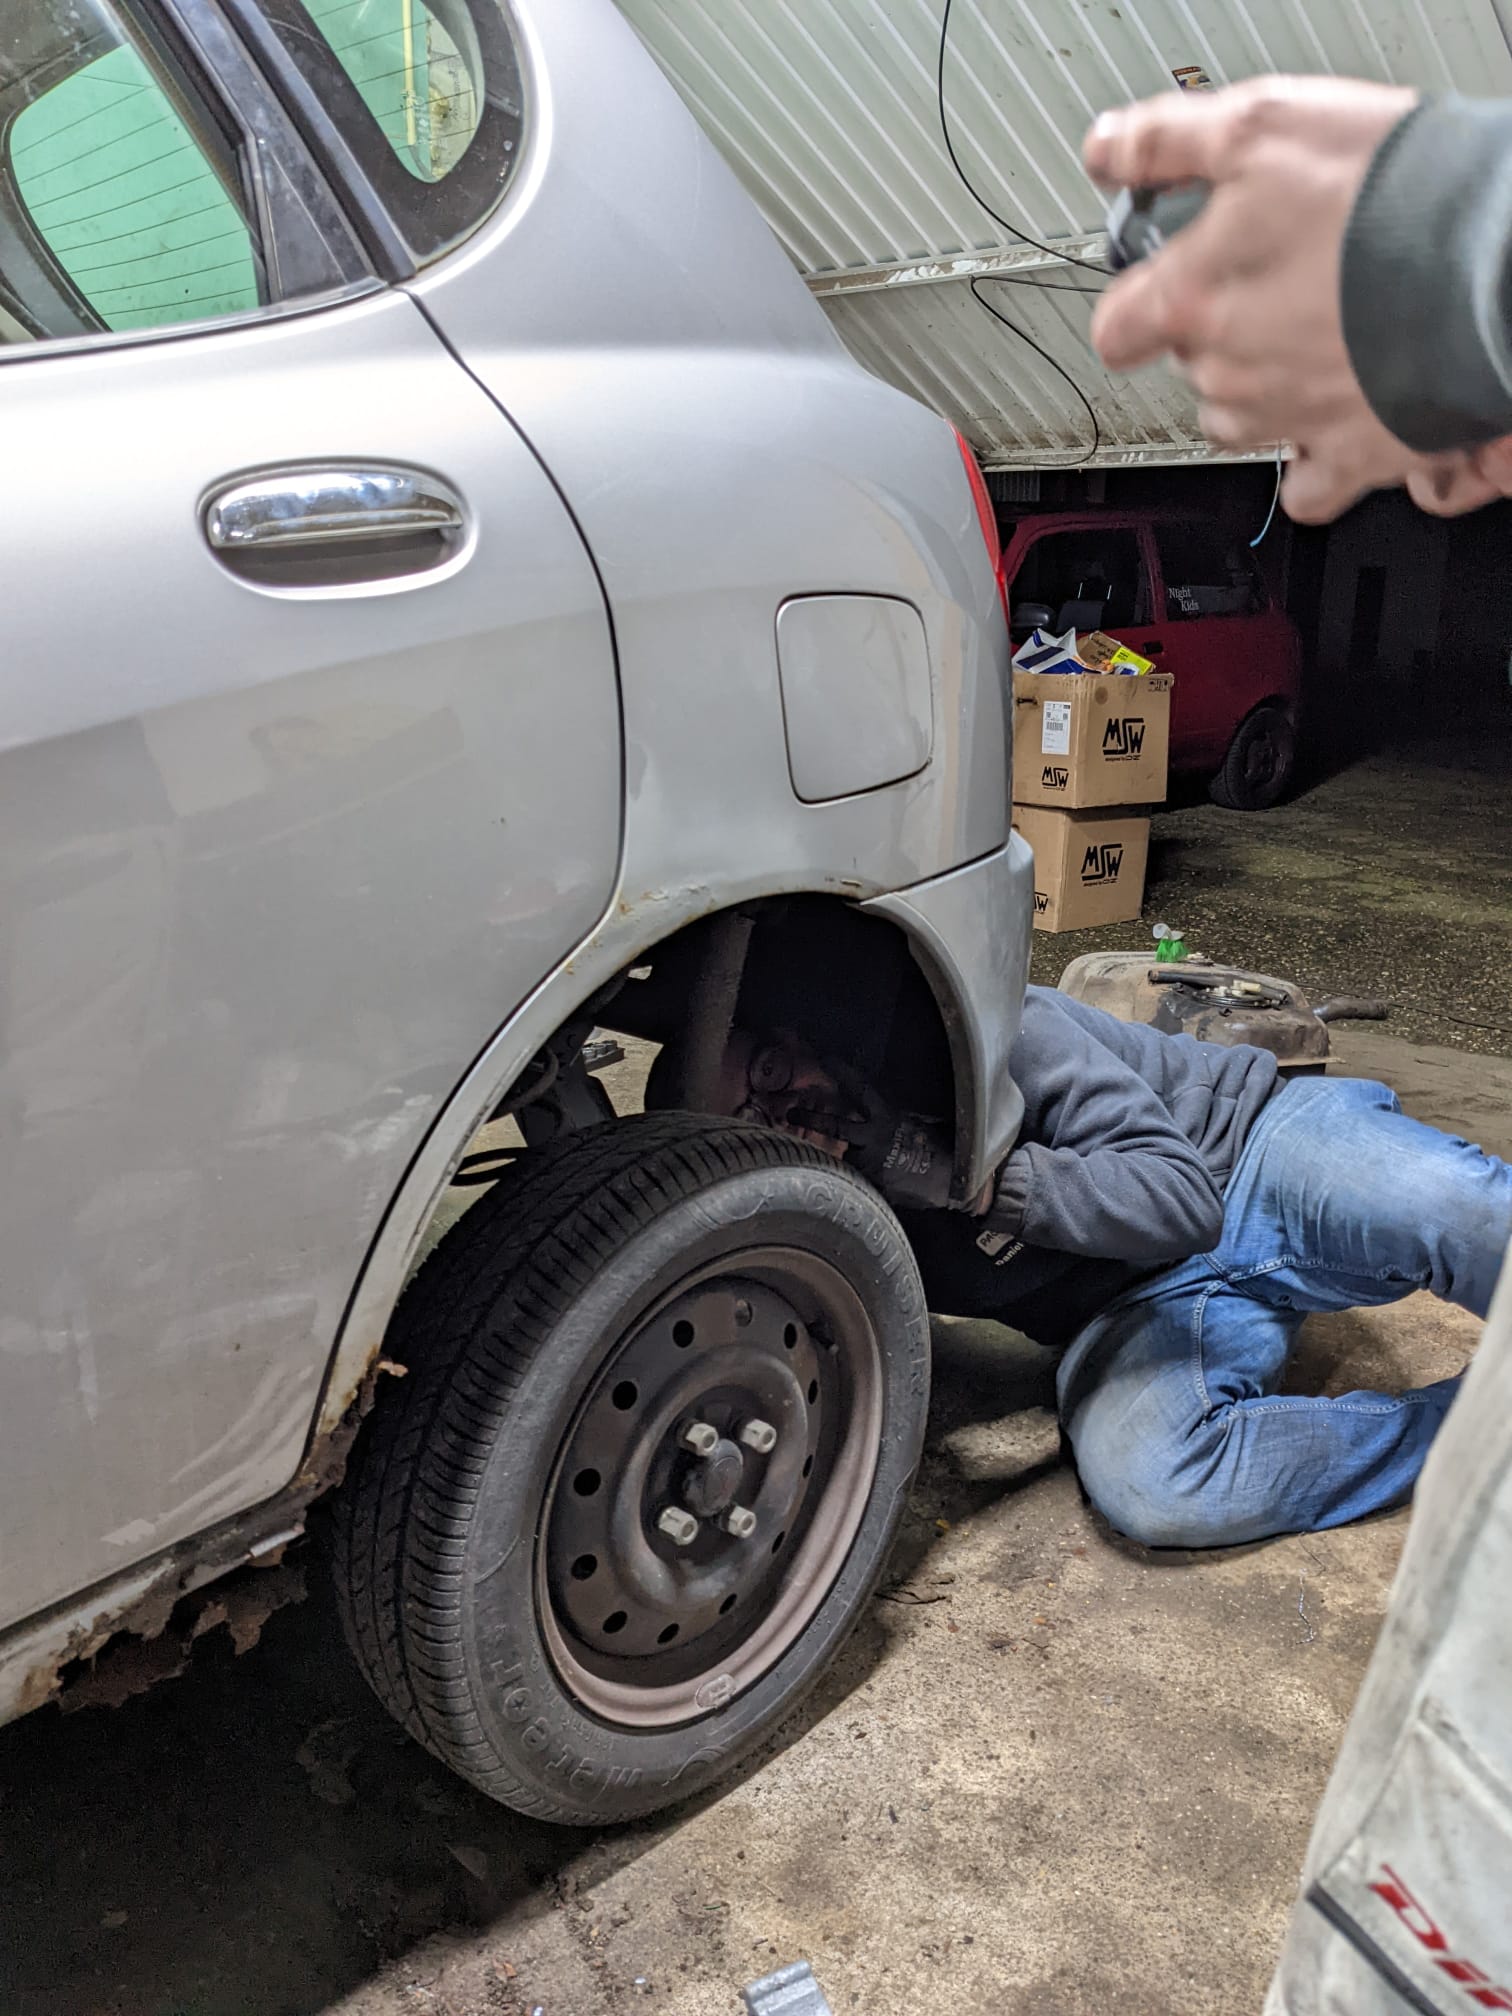
Tom turned out to be more of a troublemaker than I initially thought he would be. They day we did a service, was also the day I almost sent Tom into a ditch. The FR tire wasn’t very good at the ‘keeping air inside’ part, so when I drove to a shop nearby with two friends in the car, it didn’t really want to turn when I wanted to throw it into a corner. “Understeer” is almost an understatement. The way the car didn’t respond to steering input was ridiculous (and dangerous). So, I took off the wheels and replaced them with the steelies that were fitted to my YRV donor.
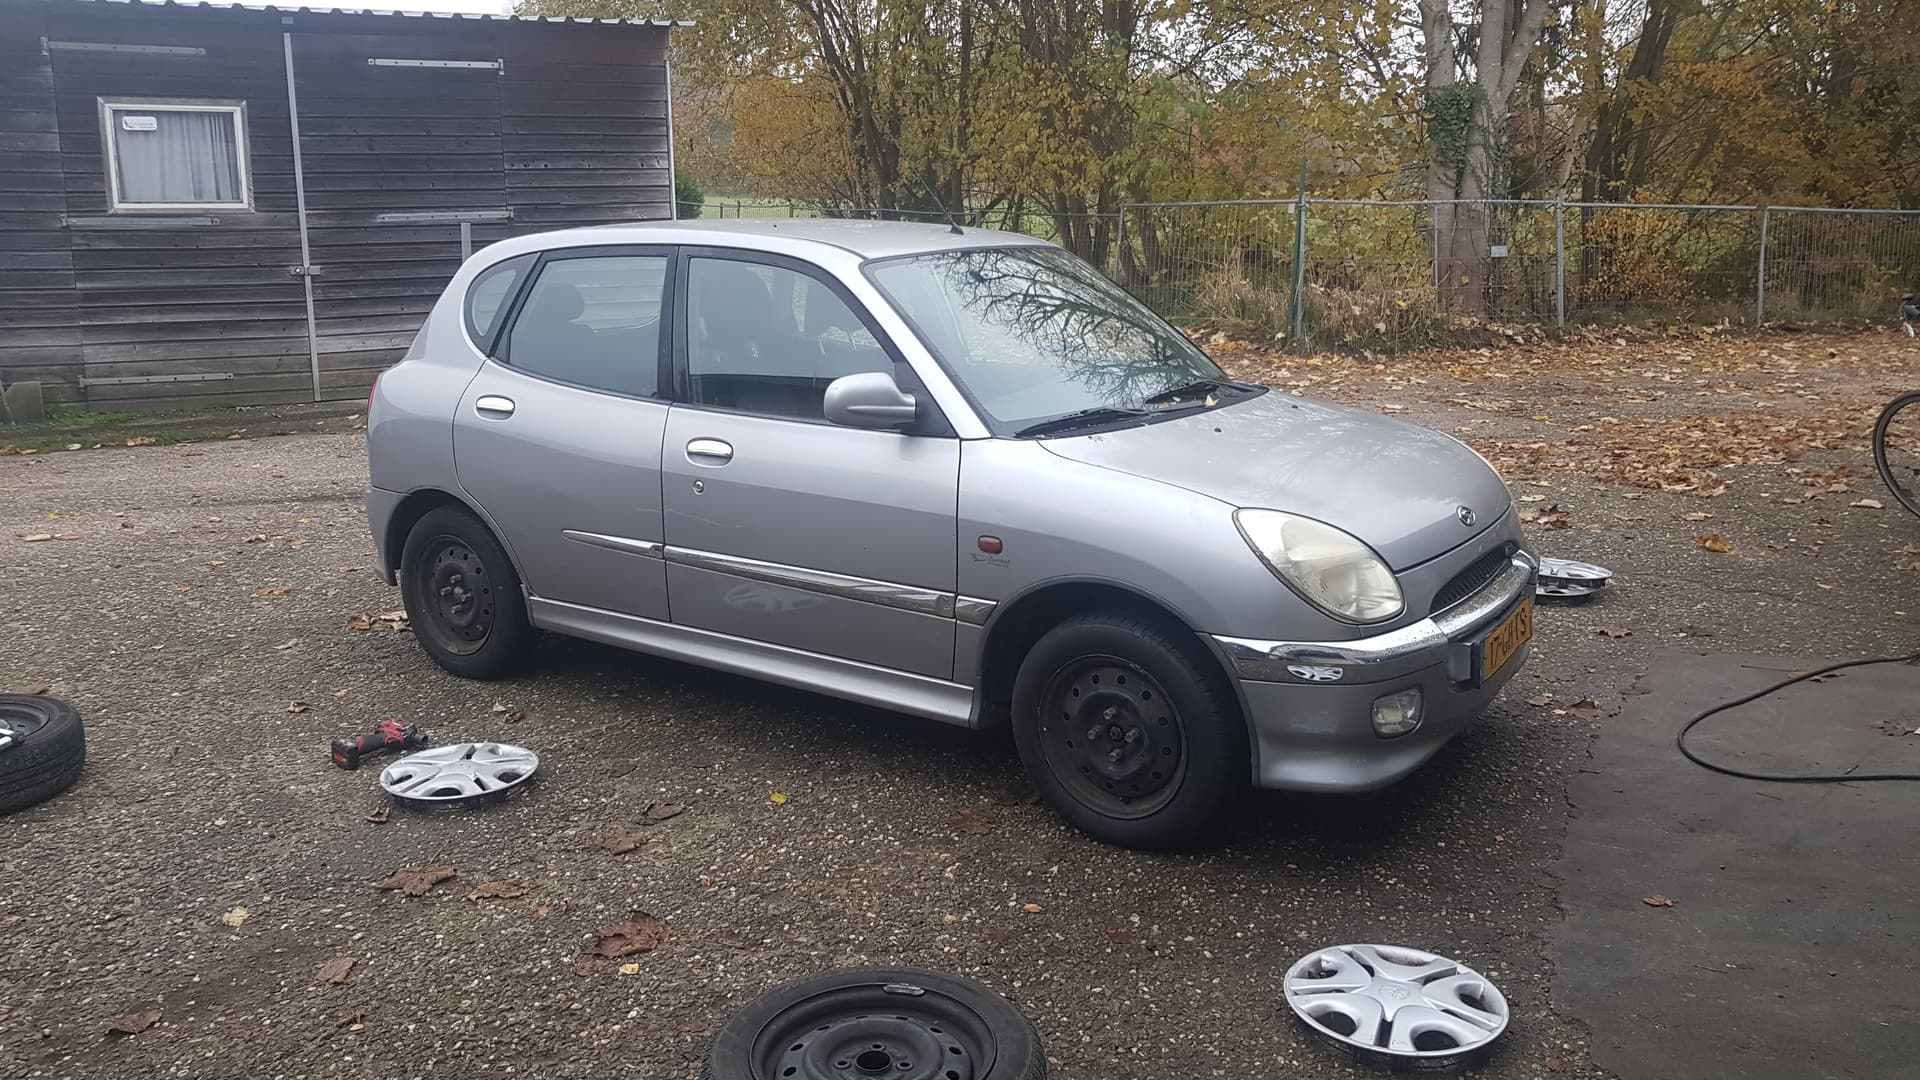
The old steelies had 165/60/R14 tires, which was slightly smaller than standard, and looked a bit weird in my opinion. Now it’s running on 165/65/R14 tires, and I ditched the Toyota hubcaps as well. Now it looks like a Sirion to me.
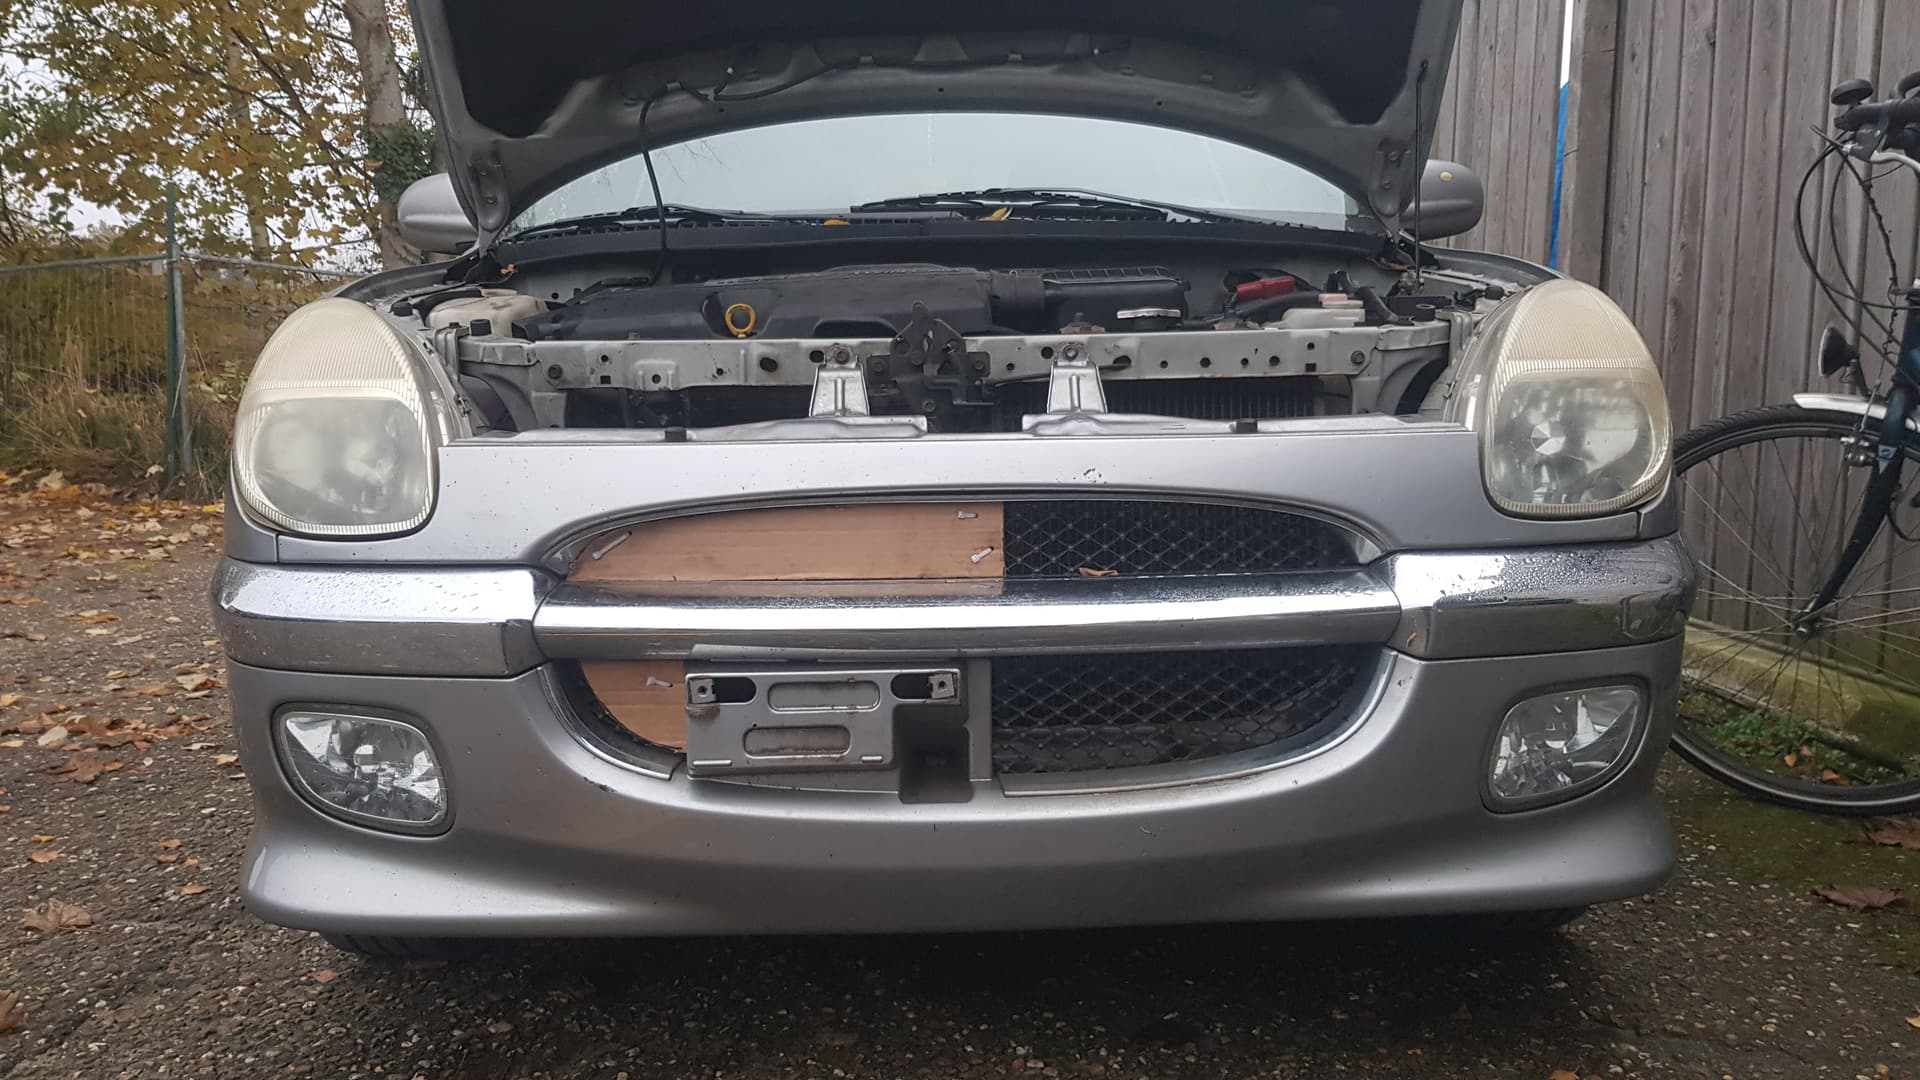
With temperatures starting to drop quite rapidly, I was in a bit of a hurry to fix the cooling issue. As I said before, the thermostat was broken. In retrospect, I’m not even sure if that was even true or not, because replacing it with a new one didn’t help. The car still didn’t get up to temperature, and it took some time to figure it out.
I thought that maybe it was struggling with the cold weather, and was simply cooled down too much by the wind, so I went full engineer.
Long story short: the car came up to temp slightly quicker, but it didn’t solve the issue.
In the end, it was running cold because the hoses connecting the radiator to the engine were fitted the wrong way.
It’s a shame it took so much time and effort to sort out, but at least it’s fixed now.
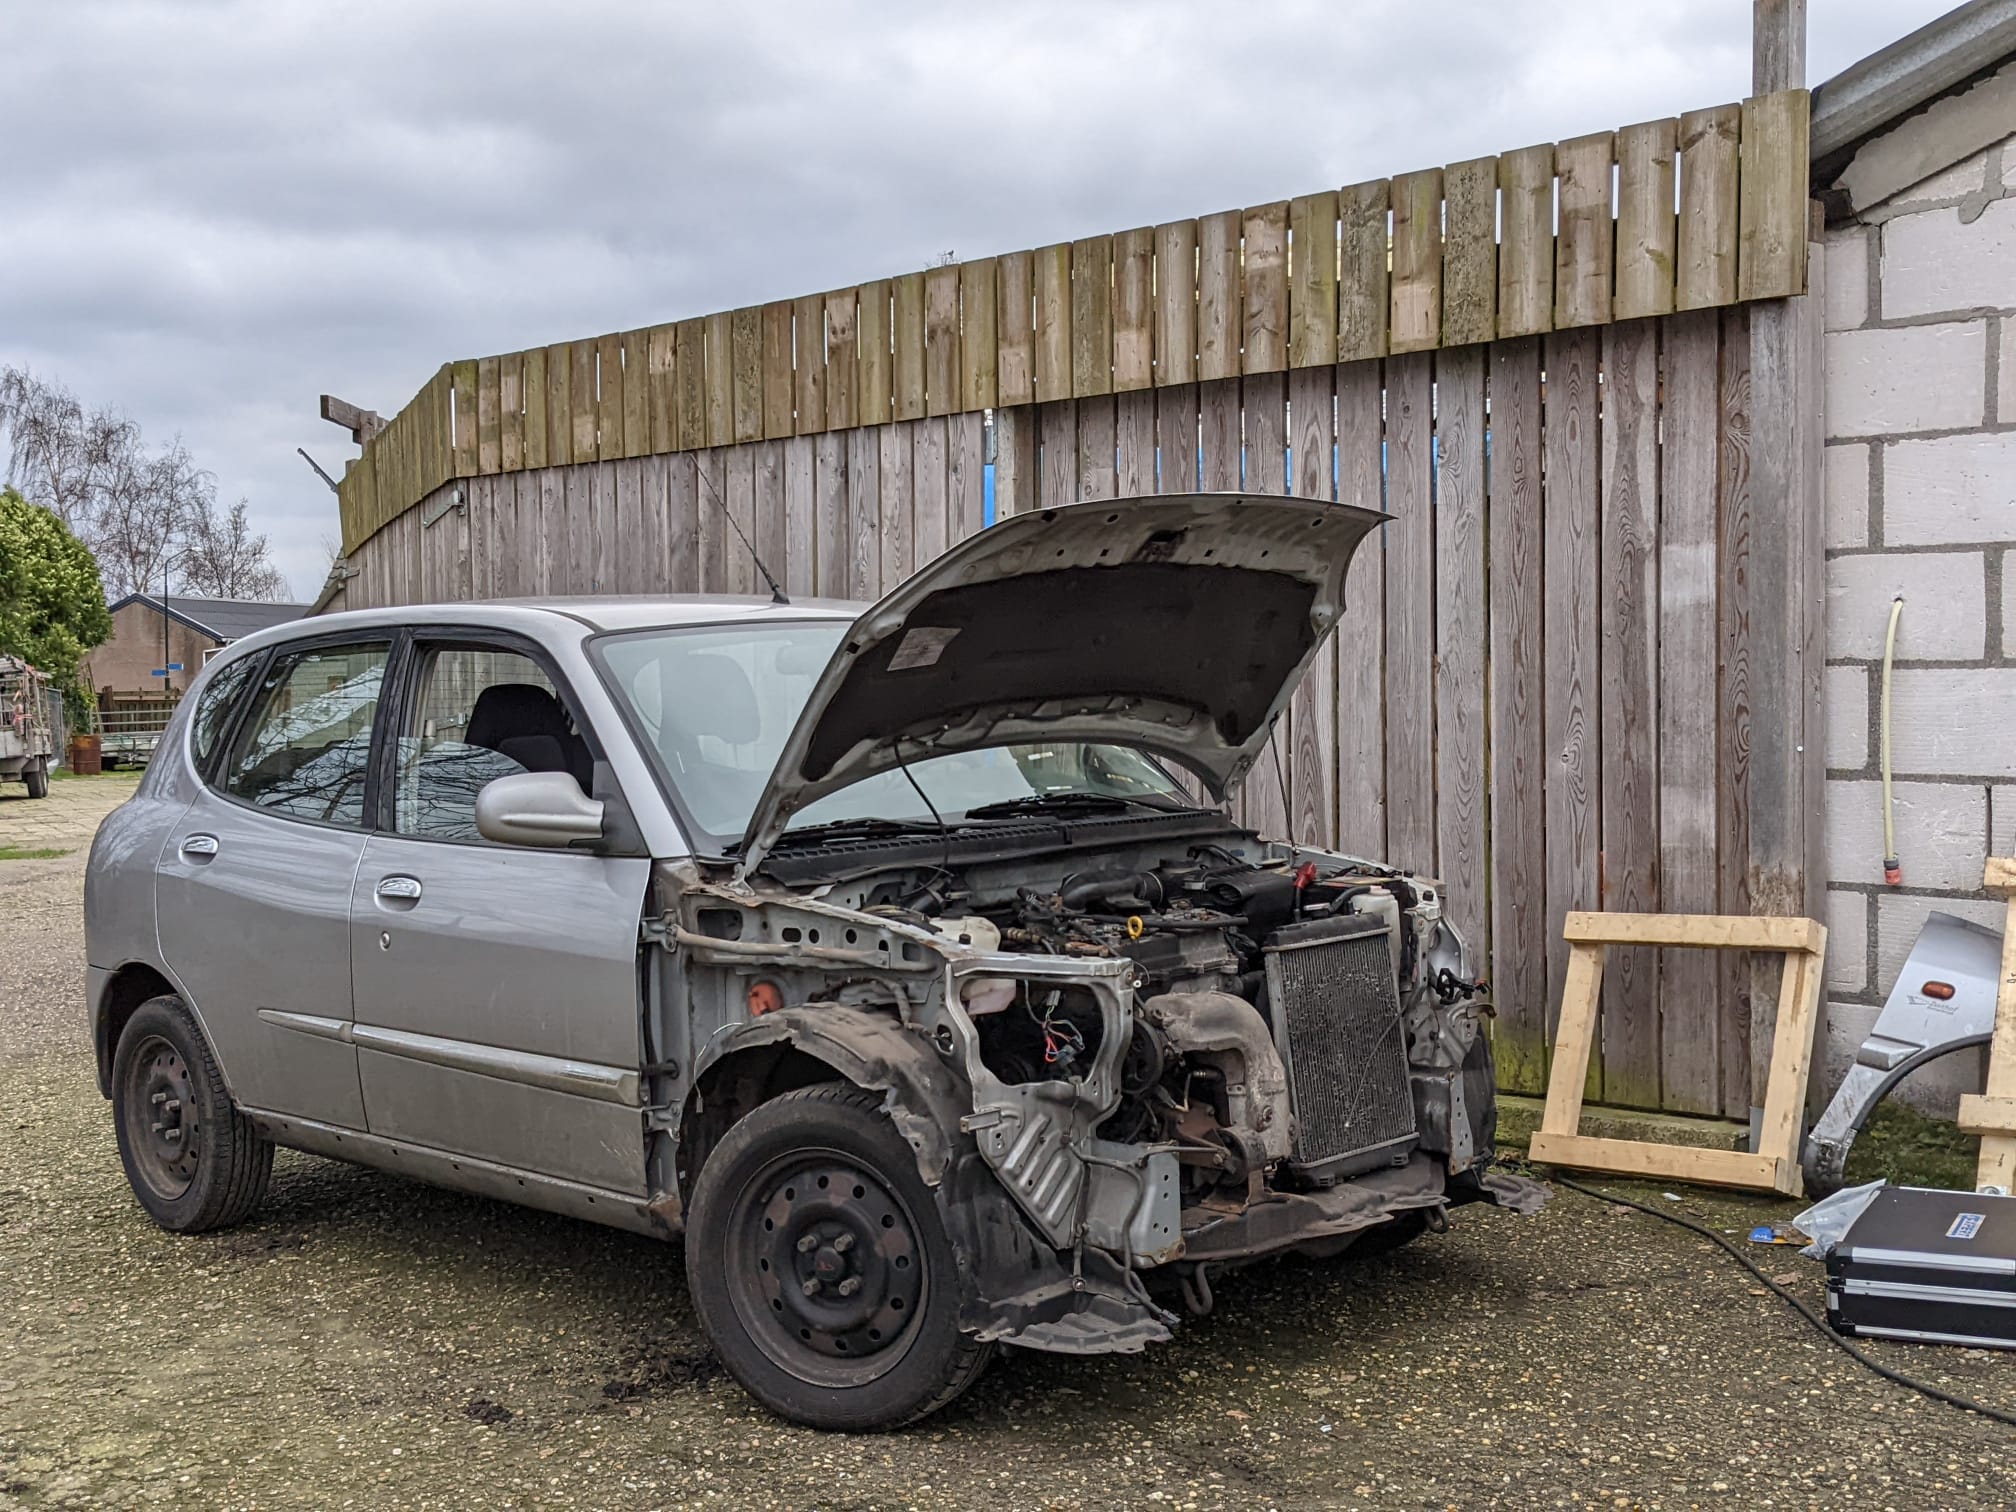
BLYATSU
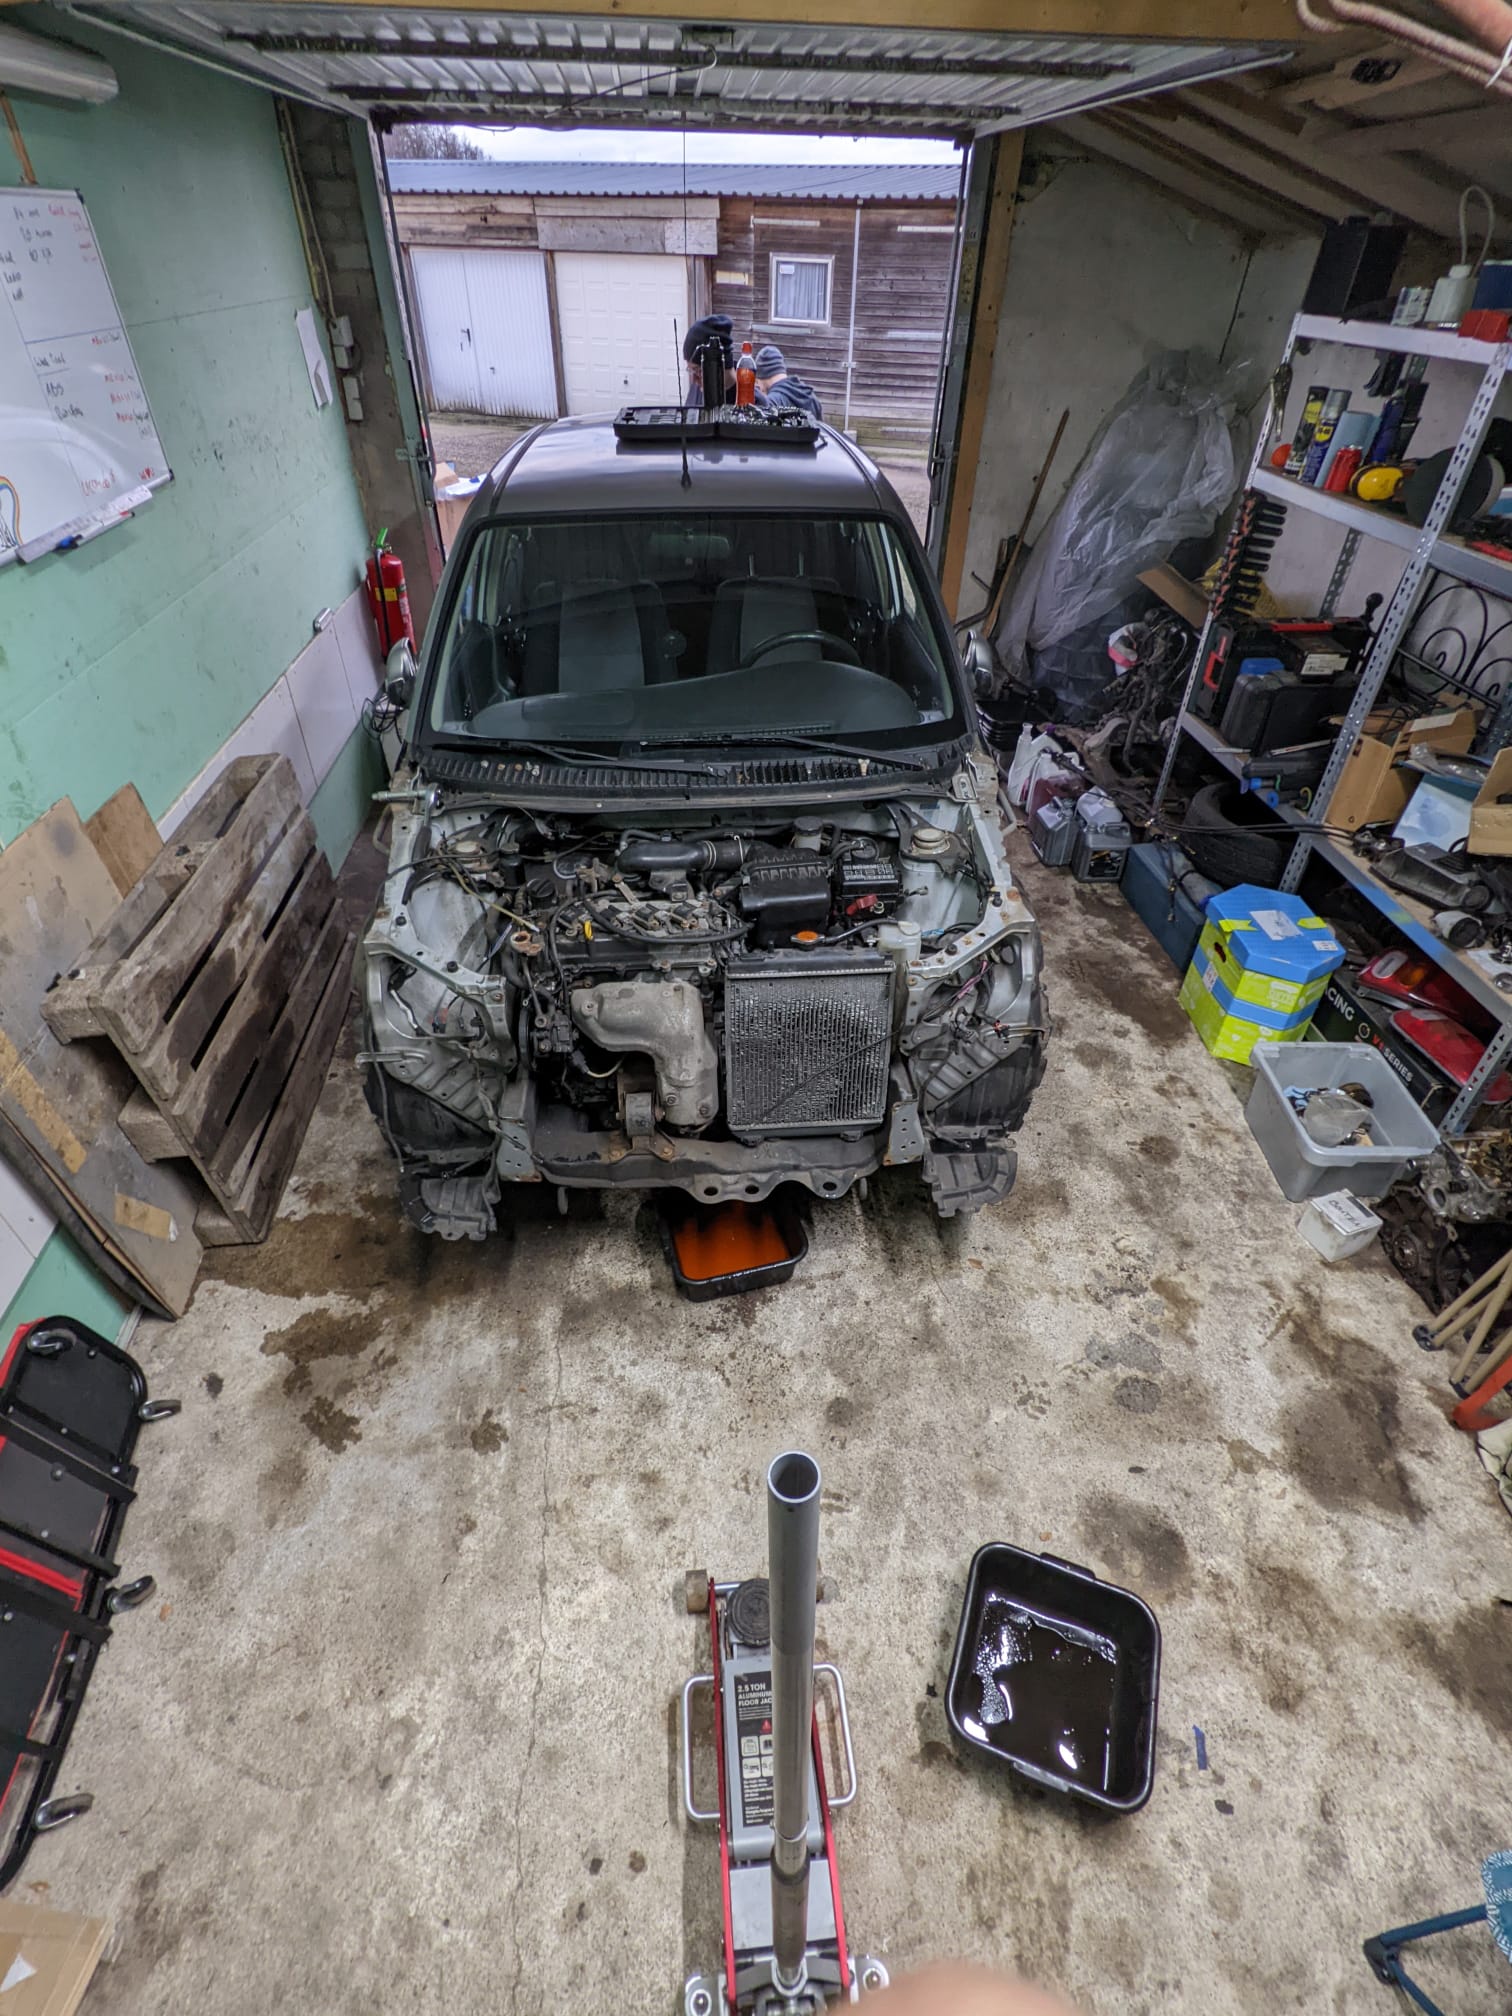
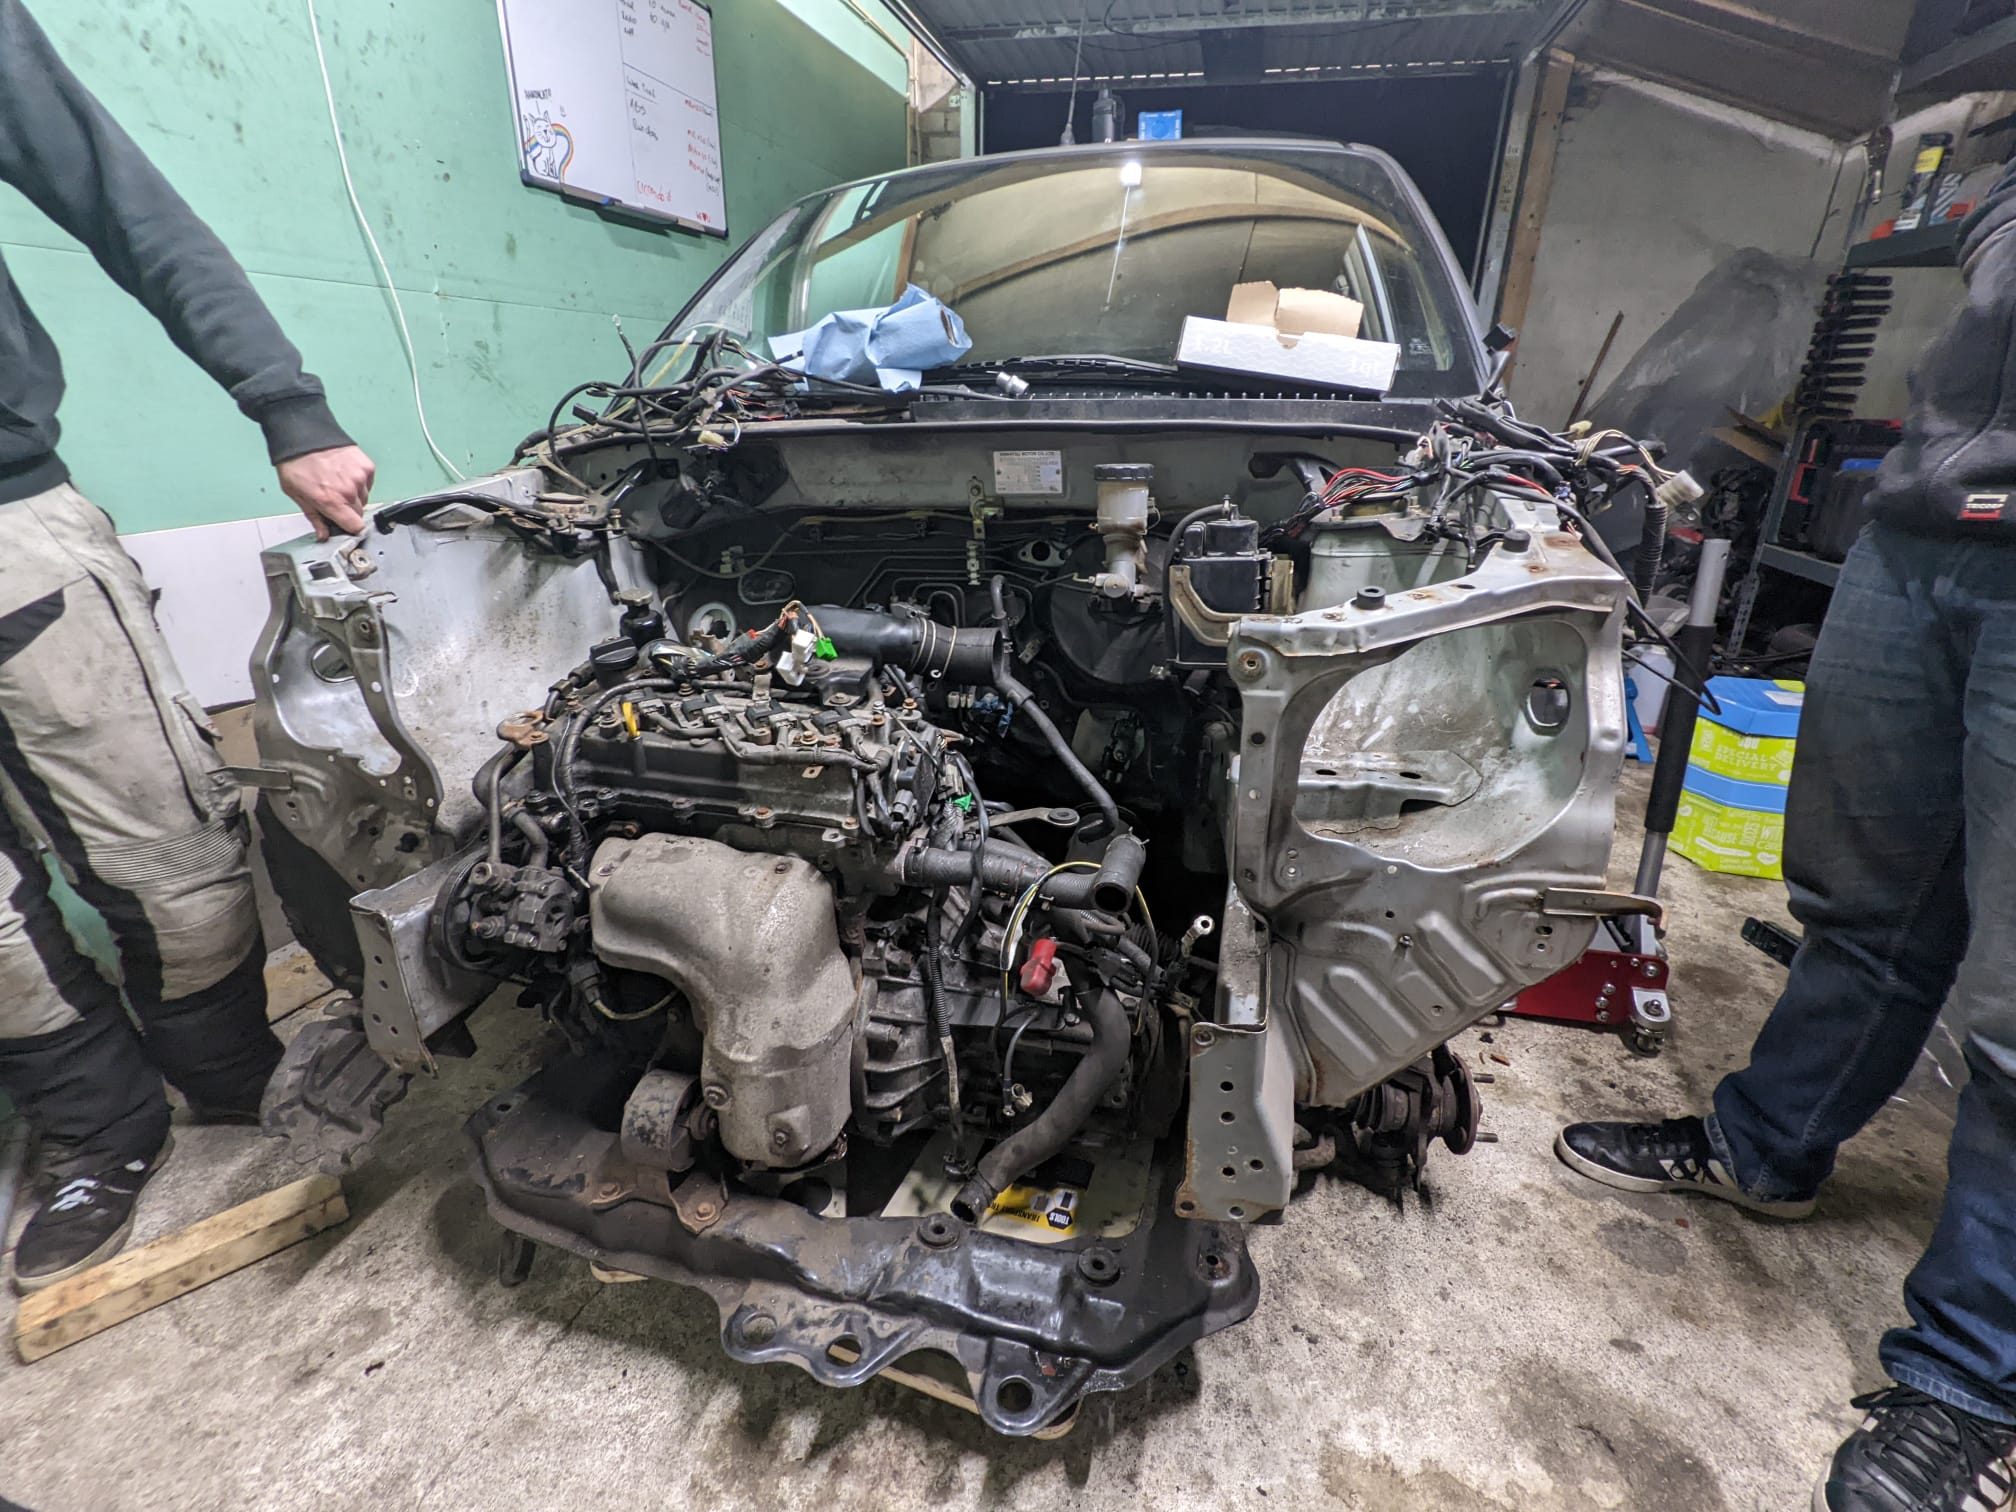
To be honest, I didn’t get very far since I put it in the garage. I mostly took out a lot of parts, like everything under the hood except the drivetrain, nearly everything on the rear hatch, and the entire dashboard.
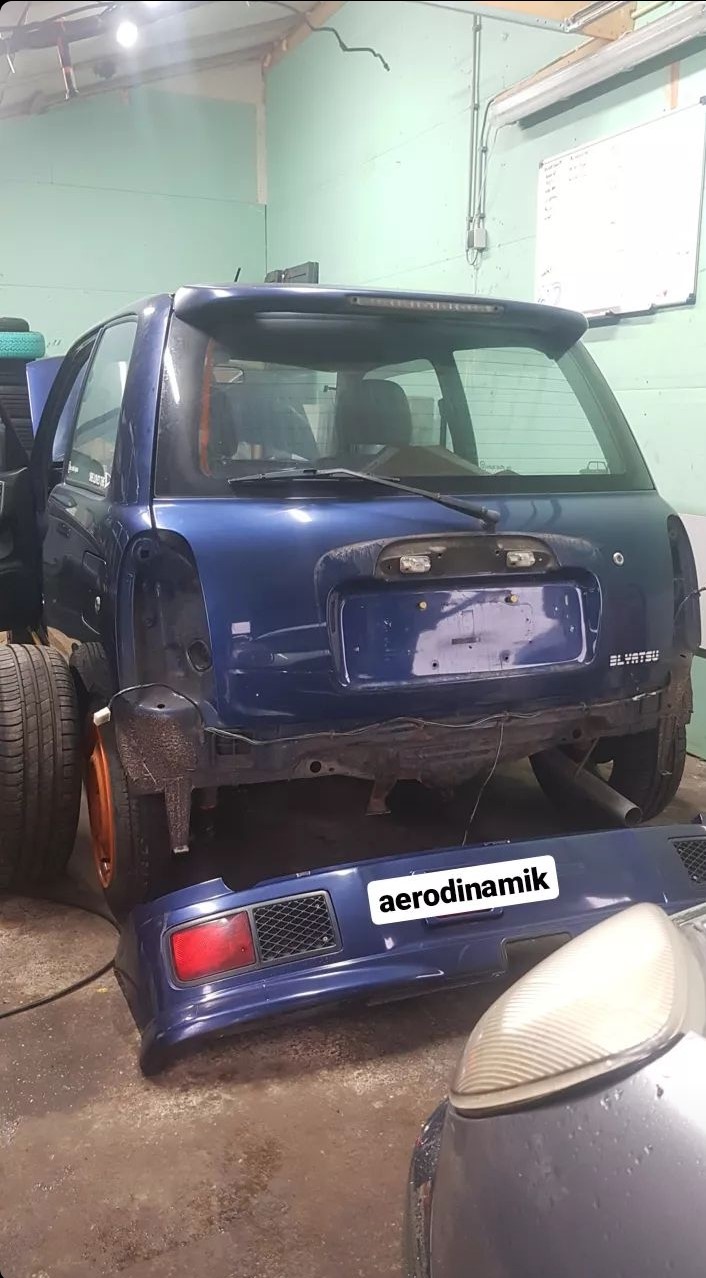
Looking rather sad
I can think of 4 excuses why I didn’t make a lot of progress, the main one being that I had to fix Tom first. The second one is me being a bit lazy, the third one is money (or rather the lack of money), and the fourth one being the weather. It it ridiculously cold inside the garage, which is a bit demotivating. I should be able to make a bit more progress in the next few weeks, so I’m hoping to start making some drawings for a few bits I want to fabricate (like a decently placed air filter box).
Wish me luck!
7 Likes
Really loving your writeup on your build. Been enjoying it a great deal. Will be looking forward to your future Posts.
2 Likes
ALL GOOD THINGS MUST COME TO AN END
(get ready for some reading, we got a loooot of catching up to do)
I wanted to start my story with “it’s been a while”, but I feel like I’ve said that more than once, so I won’t. However, looking at my last post, it does feel like it’s been quite a while since my last post, considering all the things that have happened in the mean time. Not too long after my last post, I got the 'Ronies and had to stay at home for a week. I feel like the timing couldn’t have been better, because I didn’t have anywhere to go the following week, and needed to finish some school assignments. Unfortunately this also meant I couldn’t work on the car, but I still got some preparation work done.
CANBUS OR CAN’TBUS
Ah yes, canbus. My greatest nemesis. Almost 2022, but still no luck on that front. A few days before I got sick, I visited a tuning company for an internship which would start in February. I really wanted to be able to focus on the project I’d be working on, which meant I had a bit more than a month to get the car back on the road. The to-do list went out the window, and the main goal was to just get it working properly. Which was easier said than done. I made a whole topic about canbus, so for more details, you can go over there and have a read.
By learning a bit more about canbus, I wanted to see if I got the basics right, starting with the resistors. In an earlier post, I said this:
Guess what? I was wrong. As it turns out, the gauge cluster contains the other resistor.
I watched a few video’s about the whole canbus principle, and figured that I should try and fit a resistor on the other end of the canbus, near de ABS module. The reason why I placed it there, is because I read that the main bus itself can be quite long, but the nodes (“add-ons”, like ABS, or an A/T ECU) can’t. Short explanation: this is because the nodes don’t have a resistor, which means that signals can interfere with each other when the node is too long. So, when the resistor is placed near the ABS module, the node is pretty short.
I was lucky to get a few resistors from a shop in town, because the day after, our country went into lockdown ![]() . It took some time for me to find some motivation, but eventually I MacGyver-ed something up.
. It took some time for me to find some motivation, but eventually I MacGyver-ed something up.
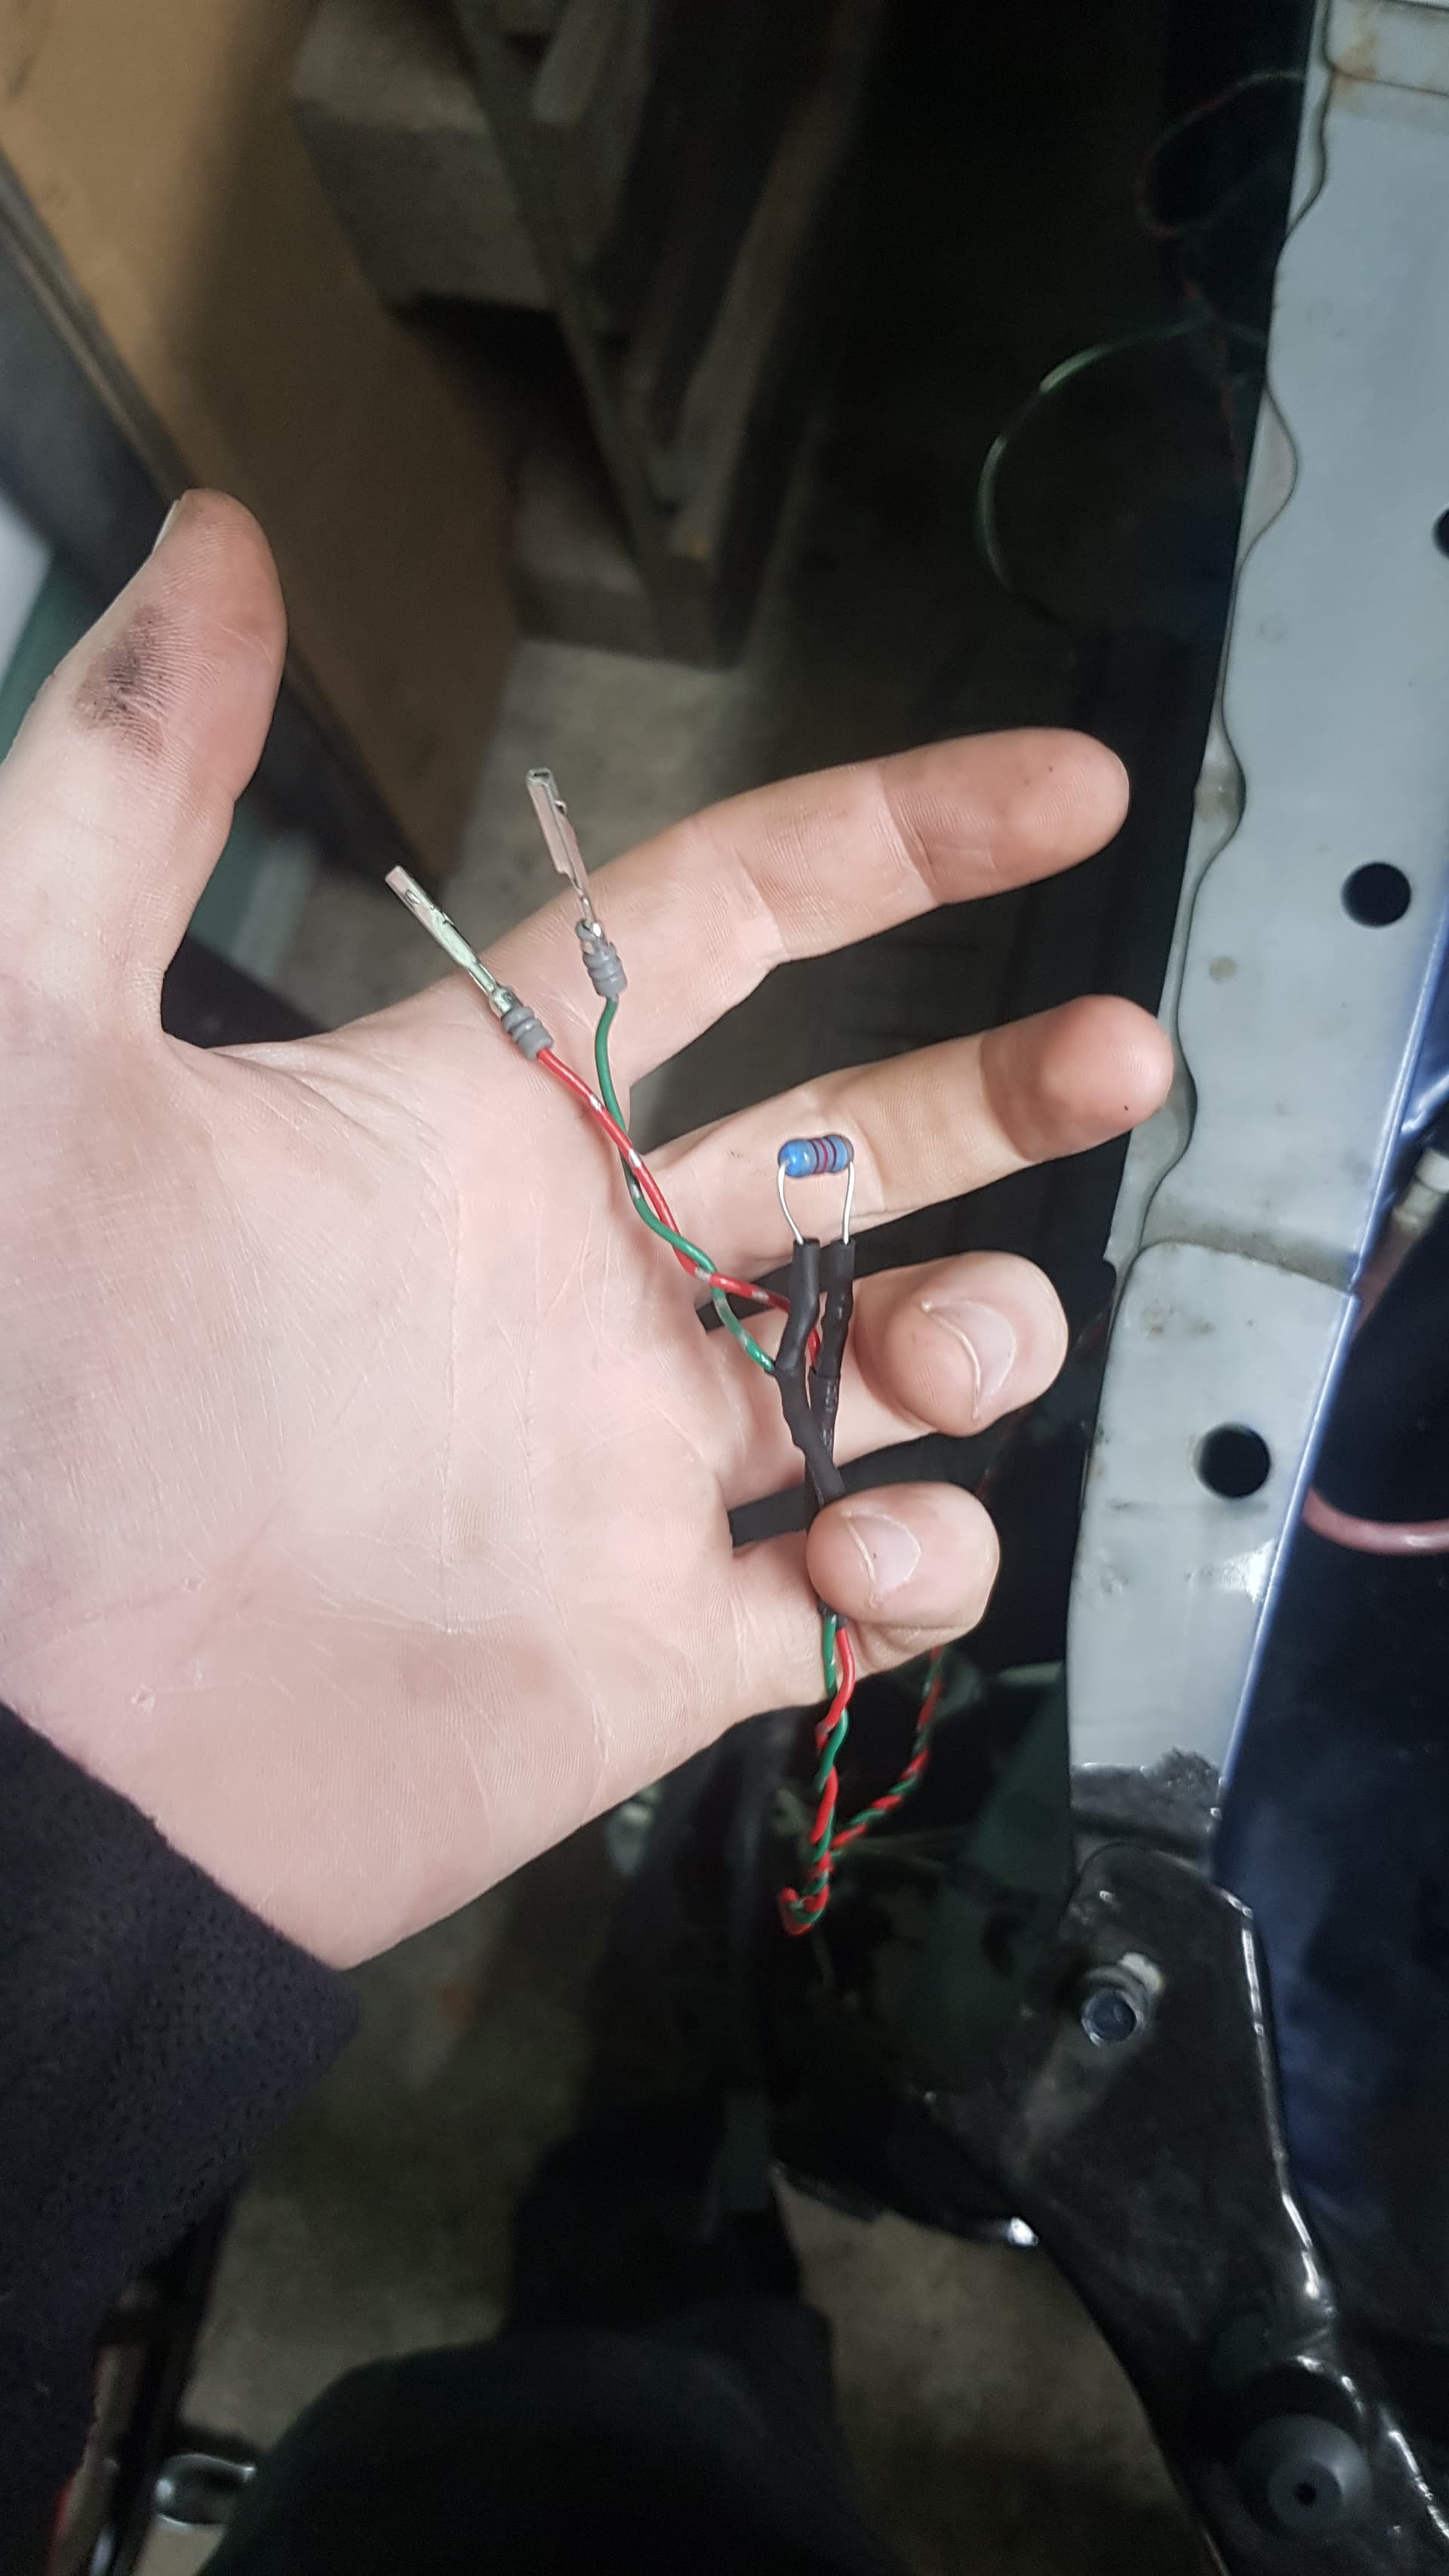
It ain’t much but it’s honest work
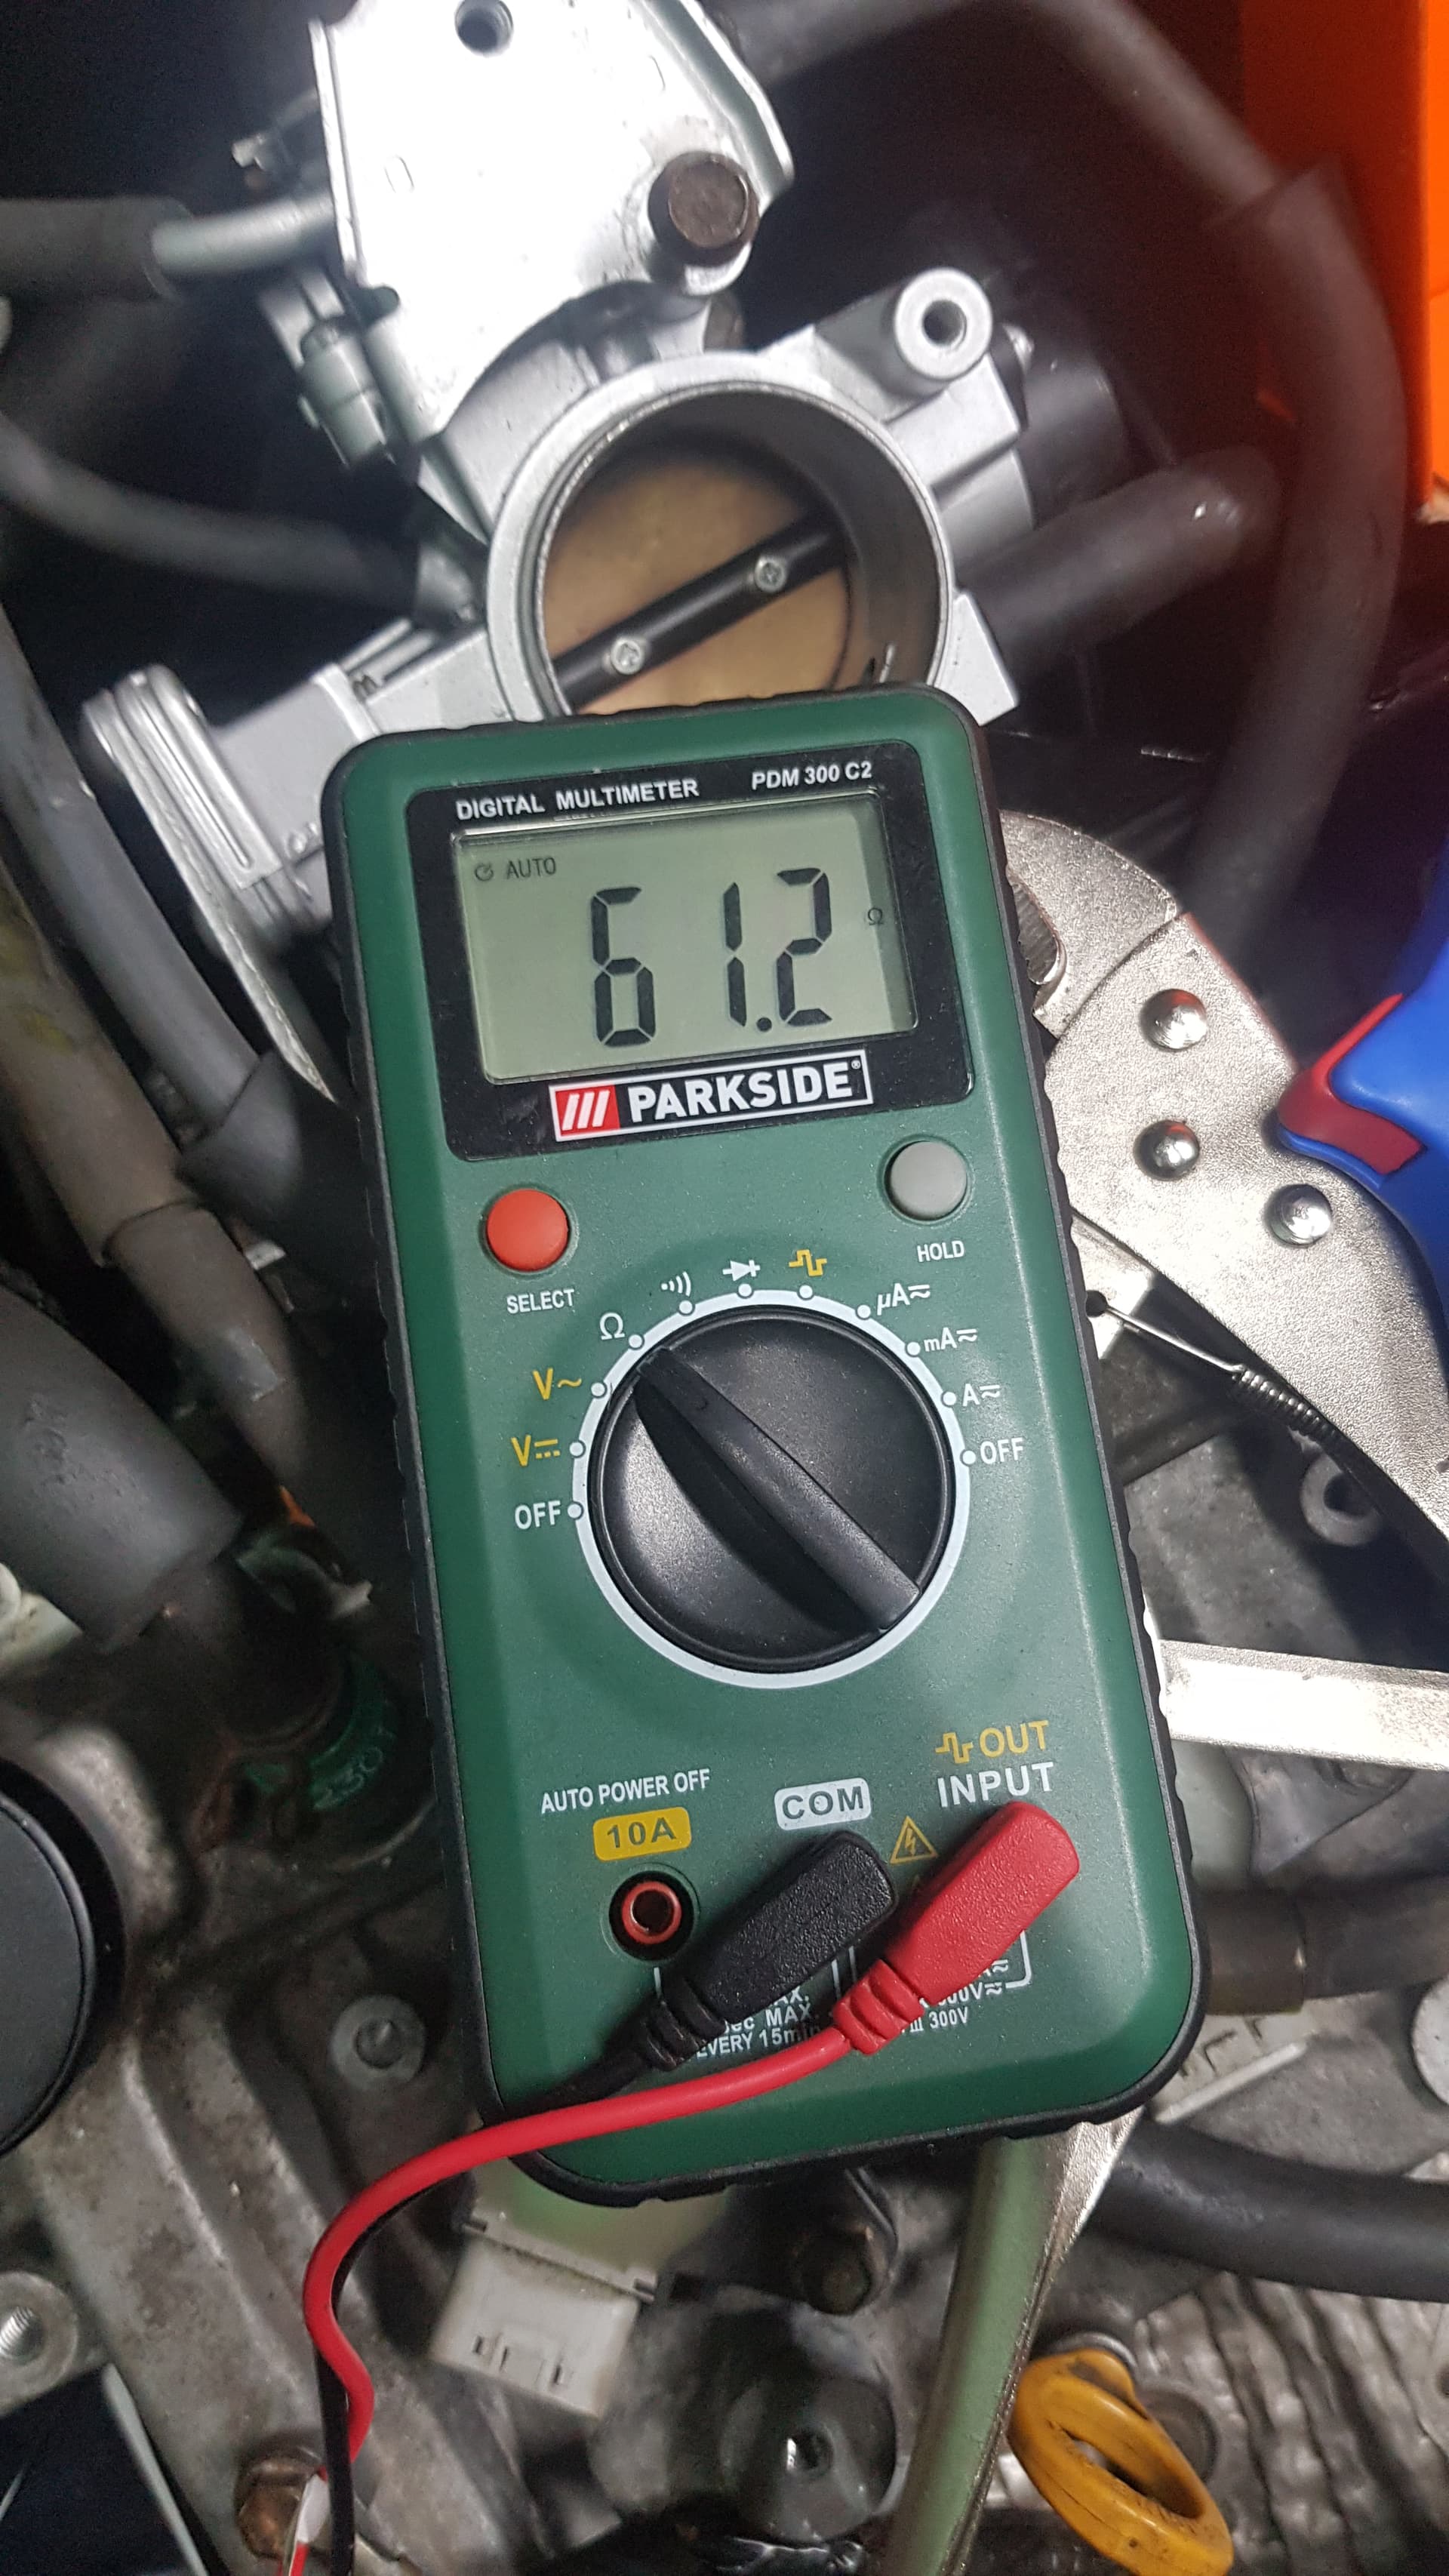
Resistance was looking good
For everyone who isn’t that great with electronic stuff (like me): the total resistance for a parallel scheme is:
1/Rtotal = 1/R1 + 1/R2 + 1/R3 .. 1/Rn (the ‘n’ meaning as many numbers as you’d like). 2 resistors of 120 Ohms means the total resistance should be around 60, becaus:
1/Rtotal = 1/120 + 1/120
1/Rtotal = 2/120
1/Rtotal = 1/60
(getting Rtotal means deviding 1 by 1/Rtotal)
Rtotal = 60
With only 1 resistor, the answer would be 120.
Not necessary for the story, but useful knowledge for understanding why we’re looking for 60 Ohms.
I turned the key and… nothing.
HEY GOOGLE, PLAY ‘TIME IS RUNNING OUT’ BY MUSE
As time was running out, I was starting to get desperate. Time for my last resort: getting a Sirion 2 gauge cluster. I say “last resort”, because there was nothing else (I could think of) left to try. In preparation of my junkyard trip, I dove back into the manuals, and found this:
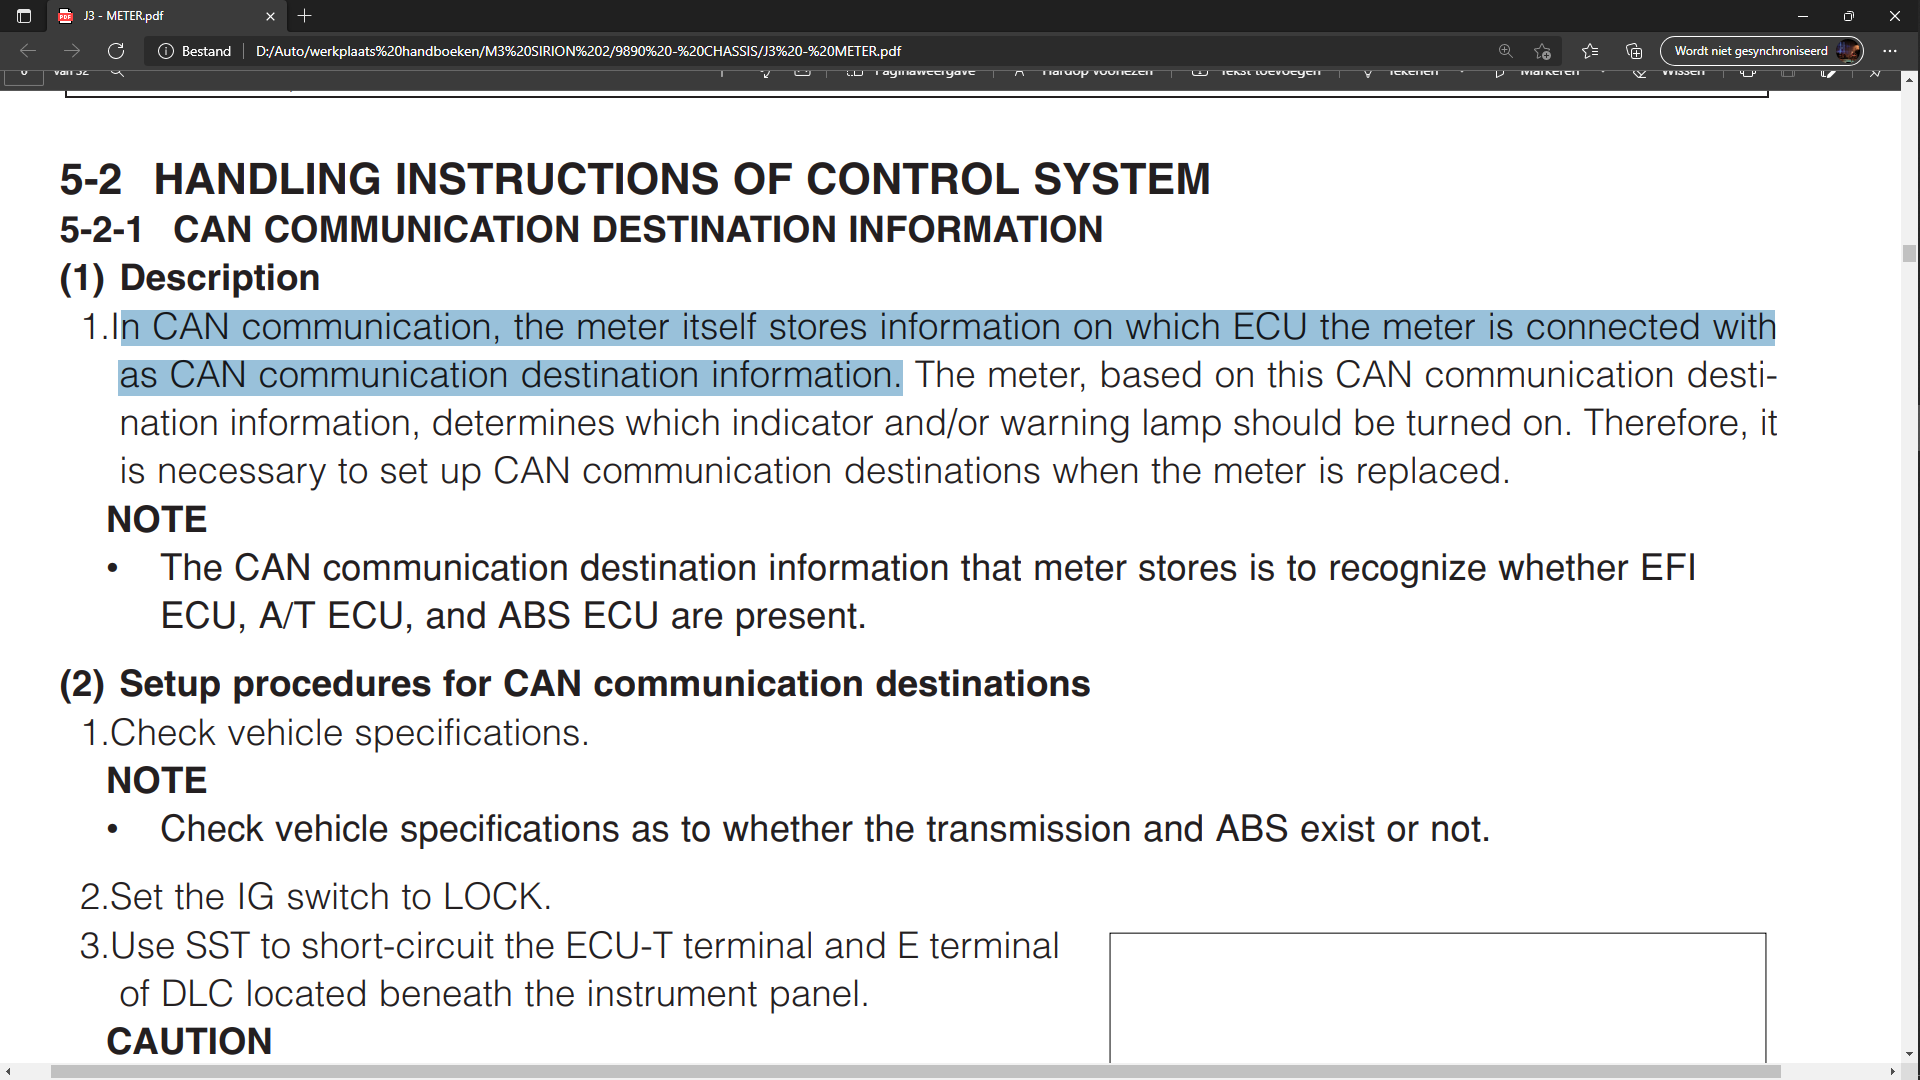
It took me several times to read the sentence without having a stroke, but this made me believe that the gauge cluster plays a pretty vital role in the whole canbus system.
Shoutout to my friend
We went to the junkyard, and I took apart the entire dash of a Sirion 2 to get to the wiring loom. Luckily for me, someone else already took apart about half of it, so it didn’t take very long for me to get there. I took out all the canbus wires to make sure nothing could go wrong with the physical circuit. I hadn’t seen my friend in quite a long time, so it was nice to do some wrenching (read: shouting and swearing at cars while violently taking them apart) together again. Combined with some dry weather and the fact that stripping the car went fairly easy, put me in a good mood. It was just what I needed, and some motivation came back.
HEY GOOGLE, PLAY ‘FRIDAY I’M IN LOVE’ BY THE CURE
Yes, I’m doing a song title reference theme thingy now.
It’s been a long week. “Exhausting” would be an understatement I think ![]()
“Monday you can fall apart”
Monday was all about gathering as much information as possible from the manuals, from various different models
“Tuesday, Wednesday break my heart”
Tuesday was junkyard day, Wednesday I went to see my sister, whom I also hadn’t seen for a while
“Oh, Thursday doesn’t even start”
This should actually say “the car doesn’t even start”, because I forgot to connect the immobilizer ![]()
“It’s Friday, I’m in love”
The last full day to work on the car. We’ll go back to Thursday, when I installed the gauge cluster
HEY GOOGLE, PLAY ‘TiK ToK’ BY KE$HA
2 days left, no pressure. As someone with ASD (autism spectrum disorder), I like to have things organised and clear, but I also have a very messy side. Sometimes the messy side wins, and this shit happens:
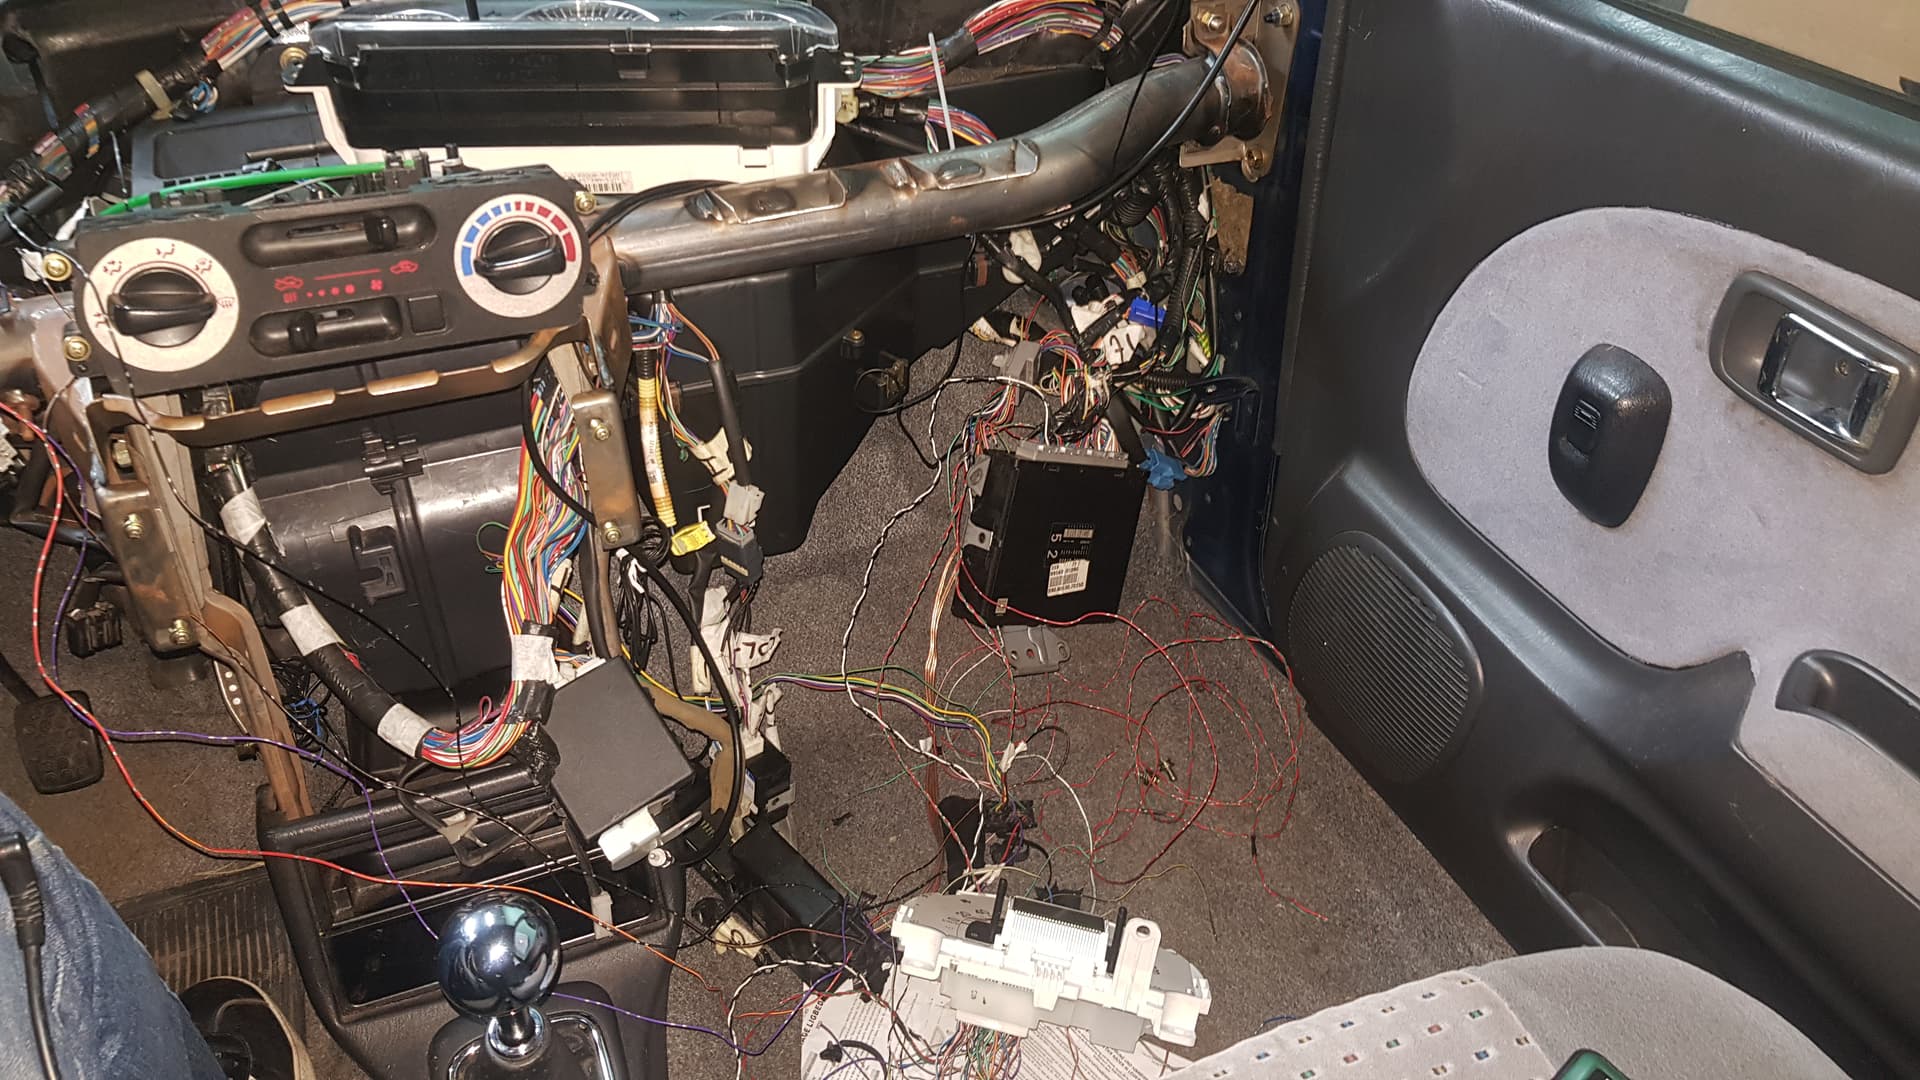
The picture doesn’t even do any justice to the mess that was in my car. It gave me so much stress, it was almost unbearable.
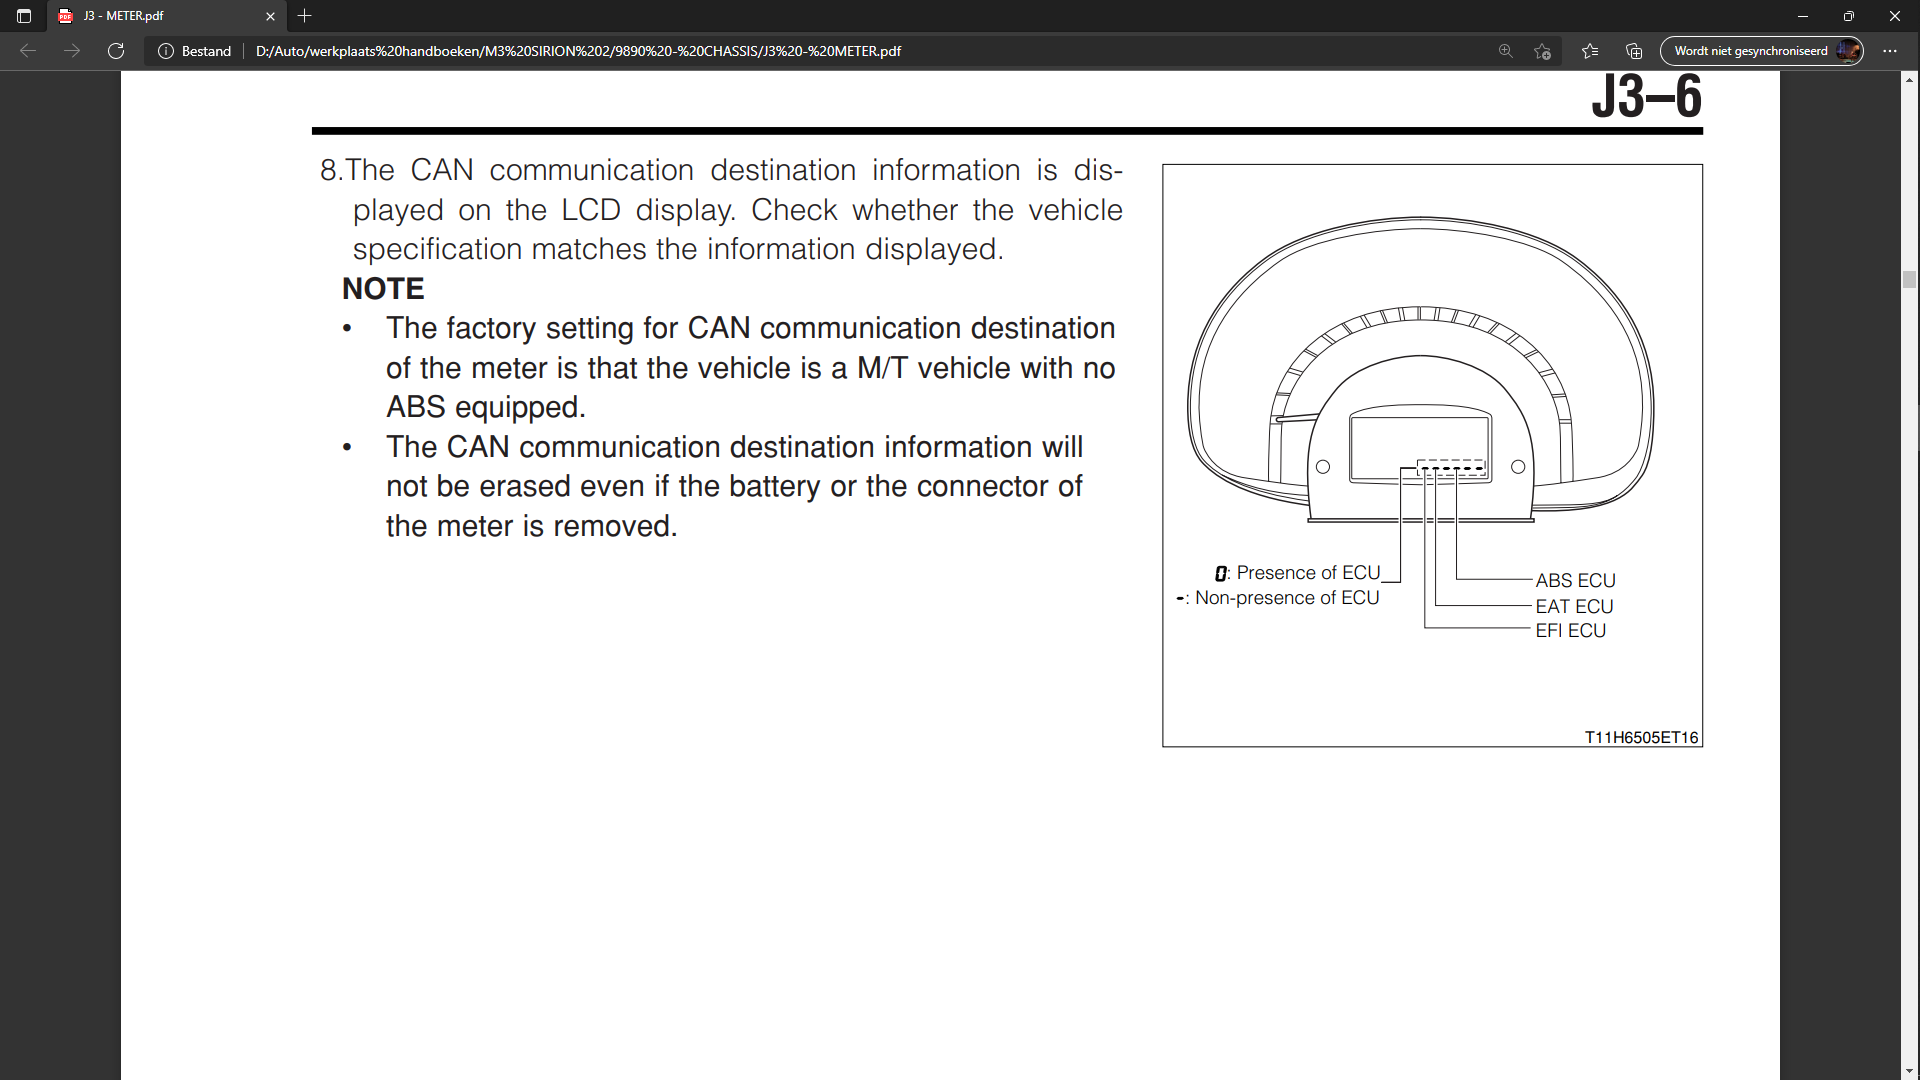
All I needed to connect was a power source, ground, ignition and ECU-T (for diagnoses), but figuring out what wires to use and not wanting to be disappointed again, resulted in some serious procrastination. But, eventually I got it all wired up, resistance was looking good, so it was time to turn the key to ignition. The gauge cluster came to life, but it didn’t seem to do have any influence on the canbus. It grabbed my manual and went back to the “METER” chapter:
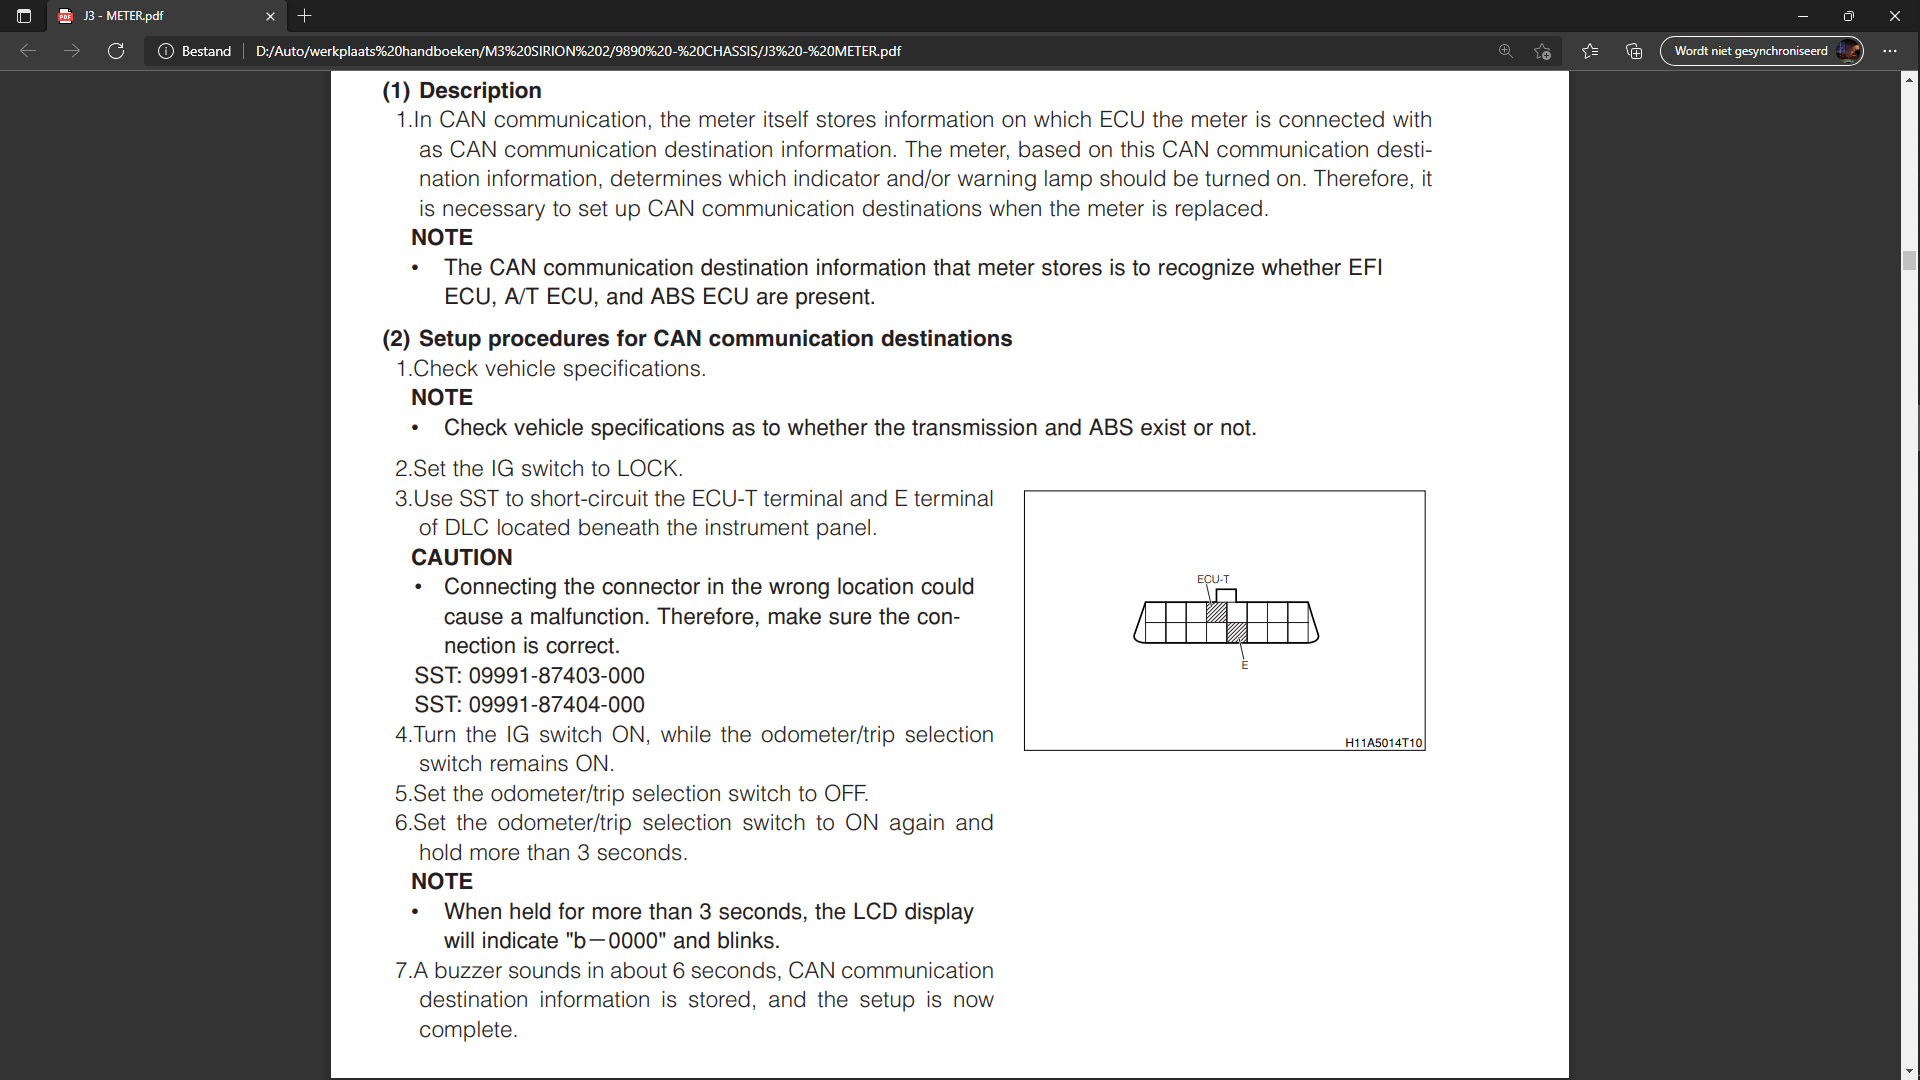
Before the ECU and gauge cluster can communicate, there’s a procedure you need to go through to “pair” both computers
I did everything on the list, but I couldn’t get it to work, so I called it a day and went back home. One thing I couldn’t work out, was step 4 - 6. On the gauge cluster, there’s one press-stick thingy for the clock, and one to set the trip meter, but no ON/OFF switch. I talked to @Roffelkut about this, and he suggested that “ON/OFF” is just a funny translation of “PRESS/DEPRESS”. That means you have to press and hold the switch while turning the key. So the next day, I did just that, and it worked! I followed the rest of the procedure and…
I got a beeping gauge cluster, and got 2 zero’s, meaning that both the ECU and the ABS module were recognized. Yay!!
Time to fire up the engine and see if it had worked!
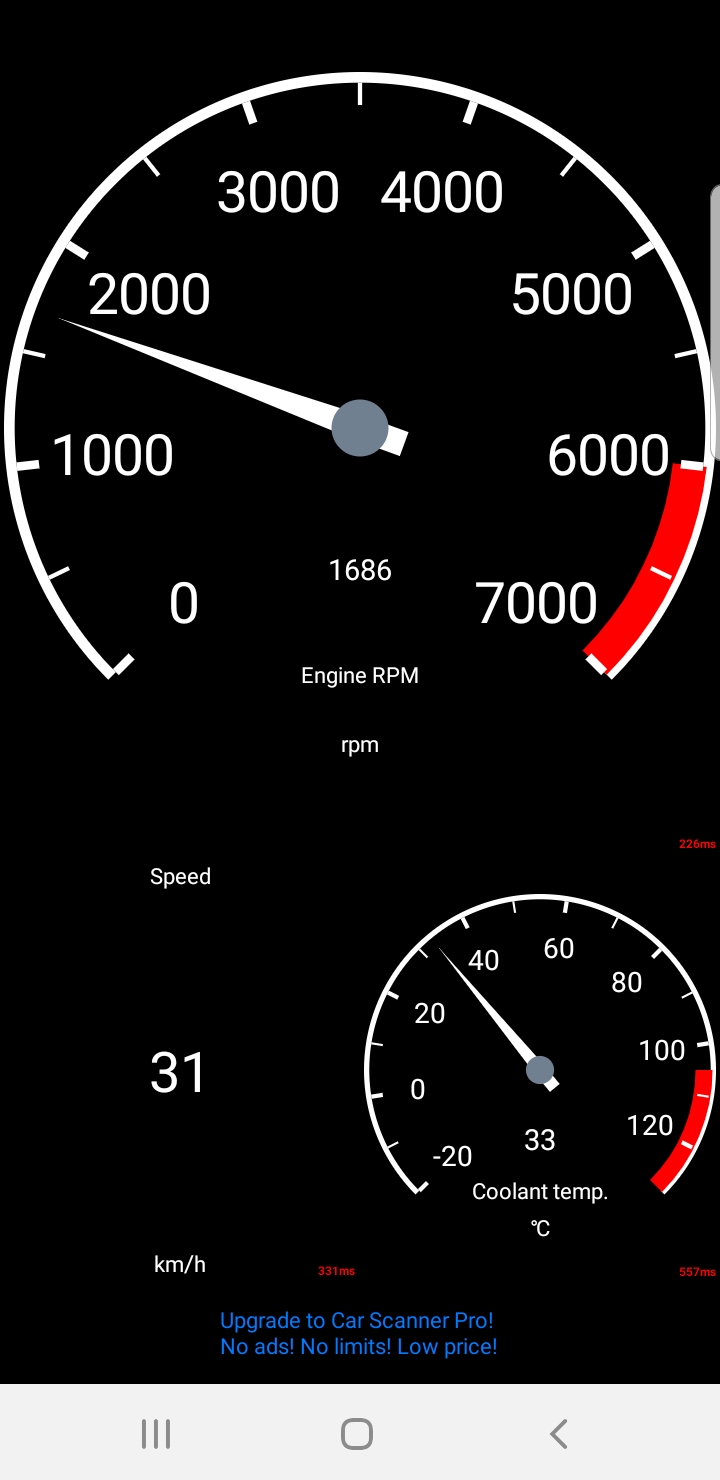
This might not look like anything interesting, but it certainly is, my friends.
Do you see the number “31” ? That is the vehicle speed, which used to be at zero at all times. So what does that mean?
Well, it meant that I was having a well deserved beer that evening, because having no speed signal was what triggered the fuel cut I was dealing with. So it’s fixed now, right? Well, yes, but also no. I still get the same weird fault code from the canbus, but everything in the system seems to work fine, so I have no idea why it keeps popping up. Does it matter? I don’t think it does, but I’ll keep an eye on it the next couple of km’s.
HEY GOOGLE, PLAY “TIME TO SAY GOODBYE” BY ANDREA BOCELLI AND SARAH BRIGHTMAN
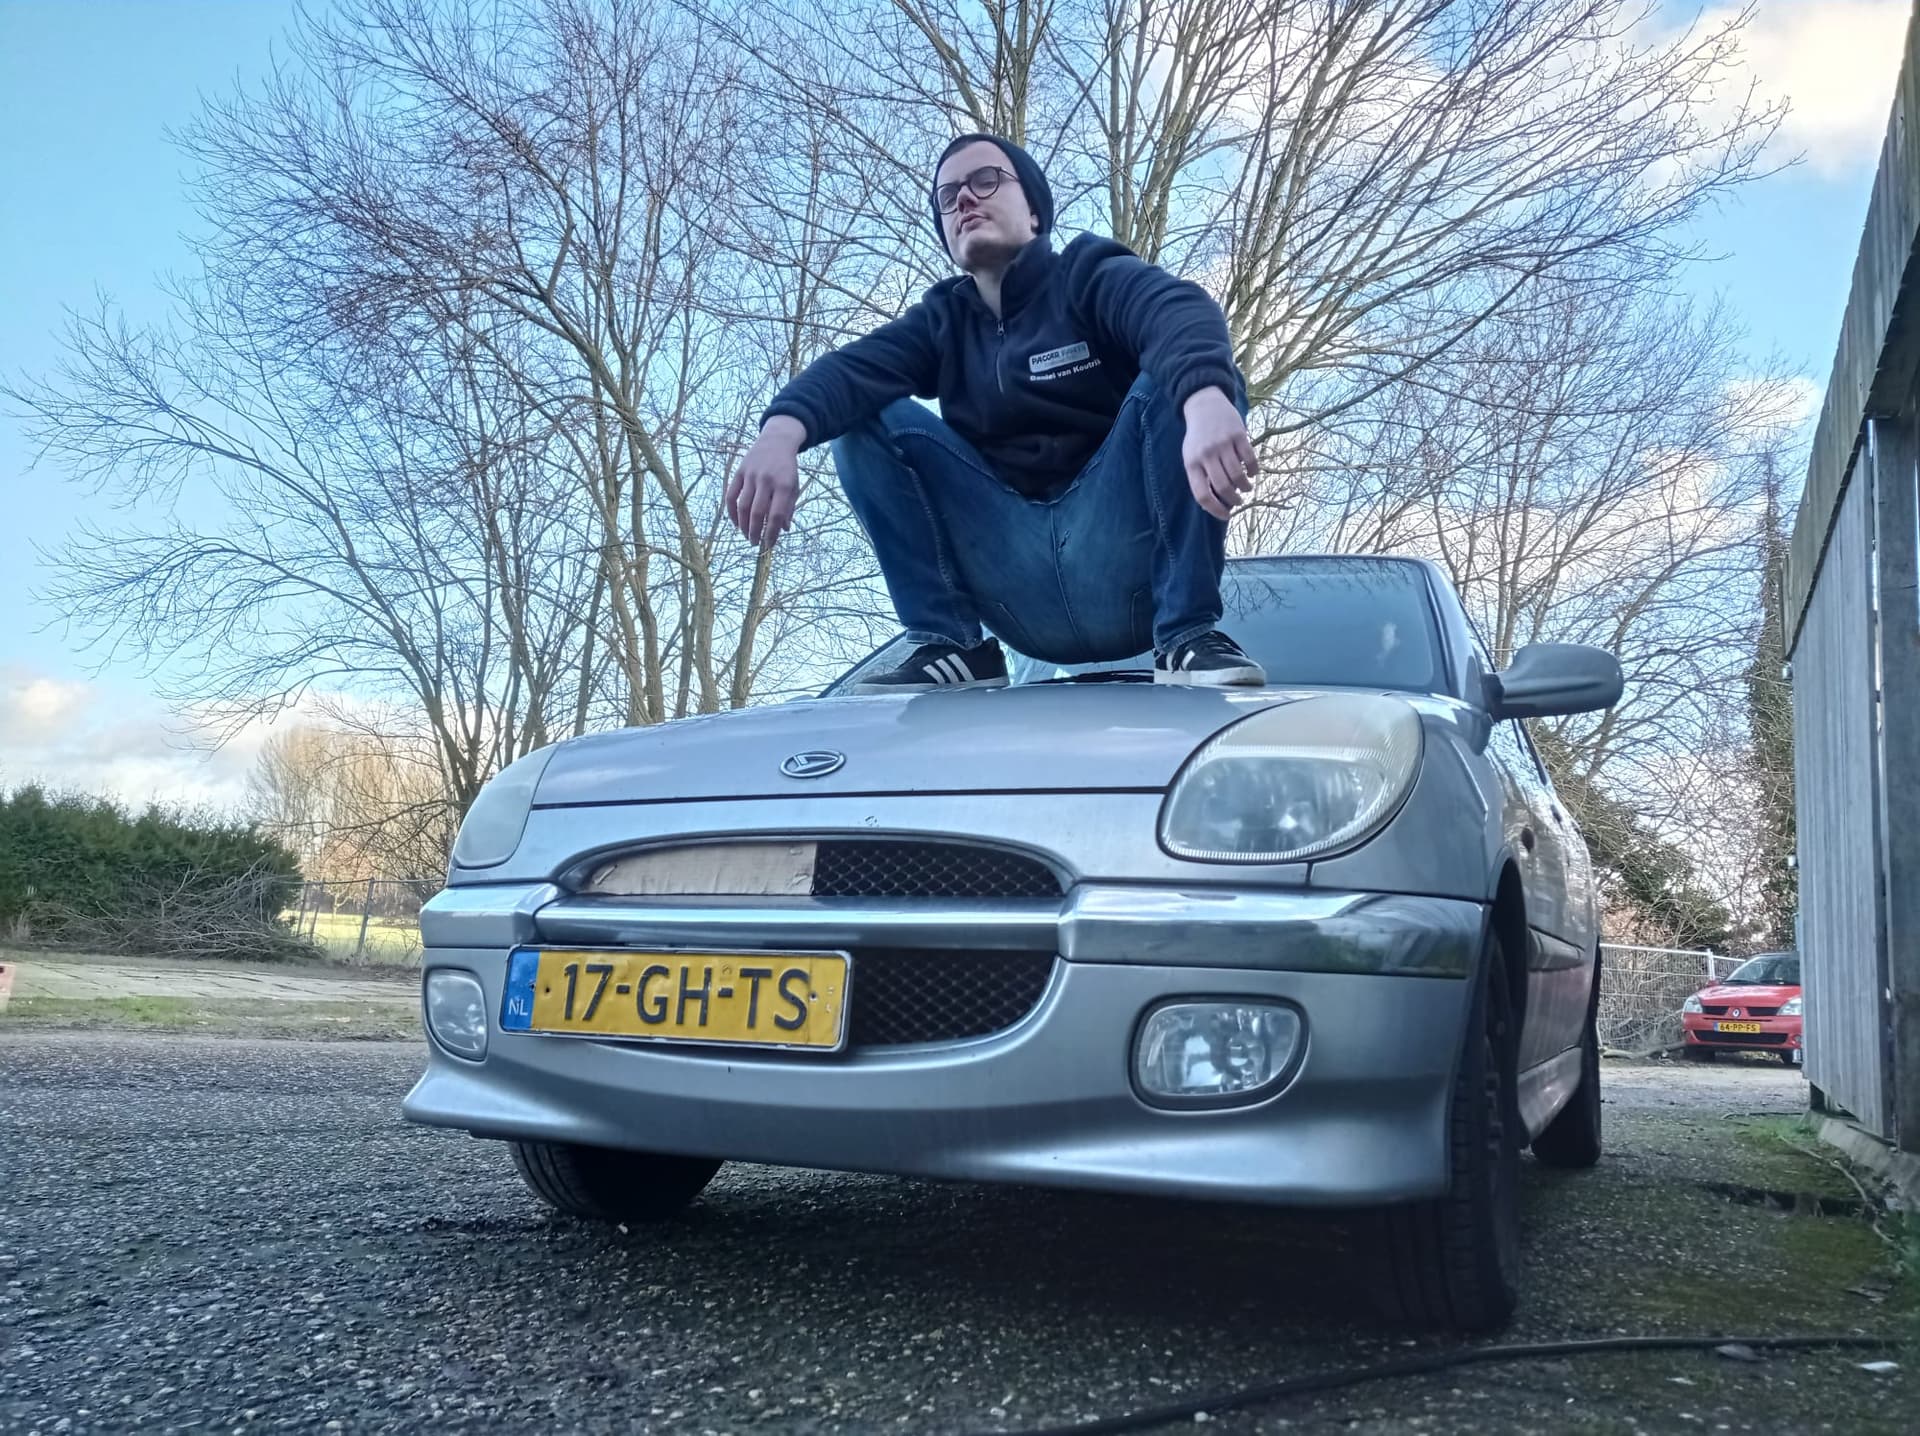
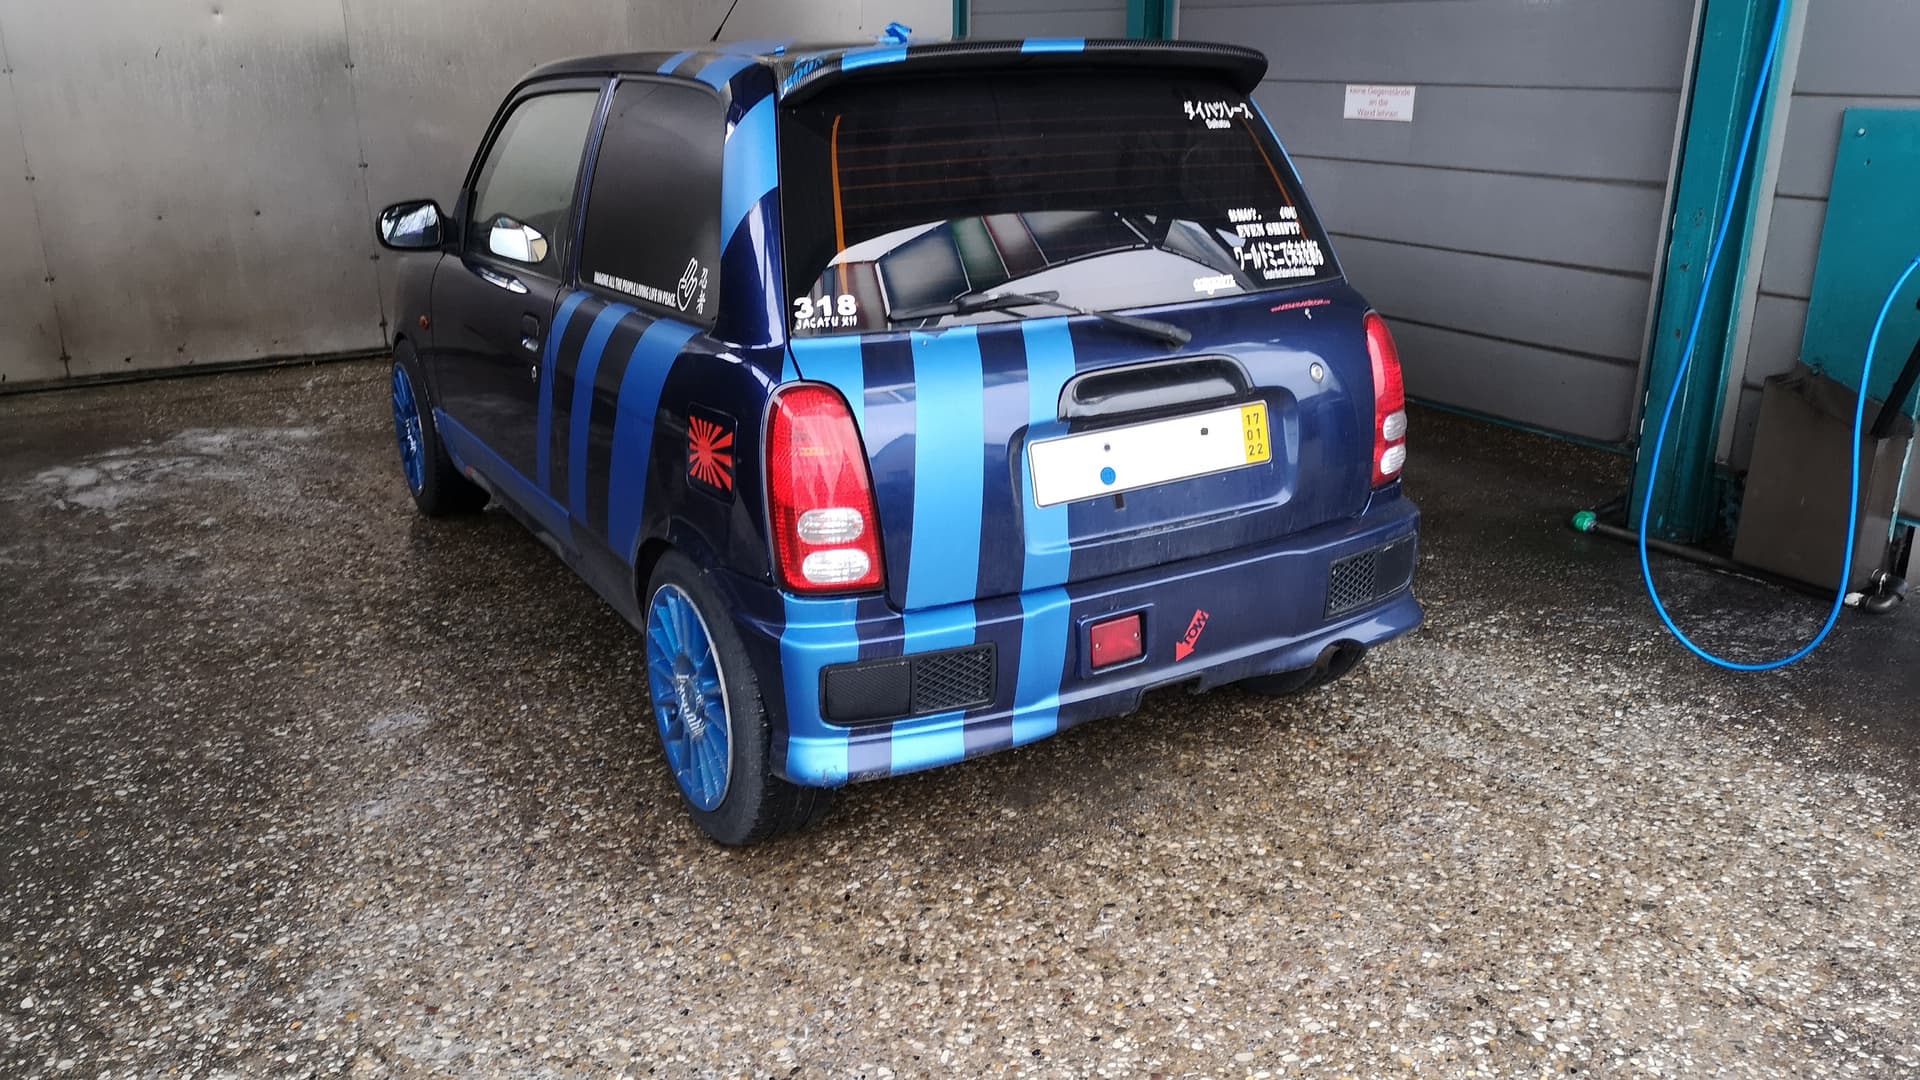
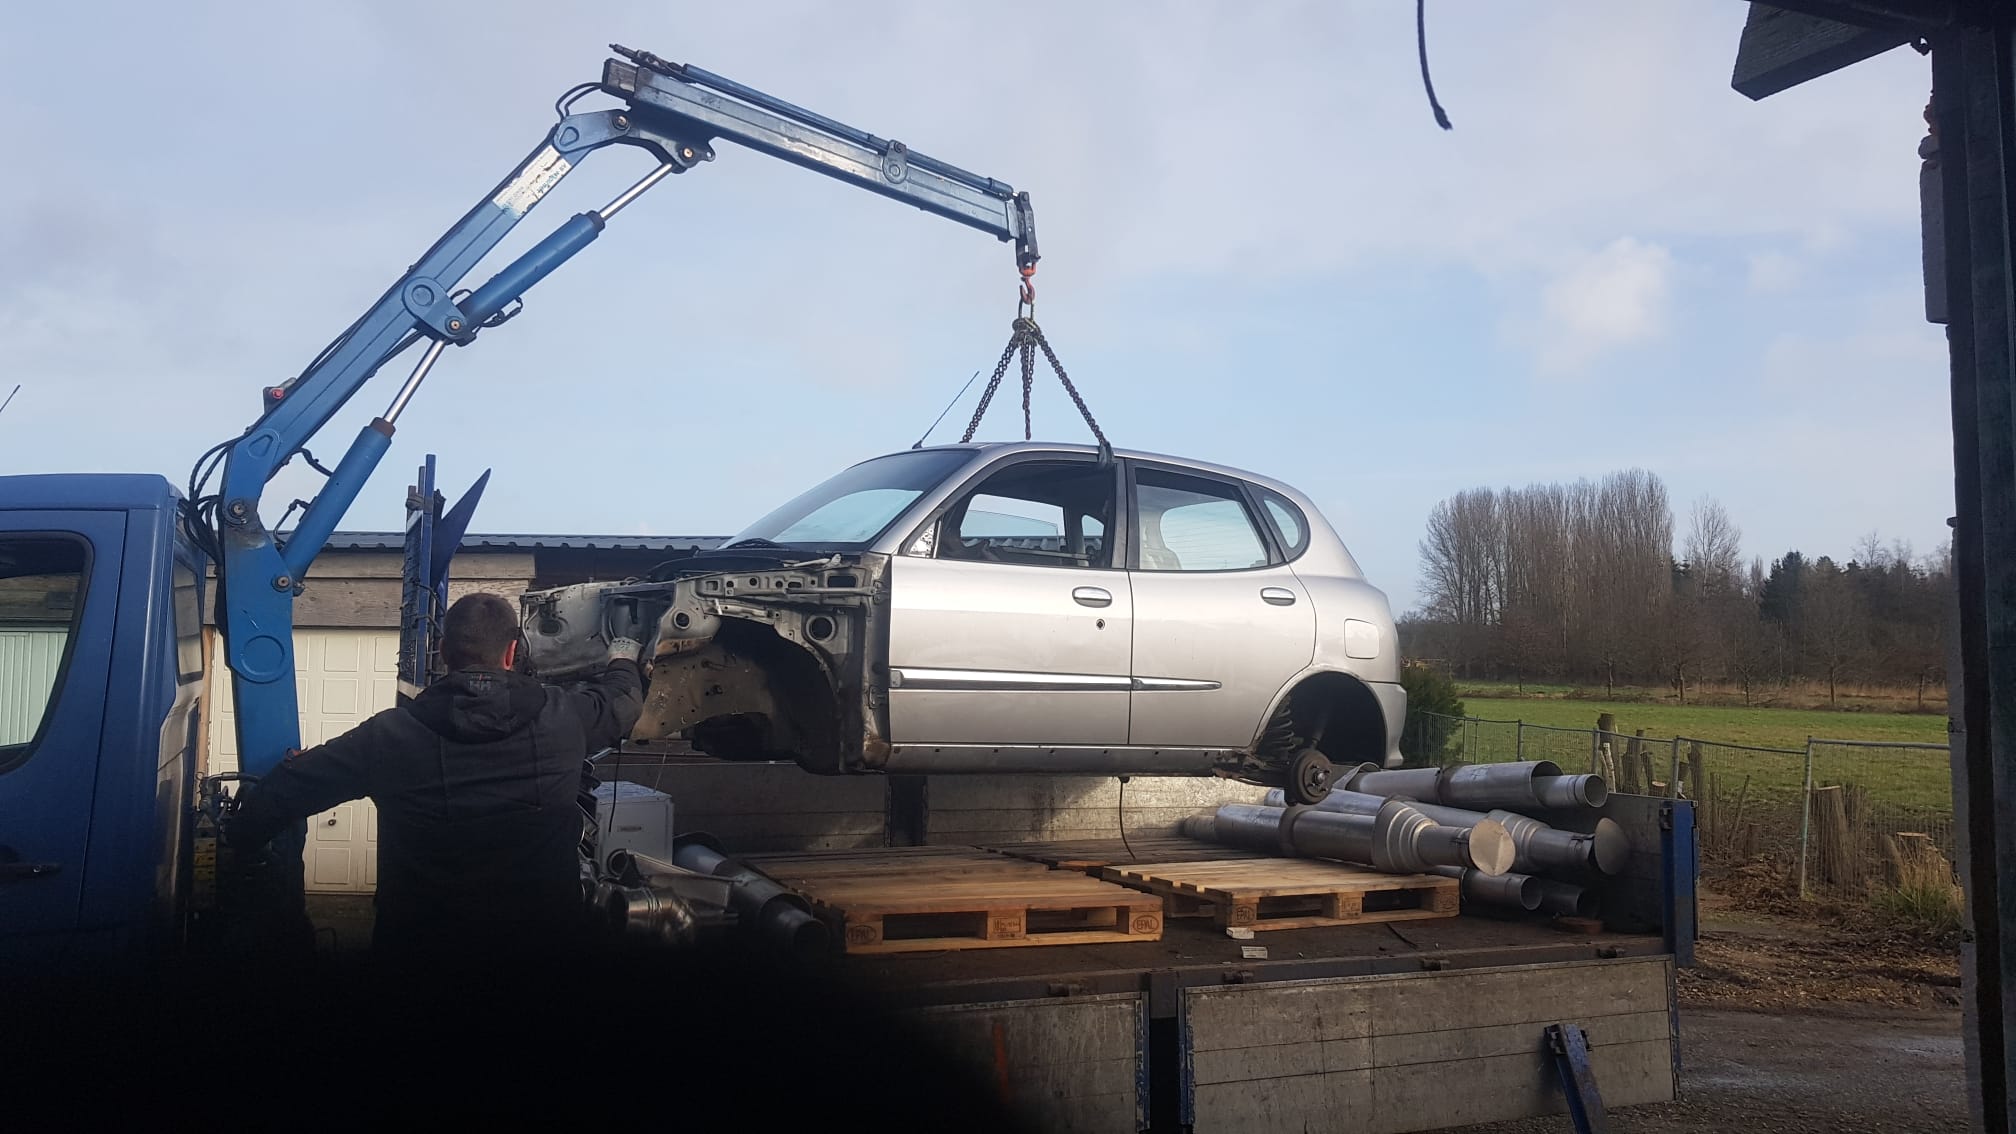
So, happy days, the Blyatsu was fixed, just in time. But in time for what? Well, I’m not getting rid of the Blyatsu, but getting it back on the road meant I had to get rid of my other Dai: Tom, the Sirion. Tom was always meant to be my winterbeater, to be then taken apart for parts to swap Tom’s L7 (it’s confusing naming a car after it’s co-owner isn’t it). Having just over a week to take the car apart and send it to the wreckers, we needed to take out the subframe on Saturday, so we got to work. I needed to make the Blyatsu actually drivable first, so we got to work a bit later than initially planned. I know it’s been a long read, so if you made it this far, you deserve some pictures to look at.
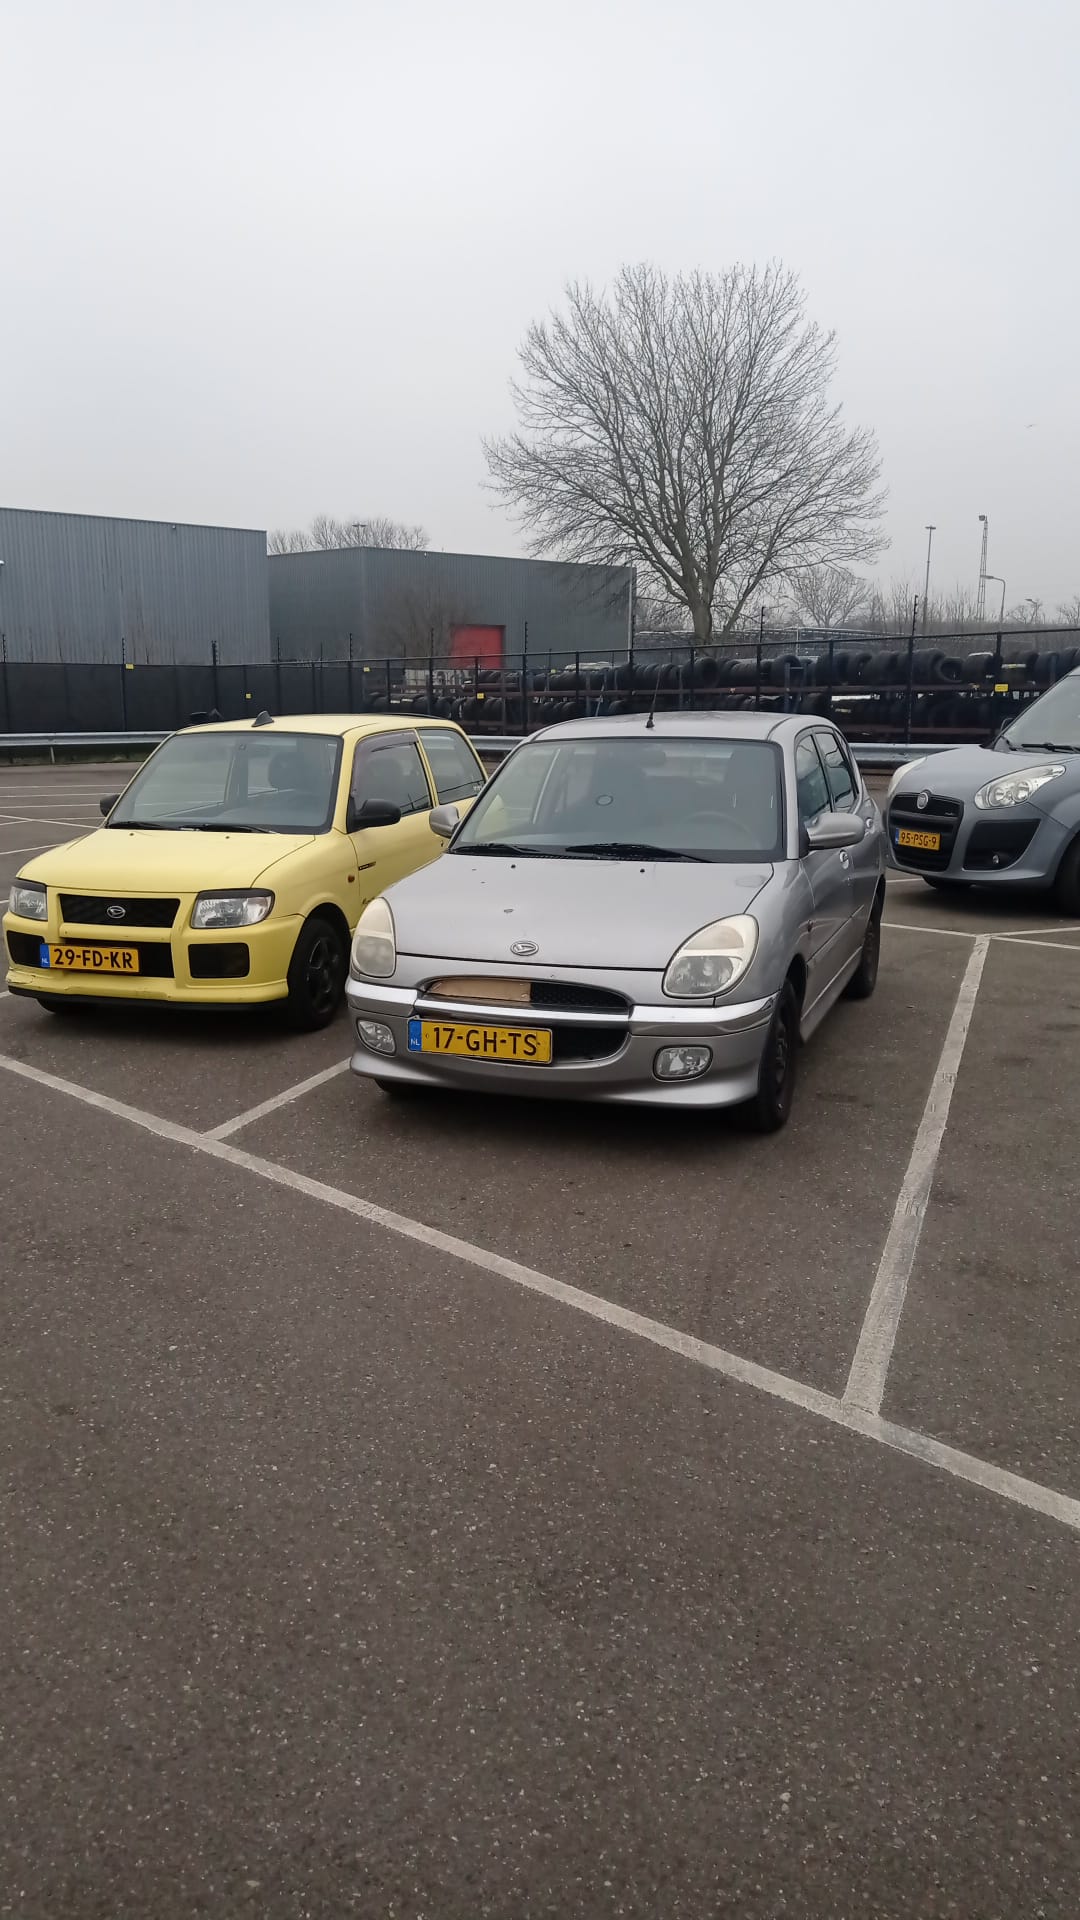
Don’t feel bad for Tom, he wouldn’t have made it through another MOT
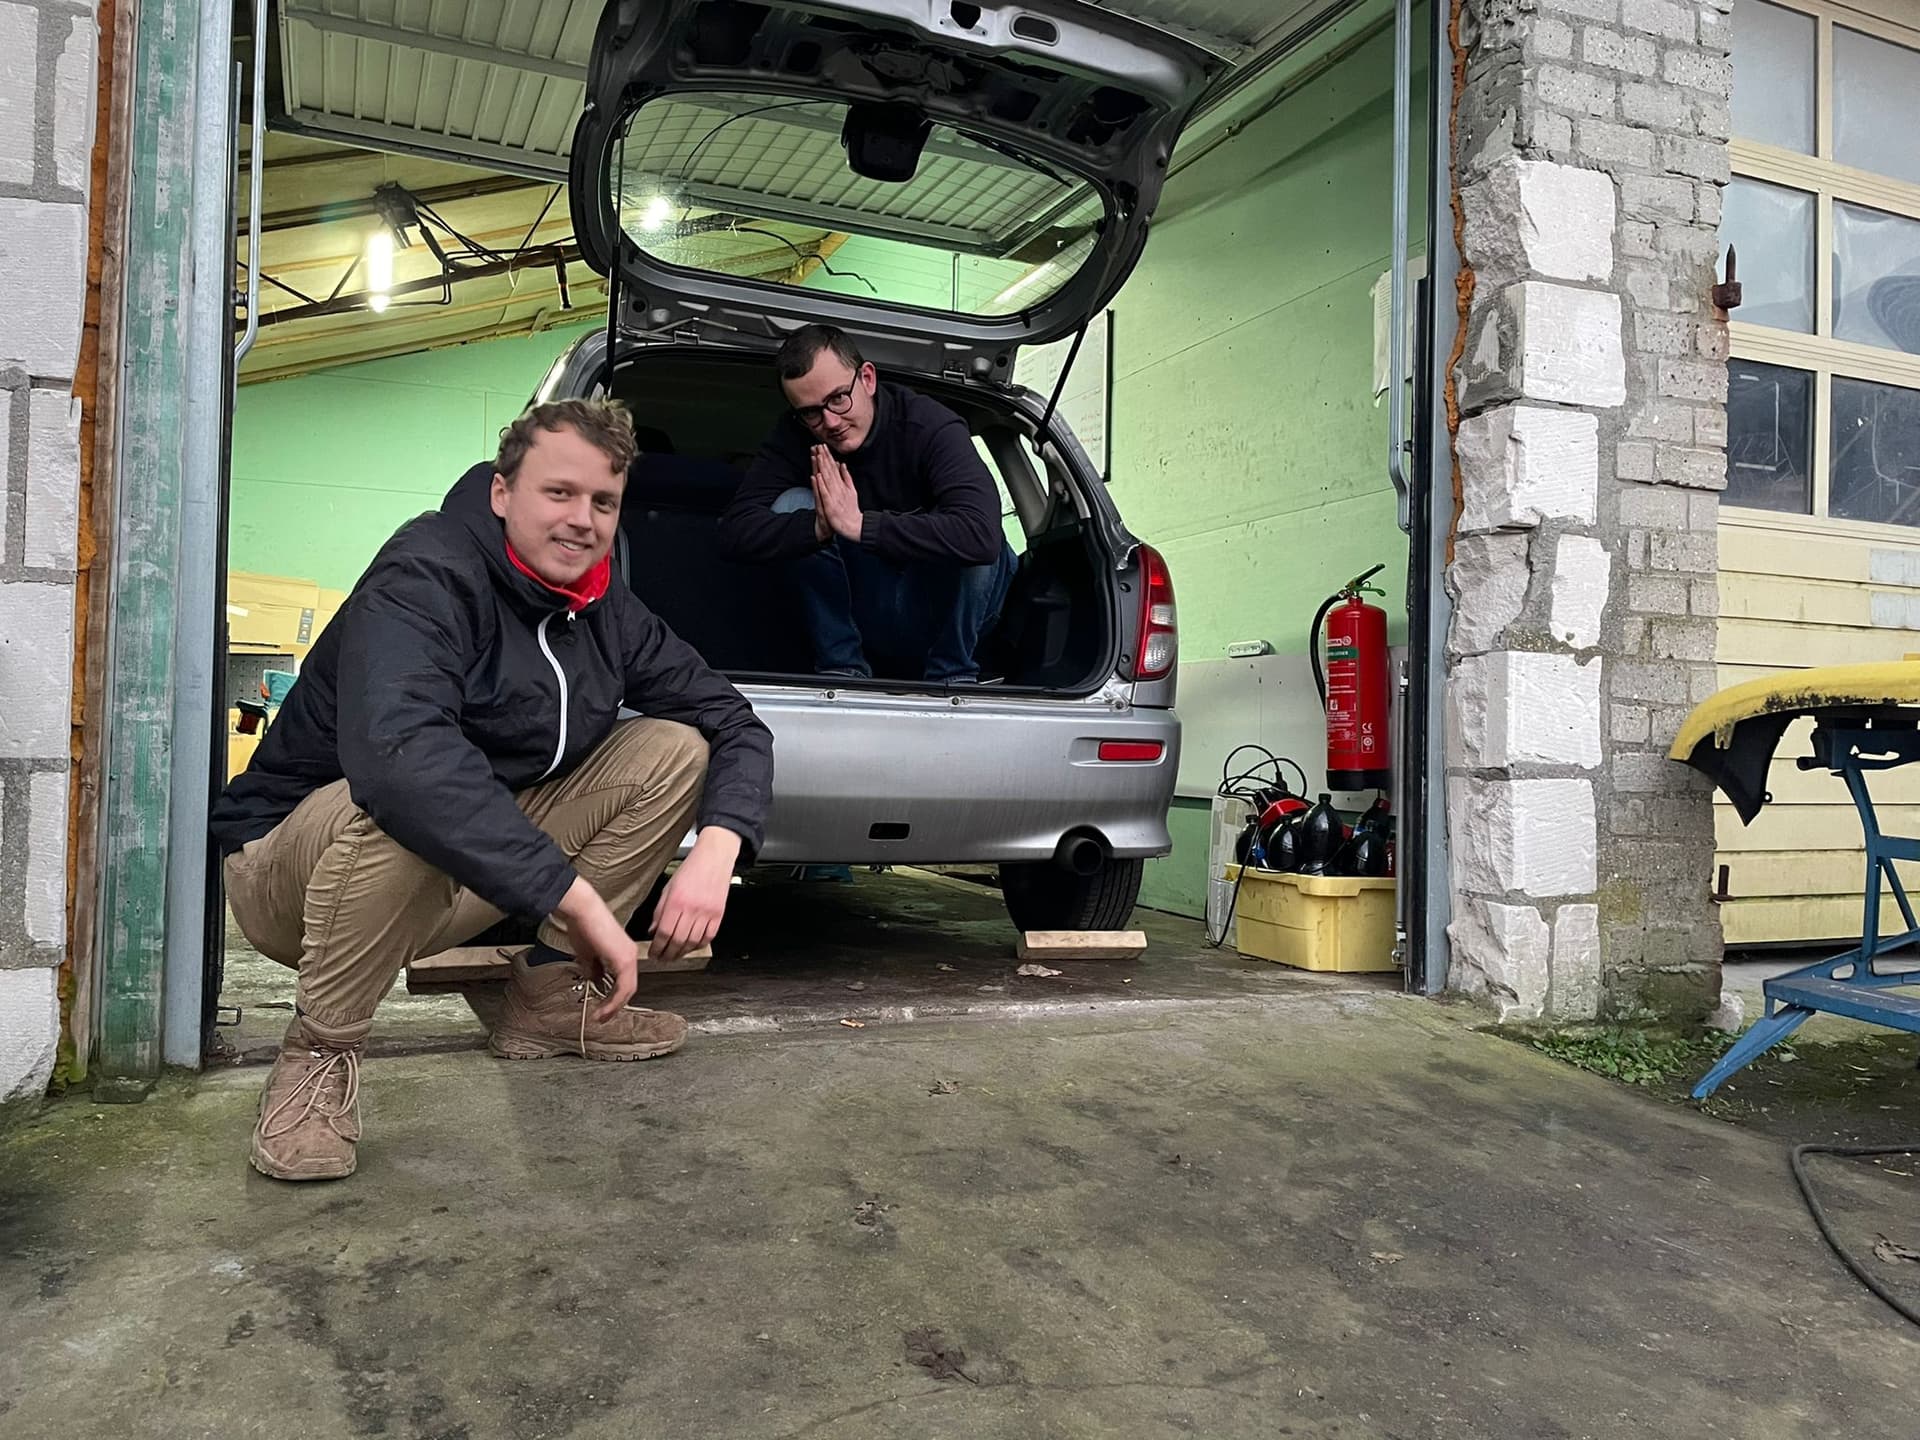
Tom and me, proud owners of Tom
Zoom for surprise

HEY GOOGLE, PLAY “THE END” BY THE DOORS

15 hours after arriving at my garage, I got the Blyatsu (mostly) up and running, and we stripped most of Tom’s bits.
It’s a 20 min drive to my house, but it was very memorable. Apart from a quick test drive, this was the first time in almost 3 months that I drove my car, and I just kept thinking “oh my god this car is so good”. I was actually shocked by how good it was. Sure it’s still bumpy in the back because there’s hardly any weight on the rear axle, but apart from that, it drove really well. And boy is it quick! I don’t remember it being so quick, nay, fast. I tried to do a first gear pull, but bailed out because I was too scared (well that, and stuff was flying through the car which was a problem).
We’re not there yet, but the worst part is over. I need to get Tom’s shell to the wreckers ASAP, and just see how things go from there.
That was quite a read, huh? Thanks for taking the time, and I hope you enjoyed it or learned something!
10 Likes
Man, you’re really going above and beyond on these write-ups! Awesome to see the Blyatsu back alive, I hope there won’t be any other hiccups. I guess now the next thing on the list is buttoning up and finally enjoying the car?
3 Likes
Fantastic write up, but an even better effort in getting things going. Wow
1 Like
What a brilliant write up, i always enjoy reading your write ups! i’m glad you got that main problem fixed, it took some serious thinking to do and working out but i guess it took even more motivation. Though reading your last paragraph, when you finally take it for a drive and it just works and works really well then all the struggling was well worth the effort! Enjoy your beast now
2 Likes
LESGOOOOOO, congratulations Daniel! hope I’ll see the Blyatsu on some events next summer!
1 Like
Thanks for all the kind words!
The plan for now is to sort out the final bits (mostly wiring and interior bits), and see how to make ik look as OEM as possible. Then I’m going to see if I can get it registered as a 4-cyl!
2 Likes
It’s been done before. As long as you swap the suspension as well as the braking system, there shouldn’t be a problem. I even know of a garage in Utrecht who would certify it, for a price, even if not done correctly
1 Like
Can you send me a DM with the details? I’d like to look into that! I’m pretty confident that all the mechanical bits are in order, it’s just the small things I’m worried about (like an awkwardly placed airfilter box) 
Something similar was carried out, here:


1 Like
I’ve seen those swaps, but I was referring to the certification part 
I’d write to those two Germans, in their video commentary section. They might have a copy of their certification
Hello there!
They won’t answer, because i bought their car.
It was for sale in january 2022.
The chassis is absolut toast, nothing to rescue.
All the wires are absolut mess, but the engine is still strong!
5 Likes
They haven’t answered any questions whatsoever of which were posted onto their video commentary section
Here comes the sun… (DUDUDUDU)
Spring is approaching, but there’s not a lot going on. But, that doesn’t mean there’s nothing to write about!
ROTTEN BUT NOT FORGOTTEN
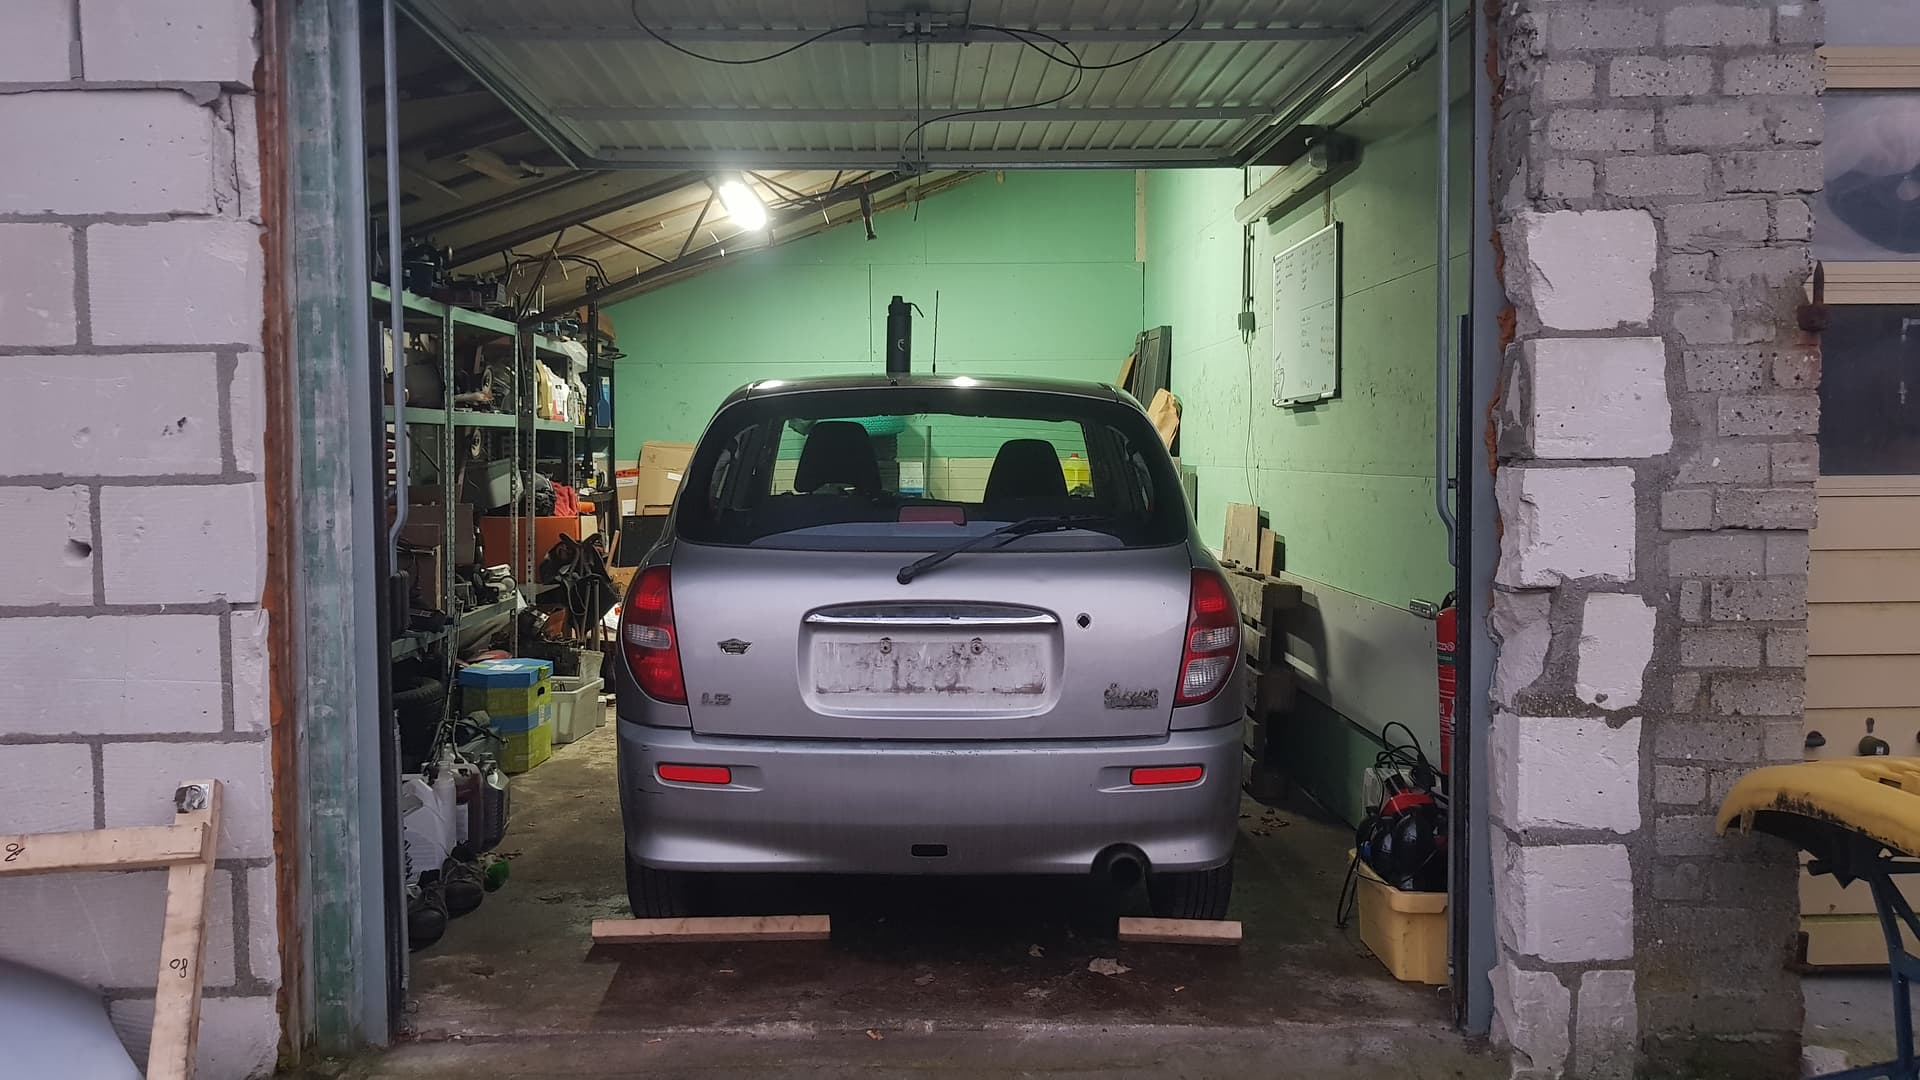
A few days after writing my last post, I had Tom’s shell picked up to be scrapped. 480kg’s of nothingness, which meant we got a decent amount of stuff out of it. I will miss the little shitbox. Rotten but not forgotten.
Also, this picture might look familiar to you…
DAILY COMMUTE
In that same week, I did a bit of tidying up before my internship started. It’s a great place with nice people, but the location really sucks. It’s about 35km away, which is doable in terms of time spent on the road, but not in terms of money. With gas prices are just depressingly high, and the 3SZ, oddly, being not as economical to drive as the EJ, it’s quite expensive to drive 350km/week. As a student, I can use public transport for free (during the week), but it takes twice as long, and is sensitive to delays, which isn’t great either. Need to figure that out.
But. not all is bad news luckily, because the car (mainly the engine) is behaving wonderfully! Overtaking on the highway (and highway driving in general) has never been easier. I do want to change a few things like the intake, rear suspension and gearbox, to increase comfort (and hopefully fuel economy). Right now, the intake sits right behind the radiator without the OEM ‘cold air intake’ tube, which I’d like to be changed. Also, the gearbox is a bit short for my taste, mainly because of the differential.
The rear suspension is still very rough on my back, so I decided so do a little experiment. I suspected the shockabsorbers were the main culprit, but I wanted to be able to confirm that by testing. I took out the BC shocks (but kept the BC springs), and replaced them with the good ol’ stock shocks. The result was interesting. You could definitely feel the difference, and what kind of difference it made. It was still a little jumpy (like, the frequency was quite high) probably caused by the unchanged springs, but the ride wasn’t as near as harsh as it used to be. To me, this was the perfect way to demonstrate the difference between what shocks and spring do in terms of comfort.
For reference, I did the opposite as well. So, stock springs, BC shocks. Those results were actually even more remarkable. I really tried my best, but there was hardly any difference between this and the full BC setup. The only noticeable difference was when I’d hit a speed bump, because then the rear would actually have a bit more suspension travel. But other than that, the ride was almost just as bumpy and harsh as before.
I’m not sure what I want to do with this, because getting a pair of (custom) springs is way easier than getting a set of shocks. I think I might go with a set of lowering springs on the rear combined with stock shocks, but I want to test that first.
SMALL TWEAKS
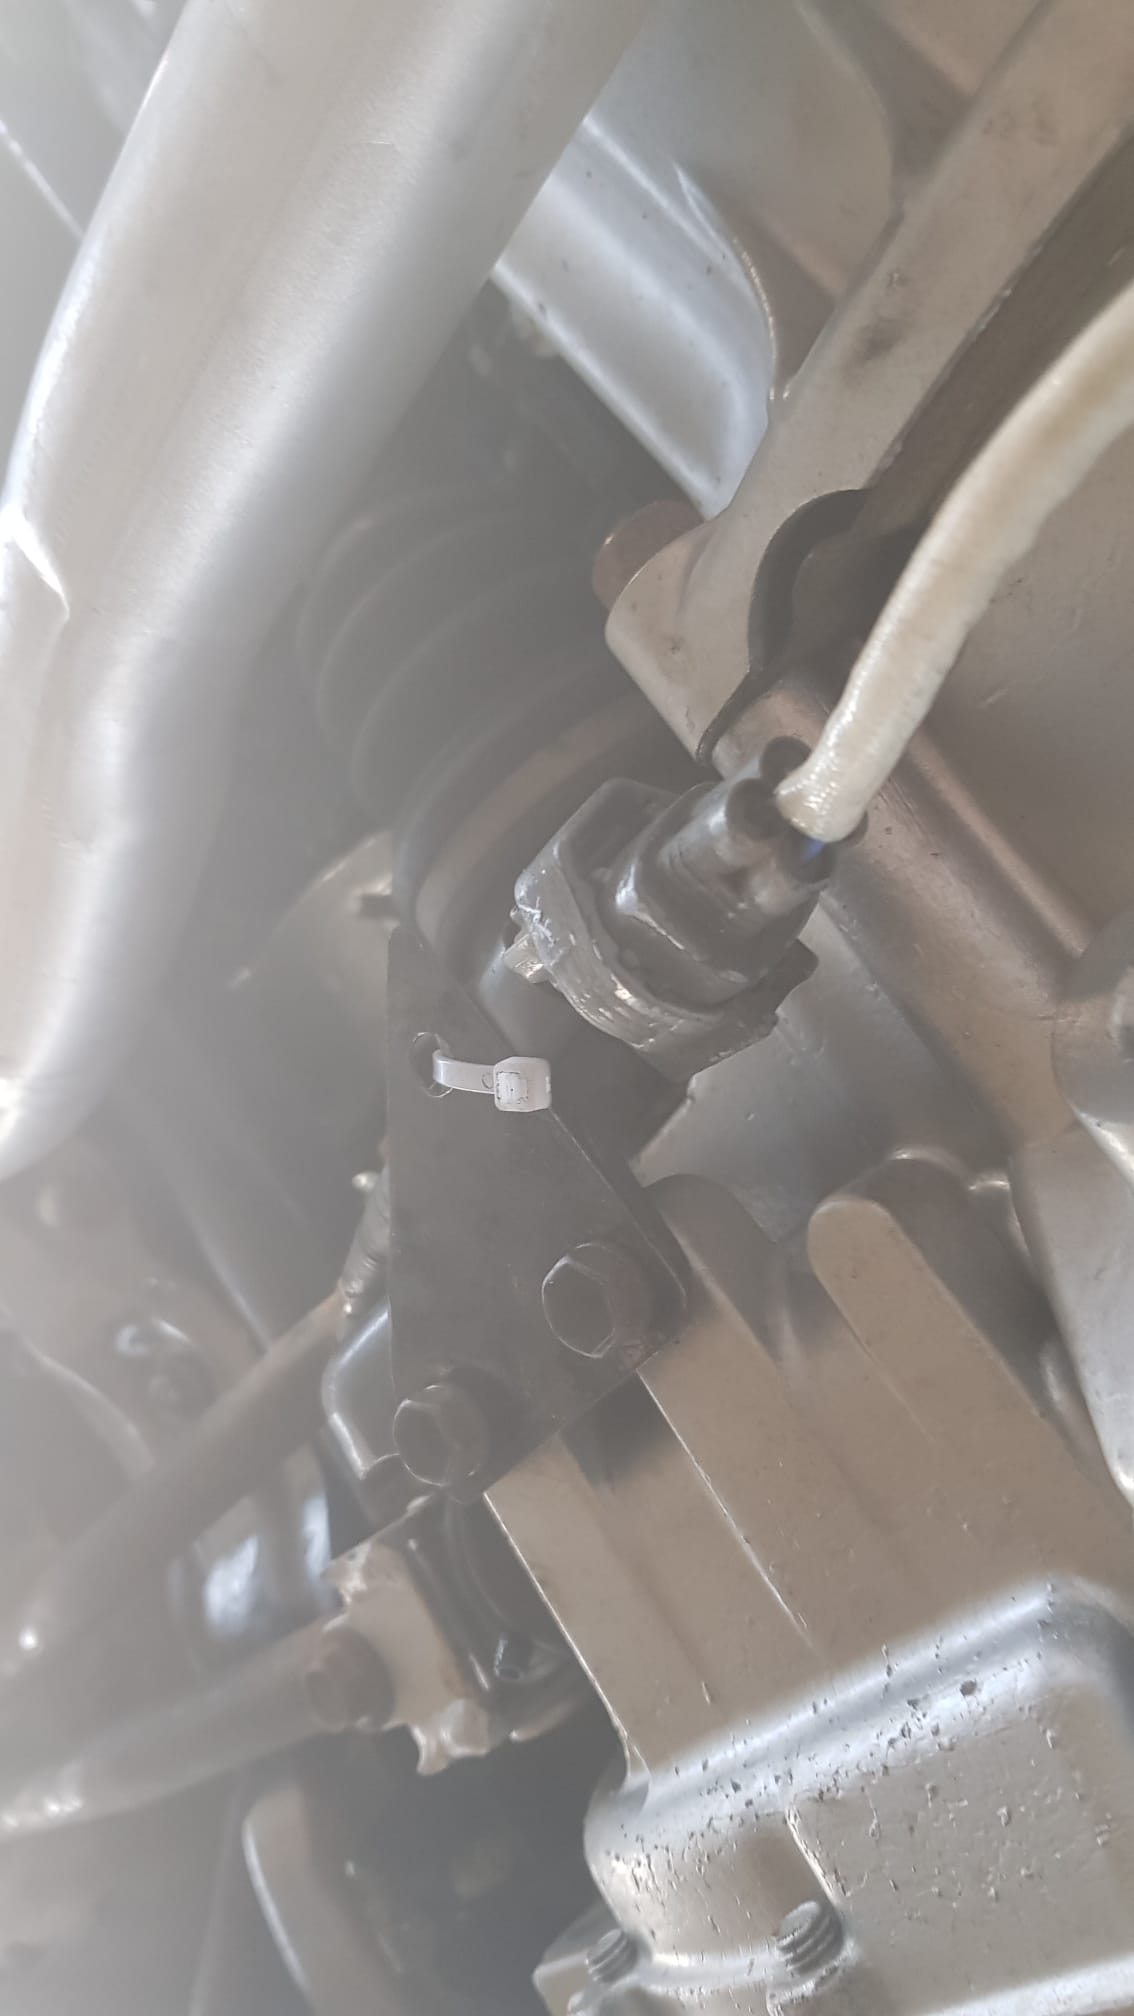
The O2 sensor was just hangin’ & chillin’ underneath the gearbox, so I finally made a basic bracket to hold it in place.
CLUTCH PEDAL
Ever since I actually started driving the car, I felt like the whole clutch situation was a bit weird. It hooks up almost instantly when you start depressing the clutch, but I already maxed out on adjustment. Also, the clutch felt lighter than in most stock EJ L7’s I’d driven over the last couple of months, which seemed weird to me.
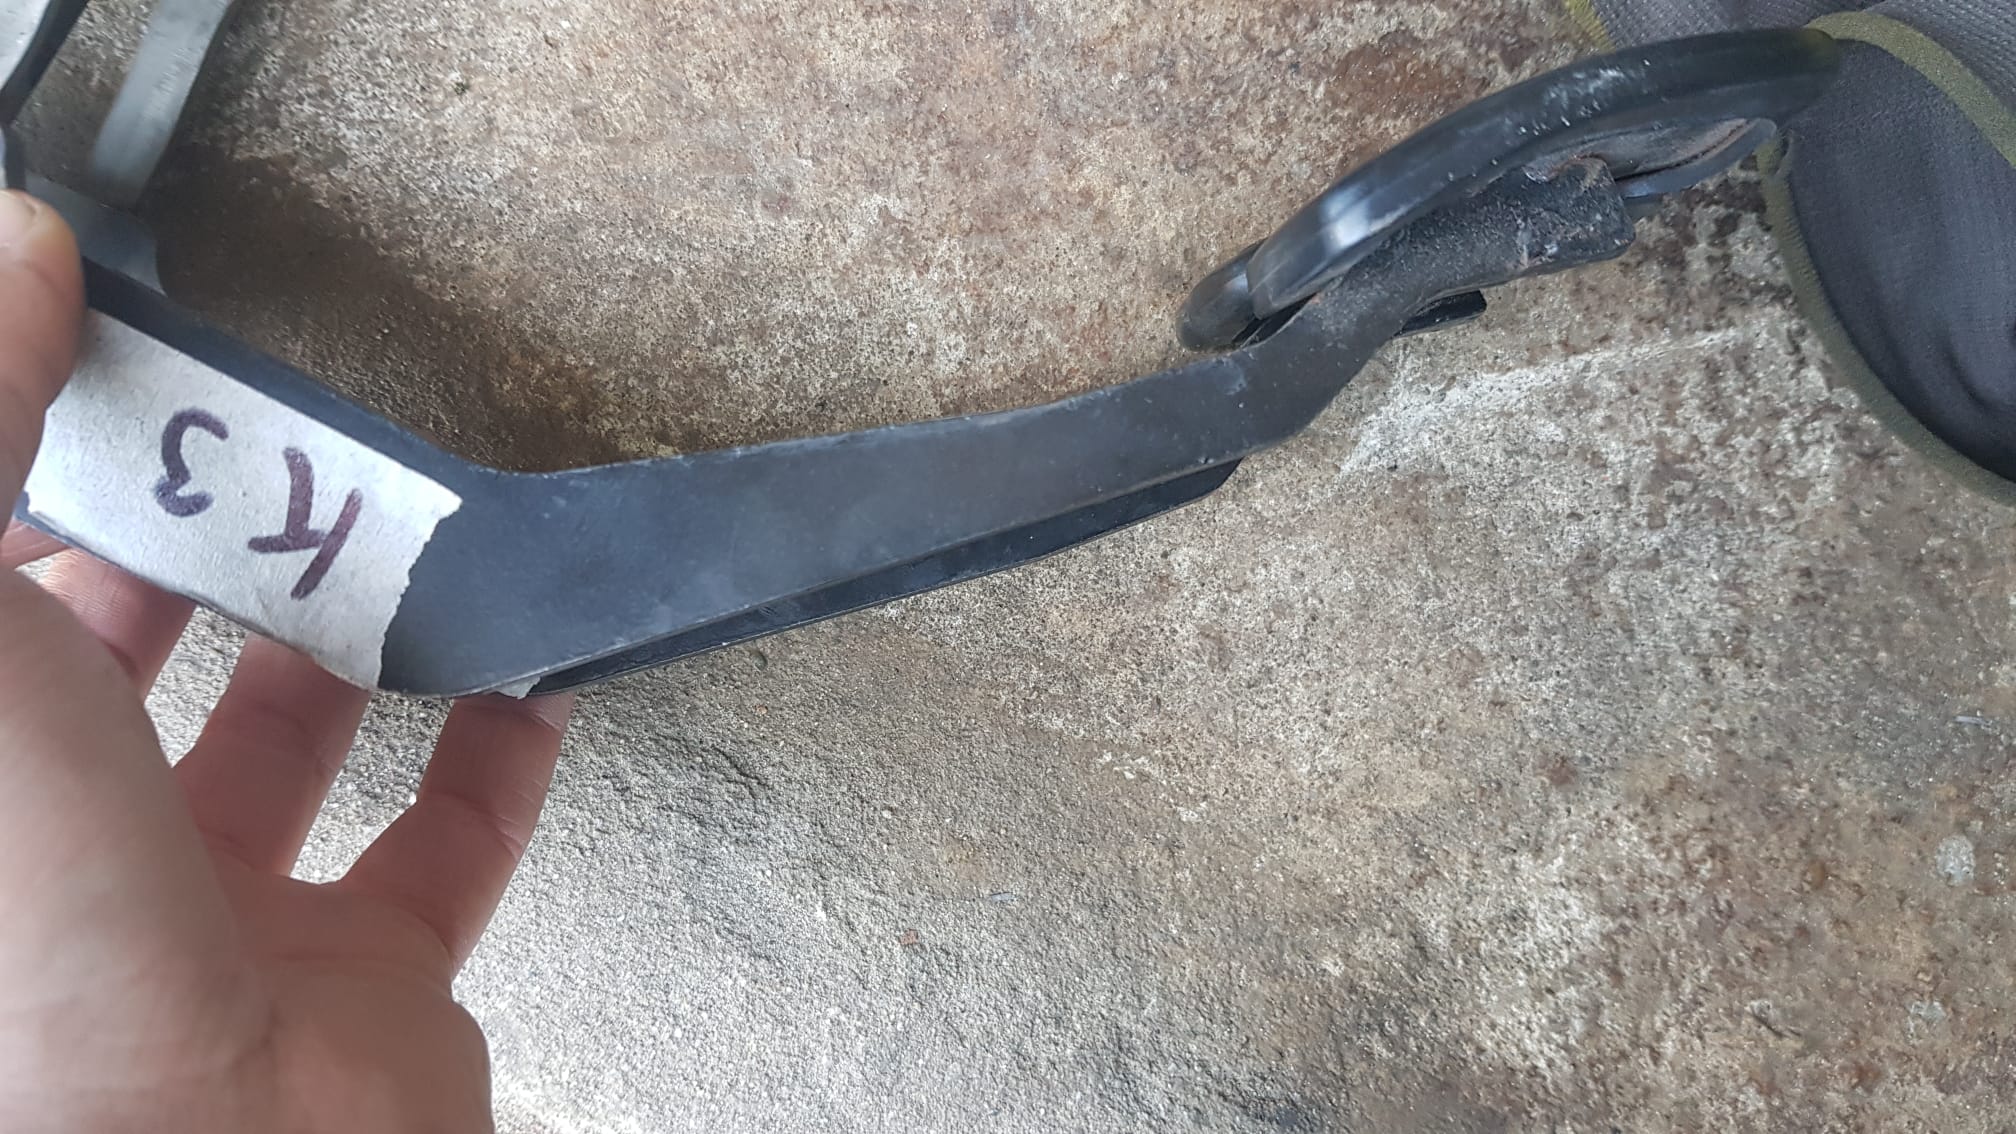
Last week, I came across the clutch pedal-section on Amayama.com, and noticed that the K3 and EJ both have different pedals. This made me think about how the actual, I don’t know how to name these, clutchlevers (where the clutchcable connects to on the gearbox) and pedalarms (distance between the pivotpoint and the clutchcable on the clutchpedal) might have different lengths and ratio’s, depending on what engine the car is fitted with. Here’s what I found:
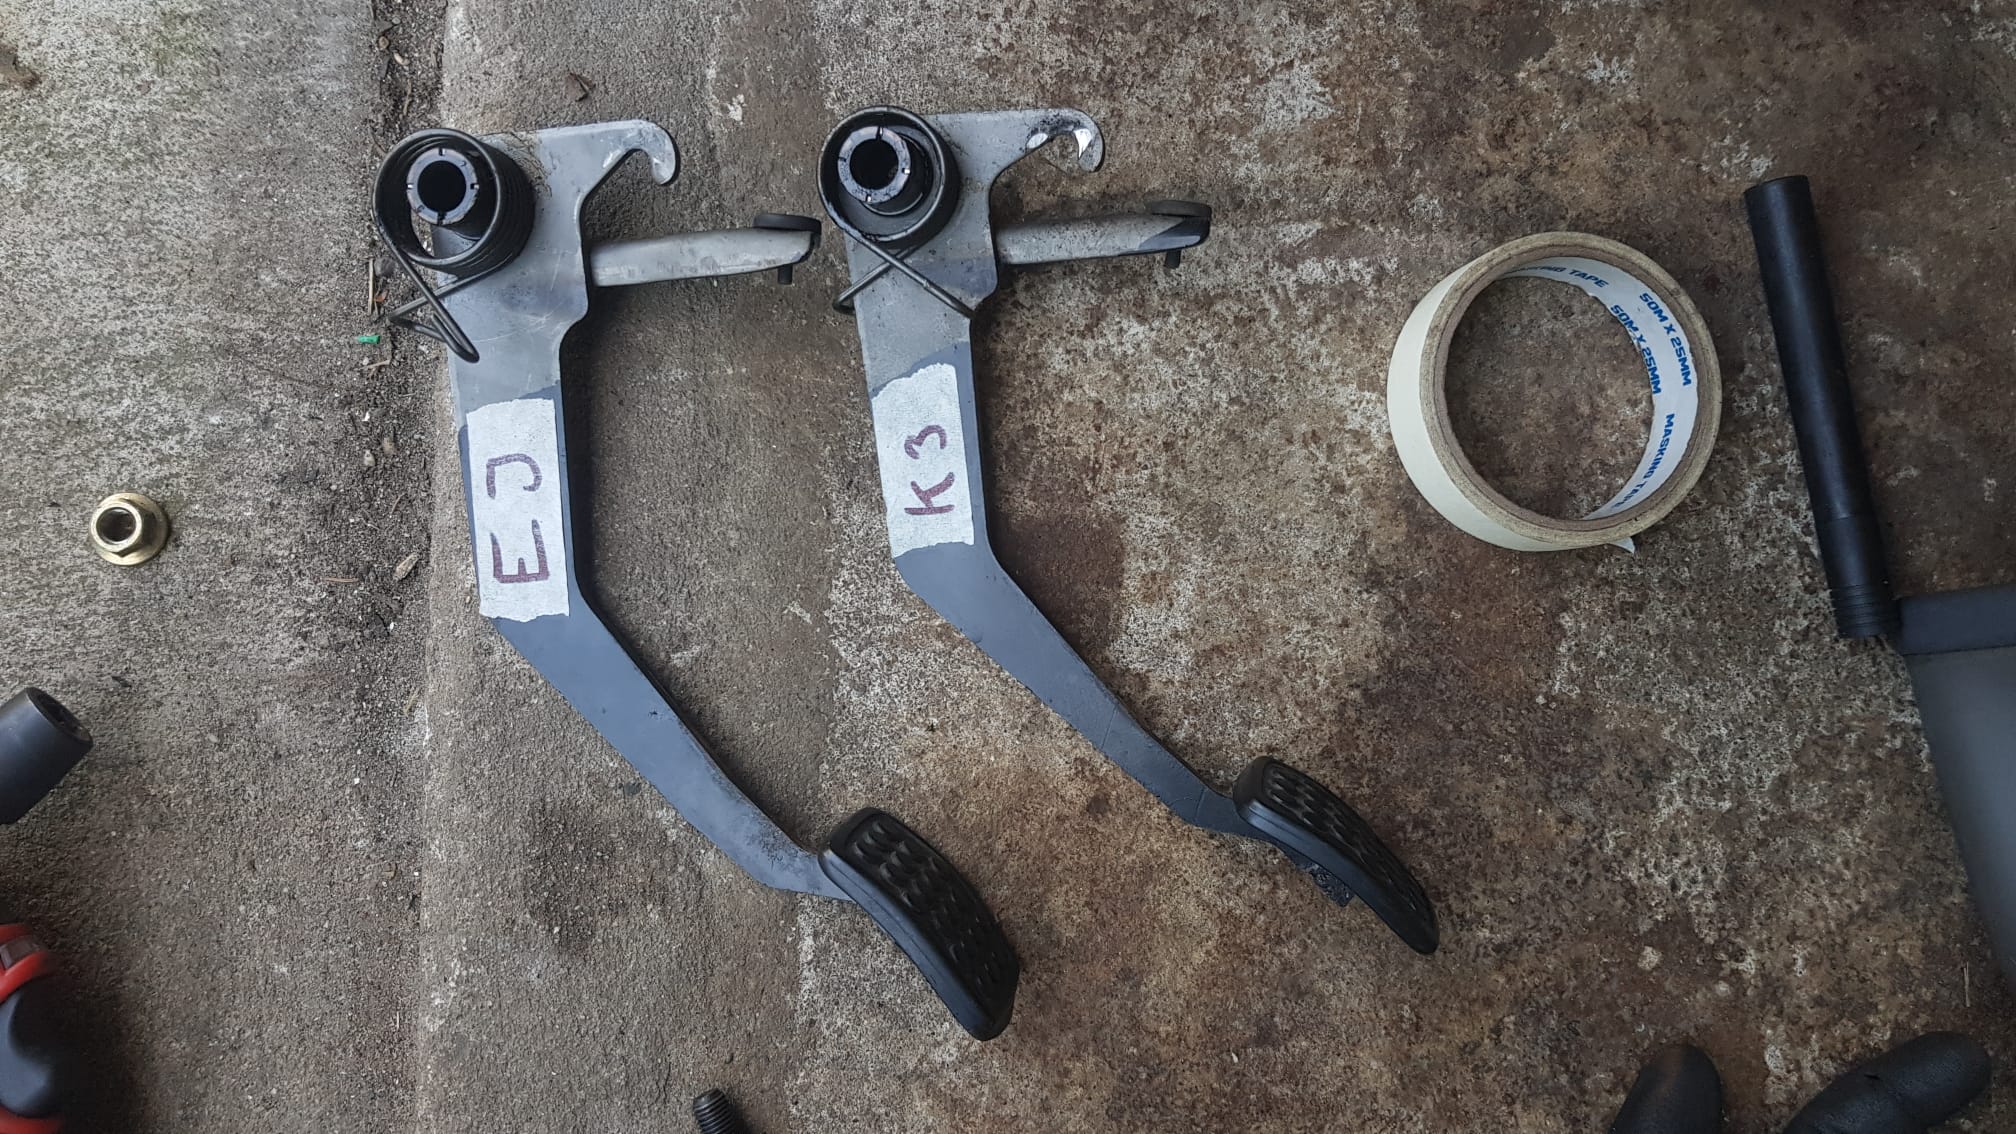
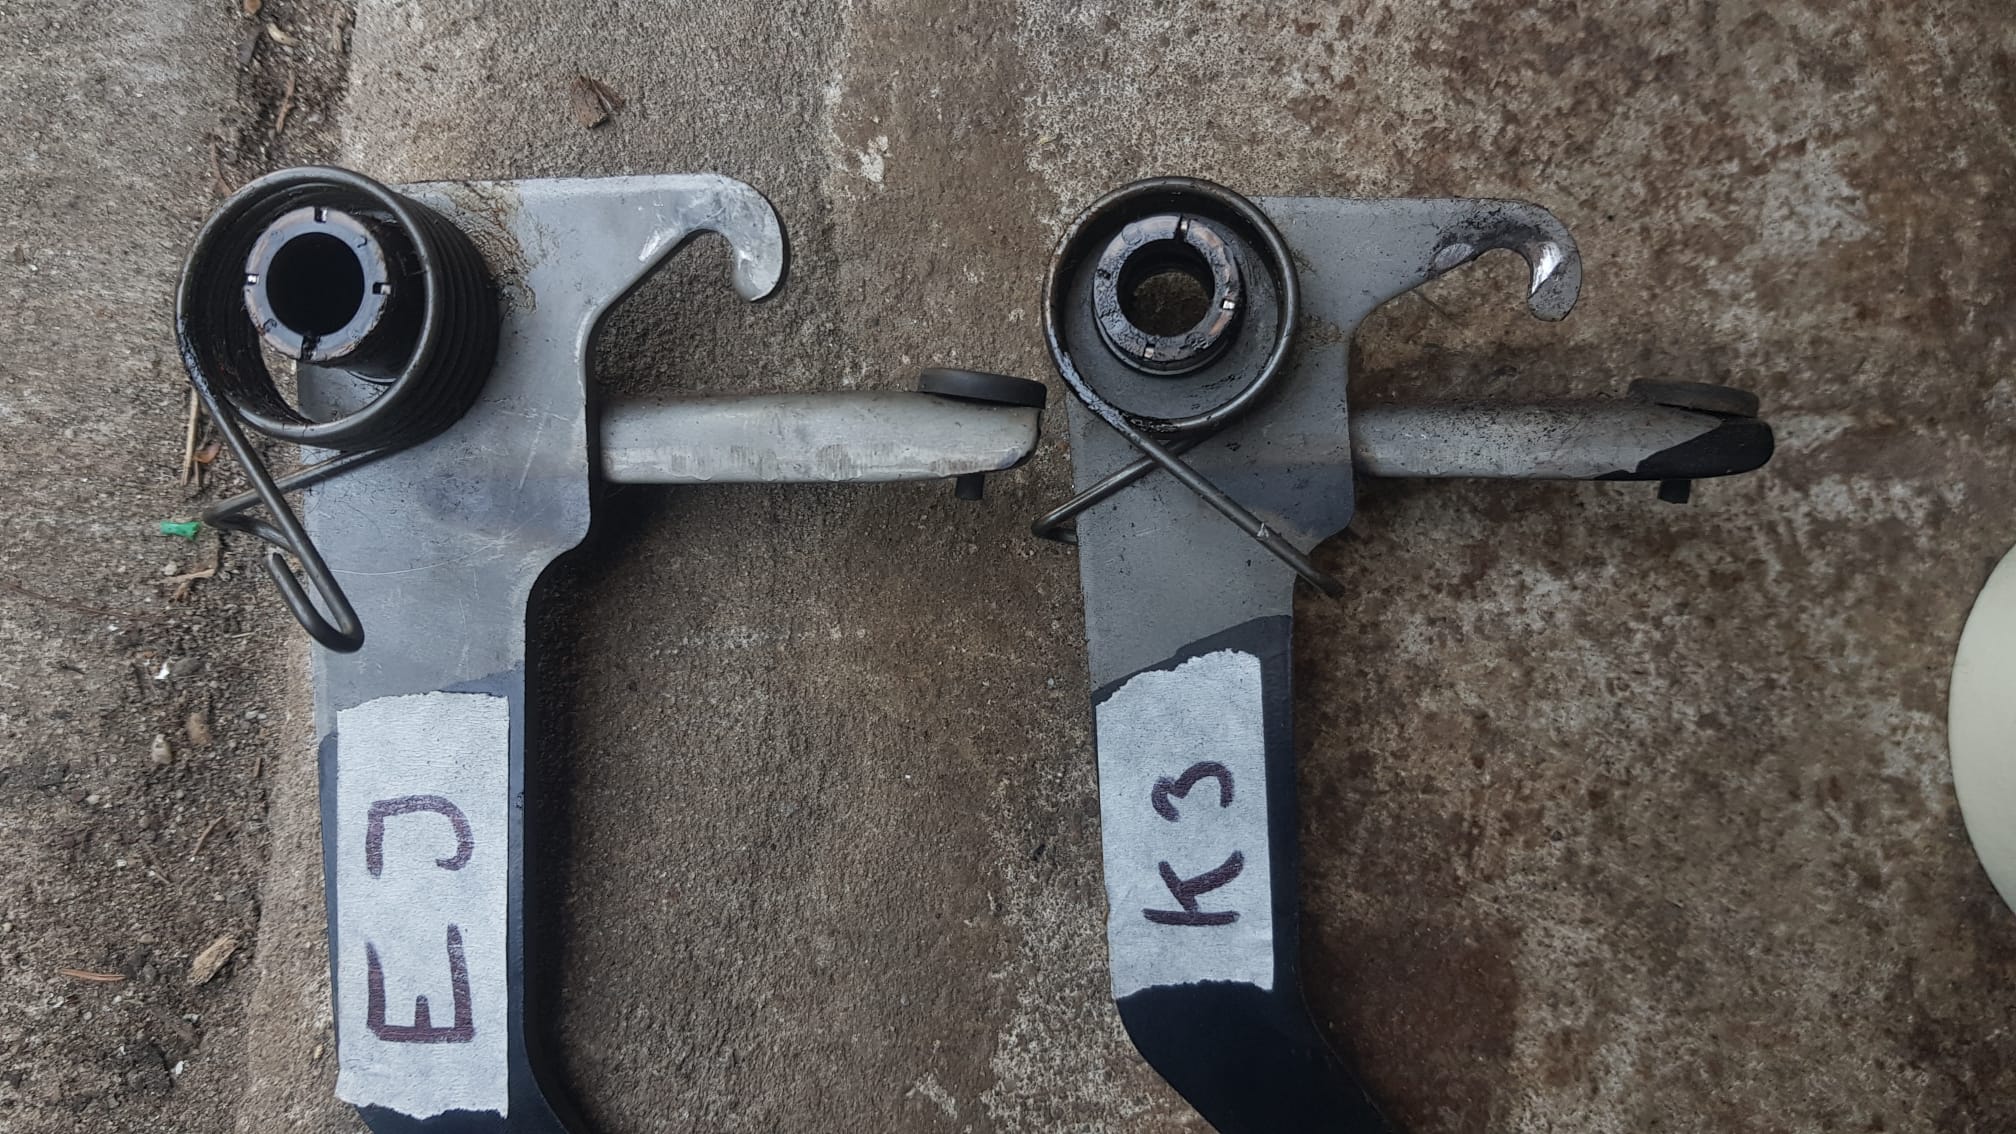
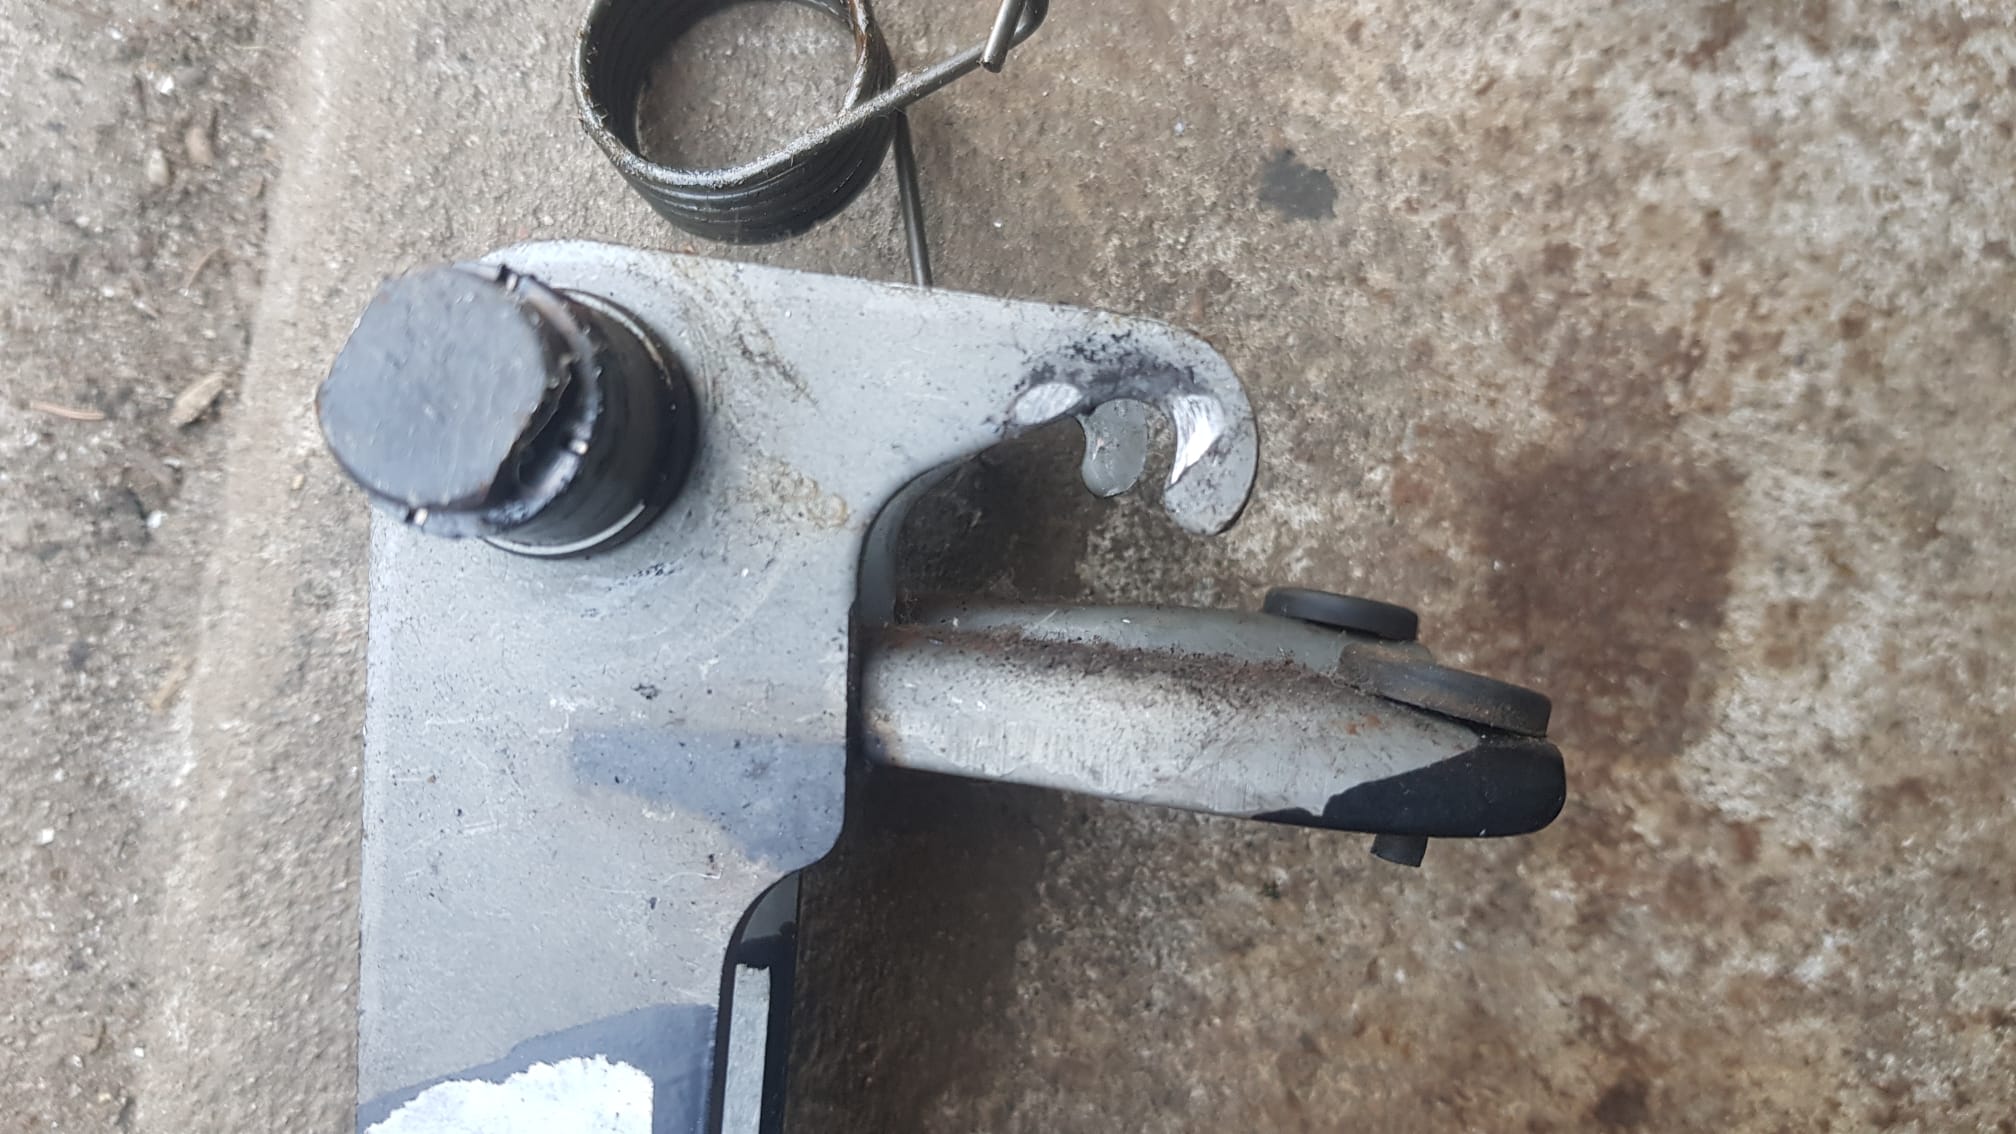
Pivot points and foot’rest’ aligned, K3 on top. You can see that the K3 arm is about 10mm longer than the EJ arm. Pivot to clutchcable is around 50mm for the K3, 40mm for the EJ. Also the angle is a bit different.
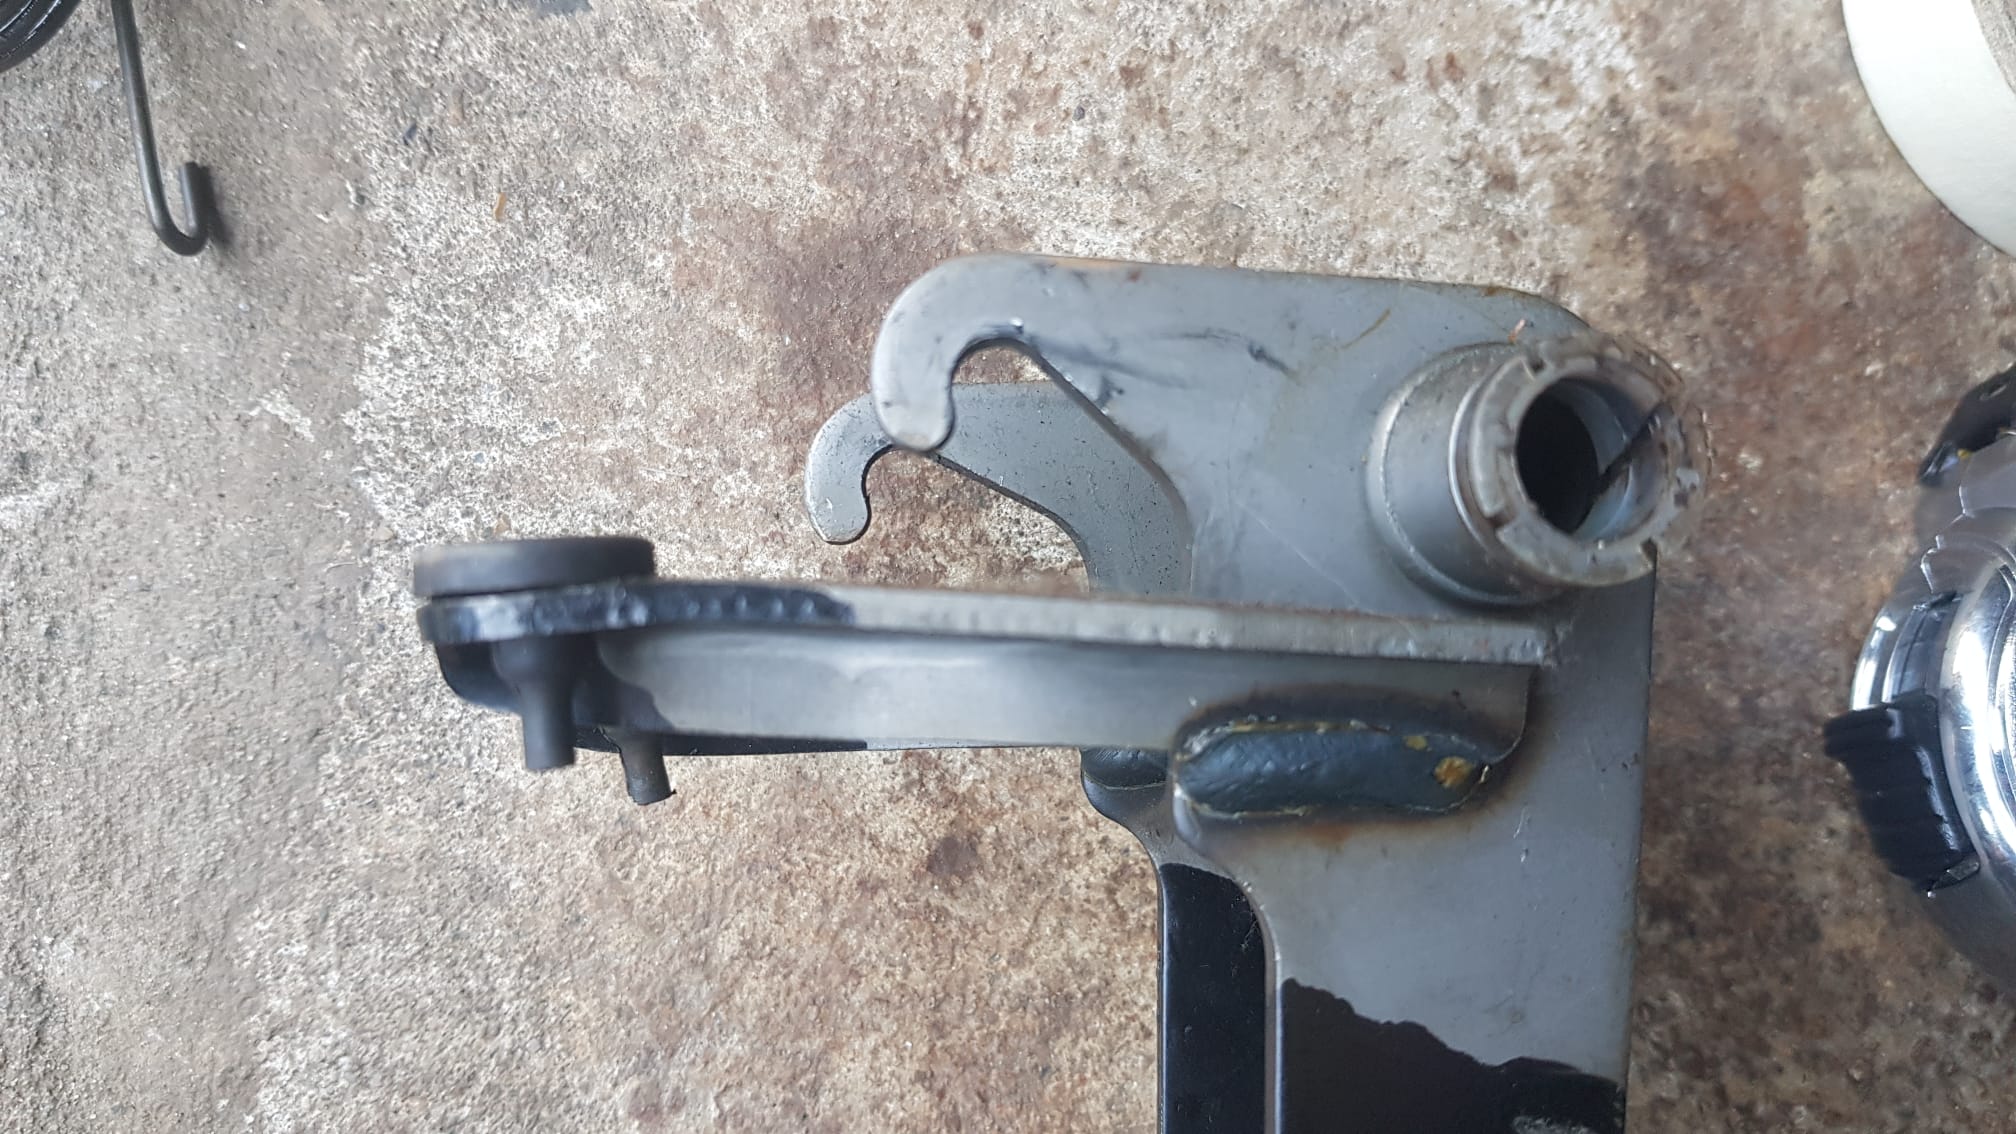
Other way around, K3 on the bottom.
Bottom part also slightly different.
I didn’t get any pictures of the clutchlevers, but they are (pivot to clutchcable) 125mm long on the EJ trans, and 140mm long for the K3 trans. I’m not sure if this is the right method, but if it is, the ratio’s are like this:
K3: 140/50 = 2.8
EJ: 125/40 = 3.125
My setup (K3 lever + EJ pedal): 140/40 = 3.5
The greater the number, the greater the pedal travel/the less force required.
This would confirm and explain all of my complaints, so I decided to swap pedals! And sure enough, there was plenty of room for adjustment, and the pedal was slightly heavier (which I don’t mind). Fun little experiment, with nice results!
A hypothesis as to why they made both arms longer on the K3: increasing the length on both arms (keeping the ratio the same, unlike they did in this case) means that pedal travel and required force stay the same. However, the stress on the clutch cable is reduced. M = r × F, torque has to be the same, so if the length of the arm (r) increases, the force (F) has to go down. This a very short way of explaining it, but if you’re familiar with physics, you’ll know what i’m trying to say.
That’s all I had to say for now. Until next time!
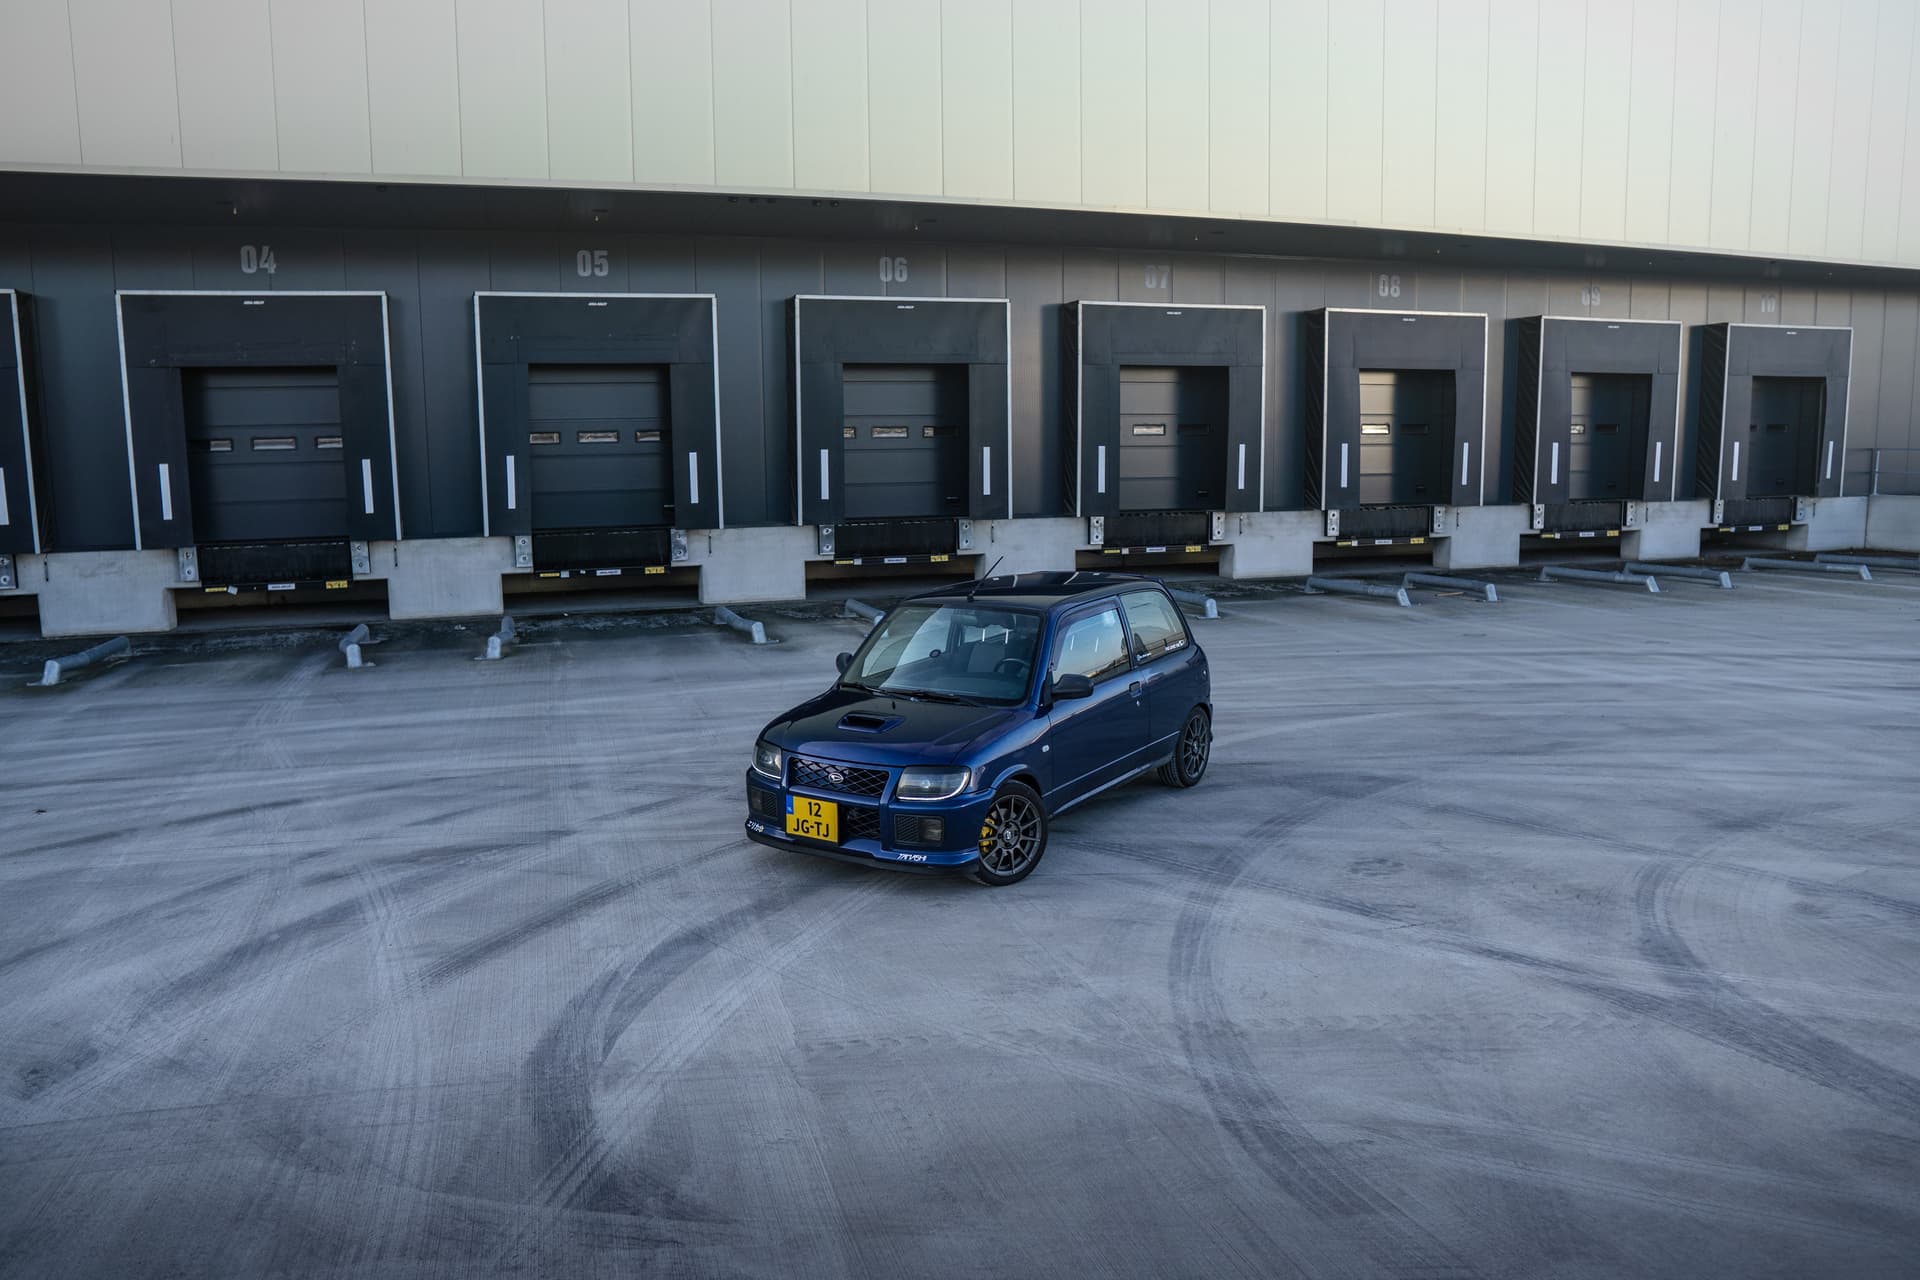
Enjoy this picture:
12 Likes