I’ve finally gotten around to pulling the head, last Friday.
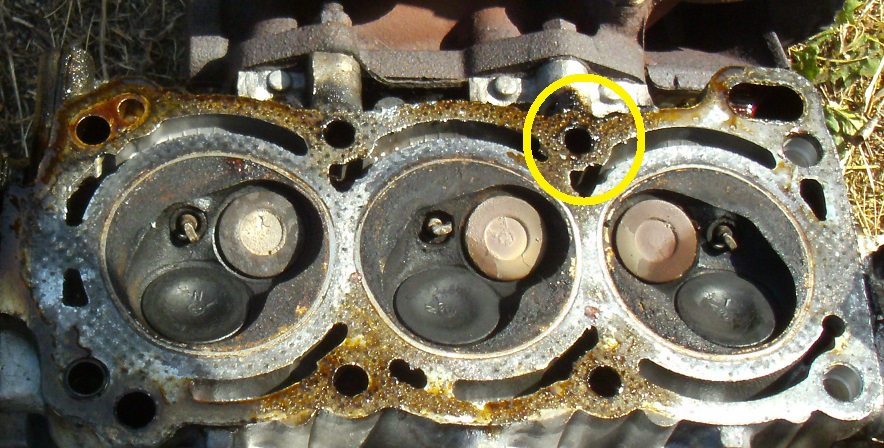
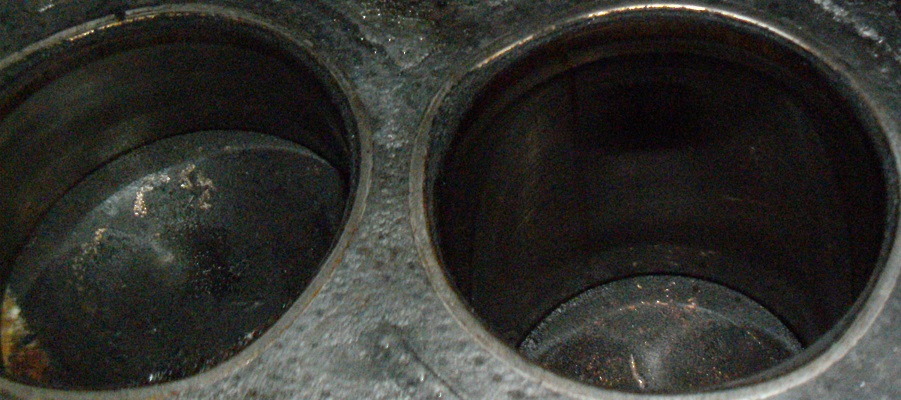
The combustion chamber directly beneath the camshaft’s problem area, pictured far left, is darker than the remaining chambers. Whether purely coincidental or not will need to be determined, through a leakage test, using gasoline to fill this chamber.
Circled is where one of the head bolts was exposed to exhaust gas, to the point where it was partly burned down. I had set my torque wrench at increments each increasing 10 nm, until the bolt started to break loose. It did so at 90 nm. Tightening torque is suggested at around 56 nm. If the bolt would have broken, that would have set me back somewhat
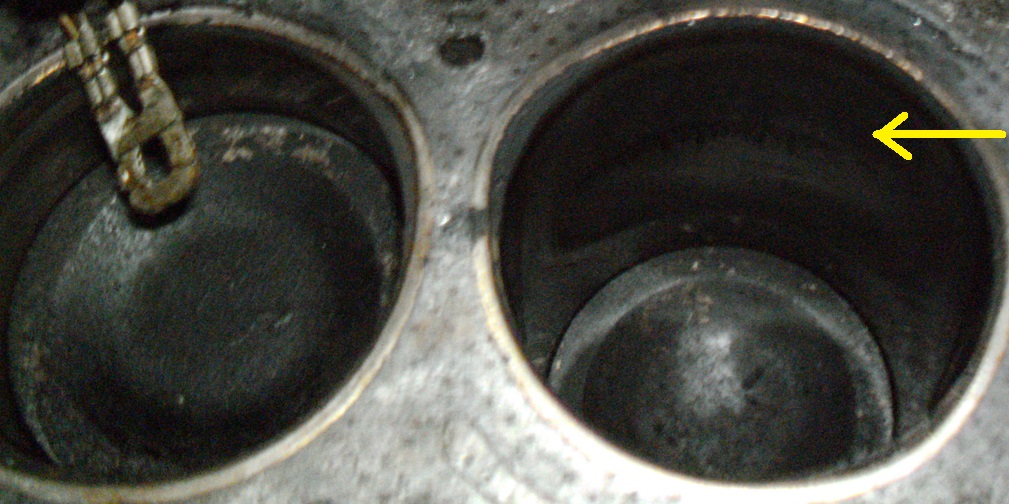
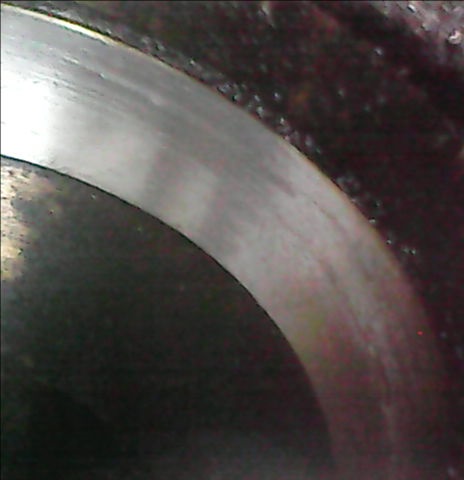
Given that the sun is now at a lower angle, approaching Winter, I needed to turn the head accordingly, so as to get a better snapshot. In the following, the exhaust valve appears to be pitted. Whether or not the carbon accumulation is pitted or the valve itself is will be determined, later on this morning
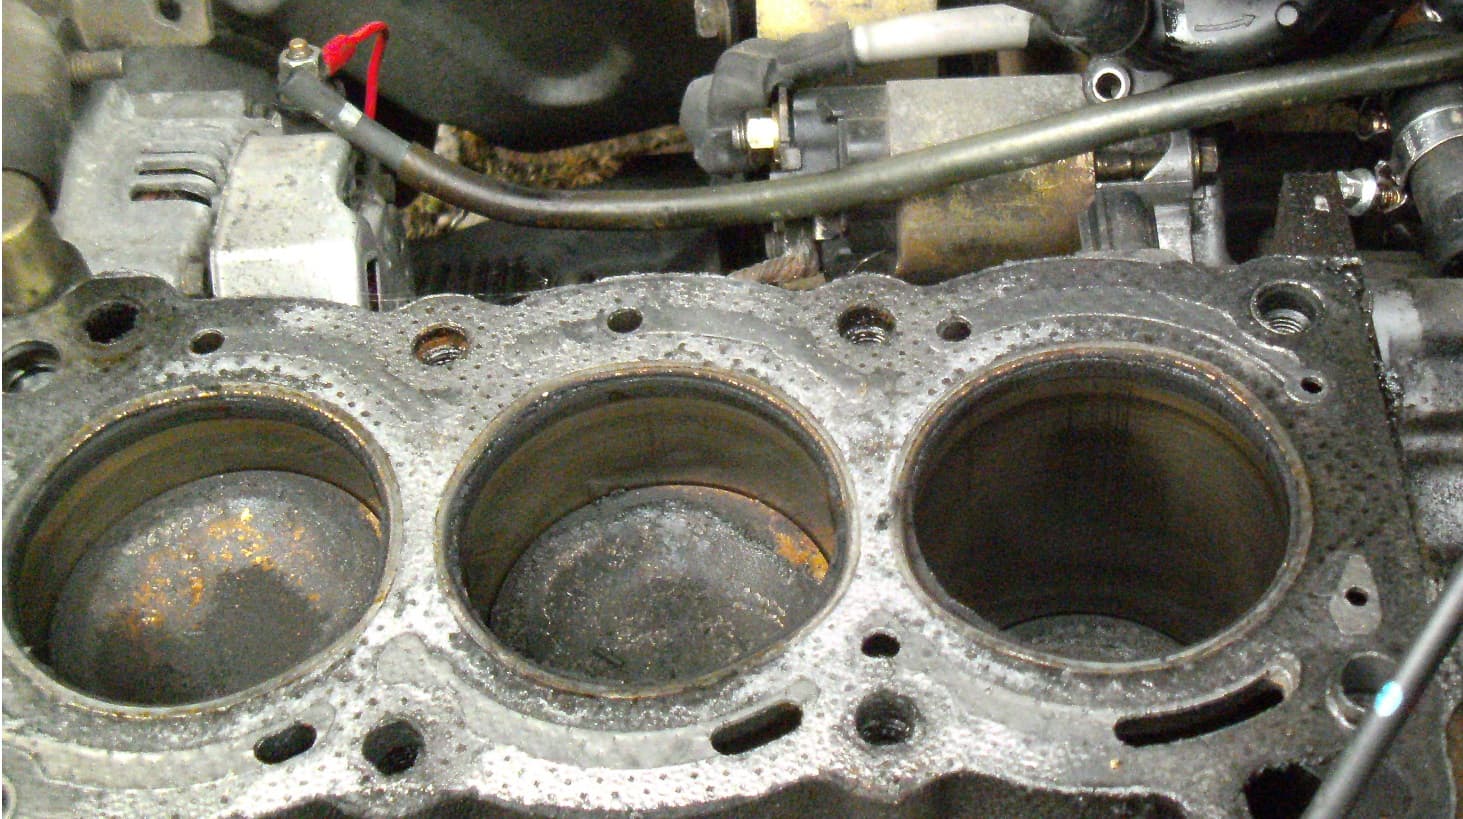
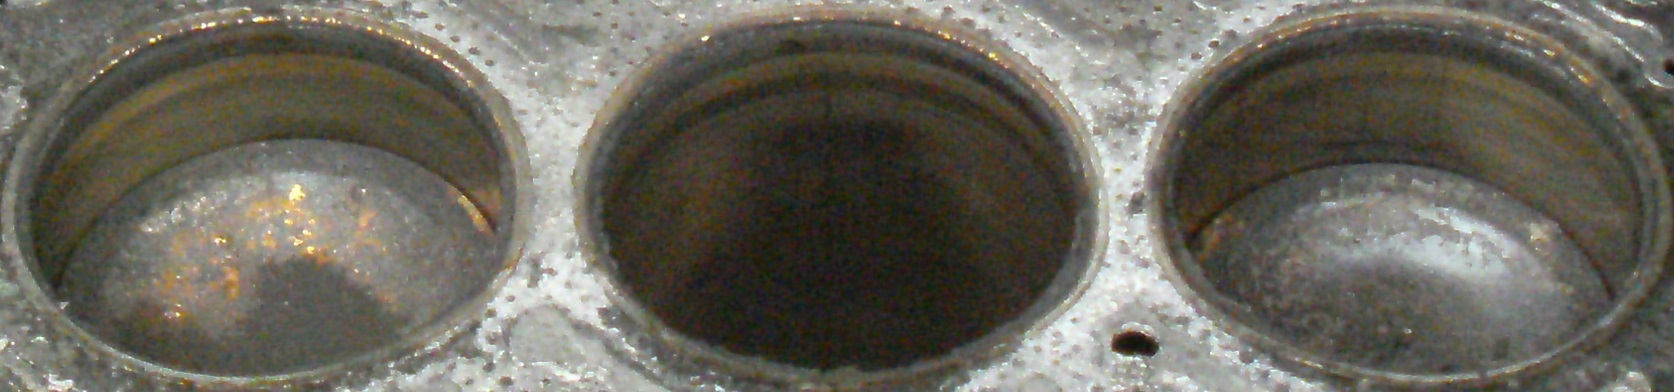
In the mean time, the scoring on the intake side of these cylinder walls point to deliberate debris-introduction. An attempt to photograph the exhaust side failed, because the flash didn’t actuate. This would not have been possible with an analog camera, given that these do what you expect them to do. I’ll have to wait until the test cylinder head is removed
Since my digital camera prefers brighter spots, I’ve given it a go at nighttime filming.
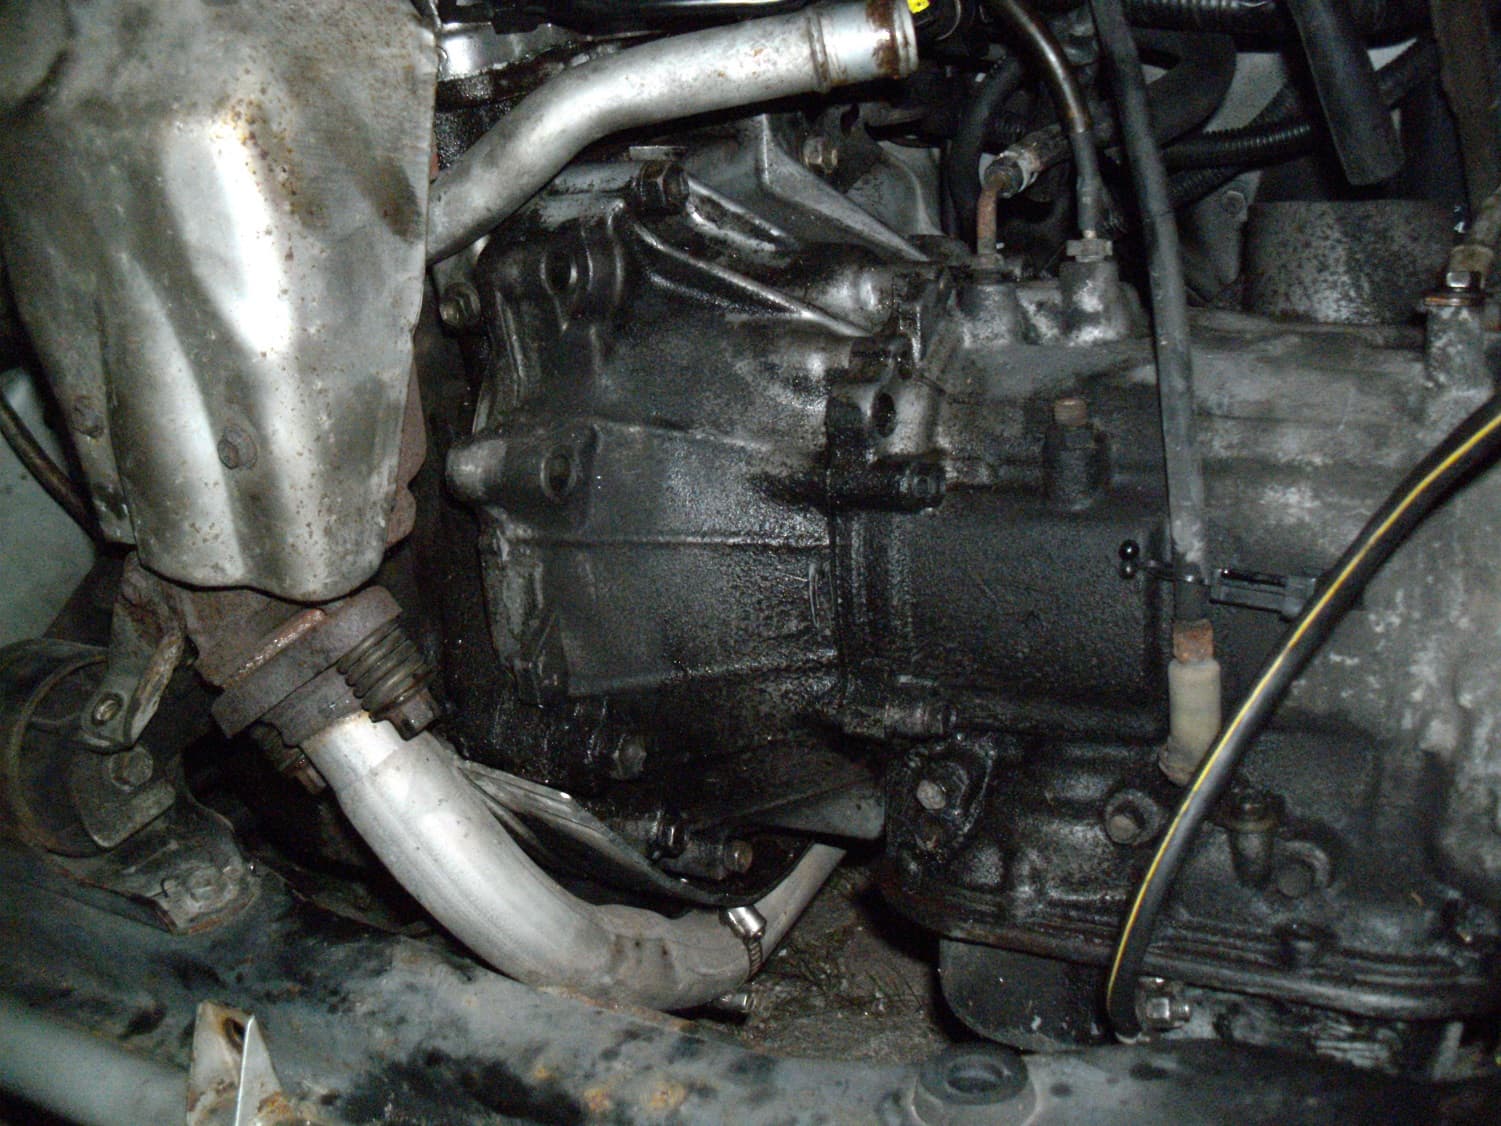
Early this spring, the automatic gearbox was cleansed and remained that way, until the head gasket started to leak.
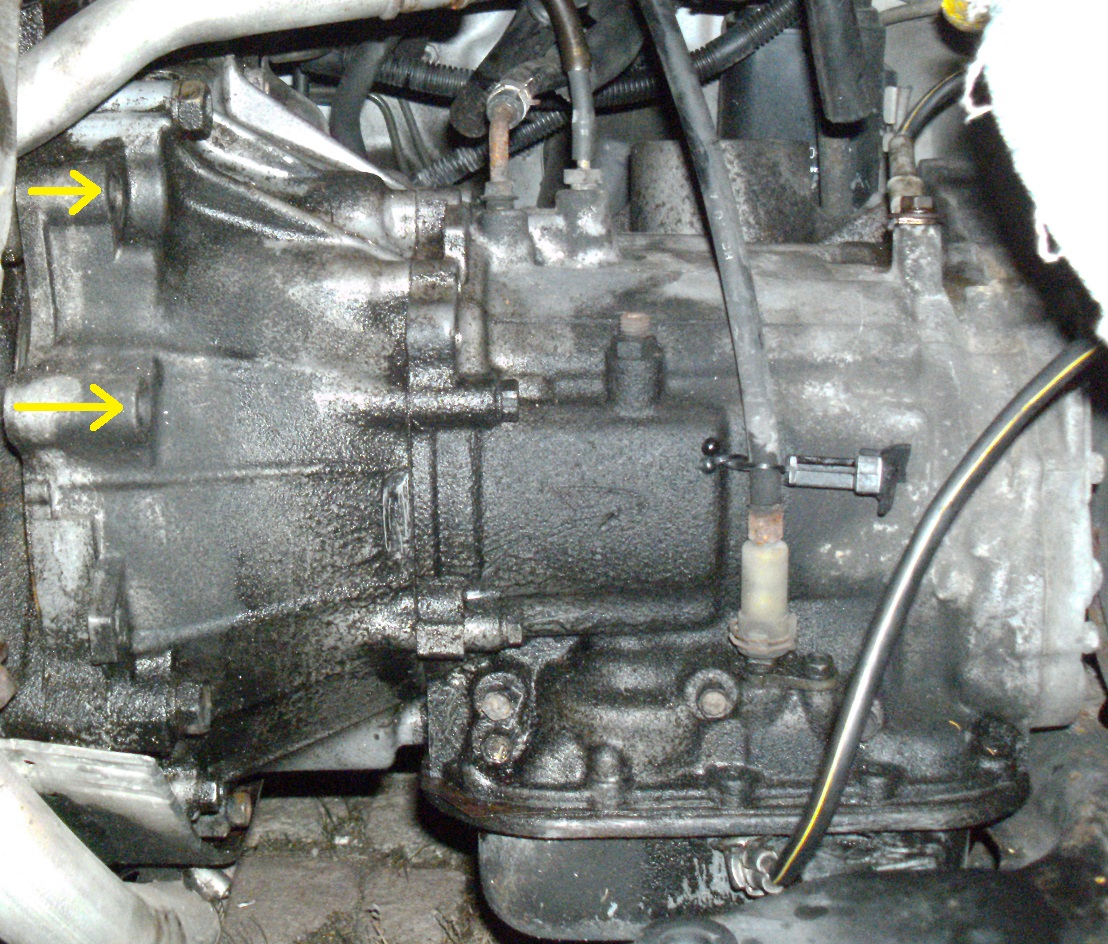
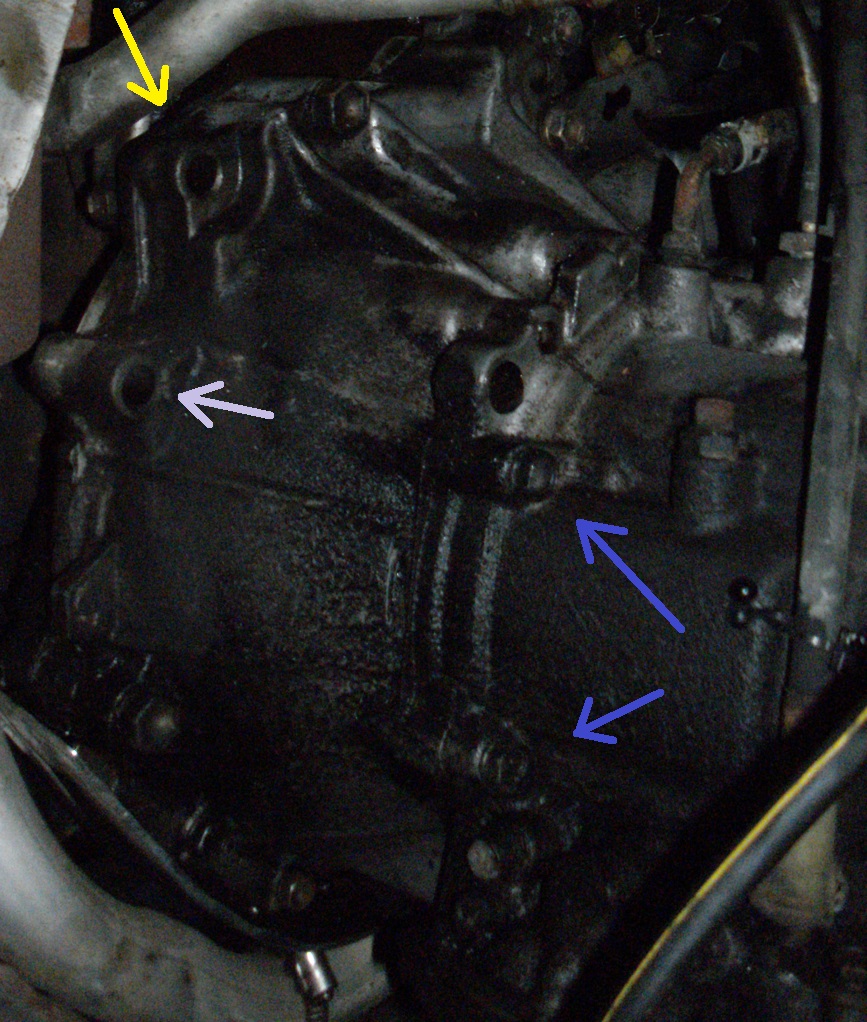
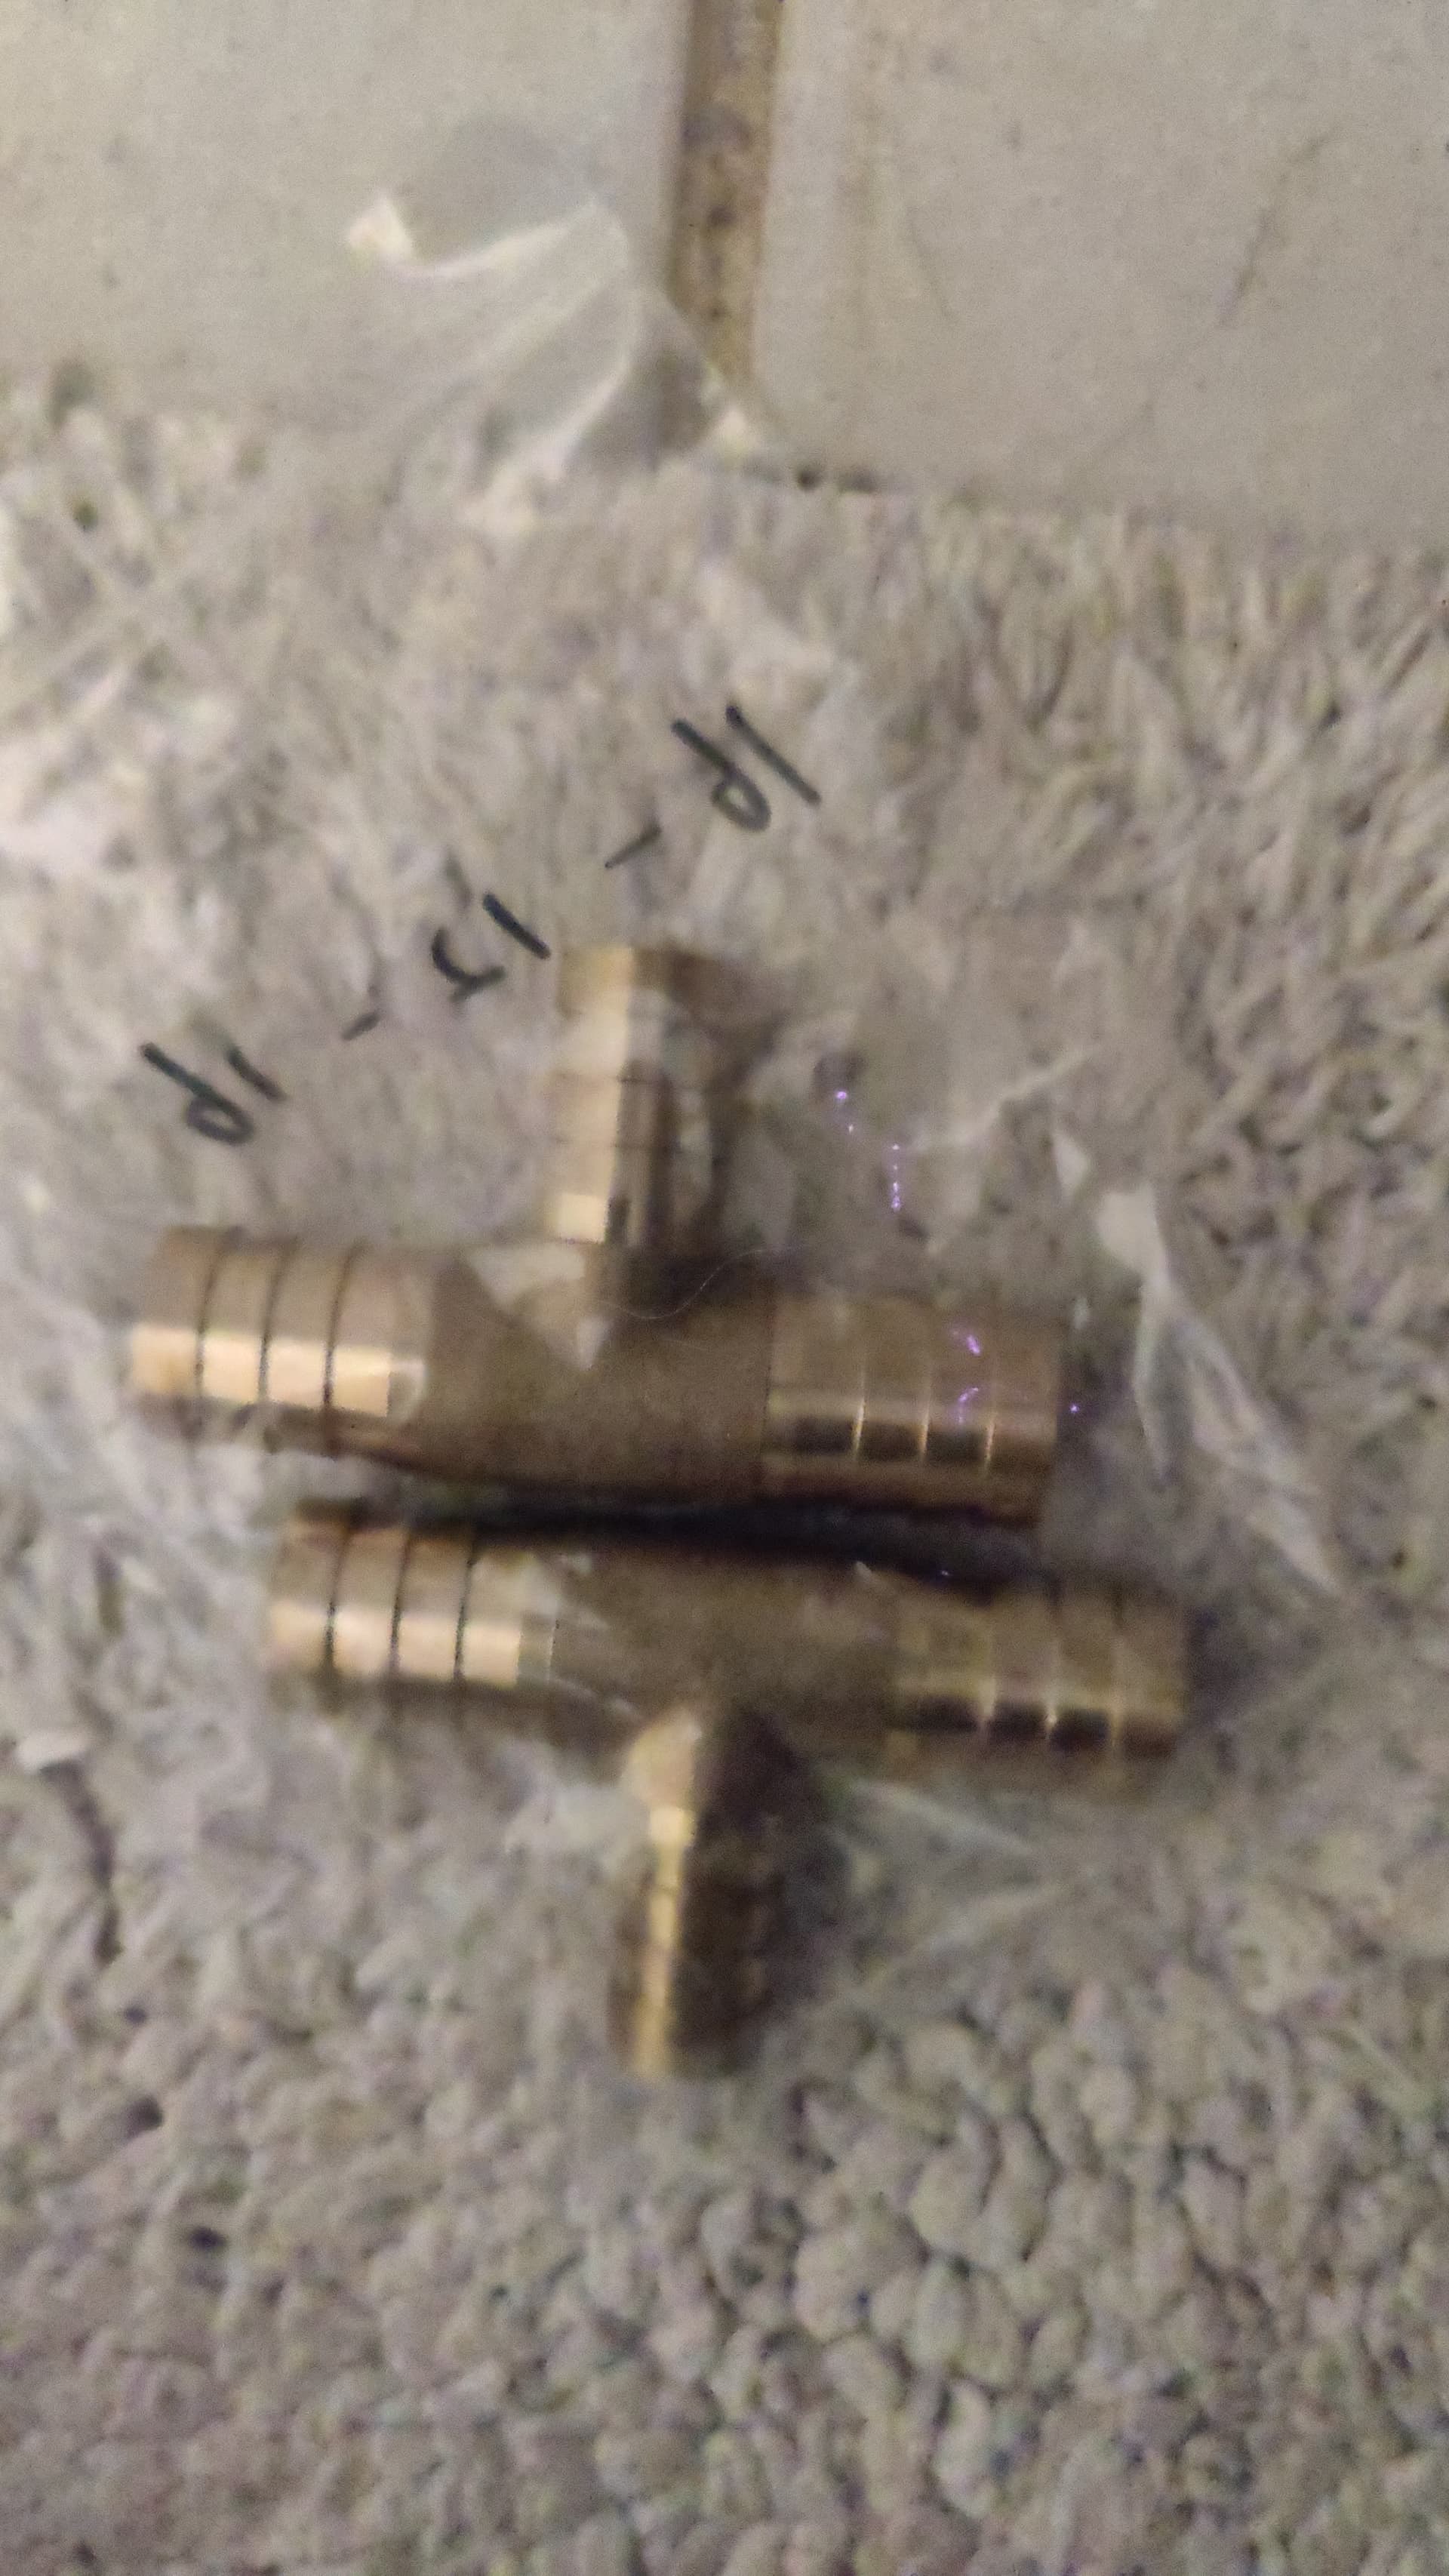
Given that this bellhousing’s entire bolt pattern isn’t being used by this engine, this hints on this gearbox’s alterior application on other engine types. Perhaps, used on other automobile brands. Does anybody, therefore, recognize this bolt patter to coincide with a different engine type?
The yellow arrow points to a definitely available mounting hole.
The hole pointed at by the lavender-coloured arrow appears to be a lining-up provision, intended to house a dowel pin, given that its outter surface doesen’t provide enough area for accomodating a 17 mm hexagon bolt. It’s doubtfull that an allen bolt would be used. But, there’s always that possibility, if another automobile manufacturer were to mount this gearbox, solely using allen bolts.
The bolts pointed at by the blue-coloured arrows hints on the possibility that changing the removable bellhousing would make the rest of this gearbox available to even more applications
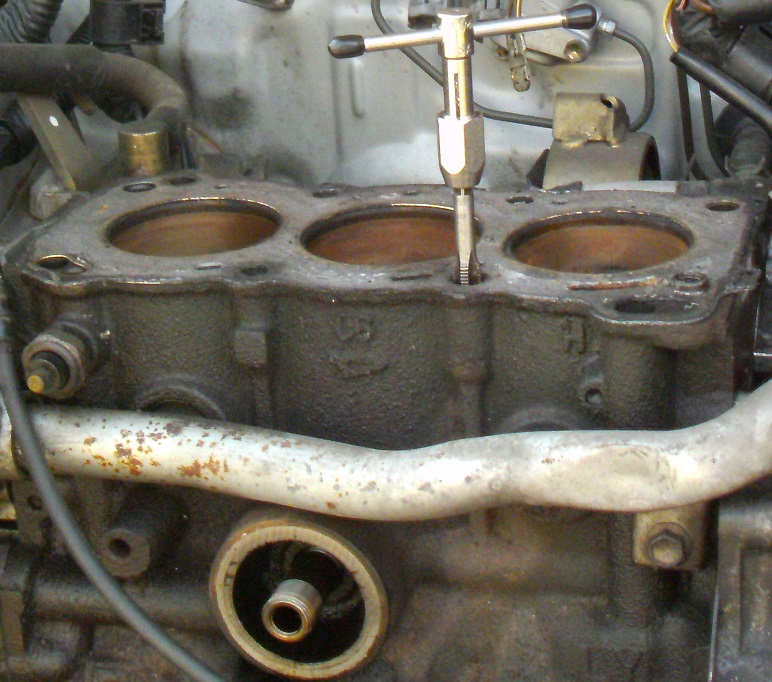
I managed to photograph all three cylinders from behind. But, didn’t get quality results equivalent to those filmed from the other direction. Some scoring is detected and will be later filmed once more, using my endoscope.
Since no loss of power was noticable and the scratches not felt through touch, I’ll leave them be
Before filming, I did run the engine, using the borrowed head on the old gasket. I ran it short enough, so as to not overheat the engine. It ran fine at all r.p.m.s tolerable, emitting absolutely no knocking noises. Here’s what test-running with a minimum of hook-ups looks like:
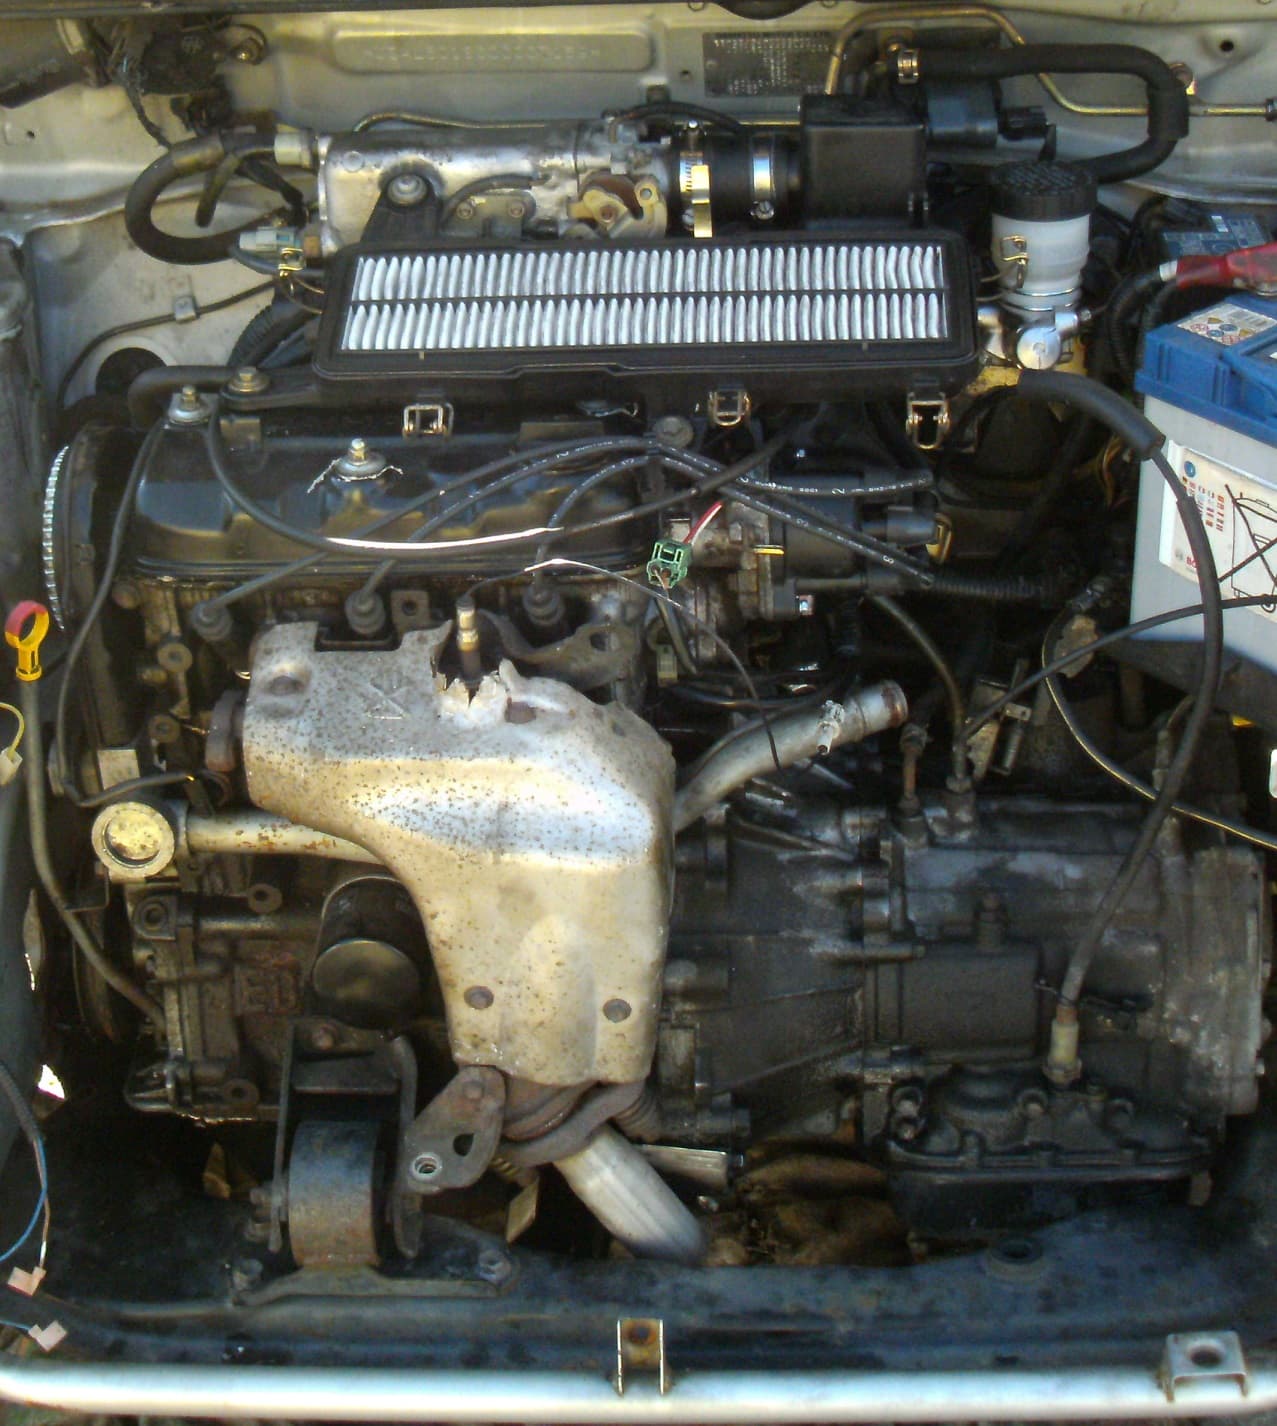
Last week, I found a used engine at a reliable scrapyard and had it loaded in place of a right-hand side rear passenger, by way of forklift, into my Suzuki Wagon R. I intended on only buying a cylinder head. But, they claimed to not having any in stock. The vehicle donating this engine was claimed to have had 194,263 kilometers on its clock. I was, in that case, somewhat hesitant about closing the deal. They also claimed to have had only this particular engine and I was even more reluctant about wasting a long trip. So, I forked over the 300€ required for closing the deal.
Before securing it to the Suzuki’s floor pan, using the front passenger’s seat belt, I removed its valve cover, to see if an ED’s typical Achille’s Heel drivetrain justified the purchase or not. To my pleasant surprise, either this engine was unusually well taken care of or it may be its donor vehicle’s second engine
My request at the shop who supposely regrinds camshafts and presses bearings into line bored heads has never been answered. I guess, they don’t need to be courteous, because they’re earning too much money?
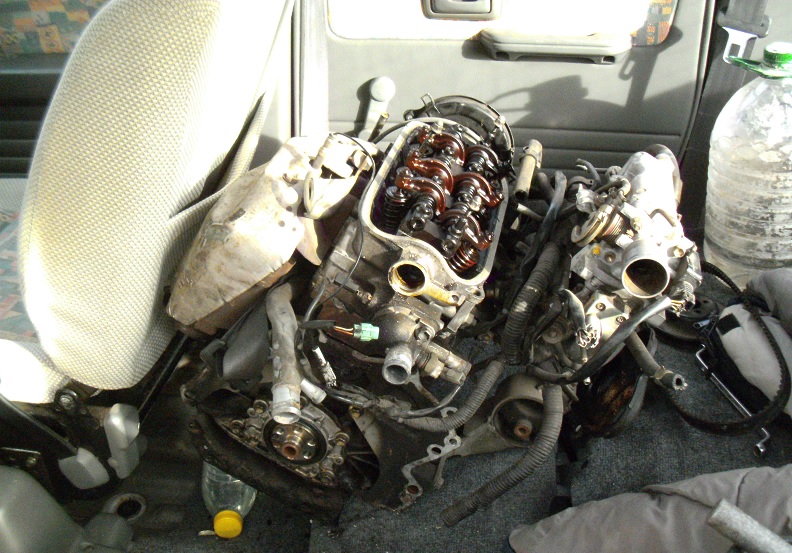
In any event, the worn out head and camshaft isn’t taking up critical space. So, I’ll put it into storage. Before I do that, I took a few detailed photographs of the removed camshaft. The amount of wear doesen’t seem typical for an engine with this amount of service. The lobes closest to the engine’s front took most of the punishment, the first lobe even worn from behind. the second journal has all of its scoring on the same side as the most damaged lobe. This makes no sense, since one would expect the opposite to have taken the majority of thrust (second yellow arrow).
Both red arrows point to quite remarkable wear, contrasted by the sharp edges formed as if the camshaft was being forced rearwards
This bit seems more heavy than necessary. has anyone heard of machining off the unnecessary for an injected engine’s fuel pump lobe and possibly drilling out the cam’s center or would that destabilize it?
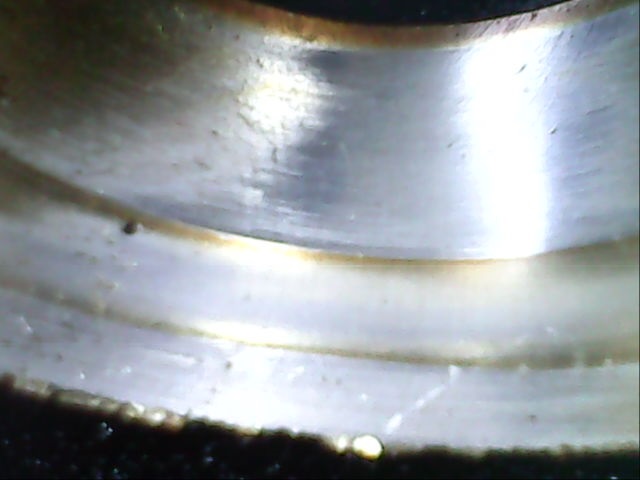
An edge has appeared, as far back as on the fourth lobe.
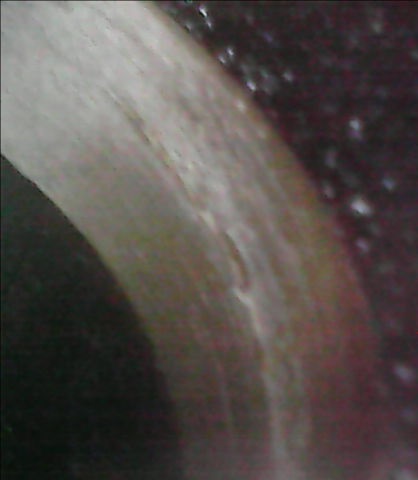
At this point of rotation, excessive scoring on the front journal is plain to see
I will put my endoscope into service, providing images of the head’s journals themselves. Here, quite irregular wear is evident on the remaining lobes. If this is normal for this engine series, perhaps replacing it with an EJ would be a good idea, given that I’ve never heard of any need to adjust valves on these engines, of course, when properly maintained.
Note the retained blackening of the last lobes’ inactive sides
Attempting to focus-in my endoscope’s mirror attachment, I decided to postpone further attempts, until the weekend was over. By that time, it would bemore likely that I would find a practical solution. Meanwhile, I did my best without a mirror, arriving at the following results.
It’s difficult to imagine that any other source for this dramatic scoring on the jounal’s surface would be anything other than the introduction of debris from outside of filtration channels. Either a previous oil filter was plugged full of contaminants, to the point where the by-pass valve allowed introduction of unfiltered oil or the debris itself was deliberately introduced into the oil filter. Given how plugged what looked like the original air filter appeared to be, it’s highly possible that the dealership of whom this aging lady trusted had also refused replacing the oil filter, during maintenance schedules. Perhaps, one of you members have had the misfortune of falling victim to similar?:
Another Achille’s Heel on this series engine or, at least, those using a catylist(?), is where the nearest headbolt to the siamese-ported exhaust is stubborn to remove, as if it wants to weld itself to the block’s threads. It took an enormous amount of torque, to get it turning, as previously mentioned. What seems to work well in theory doesen’t always work well, when time and biological influences come into play. This is the second time I had to confront a stubborn bolt, after tearing down 3 of these engines.
Preparing to install the next cylinder head, I chased these threads with my tap, meeting more resistance than when I chased a couple other threads of which posed no unusual problems. To insure that I chased enough thread, I’ll screw-in an undamaged headbolt, in order to find out if enough depth is available for turning the bolt by hand to its proper length. If it doesen’t reach, I’ll end up having to source out a bottomimg tap.
Perhaps, applying copper paste to the replacement bolt may help prevent it from seizing up?
Although the oil pumps on these are reputed to take quite a bit of punishment, I’m going to go the extra length, through sourcing a VDO oil pressure guage, even though the oil pressure warning light didn’t illuminate at idle speed
I have read your project, cams looks like they had a beating during cold engine and old lady started with throttle open to start the car every time. Oil filter not changed a lot during the years
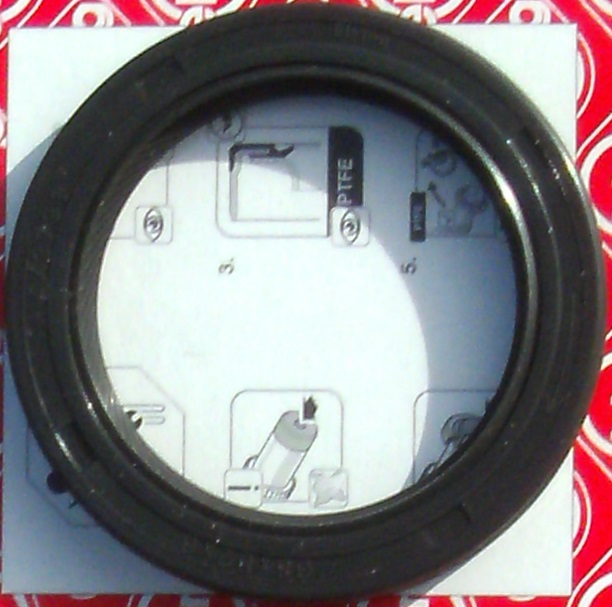
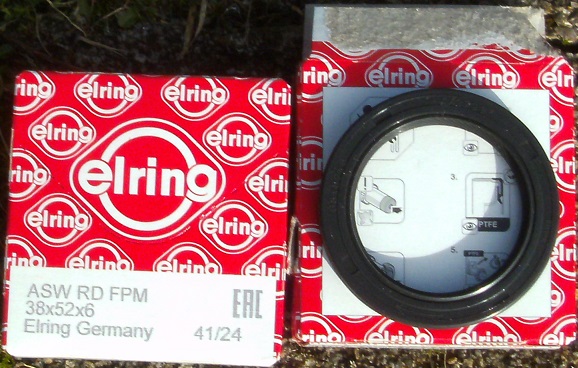
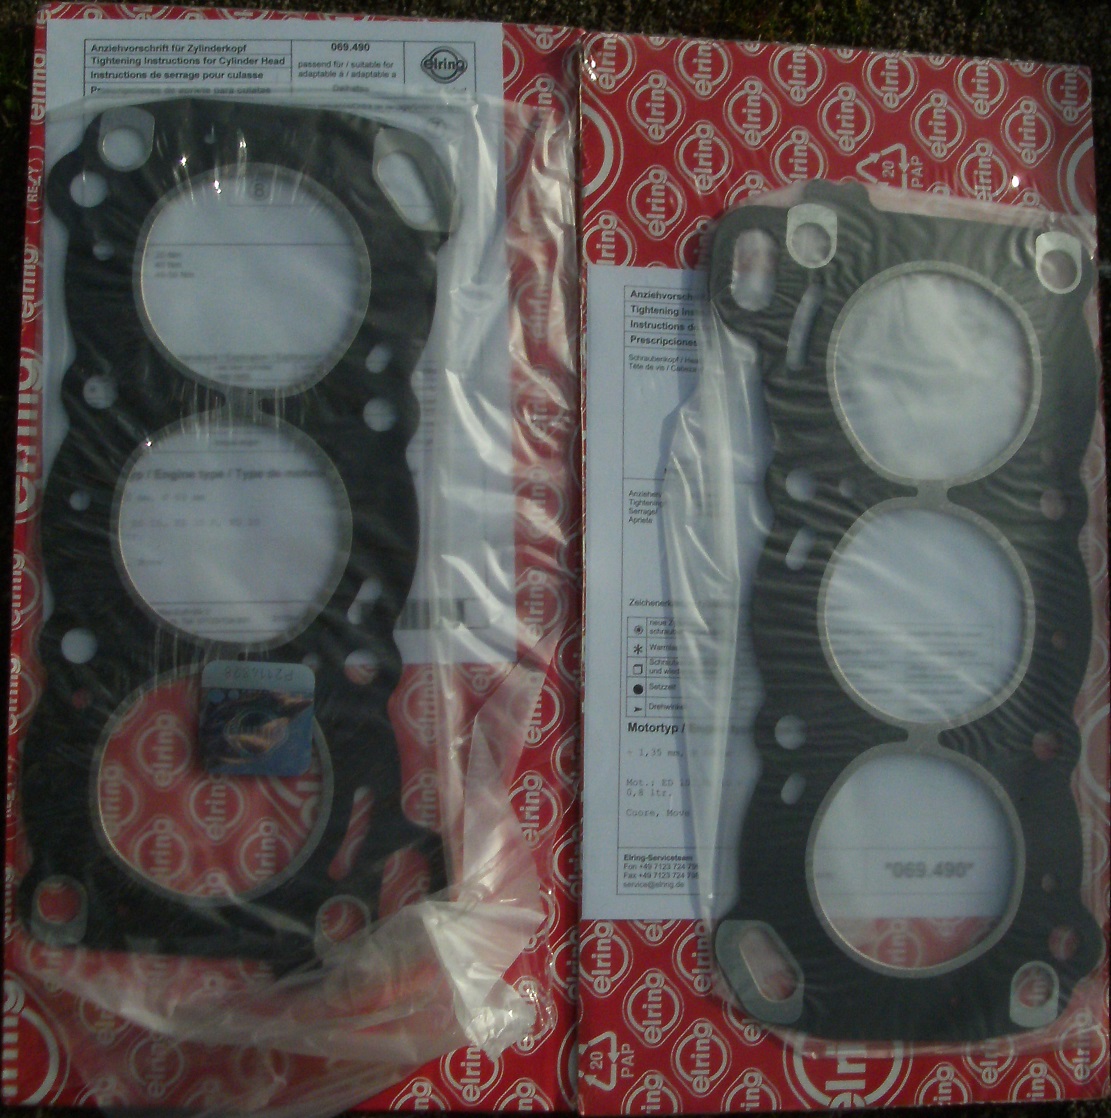
Both head gaskets and camshaft seals have arrived. A renown gasketmaker has unfortunately ceased production of headgaskets for EDs. Therefore, I could only order the seals from my usual supplier. They had stocked seals of the same Elring brand. For those here in Europe, here’s the part: ELRING 023.520
After having partially dismantled the original head, I tested the seal for maliability. It then cracked. It wasn’t leaking before, anyway. At least, nothing beyond sweating. I wasn’t sure if me once overheating the engine (I overlooked connecting the radiator fans’s switch, after having mounted both horns and their relays. It never pays to be in a hurry with these vehicles’ electrics, given that there aren’t any central connectors for much anything) was the cause or if these brittle with age and biological circumstances, after decades of service, like the distributor’s o-rings tend to do. To be on the safe side, I’m replacing these seals on both engines, because doing it on an assembled engine in car wouldn’t seem to be a pleasant task
Visting a nearby town I thought may not end up interesting proved rewarding to my L601 adiction. I just had to stop and take a look, hoping that the owner would come out and perhaps be interested in selling it.
As expected, where debris is being collected within the right rear wheelwell, it’s there where it’s beginning to rust through, typical of owners neglecting their owner’s manual instructions on sheetmetal hygiene. I reached behind that rust hole that you see there and rubbed off that debris.
This means that I’ll have to hurry up getting both of my L601 and Suzuki through M.O.T., before I can bring this gem home:
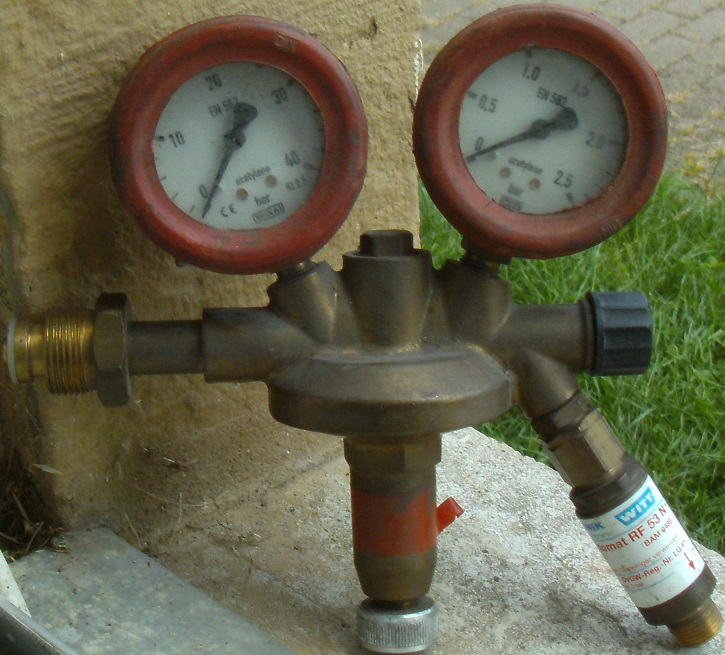
I finally found my oxygen/acetylene praphanalia, temporarilly lost through moving house. Before finding it, I went and rented a pair of 10 litre tanks, motivated by panic initiated by fear of overstepping an inspection deadline. I knew better. But, ignored logic, once again.
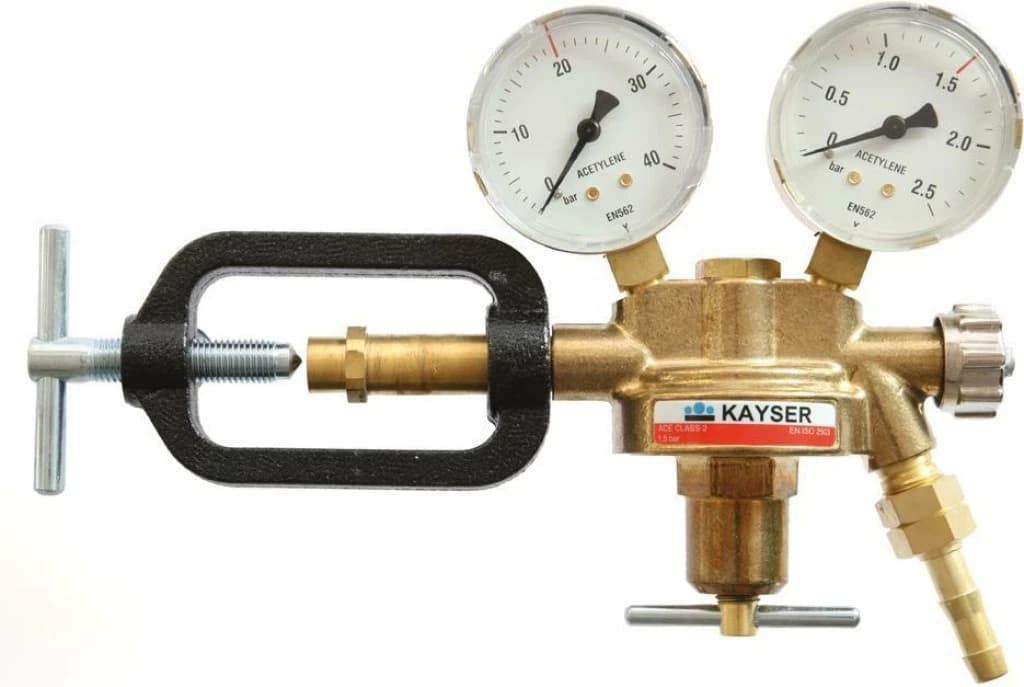
Upon getting ready to start cutting and brazing, my oxygen pressure regulator matched its bottle. But, the acetylene’s was to be attached in a completely different manner than that of central European norms:
It turns out that the person who sold me my equipment works in Switzerland where that type is used, as well as in Scandinavian countries and, I’m sure, in North America and explains as to why I ended up with owning it.
One would think that an adapter connecting the Swiss regulator to the clamp type would be available. I couldn’t yet find one, despite something like that being relatively easy to construct.
I would prefer putting my Swiss regulator to work, rather than gamble on a new one of dubious quality shipped from unknown sources. Especially, when it’s getting connected to an extremely volatile gas like acetylene. The regulator’s quality can’t be beat. Which would be quite a disappointment to have it just sitting around useless
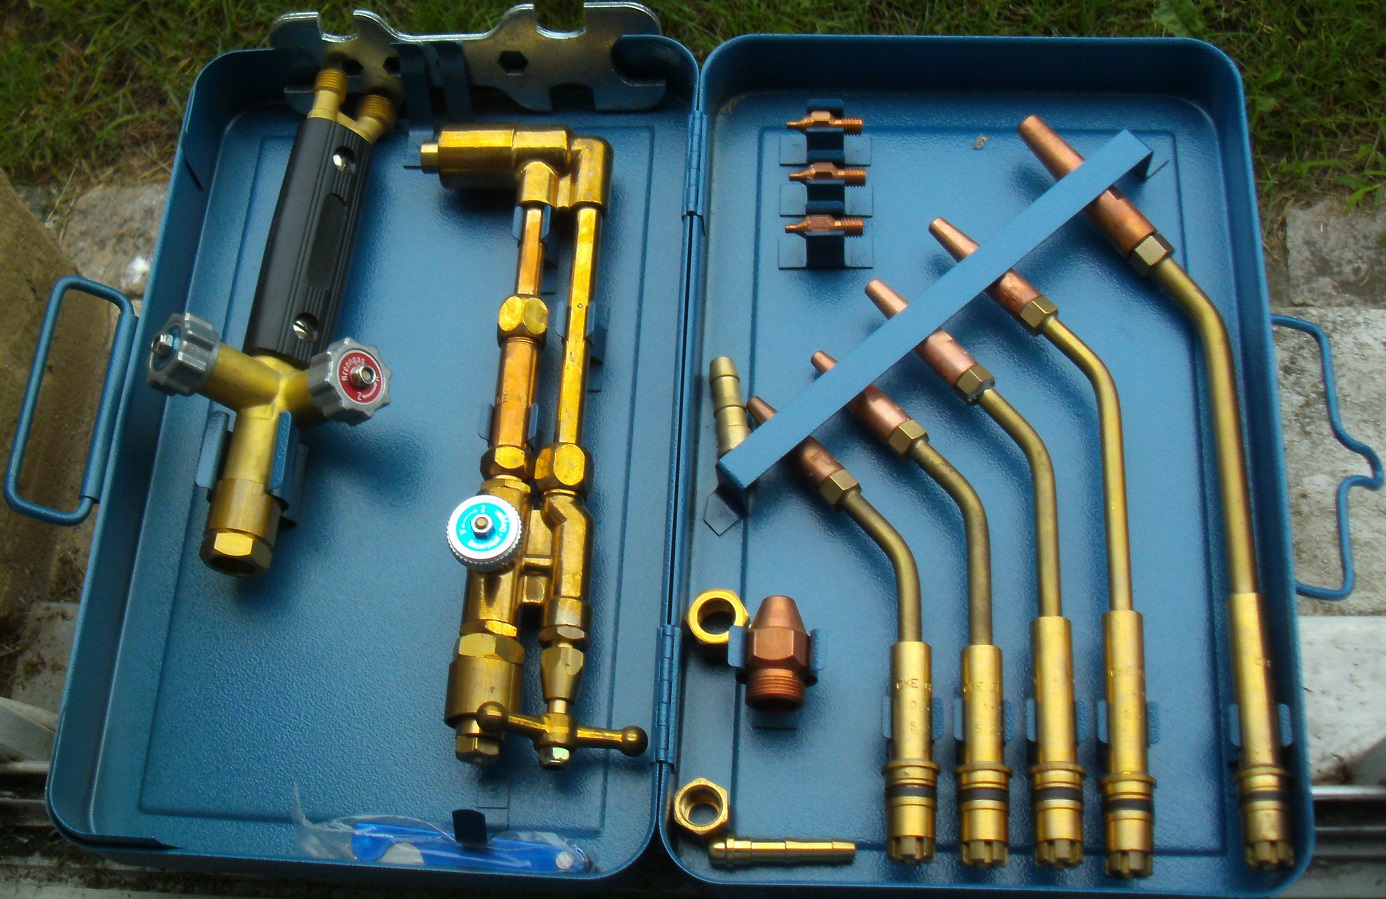
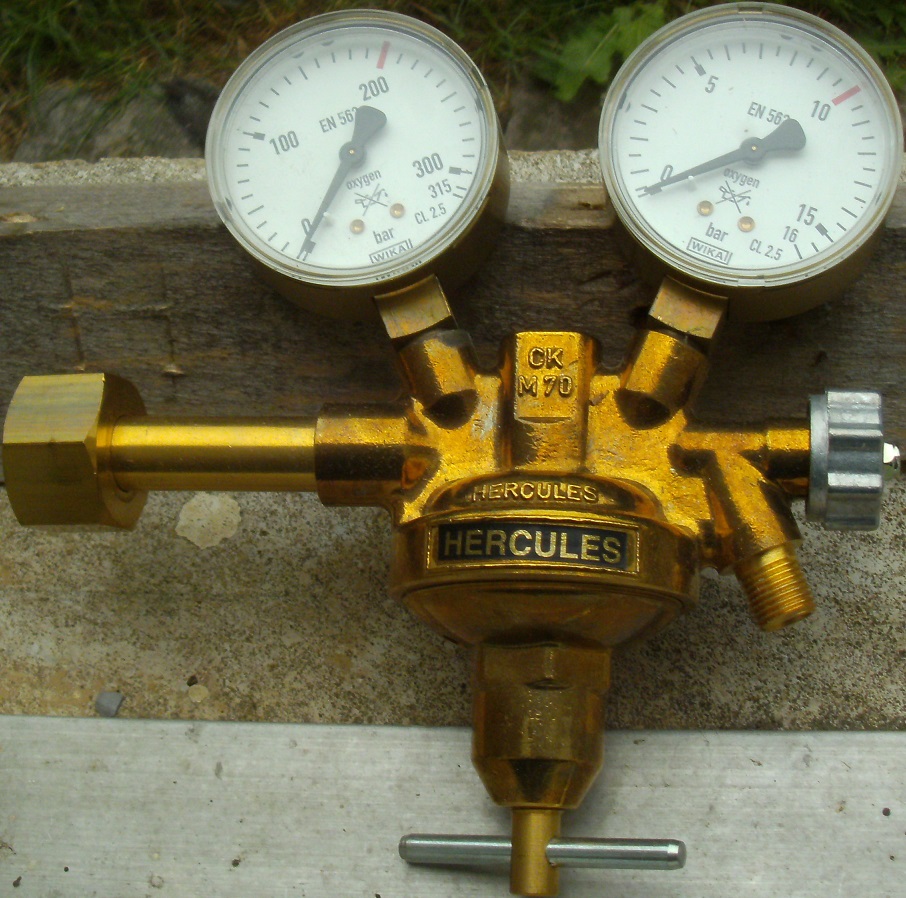
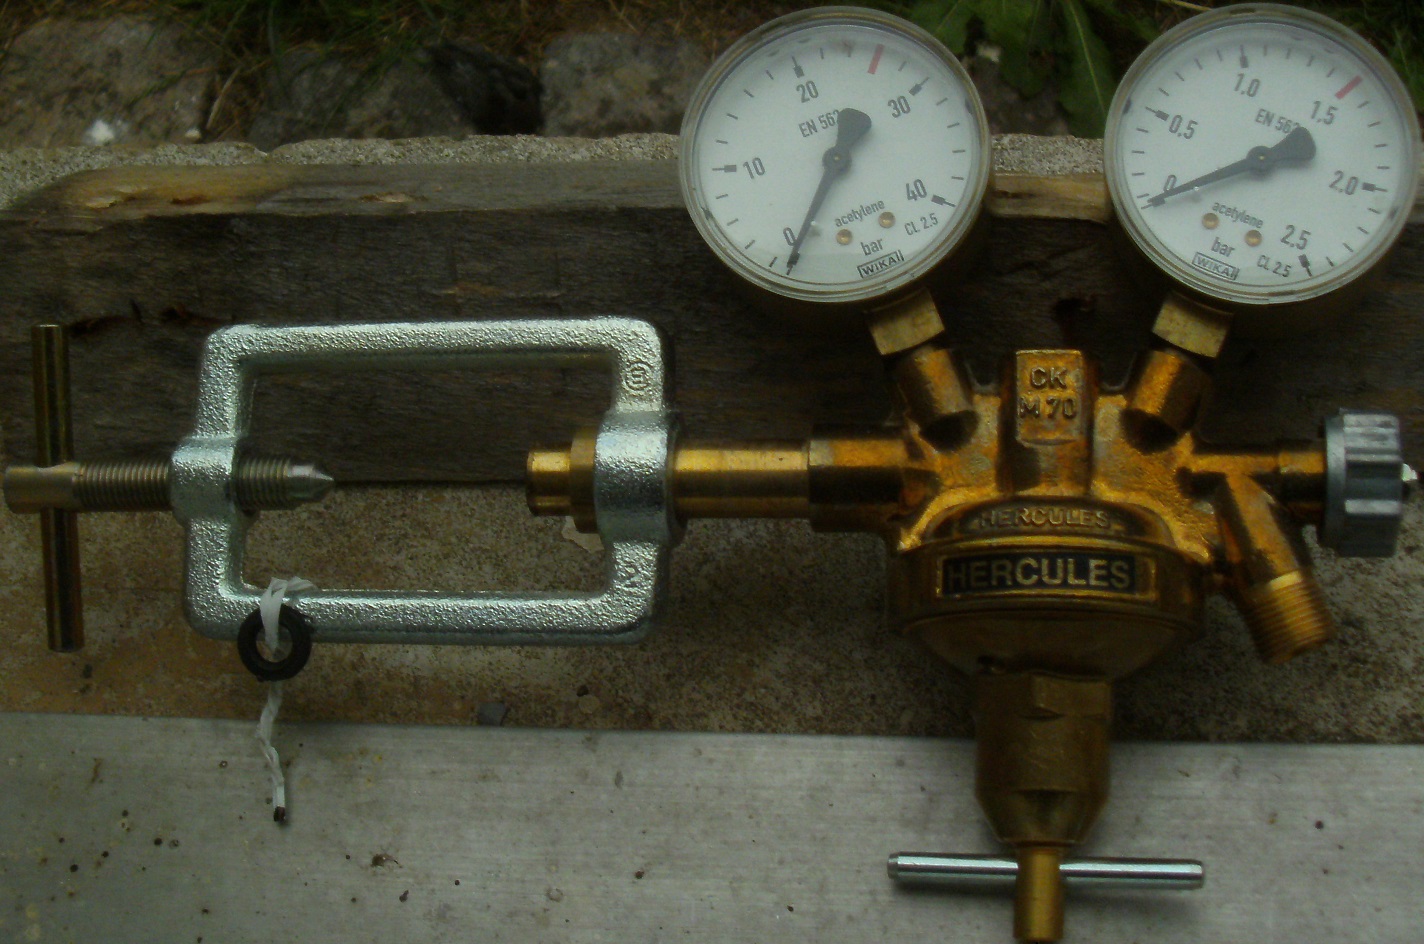
I finally got rid of the tanks I was never able to employ. The rental and related fees costed me over 550€. I did eventually get the proper regulator and the smaller 5 litre tanks I had initially wanted, as well as an entire set of what I already have, including the jet files I was ready to order. I visited a flea market and noticed a set of tanks sitting at the back of the garage wall. I then asked the lady if they were for sale. She said, she’d have to go fetch her husband. He asked me what I was prepared to pay. I said, I didn’t know. He then asked only 50€ for them and I payed immediately, before he could change his mind. He then said, he had the rest which included the tank cart, look-like-new hoses, regulators and tip set. I was so exited that I forgot to ask if they costed extra, I later thought. He didn’t say anything, perhaps being satisfied having gotten rid of all that. Will post pictures later
Here are the first three images promised. What I’ll do is to put the older oxygen regulator in service and obviously use the newer acetylene regulator, after having mounted the old one’s check valve. Both regulators have Made in Germany cast onto them. So, I need not worry
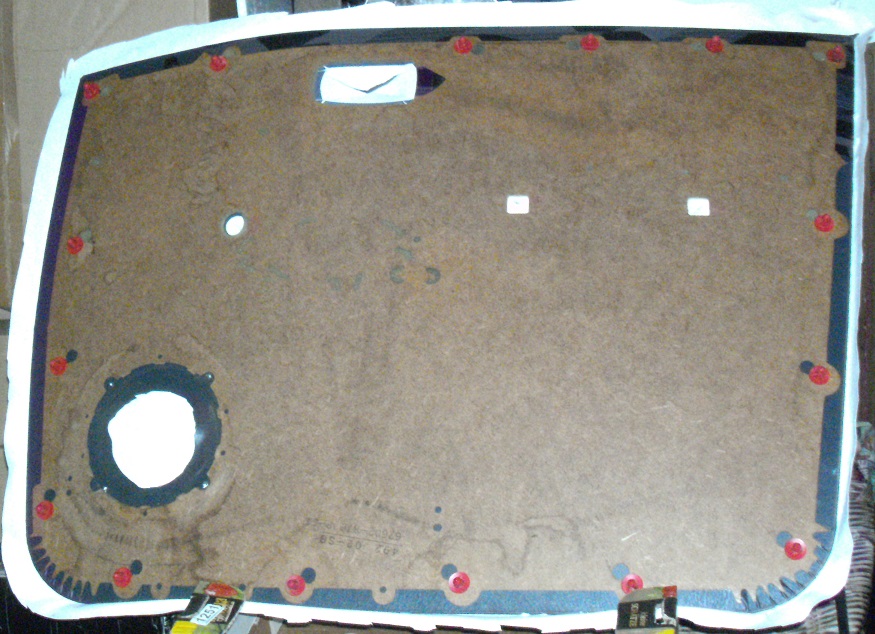
In the mean time, I have found white cloth which was flayed from a sofa. With this, I’m experimenting with lightening the interior, not only to reflect heat from this otherwise greenhouse cabin, without first adding window tint.
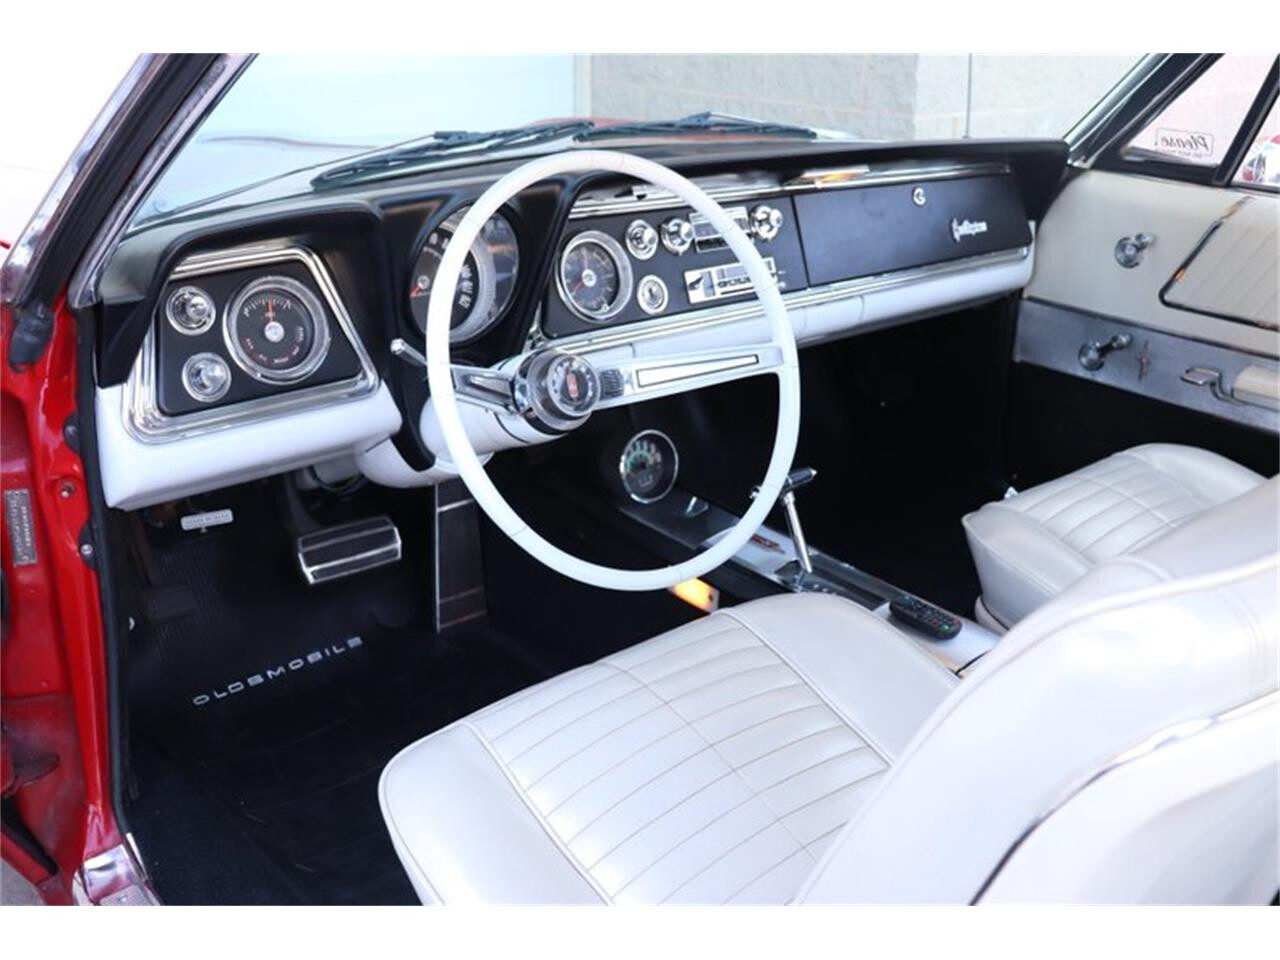
White has always been my favorite interior color. Red my second.
I once owned one of these, before it got stolen out of a garage. It was originally red, like this one. But, was later painted white, before I bought it:
So, I’ve got this cheap cloth, using it as a prototype. If it improves the appearance over the not so appealing original pattern, I’ll see about getting some higher-quality leatherette.
Unlike with analog cameras, this digital I now have decided to film the covered panel in black and white, despite the flash lighting it up:
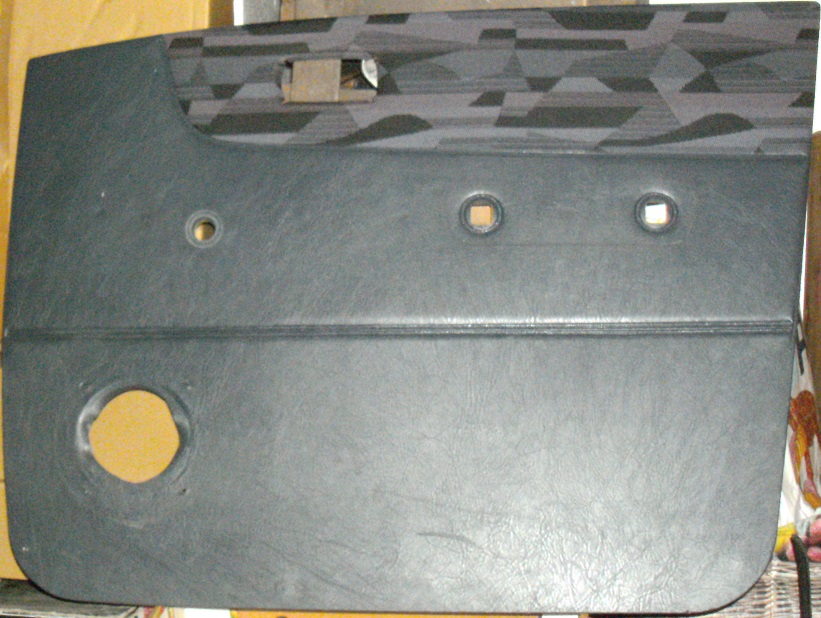
I’ve gotten around to snapping-in my panel. White and silver seem to harmonize. So, I think I’m in the right direction. I’ll have to somehow colour its armrest white and am not fully decided on what to do about the handle and its housing. The handle itself seems to be best coloured silver.
The last time I coloured an interior was with a spray can containing red vinyl dye. Nowadays, primer specially formulted to stick to plastic will be necessary for the handle and its housing. I’ll have to research the availability of vinyl dye
I could also try colouring these bits black, maybe. In any event, anything reflecting off of the windshield shouldn’t be painted white.
The white panel seems to make the grey bits stand out too much. In which case, I could either paint them black or paint the upper half of the steering column black and the lower white.
A black-coloured steering wheel from a later Cuore or YRV might also be an idea worth trying out, that is, if their airbags are electrically interchangable


