throttle body and fuel pressure regulator (adjustable)
1 Like
The following is an example of camshaft bearings applied in aluminium heads.:
I’m going to go through and see if I can find matching sets for mine.
I suppose, Japanese automakers see things from their own perspective, regarding ownership discipline. The way they build engines doesen’t seem to take into account irregular-and ignored maintenance interval practices of which traditionally do not relect Japanese traits. In order to keep a favorable reputation, European automakers offer replacements for surface bits of which are often subject to maintenace neglect
Here is a more appropriate set of bearings:
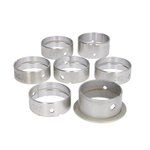
Unfortunately, there is neither technical reference given, as to which vehicle these bearings are to apply, nor measurements
only just read this but have you adjusted the tappets while hot at all? just a thought
1 Like
I adjust them cold, according to specifications for a 1973 Honda Civic 1200 cc engine of which most assimilates the EDs. I have even experimented with removing all of the play between rocker and valve for a short running period, to no avail. It still clatters despite.
Adjusting the valves cold has the advantage of adjusting all of the valves to one uniform temperature
2 Likes
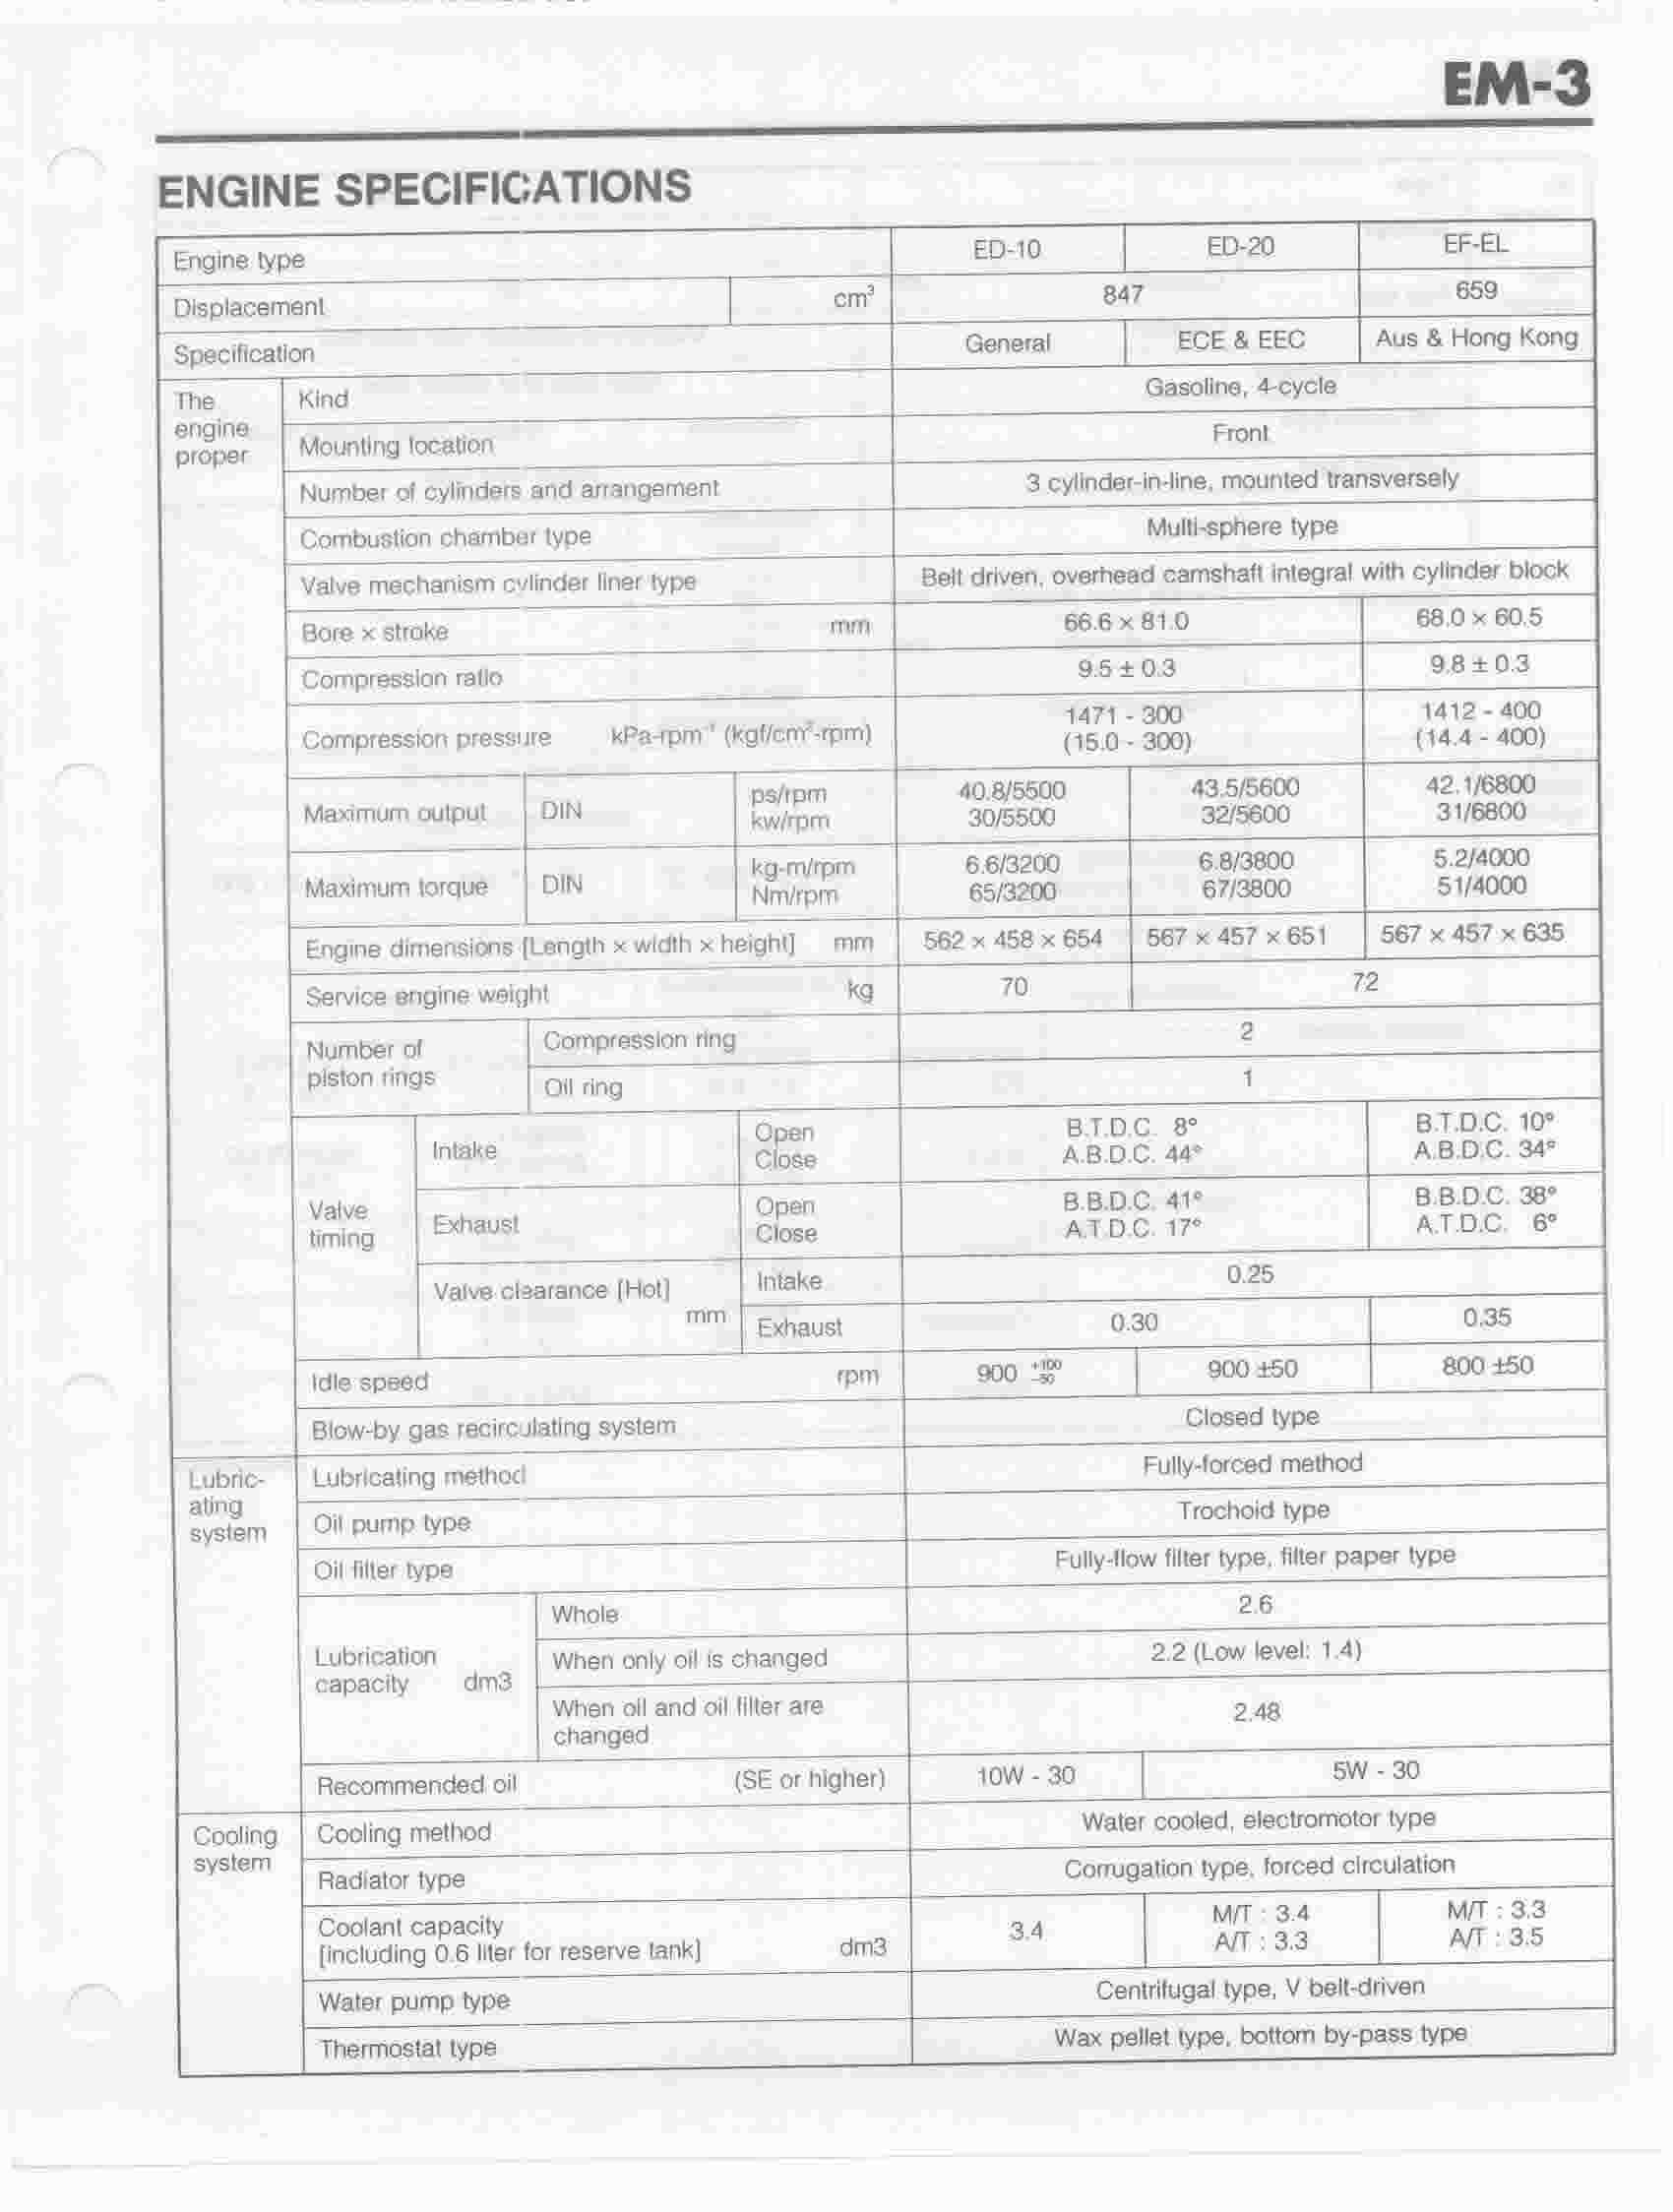
just saying as every dai manual i have read says to adjust them hot, the pic is for ED10, ED20 and EF-EL, it may be worth checking them when they are hot.
1 Like
I’m sure that Daihatsu has good reasons for setting them hot. What I could do would be to adjust them cold and then check them hot, in order to assure that the clearances are correct at operating temperature. That way, I could check all of the valves, before the engine cools down significantly
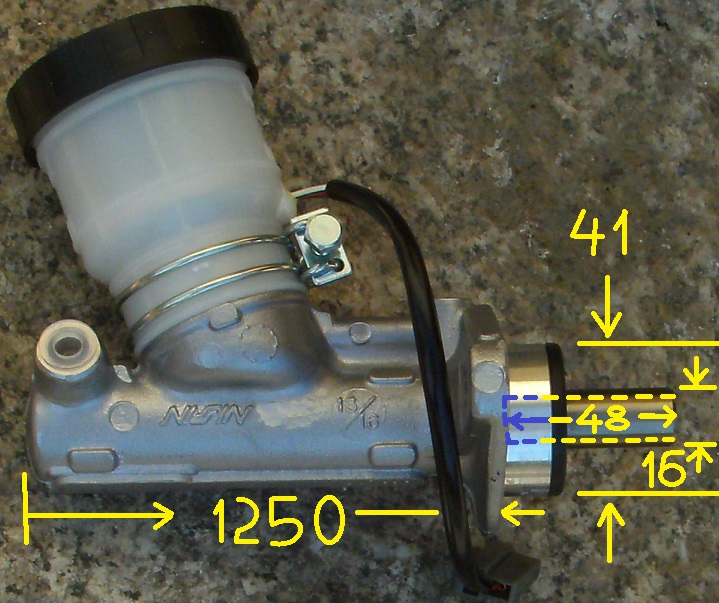
I’ve read in a German forum that when brakes get bled, it’s advisable to place an object between the brake pedal and the floorboard. Otherwise, the inner workings of the master cylinder could get damaged. Before I found this out, I bled the master cylinder as I have every other previous to this one. After a while, it did start leaking. Since the repair kit is no longer available, I found an entire Nissin master cylinder marketed as a “TRW” for 166.06 Euros (€) ![]() .
.
Because of the tightened restriction on breaker yards, I wasn’t able to visit one, with the intention of matching up a European or other Japanese cylinder of which I could make fit into my 601. For those facing replacement parts extinction, I’ve measured this cylinder in millimeters, before going ahead to mount it, assuming that relavent measurements would be identical between cylinders of both righthand- and wronghand ![]() drive:
drive:

3 Likes
Unless you are attempting a power squat on the pedal I am not sure why you would need something between the floor and the brake pedal. Bleeding brakes really needs the master cylinder to go through its full stroke. Limit that travel and one has an unknown stroke. Just be gentle. The return spring inside will not bottom out and the seal/s are not in compression. I guess if you pushed hard enough you would break the mounting flange off the cylinder (where the mounting bolts go through). I’ve seen them crack when this style of cylinder is used for a hydraulic handbrake and because the bore was mismatched to the rear wheel cylinders the user kept putting a longer and longer lever (plus short pivot) to make it work. And they broke not from bottoming out, but from the force trying to compress the fluid.
Any leaking is a seal and bore problem. Worn or scored bore. Or failed seal.
2 Likes
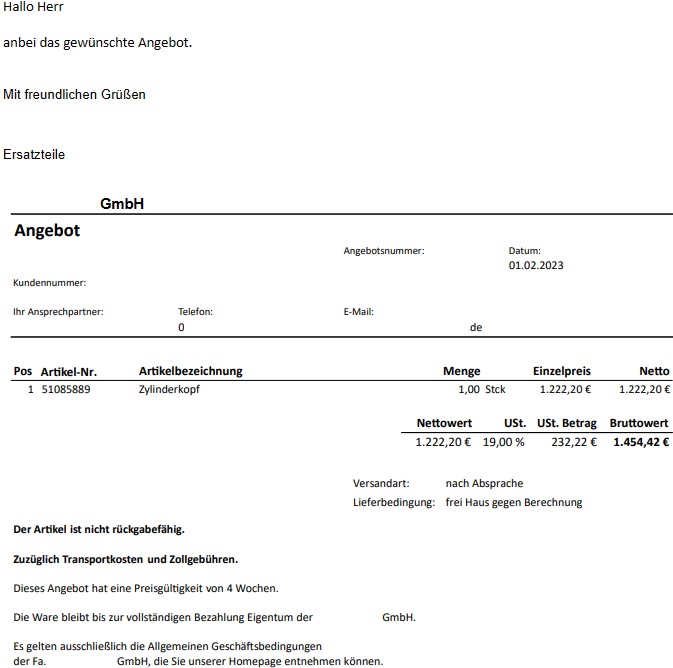
There were ED-10 engines advertised on this site which were modified for forklift use. Given that the camshaft journals on my cylinder head have taken a beating, I located a brand new cylinder head from a forklift dealer. I didn’t expect that just the casting would cost more than 500€. To my disappointment, their price adds up to nearly three times that, before import duties and shipment costs are levied.
51085889 is the part number given. Does anybody recognise this to be a Toyota number or could it be a dealer-internal number? For that price, one would expect a complete head inclusive of a new camshaft and valve drivetrain:
1 Like
All the forklift ed10’s I have ever seen have been way over priced.
1 Like
Perhaps, that’s because their owners are unaware of engine interchangabilities between these forklifts and Daihatsu automobiles.
I’m suspecting that the clerk who gave me that price thought I was Swiss, because I use a Swiss e-mail account. The Swiss have considerably more expendable income than do residents of Germany. Therefore, they are not as scrutinizing, when shopping in countries surrounding their’s. If I had used a German e-mail adress, he might have tried selling me only the bare casting instead.
I used the Swiss adress, only for getting answered whatsoever. When they think that there’s big money going their direction, they’re more likely to go out of their own way, to accomodate
2 Likes
Inspired by the following thread: Livetodai group on facebook! - General Chat - Live To Dai , I have performed some minor cosmetic updates, taking the opportunity of exploiting my 601’s silver colour of which made painting the universally-issued black-coloured door handles to match the rest of the exterior:
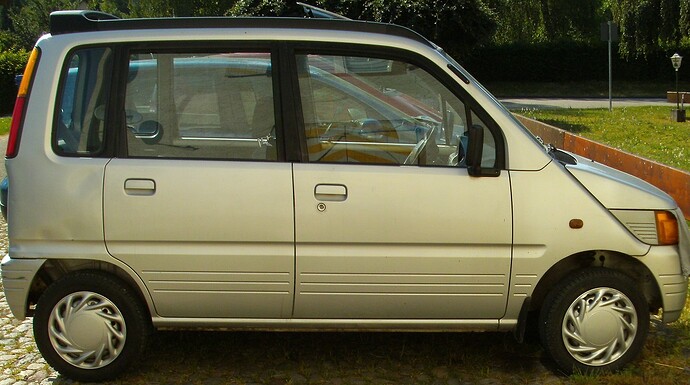
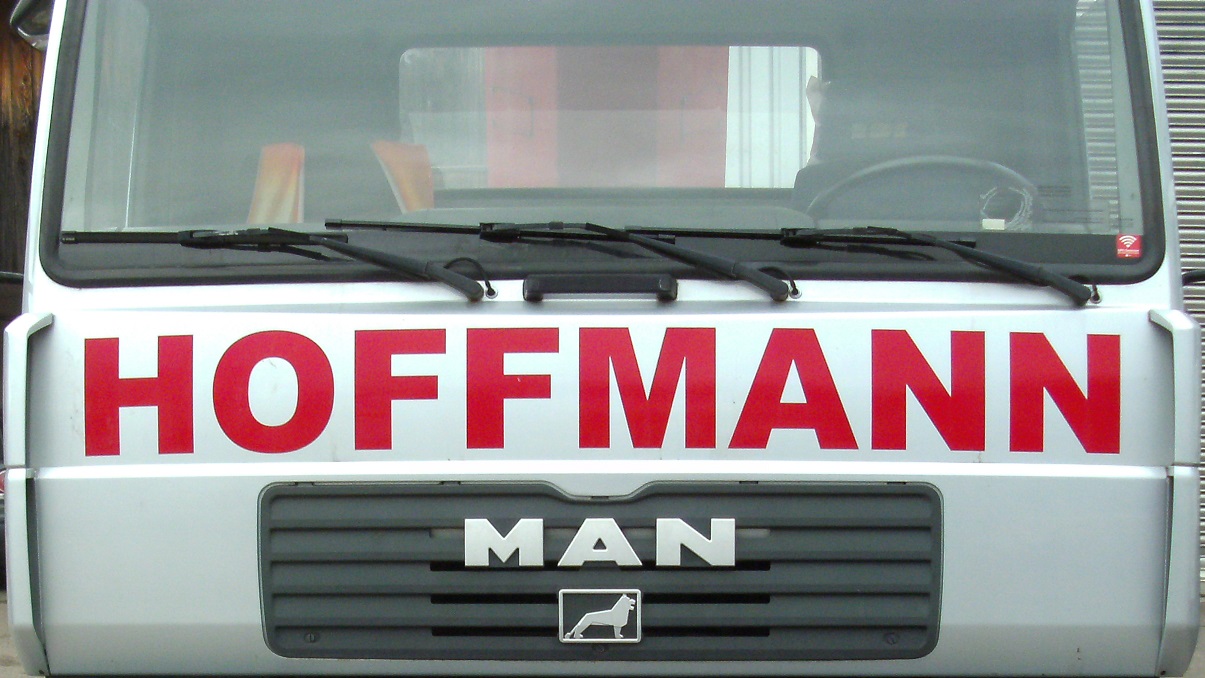
Next, I will step overboard, experimenting with combining dark red with silver, inspired by the following vehicle of which prods me with a constant reminder to do so, each time I pass it by:
I have purchased vinyl wrap of which I will begin colouring the outter most door frames of which are adjacent to the silver-coloured roof. Reddening the door frames adjacent to the B and C pillars might be going too far, downgrading the elegance displayed by the blackened out present factory-issued wrapping.
Sooner or later, I will need to adress the paint deterioration inherent to silver. Since this vehicle no longer enjoys garage protection from ultra-violet bombardment, the bonnet has begun discolouring. Instead of covering failure with programmed failure, professional vinyl foiling resistant to the above-mentioned deterioration may be the answer.
A popular colour combination of silver and gray or anthrazit is often featured on these little Swiss buggers:


It would suffice applying gray or anthazit foil to a 601’s bonnet and side doors or even just the bonnet itself, for starters
3 Likes
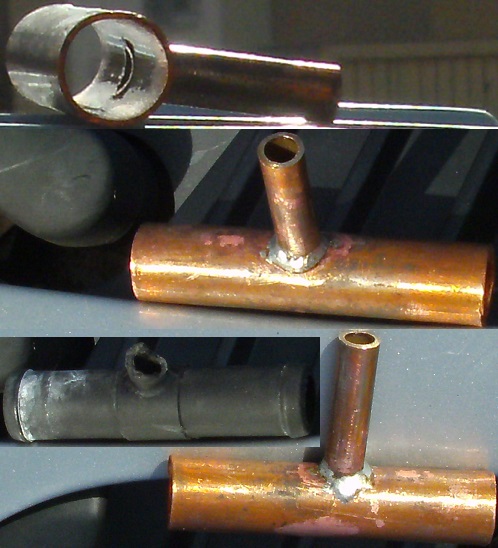
On the Facebook livetodai site, it was twice asked as to where original plastic T-fittings are available for connecting the heater hoses to the throttle body’s anti-icing circuit.
I replaced one of which I broke while draining as much old coolant as possible. Being one who reluctantly discards things, I was lucky to have copper piping measuring 8 and 15 mm available. I simply copied the original and soldered them together, taking care to slightly flair all connecting ends, in order to avoid the hose slipping off:
4 Likes
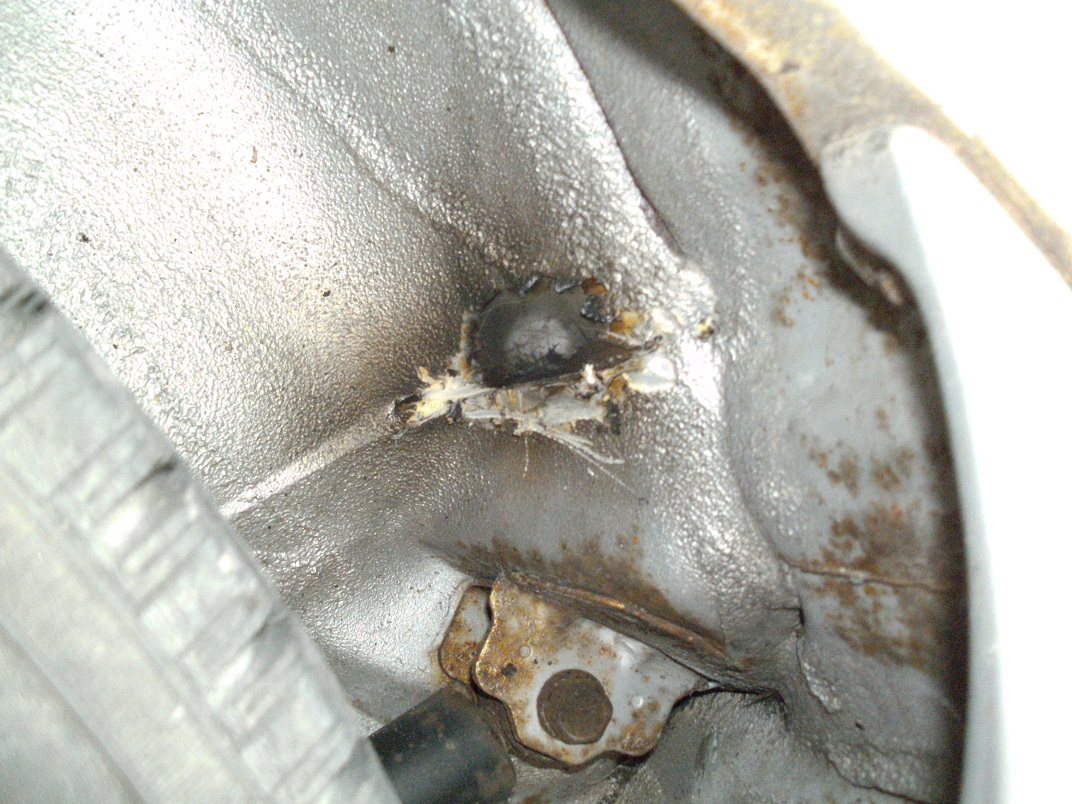
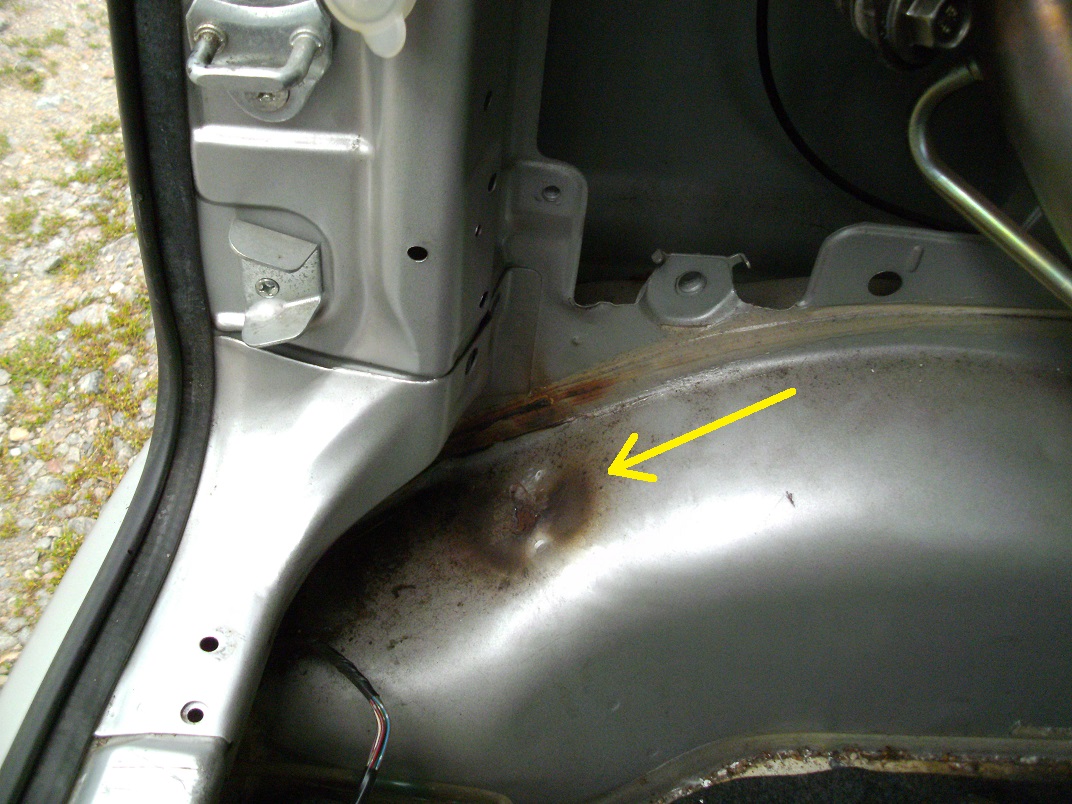
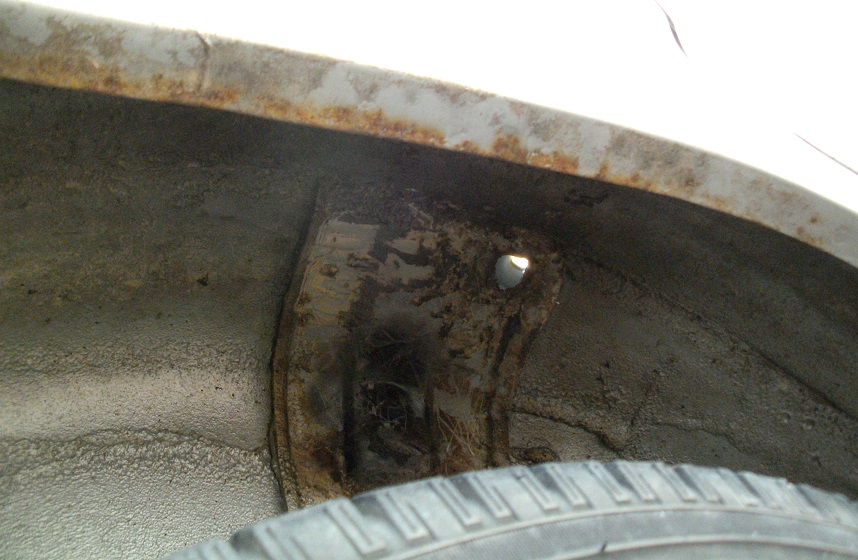
While in the process of bumping out a few dents, a typical Daihatsu owner’s horror scenarion was discovered. This vehicle’s only rustthrough has taken place where unercoating was added.
The first two images show where moisture was trapped behind a crack in the undercoating which covered a seam on the vehicle’s left-hand side.
My plan is to melt all undercoating covering critical areas and then braze shut damage and vulnerable seams.
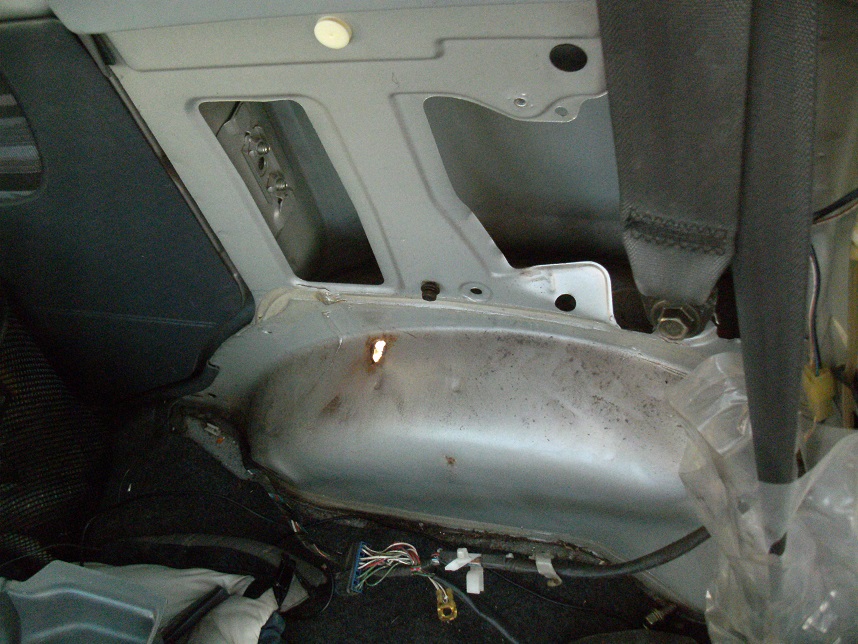
Constructing inner fender wells will also be attempted
3 Likes
While in the process of trying to secure a set of oxygen and acetylene tanks required for brazing, I began fabricating anchoring for accomodating a set of inner wheel wells.
The original bolts are hardened to the point where drilling and tapping isn’t possible. These 11 mm bolts seem over-engineered, given the thin sheetmetal plates of which are supposed to serve as anchoring points. Each of these bolts would be strong enough, to hold up the entire vehicle. Maybe even several of them simultaneously, without breaking. Any crash momentum would, in any case, get divided between 3 anchoring points. Therefore, I felt assured that the maleable steel I’ve selected would be strong enough to secure anybody weighing in at below 400 lbs.
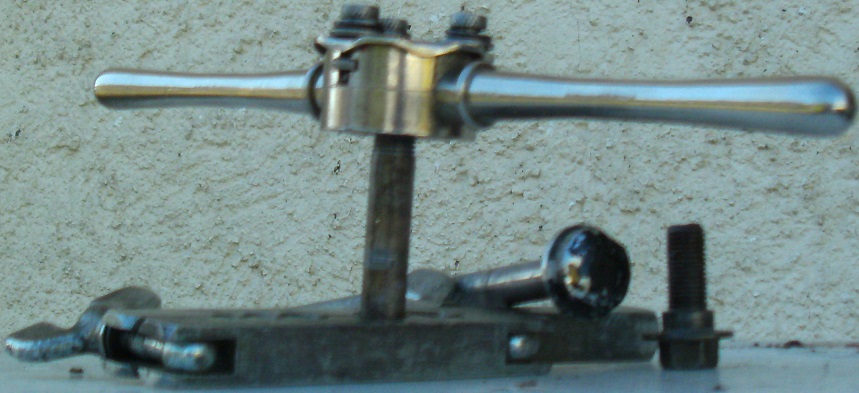
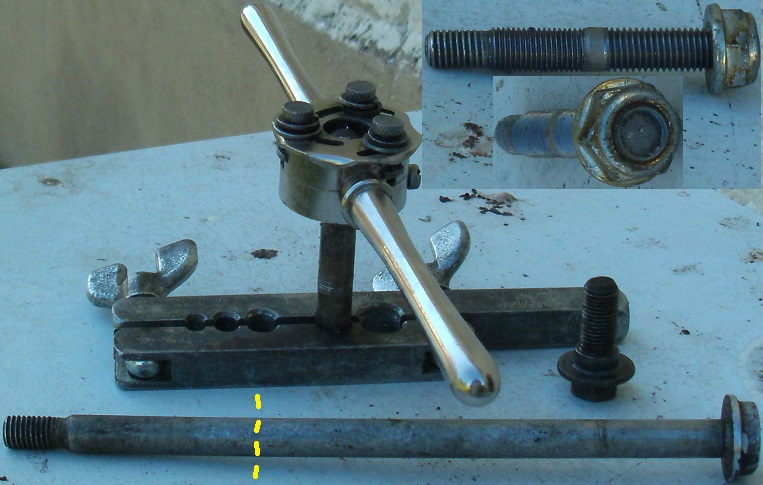
I had a sawed-off wheel axle bolt left over from an East German moped. The severed end was left over from when I raised my driver’s seat, back then, detailed in my first thread. The 10 mm x 1,5 mm threads were already cut from the factory. Despite being somewhat oversized for the light duty of which was planned, I chose to use this, as a matter of convenience. All I needed to do was to spin the 11 mm x 1,25 mm cutting die over these threads and then resume cutting threads to the original bolt’s length. The original hardened bolt was no match for the salt which was able to weaken it through corrosion anyway. Therefore, no guilty feelings were left, on my part. Daihatsu is Japan’s oldest engine manufacturer. But evidently, they never seemed to mature as much, concerning design expertise with sheetmetal and corrosion prevention.
Anyway, I cut the remaining end with the only available 11 mm die of which I could match with an 11 mm tap contained in my set. The cutting of the 1,5 mm thread was much easier and produced much less heat than the cheap over-the-internet-counter finer die (A quality die would have cost a comparable small fortune. I didn’t foresee needing to use it more than once, when buying it. Otherwise, the investment would have been well worth it).
I then made use of a nut of which I found on the roadway. It was within 10 mm. Probably, in inches or Whitworth, given that it matched none of my bolts. The fit was somewhat sloppy on my 19 mm spanner. So, I’m sure that it was forged for accomodating a 3/4" tool. I then tapped it out to the 11 mm x 1,5 opposing thread and added a spacer matching the just under 14 mm original bolt’s shank
2 Likes
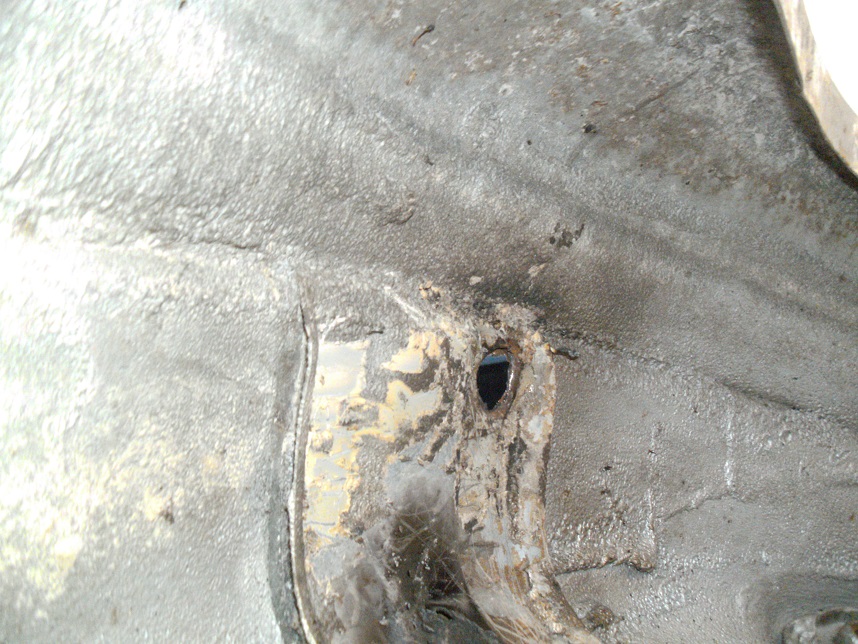
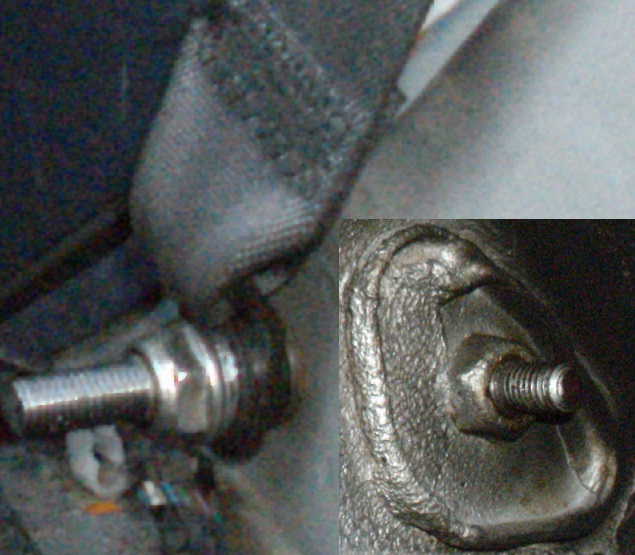
Here’s a close-up of the lower right-hand side’s fastener. I’m guessing, that side took the brunt of corrosion, because saltwater tends to drain and accumulate on the right-hand side of the roadways here.
Underlined is the seam of which I will properly braze shut. At the very right of this seam is where minor rust has started. Luckilly for me, removing the plug from the supporting structure’s chamber revealed only surface rust
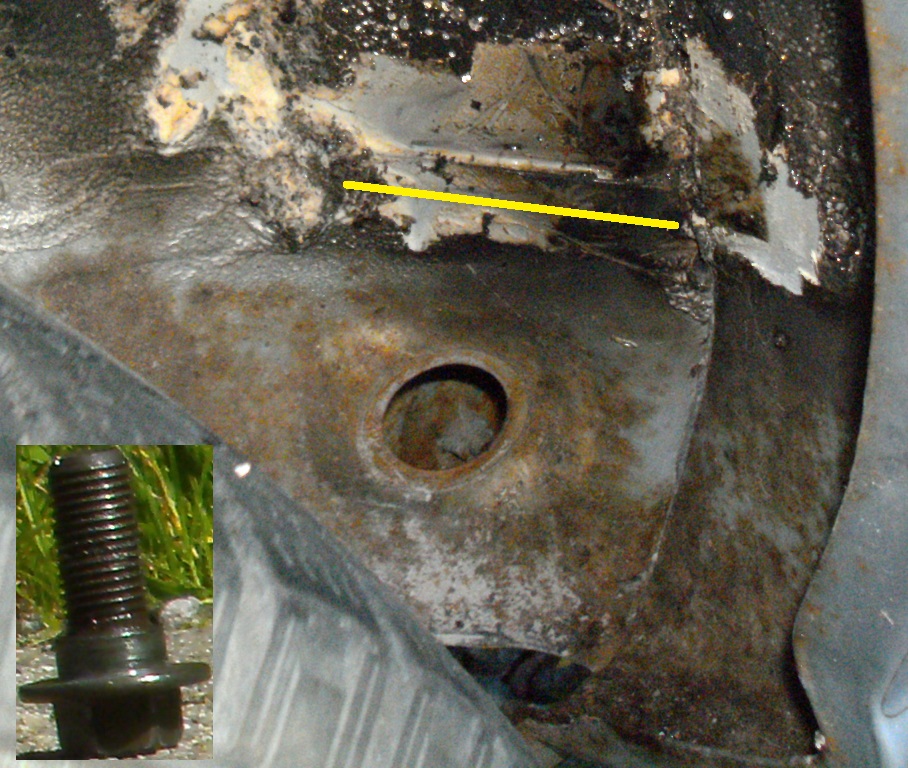
It’ll soon be time for cutting down this stud, so as to not attract negative attention during the next M.O.T. session.
I’ll have to figure out how I will cast a mold for melting a plastic sheet around it. I’m contemplating on using foam for this and then filing it down to scale
3 Likes
Here are images from endoscoping the first cylinder behind the belt. The honing marks are still vividly visible. The vertical scratches seem quite ominous, though:


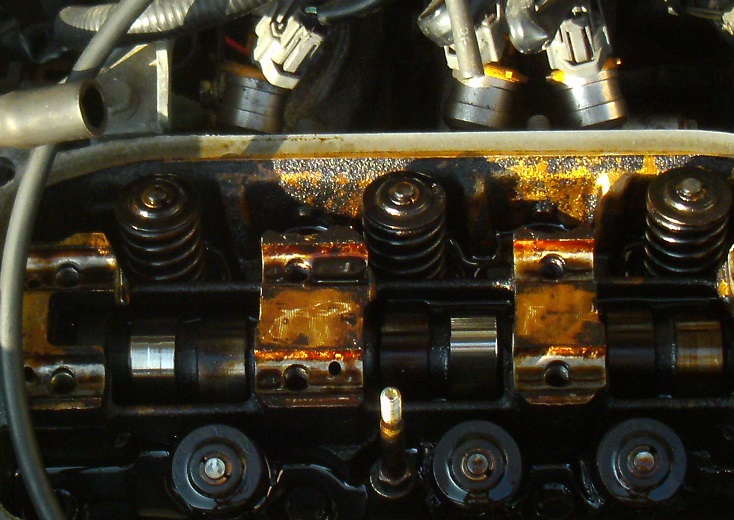
I also removed the rocker arms, so that I could determine if play was to be found between the cylinder casting and the camshaft.
The lobe nearest to the belt was damaged, as shown by the arrows. A sharp ridge of original height was left behind on the cam lobe. I will photograph this lobe, tomorrow when the sun hits the front of the vehicle


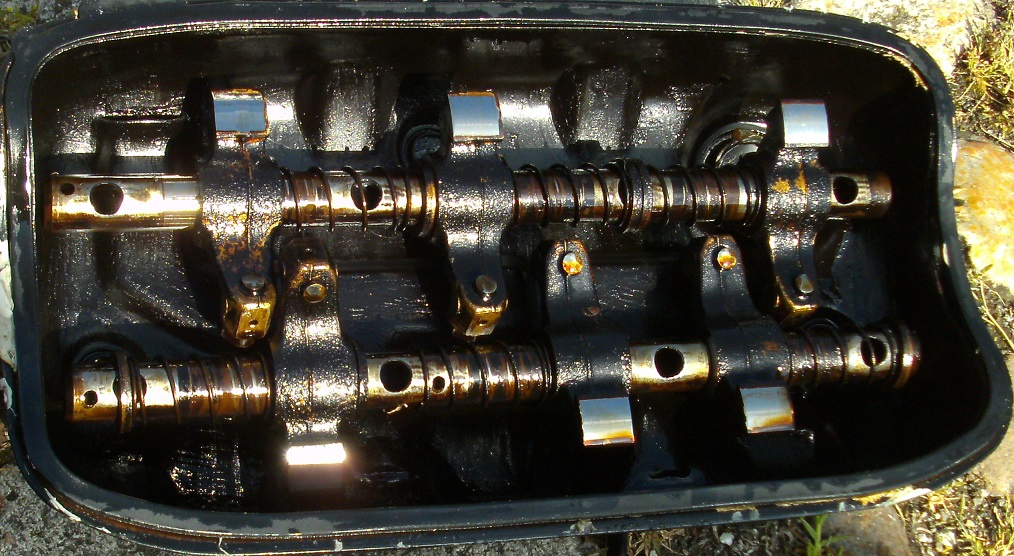
I could physically move the camshaft within its bore, when heftilly pulling the driving gear straight up and down. However, I couldn’t get it to noticably budge, when applying sideways pressure
1 Like
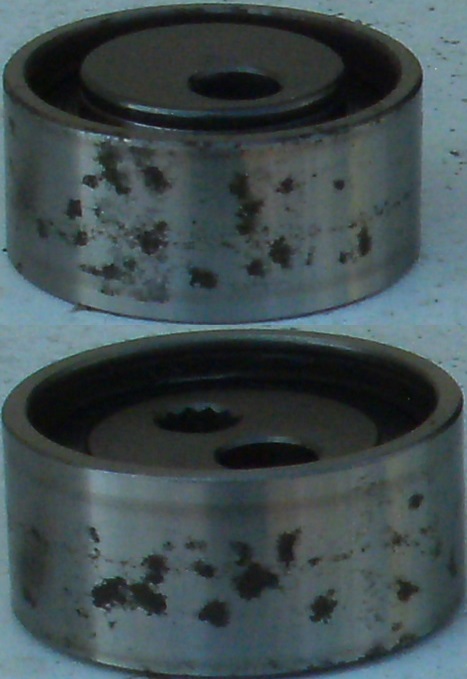
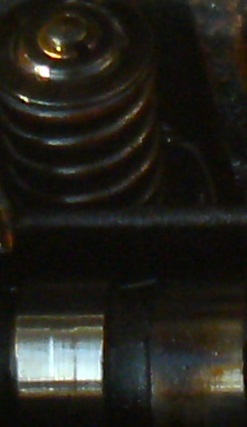
The wear on this particular lobe seems quite strange, not setting an even pattern across the surface:
What’s also strange is the rust pitting on an otherwise low-milage tensioner. You would normally expect SKF to use higher quality materials. No country of manufacture is labeled onto this part. I’m wondering, if SKF has stepped away from manufacture, only to establish itself as a parts forwarding company, much like TRW has done. At first, I thought, rubber dust was simply clumping onto bare metal, initially suspecting poor rubber composites: