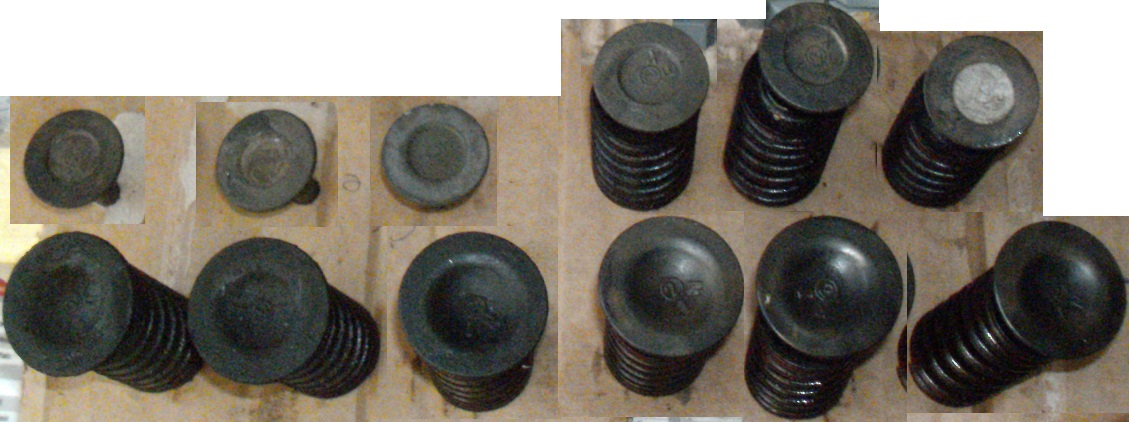
Here are both valve sets from both engines. From left to right, the valves are lined up starting with cylinder 3 going forward. The set on the right were removed from the acquired head where the exhaust valve covered with white residue is to be seen:
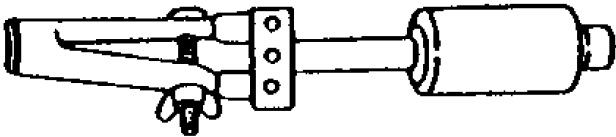
Having two seals on the middle cylinder to pull gave me an excuse for fabricating a tool similar to what the factory manual illustrated:
Having kept a defective light-alloy bicycle bit which removed itself from a handlebar-holding stem, it became the best candidate I had available for use:
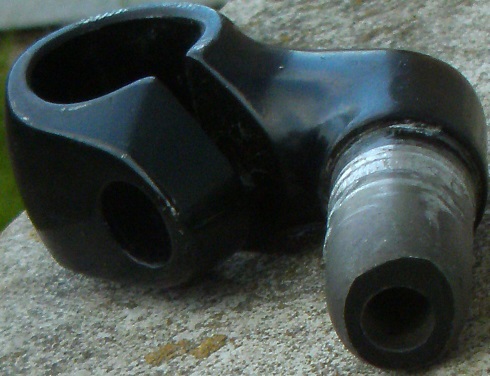
I drilled it out to 12 mm which is the diameter of the valve guides, before finally drilling it out partially to 13 mm which is the seal’s outter diameter ([color=yellow]T[/color]), leaving a ledge which should grab the seal from underneath. Having access to a Dremel, I’ll square-off the tapered ledge 90°, in order to assure a propper grab.
[color=yellow]X[/color] is where opposing screws are to fasten the threads shown. Of course, the thinnest brass nut I could find (11 mm) will keep the tool integral, while hammering. If I had access to a 14 mm wood drill bit, a common 12 nut would have fit, not needing to Dremel the ledge:
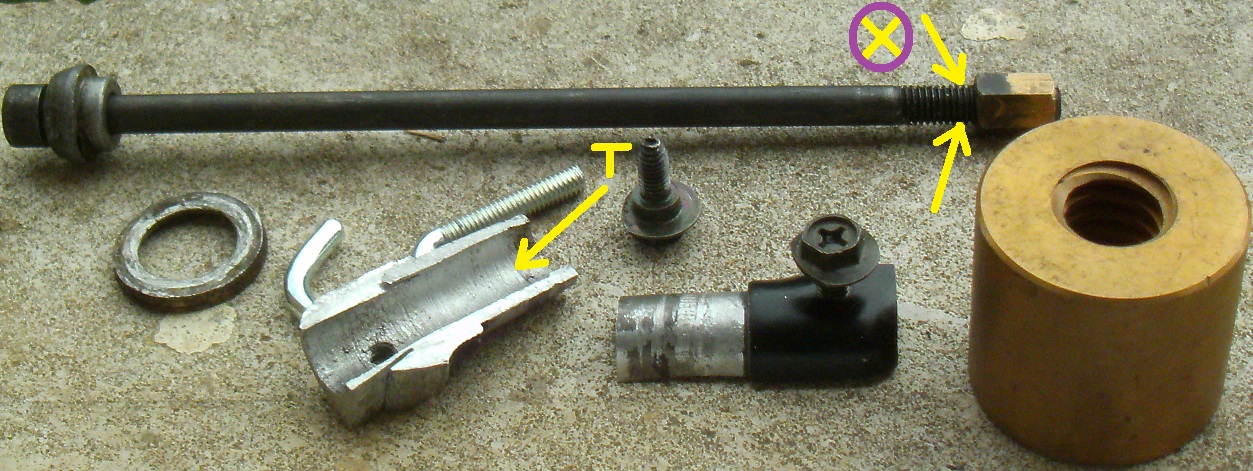
The ring is supposed to act as a pivot, locking the tool onto the seal’s base:
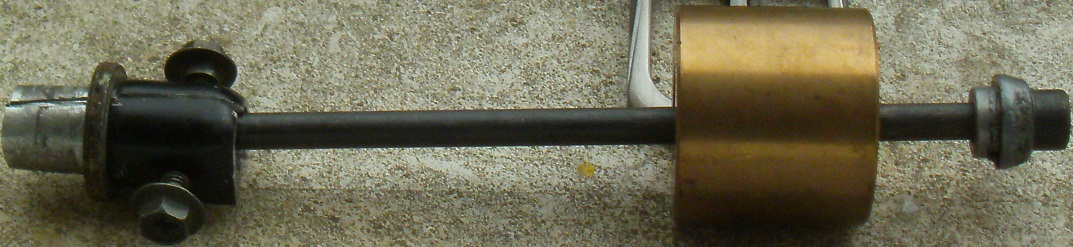
It’ll need some trimming down, later on when I’m finished using it:
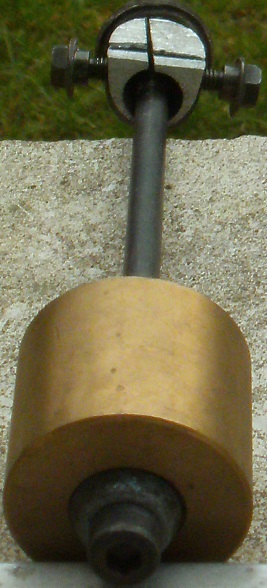
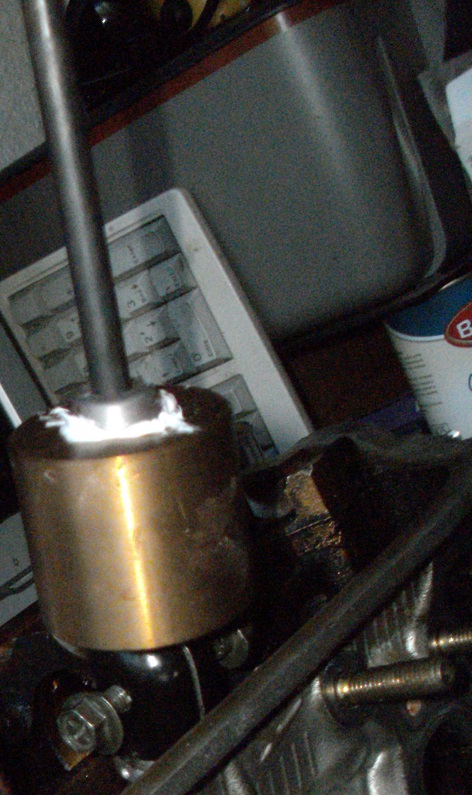
It’s now trimmed somewhat and a second light-alloy bushing has been introduced, gluing both onto each end of the brass hammer, using silicone:
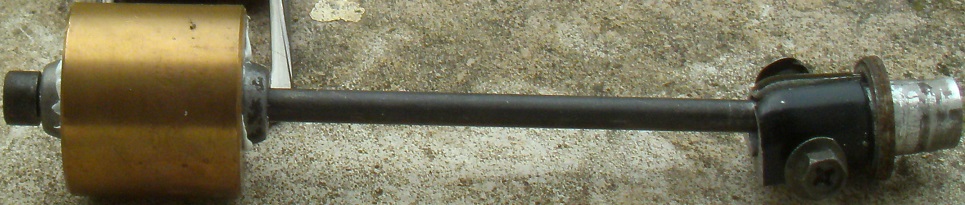
I ended up modifying it even further. A 2 mm hole needed to get drilled through opposite sides of the retaining ring, after it was filed down to the valve spring’s buffer plate’s diameter. I’ve got a propper spring for spreading within that ring somewhere. In the mean time, I bent a paper clip to fit which does the job for now. This enables me to pull the ring upwards up to the edge where it’s to serve as a pivot.
X is where I had to Dremel the ring into a V shape, allowing both tool halves to fit over the seal. That’s how tight working space is on these.
As I was shaping the tool, I didn’t regard the seal’s entire dimension, until I went to test it. It was then when I had to go Dremel accomodating grooves at Y:
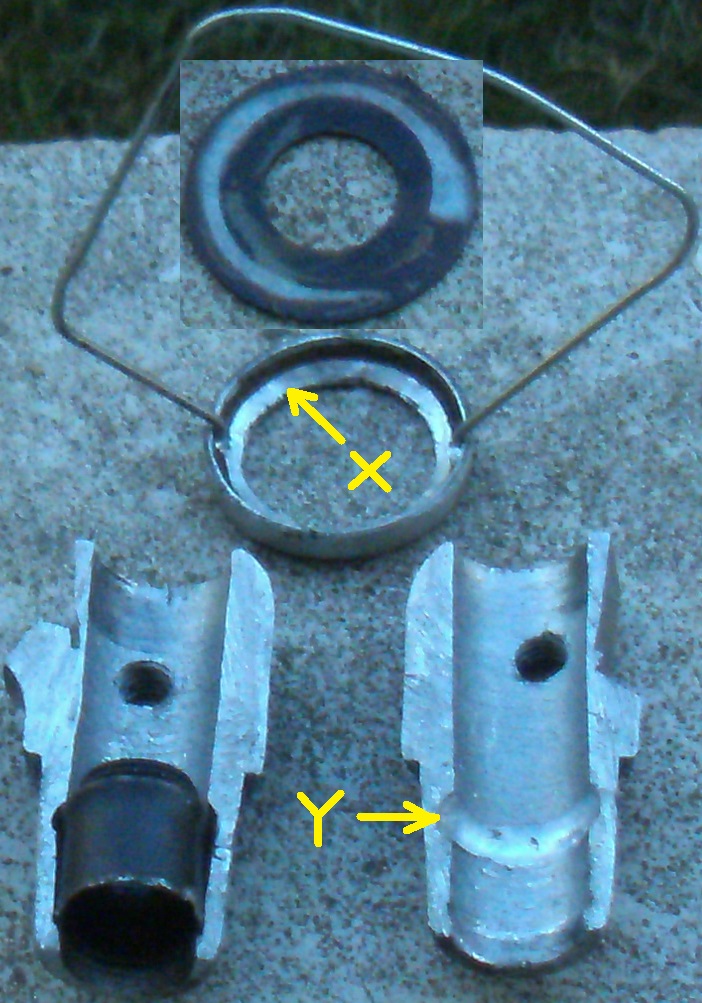
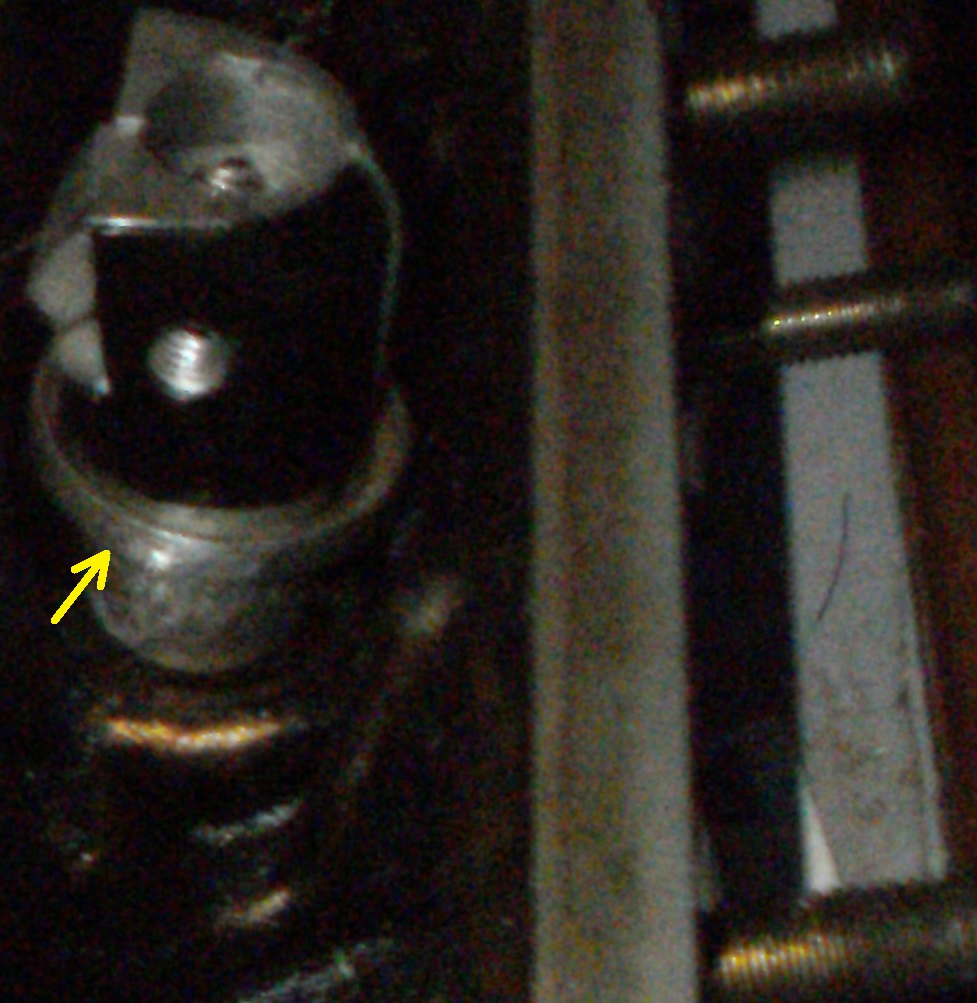
Here’s the tool’s end mounted onto a seal hammered onto the original head. The arrow’s pointing to the pivot ring placed where it’s supposed to be:
1 Like
Both remaing seals were successfully removed. They were quite stubborn, requiring at least 3 hammer strokes each. A mounting tower cast onto the exhaust side of the head required a much shorter retaining bolt, in order toclear this tower. A photograph is pending.
Again, the tool is shown ready for use, with the pivot ring in place :
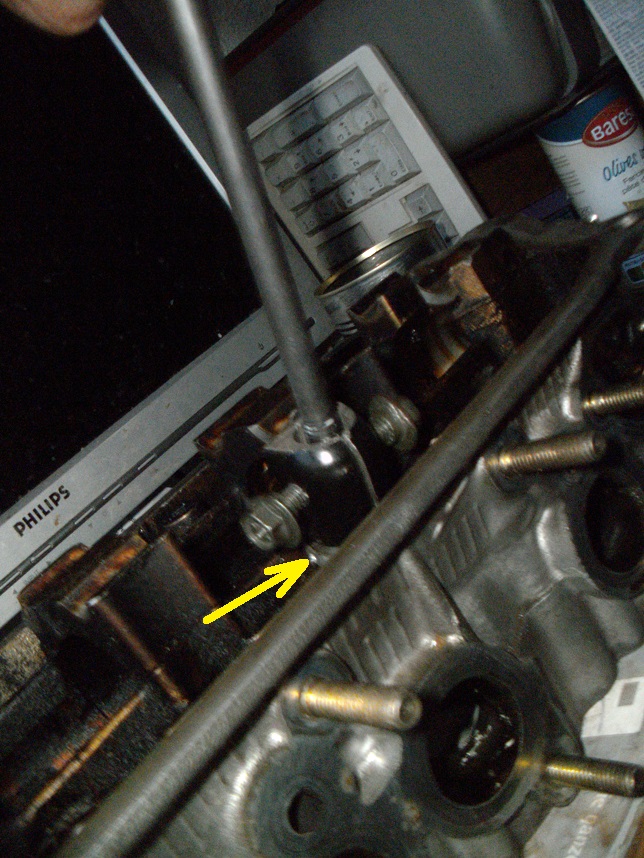
Of course, this tool is only usefull with the head off. To use it wiith the engine installed a longer clamp will be needed, since it would have to clear the valve’s stem.
Previously thinking that the difficulty in removing them was the result of corrosion having developped between dissimilar metal bonds, until an accidental magnet-application discovered that the valveguides on these were some sort of iron-based alloy, to my disappointment, because the best way to reduce wear between objects that rub against each other would be to manufacture each using completely different metals of which bronze would have been ideal, as done with expensive brands. Unfortunately, manufacturing a million EDs with bronze valveguides as opposed to manufacturing these with cast iron would require six million bronze valveguides which would considerable increase production costs. More so these days, because of the demand for copper which has risen significantly.
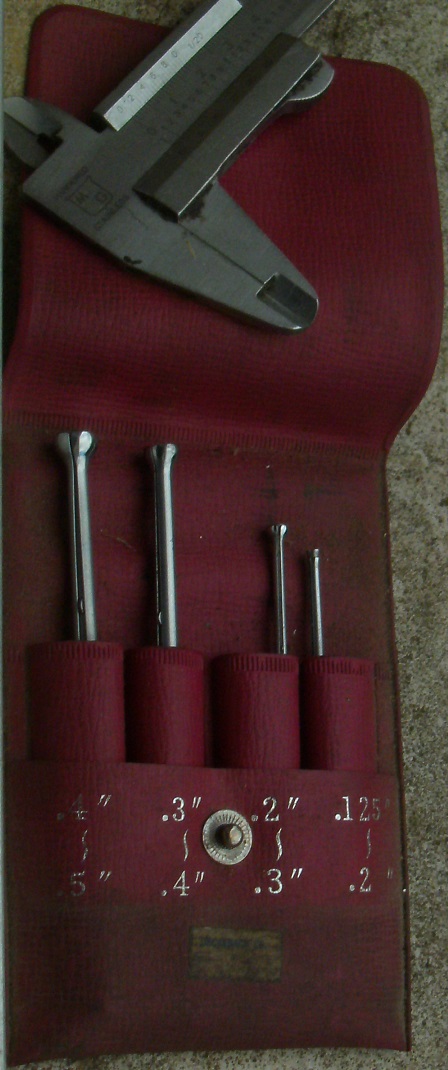
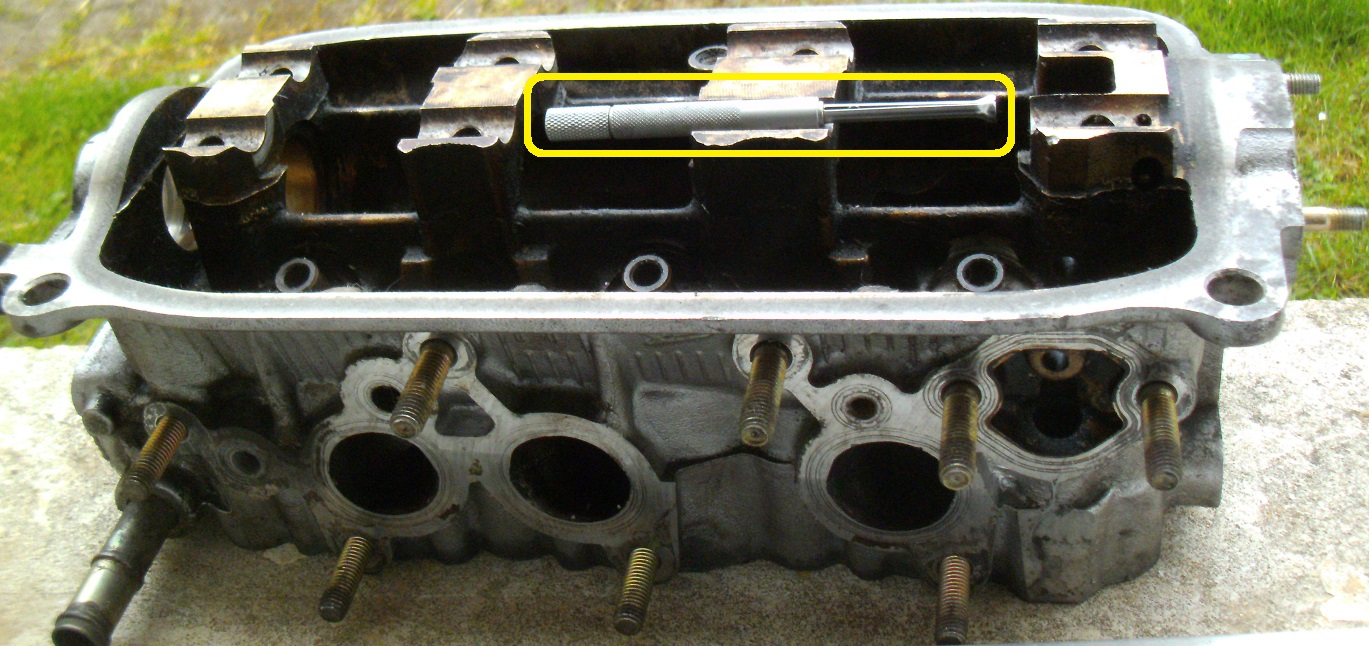
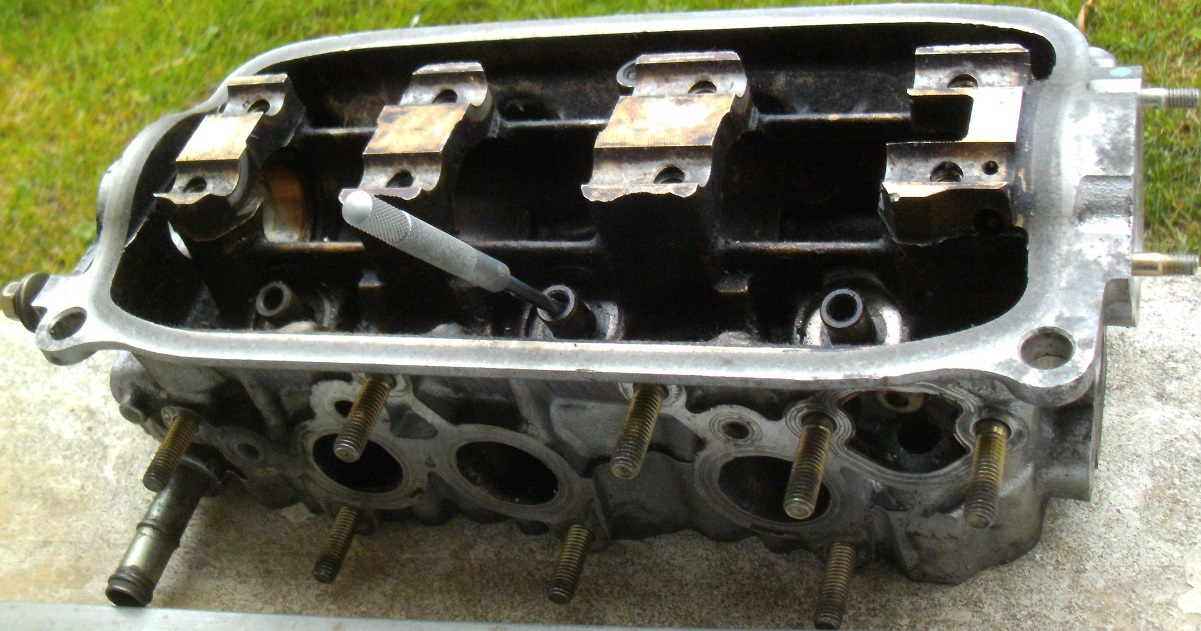
I happen to still own a set of internal measurement calipers of which I used for measuring each valve guide. Being that they’re round, I can only measure distances which haven’t been subject to the constant friction of which a rocker arm loads onto a valve stem, when a wheel isn’t placed between them for greatly reducing this lateral force:
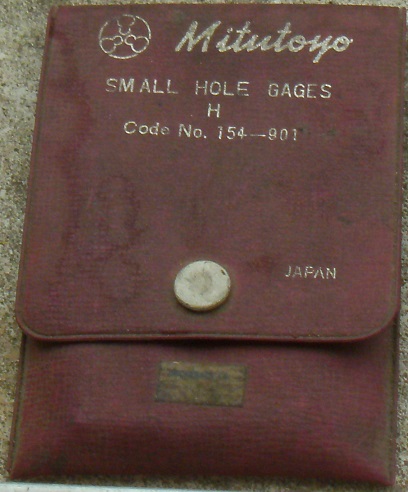
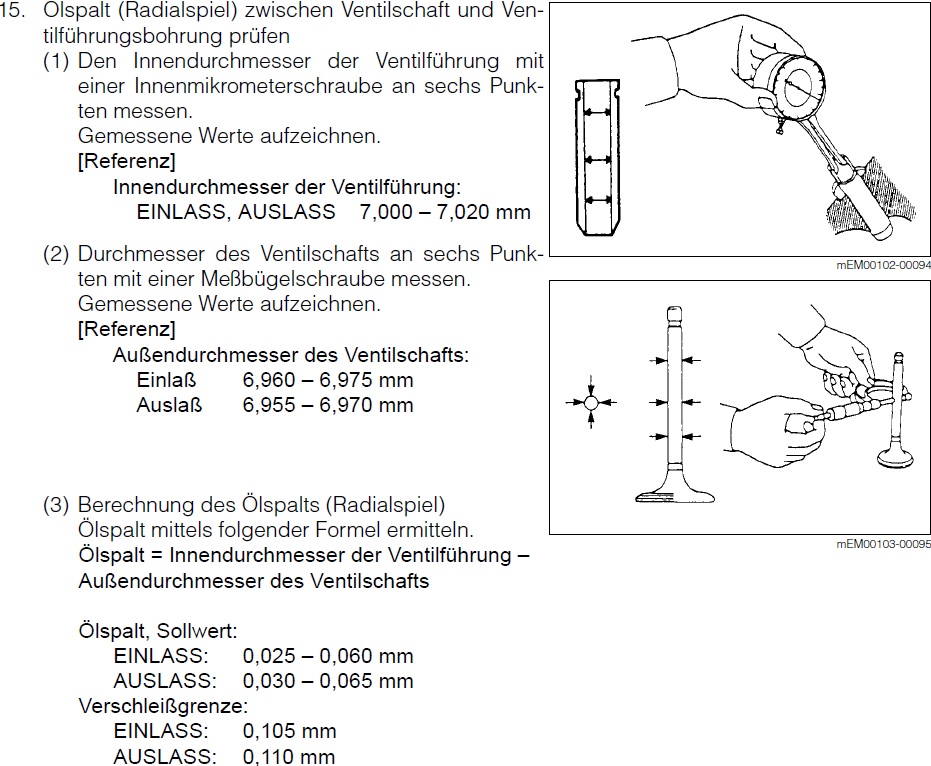
Since valve guide wear causes valve guides to wear in an oval shape, the following measuring instrument pictured upper right would be ideal, albeit quite expensive:
1 Like
During the last engine rebuild I did, it was in highschool shop class where I rebuilt my own engine. Without measuring any valve guide, the shop teacher simply brought out a knurling tool and reamer.
Without investing in a propper micrometer of which I’ll likely only use once, I’m going after a knurler which dosen’t seem to be a popular toy, over here in Europe. I’ve located a used 7 mm reamer, to be used after knurling, of course. But, I think that it wasn’t intended for valve guide use, being visually too short:

The best I could come up with was this 7.1 mm knurler available from the Ukraine:
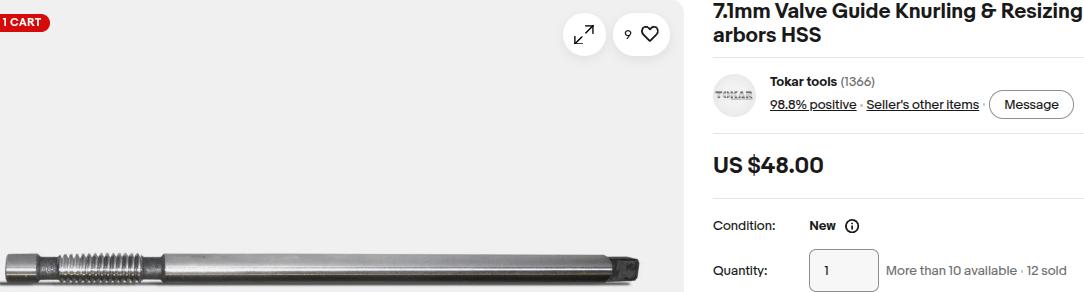
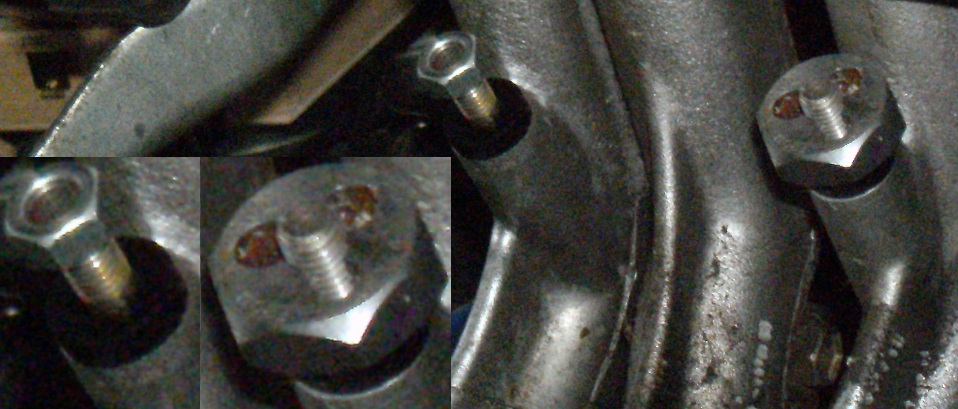
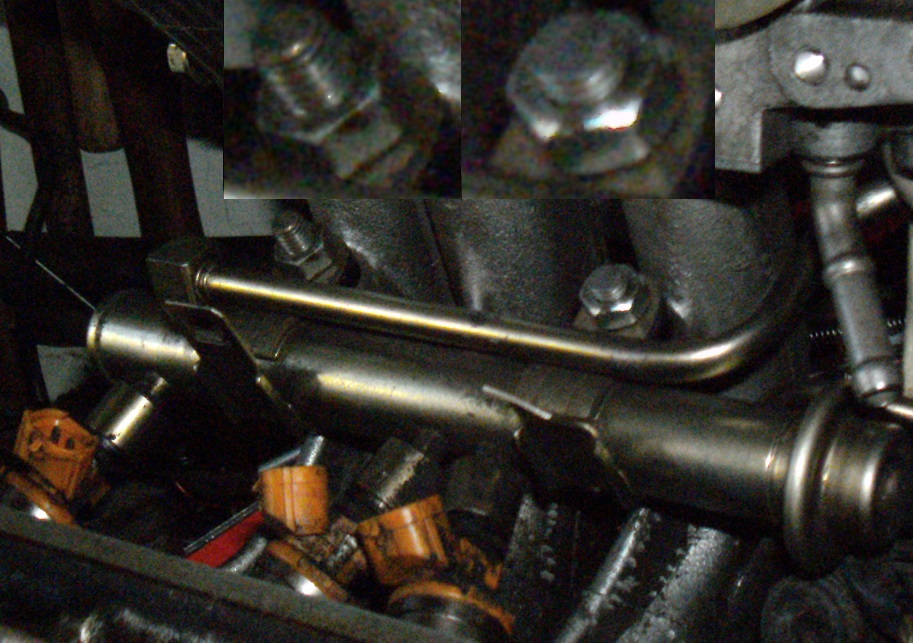
While I look everywhere for an available knurler tool, I went ahead and shortened the right side stud on the intake manifold which holds the fuel rail, so that I can install it, without causing metalurgical fatigue through bending it back and forth. Cutting off 5 mm sufficed and should be a must-do on all fuel-injected EDs:
2 Likes
A knurling tool which I ordered arrived this week. This is this project’s turning point. I can now straighten out each valve guide and proceed to lap the original valves from this vehicle into the replacement head. Here’s the tool demonstratively placed into a valve guide. I’ll do another photo session under better lighting, tomorrow morning, when the sun hits my window:
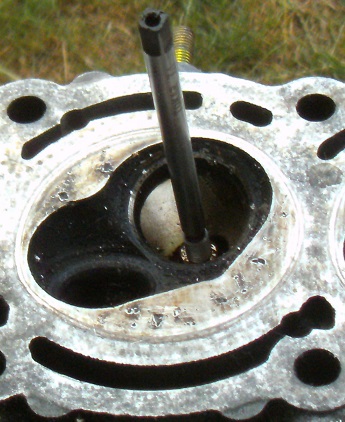
I’ll be starting from the combustion chamber’s side, as pictured, because of how these guides typically wear, taking the brunt of axial pressure at the top where the rocker arms move across the valve’s stem, leaving an eccentricly-worn cone. Starting out where the guide is least worn will guarantee that the tool gets aimed through the guide’s center.
The tool was simply placed into that guide, without beginning to turn it. It stopped somewhere in the middle of the tool’s threads, indicating that the 7.1 mm choice was appropriate. For guides that are worn to higher severity, knurling tools are available from this company in also 7.2 mm and 7.3 mm increments.
Even though the price is set in U.S. $s, I was able to pay in €s, having dealt directly with the company. They were very helpful and patient with initial payment difficulties which had to do only with my bank’s procedural methods of which I needed to visit the nearest bank in person for getting a personal tutorial on how they set up international payments in general, given that chat bots and cryptic website designs posed obstacles to those who don’t have programmer mentalities.
They catalog a variety of engine rebuilding tools. I highly recommend them, especially given that these prices are comparitively modest
2 Likes
Having taken better images, I will proceed with first testing this tool on the scrap head, before proceeding with the one destined to get finished, once I’m confident of getting it right.
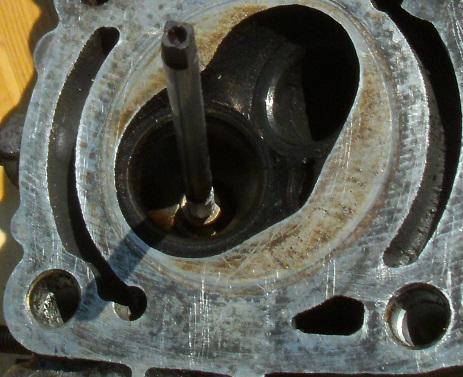
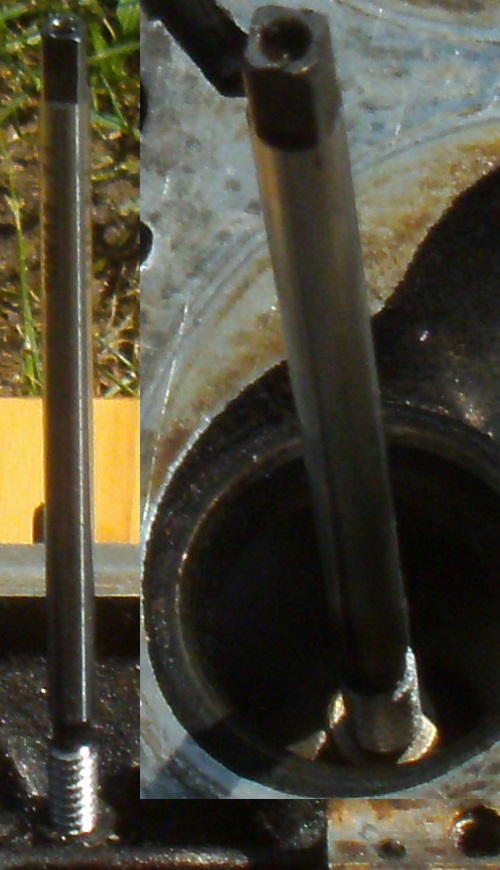
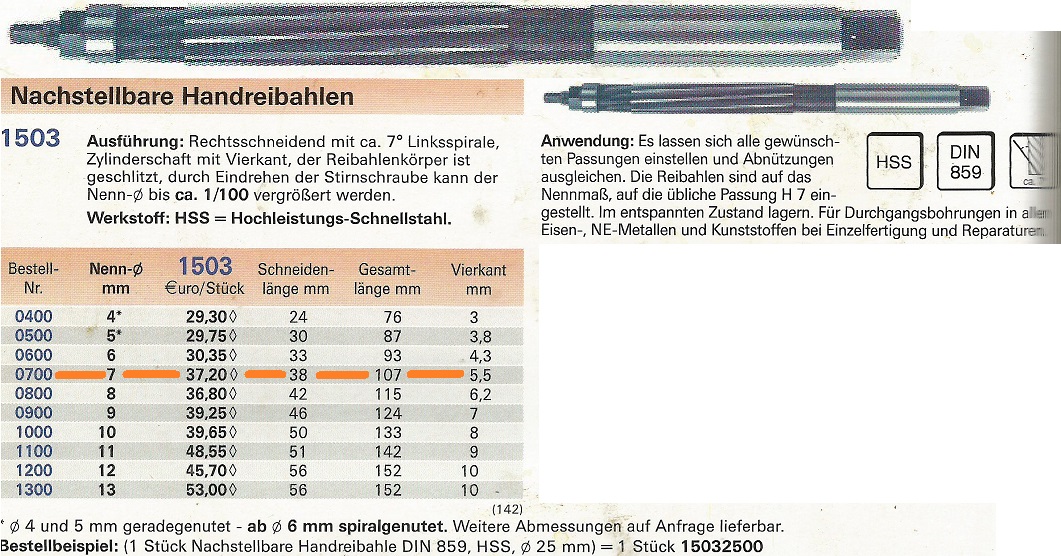
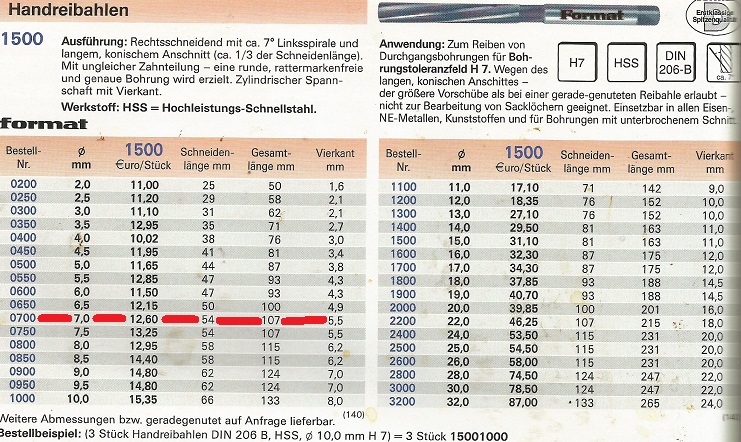
The 7 mm reamer I have seems both too short for this job, as well as improper for reaming by hand. It appears to have been designed for lathe use. Therefore, I went and looked through an older catalog that was given to me by a retail tool supplier. I now realize how lucky I am to have kept this catalog which features the best reamer type possible which has an adjustable end for centering the tool within the knurled bore, assuring that the tool doesn’t wander off to one side. I will then get in contact with a salesman who requested identifying the needed tool. If available, I will then purchase it personally, avoiding any mistaken internet purchase:
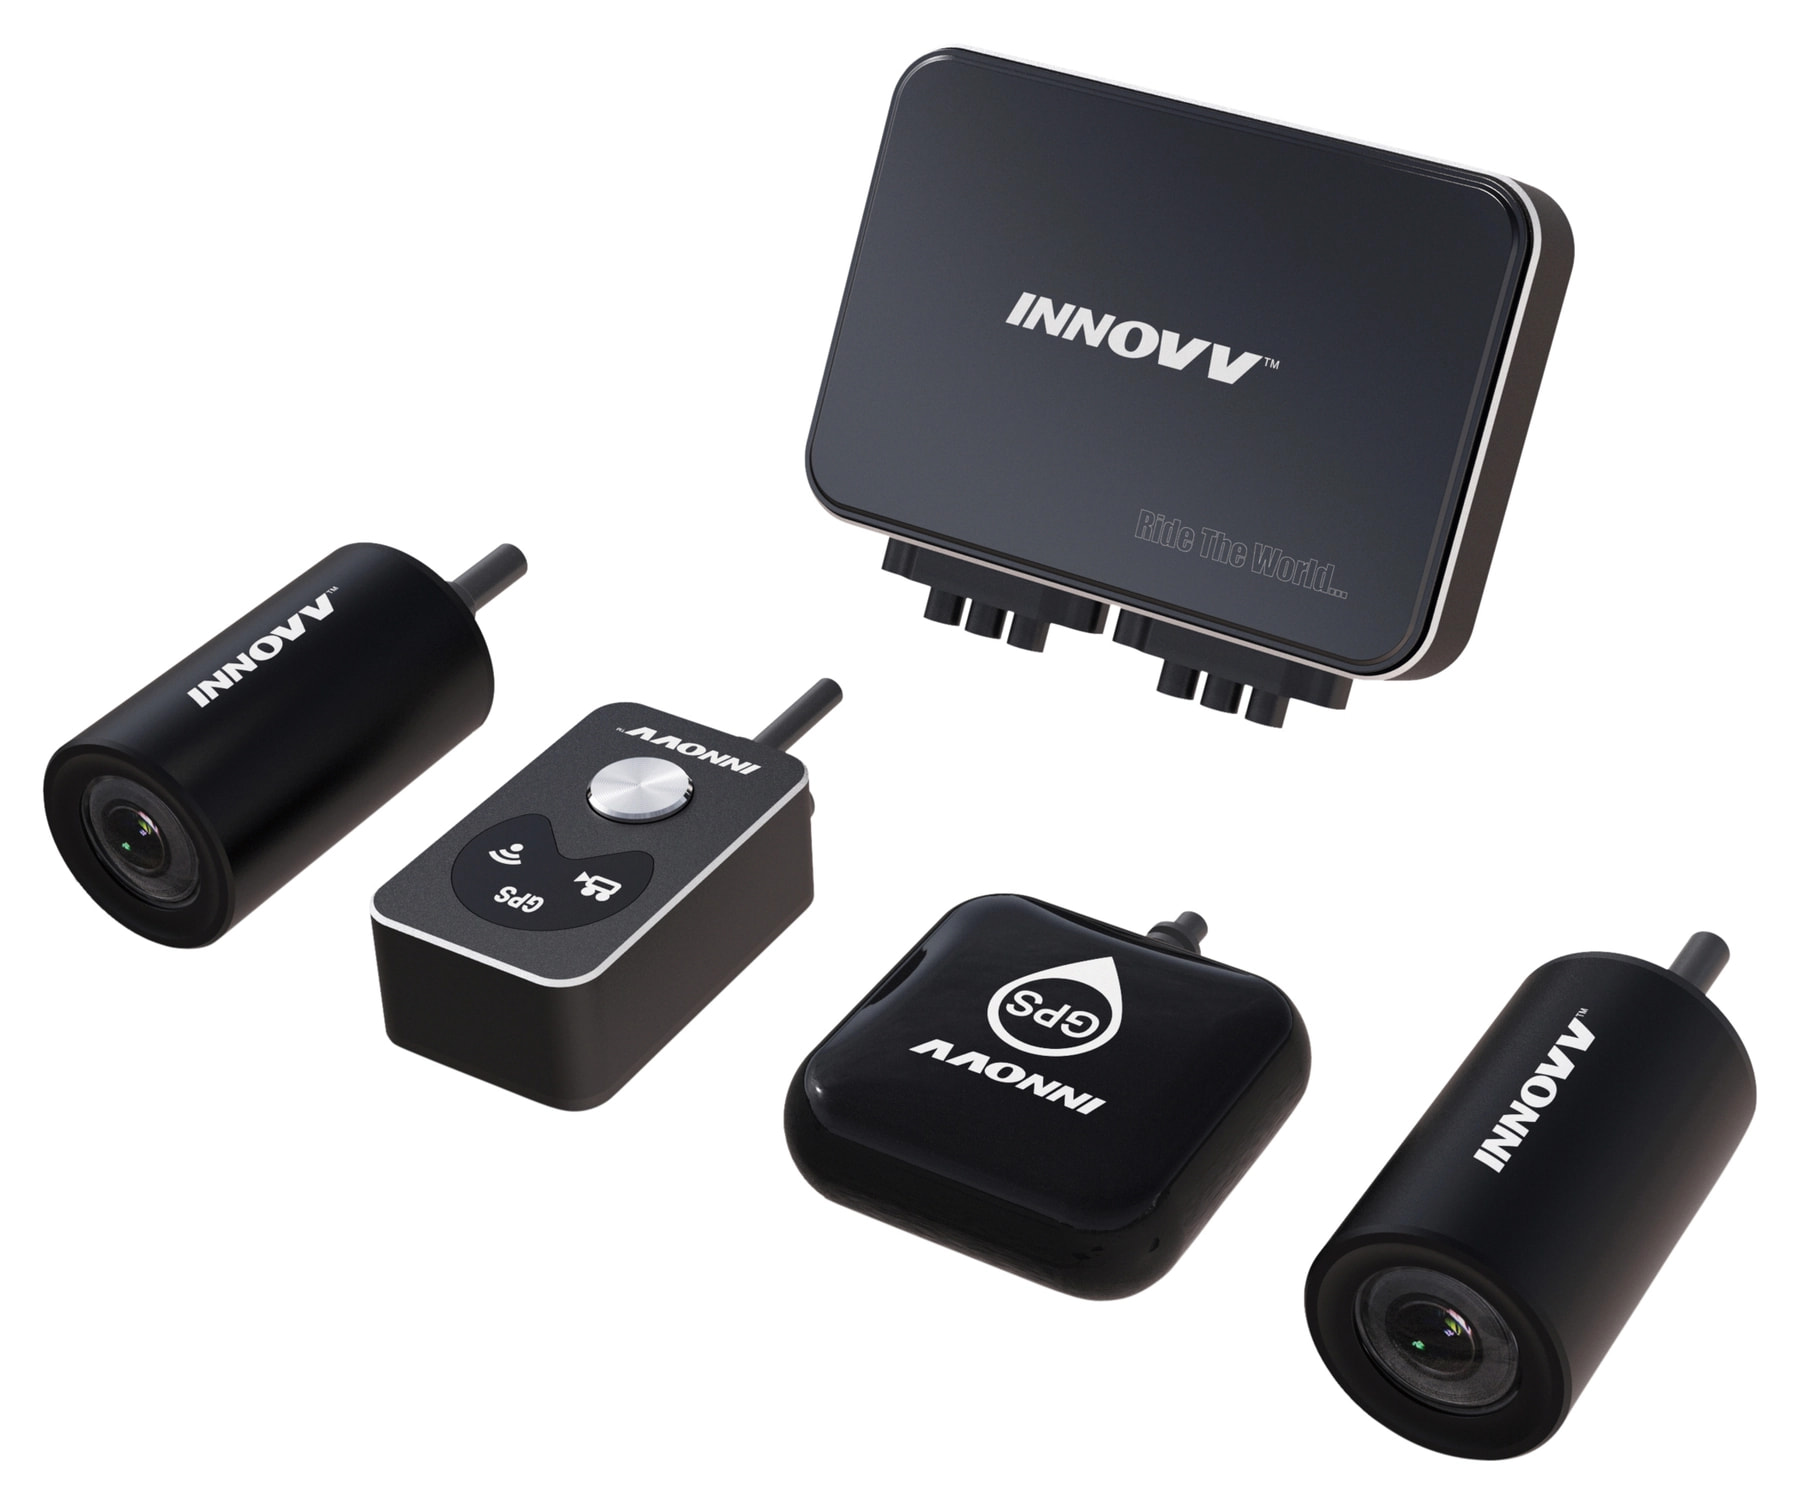
If I can get it in person, along the way is a shop where a dashcam’s available. After my Japanese camera was stolen in this once honest country, after having been honestly shipped from Japan, I’m not going to experiment once more with ebay. Instead, the following camera is planned:
1 Like
Oops! I almost chose the wrong one. Here’s the proper choice:
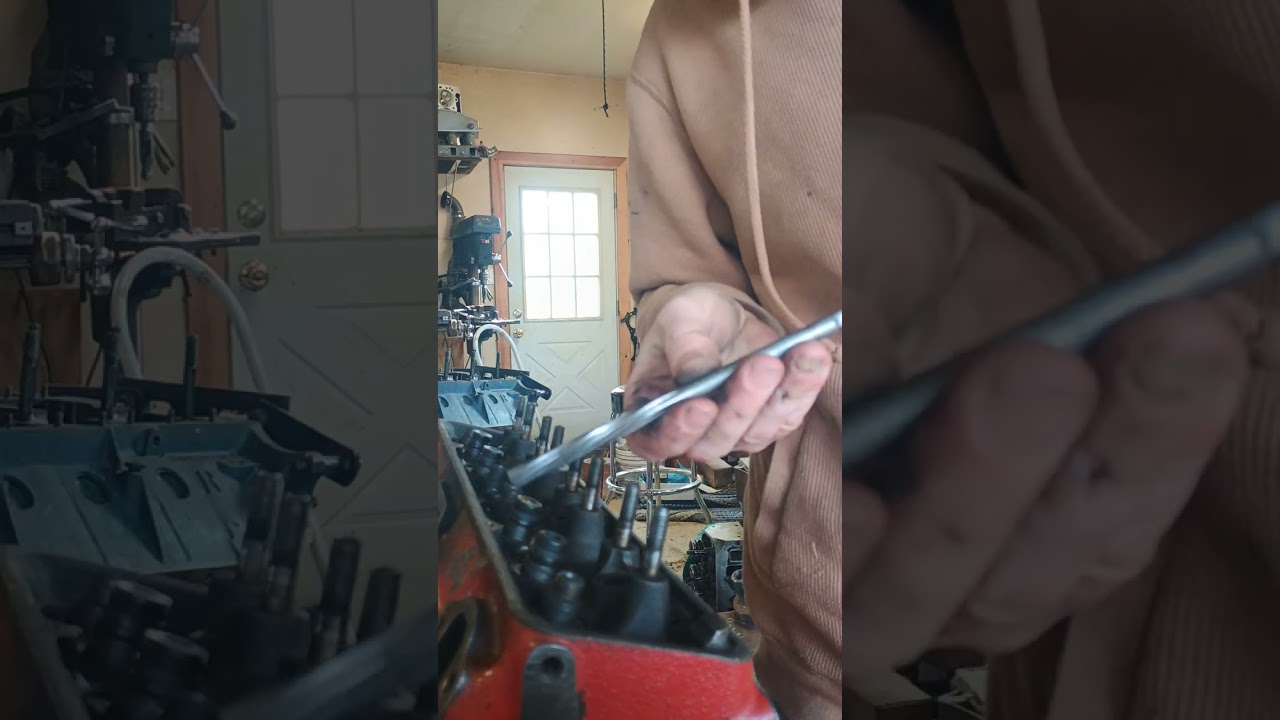
Here’s how it’s done. I will be using oil, when doing this:
The first supplier was closed, on the day I went to personally buy an arbor. The excuse was an employee shortage, due to illness. In which case, I was to e-mail him for concluding a purchase. It’s been 9 days, since I mailed this company. Right now, it’s still before business hours. But even if I get a response, that’s quite a lengthy timespan for a company to respond.
It’ll be the fifth day, since I wrote to the second company. They requested a delivery adress of which I always use the adress of the delivery company’s afiliate, so that the delivery is most likely to land there, given that home deliveries are quite unreliably and we have a package thief in our apartment house of whom the landlord refuses to evict.
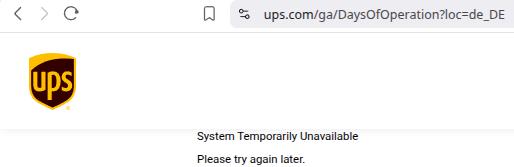
Perhaps, the latter company’s e-mail adress is delayed for reasons other than the usual laziness is due to UPS’s site being down for the second week?
My plan to knurl the guides has changed, because of the uncertainty of ever getting an arbor from a domestic source. If I go ahead and knurl these guides, I won’t be able to install the valves, until an arbor shows up. In case I would need to move this car, I’d be backed into a corner. If I don’t knurl, I can at least get the engine running, if absolutely necessary.
So, in the mean time, avoiding a second disaster with online purchases, I’ve located a dashcam from a source close enough to where I drove the 60 or so kilometers one way for personally purchasing it. The company selling these has quite a poor reputation, concerning delivery and the length of time they take to do so. Given that there is no iron-clad consumer protection legislation covering internet purchases here, the best alternative would have been a direct purchase. I first telephoned the store, asking if I needed to reserve a camera. They said no and I took their word for it and then went to get it the following week, last Thursday. Unlike the Japanese camera that got stolen by a Fed-Ex employee, this one can’t take panopticon images and isn’t Japanese. But, it’s the next best thing, supplied with a front and rear wide-angle 120° camera lens, a GPS tracker, an exterior microphone and a remote control unit which can be mounted within a reasonable distance, somewhere between both cameras, hopefully under the carpet of one of the front seats.
Some gyroscopic gadget is also attached for activating recording, in the case of an accident or of vandalism. A Wi-Fi transmitter is also attached.
Given that my L601 is snubby short, the 3 1/2 meters cables summed up for both cameras should be more than enough for attaching both, The control unit will be somewhere in the middle and it might be possible to mount the microphone behind an outside rear-view mirror. If not, only two wires connect it and I could then splice-in a set of wires for lengthening its reach.
Because this camera system was developed for motorcycle use, there was hardware included of which most of it need not get used. If and how this turns out, anybody on this forum riding motorcycles could probably opt for one of these. Later on, I’ll scan and upload the user’s guide’s illustration on how this system is to get attached to a bike.
Plug & Play it isn’t, though. To get it going, an app needs to get downloaded. Since I don’t use a Smartphone, I might be able to Wi-Fi connect to it, through either my PC’s router or through using one of my spare laptops. I should be able to bench calibrate its setting, by connecting a battery to it.
A TF card is what they require for video storage. I’ve had reliability problems with at least one of these. If I can source an adapter cable fitting into that slot for connecting to my reliable 1 terrabite USB card, that’s the way I’m going.
Here’s what they provide:
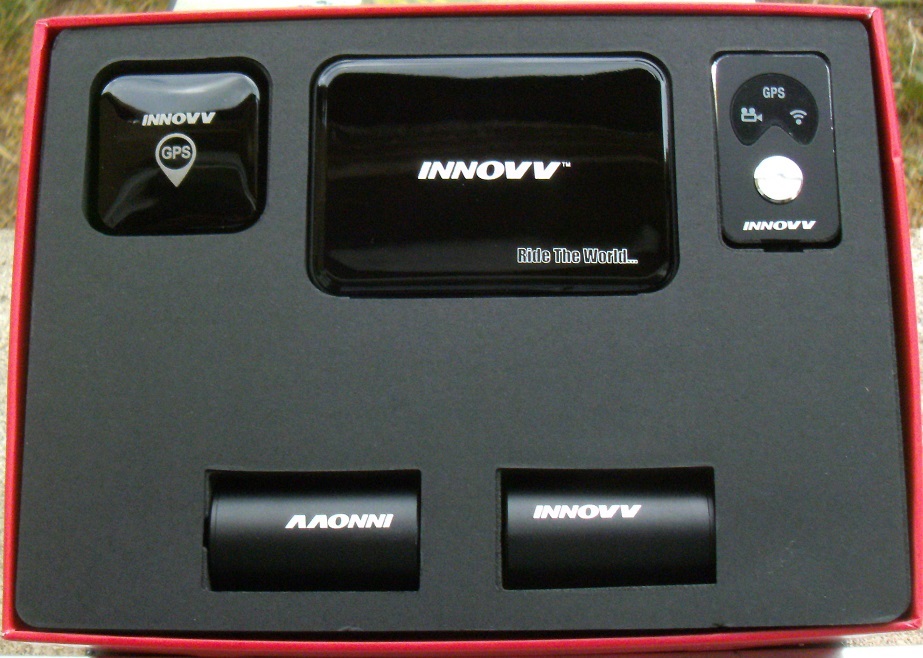
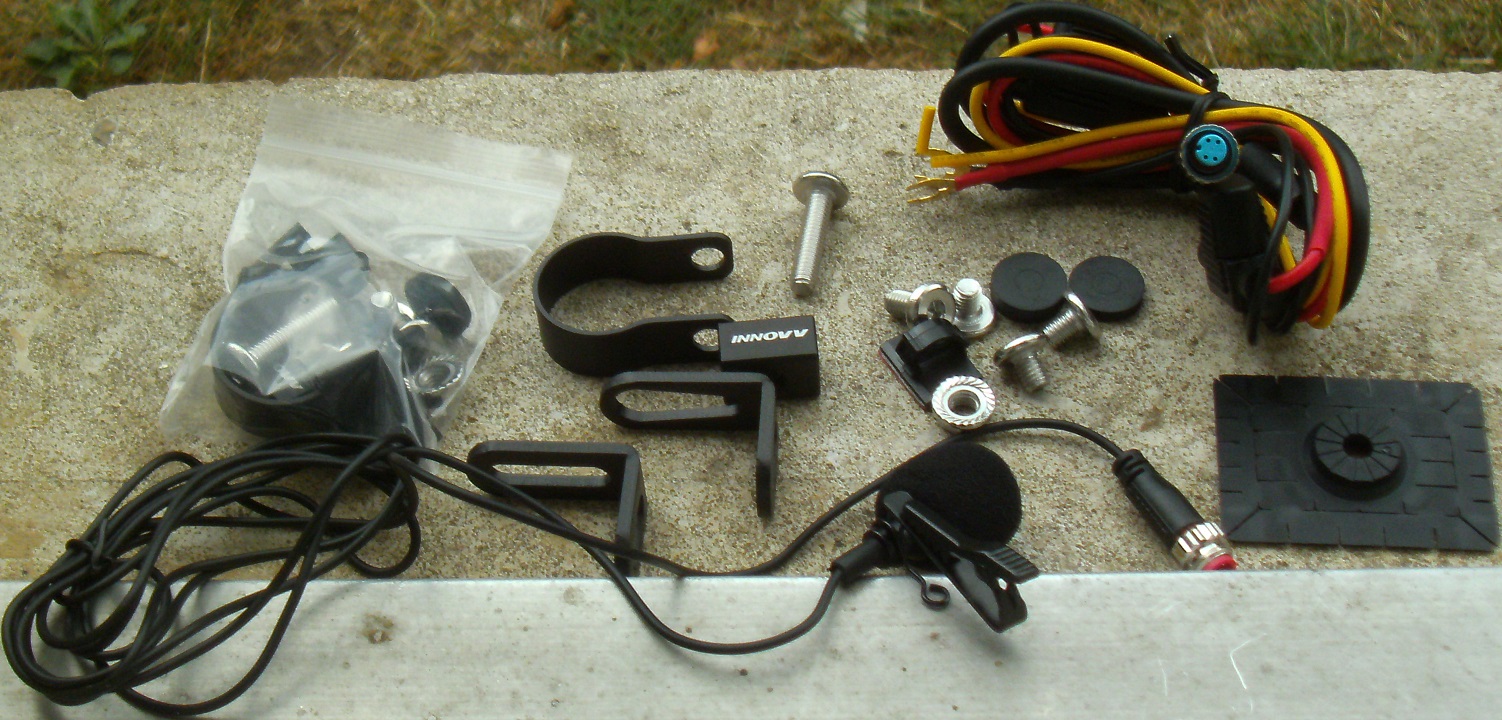
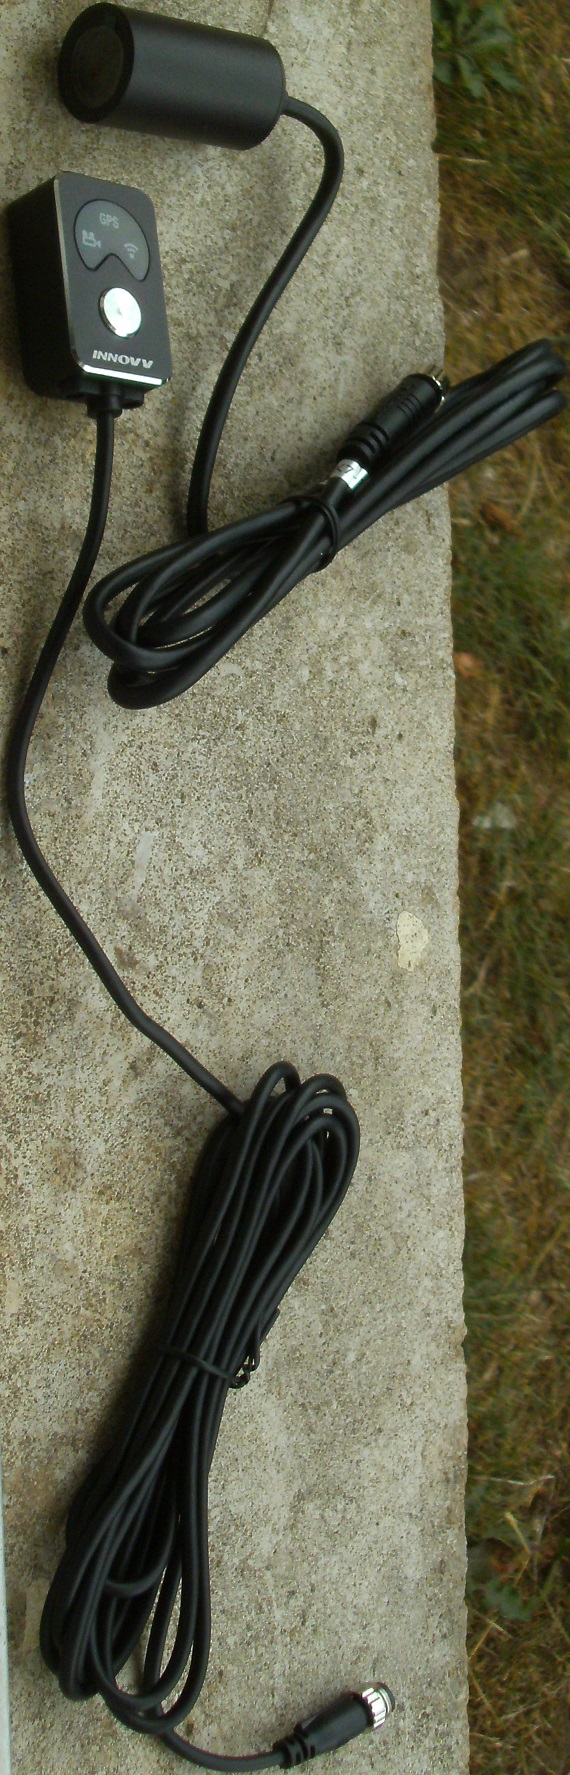
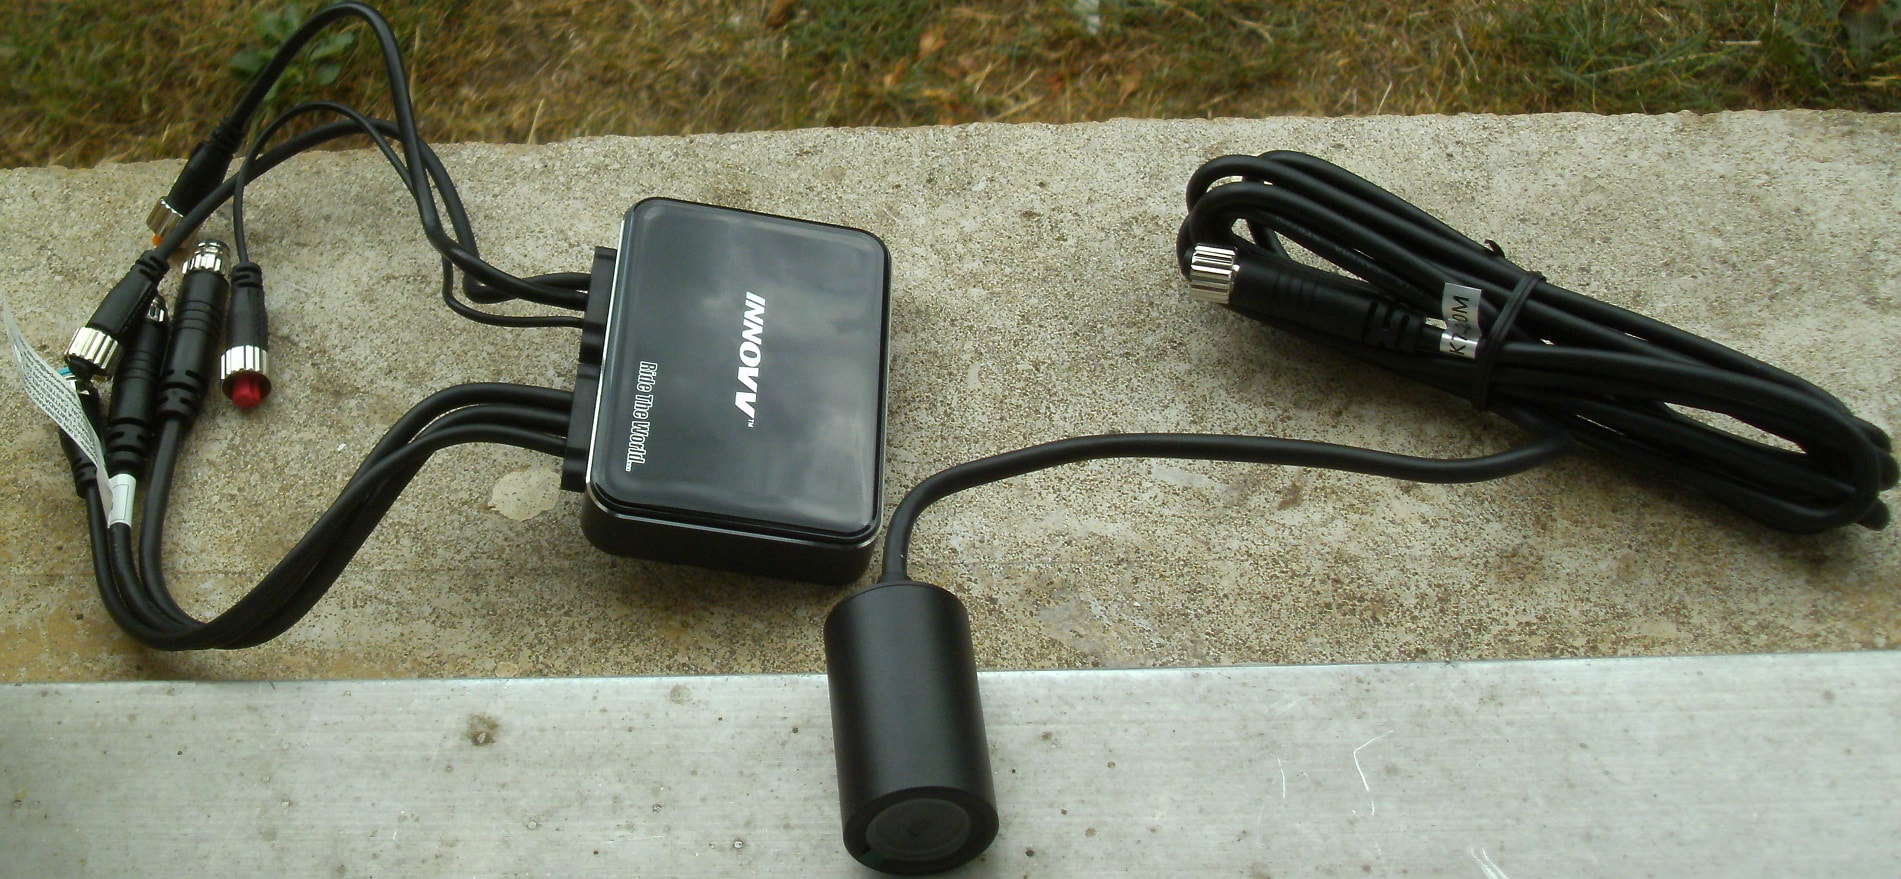
It’s at least packaged pretty. Let’s see if it works as good as it looks:

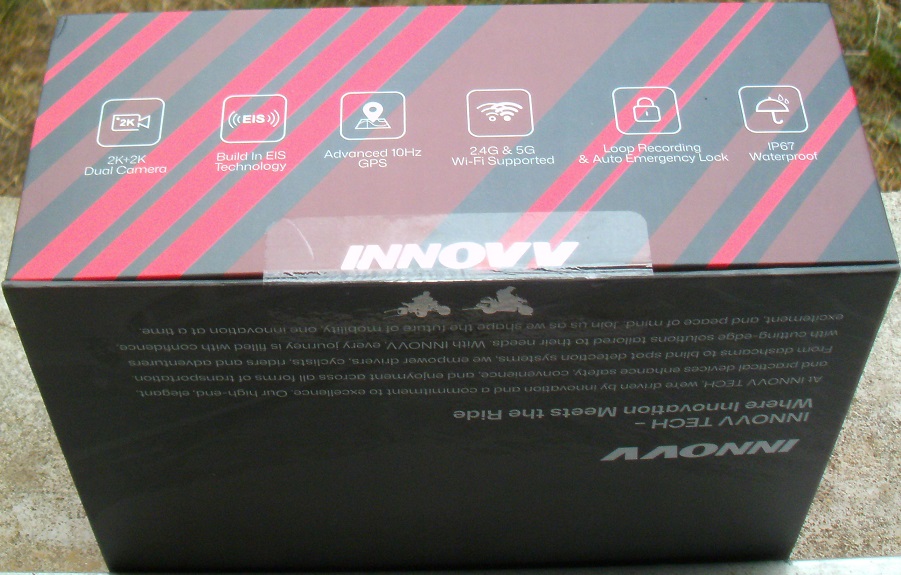
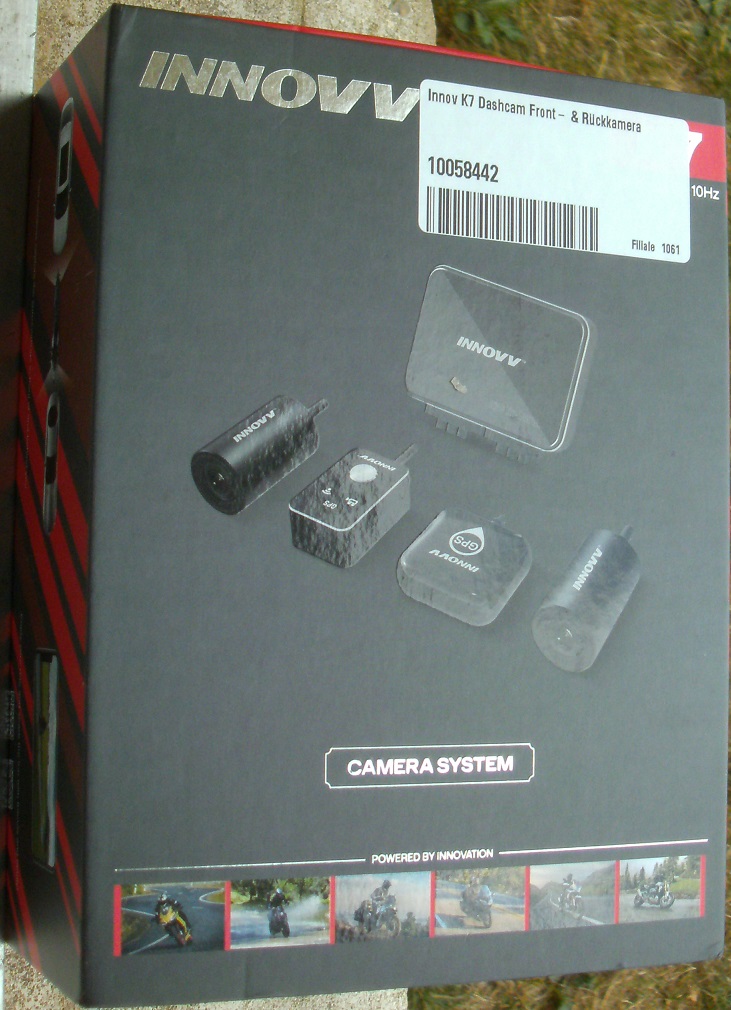
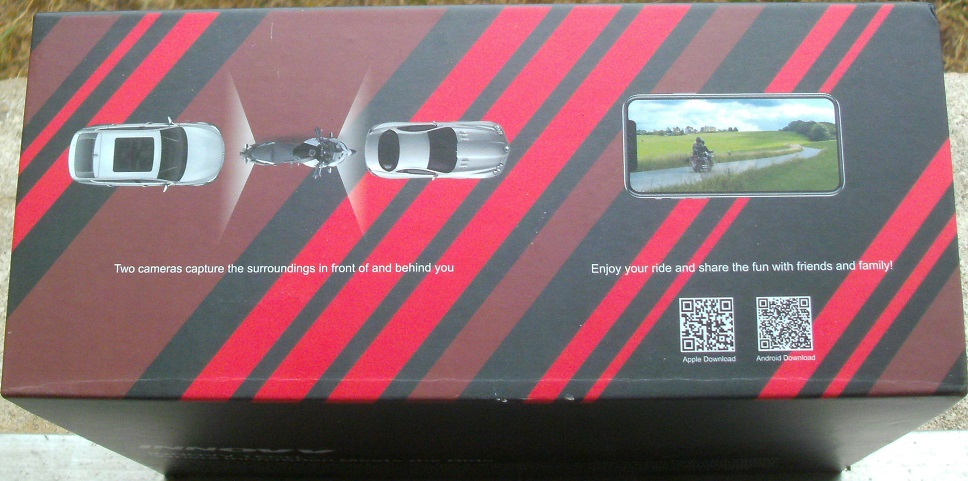
1 Like
It seems, this company has been granted a monopoly on the manufacturing company’s sales. The parent company refuses to sell to private individuals, for some unexplained reason. After having written to both, I’ getting the impression that both need not rise up from their thrones, unless 1000 items minimum get ordered. Here’s a trusted initial source for this item, only listing toolineo.de as a source for this brand: https://www.idealo.de/preisvergleich/MainSearchProductCategory.html?q=Gühring%20handreibahle%207%20mm
Before the local company I used to do business was sold, they used to sell the Czech tool brand called FORMAT. Why the new owners have decided to delete this tool from their catalog is yet unknown.
It seems to be an epidemic. The neighbor living upstairs has had similar experiences with online purchases lately when he recently ordered a set of brake pads and rotors on an express basis. The delivery driver ignored searching for the second set of mail boxes and door buttons on the other side of the building, taking the delivery back. Upon noticing this, my neighbor immediately got into contact with the selling company and was then treated like he was the problem, even getting a surly employee at the telephone’s other end. Is it any wonder that Amazon has taken over?
Since now customer is no longer king, commerce culture is no longer taught and workplaces are no longer supervised, I’m going to see if there are Japanese tools of this sort available. At least, they still have a work ethic.
Valve guides are one of the last engine components of which I don’t want to risk inaccuracy. Replacing a cylinder head on one of these is one job that I never want to repeat.
This source looks promising. It would only be a matter of obtaining access: https://en.fptools.com/
I’m making it a point to order the reamer today. I first had to do some research on the tool’s manufacturing tolerance which is still impossible to machine to exact size. They end up + or - a certain value. The source that I read claims that they end up mostly +. If I only knew what exact reamer the factory used. These, of course, are machine reamers which are of higher pricision tolerances.
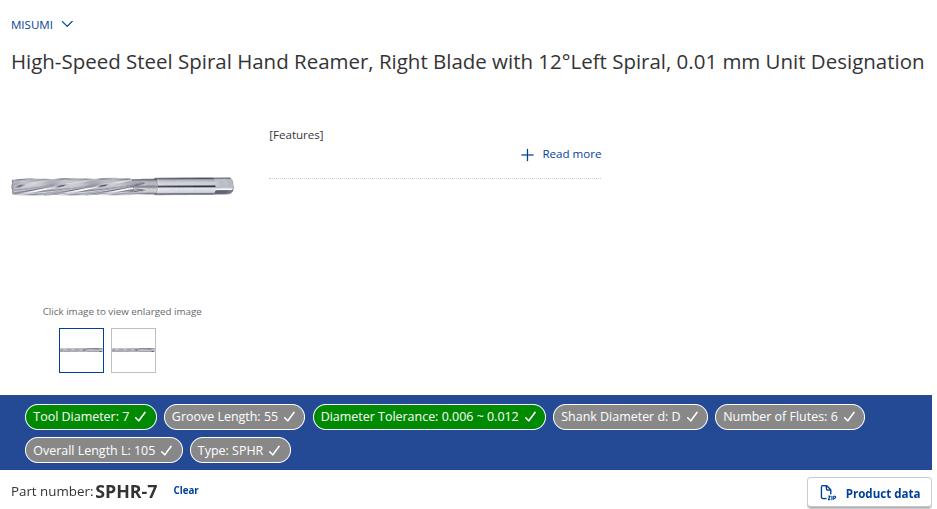
This following tool’s stated 0.006 - 0.012 mm diameter tolerance still falls within Daihatsu’s recommended maximum guide bore diameter of 7.02 mm.
The best way to go about it would have been to order new brass guides. This, however, would take greater precision, driving the guide into its original position, given that there are no stop edges for preventing pressing these in too far or not far enough. On cast iron heads, this can be done without needing to heat them up. Since we here are working strictly with aluminium heads, this raises the question of possible warping, when heating up these heads, before pressing-in corresponding cooled-down guides.
Since I’m not going to put the high demands on this engine as would those who drive mostly on freeways or use their vehicles for the track, knurling should be sufficient, until it’s time to replace the ED with an EJ.
Here’s a Japanese-made reamer. Suggestions for an alternate product are, of course, welcome:
They too don’t sell to private persons, for whatever unimaginable reason. It looks like I’ll be spending time trying to get around this:
[quote=]Can I place orders or request quotes from MISUMI without registering or as a private individual?
[/quote]
[quote=]No, registration as a corporate user is a prerequisite for placing orders or requesting quotes from MISUMI. As MISUMI is an exclusively B2B (business-to-business) company, it is not possible to register as a private customer. If you are registered and logged in as a CAD user, you can upgrade your account to a corporate account.[/quote]
2 Likes
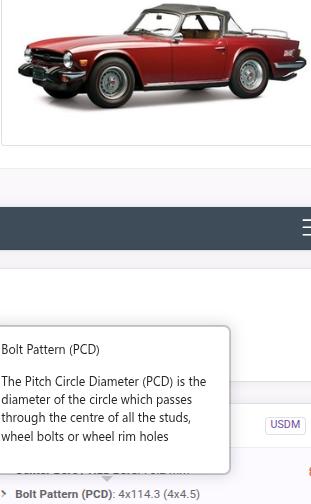
Incidently, while I was browsing an auction site, while viewing a Triumph TR6, an immediate thought came up: 1972 Triumph TR6 for sale on BaT Auctions - ending August 15 (Lot #257,916) | Bring a Trailer
I always wanted one of these. The last new one in the metropolitan Detroit area was featured in a show room, long after 1976. It was in there for at least 10 years (I moved to Europe, after that) and I wondered if it truly was for sale or not, despite the window sticker still attached. It was white with a black interior.
The instant I saw this one to get auctioned gave me an idea as to a solution to my wheel centre question.
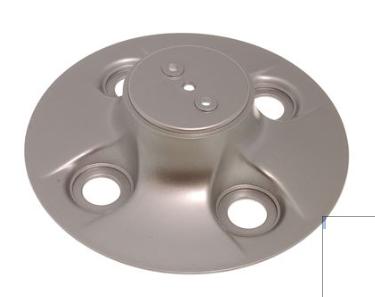
The following in black or burgundy would be a novel replacement for the brittle cheap wheel covers that are presently mounted. If the centers are close enough, I could file the cap’s fastening nut holes (114.3 mm) to accomodate my hub’s metric bolt pattern. If I remember right, l5s and 6s measure 110? If so, filing out 2 mm from each one shouldn’t be a big deal:
It would only be a matter of getting out a drafting compass for measuring the 601’s. If the axle nut isn’t large enough to be intrusive, the following replicas are still priced within reason: Wheel Centre Trim - Grey Plastic - 722898 | Rimmer Bros
Of course, these could also get 3D printed in the propper Daihatsu bolt pattern with the Daihatsu D replacing the TR6 center badge. As long as the TR6 badges are missing, I would then need not worry about theft.
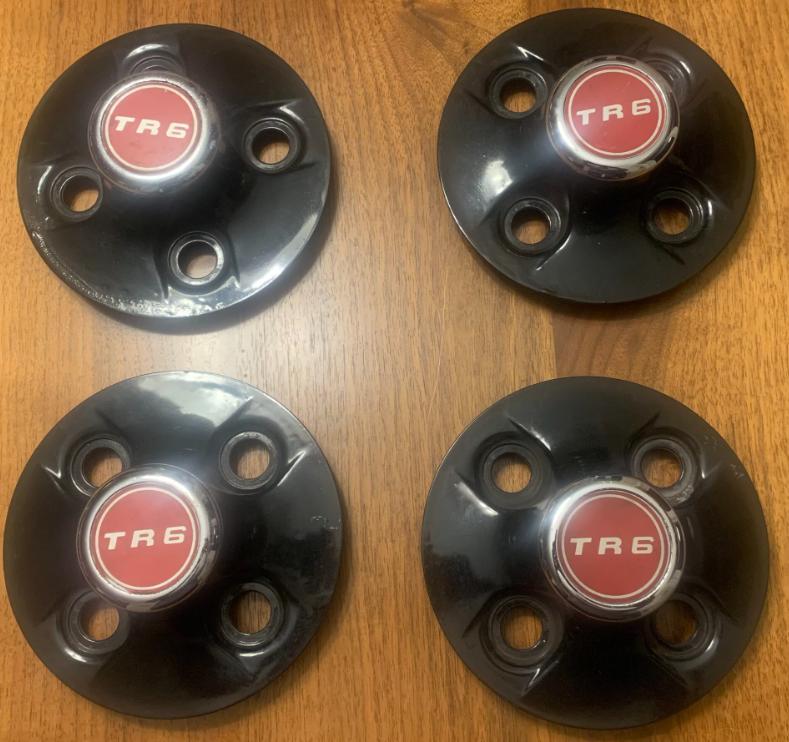
The black ones at the bottom appear to be cast out of aluminium, give the visible bubbling onder the one’s paint coating:
Innovv is pure b2b market
Not many individuals do have it
Most are sold through online or louis (as you have picked up)
I bought mine Reibunglos Abwicklung as b2b buyer as direct from them they ask for a copy of chamber of commerce
A lot companies stopped dealing with b2c and let the between company handle b2c while companies.still can buy b2b
1 Like
I could also apply for a small business license. The problem with that would be unending beurocracy, filing monthly tax forms, using up time of which could be put to good use repairing my cars.
I once printed fliers advertising bicycle repair, years ago. Typical of these people, someone had to go snitch to the authorities. This is why they should keep their mouths shut about “Injustices in former East Germany”. After having had problems with the police after that, I did what I was told and then went to apply for a license to do business. What the surly civil servant didn’t tell me was that a small business license would have been enough for what I was doing. So, she sold me the wrong license which led me to even bigger trouble, when the tax department demanded that I deposit ten thousand €s into their account for covering any possible future tax debt, shortly thereafter. Seeing that I was unemployed at the time, the tax department finally realized that I wasn’t profitable for them. So, threatening letters stopped arriving. Since then, I don’t want to support such a system, living off the grid as much as possible.
Of course, this costs me some inconvenience, when dealing with indifferent companies. But, the alternative would cost even more nerves.
If the Swiss still have a work ethic, I might try obtaining that arbor from them, even if it costs threefold. They are just across the border
1 Like
Using Artificial Intelligence yesterday, I found a source of supposedly an Austrian reamer, obtainable within reasonable driving distance. If they haven’t changed their selling to private individuals policy, I should be able to order it there: https://eshop.wuerth.de/Produktkategorien/Handreibahle-H7-HSS-DIN-206B/14017515000201.cyid/1401.cgid/de/DE/EUR/?OriginalSearchTerm=handreibeahle+7+mm&CampaignName=SR007&VisibleSearchTerm=handreibeahle+7+mm&ModifiedSearchTerm=handreibahle+7+mm
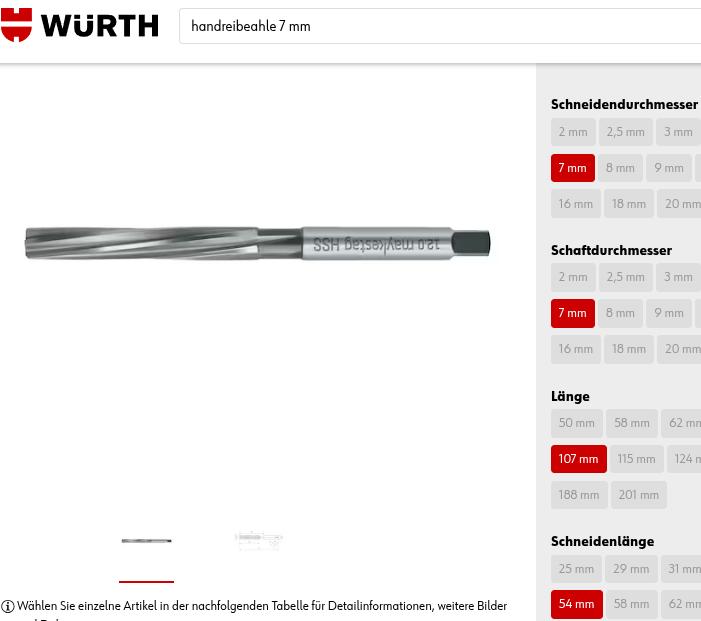
The questions I posed to A.I. were elementary enough for a normal search engine search to find. I find it odd that asking A.I. should be required for something this simple, as if they’re now deliberately choking online searching, in order to get everyone to get used to A.I..
This is the Made in Japan version which was impossible to get from European outlets:
1 Like
Gotta ship stuff over as usual i have to do it also
1 Like
I’m now back on square 1. Yesterday, I visitted our local Würth outlet, attempting to buy this tool. They also changed their policy, since I last purchased from them as a private person. I then asked the clerk if they had business client partners who could buy this tool from them and then sell it private. I don’t think, he understood the question properly. He did say that when an online price isn’t listed, the item is, in this case, restricted to B & B sale. This was a pretty large store for serving only business clients.
I’m wondering as to the reason behind limitting such sales to only B to B, as if they don’t want us working on our cars anymore. Of course, Made in China is readilly available. But there’s no point in discussing this, obviously.
Here’s another possibility. The following is supposedly a domestic product. Suddenly, the price has been reduced considerably and the store in Switzerland isn’t that far away:
https://www.galaxus.ch/de/s4/product/dormer-handreibahle-hss-7mm-7-mm-bohrereinsatz-10329727
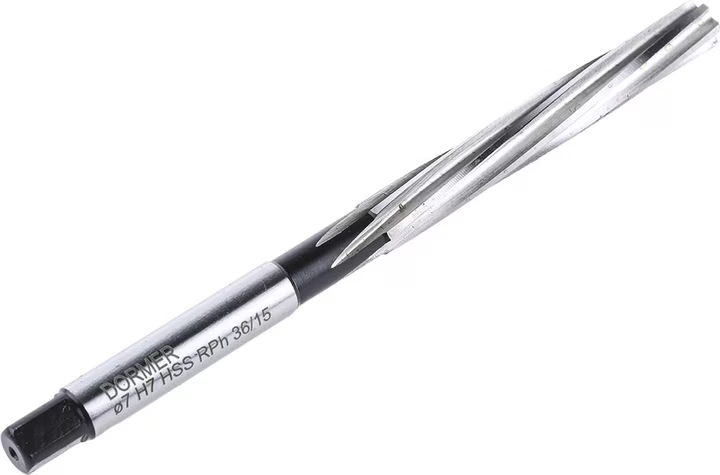
A Chinese Paulimot is also available. For some strange reason, it’s only 6 Francs cheaper than the supposed German tool. It might be a good tool. You never know. But why should I buy it, when I live in a country who produces these?
1 Like
if you really need help with B2b I can buy it ship it directly over to you
1 Like