Absolutely my mistake. Somehow I read “rear” when you said front. I had assumed the “Rally 2” was rear disc since I looked at the pic more than read what your wrote (I’ve been playing with some rears for something that look like your fronts). Sorry. You certainly aren’t “dense”, but seems I am.
2 Likes
hahaha, no problem! Thanks for the pointers though, appreciated.
1 Like
Many excite today - I dropped the Sirion off at the garage to have the new exhaust fabricated and fitted - I’ve gone for a manicat-back 2" stainless system with a resonator and an HKS muffler tip.
Not cheap (spending my annual bonus before its landed, whoops!) but will have a lifetime warranty.
I’ll get pics later, but I’m super excited!
(in more boring news, I have a lead on the caliper carrier next week)
8 Likes
Things have not gone entirely to plan! I went to collect the car and pay for the exhaust earlier, all went fine, started it up and it had a lovely bark, drove home.
It was a bit louder than I’d expected, especially above 5000rpm, though seemed to breathe better. Crackles on the overun too. By the time I’d got back I was a bit concerned if it’d actually pass the MOT noise test so looked underneath. The workmanship is exceptional, however it was missing one important thing.
There was no resonator.
So its basically a straight-through 2" pipe! Ah, this is not quite what I wanted! I’ve contacted them and said ‘ahem, great workmanship but ummm, where is the resonator we discussed?’ - to be fair to them they came back immediately and apologised for the oversight, they’ve ordered a resonator and as soon as its arrived they’ll book me in for it to be grafted in, and hopefully quieten it down a bit!
I’ll get a video of the noise, its pretty epic from a little Daihatsu but will get old, fast I suspect! It sounds not unlike a flat4 Subaru at low revs ![]()
![]()
![]()
6 Likes
Hi, The Sirion WCR car went through the MOT OK. 2" stainless with 4 into 1 manifold, 200cpi e marked sport cat (where the resonator was) and 14" silencer.
3 Likes
Got a quick video of the noise of an unsilenced K3-VE2 engine for your delight and delectation

Its going back for modification soon, but wanted to capture this for future generations!
6 Likes
Jesus Christ that sounds ‘fat’ ![]() . To be honest, I do think it sounds great for a four-banger, but I can see why it’s a bit much for daily driving. Good idea to capture it like this
. To be honest, I do think it sounds great for a four-banger, but I can see why it’s a bit much for daily driving. Good idea to capture it like this ![]()
2 Likes
Also, any chance we can get a fly-by video? Really curious what it sounds like under load and at high revs ![]()
3 Likes
Hahaha, let me see what I can do before the weekend!
2 Likes
Sounds rowdy, wonder what it souds like at WOT ![]()
1 Like
not dissimilar to this:

![]()
![]()
![]()
4 Likes
wow that does sound good but man that is loud for a 4 banger. I dont blame you for wanting it fixed. I would also.
2 Likes
A few updates here, the car went back to the exhaust specialist and they fitted a resonator in the middle of the system, its only small and while it has quietened it down a bit, its still quite noisy.
For now, I’ve gone back to the original intake to see if I can quieten down the intake noise a bit. I’ve not had a chance to take it out very far, a the insurer I was using could not cover it with the new exhaust, so its off the road for now. I’ve got a new policy with a specialist insurer starting next month so I aim to get out on the roads in March. Bonus is that the road salt should be all gone by then so I can drive it with a clearer conscience (and with less audible fizzing from the bodywork).
I’ll drive it about a bit and see how it is once the exhaust has bedded in. I have another 4 months until the MOT is due, and might go and tap up my local MOT station for a ‘will this pass?’ question or two. They’re fair, and I have good rapport with them so they’ll tell me if they’re not happy.
I have a plan B - its possible to buy inserts for the tailpipe that quieten down the noise, they’re aimed at track cars which exceed the noise limits on some circuits and seem to get OK reviews. They’re removable too, so i could just fit one for the MOT test if worst came to the worst.
6 Likes
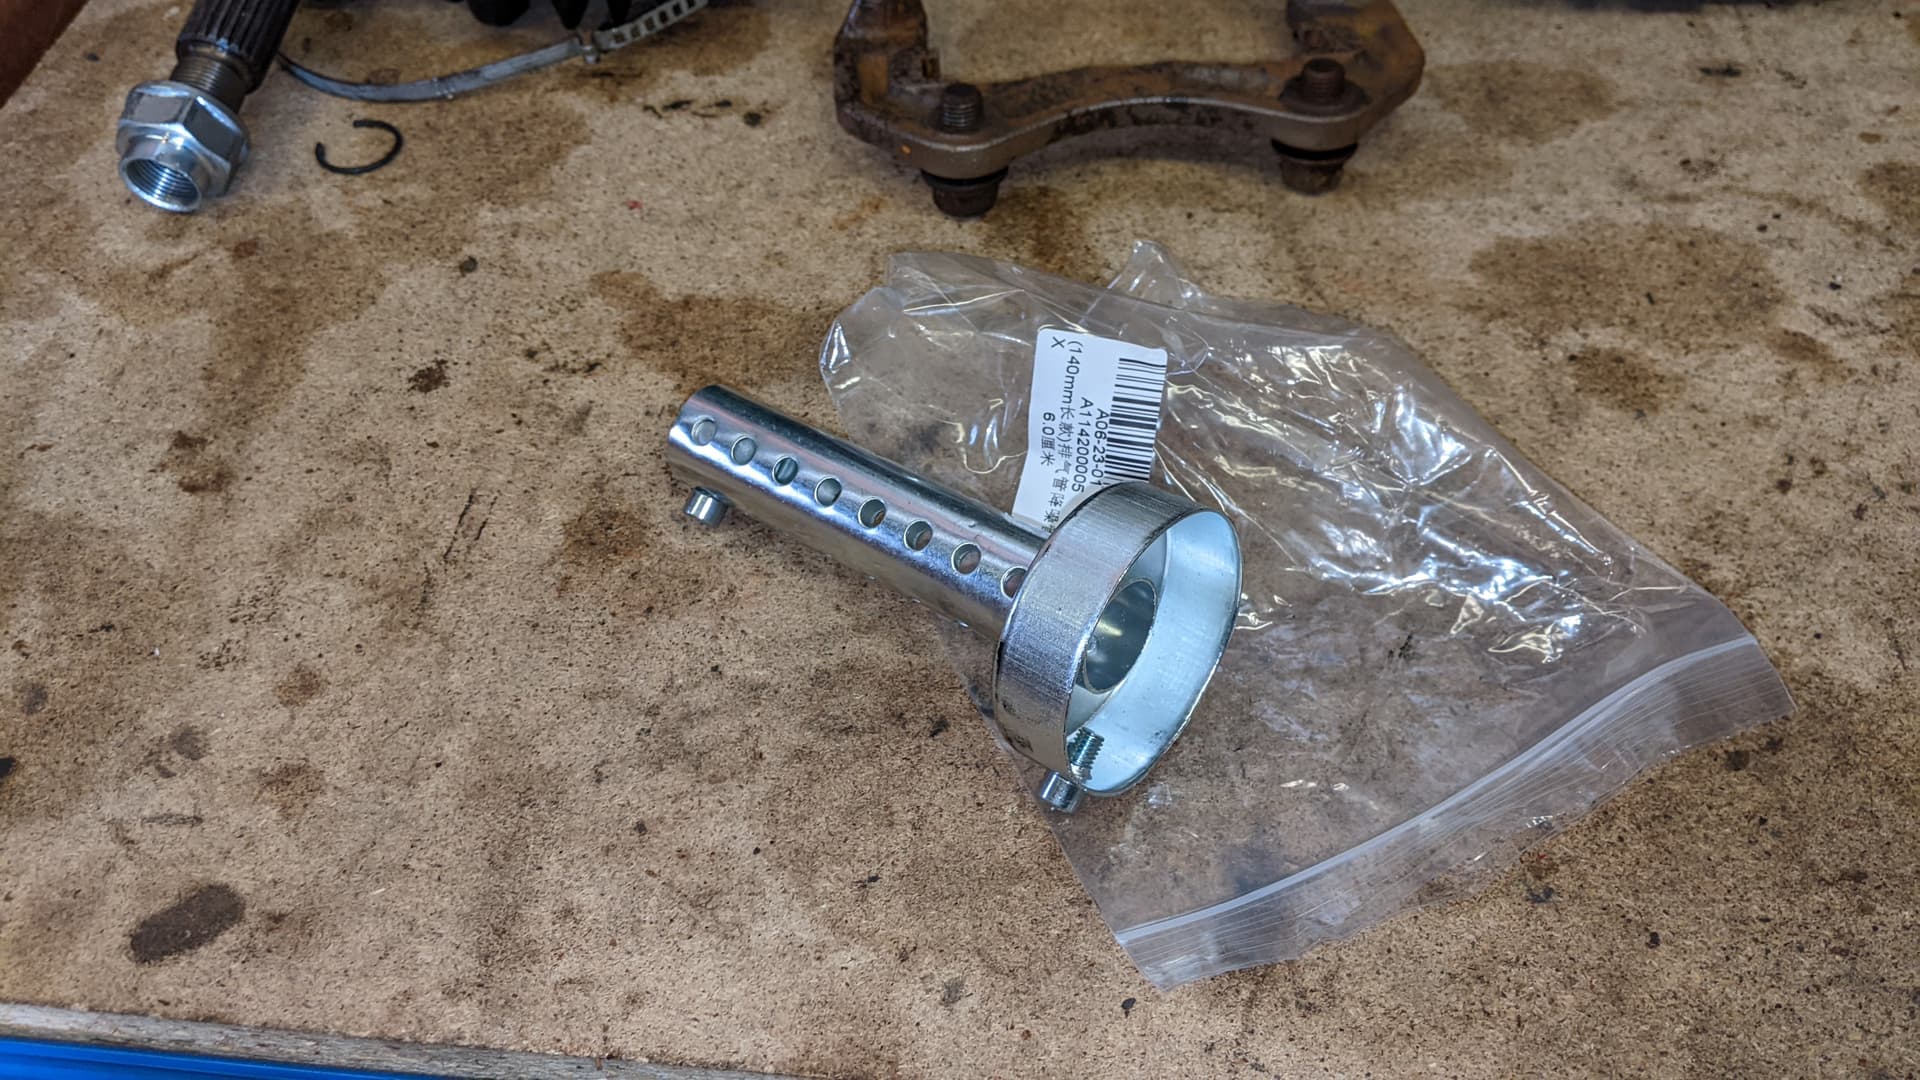
The insert arrived today and I had a bit of time so went out to see whats was what. Its quite a simple thing, being basically a stepped bit of mild steel pipe
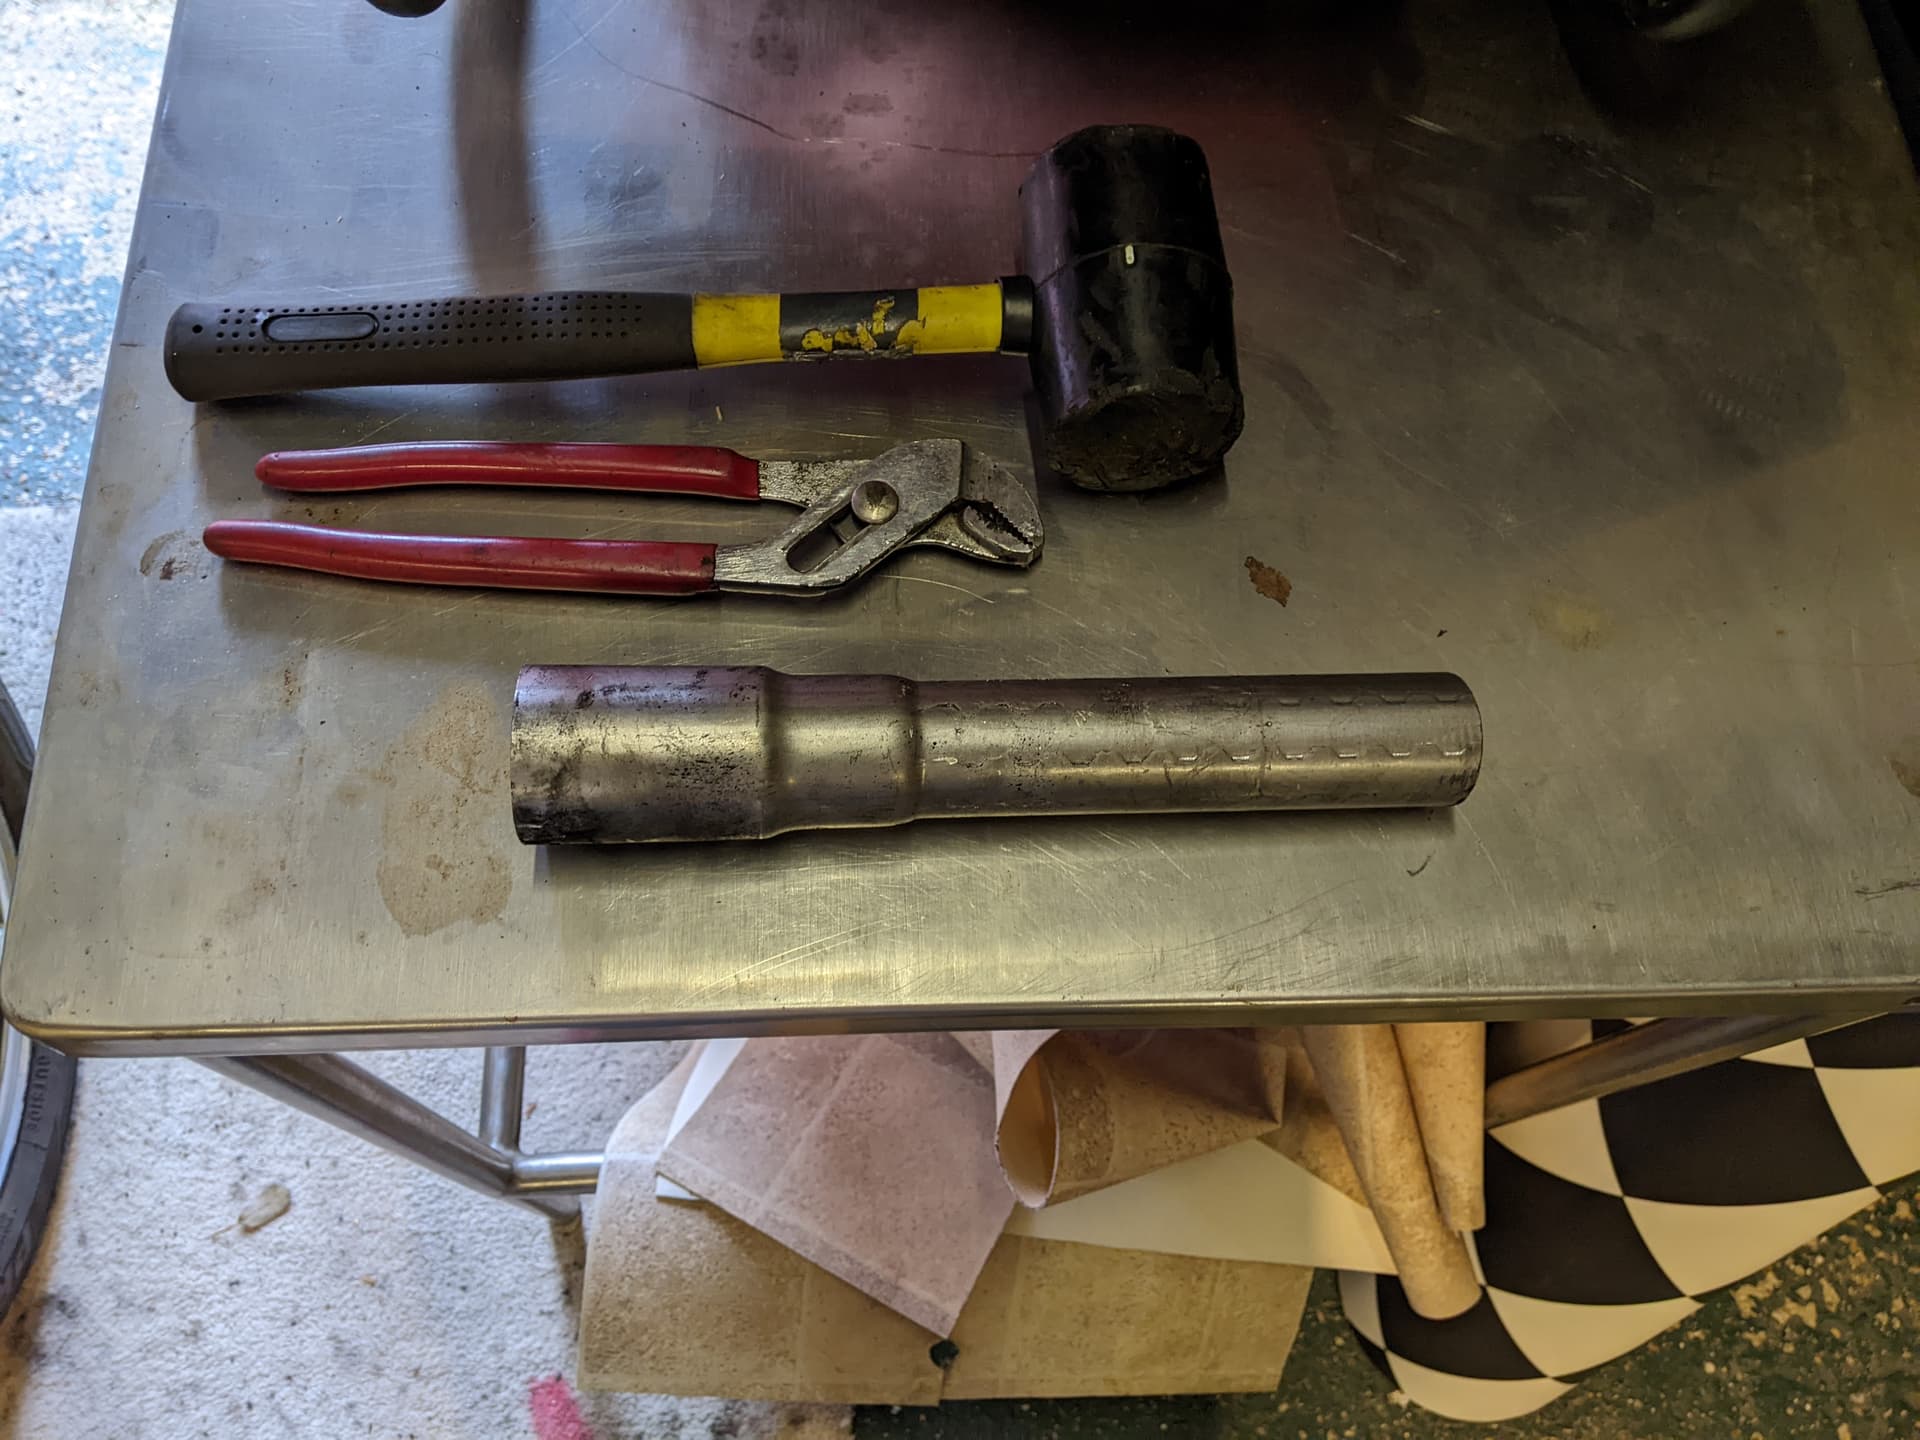
The idea is you fit this thin-end first into the exhaust and it narrows the pipe diameter as well as absorbing some of the sound at the same time. It was cheap and seemed to have OK reviews. I went to fit it and was slightly vexed because while the exhaust tip is square with the back of the car, the stainless pipe that the tip is welded to goes off at a slight angle
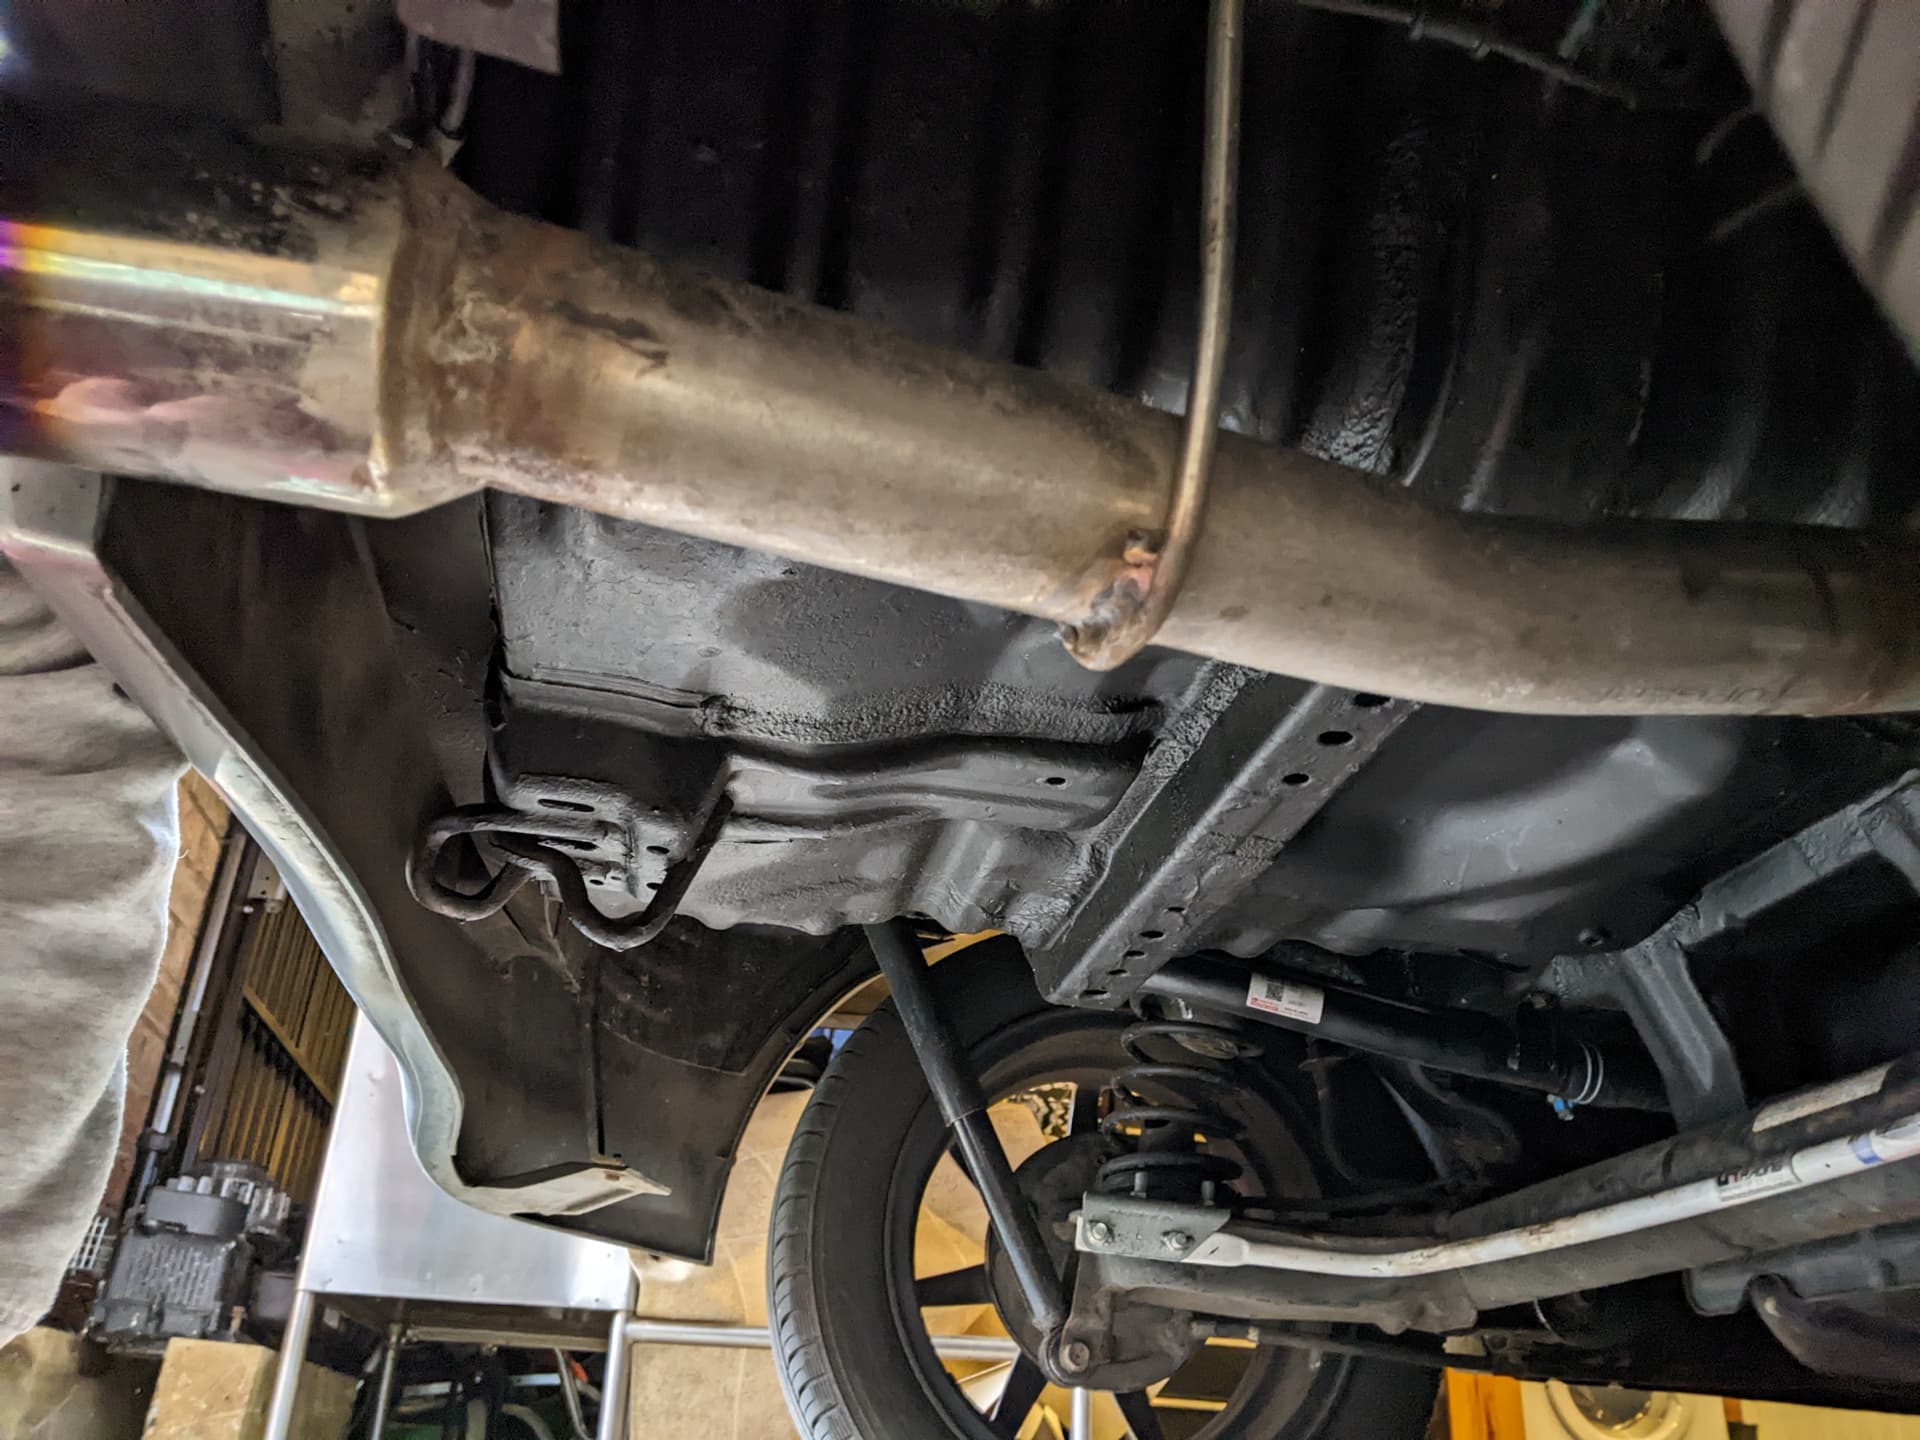
which meant the insert wouldn’t go in straight and jammed when it was about 80% in. I could have hammered it in, but I wasn’t sure what effect it would have and if I’d hammered it in then there would be absolutely zero chance of it coming out again without major surgery, so this called for some lateral thinking.
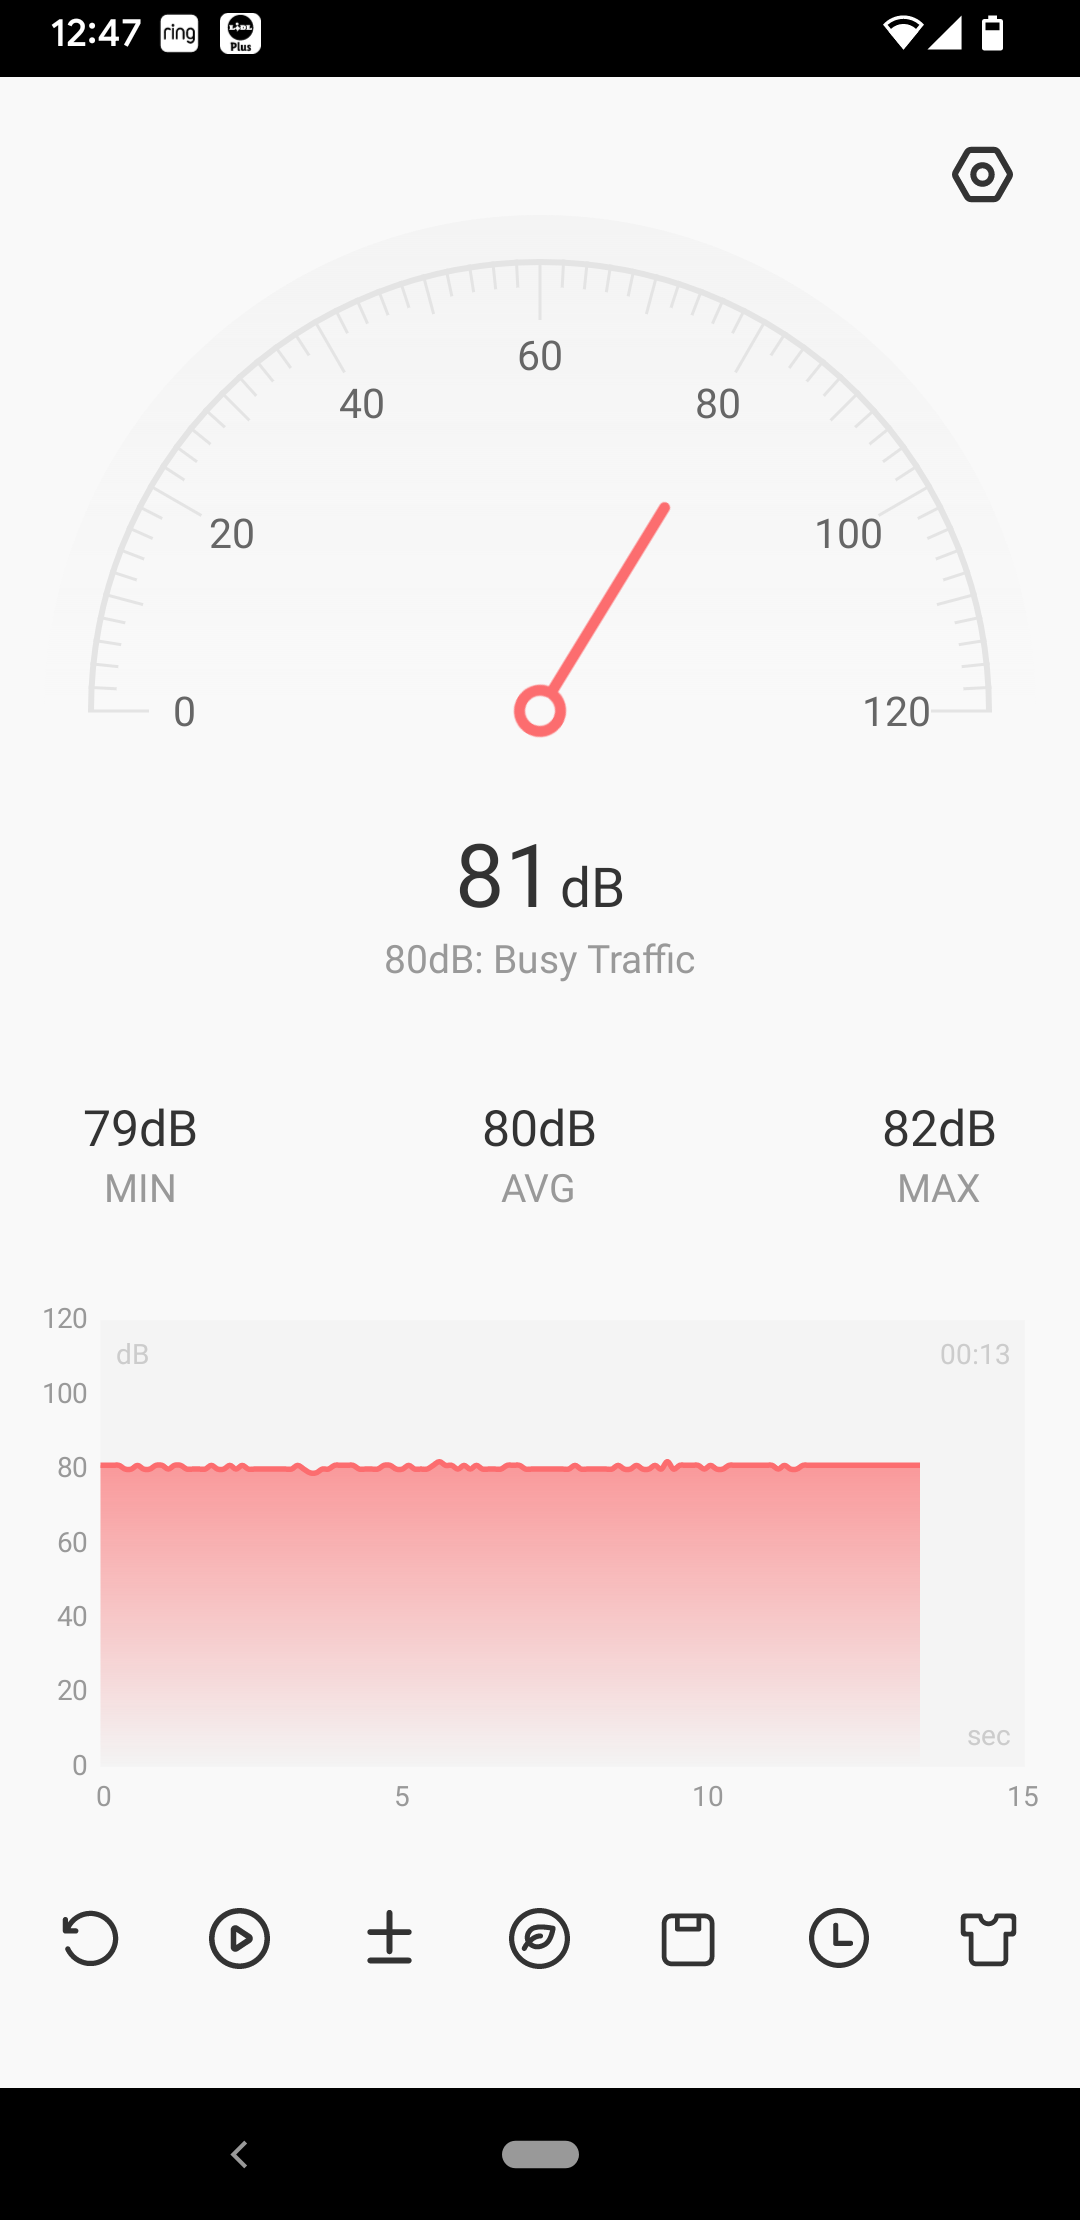
I had downloaded a decibel level app on my phone and when I started the car up and let it idle. From cold, idling at about 1500rpm it was recording 87dB on the app. Once the car had warmed up and the idle dropped to normal closed loop it was recording 76dB which was definitely better, but too noisy under load still.
My lateral thinking was to put the pipe in the wrong way, sure it’d look stupid with a bit of tatty mild steel pipe poking out the back, but the sound difference would be able to be checked to see if it was effective or not. Poking it in the tailpipe did indeed look silly
However when starting the car, the cold idle noise was indeed reduced dramatically, registering 80dB on the app, with the engine warmed through at idling at ~800rpm the reading was now at 72dB so the reducer definitely did work.
However, I still wasn’t sold on hammering it in so have had a think and decided to spend some more money, on one of these:
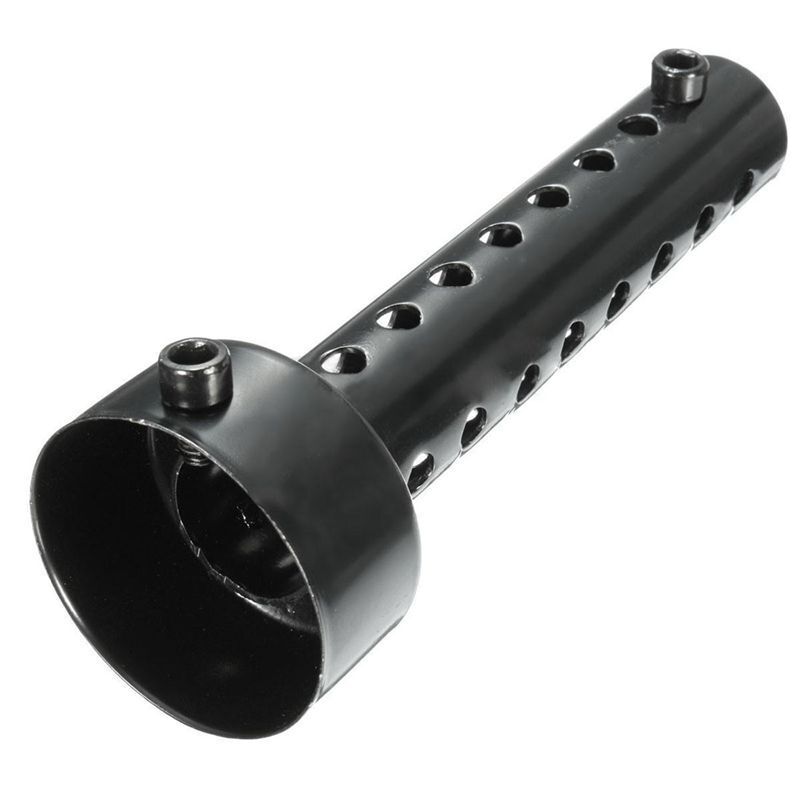
They’re designed for motobikes but work fine in cars. It will fit inside the exhaust tip (3" outer diameter, 2.5" inner) and is held in with a grub screw. This will reduce the bore of the exhaust exit and based on what I have learned, should quieten the exhaust note considerably. I will need to drill a small hole for the grub screw in the underside of the exhaust tip, but this will be all but invisible.
I’m not entirely happy with it still, and if anyone else decides to get a stainless exhaust on a M1 Sirion, I STRONGLY recommend not getting a tip larger than 2". My HKS tip is 3" and the sound is just too loud, especially if you use the rev range (which is the whole point of daihatsu ownership!).
If this muffler baffle works then I will look at getting a different tip which should act as less of a megaphone. The noise on the motorway is too droning, I’ve put a bit of old carpet under the spare wheel cover in the boot to try and quieten things down too.
4 Likes
Very interested to see if this will work. I was wondering about getting one of these as well if I decide to change my exhaust. Especially because I was thinking it might be easily removed and installed if I feel like waking up the neighbours (or was it the other way around?).
Someone who gets it!
3 Likes
So, a bit more news. Through a Daihatsu facebook grounp I spotted a breakers yard advertising an M101 sirion 1.0 so messaged them about brake caliper carriers. One of mine is warped or something as the top slider doesn’t slide very well so I’d been on the lookout. Toyota sell them, but only as a complete caliper unit for a cool £480 (!) which got ‘nope’d’ pretty quickly.
Based on part numbers on Amayama, the whole M100/M101 range seemed to share the same calipers on the front so I felt bullish about buying some from another car. The seller got back to me and said that they had the carriers and would do both for £45 delivered, which was more than I’d liked to have spent, but a lot less than brand new - they did advise that they were a bit corroded and wouldn’t warranty them, which wasn’t a major issue.
Fast forward to today and heavy box arrived
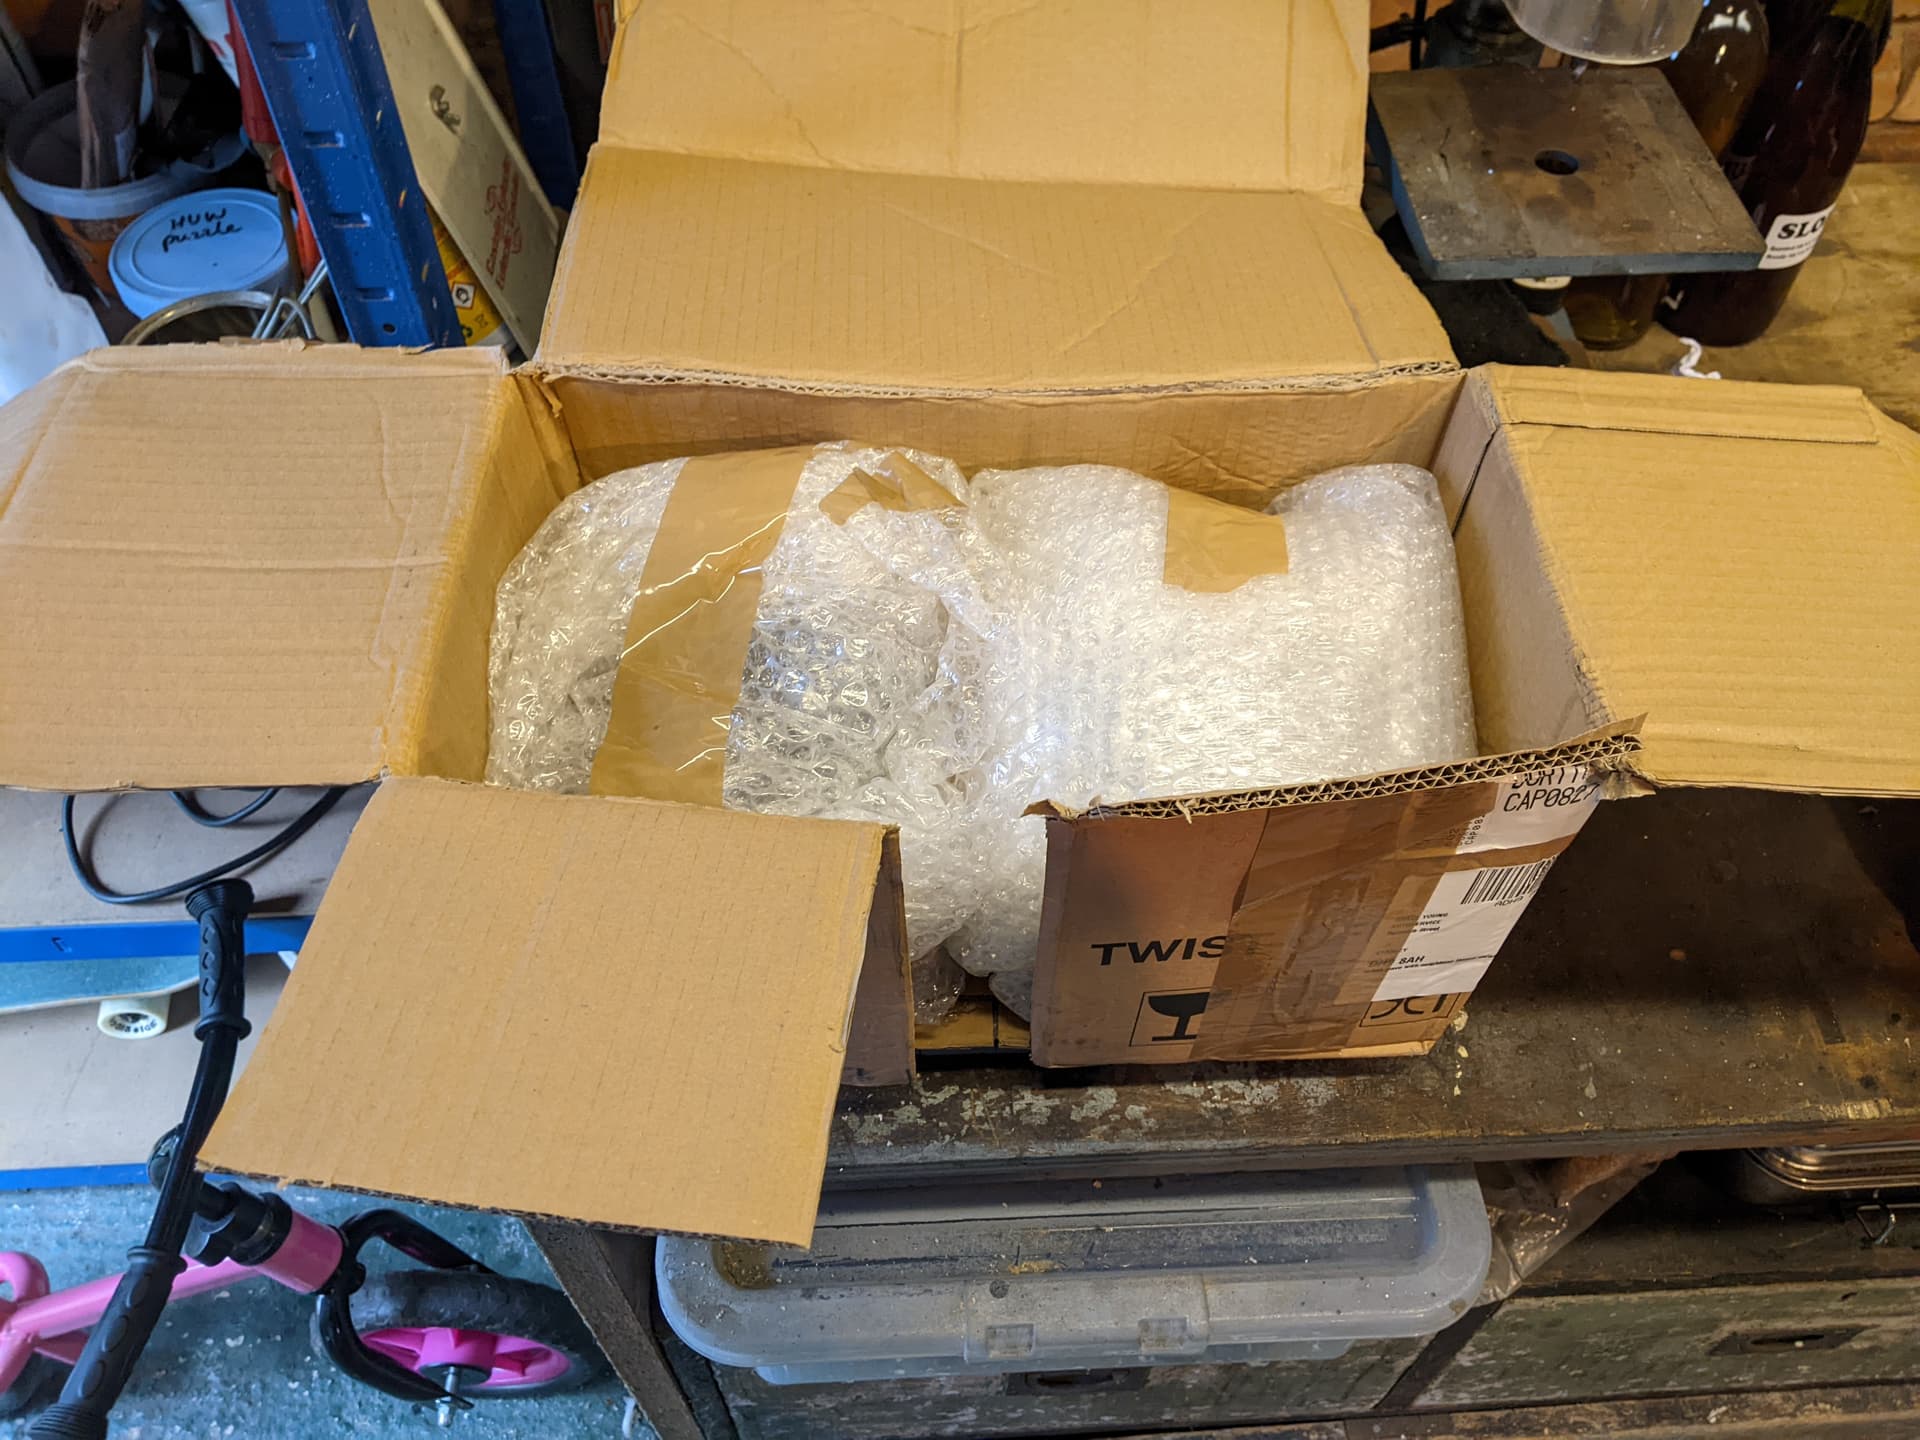
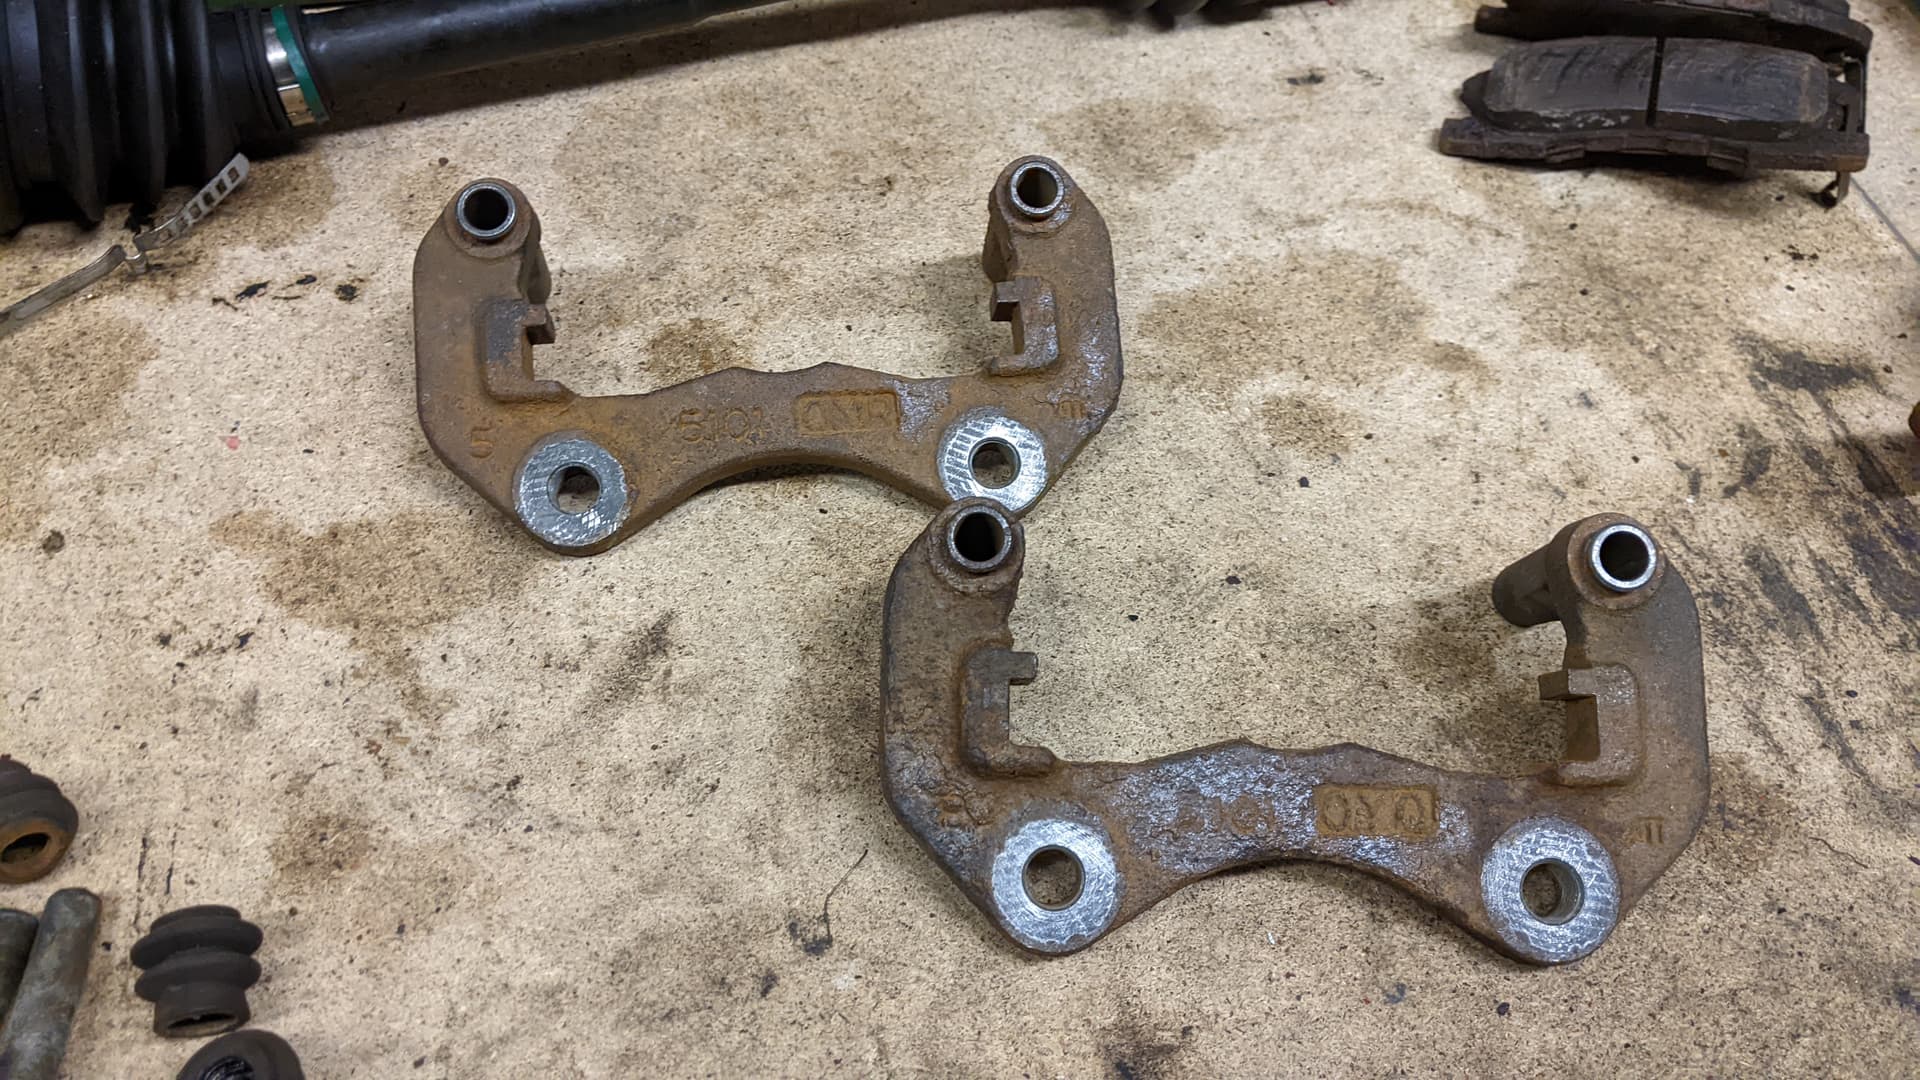
Heavier than I was expecting… Lets open it up. I thought I had ordered 2x caliper CARRIERS, what they sent was two complete calipers and carriers. result! I opened them up to see what we had
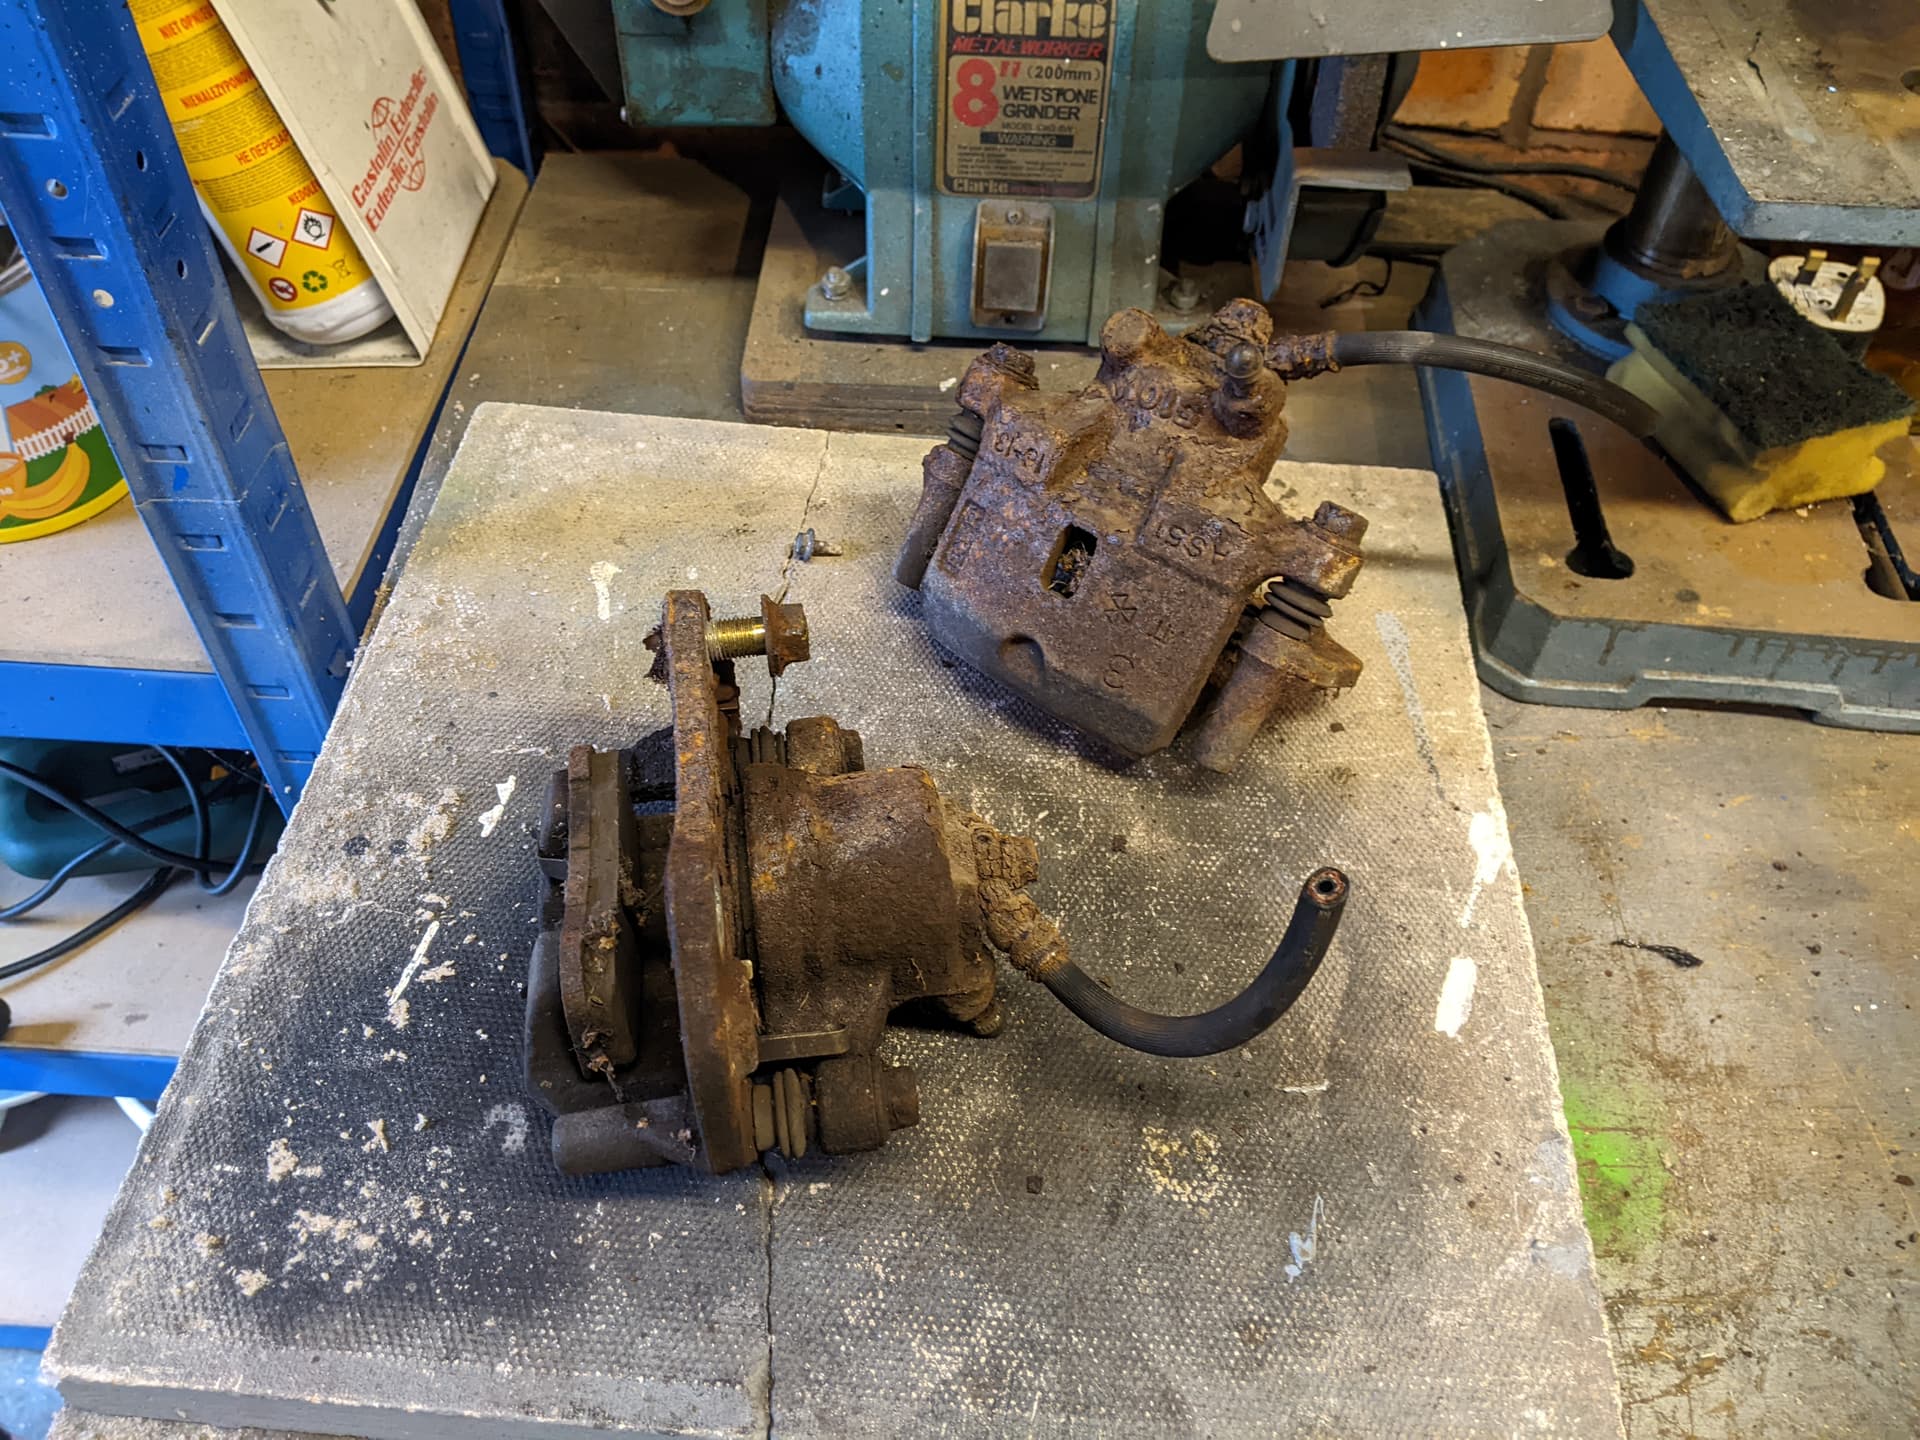
Wow, yeah they are a bit corroded aren’t they?
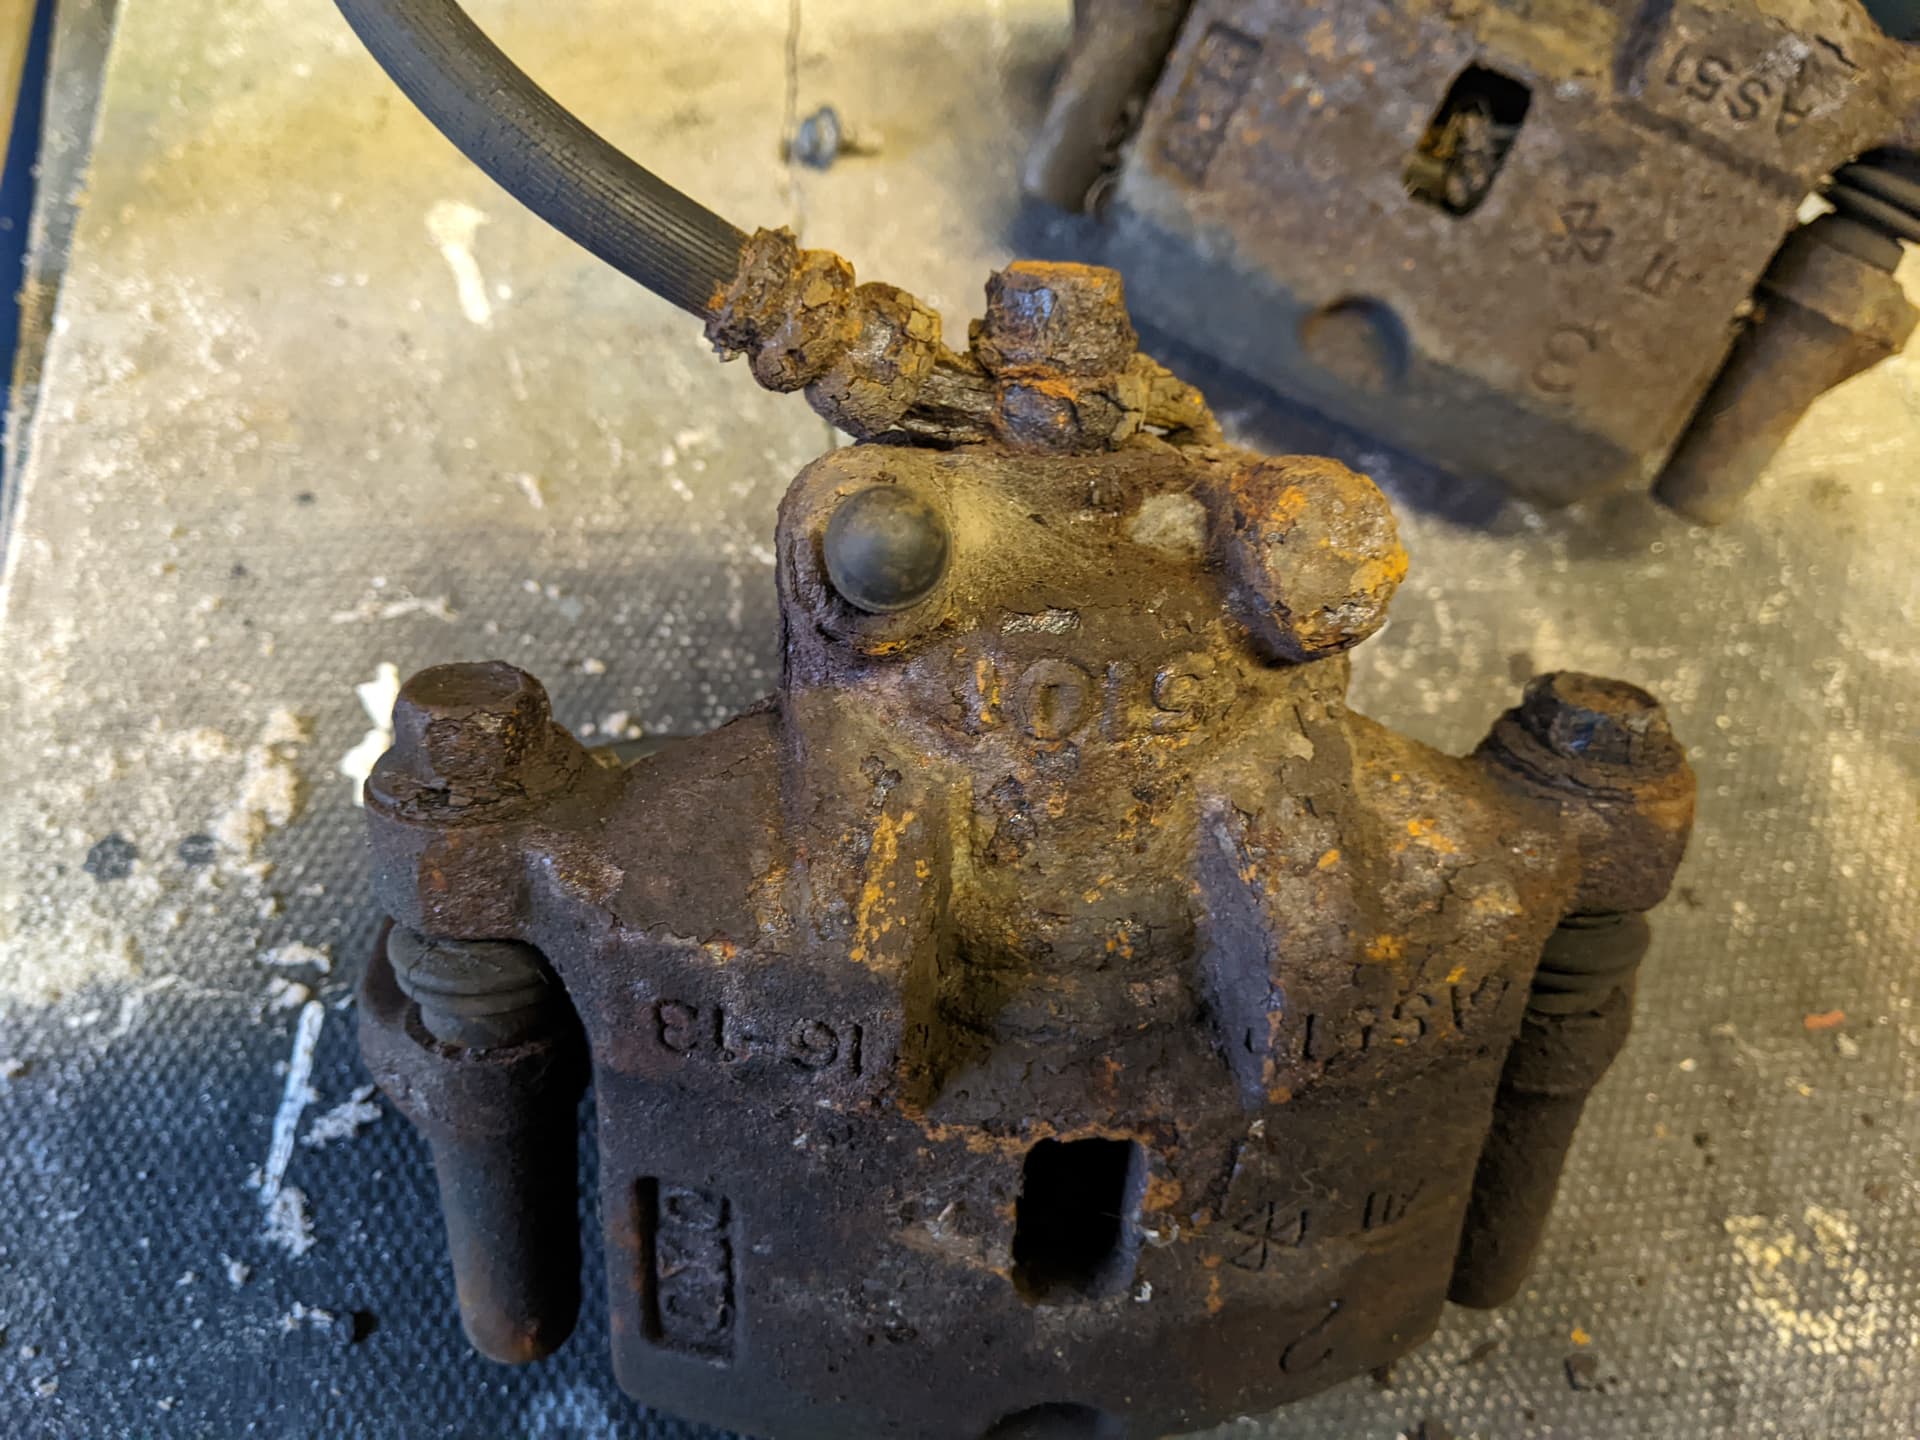
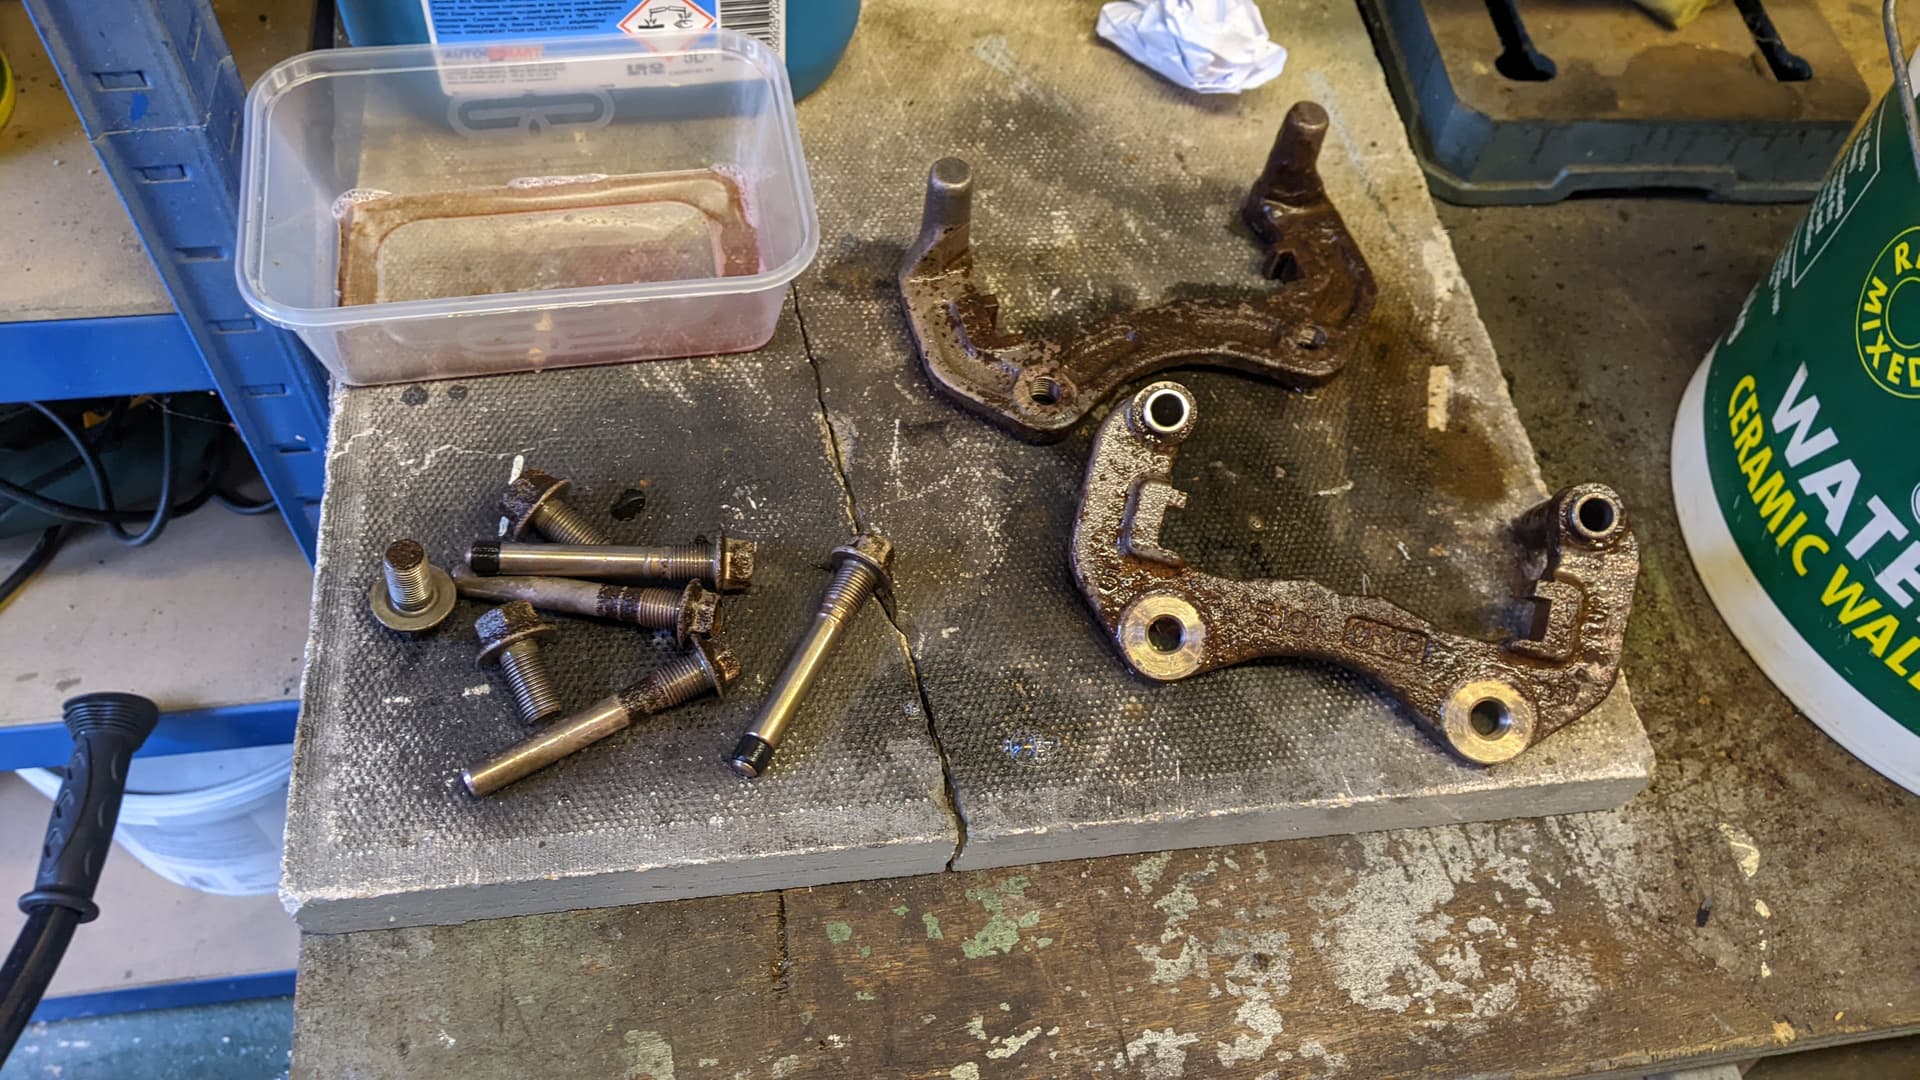
Like ‘stored at the bottom of the sea for a decade’ corroded. Oh well. first job was to separate the calipers from the carriers. they’re held on with two slider bolts. I hammered a socket onto the grotty remains of the hex bolt head and clamped the carrier in my bench vice and heaved on a 1/2" ratchet and they came away fairly easily. The threads and things were actually in OK condition, even if the bolt heads were pretty haggard.
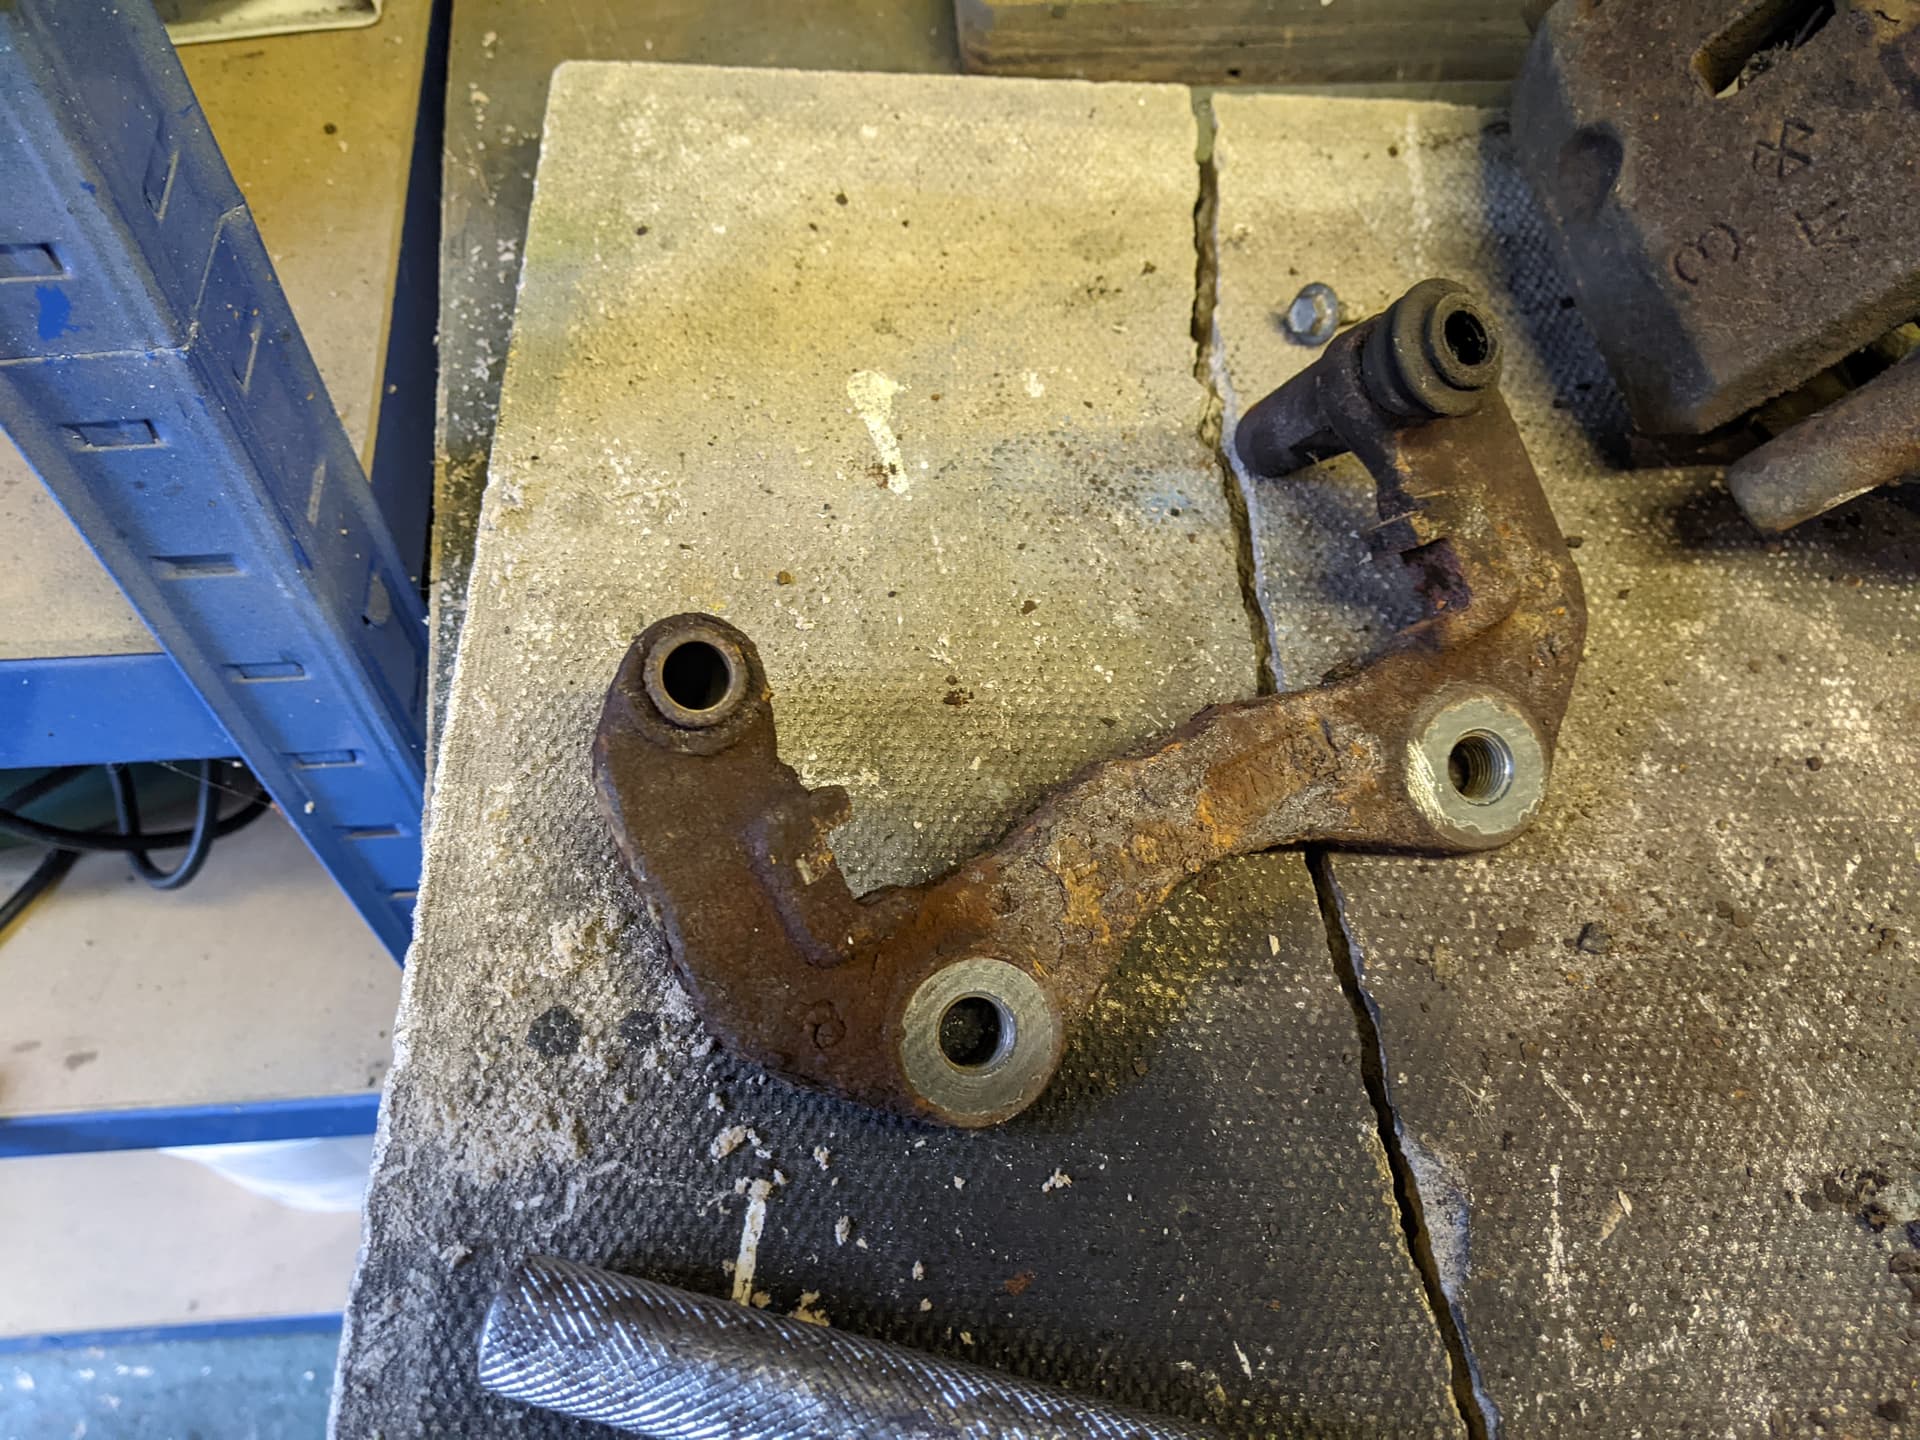
I set the calipers themselves aside as I don’t really need them right now. They came with a partially worn set of pads in, I’ll keep them for now but they’re pretty far gone. Next up i clamped the carriers in my bench vice and set to them with a wire brush
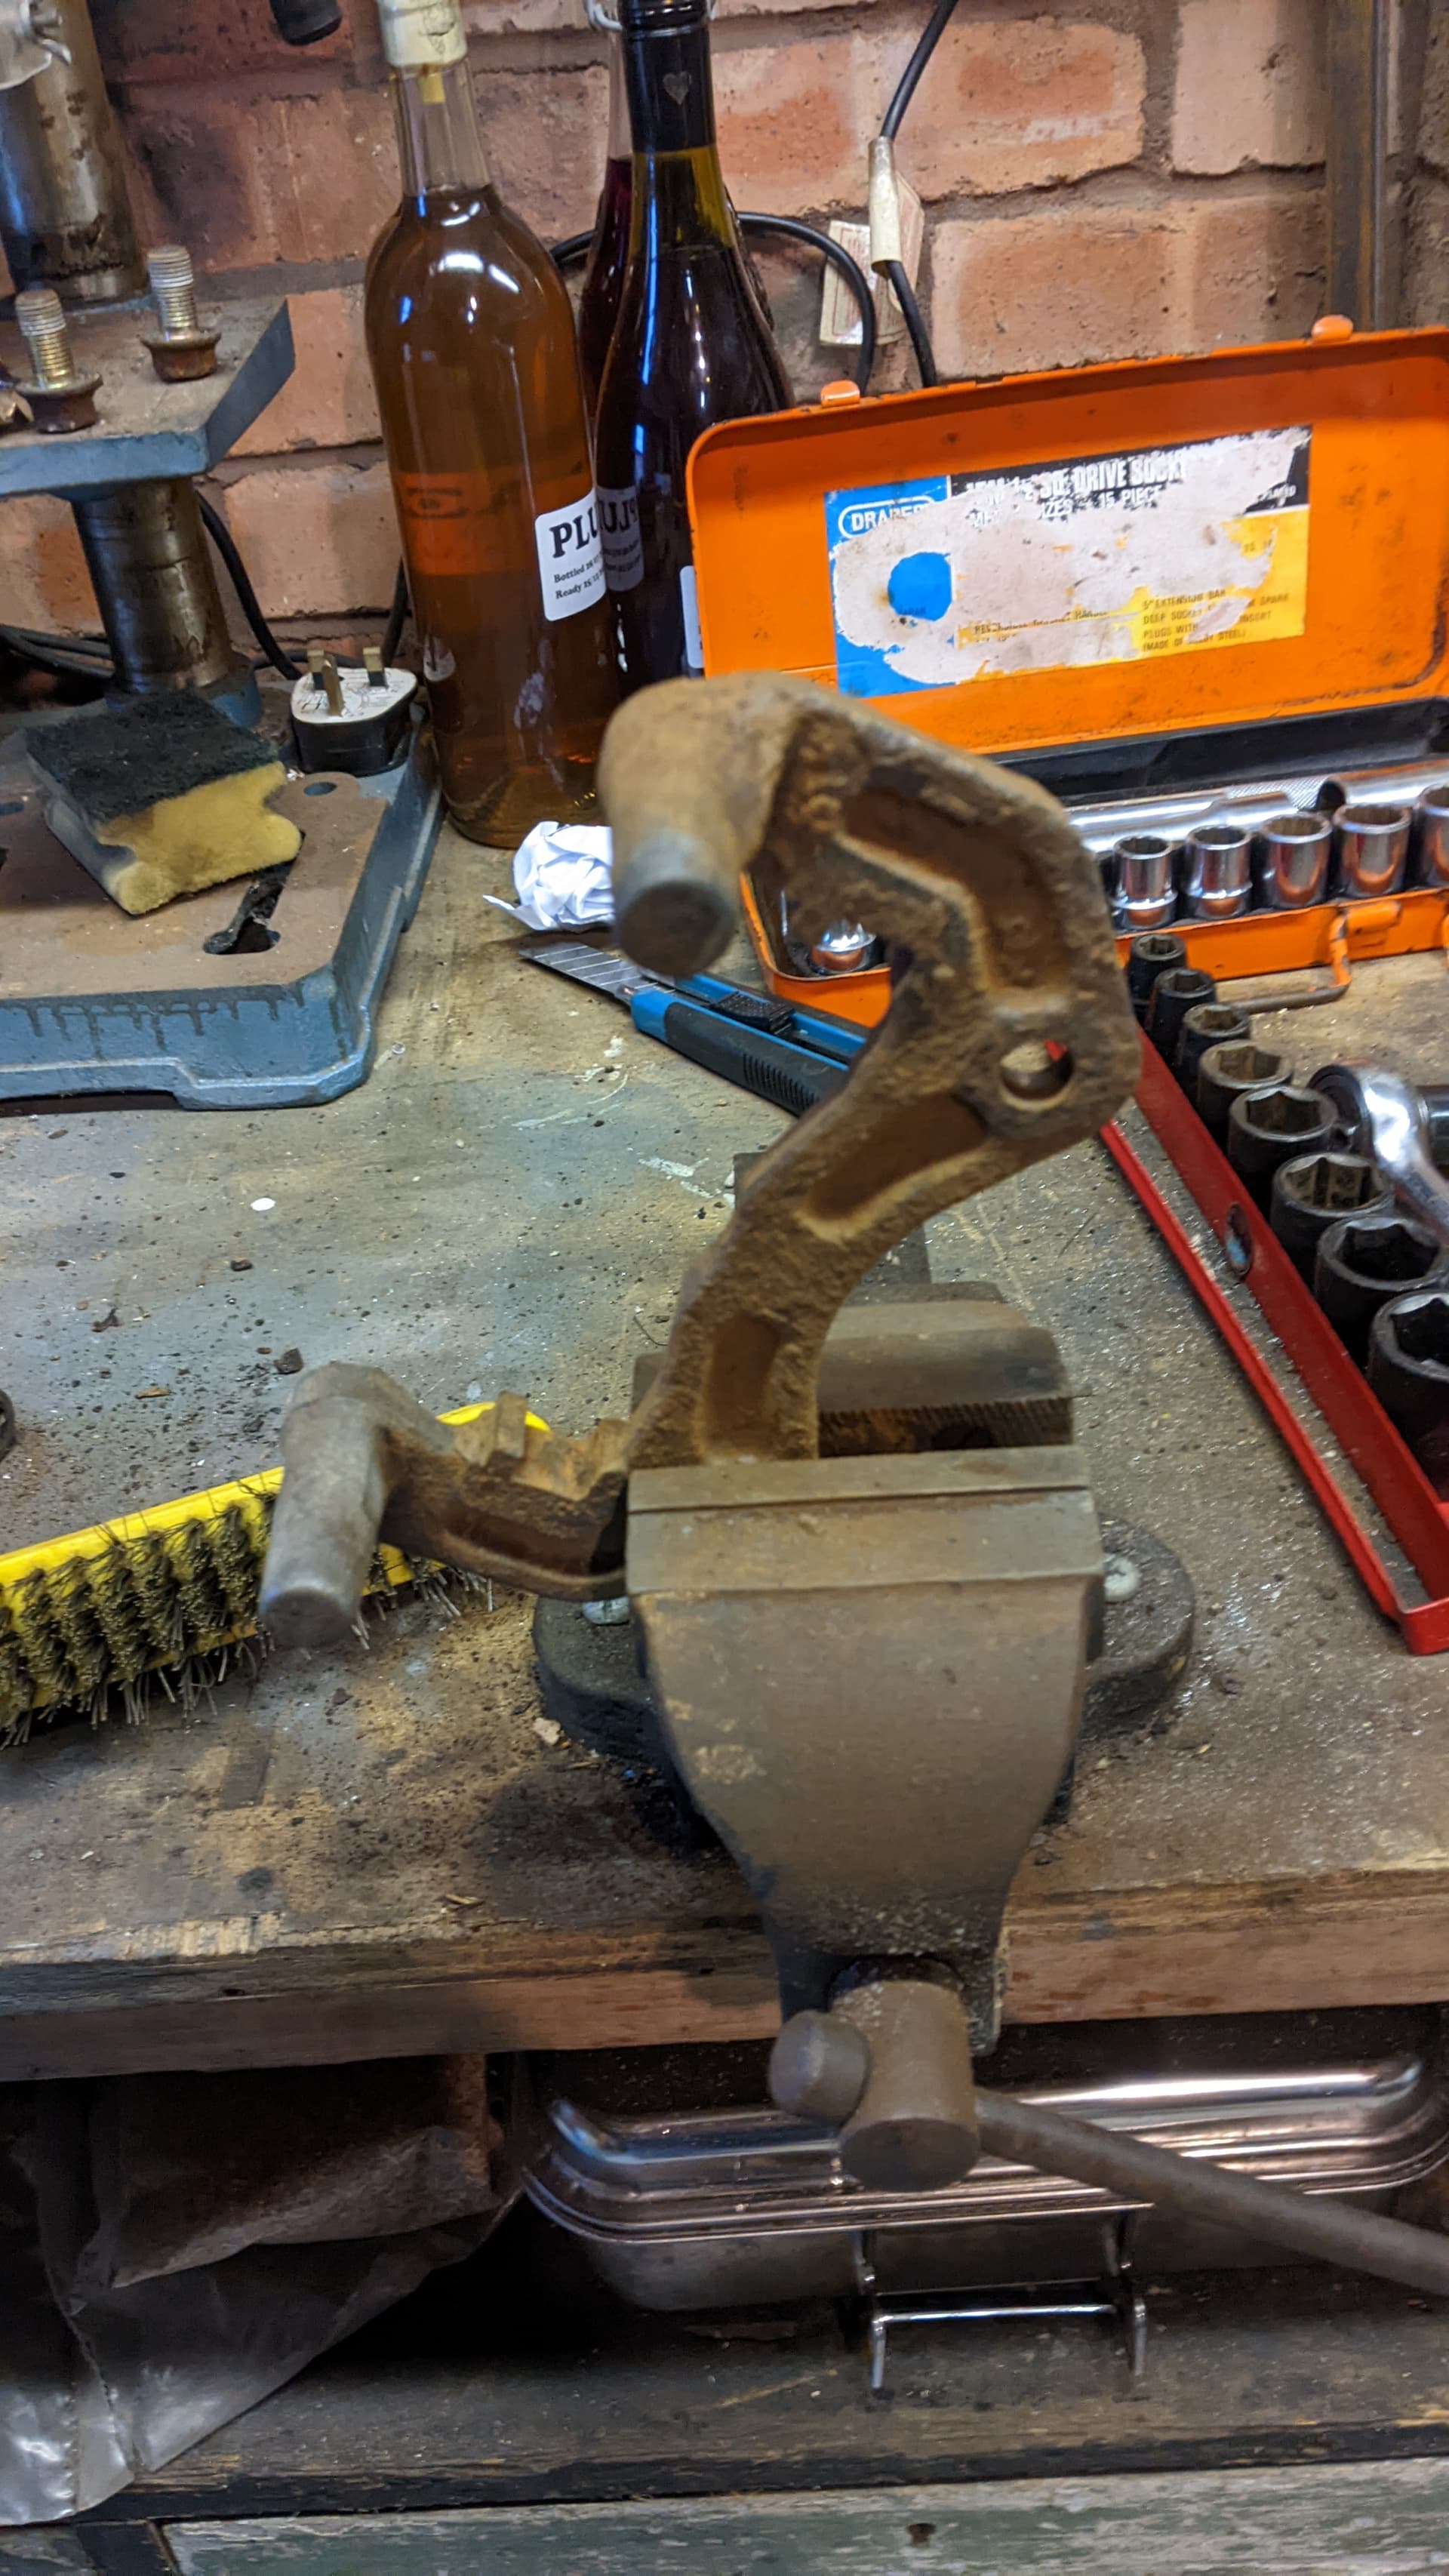
and some gentle tapping with a hammer to shock the crusty surface rust off. I gave both a good seeing to and they came up pretty well actually
However I’m not stopping there. I ordered 200g of citric acid crytals earlier in the week, and they should arrive tomorrow. Once they get here I’ll make up ~1 gallon of citric acid solution in a bucket and put the carriers (and probably the calipers too) in there for 24-48 hours. The citric acid should dissolve the remaining rust and take the carriers back to clean metal, while not eating the whole things up! It’ll need regular removing and cleaning off with a wire brush or old toothbrush to agitate the rusty crud off, but I’m hopeful this should restore them to their former glory.
Once done, they’ll get another bath in bicarbonate of soda solution to neutralise the acid leftovers then then painted with vactan to stop them flash rusting again.
I managed to save the 4x brake pad retaining clips too so thats another few random bits for the stash. We’ll have to see how the calipers themselves come out, they’re in a bit of a state, though TBF one of the pistons is free enough to move in with just finger pressure so they might not be totally shot…
6 Likes
Further adventures in home chemistry.
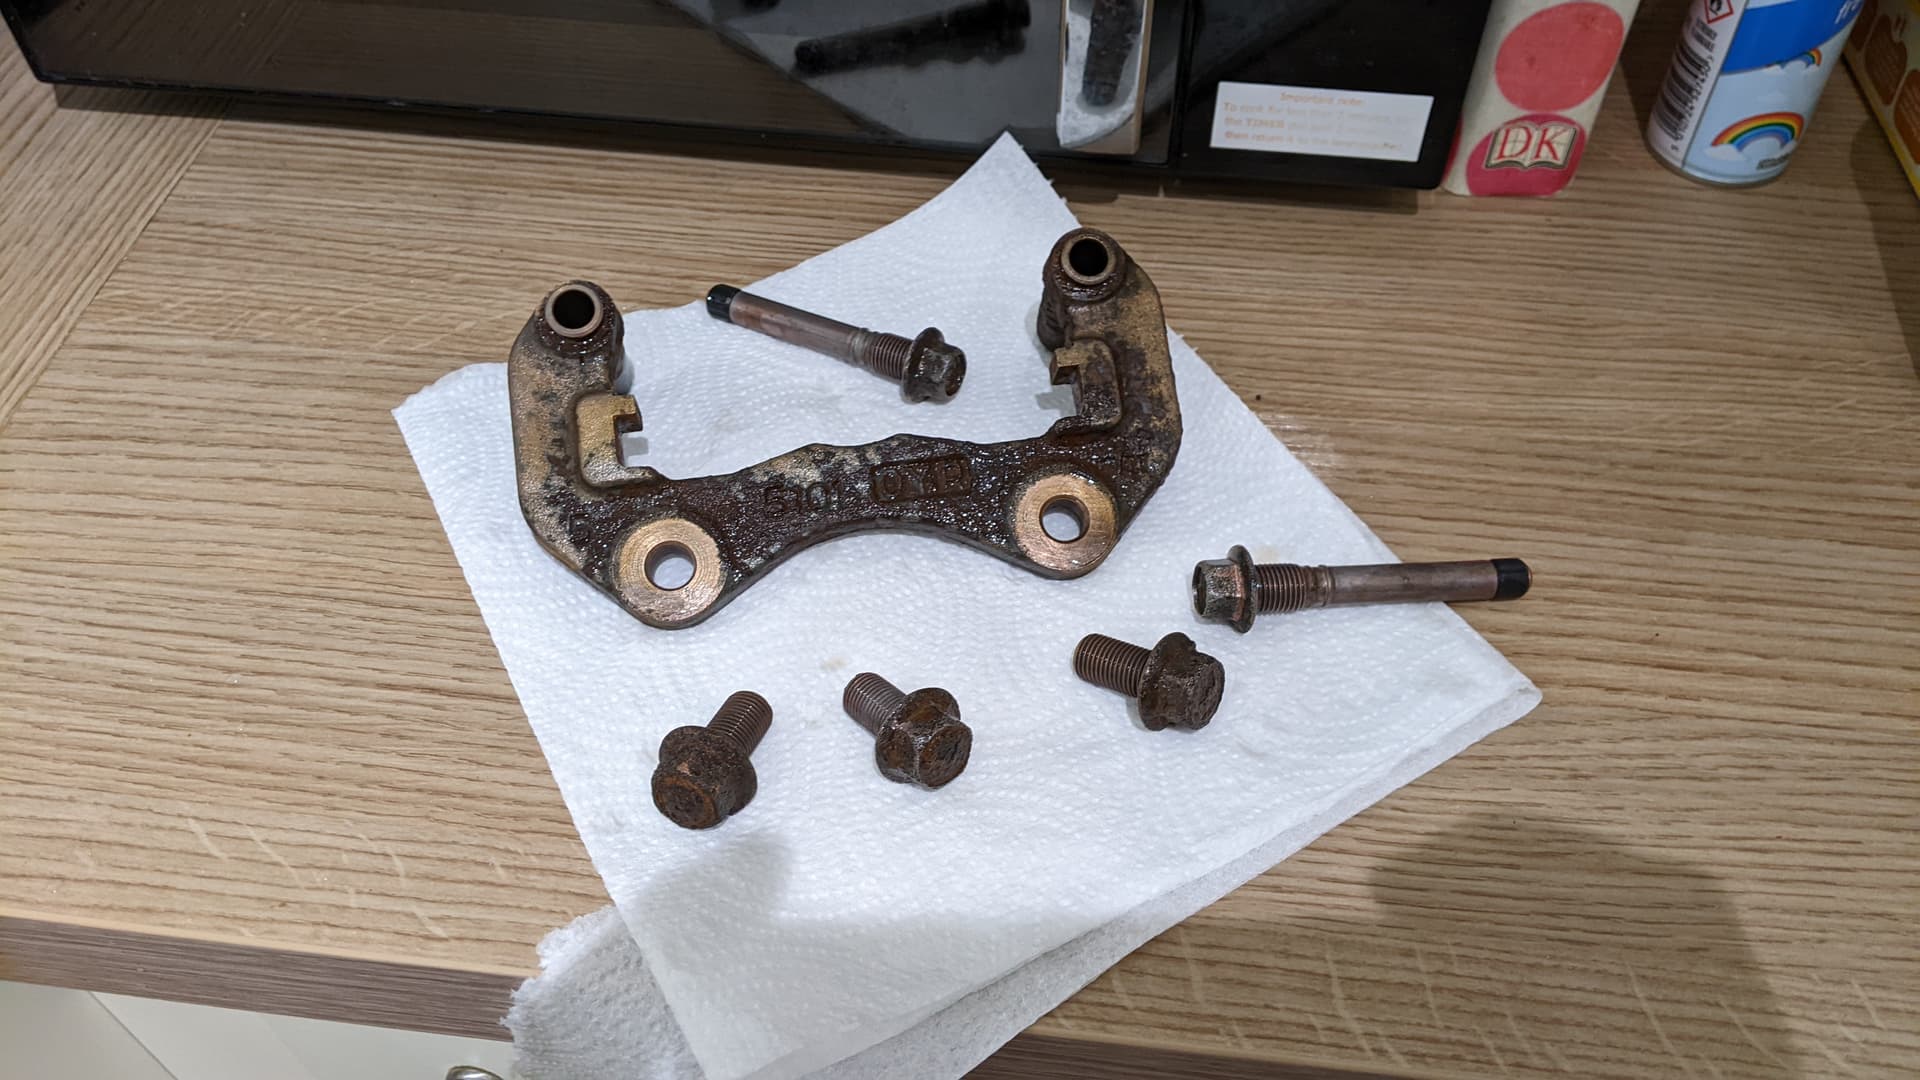
My citric acid crytals arrived today so I got an old bucket and mixed up 2 litres of boiling water and 100g of CA crystals then gave the calipers and bolts a bath

Mmmm…
I gave it all a good mix up and let it bubble away, hoiking it out every 20 minutes or so and gave it all a good scrub with an old toothbrush then put it back in to soak. Because I’m an idiot I didn’t use gloves so now I know EXACTLY where all the small cuts on my fingers are. I did this for about 4 hours, soaking and scrubbing and rinsing and so on until I got to this
I then went to DEFCON 4 and scrubbed it all with a wire brush and splashed on some hydrocloric acid for cleaning alloy wheels, then put it in for another 2 hour soak while I took my kids to a club, when i got back I took them out, washed the bucket out and washed the parts clean with tap water, lo and behold
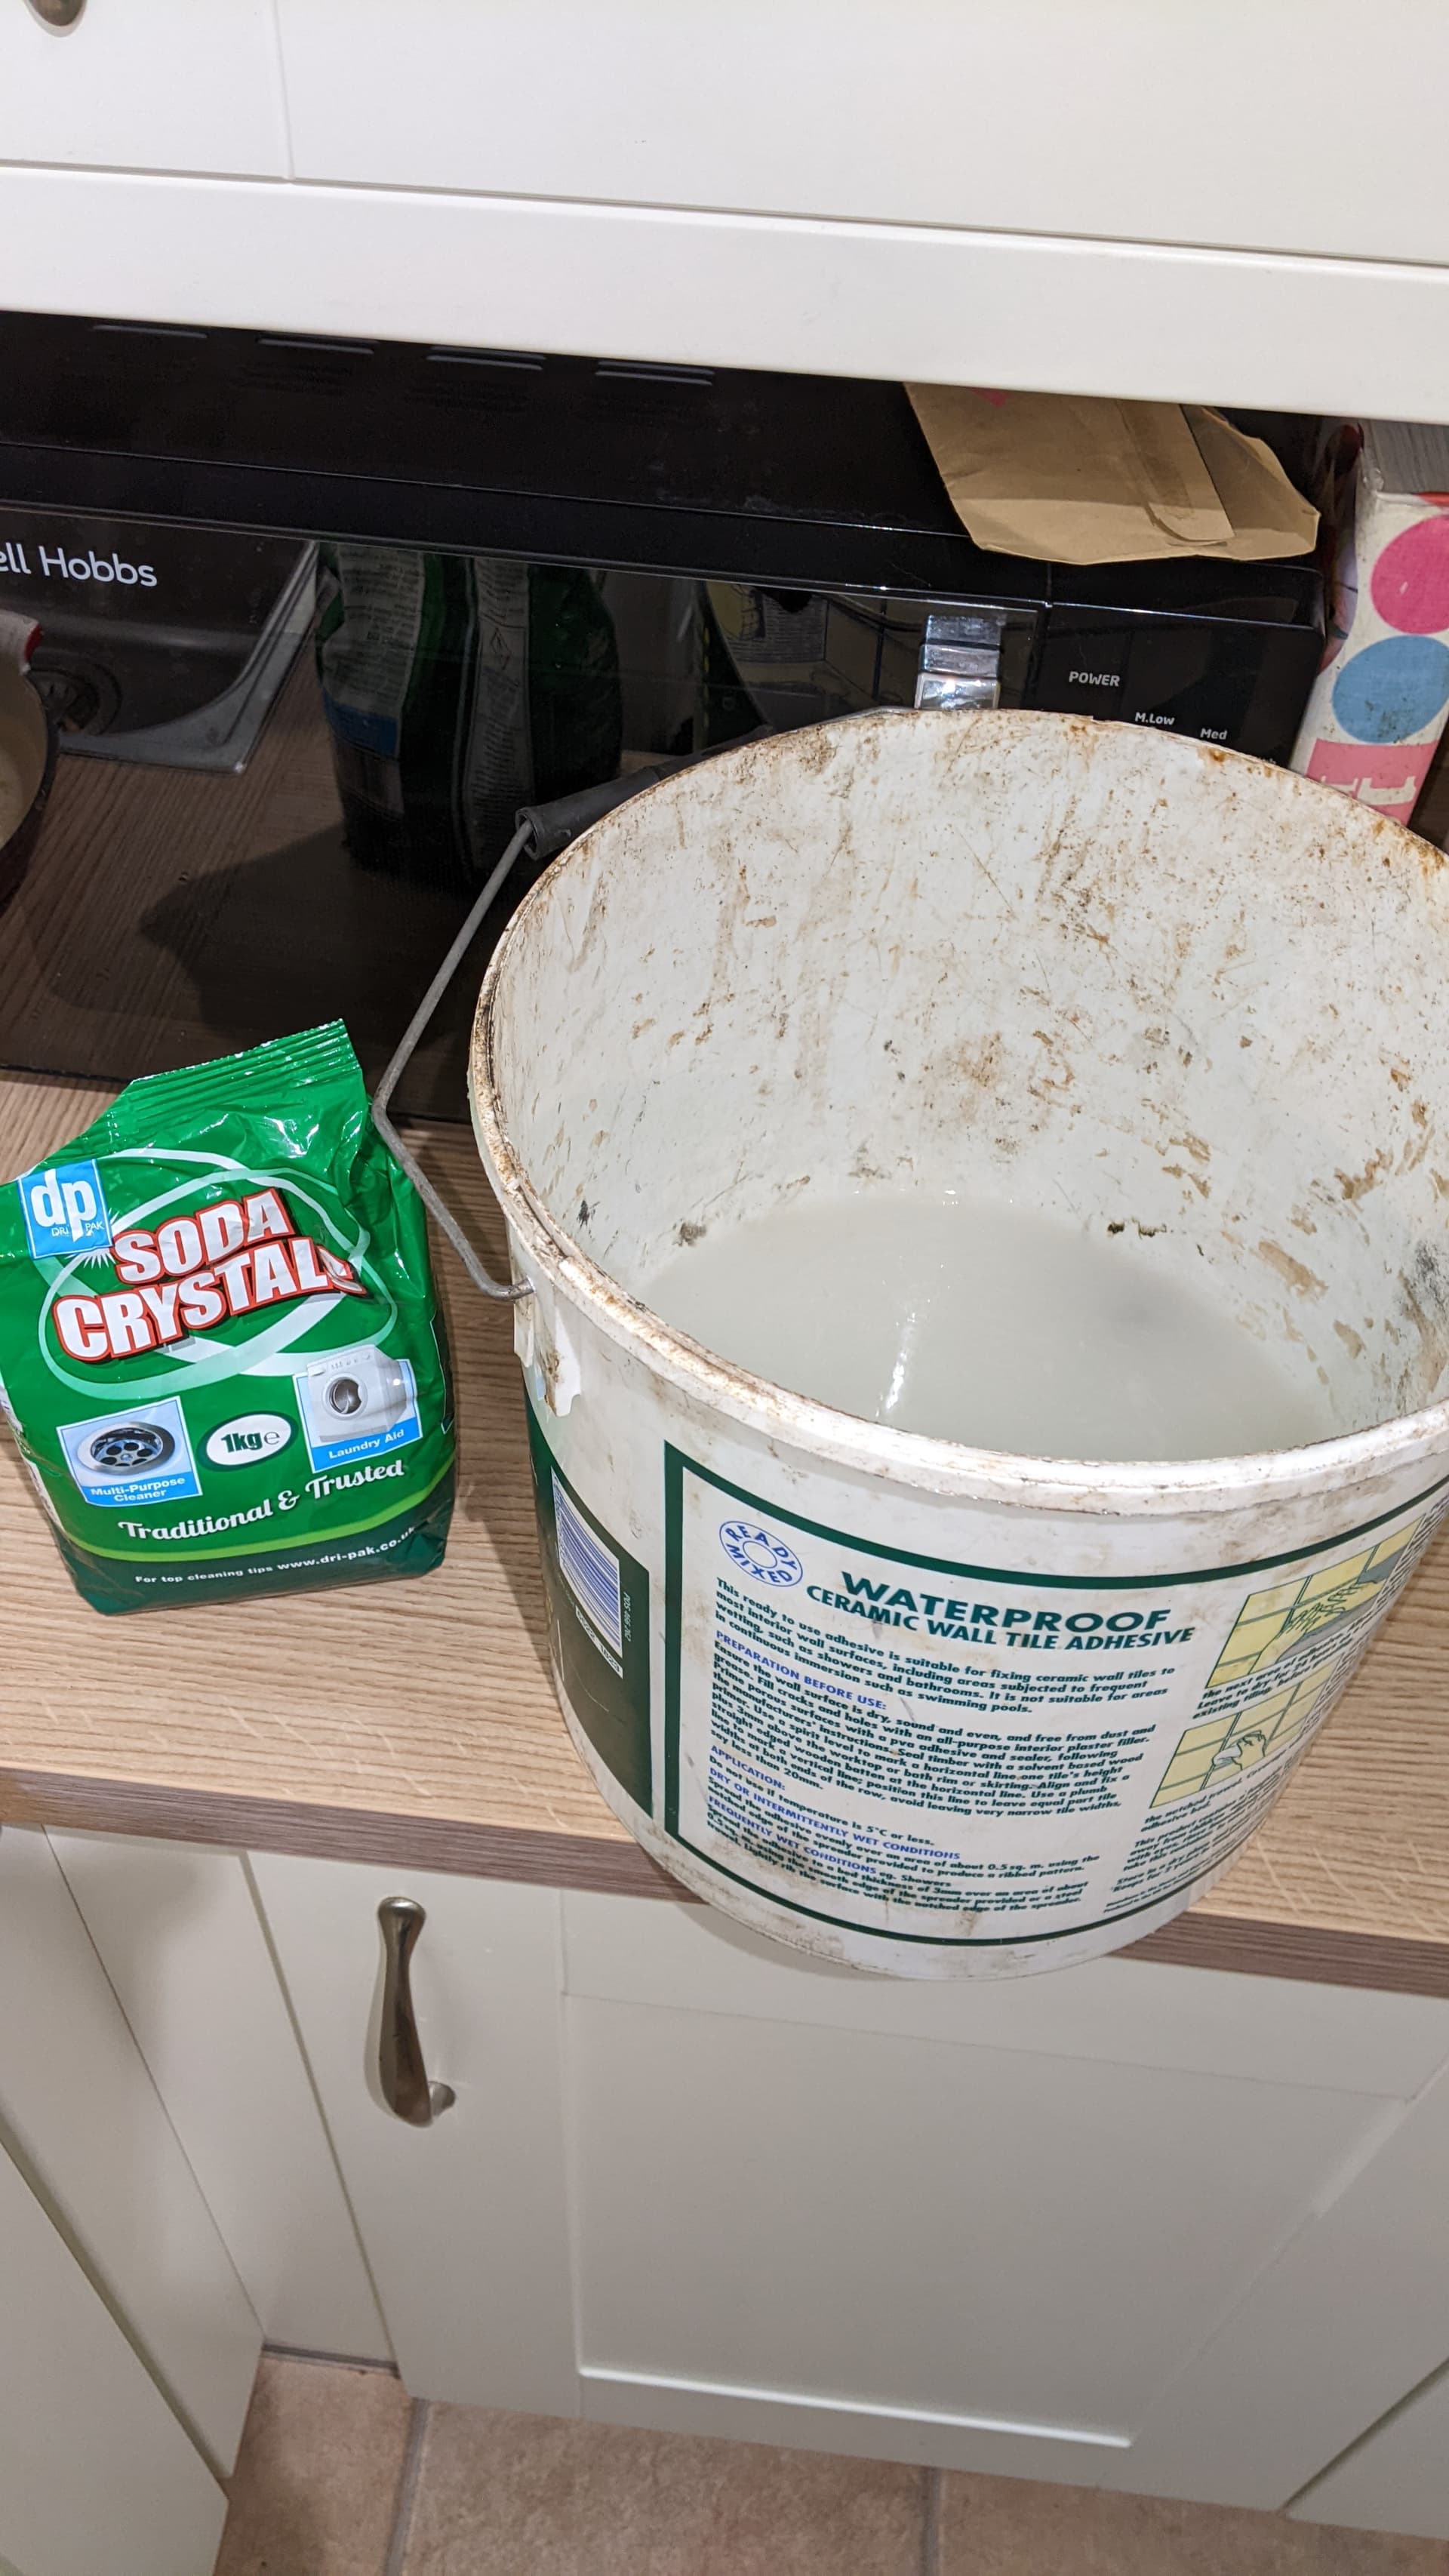
Most of the rust has come off, but it was still covered in acid so next up was a neutralising alkaline bath. I made up some more hot water and put in a couple of spoonfuls of soda crystals and chucked all the bits back in for another 30 minute swim
I quickly removed it all from the kitchen before my long-suffering wife spotted it!
I washed it all off with hot water, then took it all out to the garage and used a tiny wire wheel on my dremel to clean up the leftover bits of grot. This is the end state

There is some perma-crud but the important bits - the cutouts for mounting the brake pad and the threaded sections - are cleaned back to clean, smooth metal. I also used a polishing pad down the slider holes to polish up the bores. Looking down there, the bores are now lovely and clean. A quick fit up of the slider pins shows they fit perfectly and slide as expected. I’ll fit up the carrier over the weekend and check it all works as expected, but this seems heaps better than the drivers side one on the car at the moment.
I’m going to give the other caliper another bath to see if I can get it even cleaner than this one, but will probabaly wait to put the currently fitted carrier in too, and let them soak for a couple of days to see if I can get them really clean. Anyway, its a huge improvement over what I started with, I hope you’ll agree!
For anyone keeping notes, the citric acid powder was £2.79 from ebay and the bag of soda crystals were £1.49, and I used about 5% of the bag, so a cheap fix.
7 Likes
In an effort to quieten down the exhaust pipe on the Daihatsu I bought a thing. Various internet sources reckoned that muffler inserts would work wonders to quieten down the tailpipe noise, and at £12 it seemed a cheap option. The insert arrived earlier in the week while I was away with work, but its been a slow day today so I got out and had a go at fitting it.
it sits inside the exhaust tip and you need to drill a hole through to secure it with an M6 bolt. The idea is that it makes the exit smaller bore and therefore quieter as the exhaust gasses bounce around and cancel each other out more.
Anyway, I started the car and used a phone app to get a noise reading at idle
Thats from cold, so sitting at ~1200rpm and its a bit noisy. Actually, its not a lot more noisy than my neighbours BMW M135i is from cold, but still noisier than the MOT tester would appreciate I suspect.
I drilled a hole in the underside of the tailpipe - I really need to get a new set of cobalt drill bits, almost all the small ones have snapped and the ones that haven’t have lost their sharpness/coating and are crap. Eventually I drilled a suitable hole and was able to fit the insert. I started the car up again and
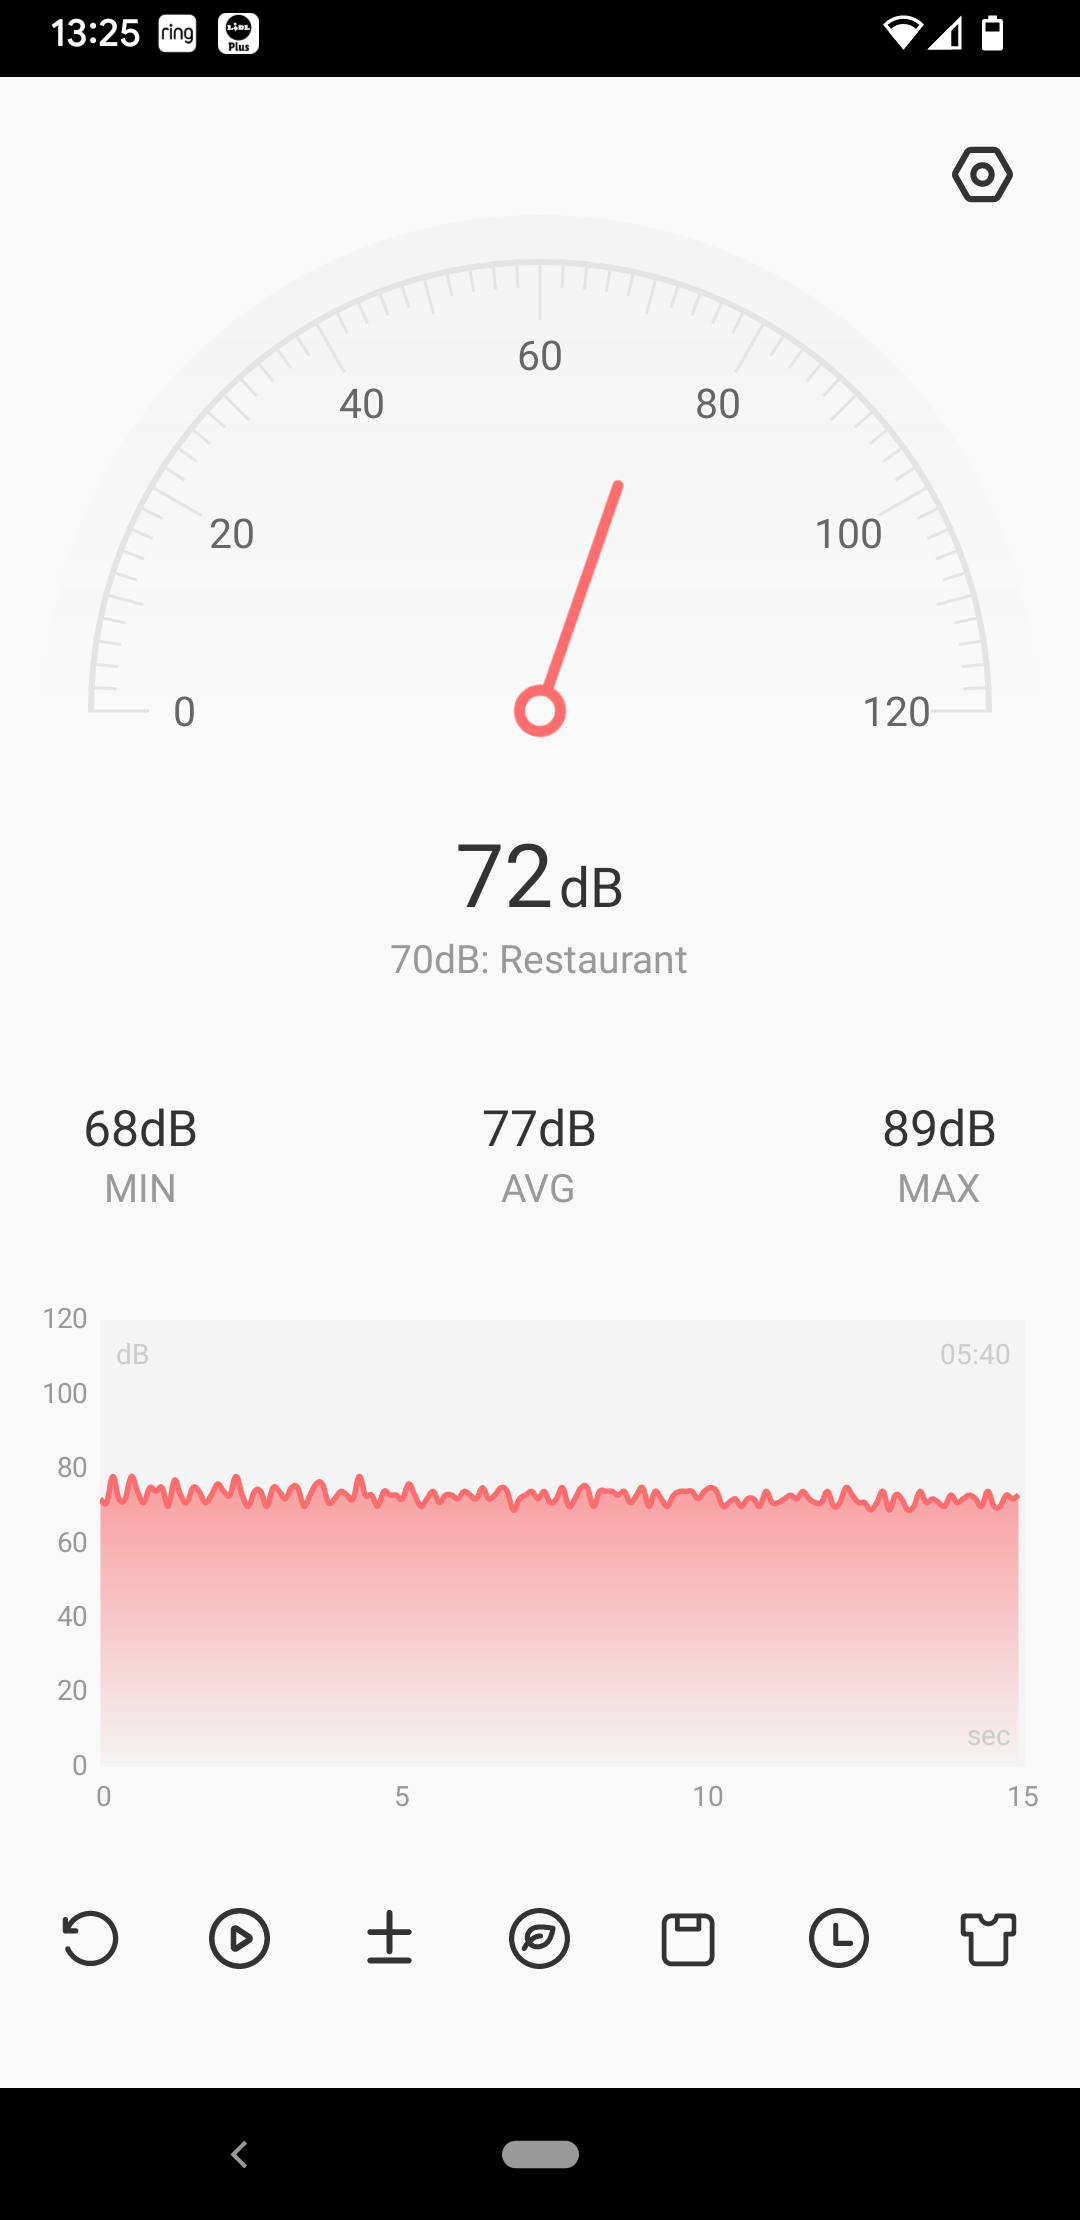
Hmmm, thats not bad. Its taken 9dB off the noise. I let it idle for a bit to warm up and it seems a lot quieter.
Later this evening, I took the Daihatsu out for a 45 minute drive and its ALL THE BETTERS. warmed through at idle it bounces between 68 and 72dB, its a bit gruffer than with the original exhaust but not ‘asshole loud’ any more. It revs freely through to 6000 rpm, so the insert doesn’t appear to be causing too much back pressure in the system and it tones down the noise through the rev range.
I think I might have it just about perfect now, it rides well with the suspension changes - polybushed all round and a 19mm rear ARB; free flowing but not crazy loud stainless steel exhaust; factory stiffer springs and a cone filter on the intake. Its got a new clutch and all gear linkage bushes replaced so the gearchange is as good as its going to get.
The derusted front caliper carrier is working fine too, so there is no binding from that.
I just need to get out and use it more! I’d got a bit disheartened with it over the winter but going for a fun drive out has reminded me just how much fun the little car is, and how involved you feel in driving it. My 2001 Mercedes c-class is a good car, capacious and feels safe, but its a bit numb to drive. Thats a good thing on a long motorway journey but its nice to have the antithesis to that as an option when the mood takes me.
7 Likes
A while back I broke the fob for the RCL on the sirion, I dropped the keys and it snapped the teeny tiny connectors for the lock microswitch, I’m way too ham-fisted to resolder something that small so I’m thinking about how to work around the problem. A 2nd hand RCL fob for a Daihatsu is silly money, so thats a non-starter.
Option 1 - Can I buy a 433MHz RCL fob from anywhere, and pair it with the receiver in my car? Or does it have to be a specific Tokai Rika C01SA chip? Generic 433MHz fobs seem to be ten-a-penny but useless if they won’t talk to the receiver in the car.
Option 2 - I could buy an aftermarket universal RCL kit to replace the OEM one in the car. The OEM system is mega simple
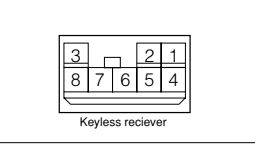
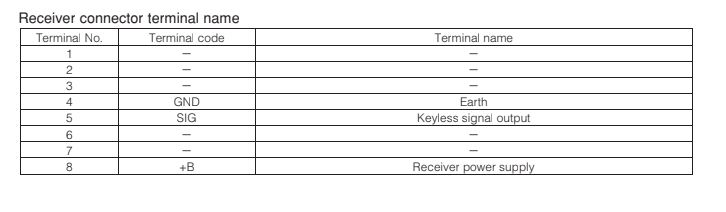
3 wires - thats all. port 4 goes to battery negative, port 8 goes to battery positive (fused). The bit that is perplexing me is port 5. All of the kits I have looked at seem to expect two ports for signal, a ‘lock’ signal wire and a separate ‘unlock’ signal wire. Daihatsu just use one signal wire to trigger the pneumatic pump to lock or unlock the doors. How does this work, and more importantly, how would I get an aftermarket kit to work with the daihatsu wiring loom?
Option 1 is vastly preferable, but I can’t help feeling that its too simple and cars would be getting unlocked and looted all over the country if it was this easy to pair any old 433MHz fob to an existing receiver? Or maybe it actually is this easy?
Can anyone help?
I’ve tried to get a aftermarket system to work on my m300 but i couldn’t get it to work. I am not a good electrician so it might just be that my lack of skills caused it to not work dit what i found out is that it is wired in a wierd way with only something like 4.8 volt that go to the lock when you unlock or lock the car.I tried almost every combination but it kept blowing fuses or just not working. I suspect that most aftermarket systems use 12 volts instead of the 4.8 volts Daihatsu uses. The aftermarket reciever klicked when used but the locks wouldn’t do anything.
1 Like