Looks nice, I like bronze more (I think) but it’s not my car so you have to decide!
Auto transmission oil is not something I’d use to improve shifting and certainly wouldn’t use it in a manual gearbox. This is not due to the weight though. It is an hydraulic oil and has a viscosity to allow a pump to circulate it, a chemistry for anti foaming, detergents and additives to help survive high heat from pressure of being pumped through small holes and endure the horrors of the torque converter. It gets to where it needs to go by being pumped. A manual box has the oil splash about and the oil needs to be tacky, have shear properties (cling to surfaces) and also deal with heat from friction. The oil thickness is only part of the puzzle. Does the oil stick to things, remain under pressure, is okay with the syncro ring material and so on. Auto tranny fluid is not something I’d risk using. Use a shock proof oil instead. I still like a light weight shock proof in a gearbox and a heavy weight in the diff, this is in line with the manufacture specs since they will have researched what works and we often guess or are guided by theory. I have had oils tested before (PM oils are a helpful group not far from where I once lived) to help solve an issue we had with wear on a Nissan R200 5:1 ratio rally diff that ran really hot from high loads, high rpm and an exhaust next to it. The case hardening would wear off the pinion after 5-6 stages. The PM Oils tribologist formulated an oil that fixed the issue, same weight just different chemistry. Yeah, auto trans fluid might work but in machinery that I can’t afford to replace I put the best in that my experts recommend.
2 Likes
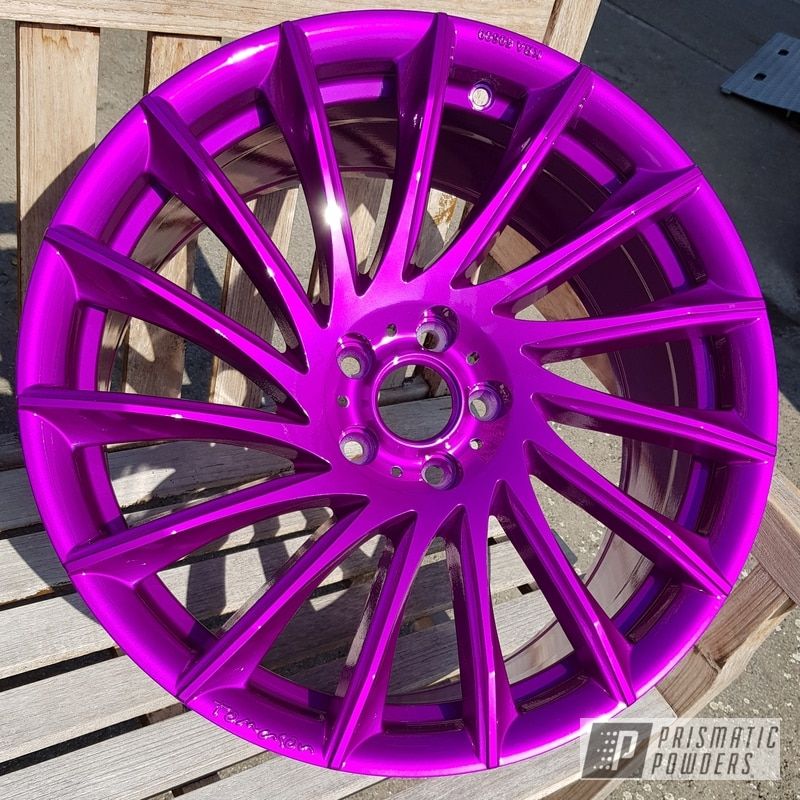
Thanks all, didn’t think of how the body colour would differ on people’s PC monitors! Its actually a very slightly purpley silver, I think its P10 Lavender (grey) Metallic?
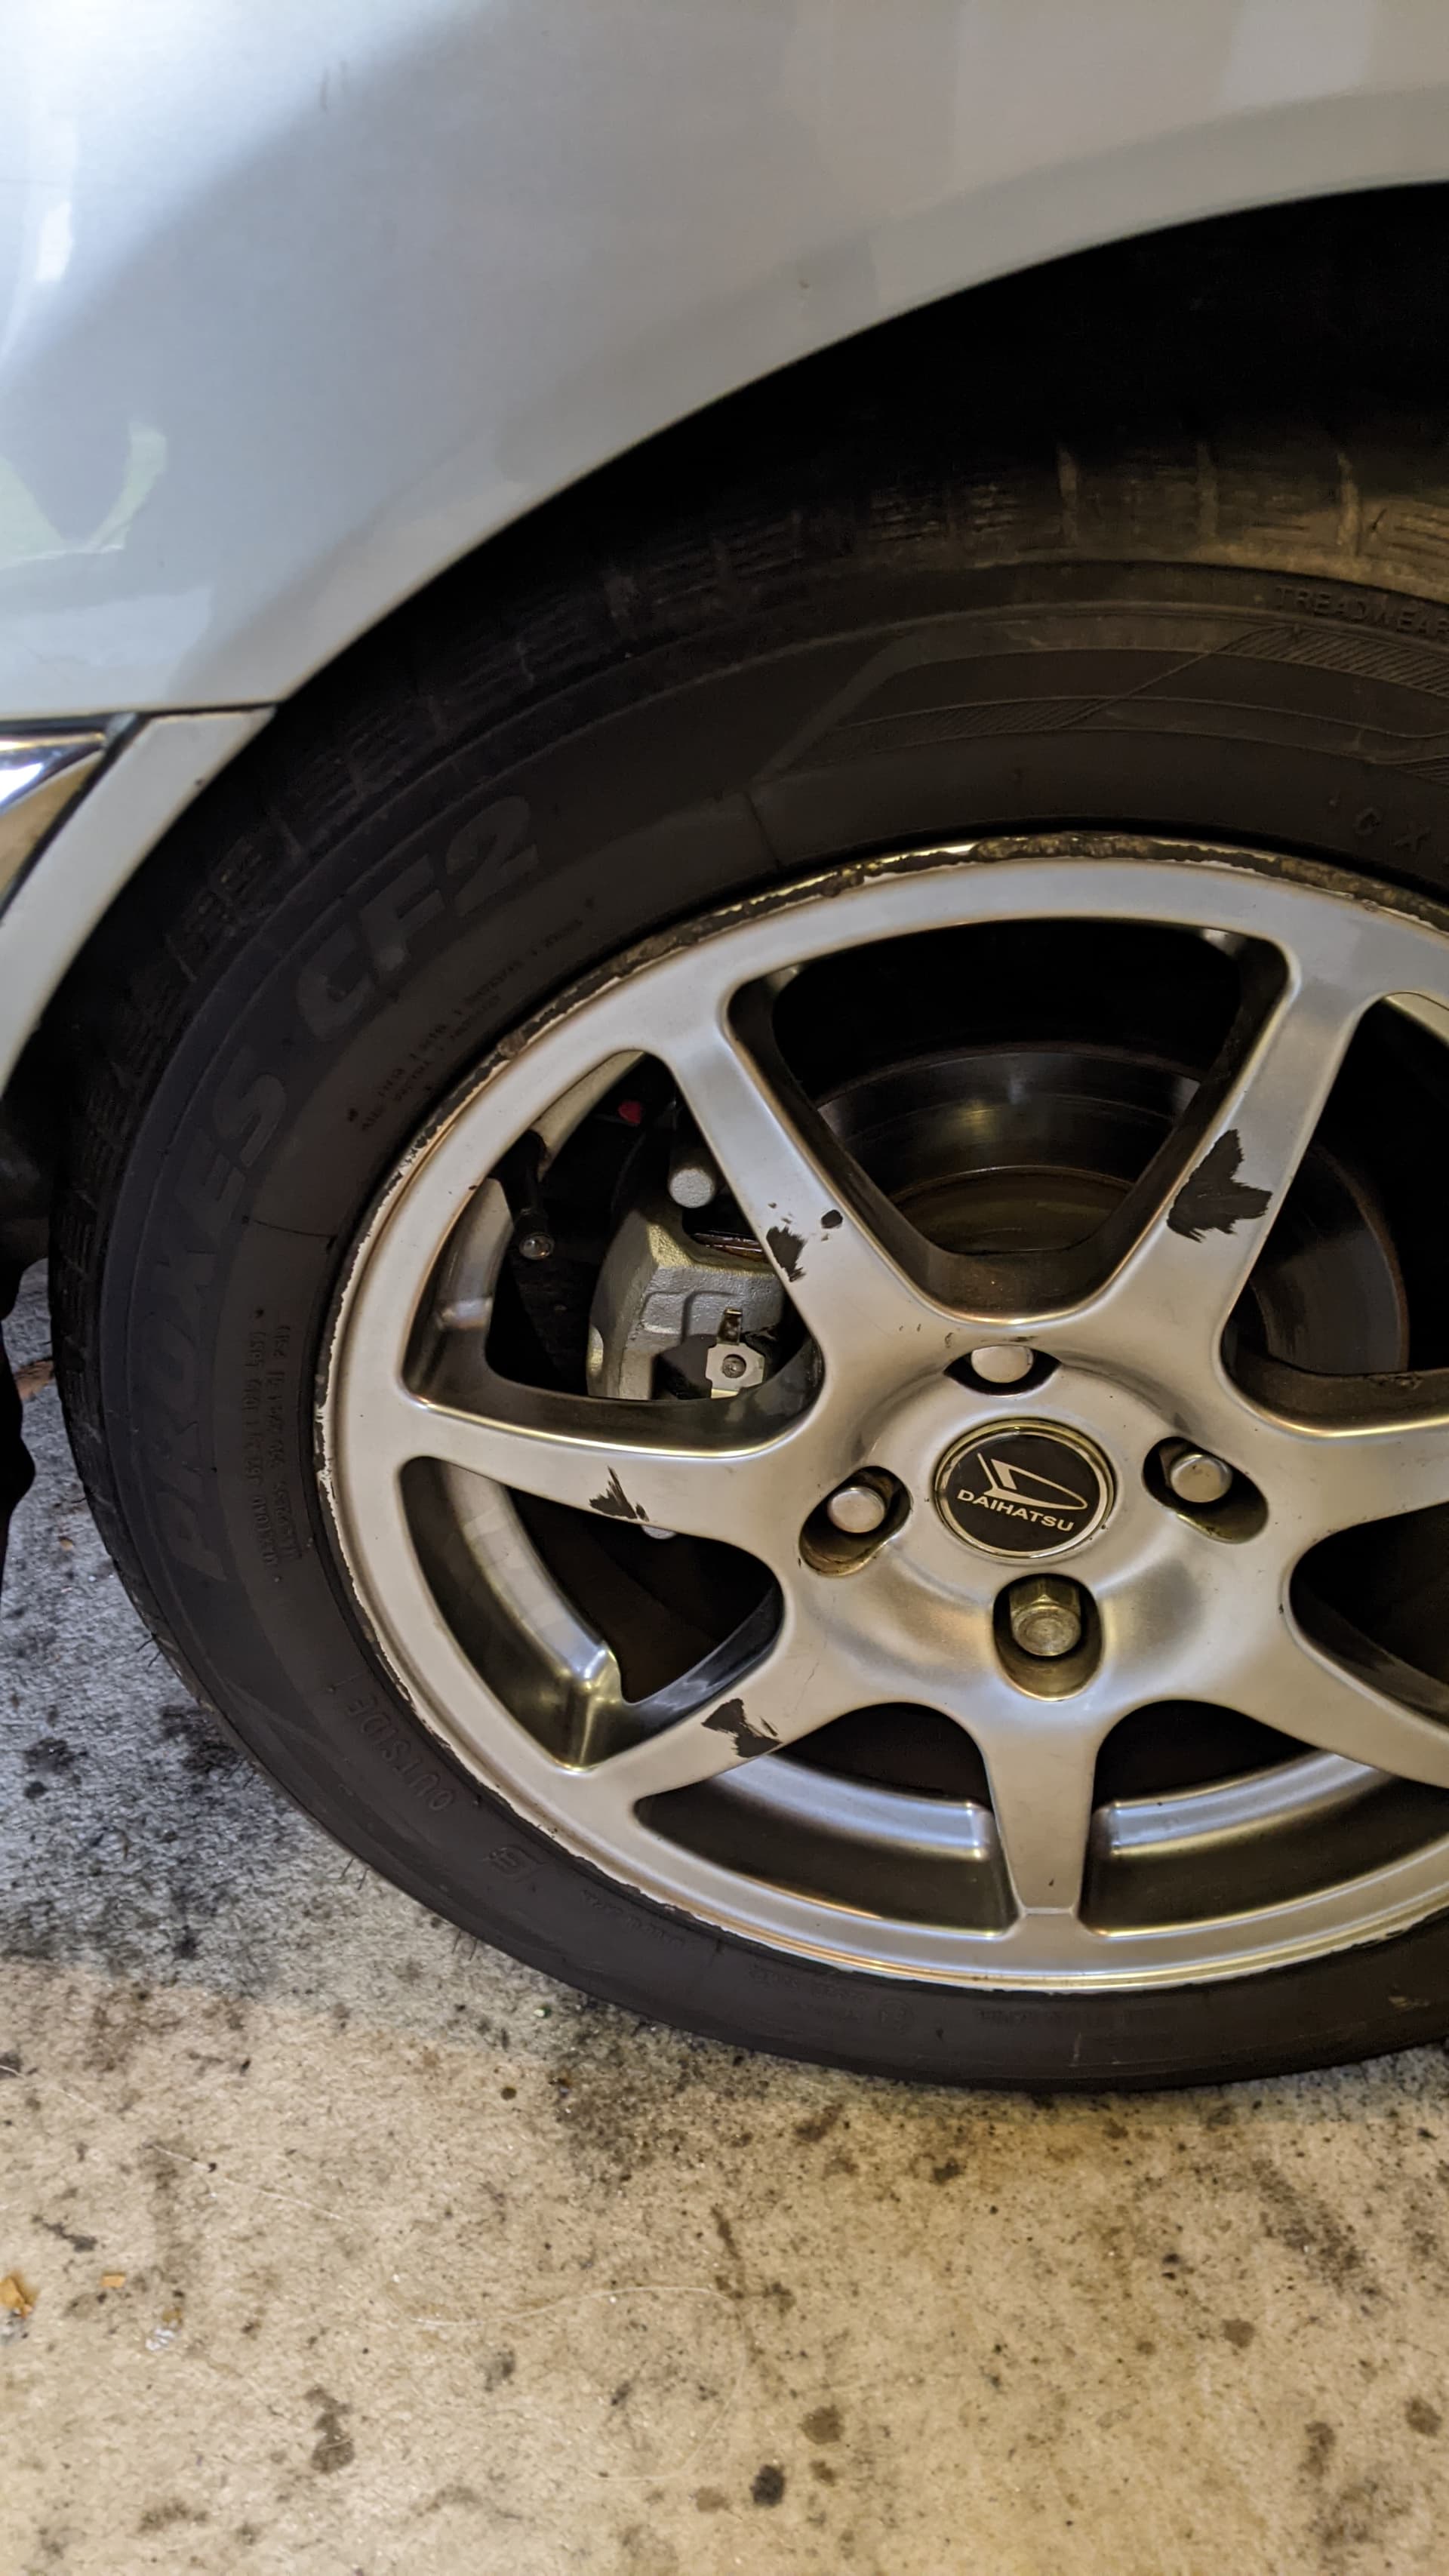
I might try and get a rattle can of bronze and respray the 2x wheels and see how that looks since its a cheap & quick test prior to committing to blast & powder coat.
1 Like
I took the risk a few times with atf in the gearbox and diff.
I’ve had a lot of luck. Had a diff that was eating itself up, we only had engine oil and atf with us. So i just tossed in the atf. The wear and tear stopped. We left it in for years without any problems. Even changed the gearbox and transfercase oil for atf with succes.
However i don’t recommend it unless you don’t mind the risk.
We had loads of spares, and were already counting needing to replace them.
3 Likes
[quote=“Granger, post:263, topic:3337”]…didn’t think of how the body colour would differ on people’s PC monitors…[/quote]If it isn’t because of aging monitors, colorblindless could also be playing a role. Since it has a purple hue, maybe this color might suit?
I seem to have developed a binding caliper on the front nearside, it takes about 5-6 miles to start binding on, but the wheel is hot after a 10 mile drive.
I removed and greased the sliders last weekend but took it out for a drive again today and its still binding so I think its probably new caliper time. A recon caliper on exchange basis is £70 + surcharge, or I could get a rebuild kit for £25, but I’m not sure I fancy standing out in my garage in December in the UK wrestling with a freezing lump of metal…
2 Likes
Cast-iron calipers can get honed. If rubber inner- and outter seals aren’t damaged and still maleable, a rebuild kid wouldn’t be necessary. It’s never a bad idea, to have a brake hone in one’s tool collection.
Compressed air will drive out even more stubborn caliper pistons. Just be sure to insert a block of wood in between piston and caliper housing, in order to prevent the piston from becoming an unruly projectile
2 Likes
I’ve just got my 2nd RCL fob back from having the buttons re-soldered and it works like a champ again, however I can only seem to get one fob to pair with the car.
I have 2x working fobs now, and thought that the car would let me pair both to the receiver in the car - I can pair each of them, but when I sync one, the other loses sync.
Anyone know if it is possible to pair 2x fobs at the same time so either will work?
Brakes work is on hold until the reconditioning shops re-open in January, but I’m now leaning towards sending my spare pair of calipers off to be fully reconditioned by a proper grown-up person and then just swap them over when they arrive back with me. I’ve never been entirely happy with braking performance so this might improve things. I may also look seriously at new flexis too…
1 Like
Yes you should be able to connect 2 keyfobs. From what I’ve read I online is that after you pair one you should immediately redo the procedure for the second one without disconnecting the battery. So press the buttons until the first remote works and than press the buttons on the second remote until it works.
Also, swearing allot seems to help ![]()
3 Likes
Ah, interesting, thank you!
I’ll try again later on, I think maybe I was too slow to try and pair the second fob.
2 Likes
Hi, Try and find some Ferodo DS 2500 pads for your new calipers.
They were the pads originally fitted to Rally 2s and 4s. Makes a big difference.
3 Likes
I had those on my Sirion. Bit more dust and noise, but did really well on the track.
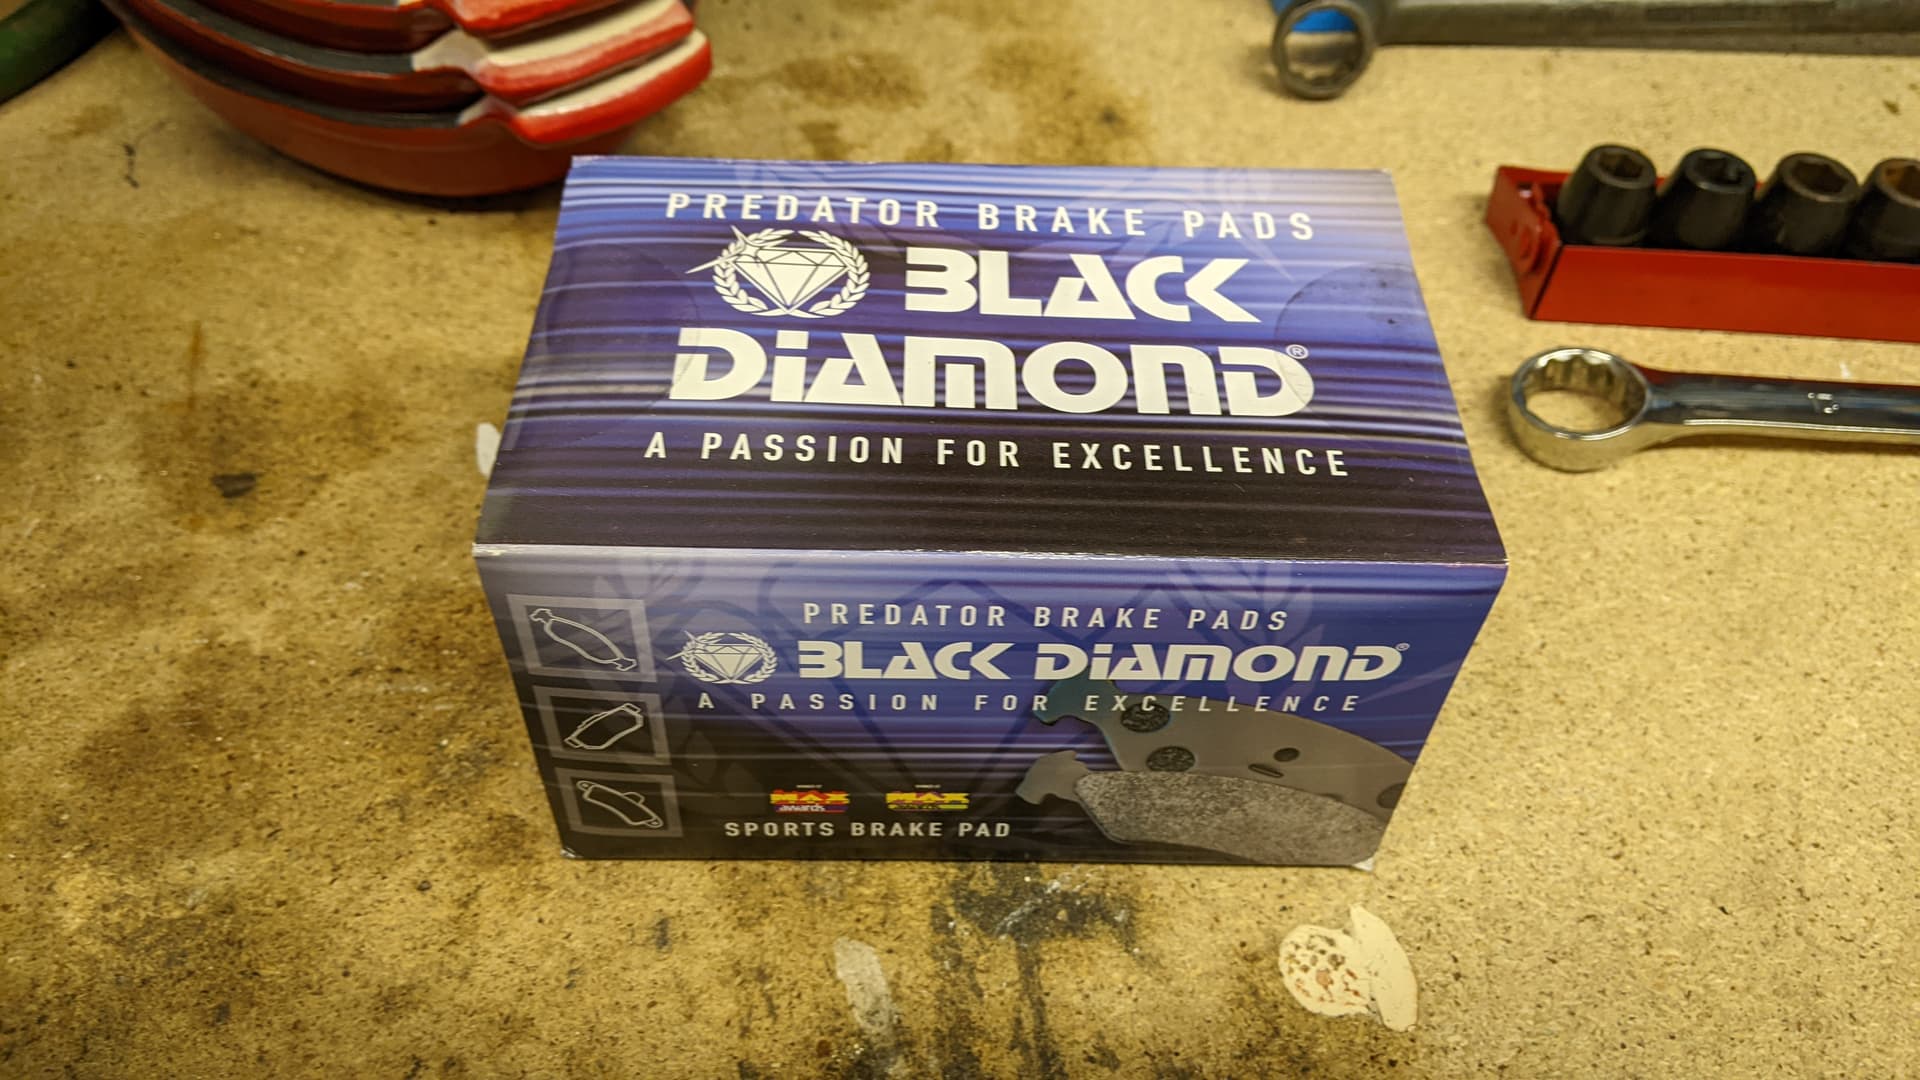
I’ve bitten the bullet and sent off my ‘spare’ set of front calipers & carriers to a company called Bigg Red in the UK to have them fully refurbished, and also bought a set of Black Diamond performance brake pads for the calipers when they come back.
I looked as the DS 2500s and while they are available, they’re £160+ a set which is more than I’m spending on the calipers! I’ll see how I get on with the Black Diamond pads for now.
Changing the calipers over will be a piece of cake, likewise pads. I need to have a look at getting a new muffler for the exhaust, which will need measuring up. The current one is 9" long by 4" diameter and nestles nicely in the transmission tunnel of the floorpan. I need to get the car up on the lift and see how much more room I have to play with. I’d like to go for a muffler thats at least double the length of the current one, and possibly longer to cut down on the noise and enable me to remove the muffler insert from the tailpipe. This will need some planning, and rolling around on the floor so I’m hoping it warms up a bit outside!
I’ve not got any further on the wheels, I need to order up some Rays Racing Bronze paint to put on the 2x wheels I painted copper and then fit them up to the hub to see how that looks before going any further.
4 Likes
The Sirion has been confined to the garage for about 6 weeks due to a binding nearside caliper on the front, its just about pushable when stone cold, but after a mile or two of driving and its pretty bad. Since its road salt season I’ve not been particularly motivated to get it sorted since I’d not be driving it much anyway, but I finally extracted the digit and sent off my ‘spare’ set of calipers to a UK brake refurbishment company called Bigg Red last weekend for a refurb. I got this set as a bit of a bonus, having asked a guy breaking an M100 sirion for a pair of caliper carriers, and he posted me out both carriers and the calipers for £20. The downside is that they looked like they’d been stored in the sea since shortly after manufacture. I thought I had a ‘before’ picture but I can’t find it so imagine a rusty cannonball and you’re not far off.
I rang BR to explain they were a bit weathered and the guy at the end of the phone laughed and said most of them arrive like that and that they can sort the majority out, but that if they couldn’t then they’d either dispose of them or post them back, and all I needed to do was pay a deposit of ten quid for inspection at this point. I duly paid my tenner and posted them off, and about 4 days later I got an email saying they were all sorted, good as new and could I please pay £160 and they’d post them back next day. As promised, they arrived here less than 24h later, looking well peng.

Derusted, painted, new pistons, seals, bleed nipples - basically good as new. I’d also posted them the carriers, bolts and a few other bits, all of which came back good as new, along with new slider boots and copper washers. Very impressed. While they were away, I also got some new pads for the car too. The Rally 2 and Rally 4 originally came with Ferodo D2500 pads which are supposed to be really good and a big upgrade over the regular pads, however they are £160 a set (!) and also not actually certified for road use. This isn’t a problem per se, but my pockets weren’t deep enough for them and I could get some equally well-reviewed, and crucially road use certified ‘predator’ pads by Black Diamond for £25 delivered so I got them instead. They pitched up the next day.
So Saturday rolled around and I had some time to roll around under the car. I got it up onto the lift and weighted the boot down with ballast to get the nose to rise up, then whipped the front wheels off. I’ve been in here quite a bit, so nothing is too bad
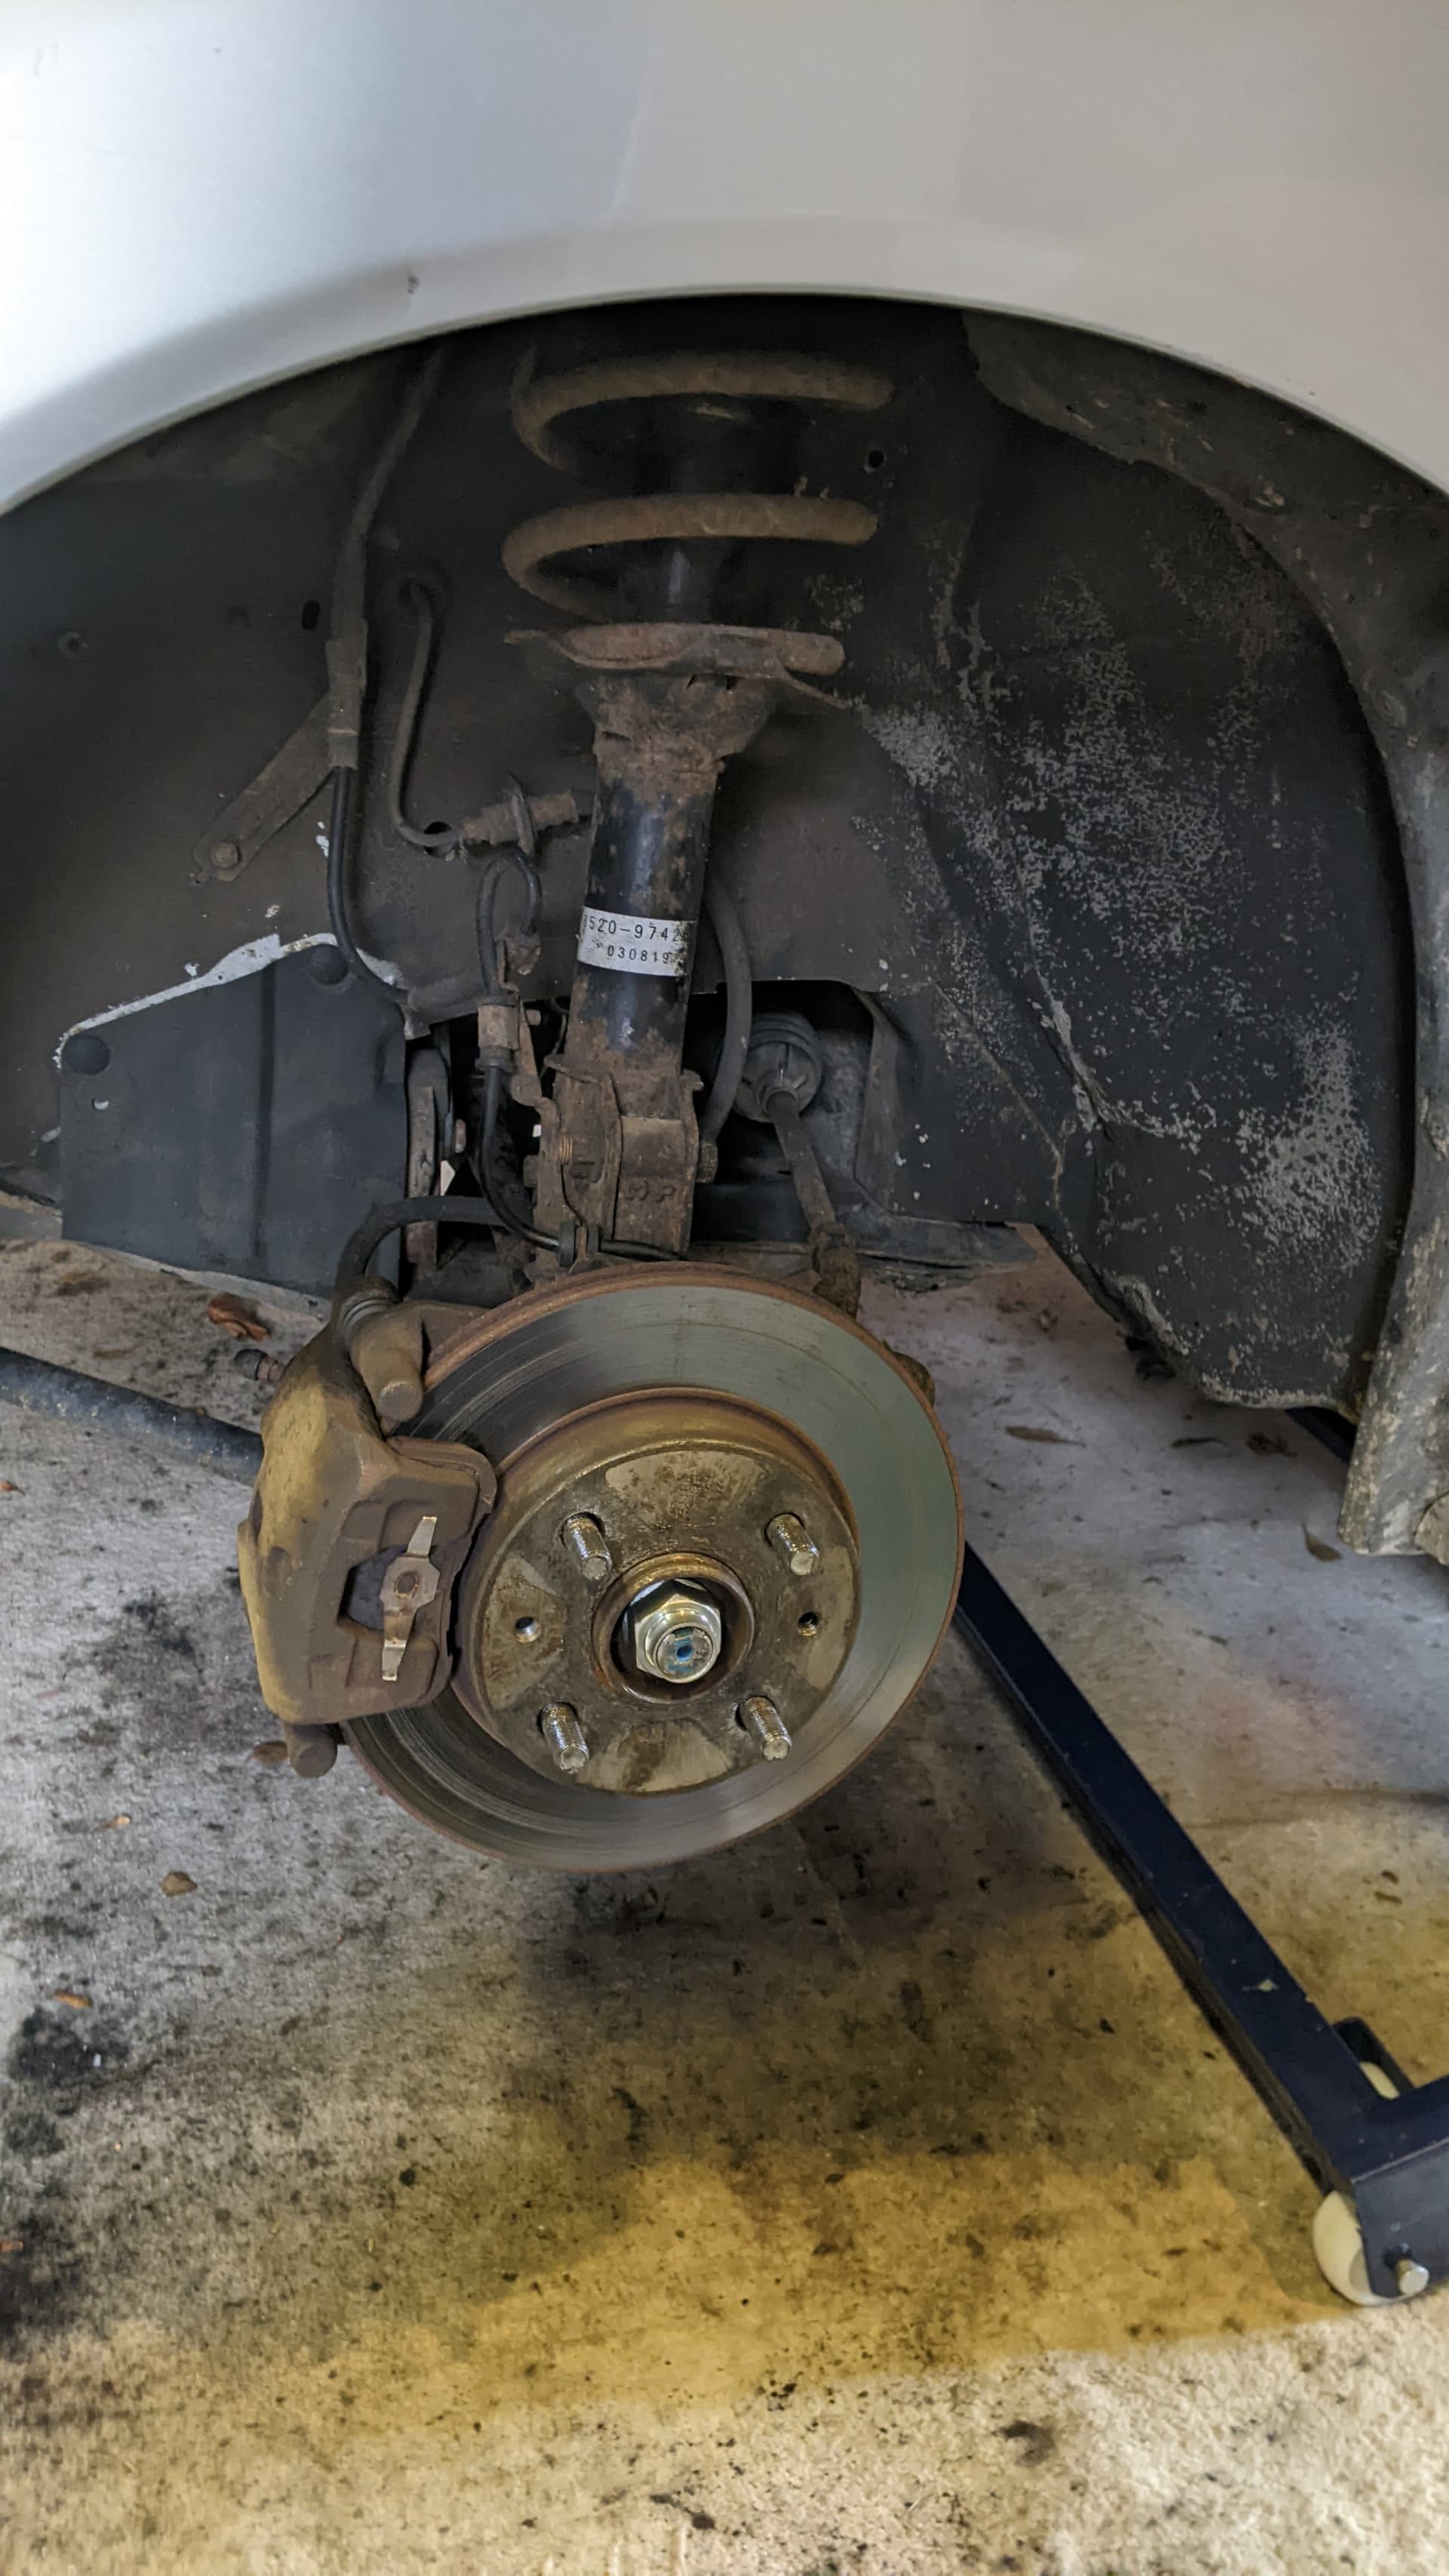
A couple of 14mm bolts undid the sliders, which looked a bit grim, despite having only been regreased about 6 months ago. I think the bores of the current carriers are a bit scuddy, anyway, won’t be a problem soon
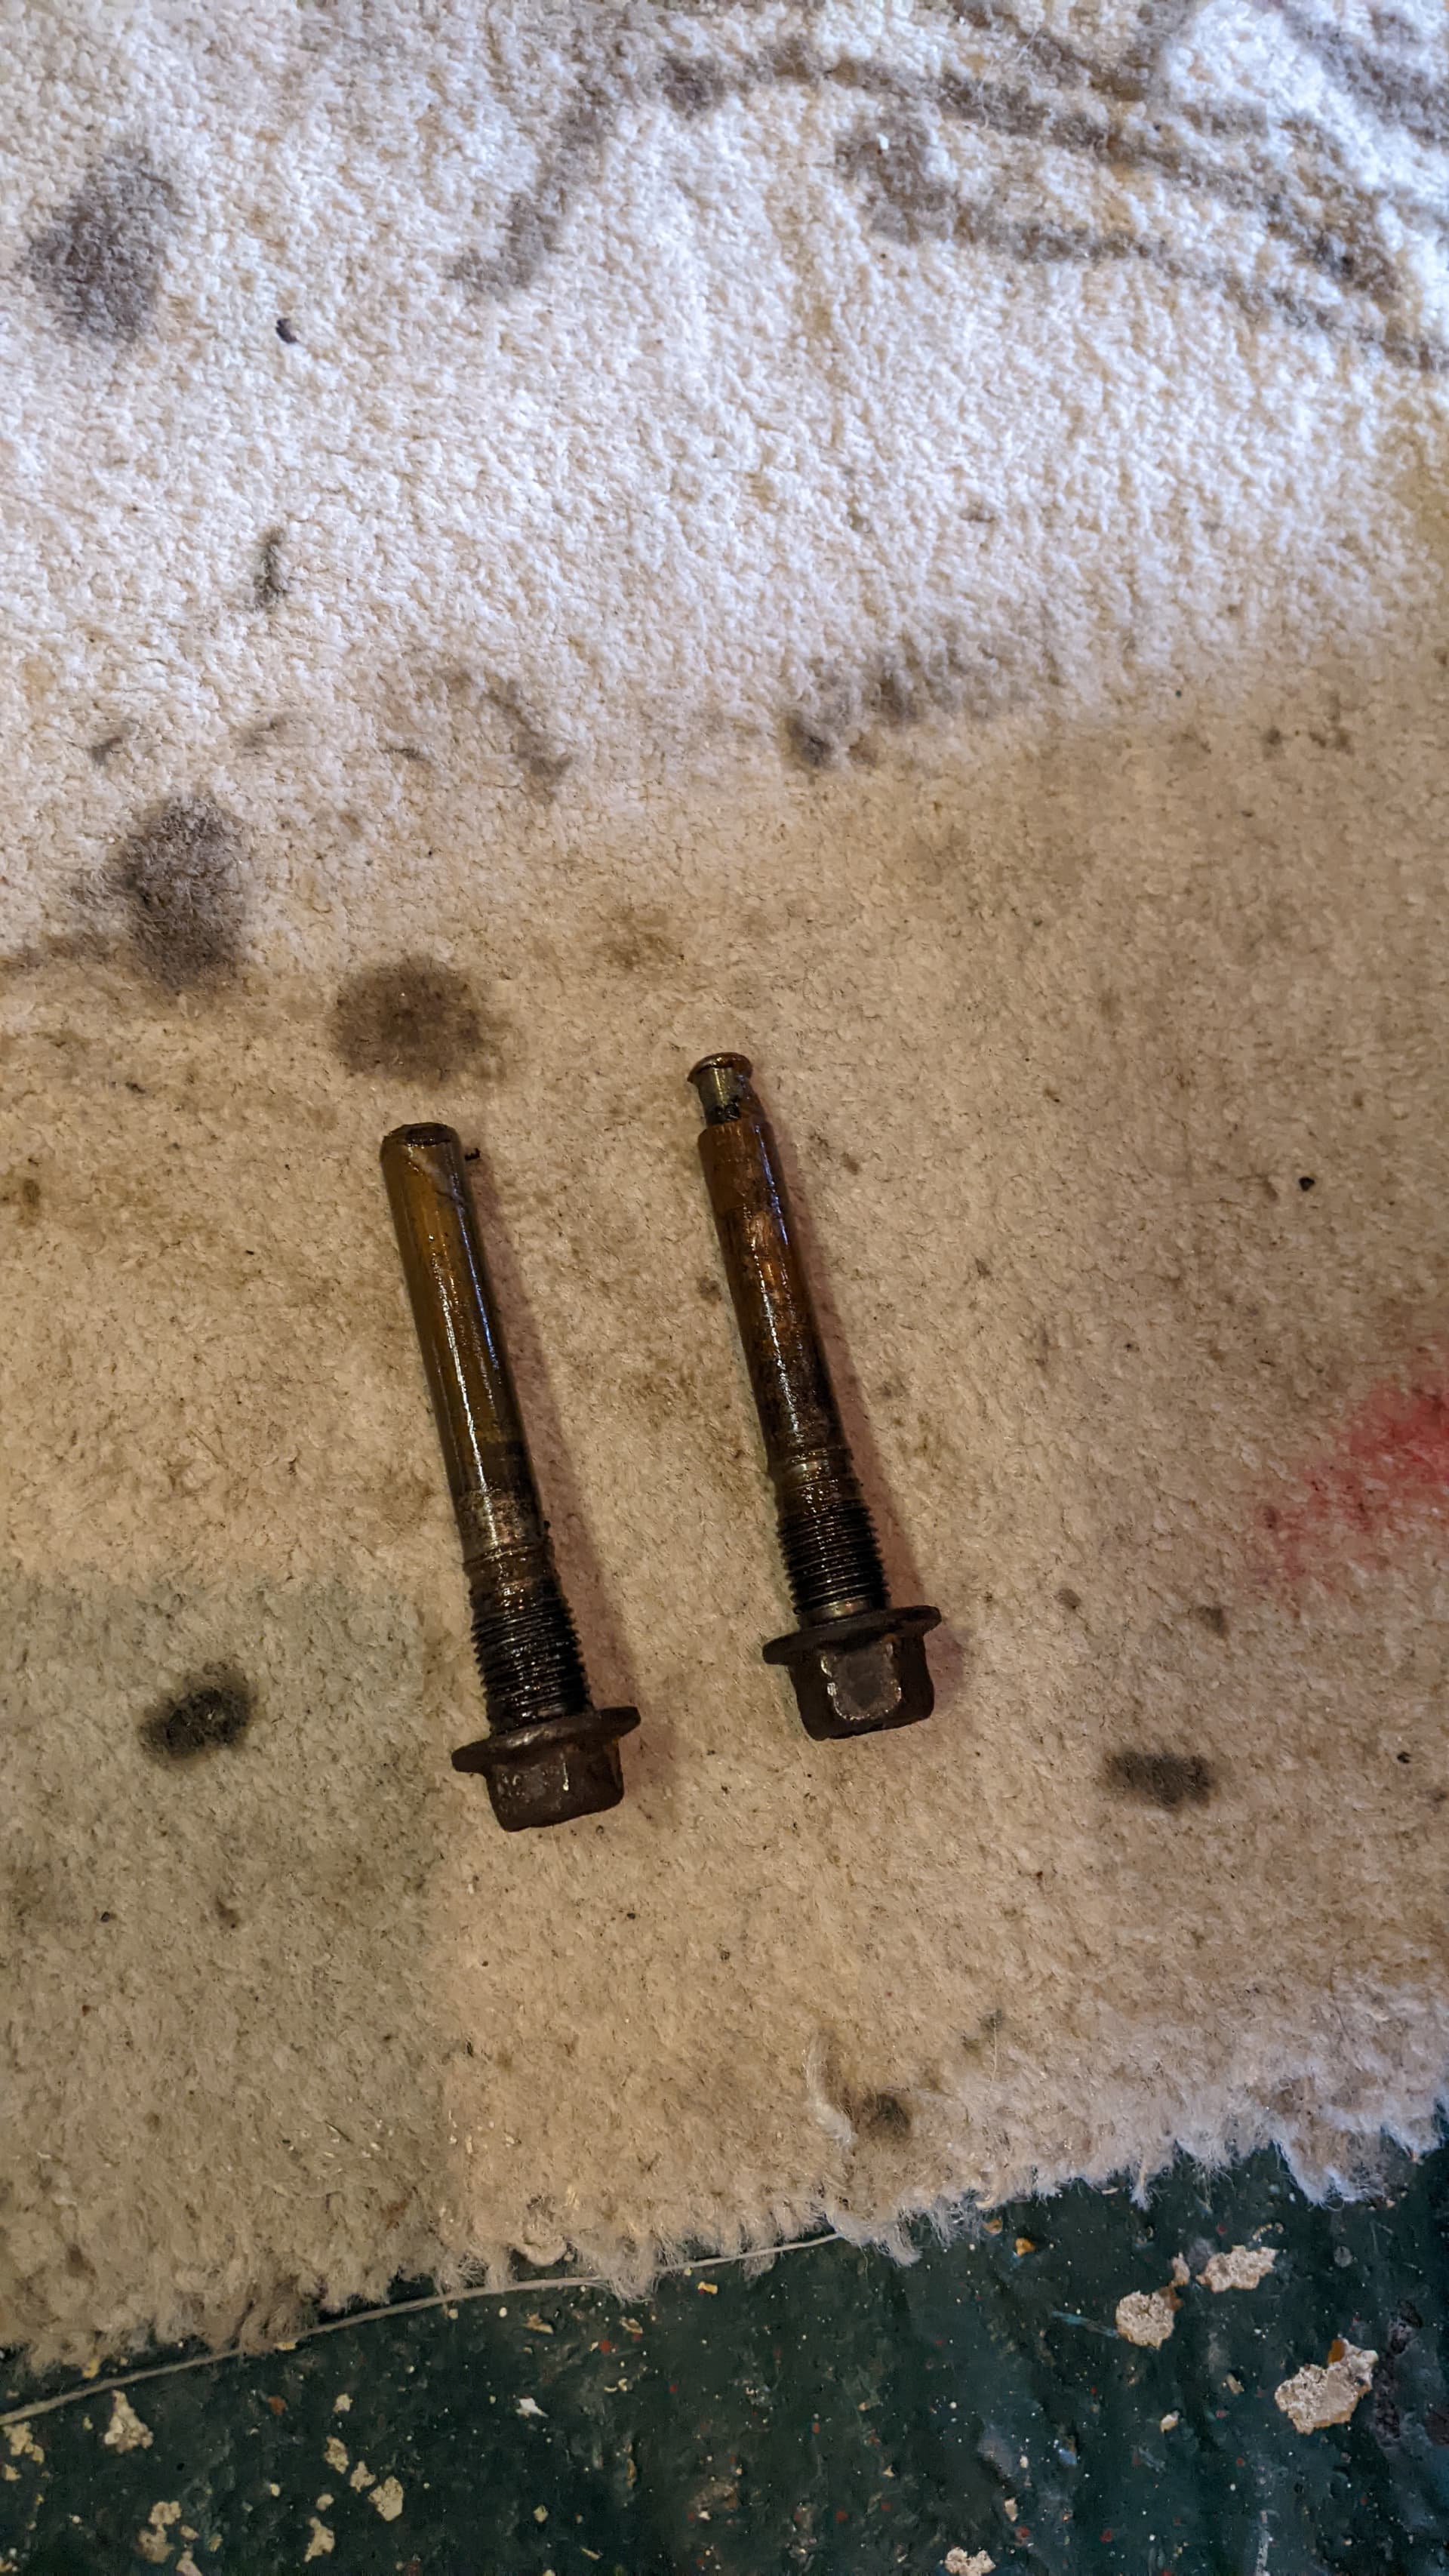
They wiped clean OK and were re-greased with silicone No 2 grease and put on one side. I lifted the caliper up on top of the disc and undid the carrier. The 2x 17mm bolts were done up mega tight, I don’t recall doing them up that tight but it must have been me. Maybe I’m getting weaker?
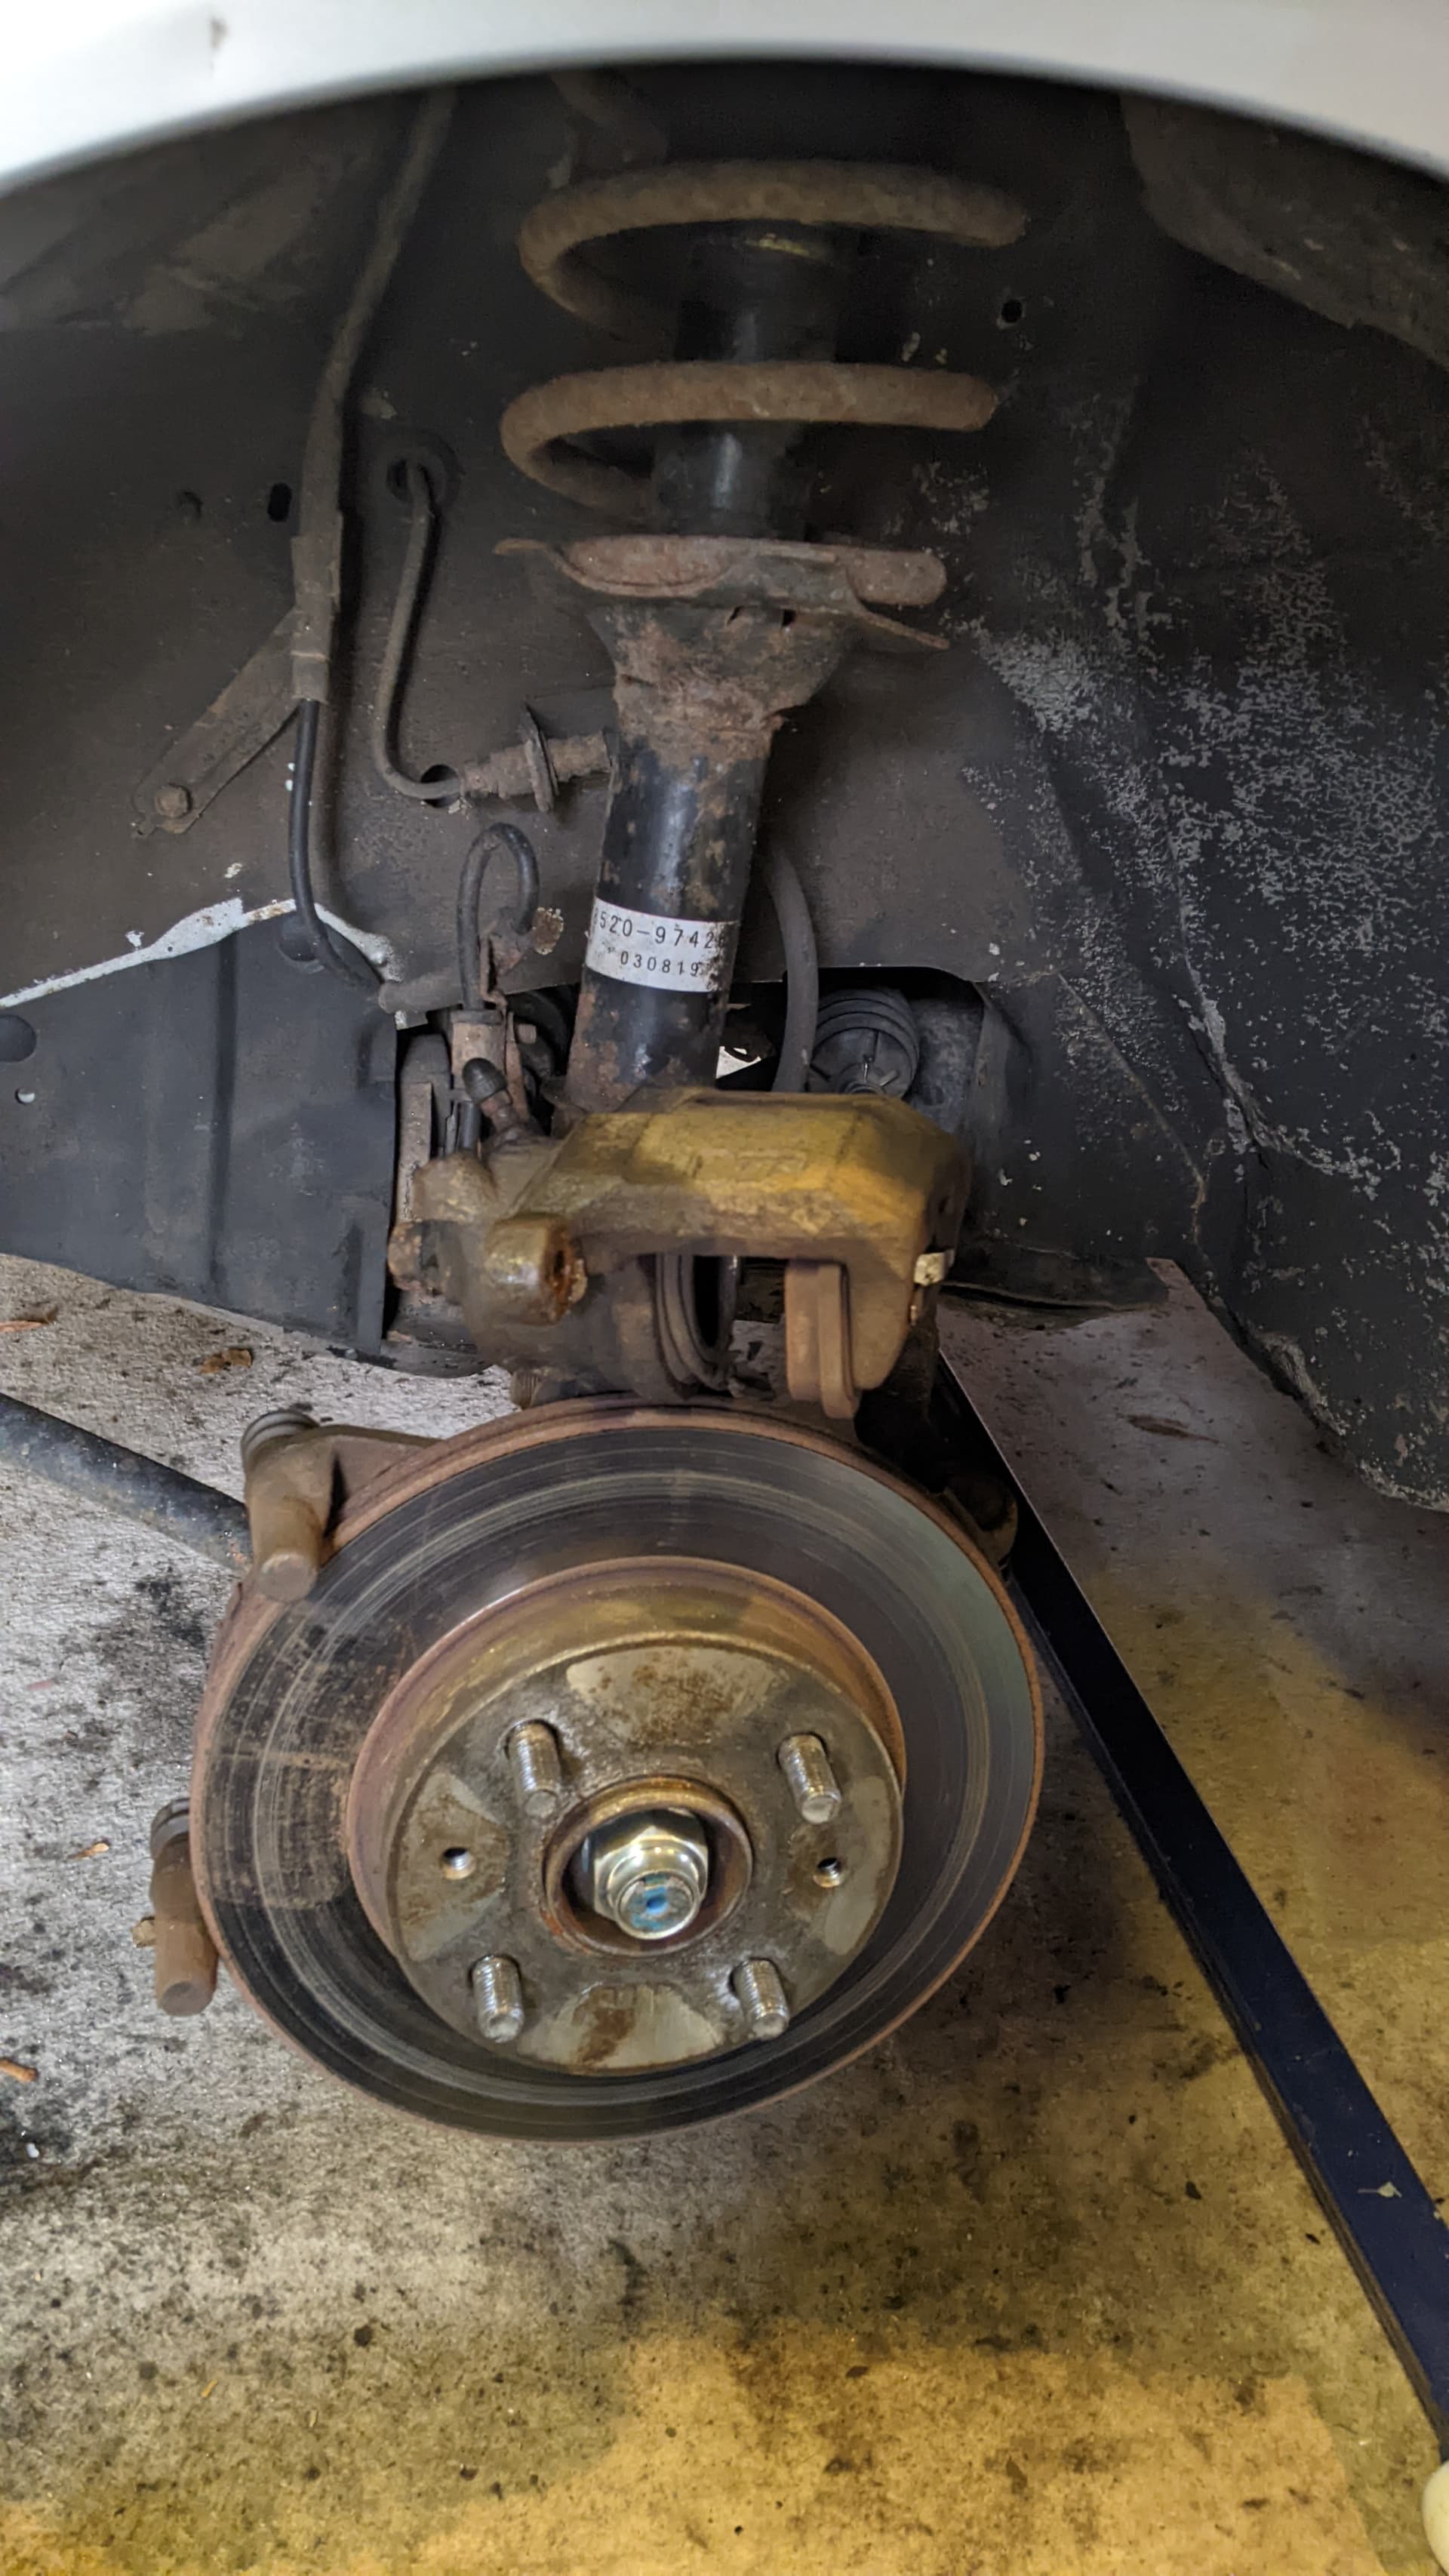
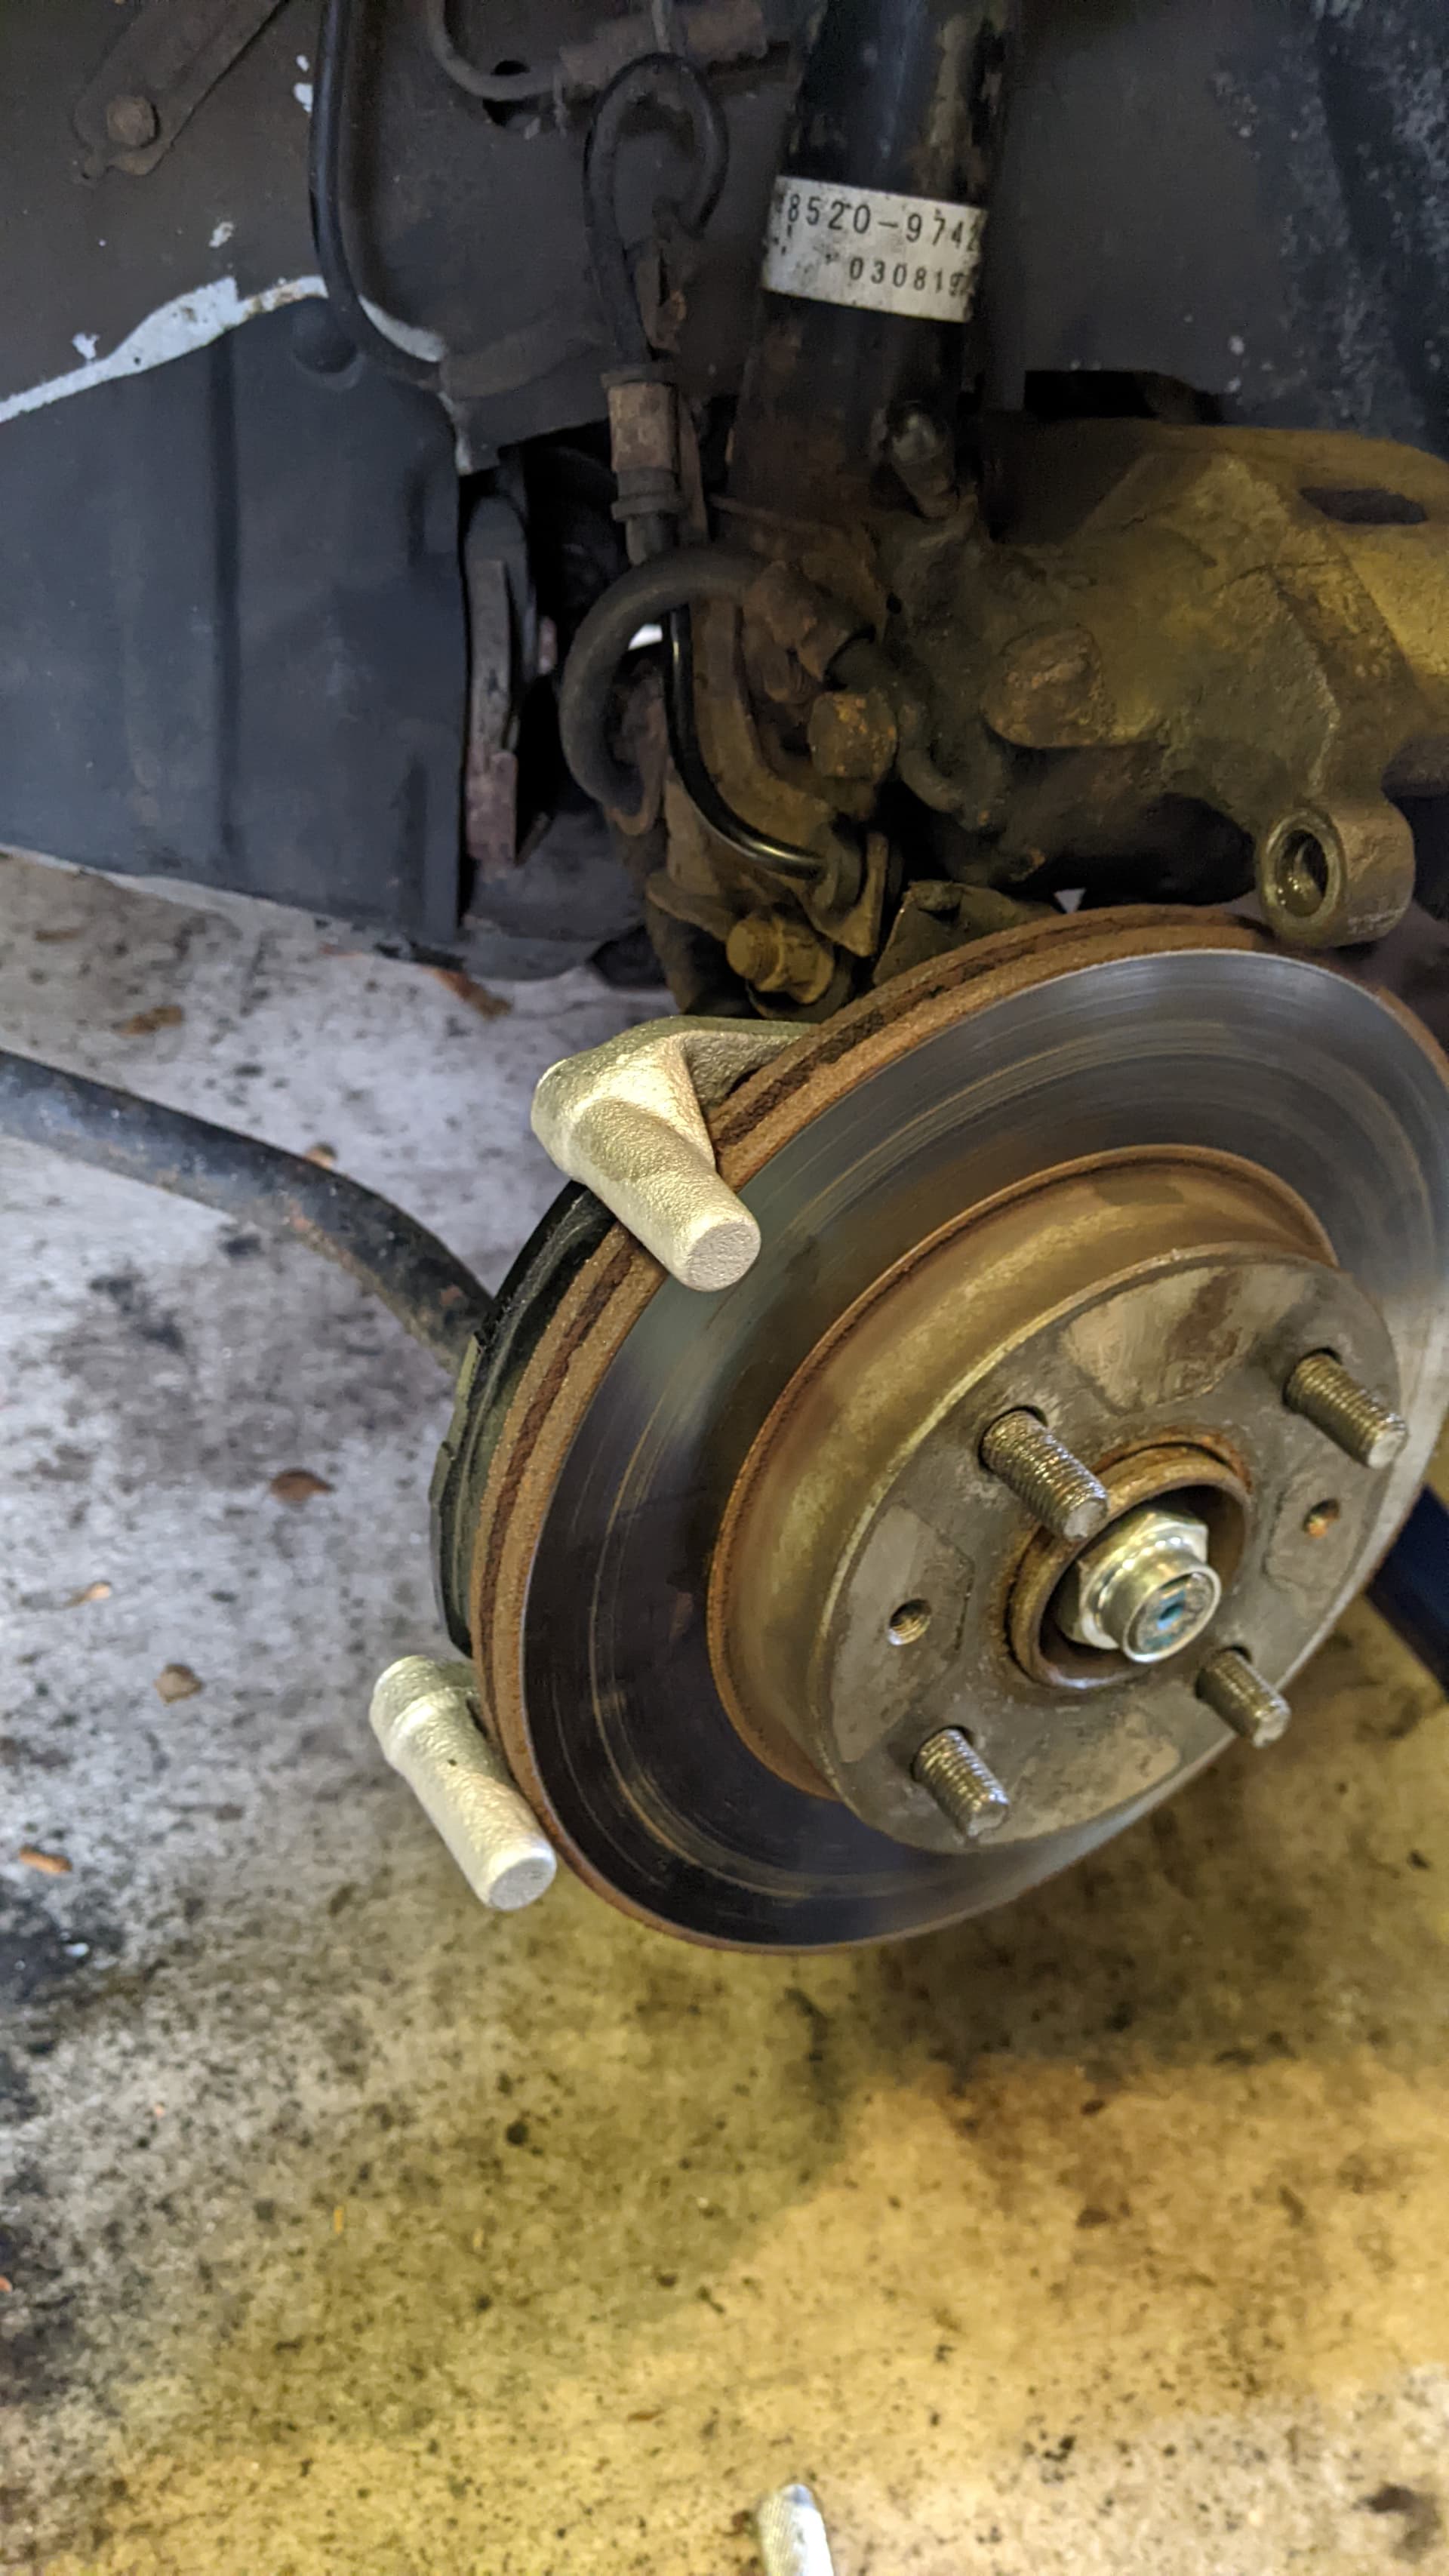
I took the disc off too since it gives more room to play around with everything, leaving a bare hub
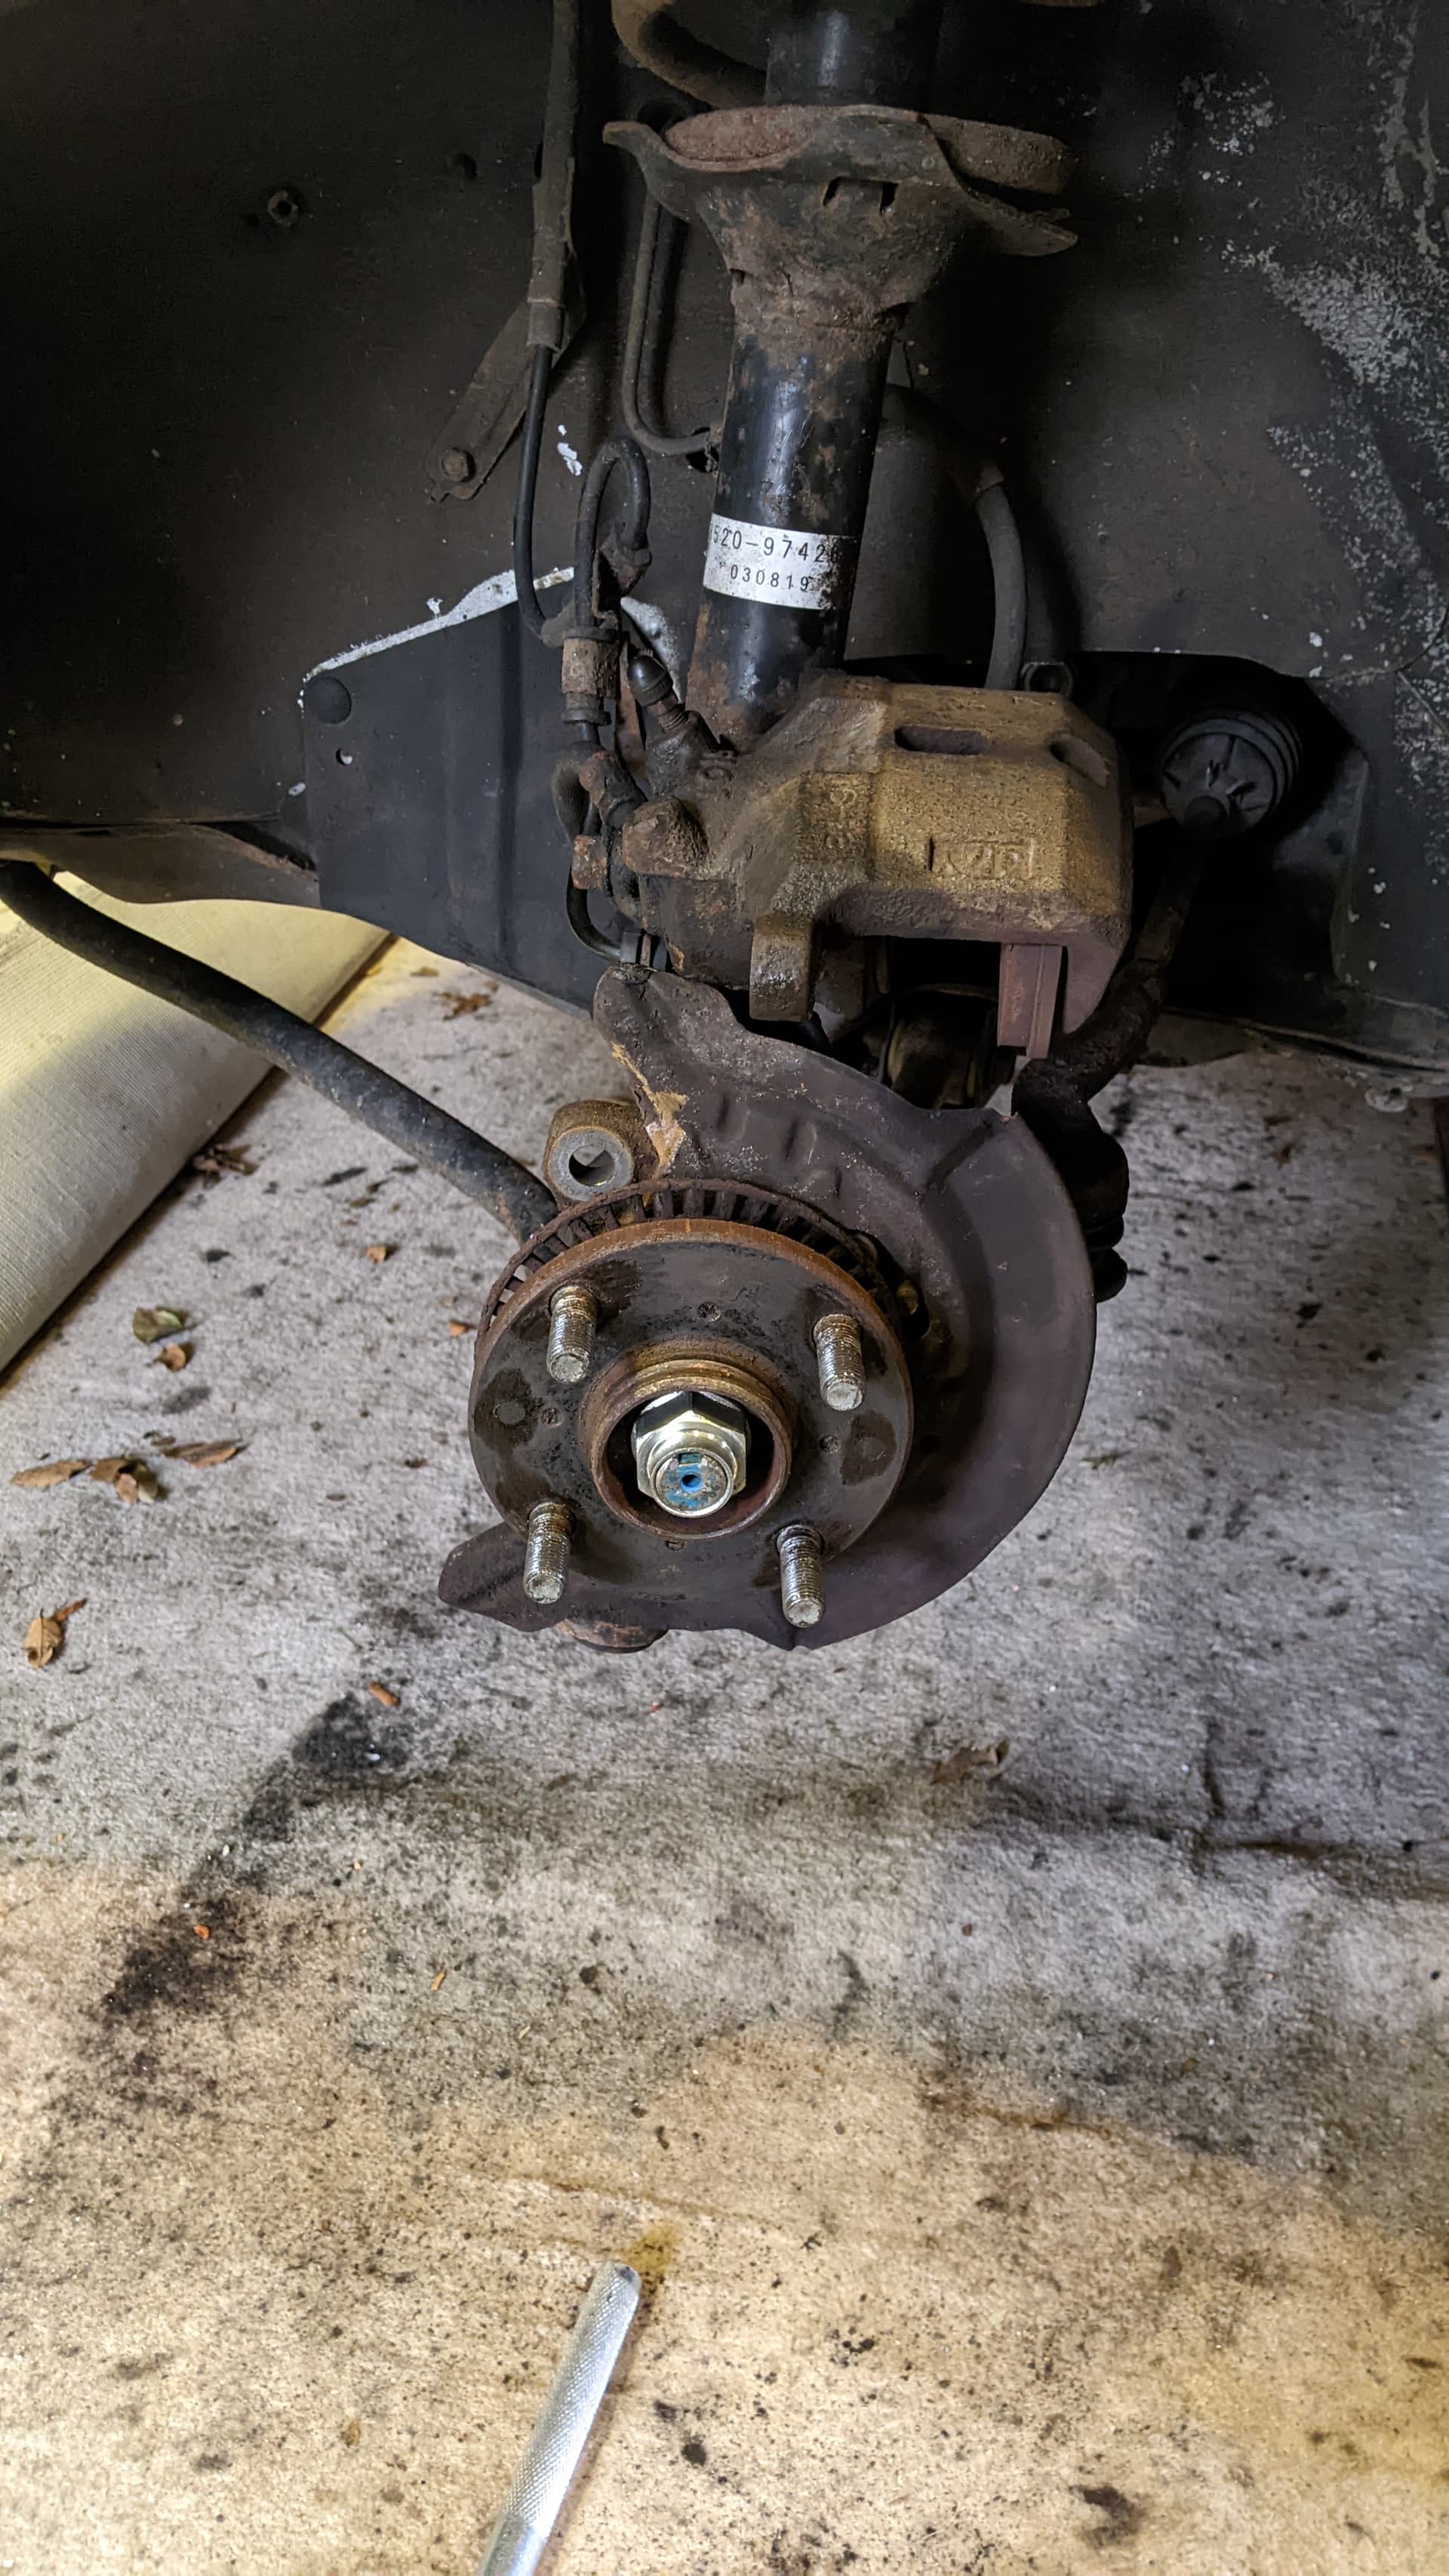
I then undid the banjo bolt on the back of the caliper to free it from the car, and poked a foam ear plug into the void to stop too much brake fluid dripping out while I fiddled around with things. With the caliper free of the car, the cause of the seizure became apparent
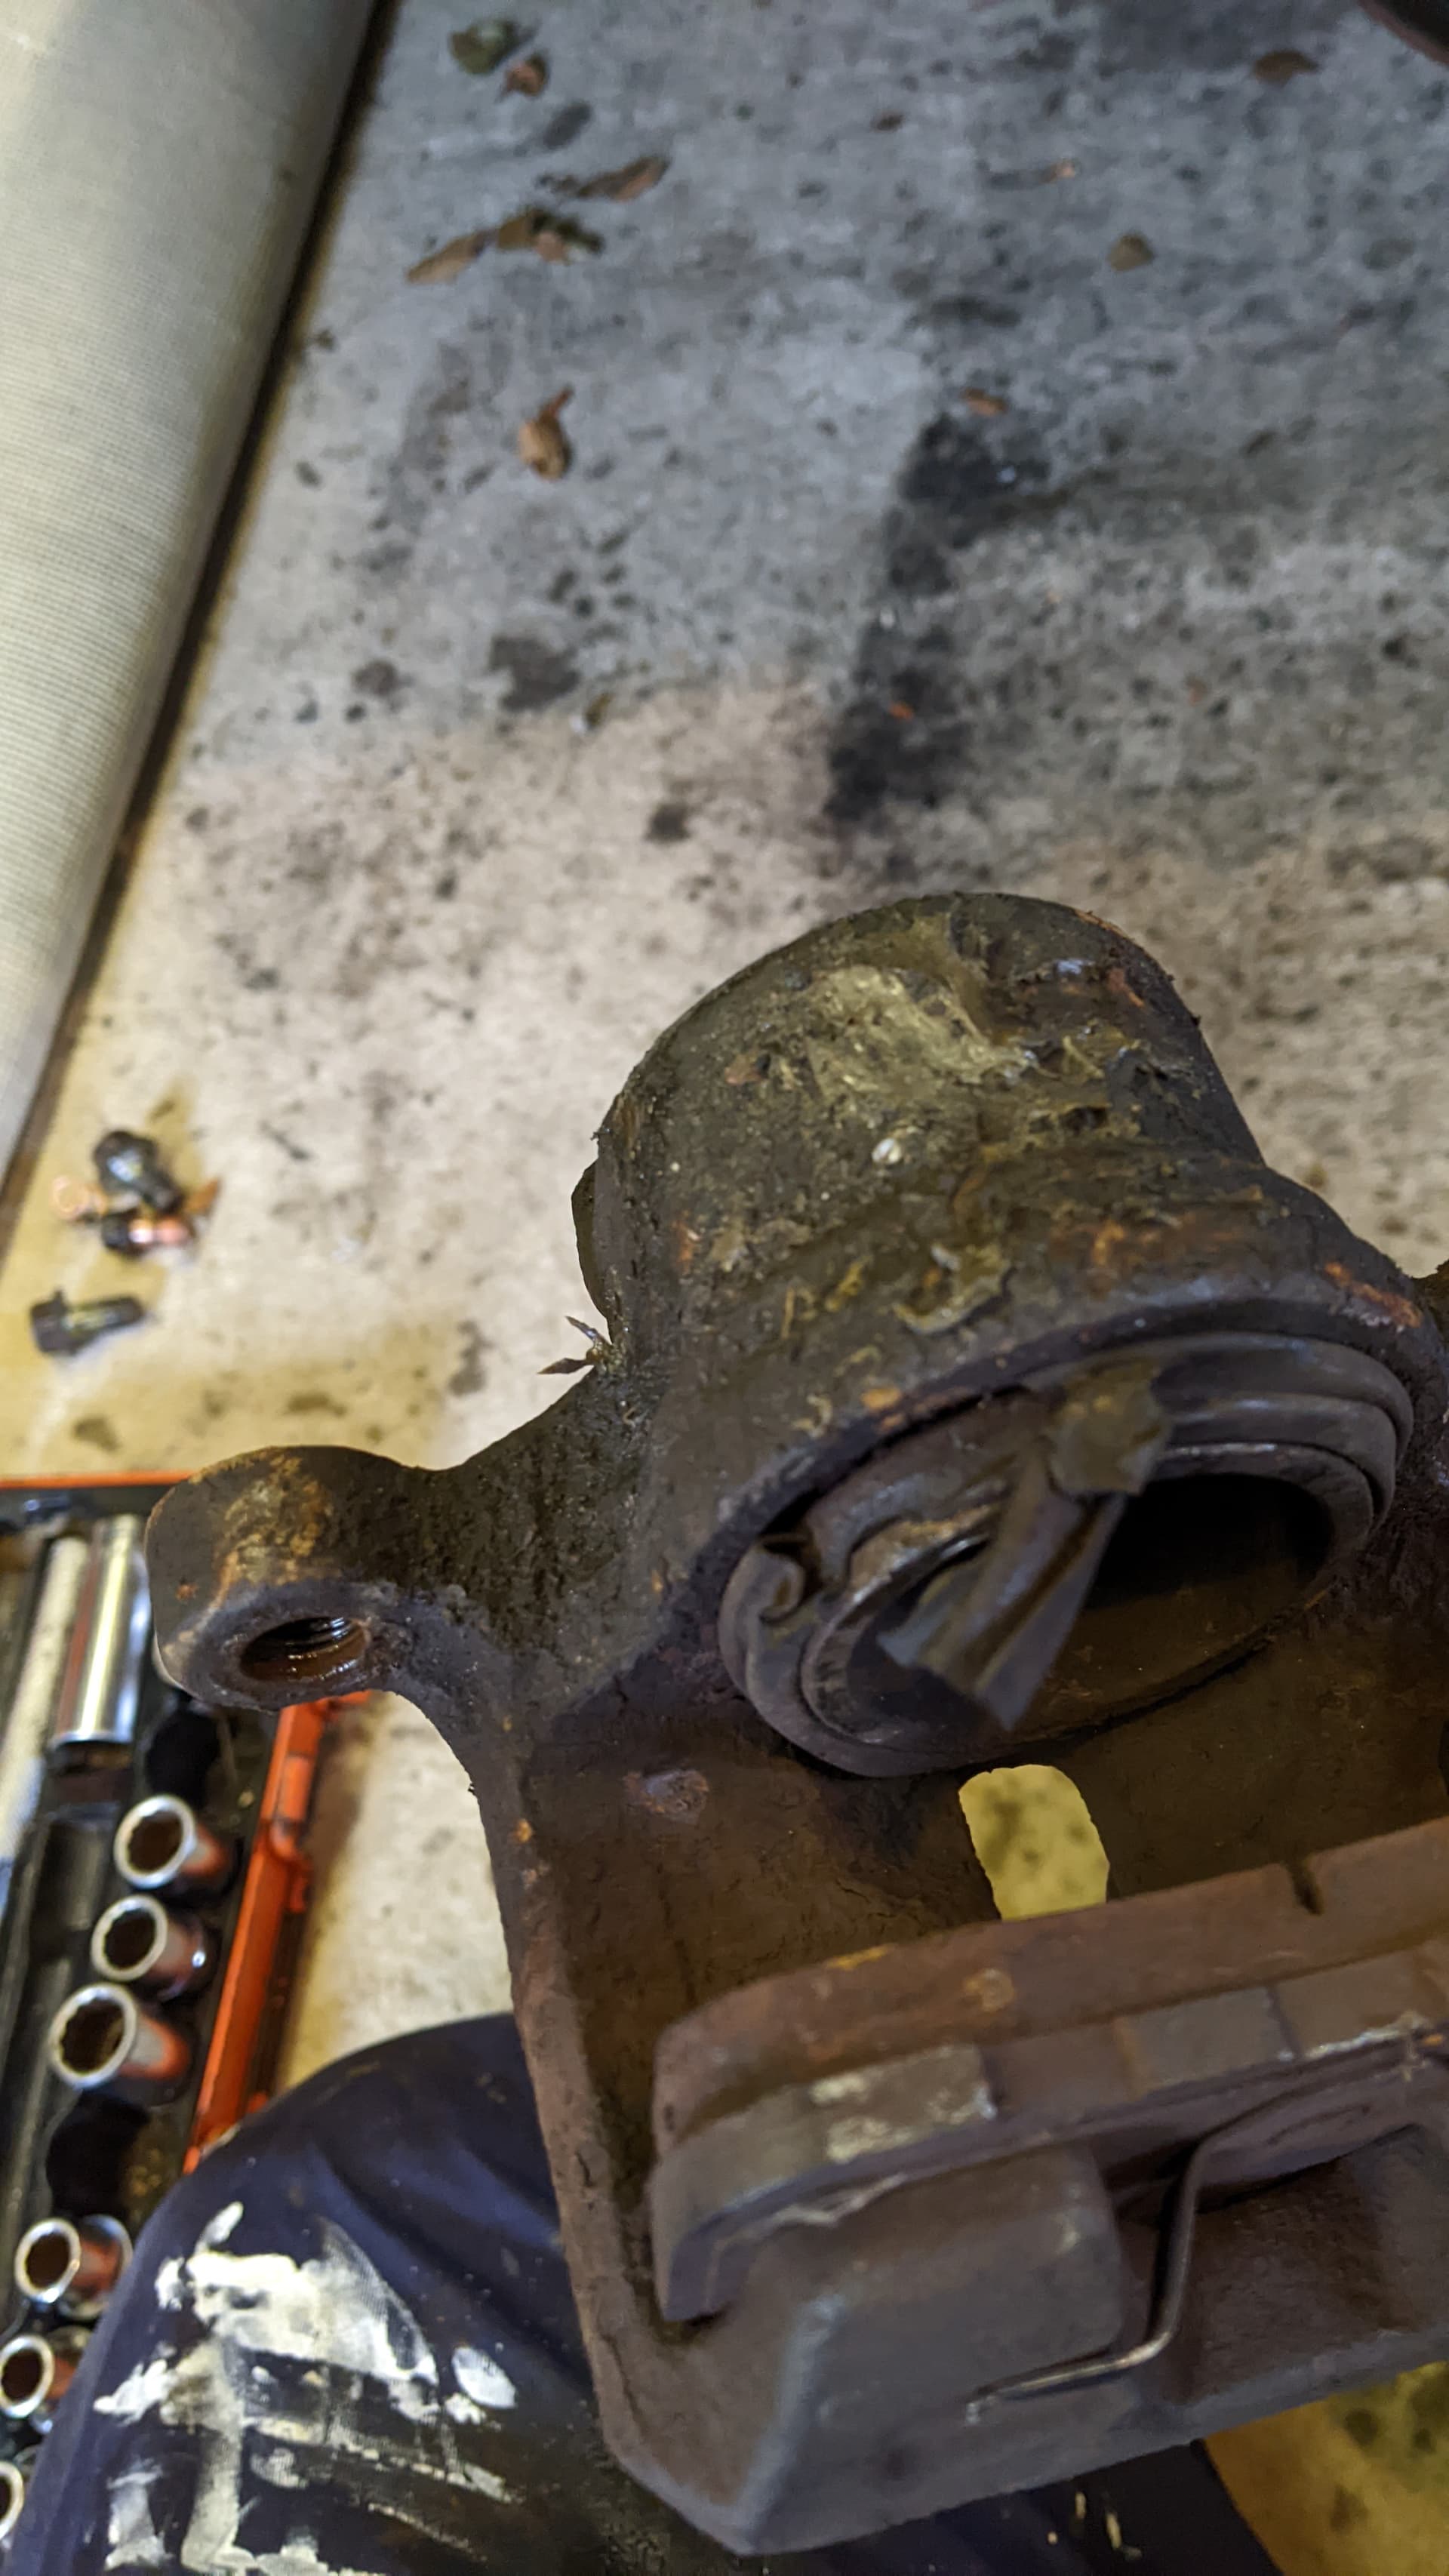
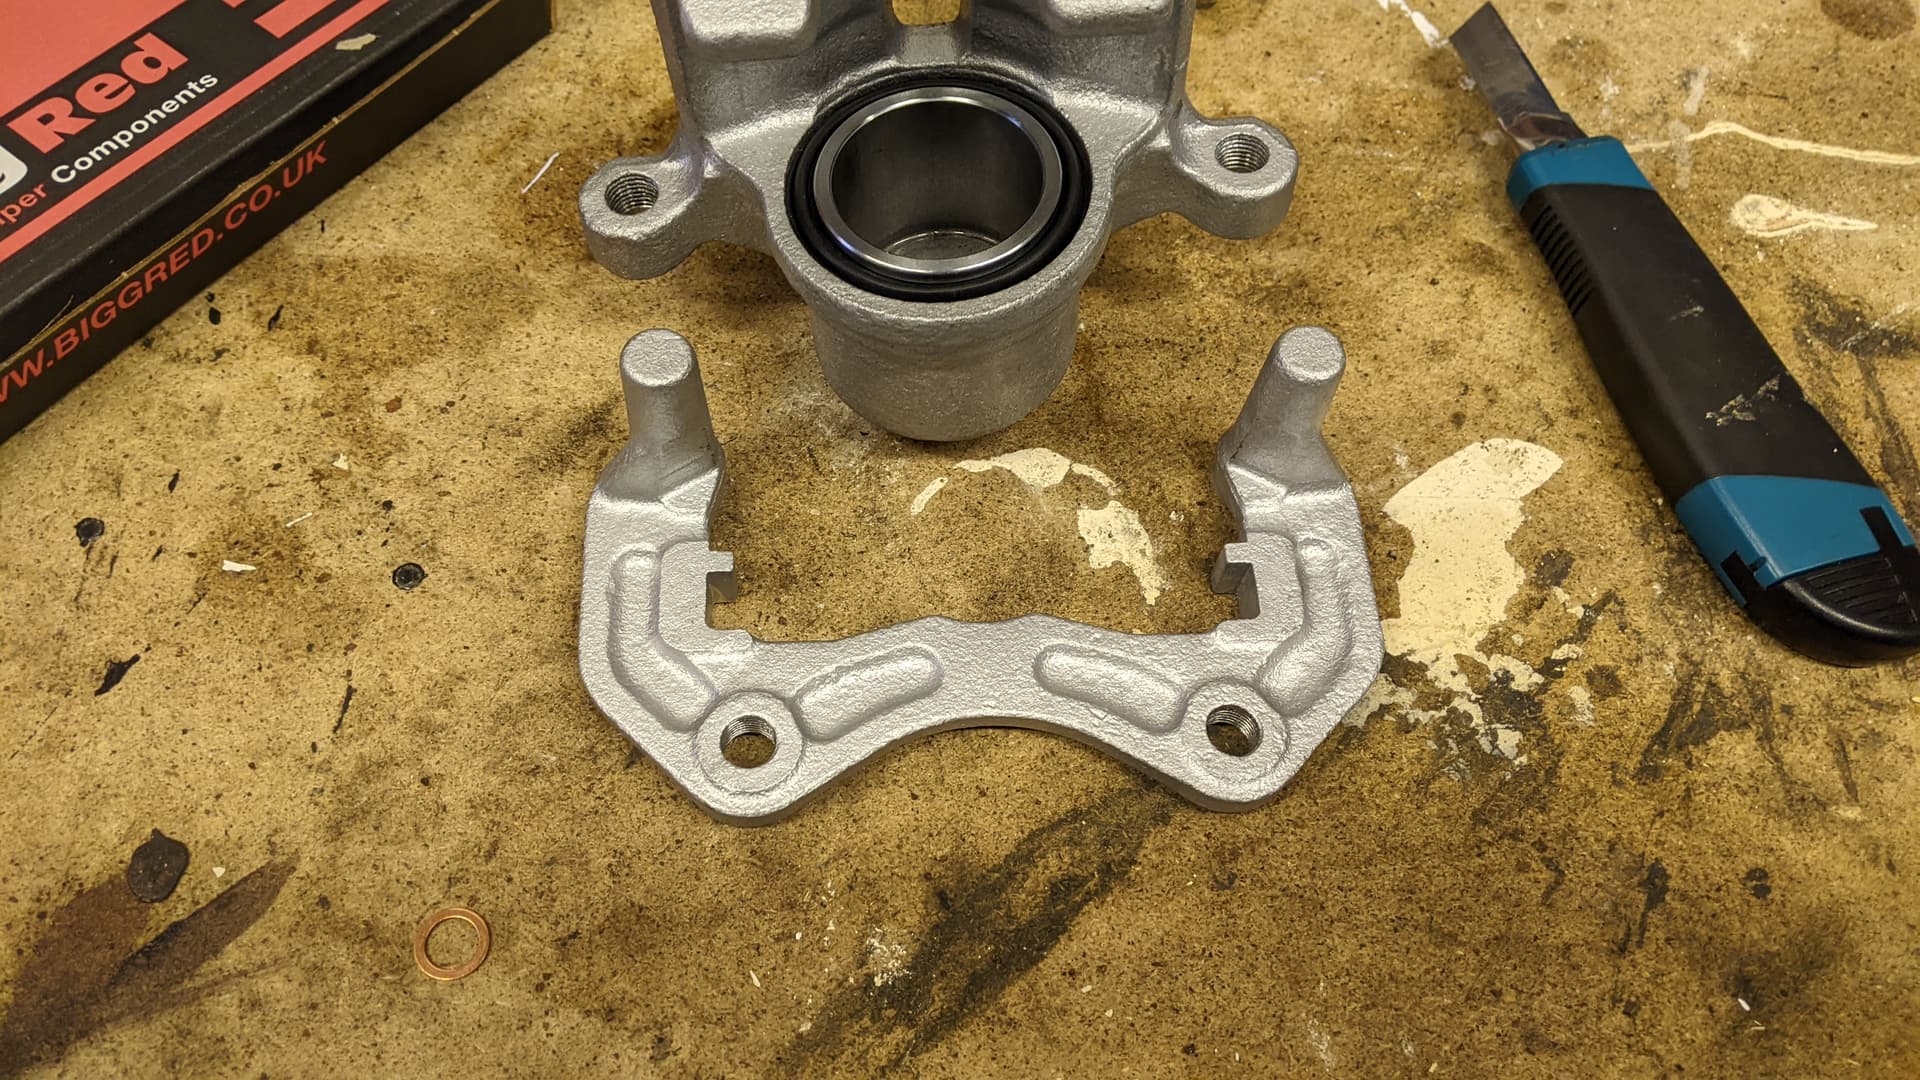
Yeah, thats not going to help is it? I set the caliper and carrier to one side after removing the old pads and the anti-squeal shim. I think I’ll get these sent off for refurb too in due course so I have a spare set that are good to go if needed. The ones I took off the car are in loads better condition than the ones which were refurbed, so should be eminently refurb-able.
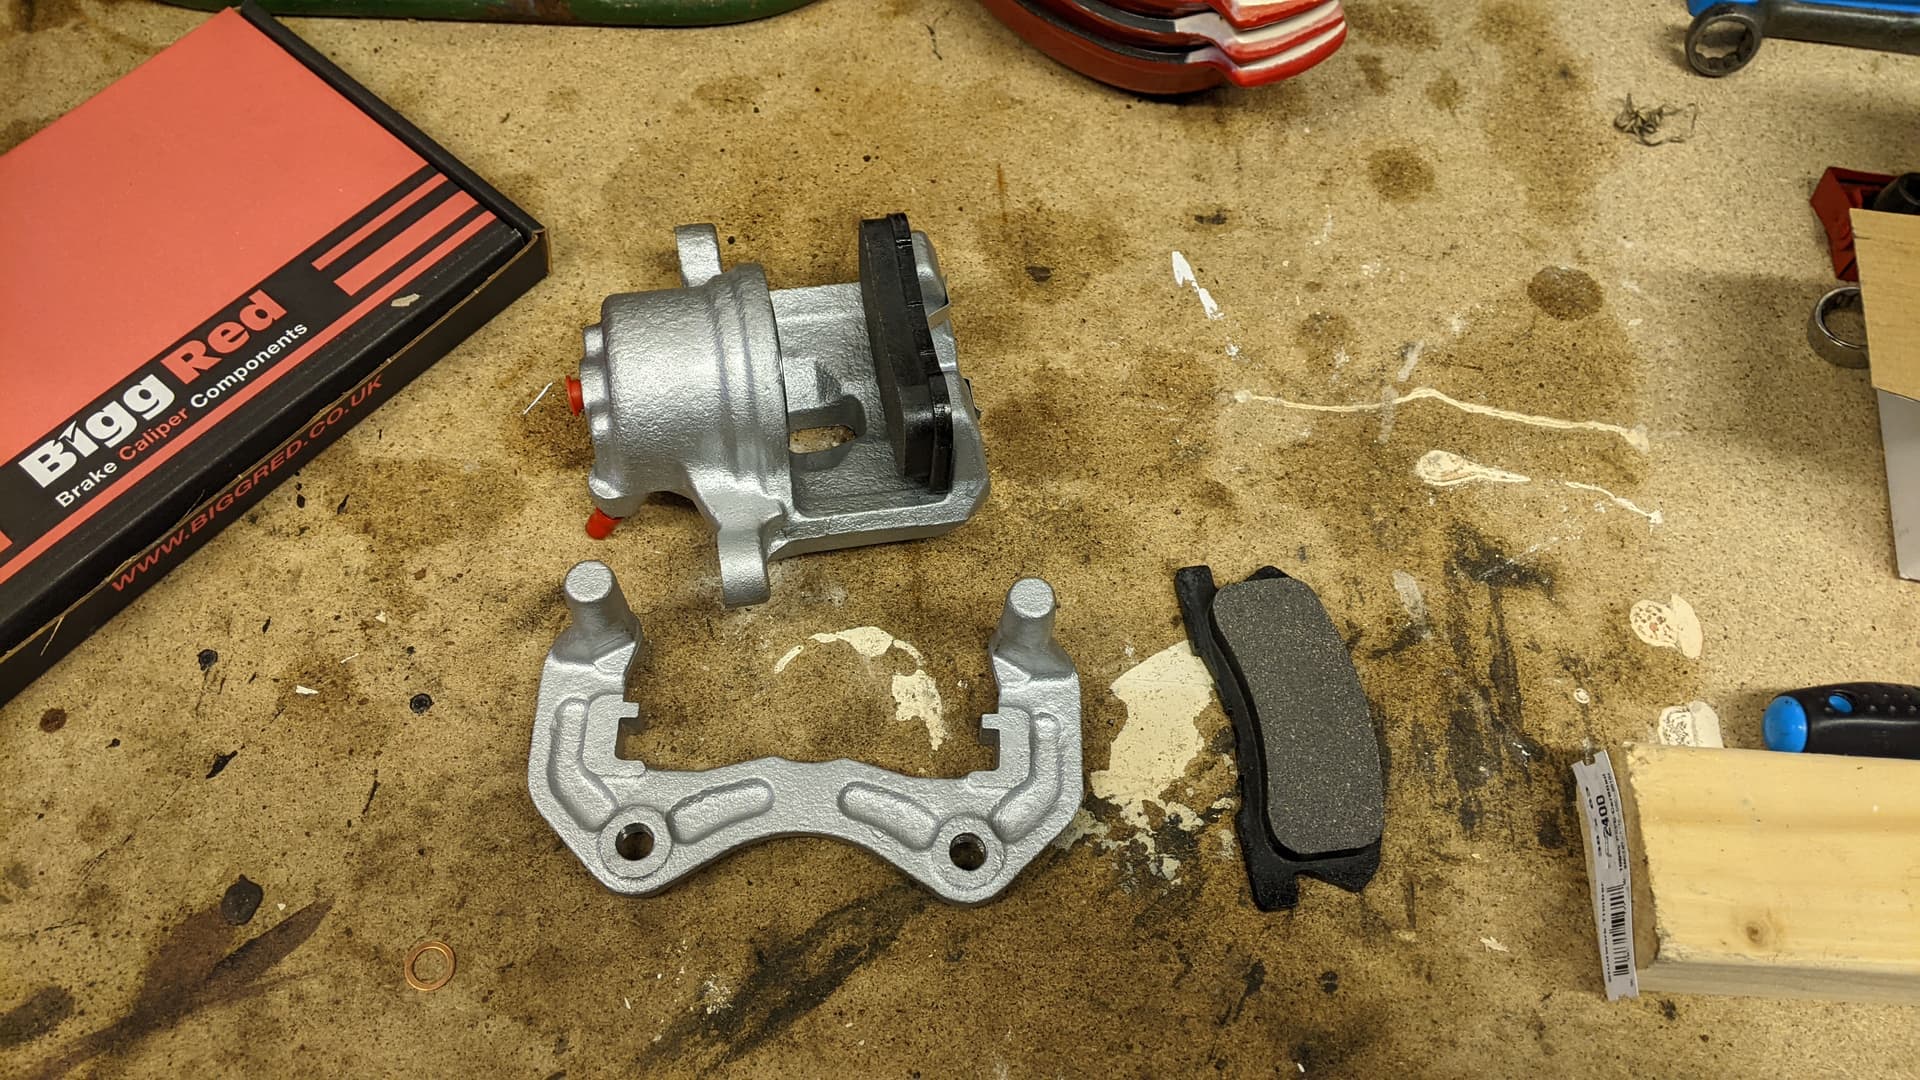
Next up was assembly of the new stuff on the workbench. Refurbished caliper and carrier ready to go
I put one of the new pads into the caliper and swapped the shims from the old carrier onto the new one so I could fit the pad to the carrier side, and fitted the anti-squeal shim to the back of the carrier-side pad. I used a bit of copper grease to keep it all in place for good measure.
Then it was a case of reassembly. Carrier on, then disc on, then retrieve pad and shims which fell off and refit them.
Then remove the ear plug, fit the refurbed banjo bolt with new copper washers and locate the little peg in the back of the caliper, slide the caliper onto the disc and then bolt the sliders in. Easy peasy. With it all connected up, I had my eldest daughter come and help with bleeding the brakes, which went fine. I bled through quite a bit of the old fluid to make sure it was relatively clean. She’s pretty good at the ‘pedal up - pedal down’ carry on now which is a useful life lesson. She knows either how to bleed brakes herself, or has learned not to follow in her father’s footsteps and make better life choices so you don’t have to roll around on the floor of a garage on a saturday in February fixing your own shit cars. Anyway, I then repeated the procedure on the other side and got her back out to do the pedals bit of the bleeding and all was sorted.
Pleased with myself, I cleared an escape route from the garage and took the car for a drive to see how it behaved.
Then drove back home very carefully, jacked it up again on both sides and did the banjo bolts up PROPERLY this time, cleaned the brake fluid off the wheels, arches and front door, topped up the reservoir again, swore a bit, then took it for another run.
I’m pleased to say the brakes are a lot better now, no binding and they engage and release fine. The pedal still has quite a bit of travel but is now firm and the car pulls up smartly. I think I need to re-bleed the brakes a bit now its all done up fluid-tight (ahem) to see if that improves things some more.
Overall, pretty good work though. I think I do need to use it some more though, and I need to take it on the motorway to see if this has fixed the 70mph wheel wobble I had before. If its not this, then I will just have to put it down to the poly bushes being stiffer than the rubber ones and transmitting more road feel through to the rack, but I hope it might be sorted now.
7 Likes
[quote=“Granger, post:274, topic:3337”]…re-greased with silicone No 2 grease and put on one side…[/quote] If you’re referring to those sliding bolts, you’ll need to use high temperature resistant copper grease, instead. Contamination may be the result of those bellows seals also having deteriorated[quote=“Granger, post:274, topic:3337”]…The 2x 17mm bolts were done up mega tight, I don’t recall doing them up that tight…[/quote]That’s why I never assemble these bits dry. Oiled threads also allow their bolts better usage of tightening torque
I’ve learned to never use copper grease on anything brake related since copper is magnetic and can interfere with the abs. Never really got any problems when I used copper grease so might be a load of BS.
Anyway, good work as always! Teach your kids to love cars and they won’t have money for drugs ![]()
Edit: copper isn’t magnetic, no idea how I got that mixed up. Thanks butch for pointing it out
2 Likes
I never knew, copper’s magnetic. That’s a new one
1 Like
Copper shouldn’t be magnetic, don’t know how I got that mixed up… Let’s just say I need some weekend…
Edit: found this after a quick search on the interwebs:
The main reason for copper grease falling out of favour, however, is because it can affect the vehicle’s ABS, ESP and EPB systems. Braking systems or driver assistance systems are highly sophisticated these days and with every year that passes, more electronics are being used in vehicle braking systems. Electronic braking systems utilise extremely low voltage signals generated in the sensors. The low-voltage signals are easily disrupted and this is why using copper grease is a problem. Copper is conductive and its presence in and around the braking system can interfere with the Hall-effect sensors used in the system electronics.
2 Likes
About 18 months ago I had a custom stainless exhaust made for the Sirion which is well made, but a little bit loud. The first iteration had no silencing whatsoever and while it sounded amazing, it was also audible from Spain, so it went back and they grafted a silencer in, which did quieten it down. A bit. Since the car likes to rev, the new exhaust has been a bit of an issue, its fairly normal up to about 3000rpm, but then gets quite loud. I’ve fitted a bung to the tailpipe which helps quieten it down but seems to stifle the power a bit. The car has passed MOTs like this so its not horrific, but isn’t quite how I want it.
I’ve pontificated on this for about a year when I really ought to have grabbed the bull by the horns ages ago. So I’ve gotten a grip and decided to DIYMFS.
I got the car up on some blocks so I can get underneath so I can see what I’m working with
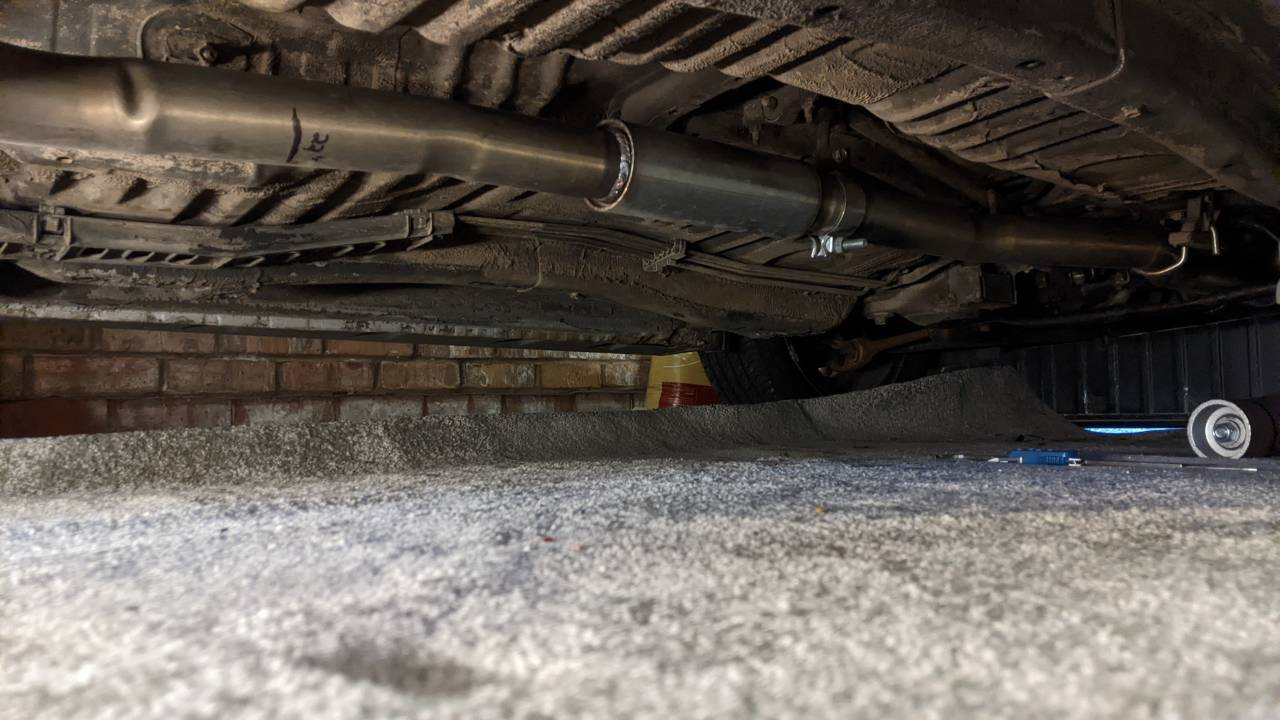
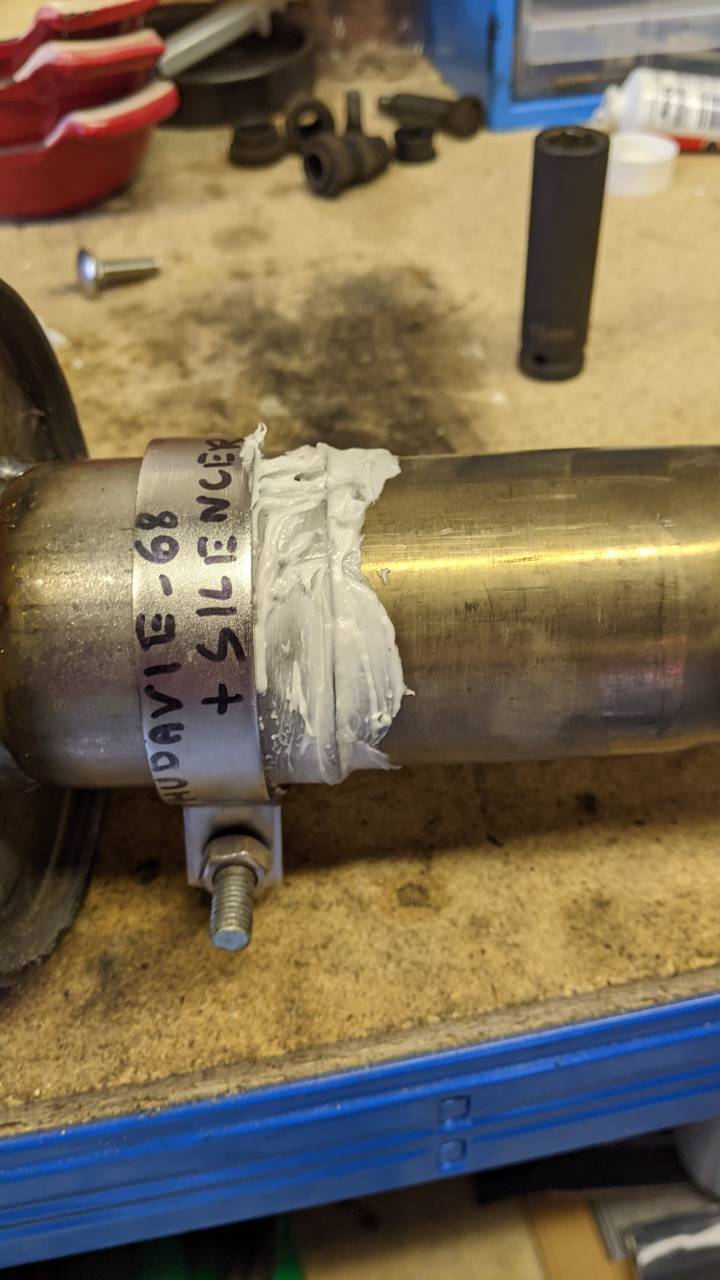
The exhaust fabricators have saved me a world of pain by making the exhaust in three sections, flared and clamped together. The system is made from 2.25" stainless pipe and has a 9" long x 3" diameter silencer grafted in about level with the gearstick. I was able to undo the clamp visible in this pic, and the one further back, level with the fuel tank, and the pull the rearmost part of exhaust back and wiggle the centre bit out
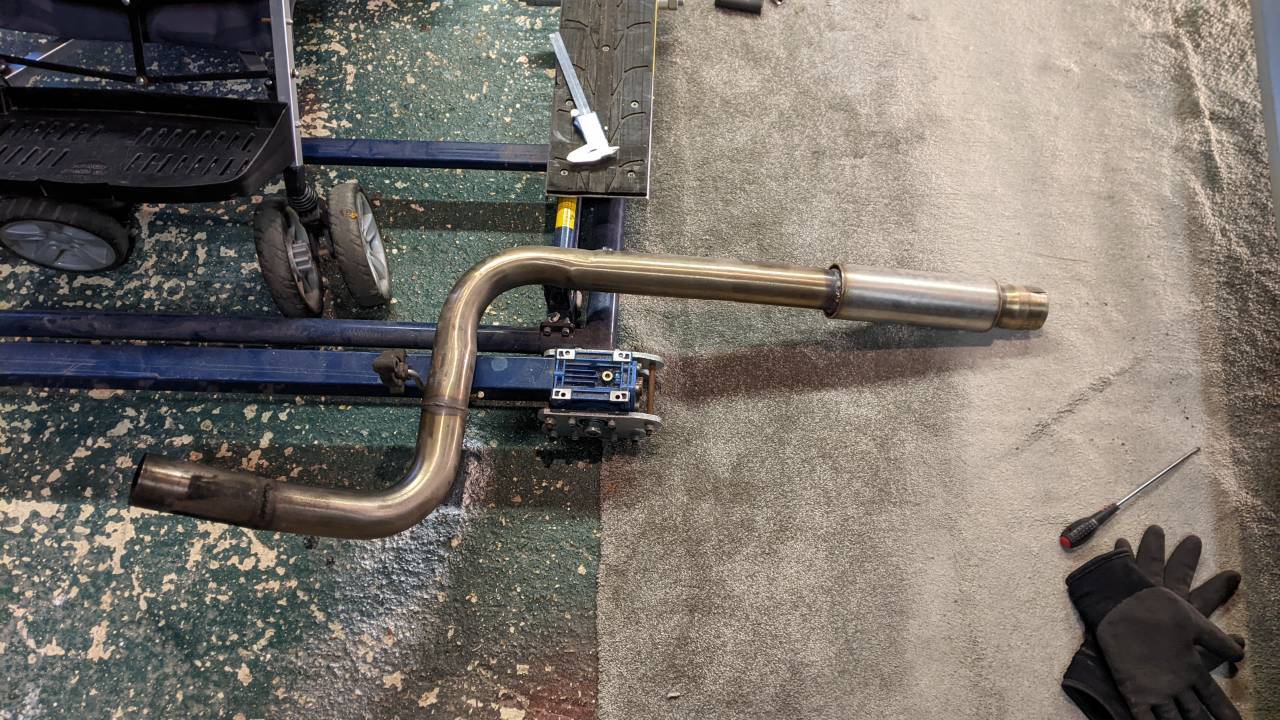
TA-DAH!
I’ve purchased a much bigger silencer - 18" x 5" with flared, clamp-on ends, plus some clamps and assembly paste. This should be here by the weekend. I plan to measure it all about 800 times, then cut the existing pipe about 10" rearwards of the existing silencer. Then I can clamp the new, bigger silencer into the system - connecting the the front pipe at the front, and into the existing centre section about 4" forwards of the first 90 degree bend. In theory* the new silncer will just slip over the existing pipework and clamp on, meaning the exhaust will be composed of 4 sections rather than 3. Assuming I do it right, and only cut it once, if I make a total hash of it then I can just re-join the cut section with one of those pipe joiner things and pretend like it never happened.
I’ve had a really good look and there seem to be plenty of space in the transmission tunnel. The Sirions came with one body pressing for both the 2WD (like mine) and 4WD variants, so the transmission tunnel is pretty massive and empty on mine where the propshaft would go on the 4WD variants so I have a fairly good amount of space to play with.
So now we wait for the exhaust bits to arrive, then loosely fit them up to make sure it all fits as its supposed to, then measure a hundred times before cutting the pipe read to join to the bigger silencer. Hopefully with this fitted I can remove the rear bung and have a fruity, but not deafening exhaust!
4 Likes
The exhaust bits arrived in the week, and today the assembly paste showed up so I decided to crack on. There was an element of ‘hope for the best’ with all of this, with the silencer I ordered being a lot bigger I had to make an educated* guess on dimensions. I finally settled on a 5" x 18" stainless silencer which looked like it should fit.
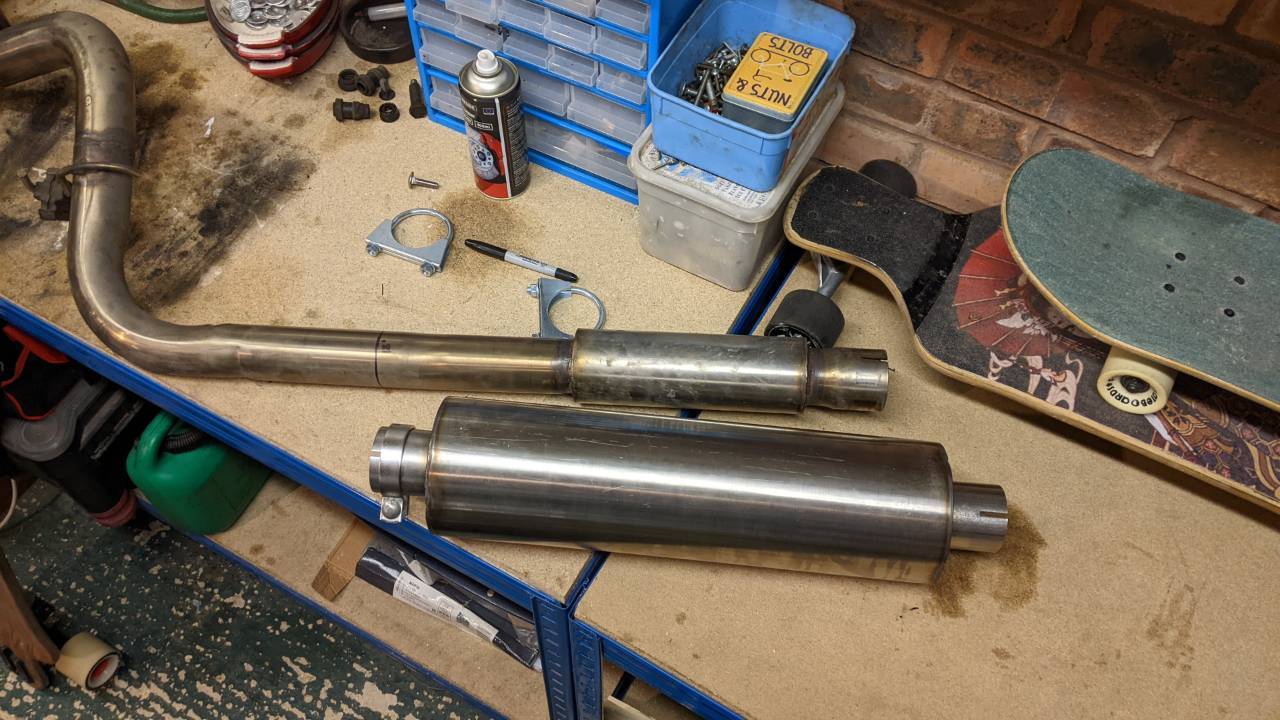
As you can see, it’s quite a bit bigger than what came off. I measured up the pipe about 20 times then finally bit the bullet and cut the straight pipe. This was the point of no return.
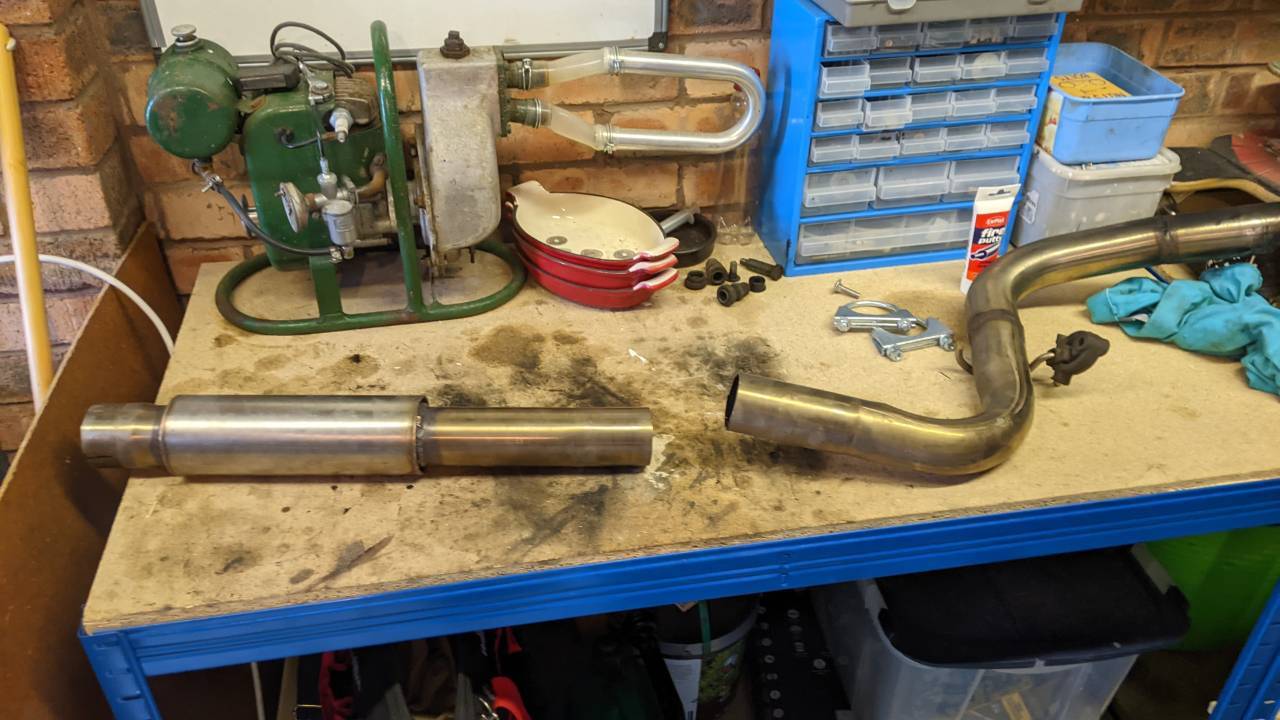
No going back now! Actually there was a plan b, if I totally hammed it up I could use a joiner to remake this, so it wasn’t 100% jeopardy
I splodged some assembly paste on and slid the pipe onto the silencer onto the mid section of pipe and clamped it

So far so good, then onto fitting it to the car. I used the assembly paste and amazingly it all went together correctly. Mid section went on fine and hanger fitted, the rear section is a bit fiddly as it routes over the rear beam but that eventually went on too and got clamped into place.
I need a slightly longer hanger for the rearmost section because the tailpipe touches the rear bumper, but for now I have cable tied the bumper up a bit to stop them contacting
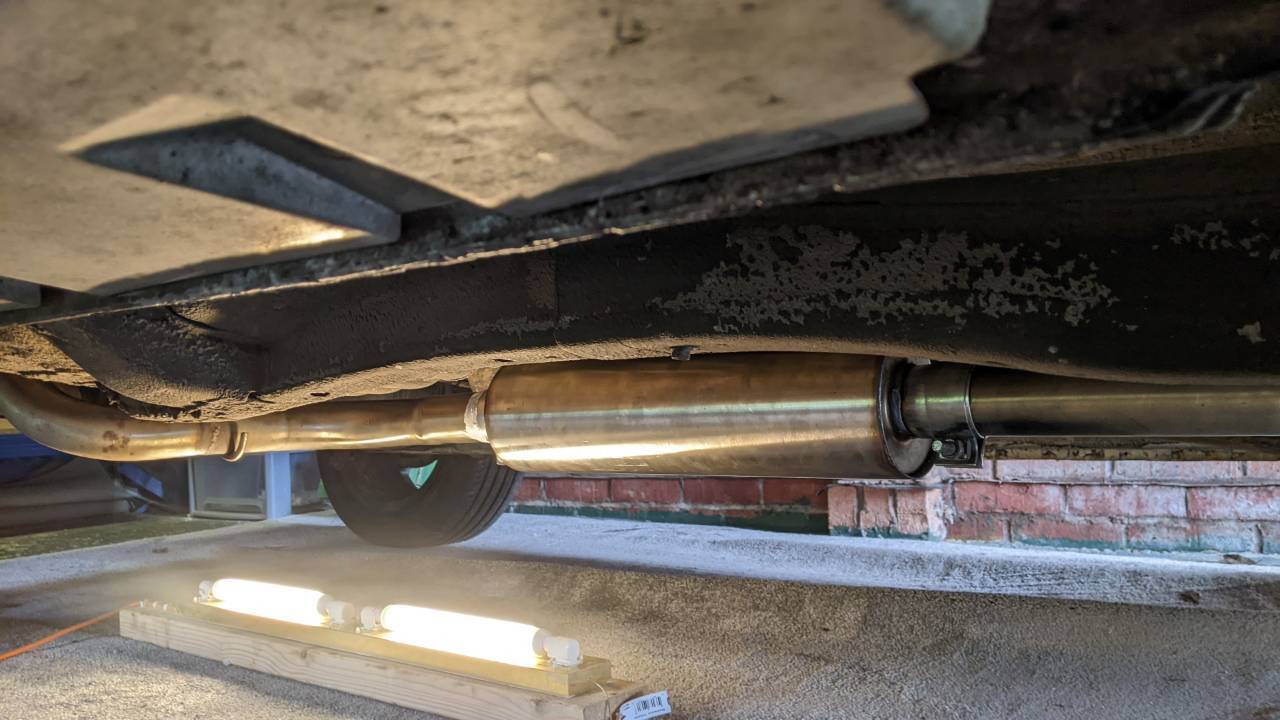
This is the finished article, the new silencer fits really well into the transmission tunnel with room to spare. The joints don’t seem to leak and it’s knocked a good bit of noise off the exhaust note. It’s still louder than stock, but just sounds nicer.
I removed the bung from the tailpipe and went for a drive, it’s now a lot less noisy, especially about 4000 rpm, when it’s a lot more civilised. It also revs a lot better, previously the bung seemed to really restrict it revving above 4000rpm, now it revs really well through 6000rpm and isn’t a piercing roar any more.
I should have just fixed this myself ages ago, I’m really happy with it now. Next up is to replace the windscreen before the MOT, and look at changing the short driveshaft to try and cure the 70mph wobble
For anyone else considering a stainless customer exhaust, do it! However learn from my mistakes. On a K3-VE2 engine, a 2.25" system breathes beautifully and you will notice a significant improvement in the revviness of the engine vs standard (which is 1.75" if it saves someone rolling around in the mud with a set of calipers). You will want at least one silencer, if you go with just one then I would say that a 5" diameter x 18" length is the very smallest volume you want to tame the exhaust pipe roar. The transmission tunnel would accommodate a 6" diameter silencer in retrospect, and you could fit a 20" or probably even a 22" or 24" length silencer easily in the transmission tunnel between the gear linkage and the fuel tank. If you went with a 2-silencer system then you probably still want a fairly long silencer in the transmission tunnel because there isn’t loads of space rearwards of the rear beam but fore of the bumper. You could fit a fatter silencer there, but it would be short in length.
Also, the exhaust bungs DO work to reduce the tailpipe decibels, but stifle the engine breathing. I don’t have anything scientific to back this up, but the ‘seat of the pants dyno’ tells me that it did not rev as freely in the top 30% of the rev range with the bung installed vs now with no bung.
For anyone still reading, well done! And the total cost of the modifications I have done here was £68. This was for a stainless 5" x 18" silencer and two sturdy clamps. This is very small beer compared to the initial cost of £650 for the custom cat-back exhaust, but all I’ve really done is cut straight pipe and clamped in a new silencer. The art of it all is in the bending of the pipework from stock 2.25" stainless pipe.
7 Likes