Yes they have started. I have today also to do some things but wont get it finished but progress is progress.
Oh one thing to note also was when I drained the oil from the engine there was not one spec of metal flake’s at all which is a good thing I guess.
2 Likes
I made a tiny bit of progress today I replaced the oil pump on the original block which was most of the day doing the one job I hate on engines. Scrapping old stuck gaskets off. I hate it with a passion sometimes. but it is now replaced
4 Likes
Awesome champ. Let me know if you would like the ED block I have here
Thanks Dale but I think I have enough to get me by here atm 
1 Like
slowly pulling down the engine today and the bottom of the sump has quite a bit of metal in it. So I would say it would be one of the bearing’s and maybe something else.
the verdict on the engine was yes it was big ends there was a little marking on the cylinders also but nothing that major. Number 3 was the worst bearing and the other 2 were not as bad but still not good either, I remember when I built this engine I didn’t bother measuring the crank or big end’s as I never had the tools and didn’t know about plasti guage then and took a punt that they would be standard bearings. That punt/ guess ofcoarse would be the downfall
1 Like
Damn! That sux. So crank out and linishing?
The size should have been on the back of the original bearing shells.
Maybe just a clean up and you can keep the right size.
Check the oil pump is in good nick while it’s all apart and pick up is clean.
I’m not sure how far you have gone with it but if you wanna keep it on the low cost build then you may not have to pull the head off.
Just upside down and onit all from underneath.
1 Like
engine is already out and head is off. It will just be a clean up and right size bearing put back in there was alot of crap int the sump but mainly gasket from the sump. so it looks to be. I will be checking everything, but I will be using a different block for the move with standard size pistons and rebuilding this better for the mira. So no great hurry at the moment.
1 Like
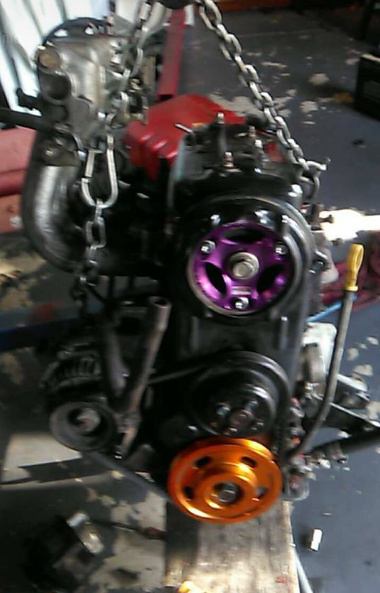
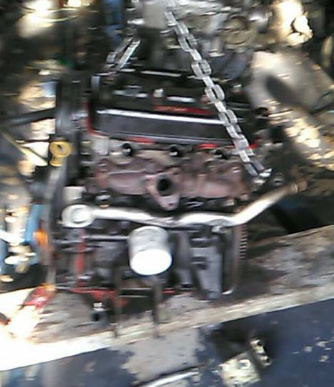
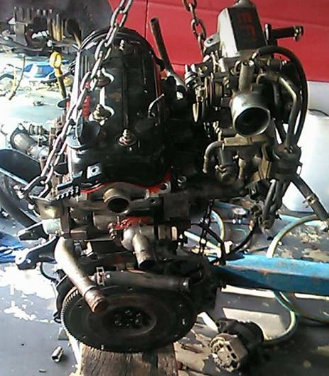
got a bit of time today to get some progress done. I took the head off the other block. cleaned up the 12v head and checked for straightness all looked good. Moved the block and put it where I could access it better. By the time i finished I got the head on and torqued down, replaced the front and rear crank seals, Timing cogs, belt and pulleys on alternator on flywheel on and rocker cover on. As usual I always somehow break my tube of high temp gasket sealant and today has been no different.
Next thing’s on the list to do is take the gearbox off the other ed20 I have and see what size clutch is on it that will determine what clucth and pressure plate I will use. If it is a 160mm clutch I will use that with my double pressure plate and be able to run higher boost and if it is 170mm cluch I will just run the 3 puk excedy and have lower boost until I need a new clutch.
anyway here is some engine pics for the fun of it. and plaes excuse the potato phone pics lol
6 Likes
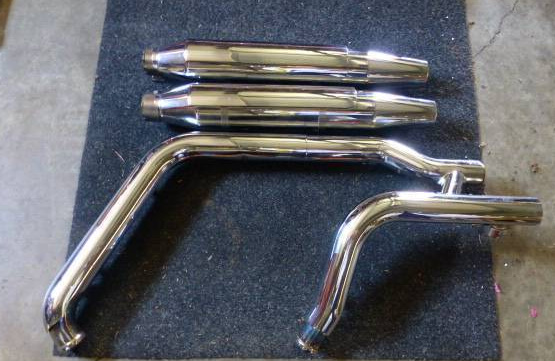
Nothing real much has been ahppeneing but i scored some 2015 Harley softtail muffler’s acustom exhaust from gumtree today and I am going to some how put one or both mufflers on the move. Couldn’t pass it up for $20
5 Likes
Certainly worth it for the tubing. You said, “Harley”. Is there anything actually inside those “mufflers”?
1 Like
Yeh the mufler’s are from a 2015 softail, The muffler’s are full but one is more packed than the other or atleast smaller hole on the outlet. Im guessing it was a setup where they chose what muffler they wanted to use on the bike for the situation with the throttle style butterfly on it.
Normally we drill that washer welded into the centre chamber with a holesaw on most of the Harleys I work on. All it is is a centre chamber with holes and a washer in the middle and gas flows out of the chamber when it hits the washer around the washer back into the centre chamber and out the middle. Very simple but effective.
PS, if you do drill the whole thing out, you may as well not have it. It’s just like taking it off. Some people prefer to drill a hole in it like a 13-16mm to keep it not so loud.
1 Like
got out to the shed the other day after Mrs is mobile again now and we had another damn house inspection so my shed got cleaned up also.
I managed to get the 4 speed box off the engine as I forgot the throw out bearing. I got that on in about 20 mins which was good as I have a habit of either getting them straight away or it taking me an hour or so.
After the throw out bearing I put some new axle seals in and got the box backon also the starter and rear engine mount with the jackshaft and the cv joint cup in the short side. Filled with oil and no leaks :).
I started working on a mount to put the tps for the greddy on and it will be infront of the throttle butterfly linkage and a bolt going from that will rotate the new tps. I started bending up a bracket and all was going ok and then I Though I better get my tps so I can getit in the right spot etc…
Seems I cleaned the shed so good I cant find or remember where I put it lol
Until next time (hopefully monday)
3 Likes
Made my tps bracket and mounted the Vn commo tps on it I just used a bolt off the throttle linkage and made a bracket to fit it. It’s not pretty but it works so Im happy. Now I just have to work out which wire is which. I have a multi meter on order as my other one slightly broke when I was cleaning up the garage.
5 Likes
so got the engine in and discovered the gearbox has a crack that I hadn’t noticed b4 an was leaking gearbox oil so for now i will use move 5 speed for now as Im am getting to the point of needing this on the road. I will get it repaired or rehouse the internals later.
Anyway here is update vid as I was too lazy to write more out.
4 Likes
That TF035 will come on boost heaps earlier. Unless you’re going to be raking it out and running big boost TF035 will be a much better suited to your motor.
Looking good.
Also with that leaking gearbox if you clean it with paint thinner around the crack and sand it a little you can use liquid metal that you buy from the hardware store. It sets just like metal and won’t leak. It looks like the crack is up high and not actually in the oil reservoir part of the gearbox so should be fine
1 Like
yeh the difference between the sizes of the turbo compressor wheels is noticeable visible so thats why I am gong to go with that, Not after huge boost especially when limter is around 6k. the crack does run down the back a bit but I was hoping someone would know if the liquid metal stuff would work or not so thankyou heaps. I will definately give it a go I think. I may grab some tomorrow and give it a shot. I think it may be through the thread too but will investigate better when its out.
Yeah I use those tf035s on the 1.3 starlets and td04 on the 1.5 conversions.
Some like the lag of the td04 on the 1.3 but it’s too laggy. The tf off a forester is a great turbo for lower boost apps. The tf has 4cm rear housing. The td has a 6cm rear.
Good pix here
Ps, I’m using a vf 26 on my 800cc mighty boy.
2 Likes
Great going @evilhighway.
I remember using the TD04L on my EJ set up, maan was it laggy, but highway killer😈 . Not a highway driver. Good notes from @Paulep82
2 Likes