Ongoing project thread of Sirion Rally 2 M101

What an age we live in eh? I ordered the rear ARB from a seller in Malaysia on 1st October, and it arrived here, beautifully packaged on the 7th October for under £120. The best any UK based sellers could do was £180 and a 6 month (!) wait.

Top marks to yulicoauto.com.my for superb service and impeccable English - they couldn’t have done more to help!

Kit comprises the ARB itself, an Ultra Racing AR16-406 bar, 2 mounting brackets and a pack of stainless steel washers and bolts for fitting to the rear beam of my Sirion. This is the 16mm version - they also do a 19mm one - which i hope will tidy up some of the body roll when driving enthusiastically.

I’ll have a go fitting it at the weekend using some ratchet straps to bend the ends inward a bit and try to not knock any teeth out while I’m at it!

Its also a:

image

5 Likes

That’s actually the same Company I purchased mine through - and found similarly good service / shipping / packaging!

Glad it got there quick - looking forward to what you think of it!

3 Likes

FYI, make sure you copy the “.my” at the end of the website’s URL as well. If you don’t, you’re in for a surprise. Don’t ask me how I know :joy:

1 Like

:flushed: :flushed: :flushed:

1 Like

Work has been quiet this morning so I went out and got the Sirion up on the lift to fit the ARB. The rear beam is 4 pre-drilled holes for mounting the ARB so first of all I bolted the angle brackets to the rear beam. The kit comes with 8x 14mm bolts in 8.8 stainless steel, plus washers for mounting.

I did these up tight, then bolted one side of the ARB to the bracket. As several others have said, it needs to be fitted under tension, it comes shaped like \ ___ / and needs to be tensioned so it looks like this |____| instead. As @TPG suggested, I got my ratchet strap out to try and bend it into position then (in a rare instance of this for me) had a brainwave.

Rather than doing one side up tight, then using a ratchet strap to bend the other side in parallel, I undid the bolts on the side I’d done up so they were engaged about 5 threads each into the captive nuts of the bracket. This allowed the whole ARB to slide over about 1" and meant I could use a small g-clamp on the other side to bend it in a small amount, just enough to get the bolts to line up and engage with the threads in the captive nuts - I hardly had to put any tension on it to get it to this stage, meaning less chance of it slipping and pinging off into my face or whatever.

Once I had all 4 bolts engaged with the captive nuts I could tighten it all up, working diagonally about 5 turns at a time, left front, right rear, right front, left rear and so on until it was fully tightened up

Here it is in situ, I didn’t realise until I took this pic that I’d mounted it with the Ultra Racing logo upside down (doh!) but I’m not going to undo it and flip it over, no-one will see it anyway, unless I’m upside-down in a ditch!

I’ll take it for another run over the weekend to see how its altered the handling, looking forward to reporting back.

3 Likes

Your doing some fantastic work here mate! Love the time and effort your putting into and it’s only going to get even better :grinning:

Thanks to you I will probably also order those bushes seeing as we have no choice here in the UK :slightly_frowning_face:

Really keen to see what you come up with regarding the new 4-1 exhaust, I’d love to fit a nice sports exhaust to the K3 once its in the Cuore. Also regarding the rear anti roll bar, I just fitted one to the Cuore the other week that I took off a Copen, I swear it looks the same thickness?

Keep up the great work.

2 Likes

I was really impressed with the service from siberianbushing.com - and the bushes themselves were top notch quality. Definitely recommended. The only downside is that the shipping is quite expensive, but its with Fedex or DHL and you get full tracking details etc.

Re the exhaust, my ultimate plan is a Maxx racing 4-1 manifold like @Rallynrace has, then a custom 2" exhaust in stainless steel all the way back with an inline sports cat, but that will need deep pockets - I think I’d not be seeing much change from £1k for that work - the cat-back exhaust in stainless with no cat comes in at about £450 based on quotes I’ve had so far, then the manifold is £150 delivered, a decent sports cat about the same and then I need to get my soldering iron out to lengthen the wires for the post cat O2 sensor which will end up much further back in the system than a stock exhaust. It will/ought to last forever though. Probably a job for next year I think.

I think you’re right, and the YRV/Copen/Sirion M3 rear ARB is a direct fit, I just couldn’t seem to find one anywhere for less than the UR one so that won in the end!

2 Likes

I guess another positive is that they should last a very long time so the cost will eventually wear off knowing you won’t need to replace them again :slightly_smiling_face:

Sounds like a good plan, it’s annoying when costs just start adding up so quickly so soon! I do have a TIG welder and I have always wanted to have a go at making an exhaust, so depending on how I get one maybe I could help you out if you ever needed it.

So I found a guy on eBay who has a few Copens he is breaking, I got my front and rear roll bar off him for £50, they did need a bit of a clean but wasn’t a bad price? If you maybe need something from him here’s a link to his eBay listings: Items for sale by hijetparts_0 | eBay

1 Like

I’ve moved away from stainless exhausts and back to steel. I hate tig welding stainless and having to back purge but that was not why I changed. Also cracked stainless is something that’s given me grief now and then. Lately I started experimenting with turbo X coatings for the outside of headers. Inside exhaust ports, dump pipes and exhausts I’ve been coating them with THLB polyphen coatings (https://techlinecoatings.com/). I’m yet to test the temp properties and early on more interested in the integrity of coatings, especailly adhesion. If it doesn’t last then why bother. Admittedly I do access to a large fridge size high temp oven (200 deg c) for the THLB and a huge kiln (300 deg c req, does go a lot higher) for the turbo X. I’ll pull all apart some time this month and inspect and will do some rudimentary surface temp testings. I’m seeking to learn as much as possible becuase I have a yacht exhaust for an inboard diesel to do. Salt water flows around the exhaust and through the Volvo engine as part of its cooling. They’ve had trouble (of course) with steel rusting and stainless cracking.

4 Likes

I’ve done about 40 miles with the new ARB and the handling is hugely improved - understeer is significantly reduced and turn in improved - Its lovely and precise along a winding back road now.

There is one small fly in the ointment though - over the poor road surfaces here there is a pronounced clonk as you go over bumps. To begin with I though it was that I’d not tightened the ARB bracket bolts up enough, but a closer look today revealed some telltale contact marks on the rear section of exhaust as it drops down on the rear side of the back axle

d58780d4c2f129e6ab5ba29c9819e8782d894bdf_2_666x500

There is loads of space between them with the car on the lift, but with the car sat on its wheels there is about 1" between the trailing edge of the rightmost ARB bracket and the lower edge of the ‘elbow’ of the exhaust. The exhaust is coming out worse in the relationship by a significant margin with scratch marks about 3mm wide and 50mm long where the rear trailing beam rises as the suspension compresses over poor road surfaces and the ARB bracket hits the exhaust.

Anyone got any thoughts on what to do here? I was thinking of a few options:

  1. Wrap exhaust tape around the area that hits the ARB bracket to cushion the impact
  2. Cut the trailing edge of the ARB bracket with a grinder on the diagonal section to square it off (possibly reducing strength, and also probably not really improving clearance
  3. Wallop the exhaust with a hammer a bit to indent the elbow and increase clearance (possibly combined with #1
  4. Cut, re-route and reweld the exhaust to give more clearance

#4 is realistically the best option, but I can’t weld and have no gear so would need someone to help with the job. I reckon if the exhaust was cut in the straight section as it goes over the rear beam, and another 3" of straight pipe welded in, it’d clear the ARB bracket fine, but then the mounting hook would need to be cut and moved back 3" on the very rearmost section (just out of shot above) and the pipe would look a bit silly sticking 3" out the back bumper so that would want shortening etc etc.

TBH for now it can just merrily clonk away now I know what the issue is - I think some sort of cushioning might be a good idea in the medium term though. It gets too warm even this far back to use duct tape, but possibly worth cable tying a 5mm bit of rubber cushioning pad to the impact point?

This is something that I’ll have dealt with properly when I get the custom exhaust sorted as I can make sure the rear section clears properly.

Whatever you do decide to do, I have a spare exhaust off a Sirion your welcome to for free.

Seeing as I have a spare exhaust, if you private message me I might be able to help you with cutting and welding it to suit your needs.

2 Likes

Wow, thanks! PM incoming

A trick a mate used to gain a few mm of clearance was to wrap cable ties around the outside of the exhaust hanger bushing so that it had reduced stretch and even compressed it a bit. Lifted the exhaust up just enough to clear parts then, perhaps an option?

Can you get a taller bump stop rubber that is inside the spring?
I know it would limit suspension travel, hitting the bumpstops earlier, but if it’s only on large bumps it would keep the two parts from connecting.

Or stiffer rear springs - presume it would take larger bumps to compress the springs enough to cause the two parts to hit.

Sucks that it also fouls with the factory exhaust, figured if it had a factory sway bar at one point the factory exhaust would clear it!

1 Like

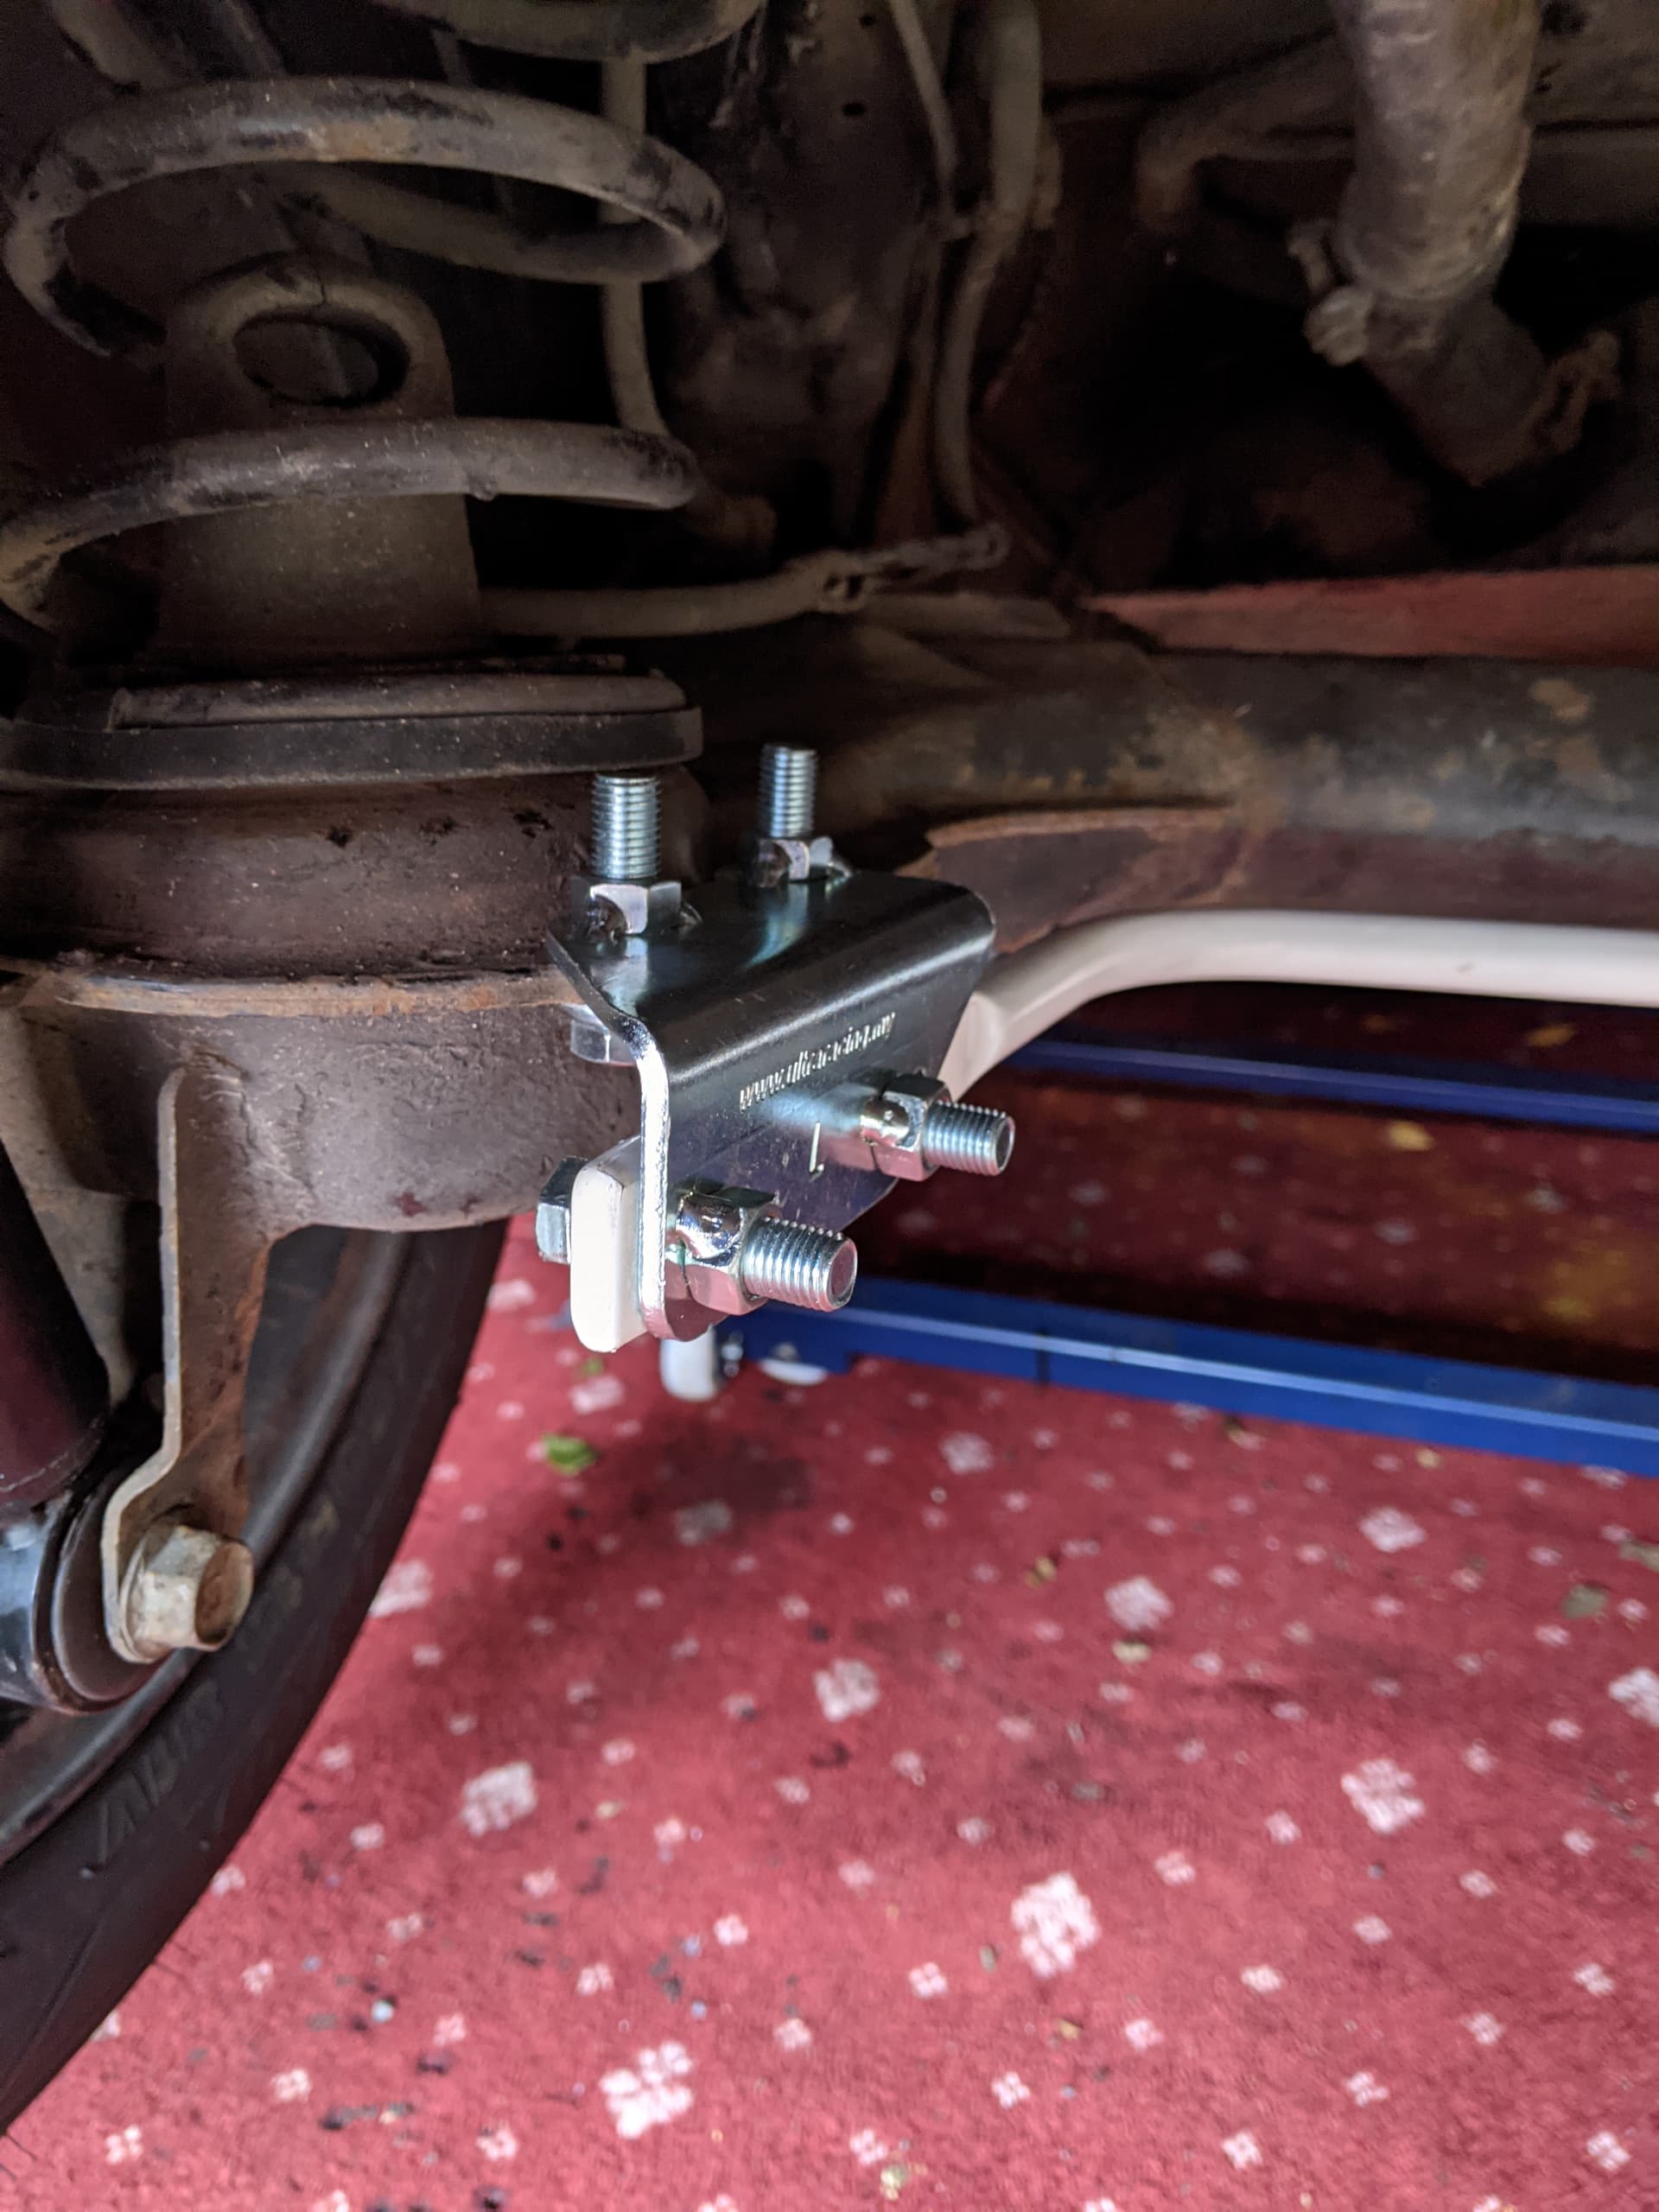
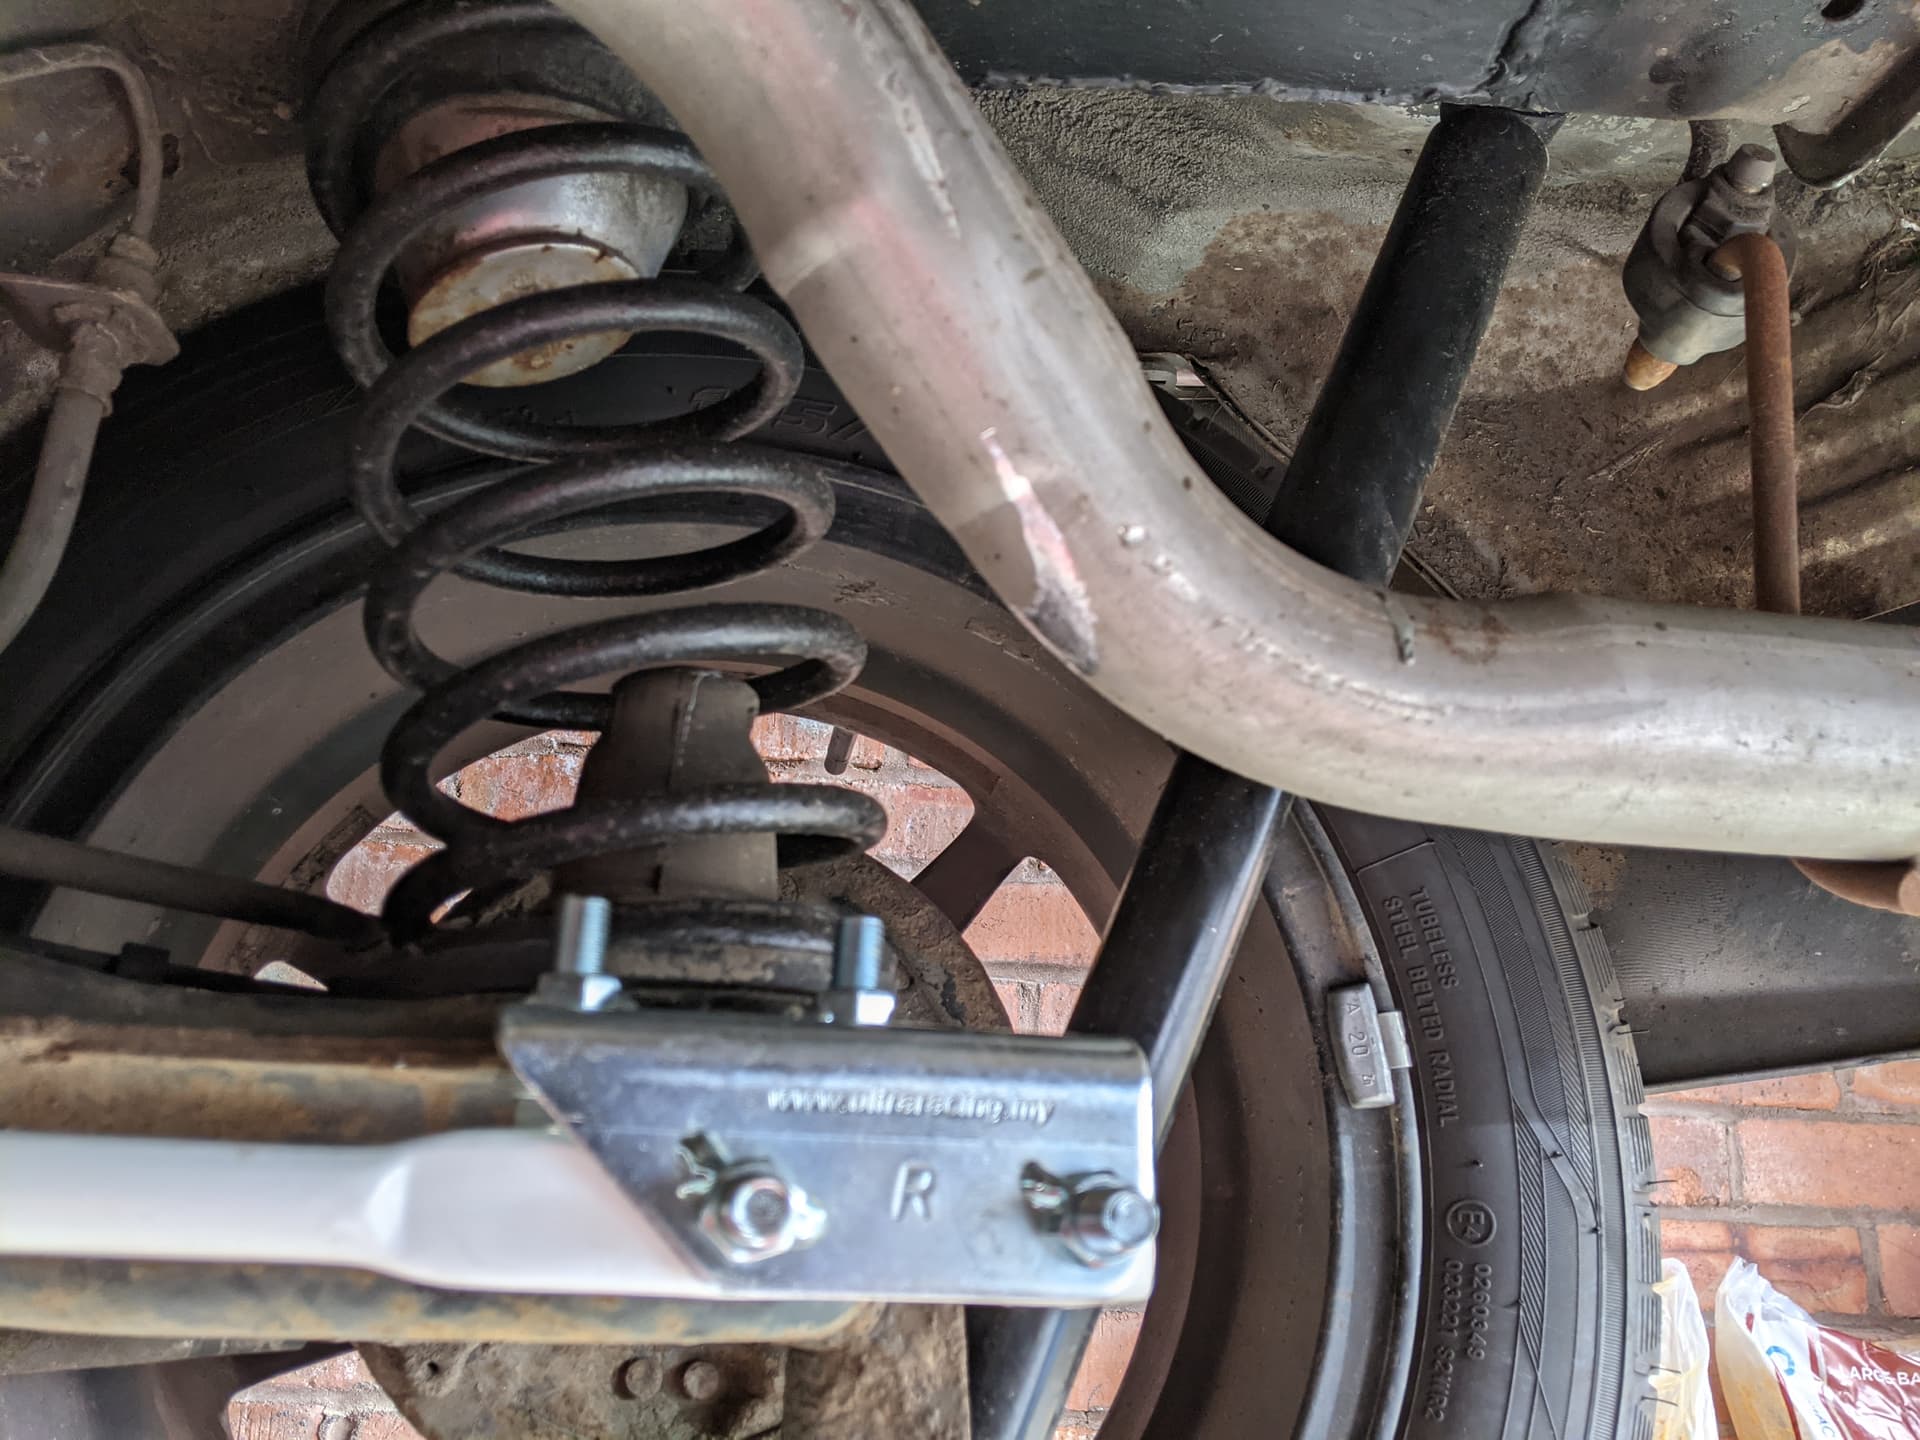
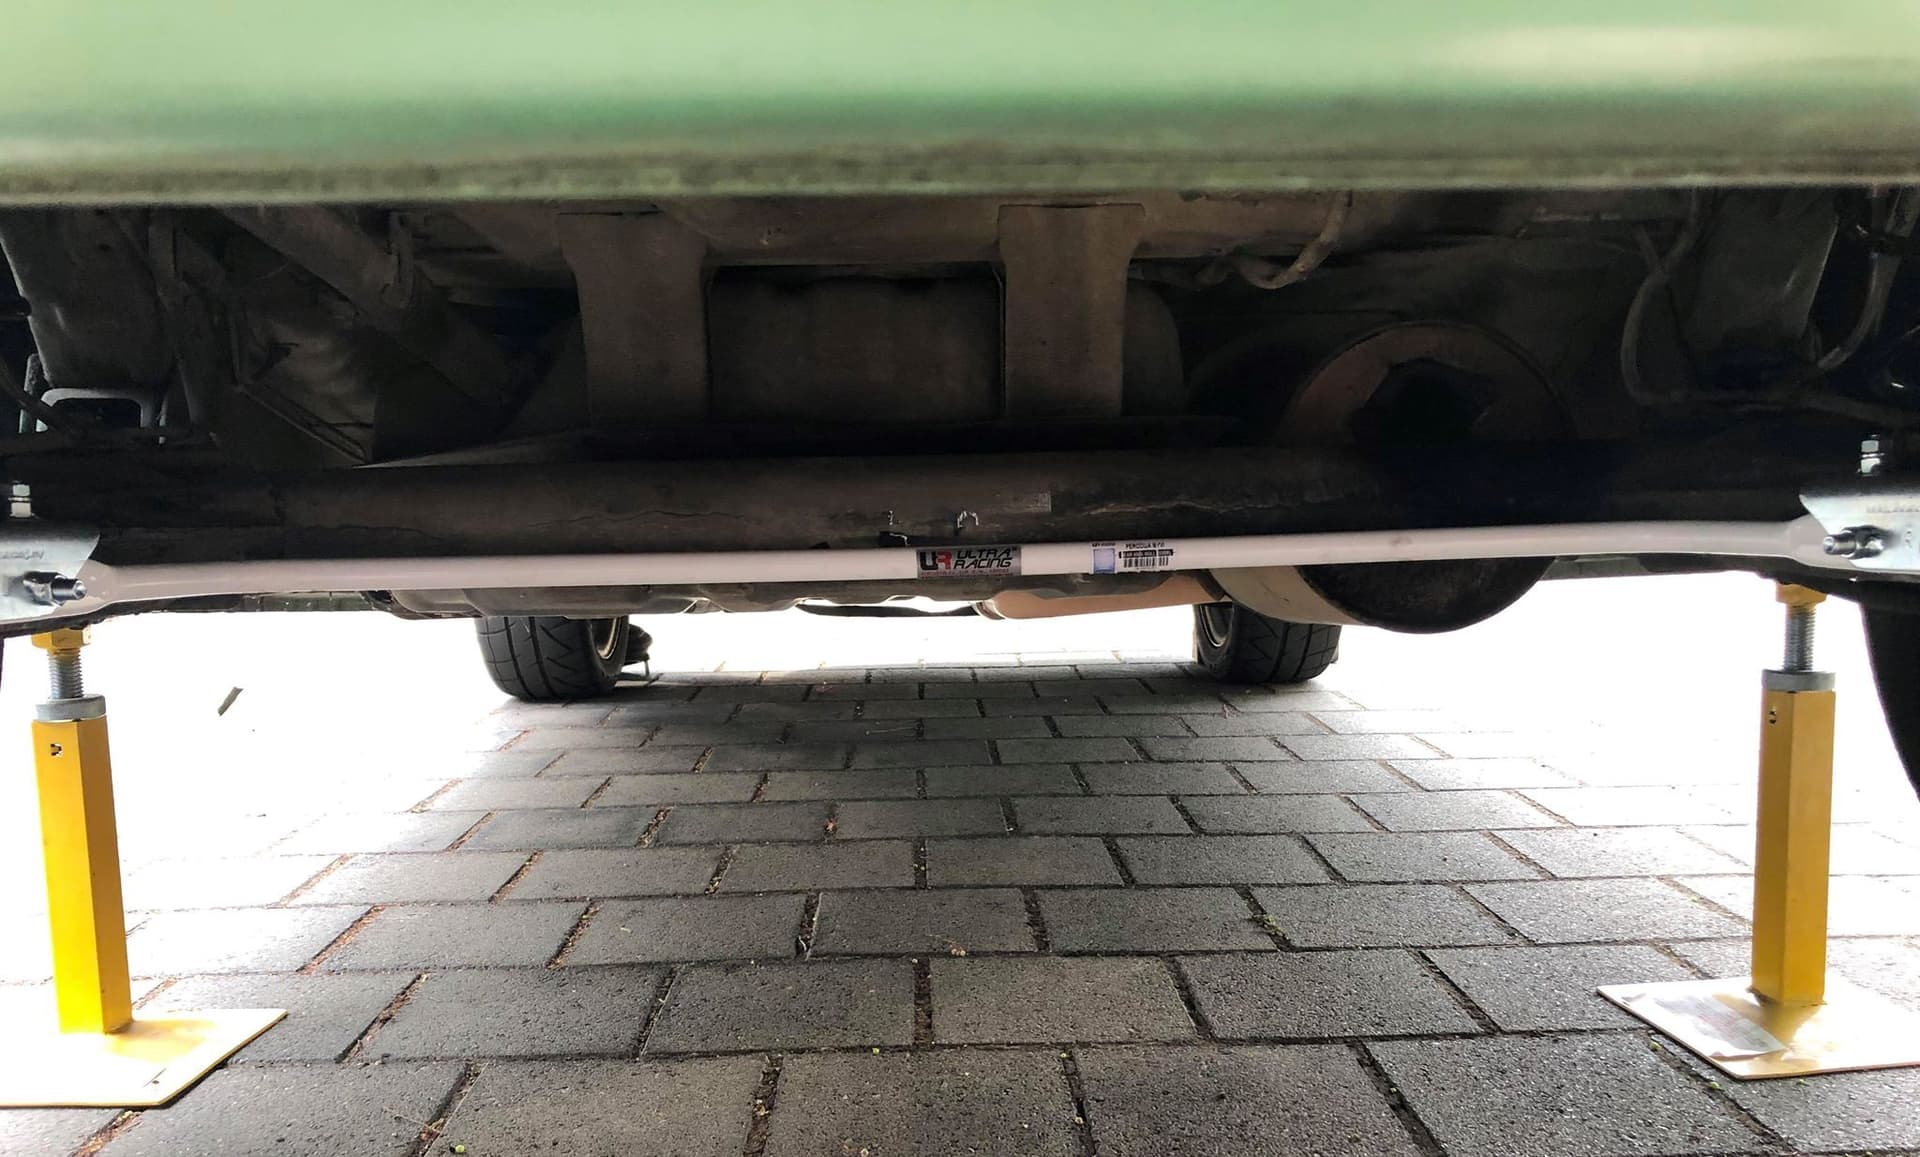
So, a bit more info on the exhaust issue. Here is a closeup of the exhaust → ARB bracket interface

The shiny bit of exhaust in a U shape is where the underside of the exhaust hits the trailing edge of the ARB mounting bracket.

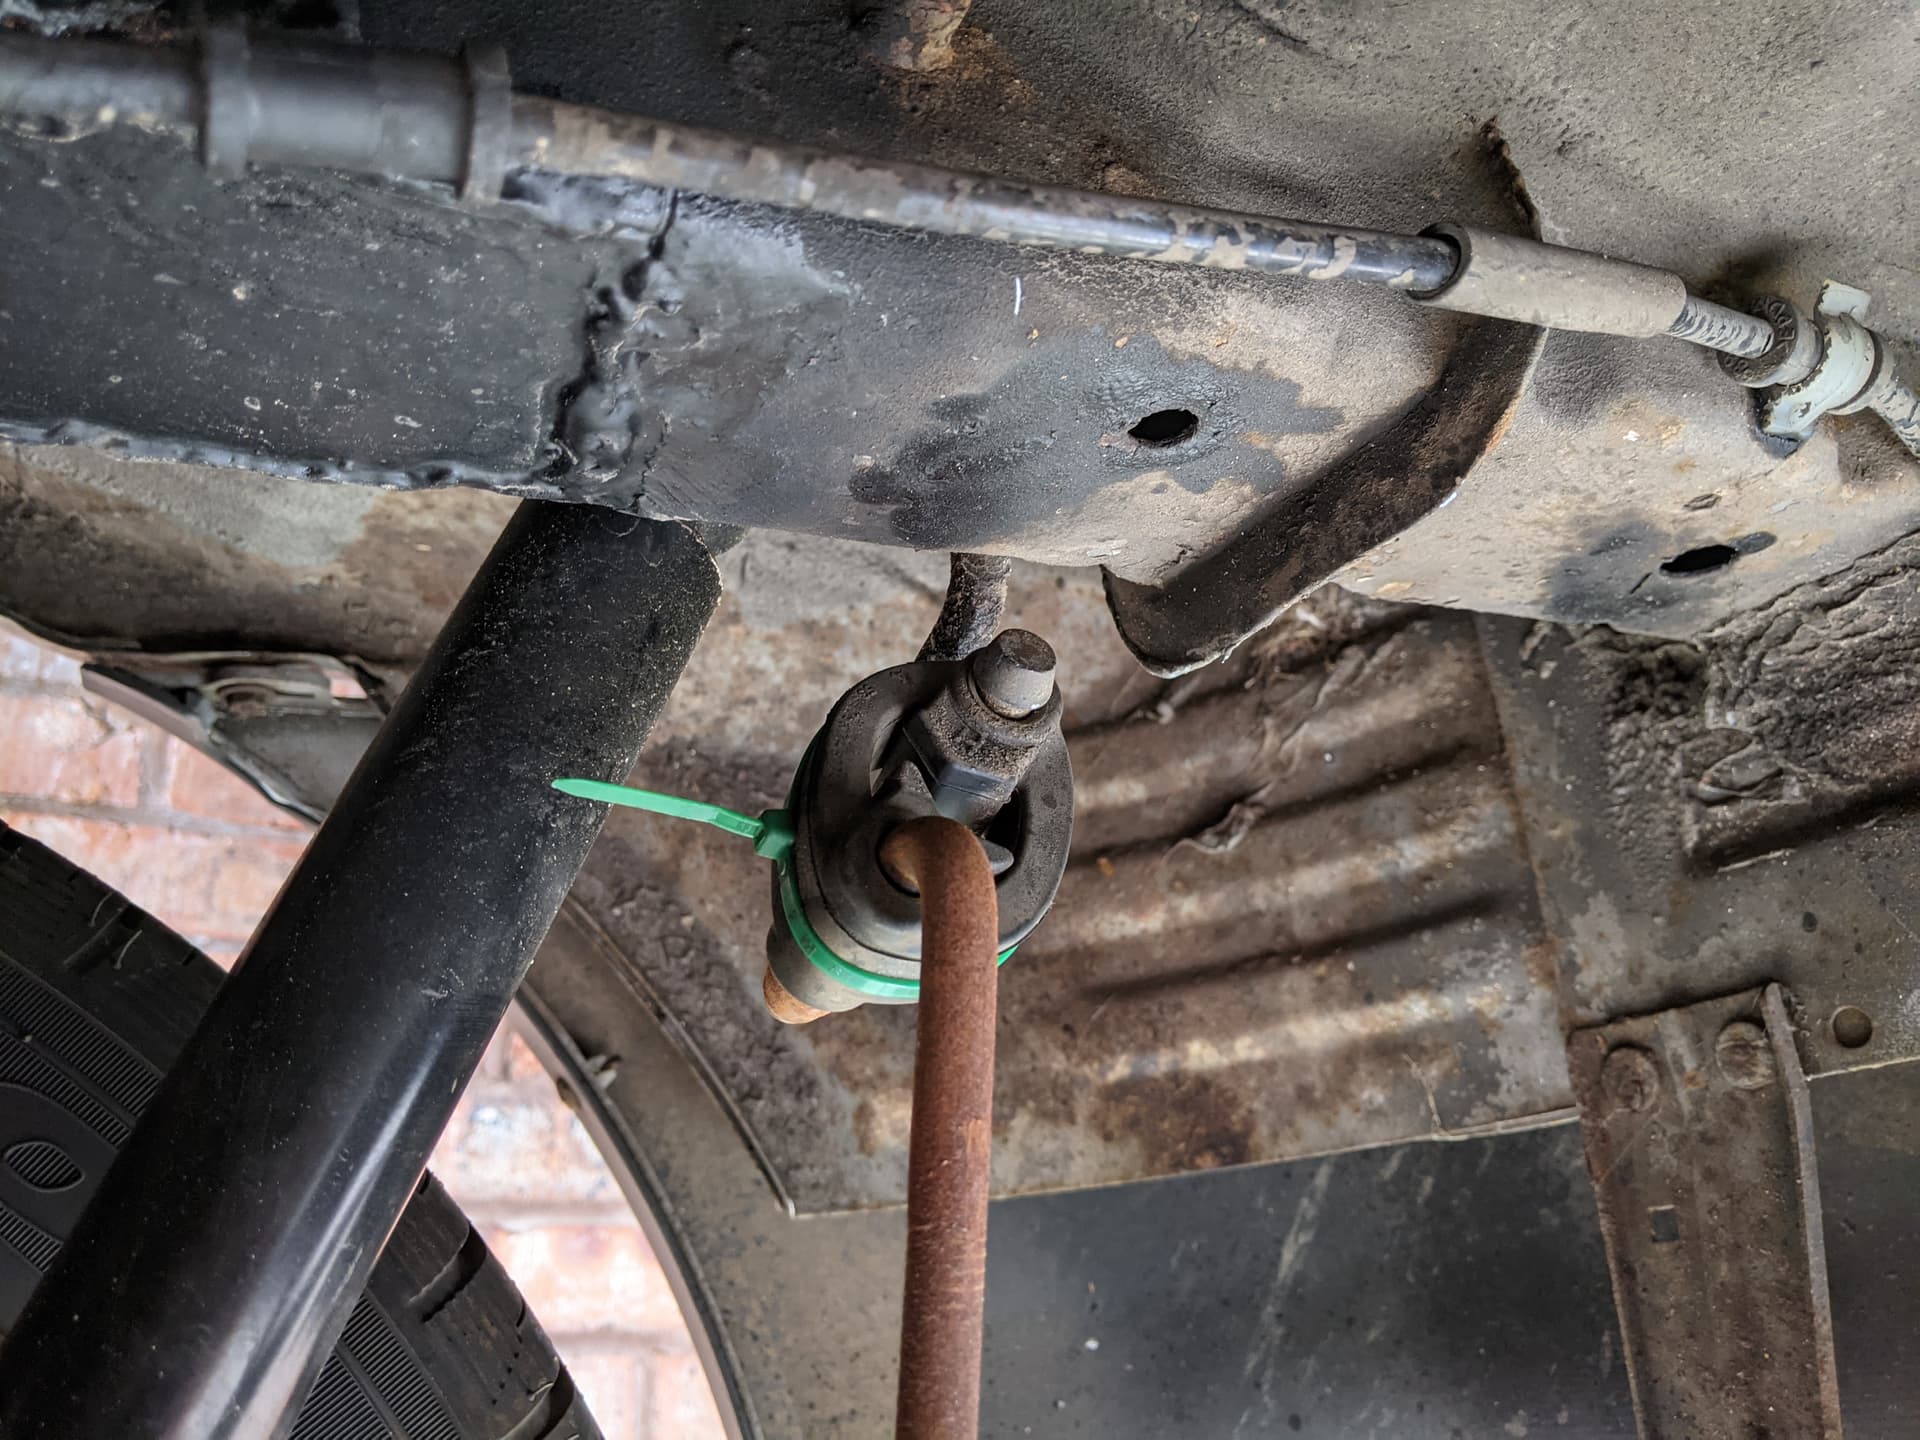
It doesn’t half clonk when they hit each other! Following the advice of @TPG I wrapped the hanger rubber with a cable tie to pull the exhaust up higher. It only raised it about 10mm because then the exhaust tip fouled the top of the cutout in the rear bumper, but its lifted it a bit

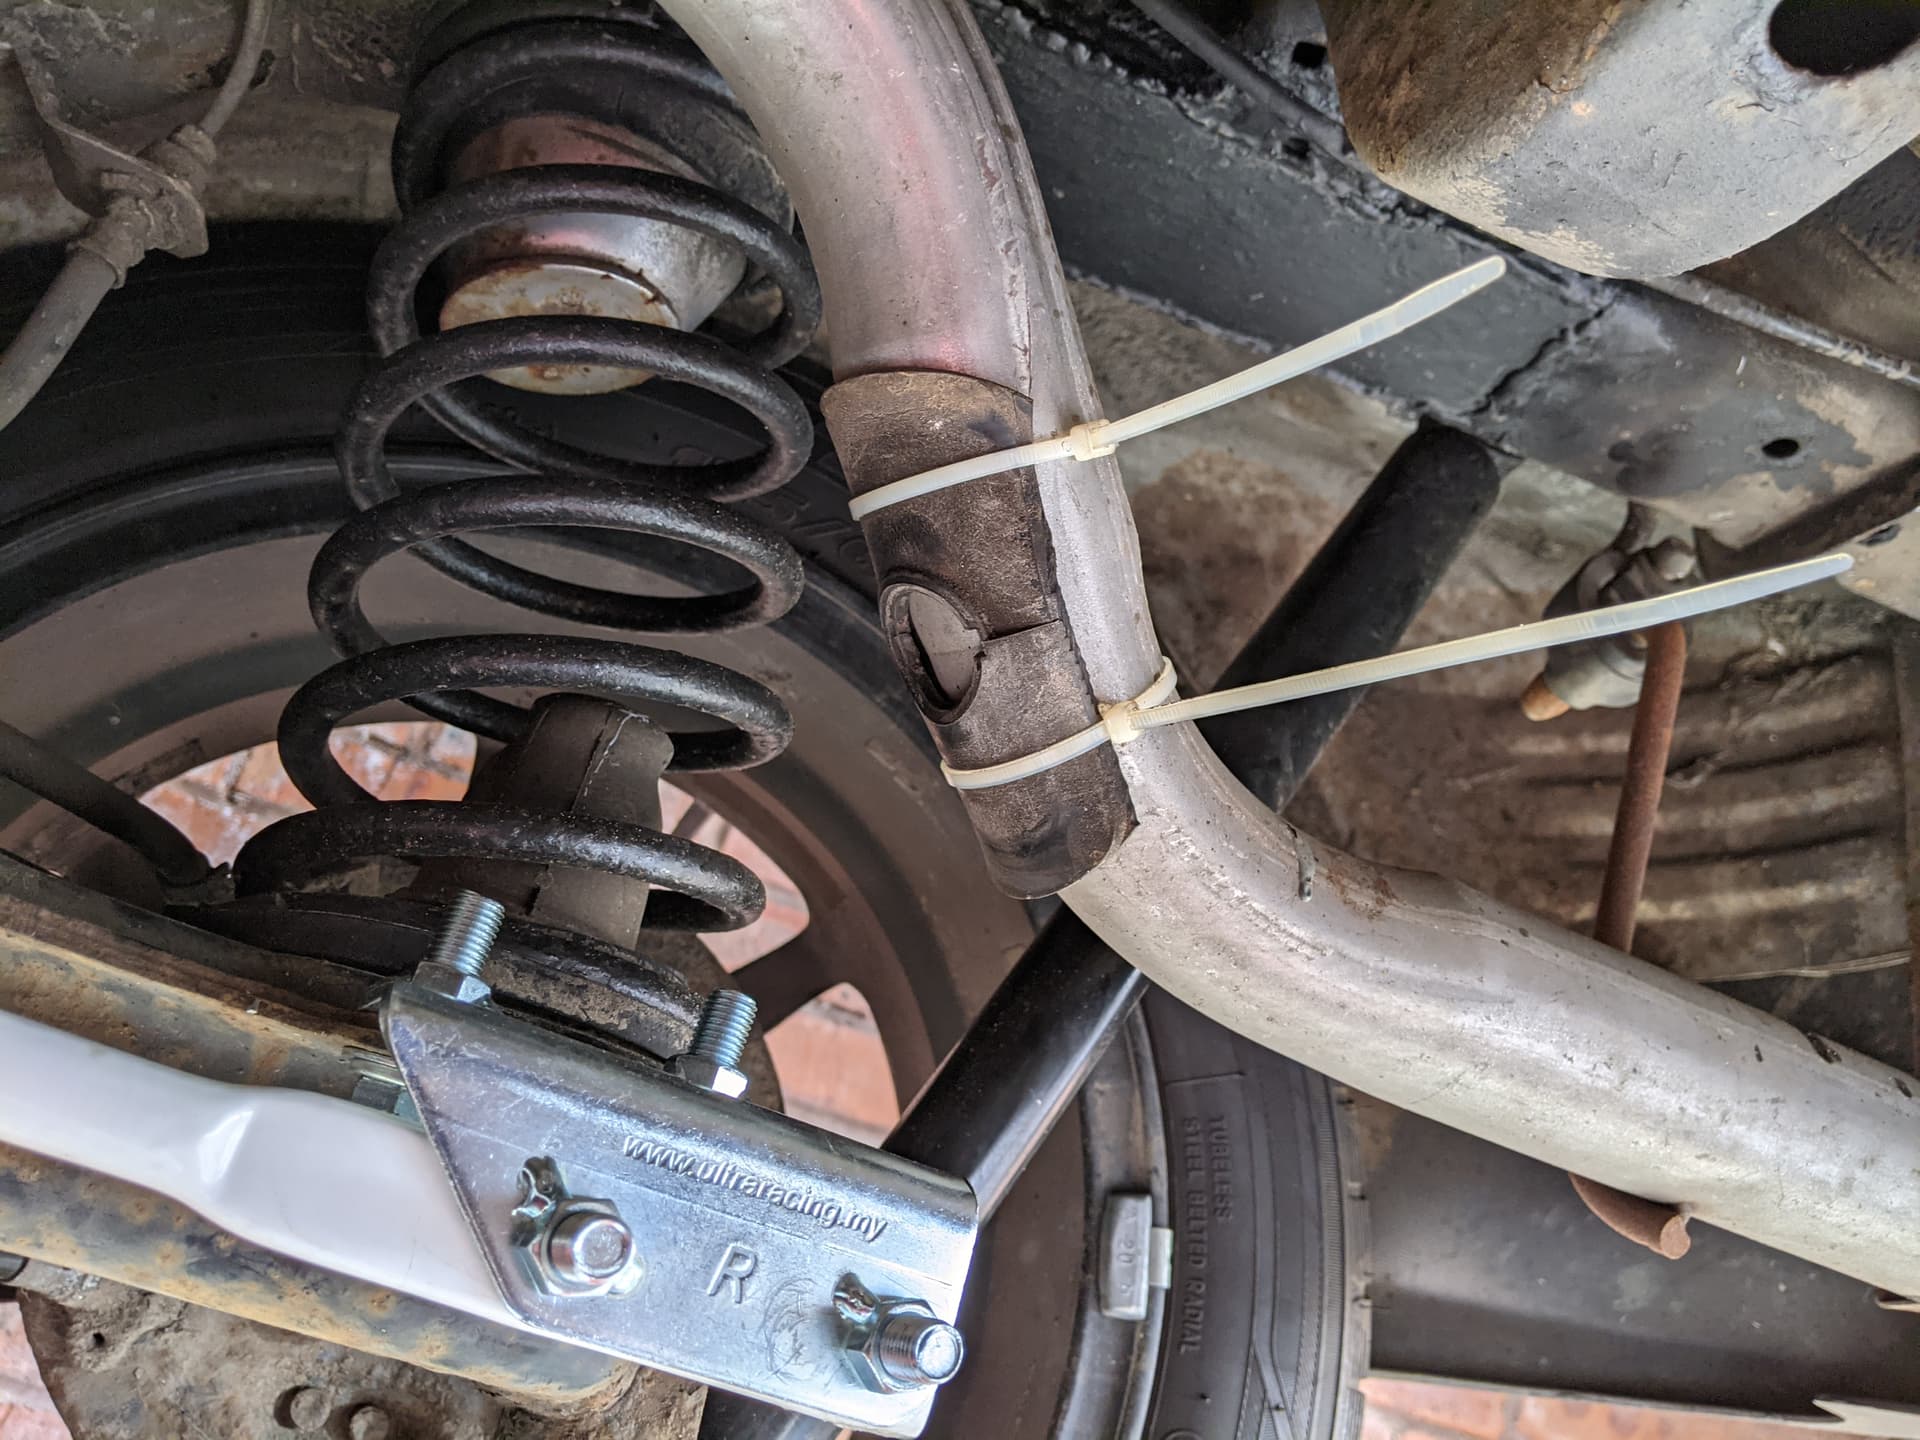
The final bodgery for today was to cable tie on a protective cushion in the form of some leftover heavy duty rubber sheet cut to size. This is about 5mm thick and reasonably heat resistant

Not pretty, but it did help. I took the car for another run for about 20 miles earlier and the clonking is now less obvious, and only happens over the bigger bumps & potholes so thats improved it a bit. After coming back I checked how hot the rearmost bit of exhaust was getting and while it was hot, it wasn’t really hot - I could touch it with my hand, but it was too warm to grab hold of and leave you hand holding it. Would be fine with a glove though.

@TPG -some/all of this kerfuffle may be a result of it being a pattern part rear exhaust, the OE one might have cleared it better but was more ‘holes’ than remaining metal so got binned off a while ago.

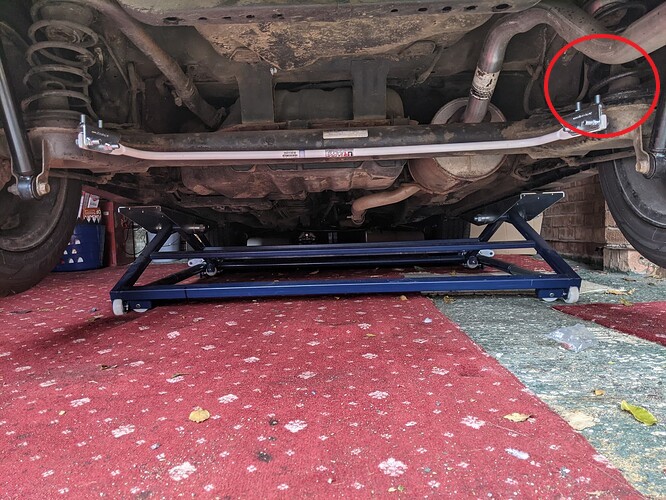
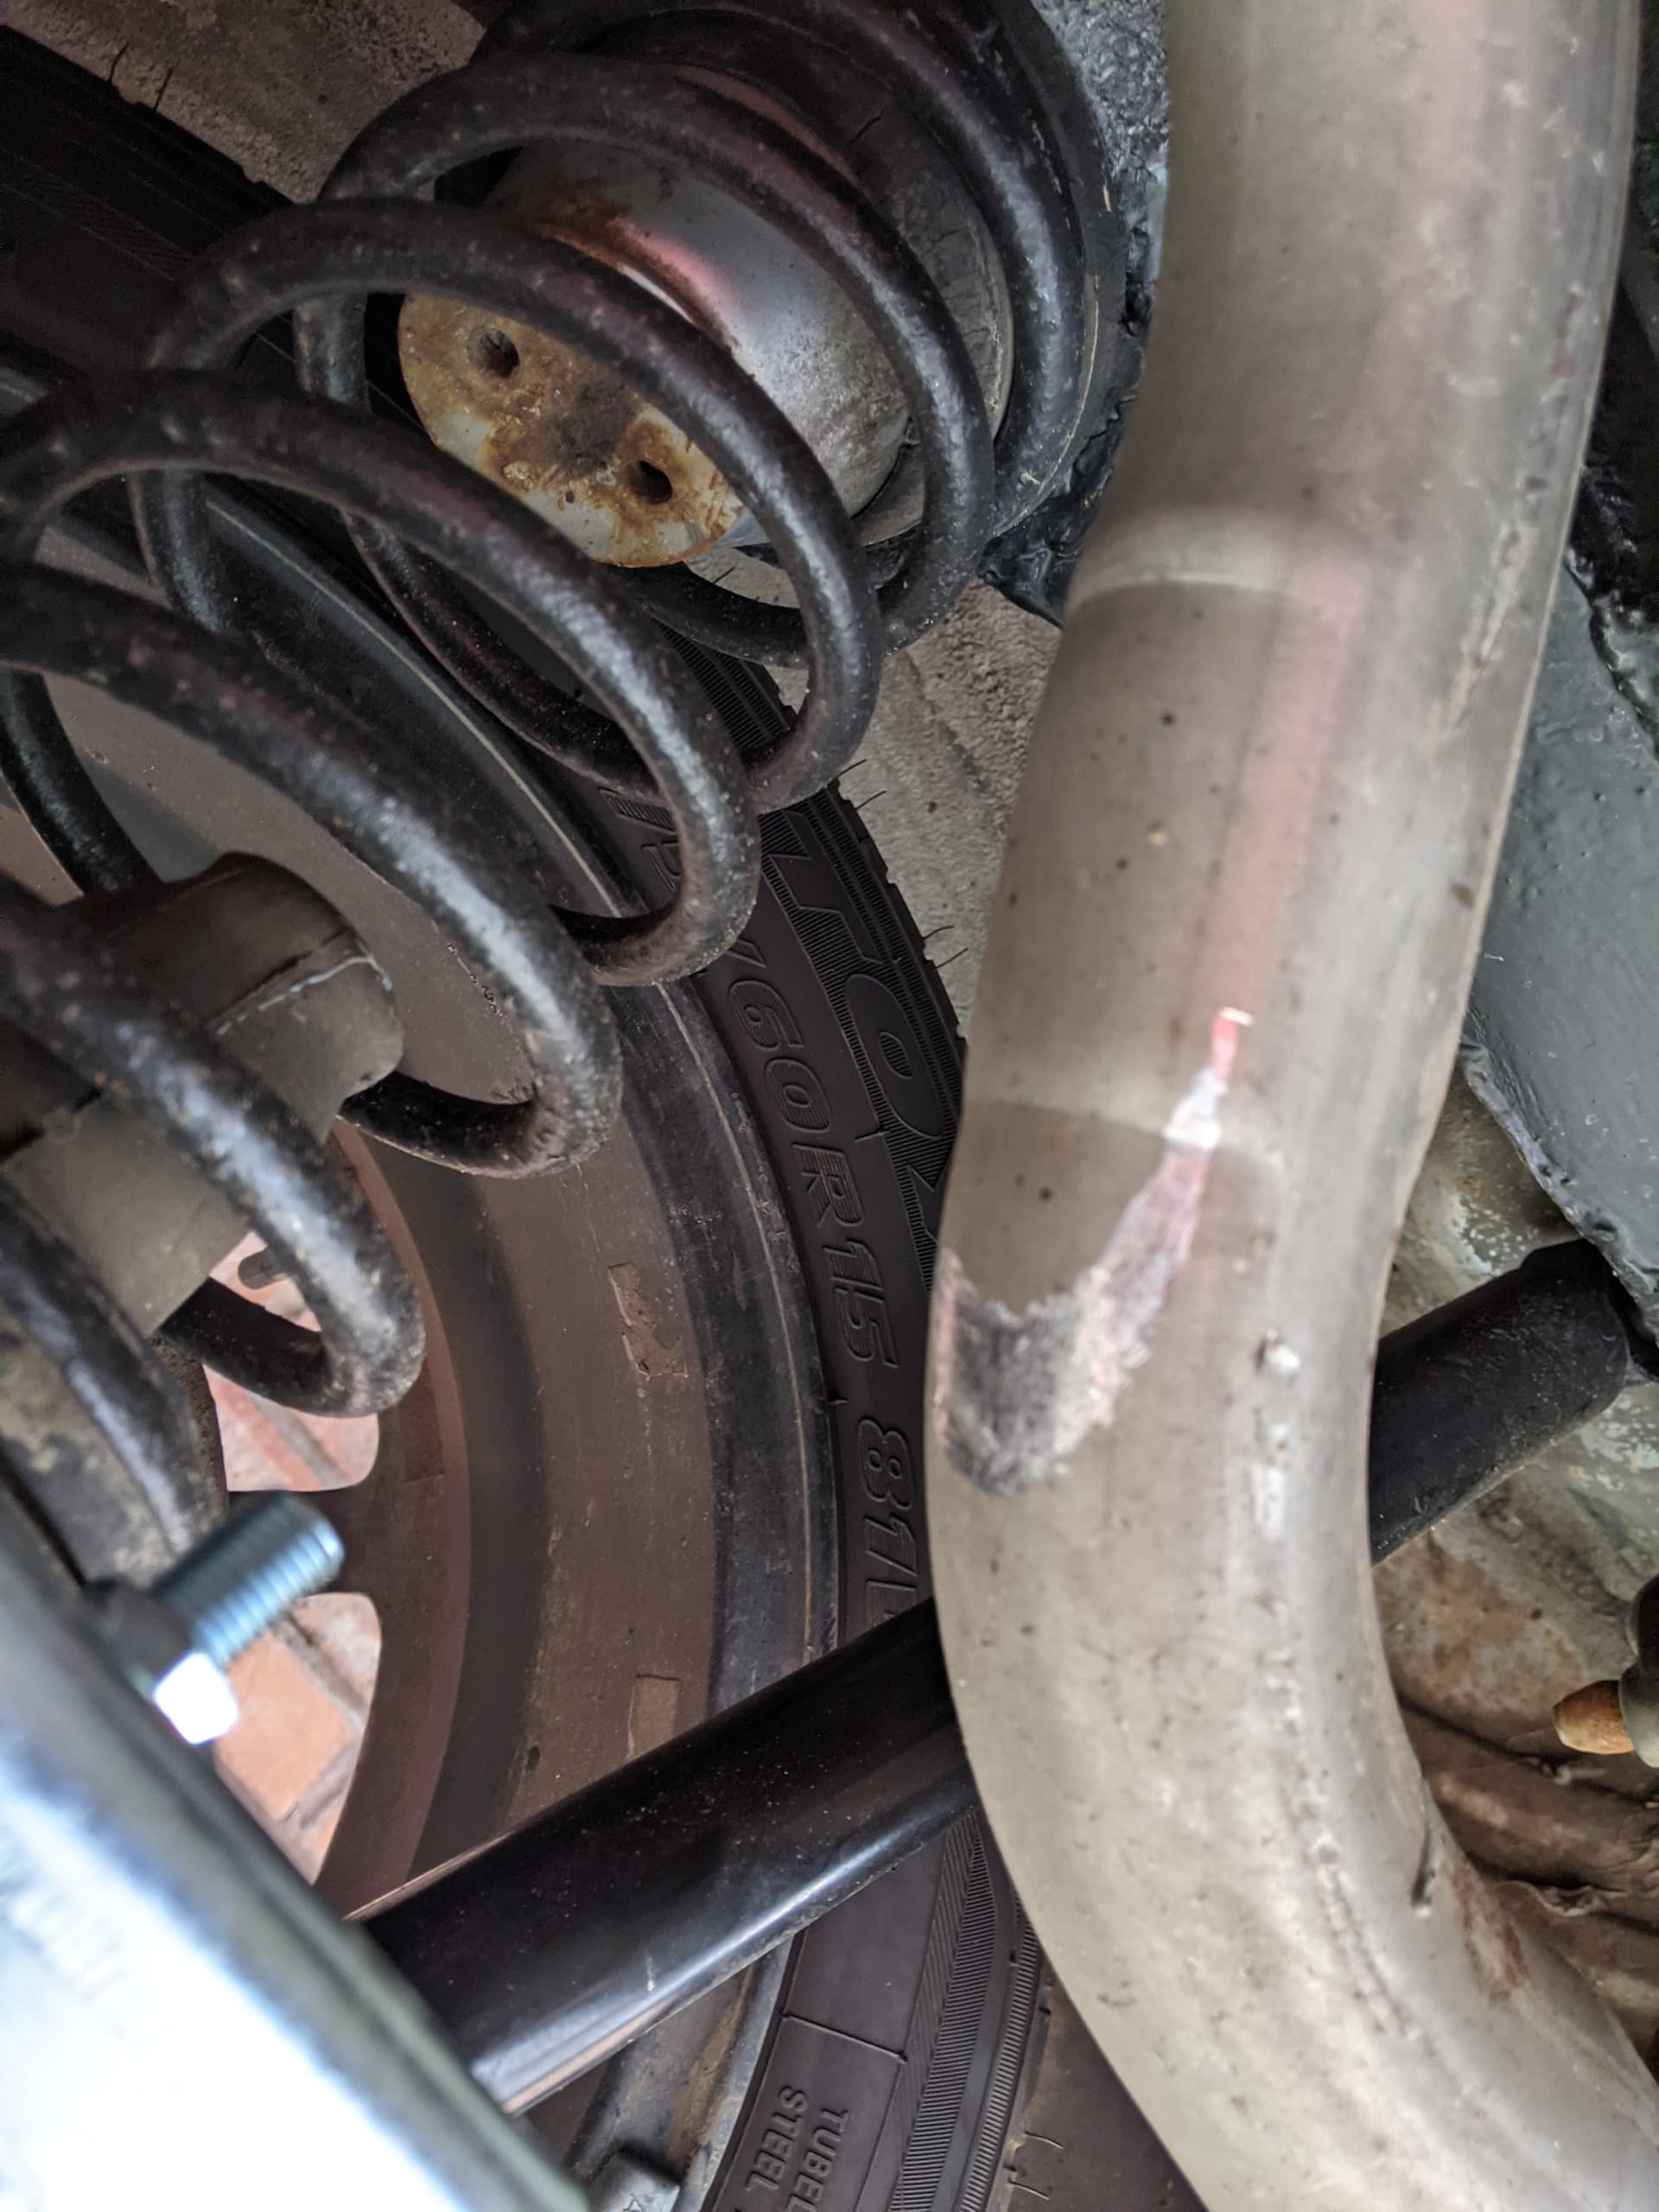
What I need to do now is some proper work on it. The rear section of pipe looks like this

5

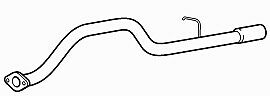
The issue is the that drop to the left of the hanger arm in that pic is too far forward, and too shallow to adequately clear the ARB bracket. It needs to be modified a bit to improve clearance so its more like this

6

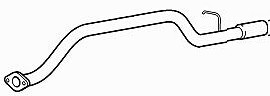
With a much longer middle section where it rises over the rear beam and a shorter straight end pipe section, but keeping the hanger arm is about the same place. I had a think about some cutting and welding, removing the hanger arm, cutting 3" out of the final straight pipe section and re-welding the hanger and end tip back on, then using the 3" of pipe to lengthen the centre bit, but this is a right old carry on.

Plan B at time of writing is to buy in some universal 1.75" bore 45 degree elbows and clamps. These will give me much more flexibility as I can slot them together until I’m happy with the fit, then clamp them up with some exhaust paste, cutting and welding will need to be right first time really. The sections have a centre line radius of 100mm, if I cut the current exhaust just where it starts to bend back down, slide the 45 degree elbow on (pushing the bend point back by approx 80mm) then fit a second 45 degree elbow to line the pipe back up with the rearmost section - which I can shorten as required - and it should all be OK. The elbows have one flared & slotted end and one regular end, so they should slip together for the purposes of getting it all aligned, then I can just clamp it up and it should be fine.

I’ll look at sourcing the bits from ebay, it looks like it should come in under £30 for two elbows, clamps and assembly paste which is hardly a huge cost to swallow.

The manicat from @Rallynrace arrived too, so thats something for probably next month after I get paid, I can offload that onto a garage to do the manifold and rear beam bushes in one hit.

I just had a look at your ARB pic’s and I think you have the bracket upside down.
Flipping it and mounting under the subframe, moves it forwards, lower and the cut angle should then miss the exhaust.

1 Like

doh! I’ll have a crack at that tomorrow morning - I see what you mean and yes it should then clear the exhaust!

1 Like

OK, been out to roll around underneath and the brackets have to mount like this for the ARB to fit. If I flip them over so the bracket mounts under the subframe/rear beam (so bolts drop in from above, not push up from below) then the bar itself gets pushed way too far forward and the rear beam gets in the way so the holes in the bar and the brackets won’t line up, not even nearly. Likewise if I have them the same way up, but switched side to side, they clear the exhaust OK, but push the ARB too far forward and it fouls on the rear beam before the mounting holes line up

@Denis477 - if its not too much of a chore, are you able to show how your Copen ARB mounts please? Do the brackets hang down from the rear beam mounting holes, or does it rise above them? Does the bar itself sit below the centreline of the rear beam, or above it please?

@TPG - can i ask you the same question as you have an identical setup IIRC to mine -

Could you mount them the current way, but under the subframe? might give you a few extra mm of clearance?

Glad the zip-tie trick worked a little, but yes bringing it higher will foul the rear bar, so it’s a budget fix for only a few mm at best.

Here’s the photo from my thread - it’s not the greatest, but you can just see that the brackets are mounted the same as your setup currently. Whether that’s how I did it first, or determined that the other ways wouldn’t fit, I can’t remember.

It’s honestly not the 100% correct part for the car, but it works. So a quick mod of the exhaust is a small price to pay.

Also, I was of the impression the Copen ARB won’t fit the Sirion Rear Beam? Due to the Sirion chassis having a wider rear torsion beam than the Copen?

Of course if you’re after more ideas for the exhaust - side pipe?!?

1 Like

Sadly not, the brackets have captive bolts in them so it only mounts this way (or flipped upside down and swapped side to side)

1 Like