Clutch friction material will be okay going over them, of course, so long as the bolt does not protrude. What is the thread size? How deep do the bolts engage?
I have other problems with it, I really didn’t put enough thought into it when I sent it off. The springs in the clutch disk foul so the centre needs to be machined down more and once that is done the clutch disk will foul on the crankshaft bolts, so either the backing plate will need to be machined down or a spacer will need to be made up to fit between the 2 halves of the flywheel. In any case its going to be one very light flywheel when its finished. I will be there next time and work with the guy to sort it out, but first we will wait for the new clutch to arrive and re-assess the situation before doing any more with it, just in case the new clutch is a bit different in some way. I didnt get a chance to measure the bolts, the bolts for the backing plate do not protrude so thats not a prob and there is definitely enough meat for the pressure plate bolts, just a bit more machining and everything should work, although there fill be some fine tolerances.
1 Like
I usually machine every area that there are casting marks. Often much of the need to balance will be due to casting irregularities.
I must say I was having trouble getting my mind around what I was seeing. I thought there was something else to bolt on, but as you say need the pocket for the inner parts of the clutch plate machined back in.
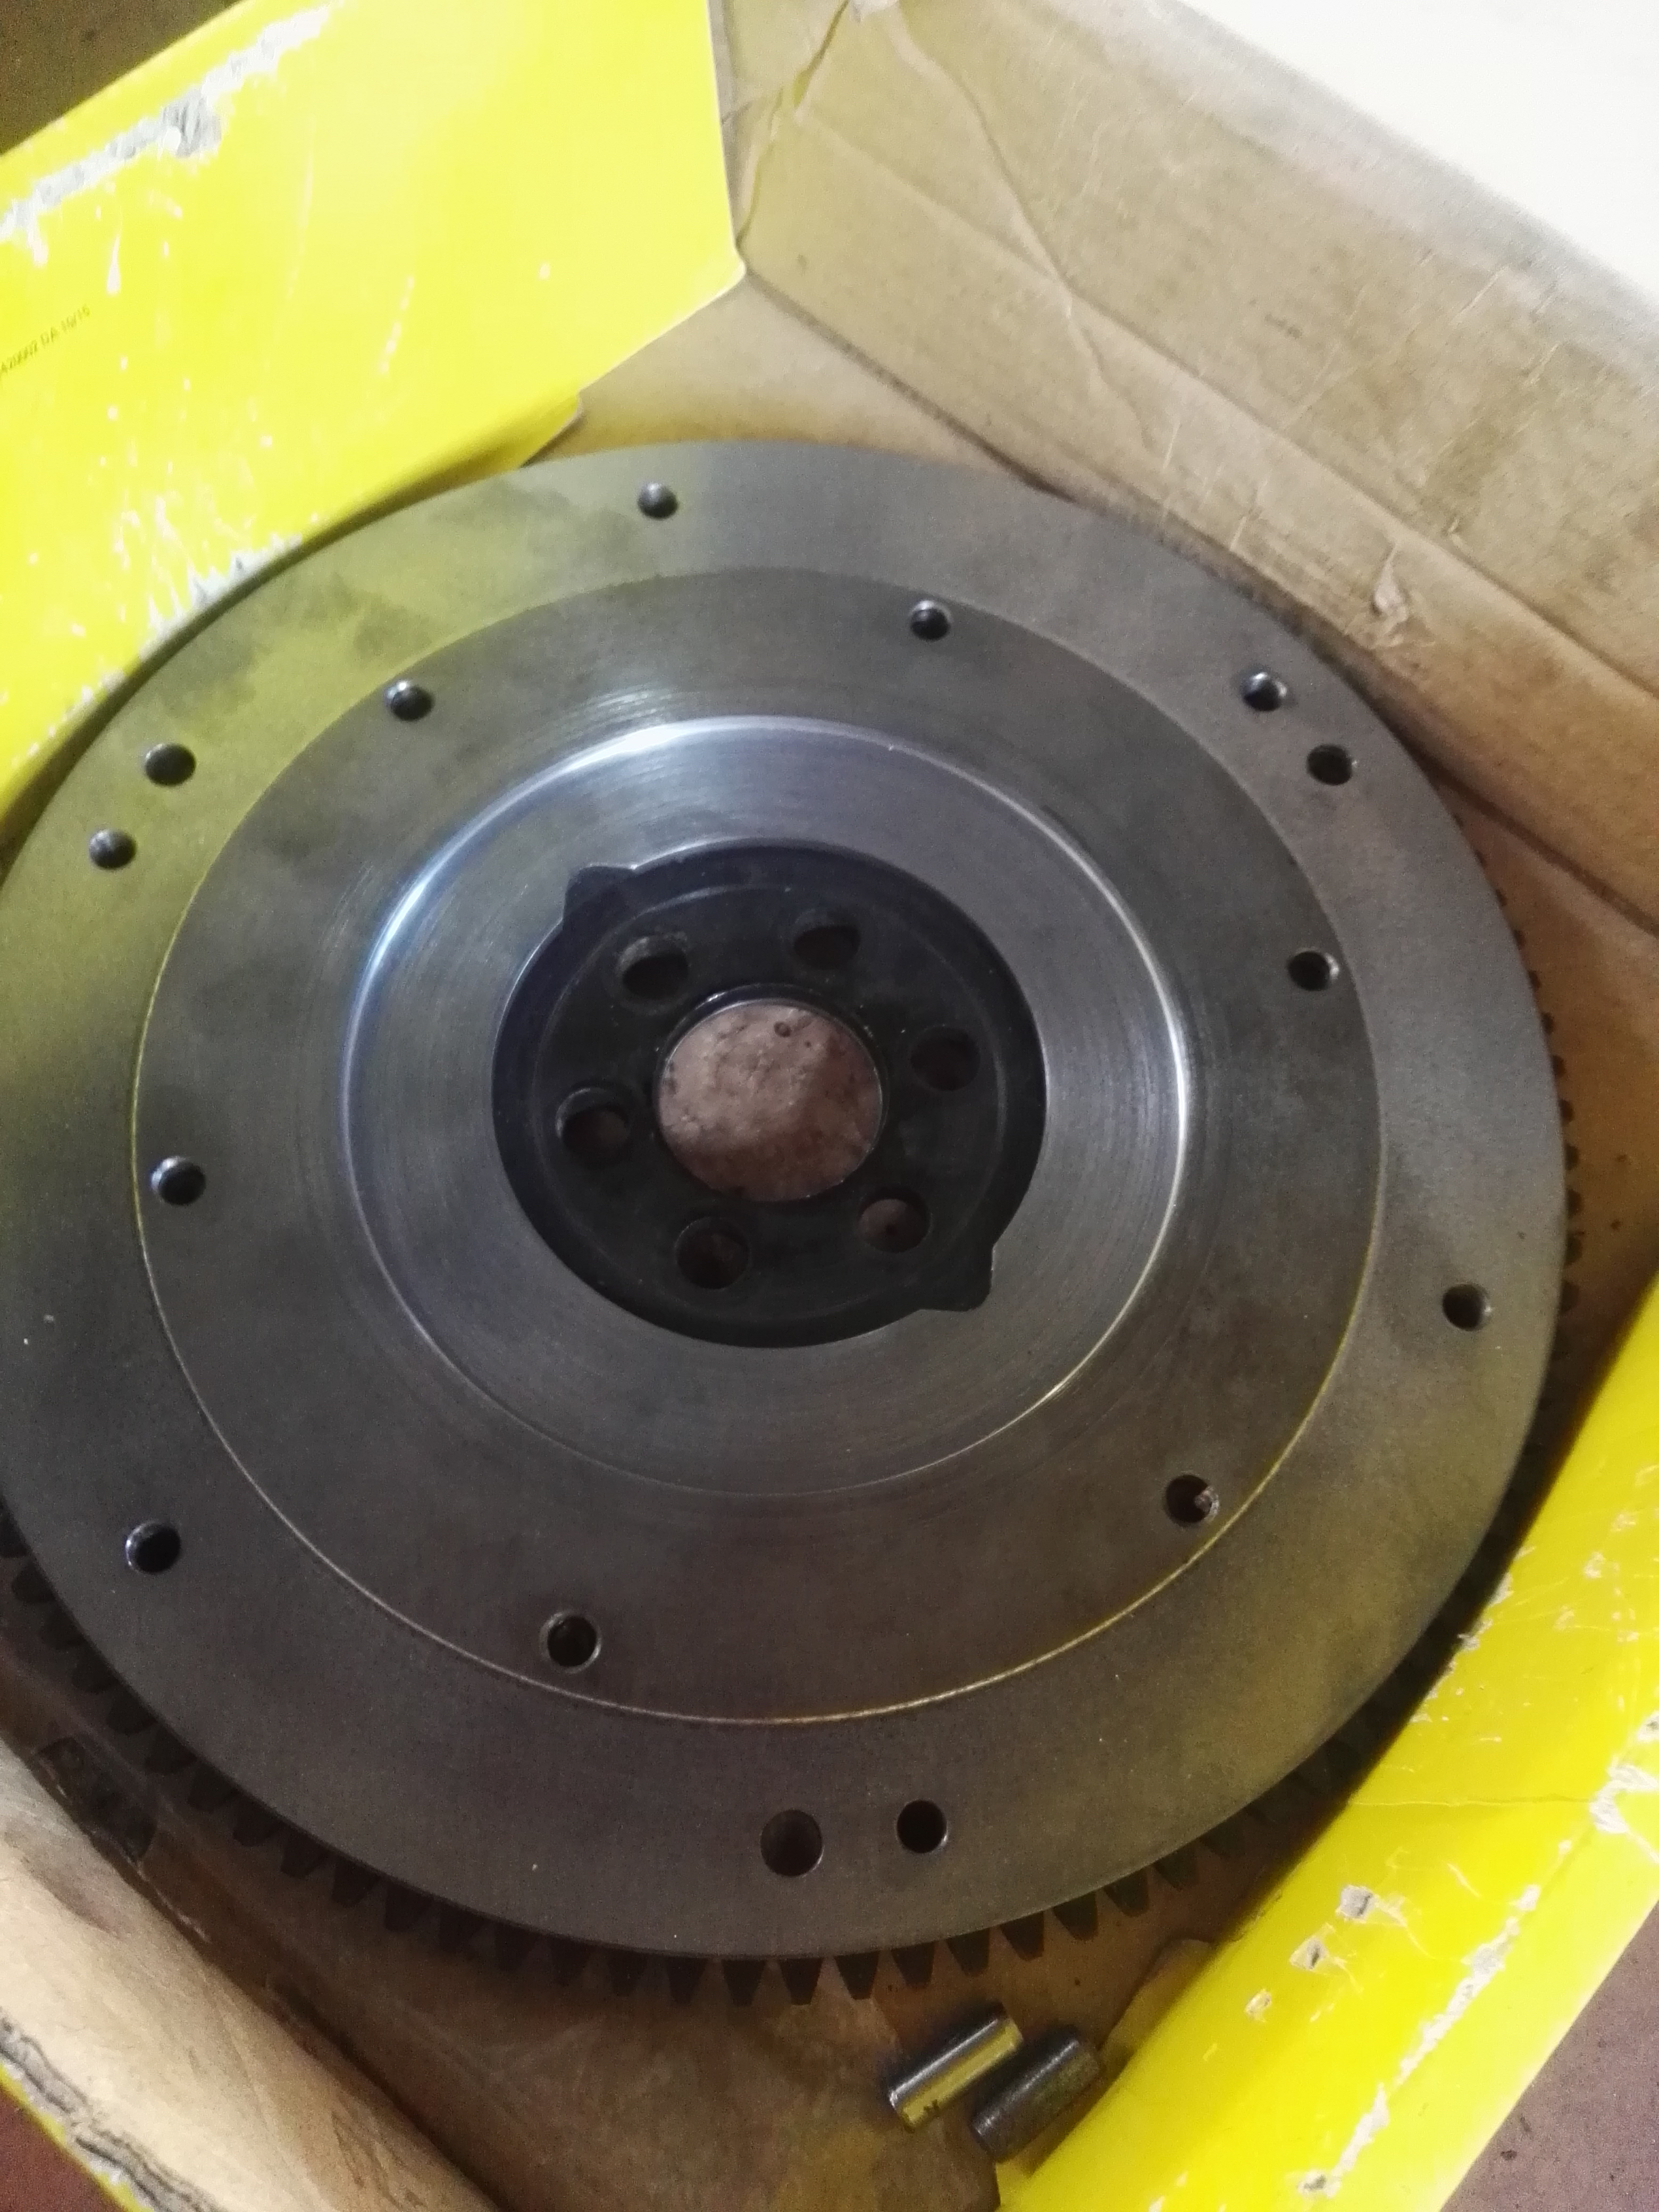
Yes the pocket needs to be machined out again. Quite alot of material has been removed, there was a lip on the back of the flywheel about 9mm x 9mm around the outer edge that is gone, and the face of the flywheel has had 4mm removed right across. If I can actually get the clutch to fit, it should make a noticeable improvement. When its finished ill throw it on the wheel balancer and make sure there isnt any major imbalance.
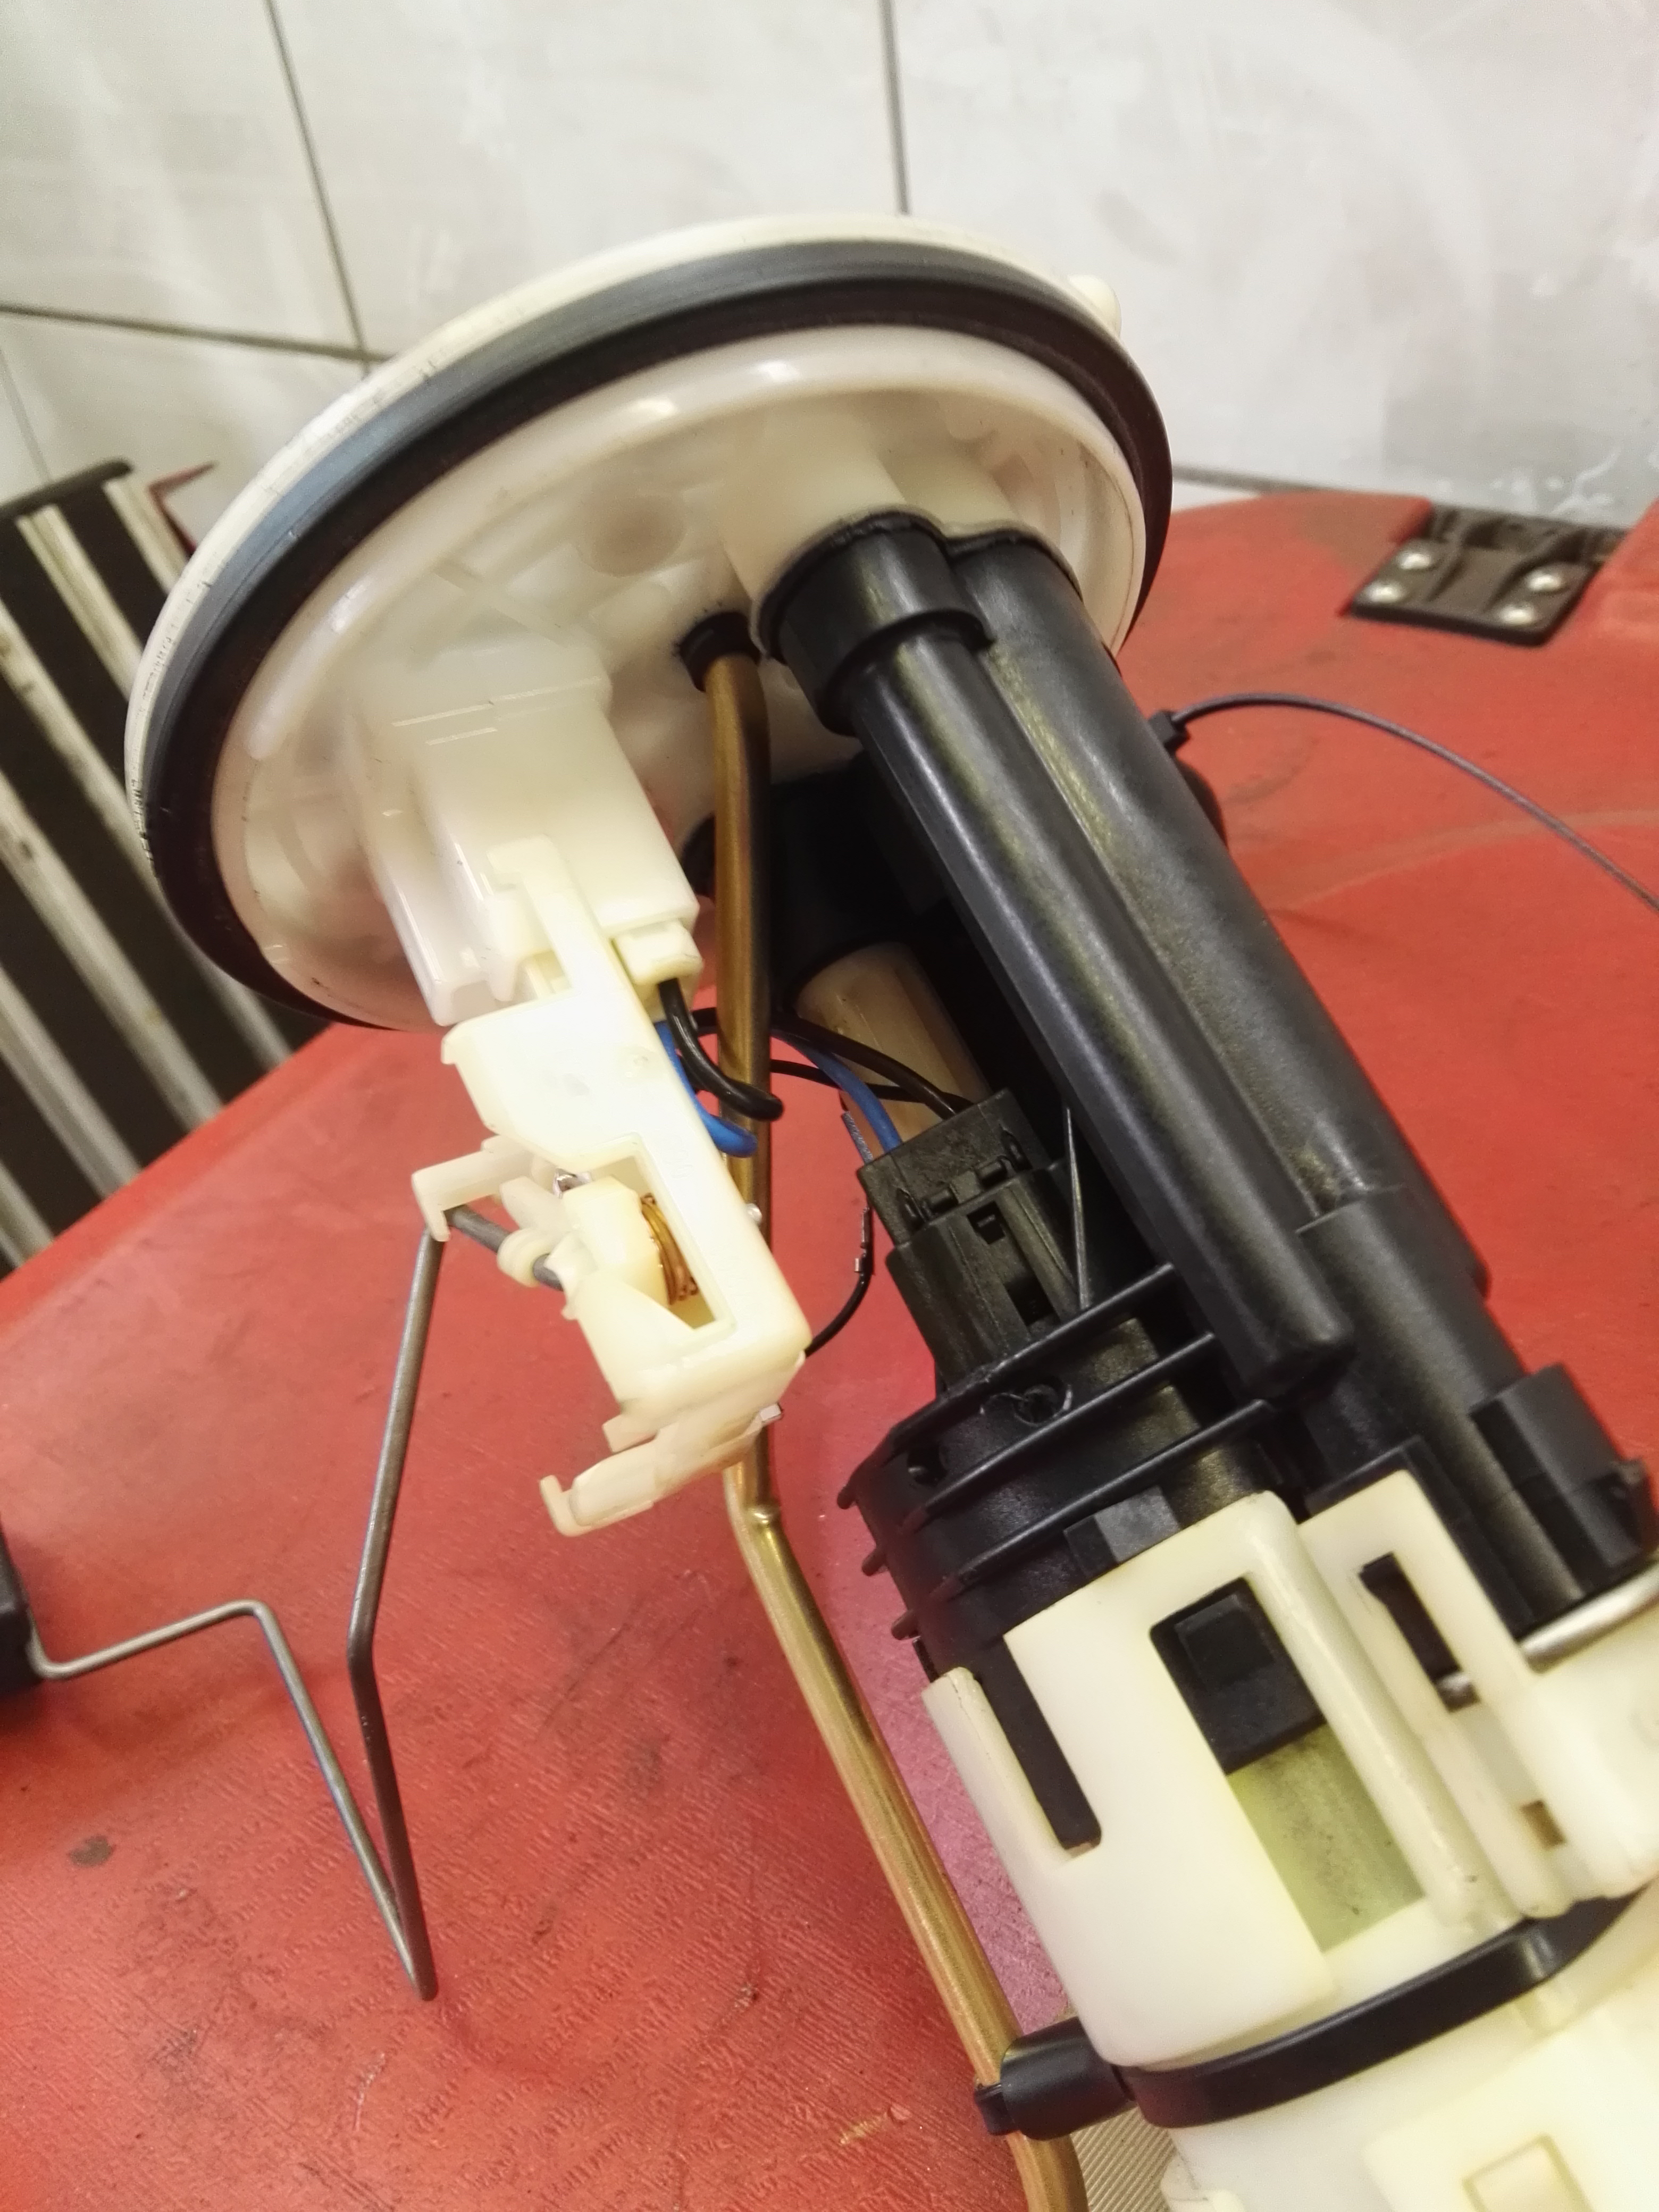
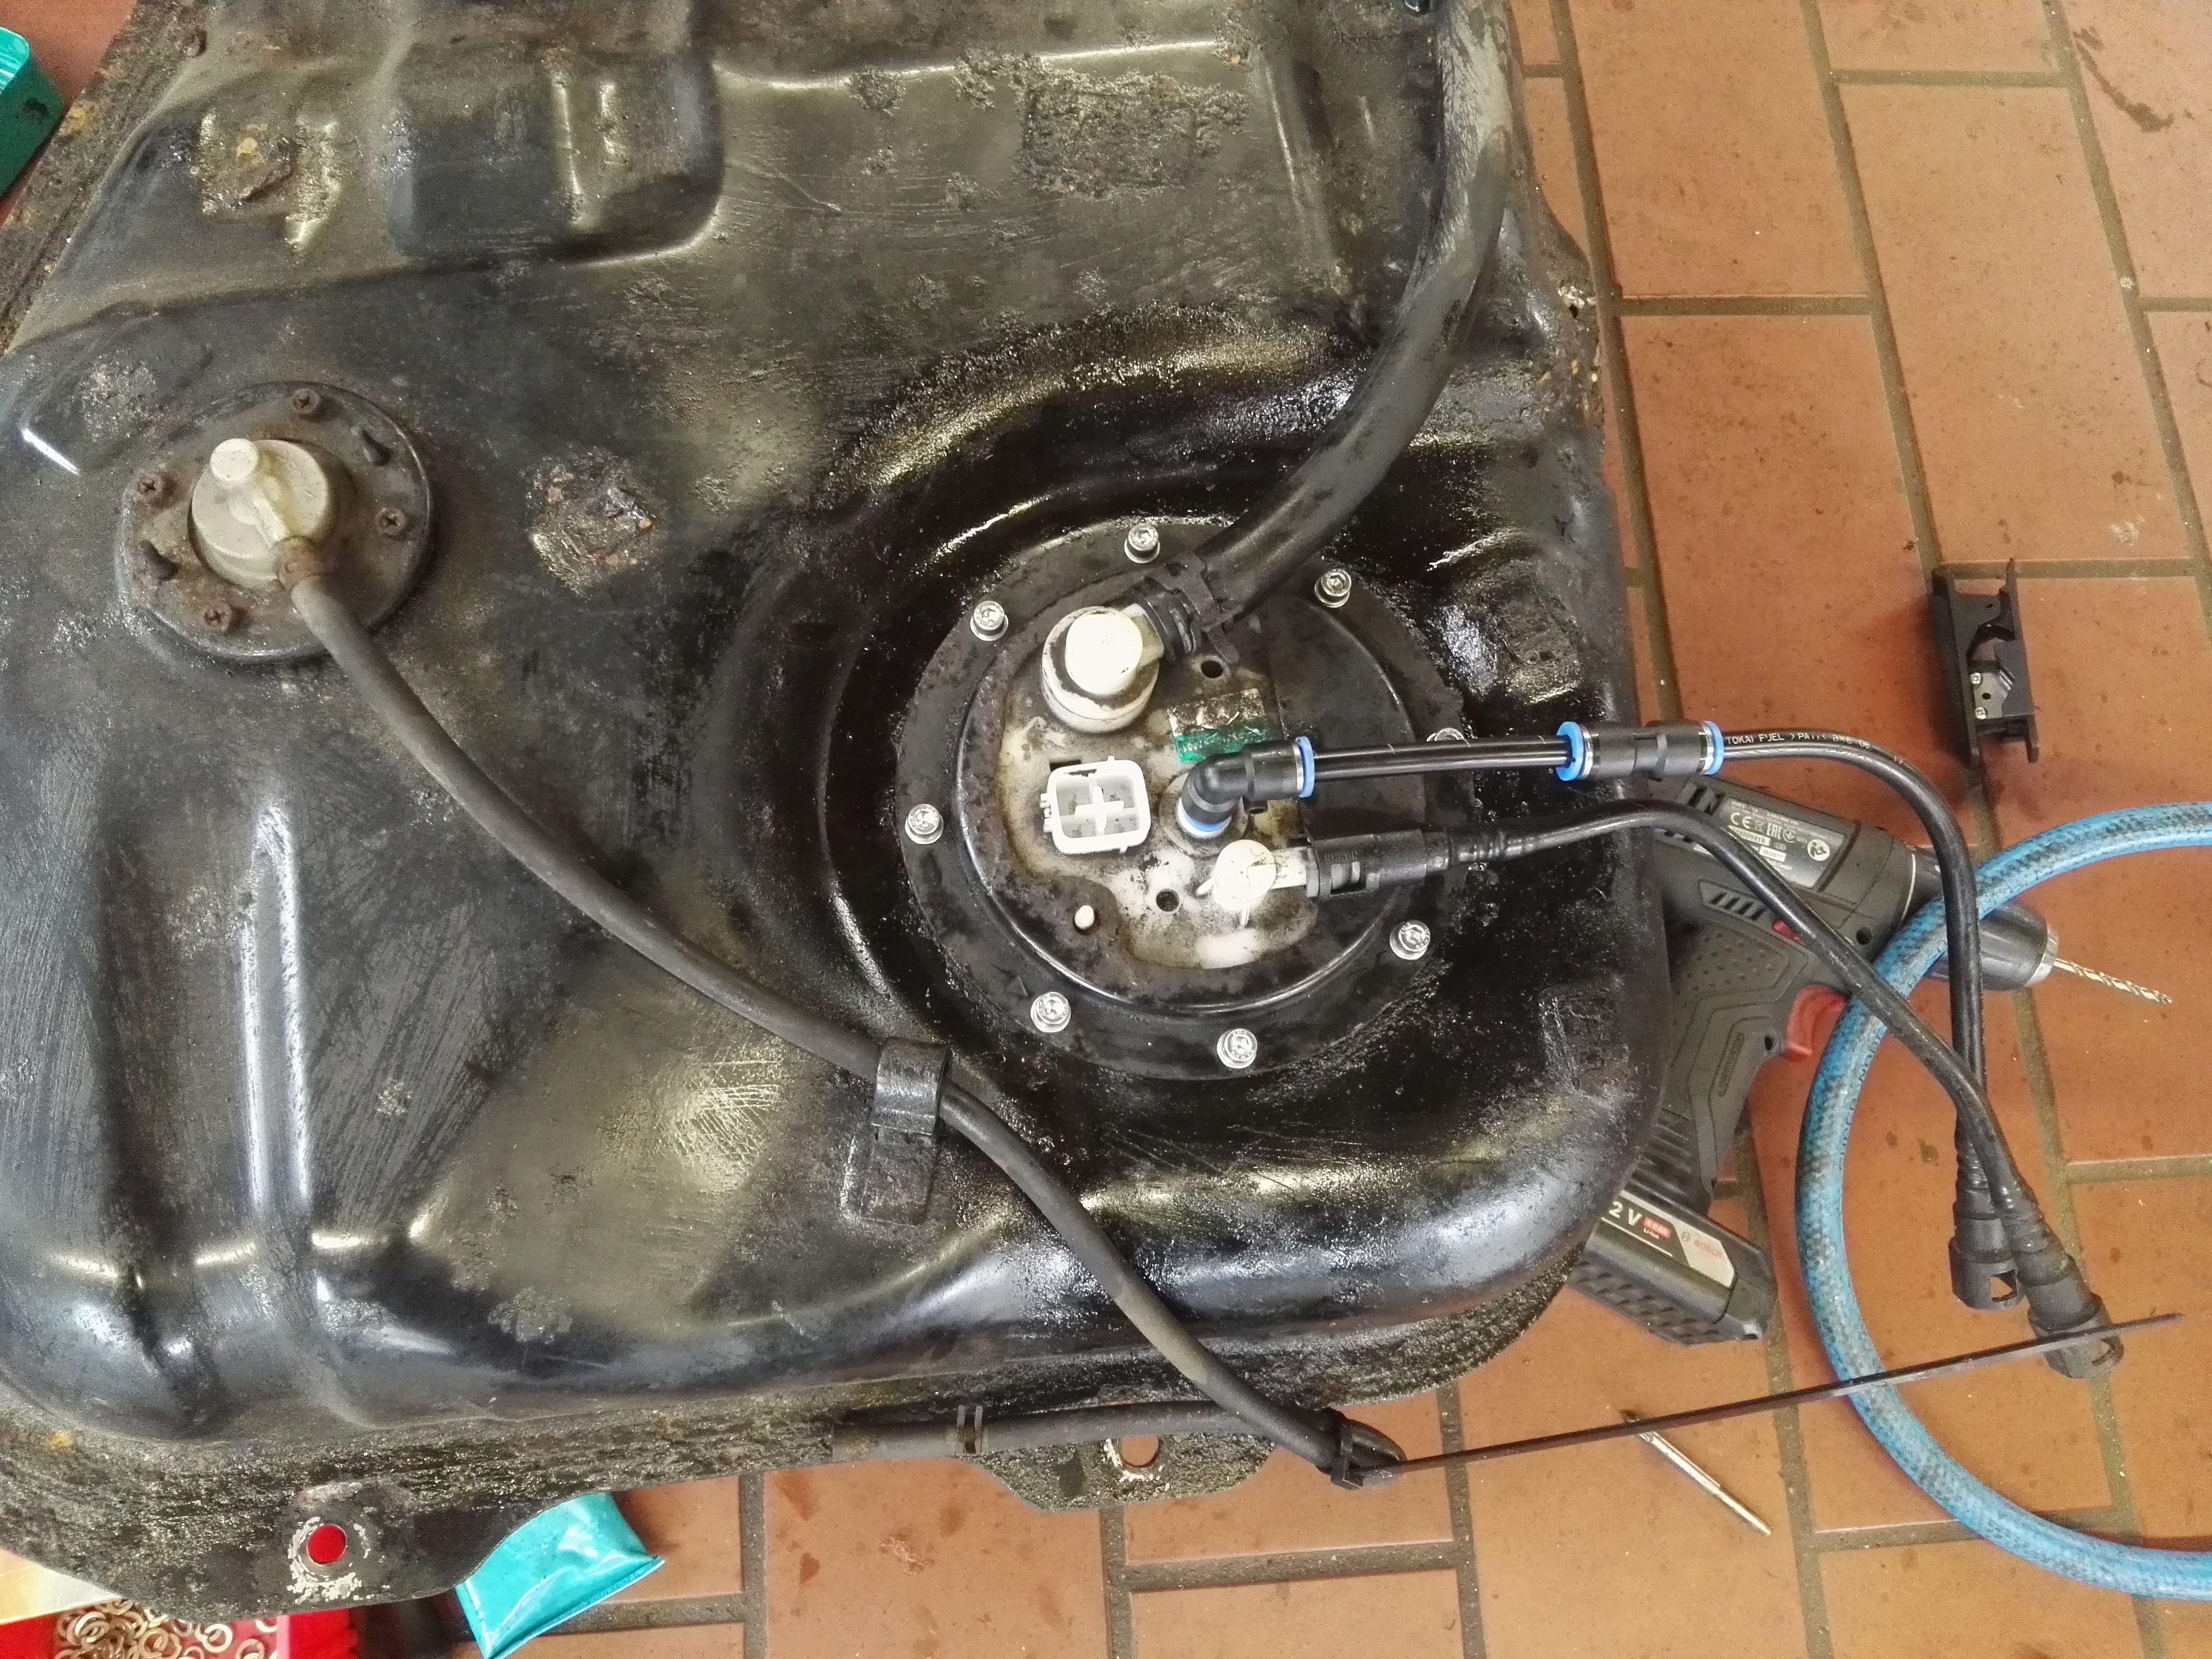
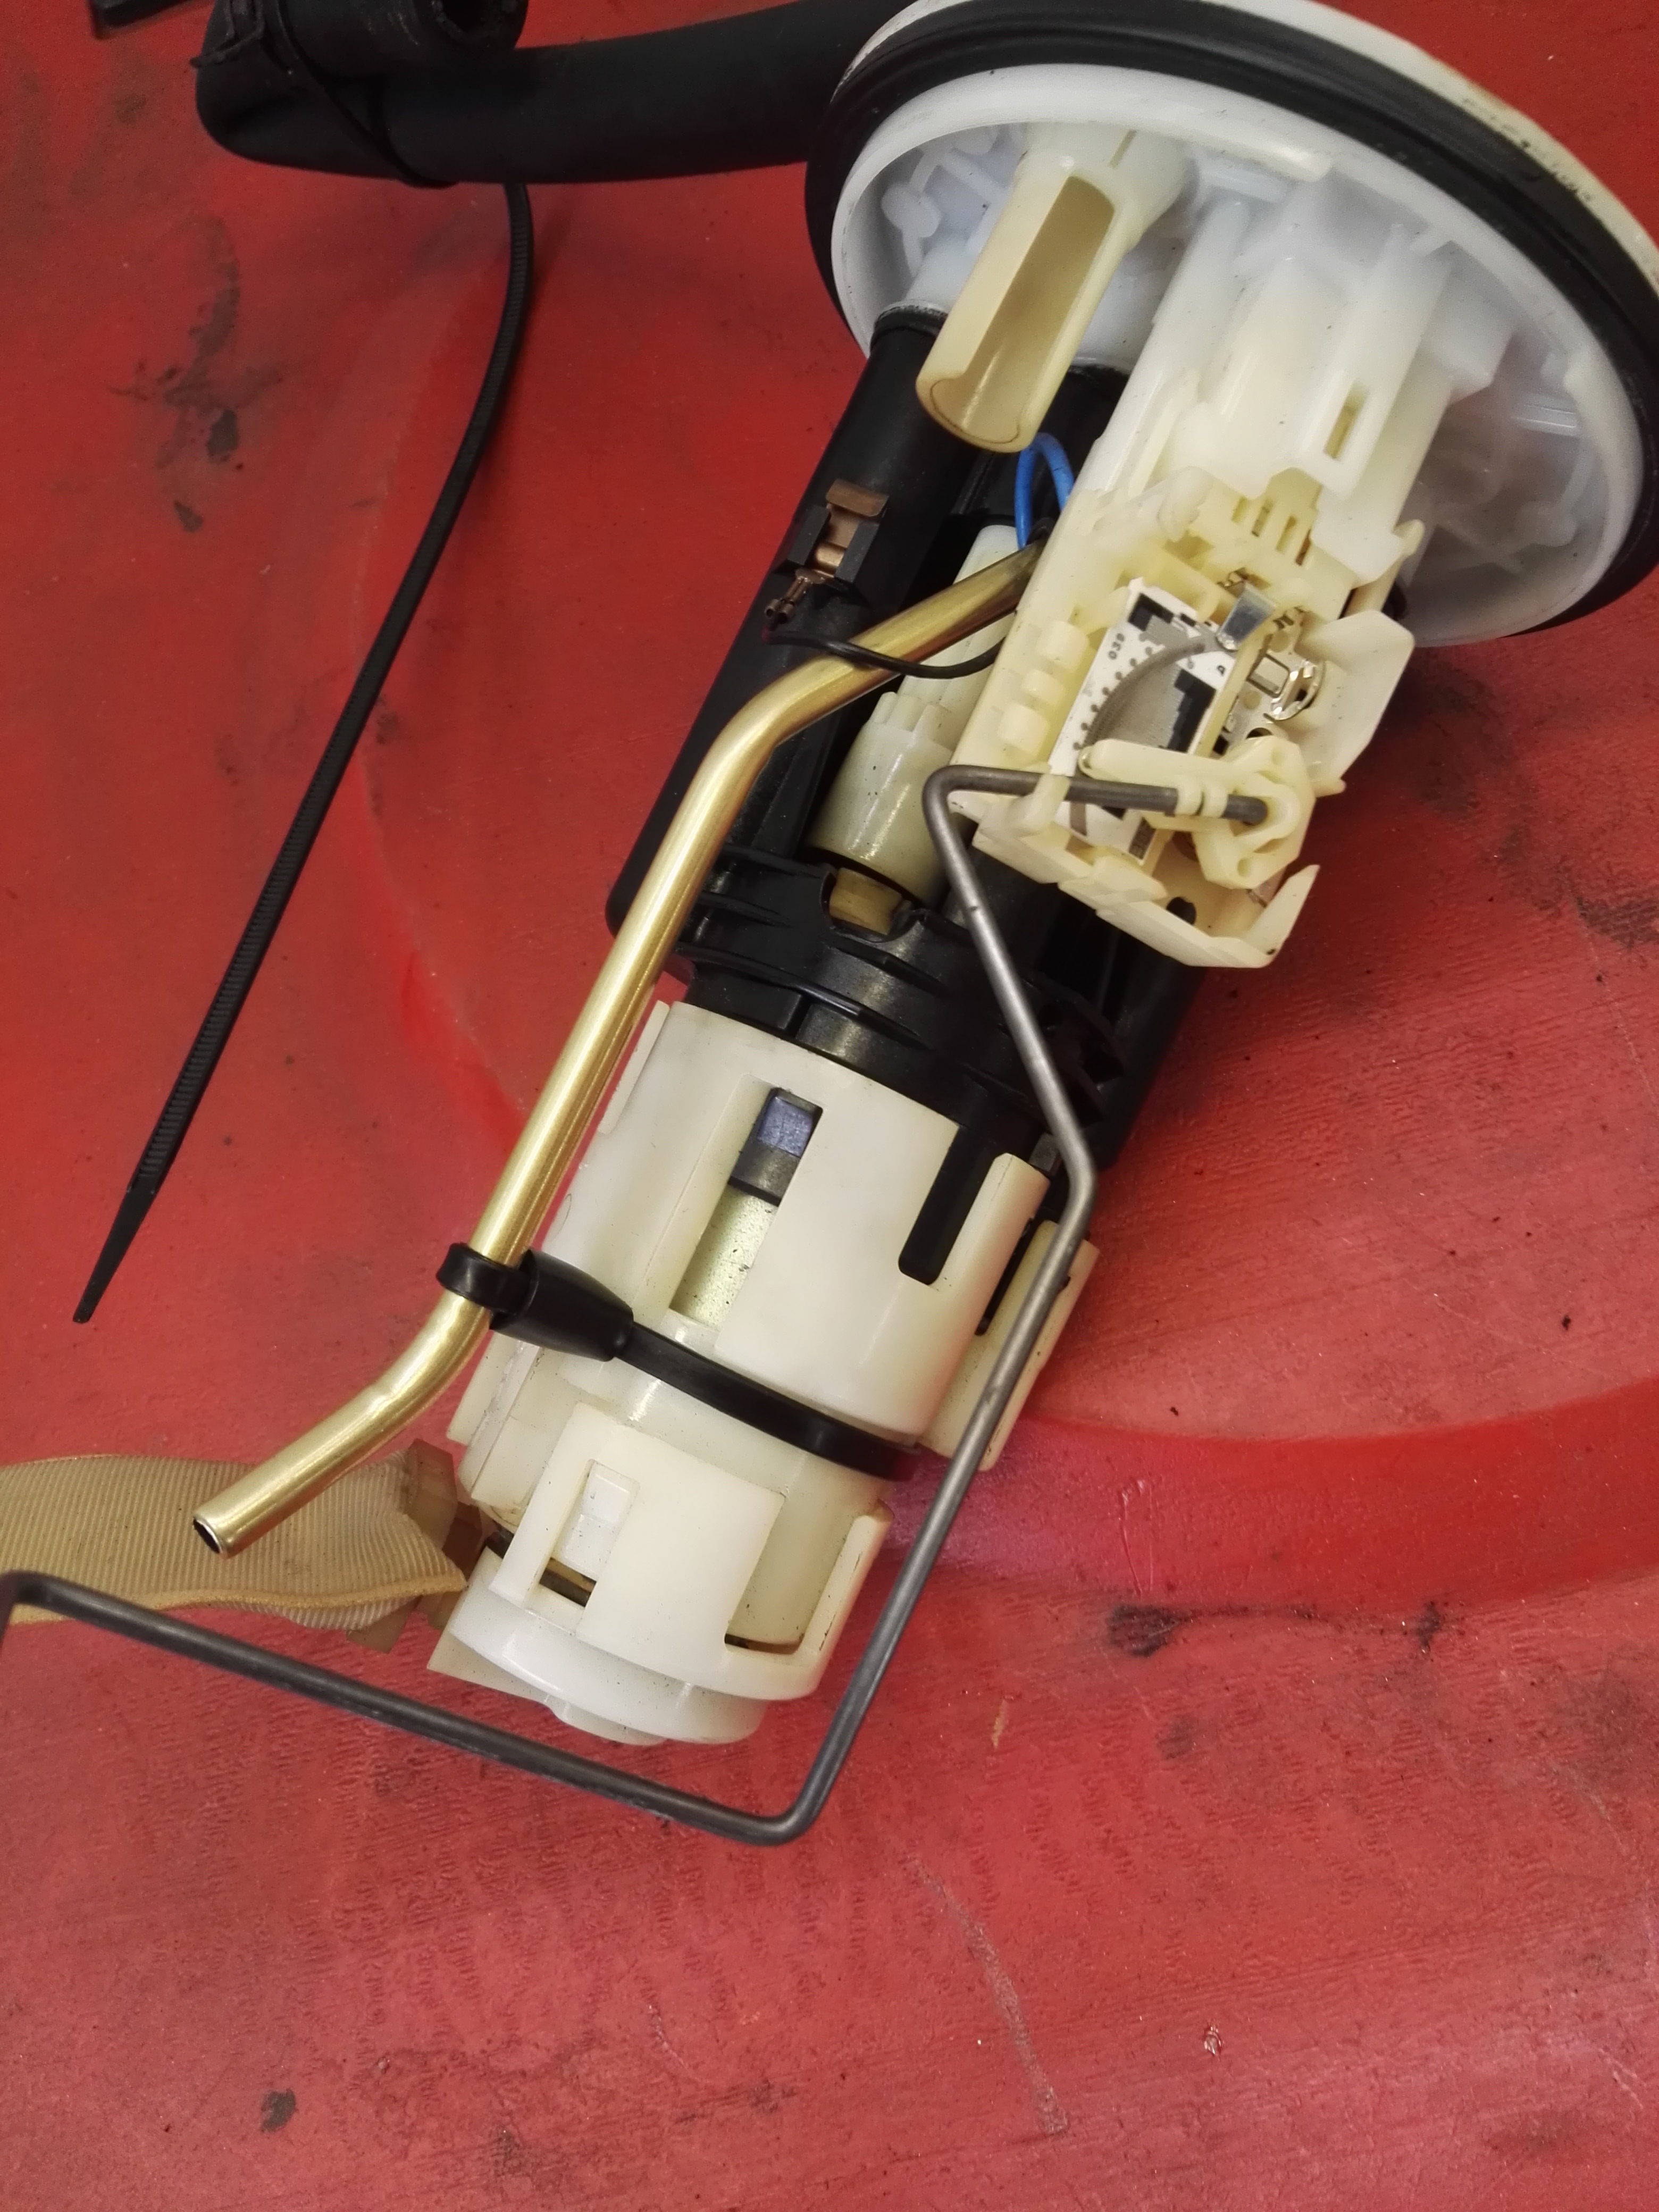
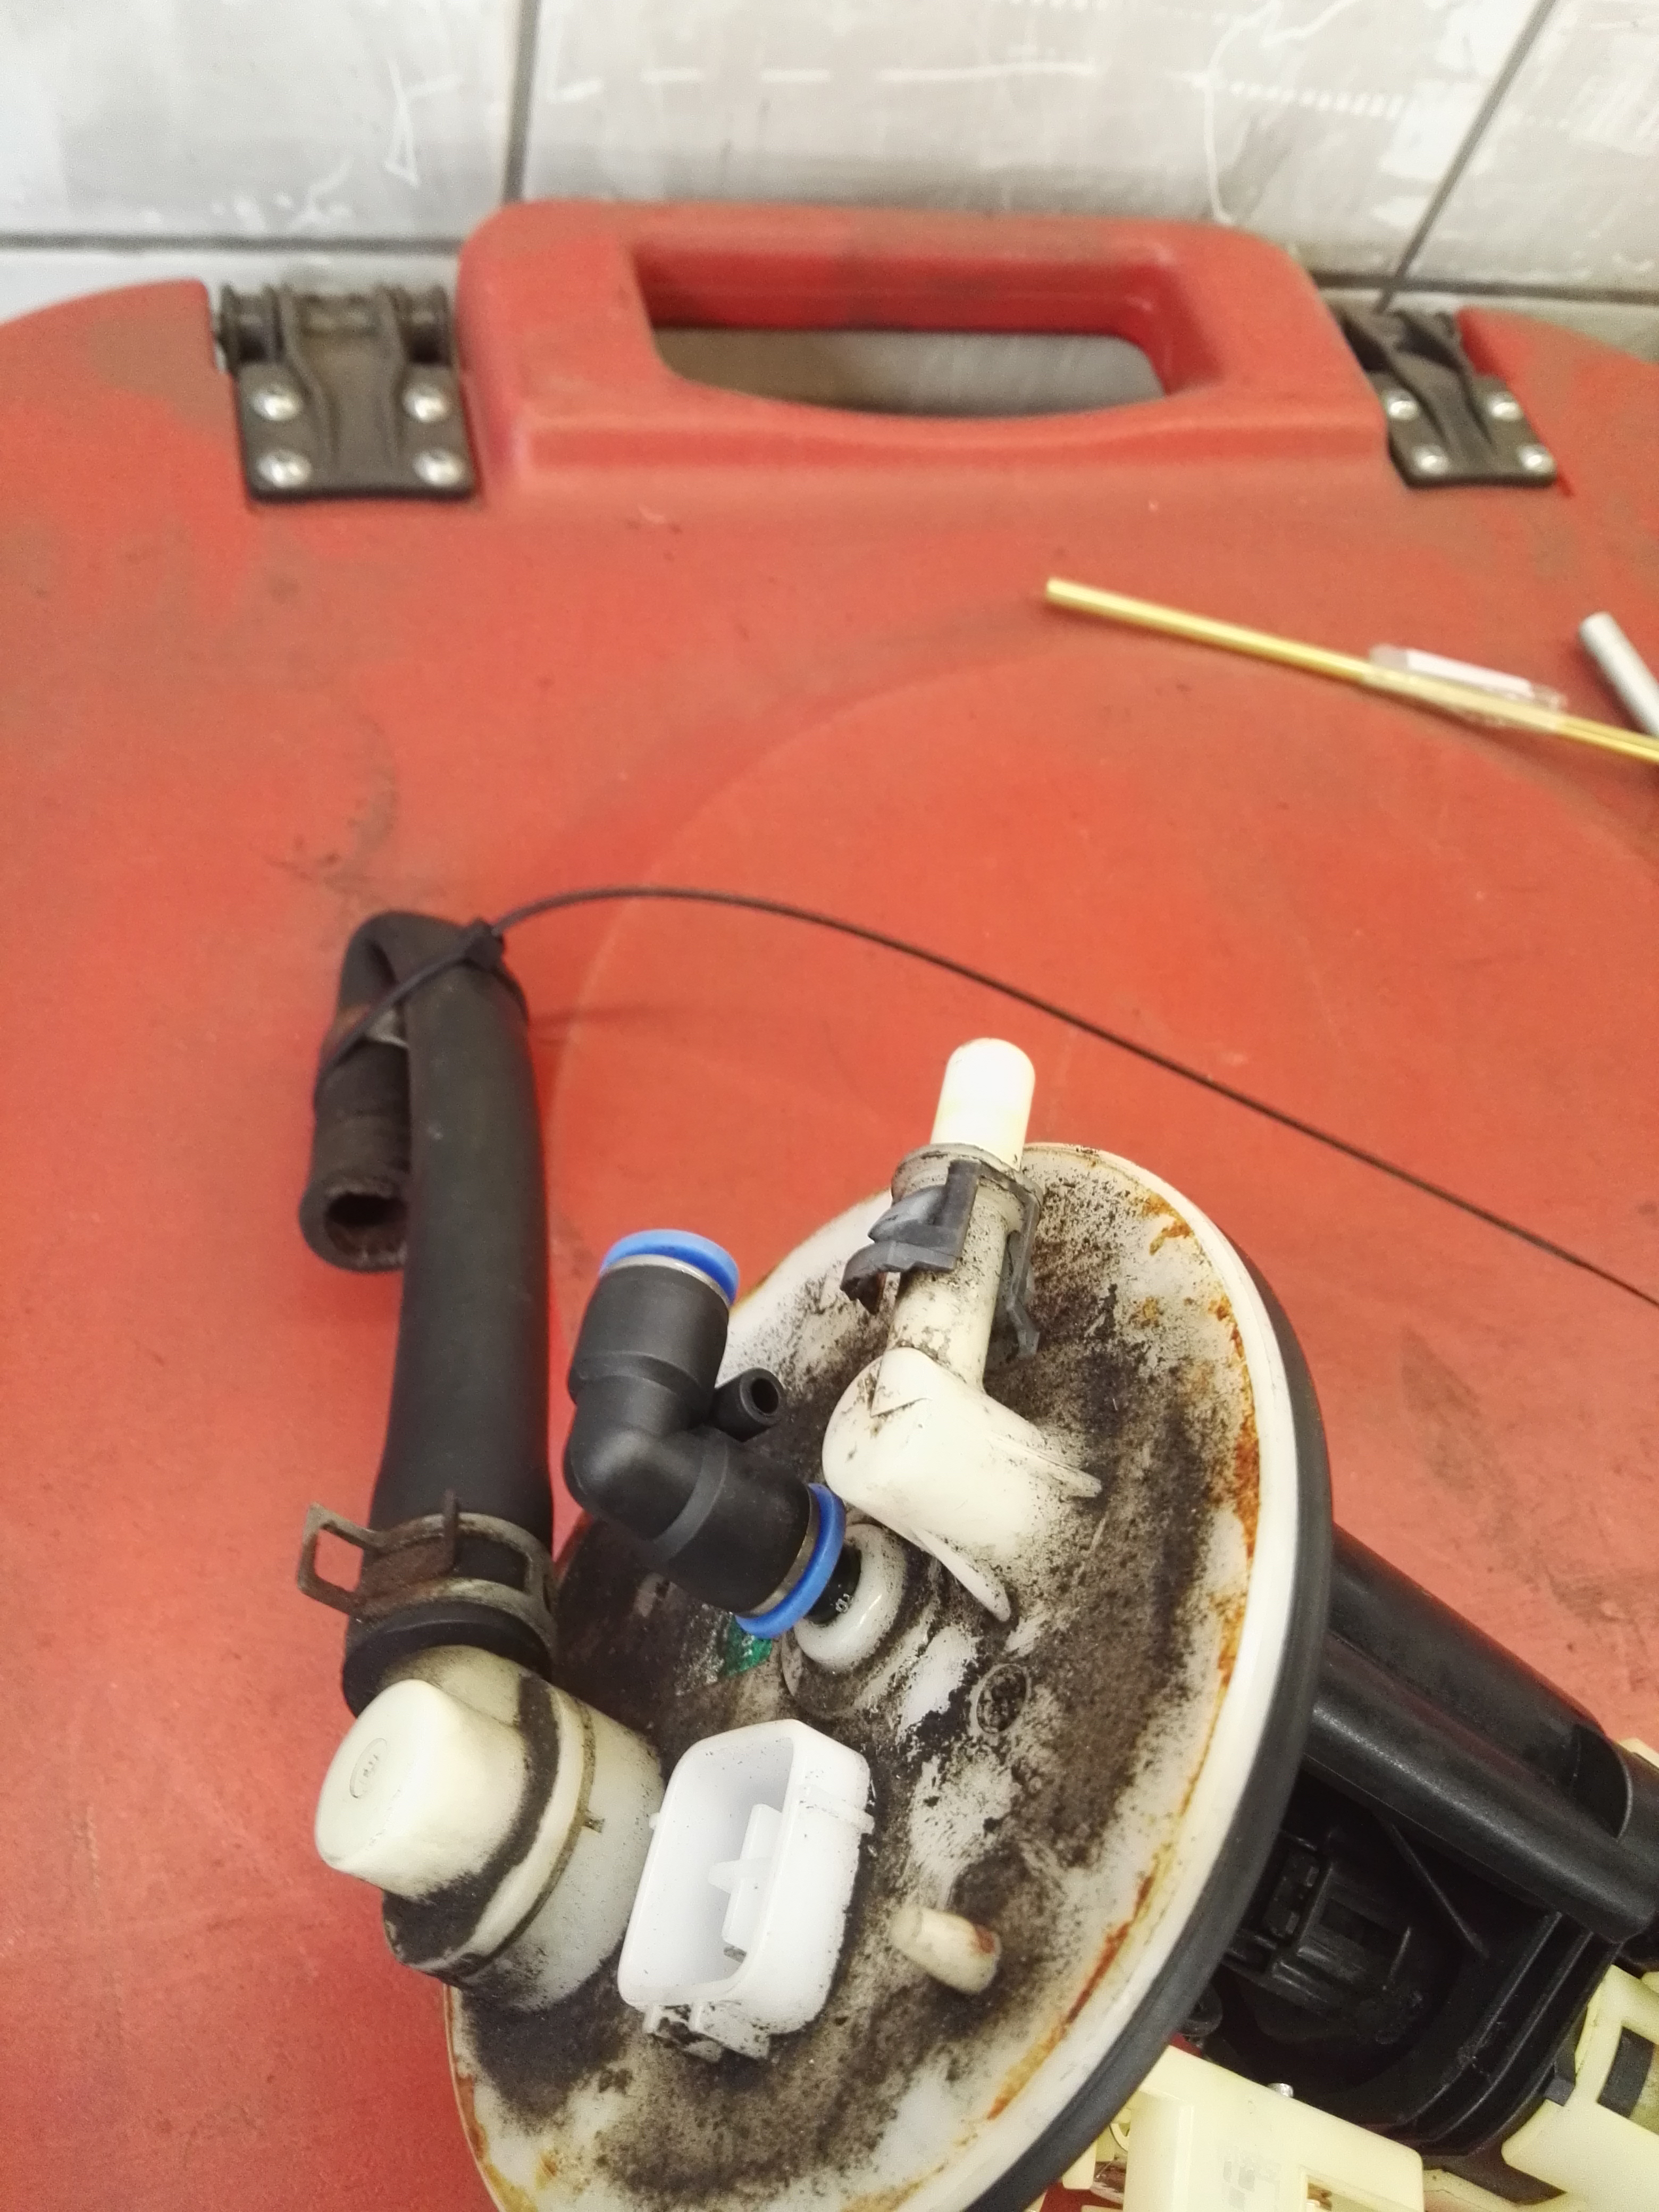
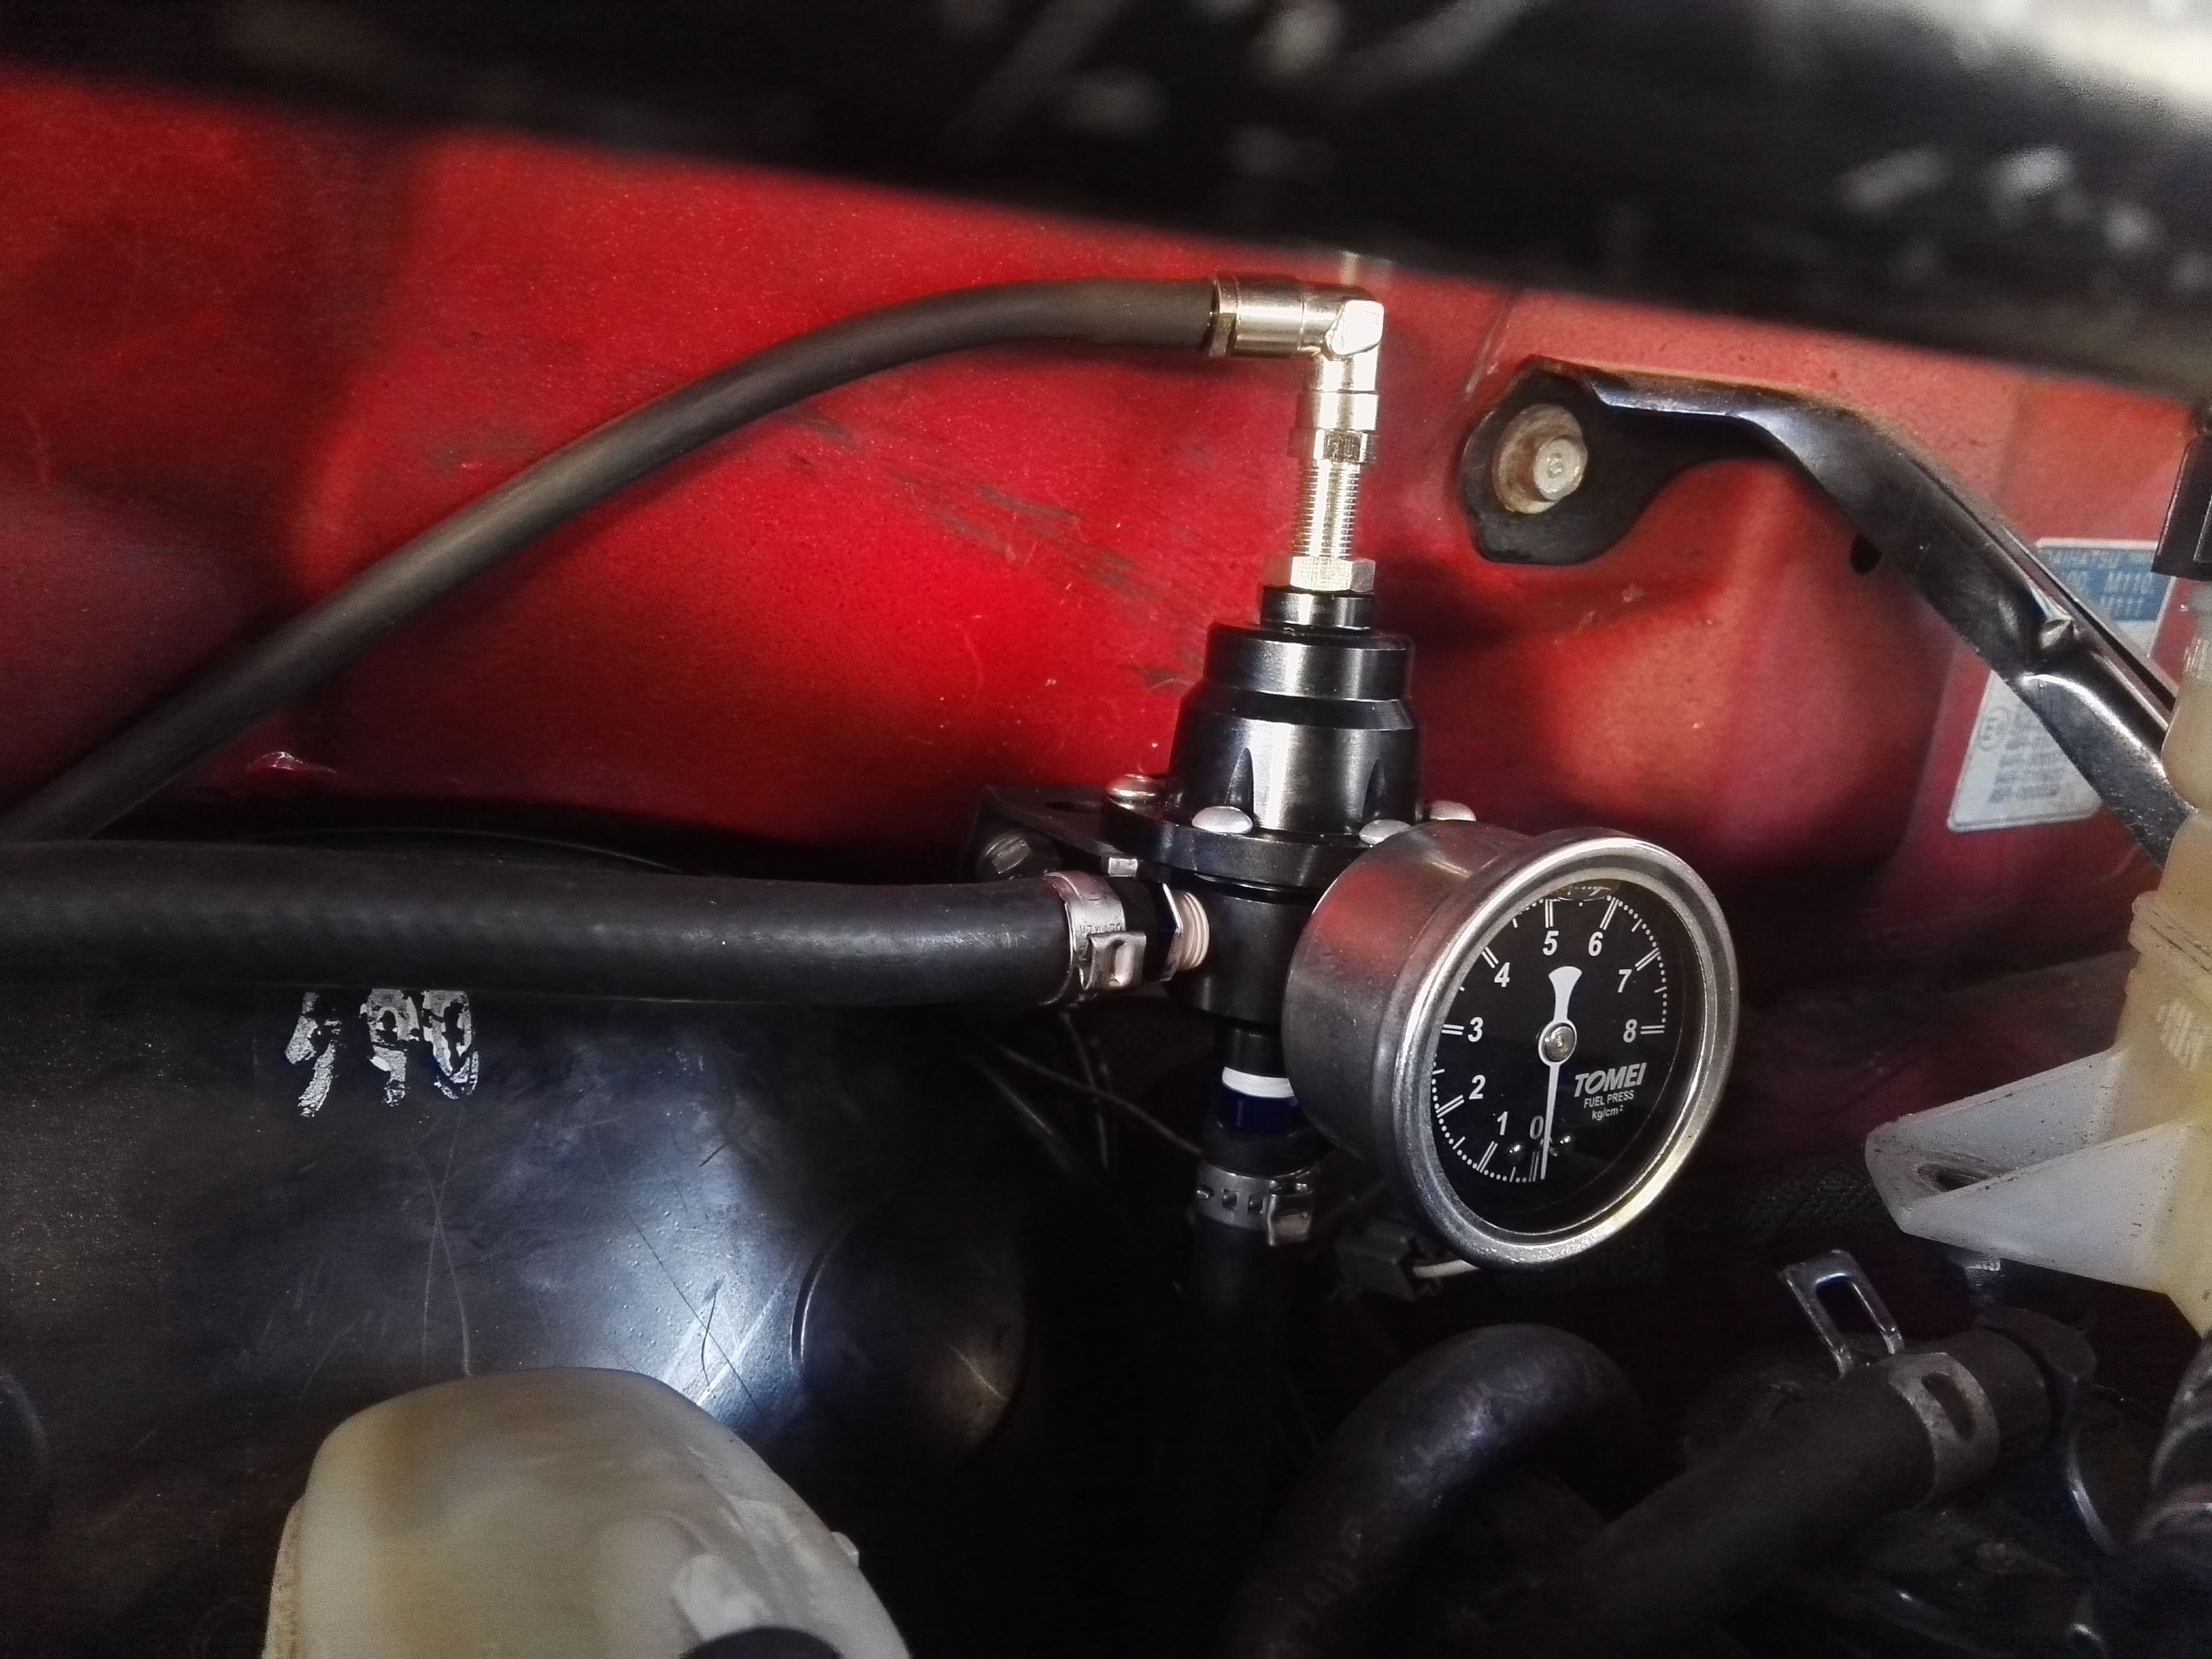
Hi guys, so work continues on what has been nick named “der Porsche Jäger” lolol I have installed the fuel line from the donor car as a return line and installed the adjustable fuel pressure regulator and my modified fuel pump carrier.
We have finished machining the flywheel so now there are no problems with the clutch and that will be going in this weekend with this:
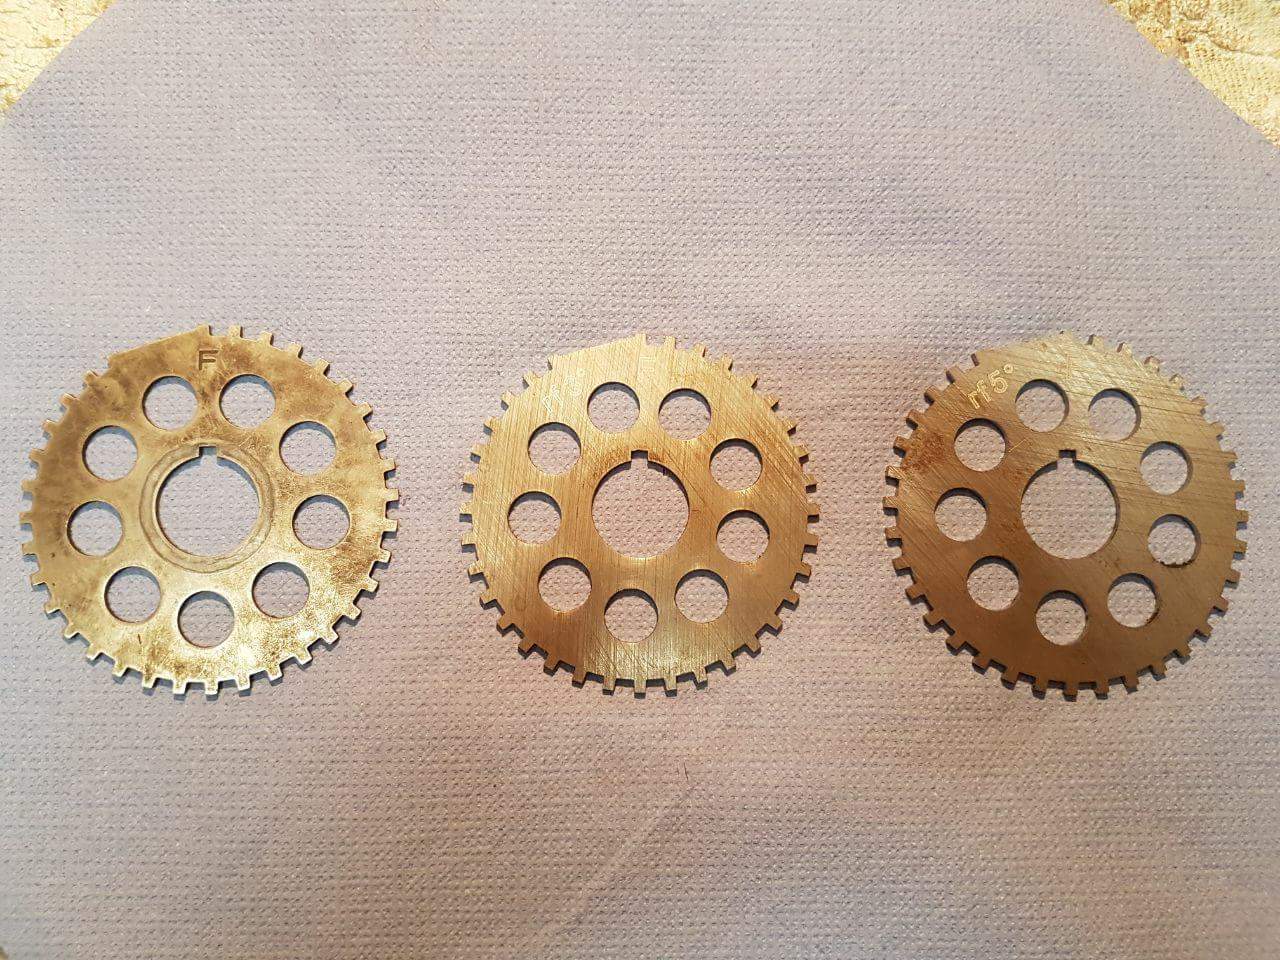
It is a sensor wheel for the CPS that has been advanced 5°, so the ignition timing will be advanced 5° across the complete rev range. It is something that has been tried and proven by a fellow Daihatsu driver here in Germany and is said to work quite well, in conjunction with 102 octane fuel ofcourse. There are also some other things going on, more photos will be coming soon

5 Likes
nice as always mick well done
1 Like
Thanks 
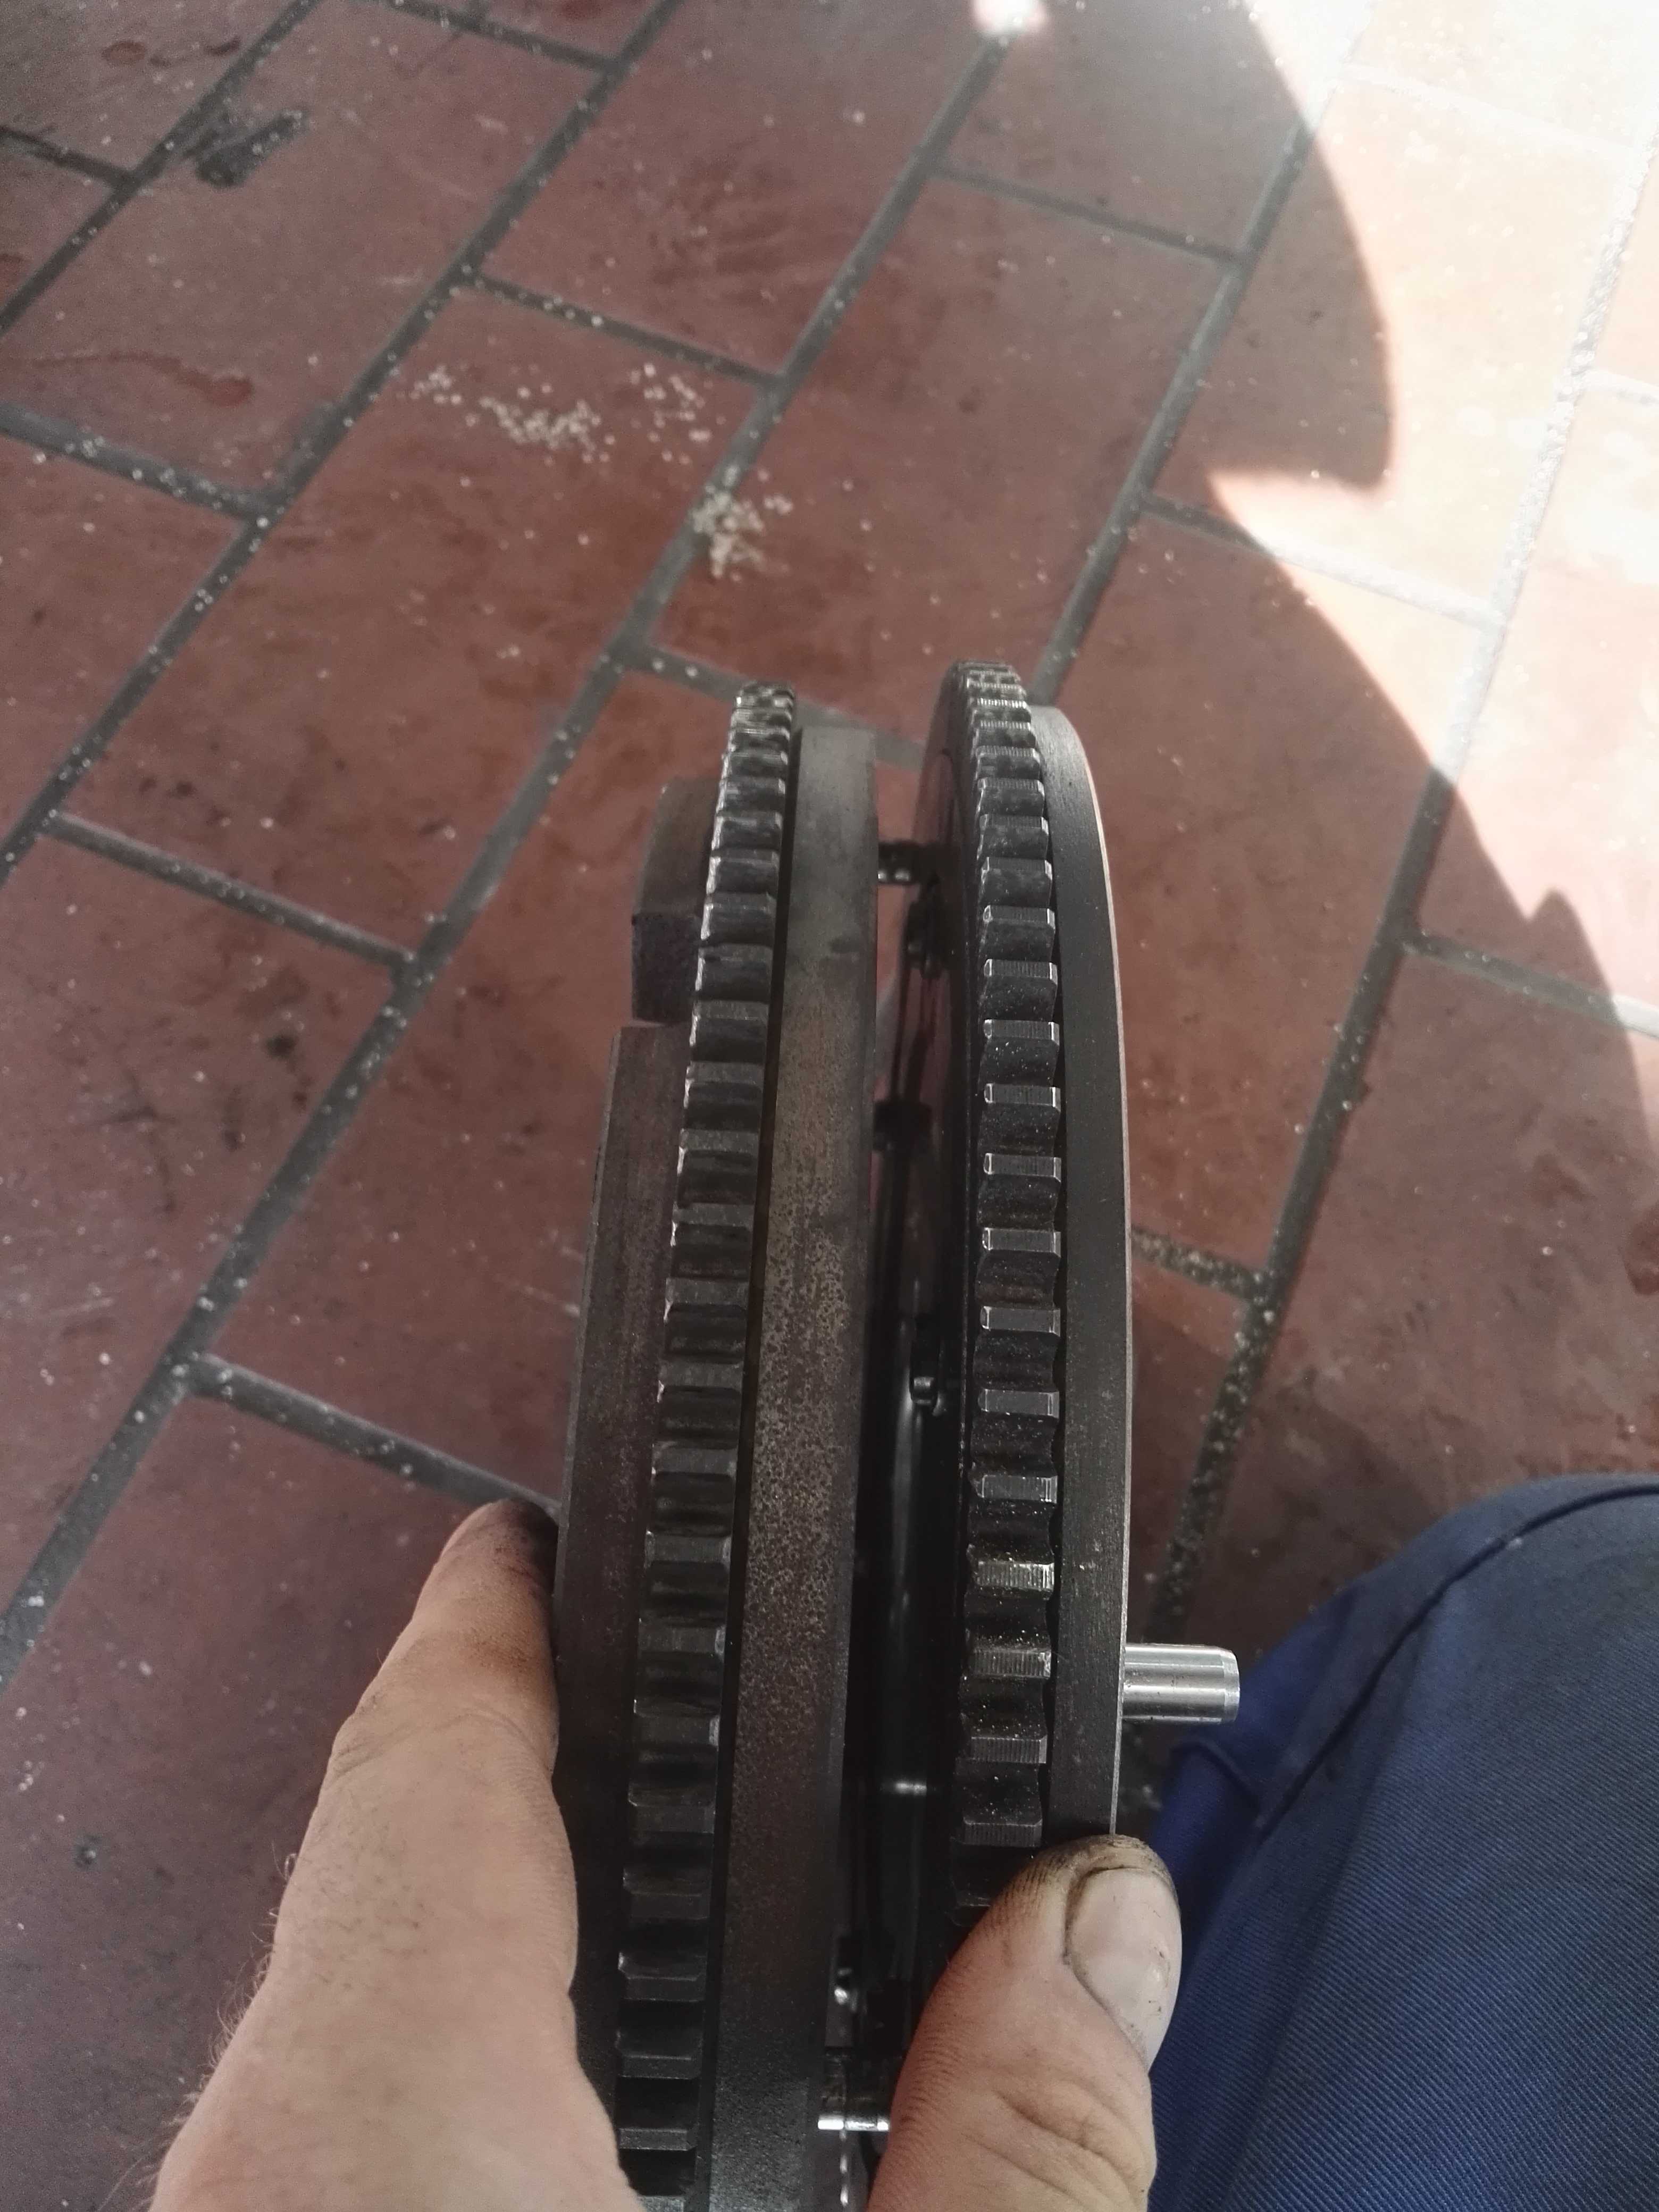
Both flywheels side by side, unfortunately nothing available to weigh them but the difference is definitely noticeable when picking them up.
4 Likes
How about bathroom scales. Measure yourself, then measure yourself holding light flywheel, and the with the heavy flywheel. And obviously subtract your weight
1 Like
or you could just put them on the bathroom scales without weighing yourself
sorry guys, i meant i left my bathroom scales at home so i didnt get a chance 
1 Like
Im having some problems with the clutch, with the new flywheel the throw out bearing doesn’t disengage the clutch fully. I guess the 4mm we removed was important  im going to have a go at removing some material from the stop for the lever on the gearbox where the cable attaches, otherwise ill have to pull the gearbox out again. Im a bit suss on the new clutch, its from LUK it all looked ok going in but I have a feeling the spring prongs weren’t coming out far enough, but hopefully thats not the case…
4mm from the drive face means adding 4mm to the throwout retainer. I had to add 2-3mm to mine due to the diaphragm height of the PP. I pulled the pressed metal cover of the throw out off, machined up some extra delrin to extend the plastic block, bent the metal tabs back down and rewelded. You can’t weld much at a time due to the plastic proximity. Delrin is noxious stuff if set on fire. I think you will find it is box out. Sorry.
Thanks for the tip. Im feeling a bit defeated at the moment, me have a heat wave here at the moment, 38°+ and the workshop isn’t designed for hot weather, no fans ect. Im feeling really drained. The next race is on the 11th of August so its really only next weekend to get everything sorted. I still have the spare gearbox and some old throw out bearings, I can try and dummy something up during the week, check measurements ect and see if its possible without removing the box again. Otherwise there is a 1mm or 1.5mm spacer that sits between the flywheel and crank from factory, I have a spare so I could double that up and do something with the throw out bearing if needed. I wasn’t expecting such a problem with it, with the original clutch/flywheel the lever didn’t have to bottom out to disengage the clutch, I though I had enough adjustment there to compensate, but apparently not. I dont need much, at full adjustment with tje pedal depressed its just a bit below the friction point, I can pop it in 3rd on the hoist and hold the brake and it will slip easily with light braking, but it just needs a touch more to disengage completely.
Another idea I have is to remove the clutch fork and flie turn it one or 2 teeth on the pivot, but im not sure if the throw out bearing will bind up working so far out. Its a tough nut to crack with so little time and without a lathe on hand 
1 Like
I think the box needs to come out. The contact angle between the fork and bearing can end up to great. Space the throwout rather than moving the flywheel.
Update:
-
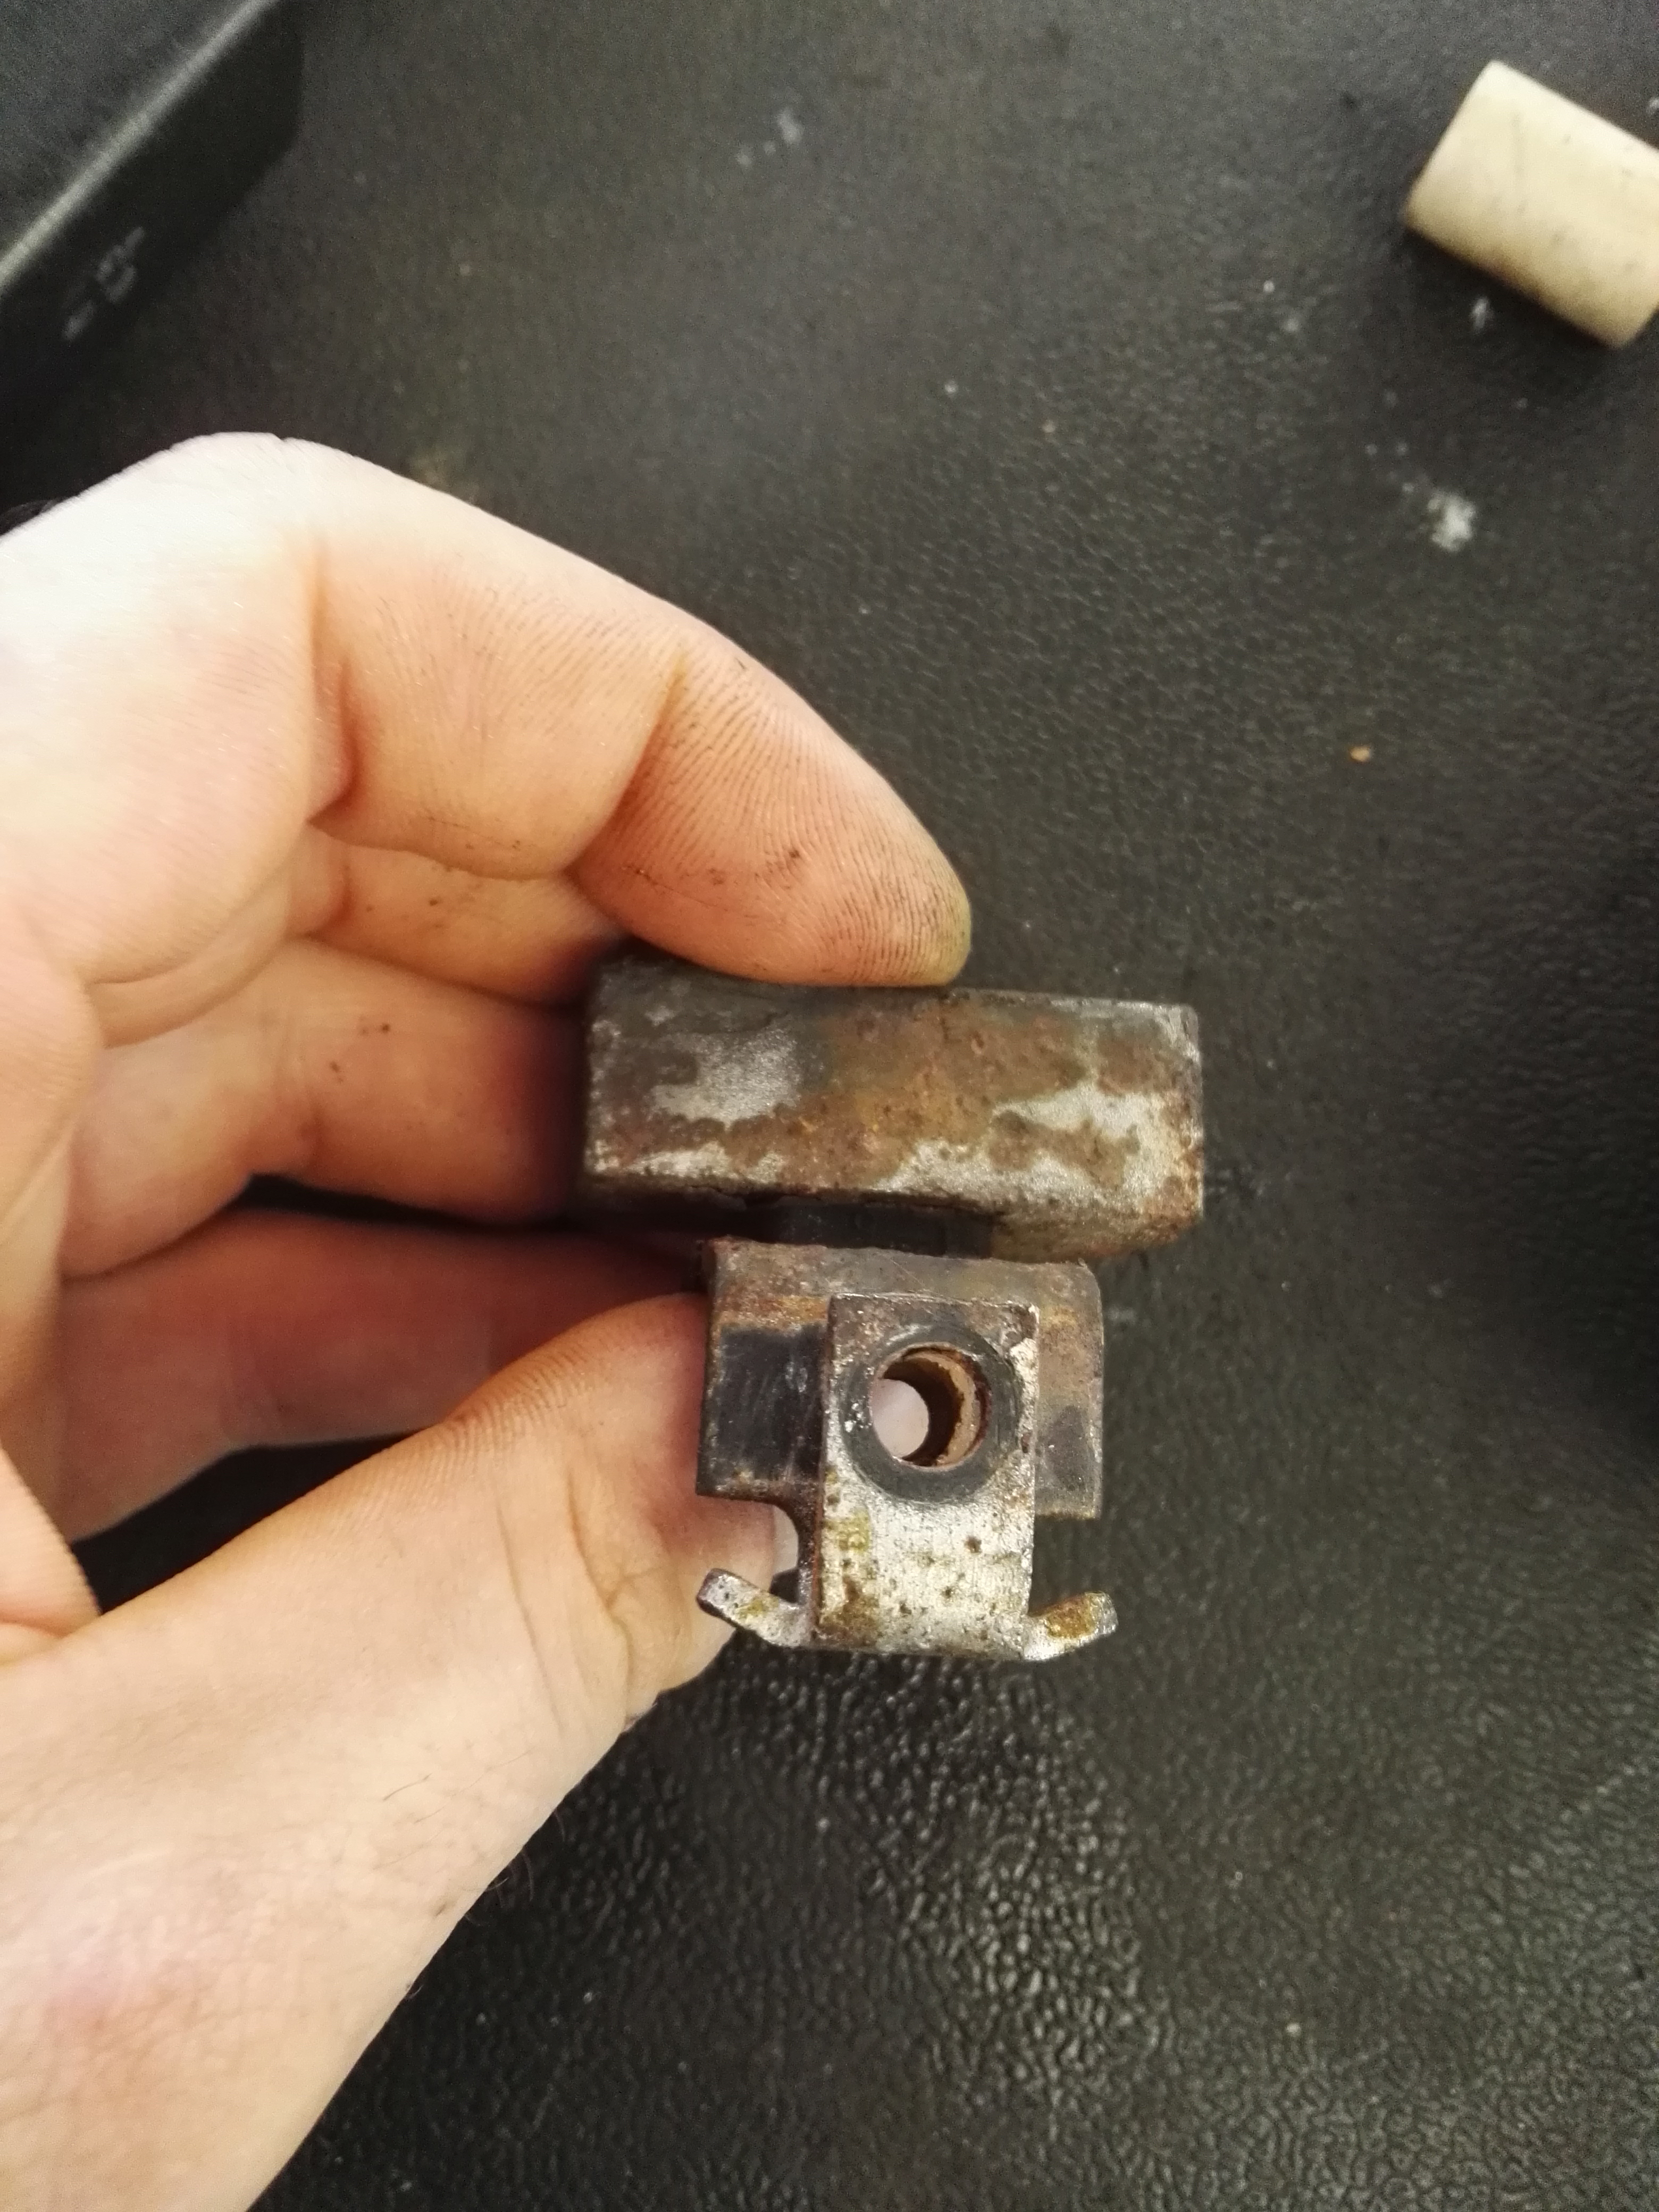
I removed the vibration damper attached to the lever for the clutch fork, the extra 1.5mm was all I needed to get the clutch to function.
-
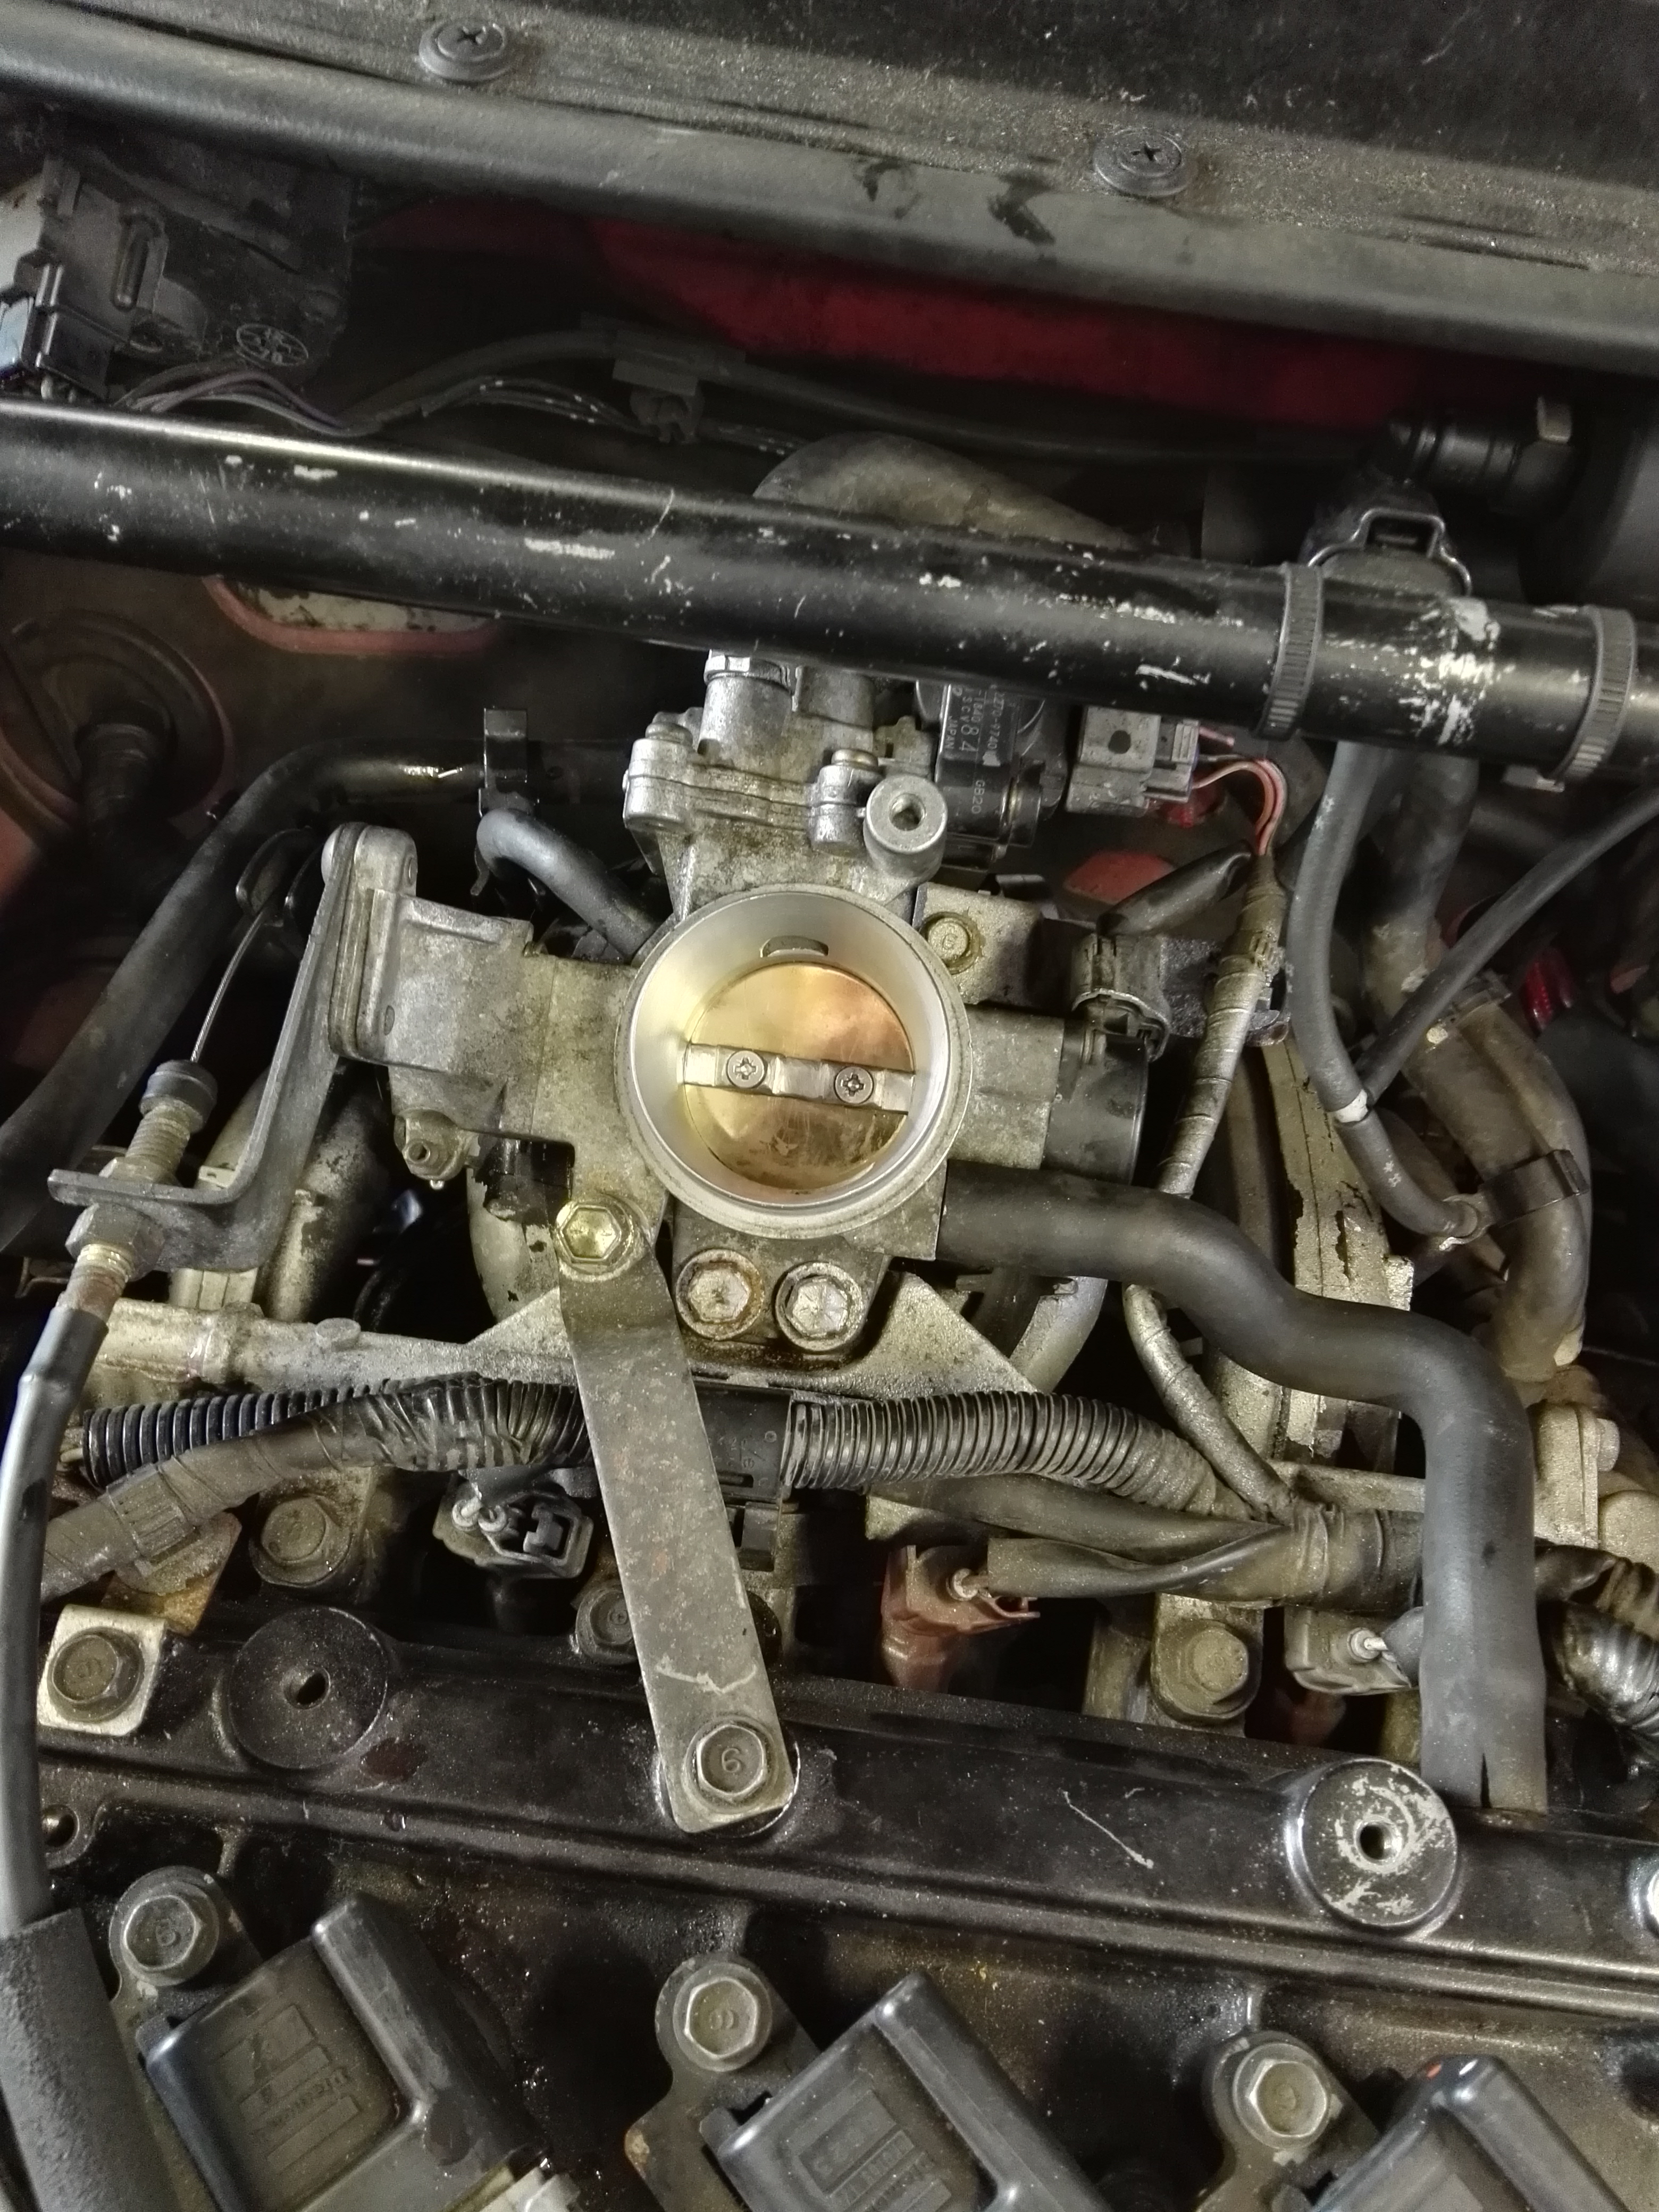
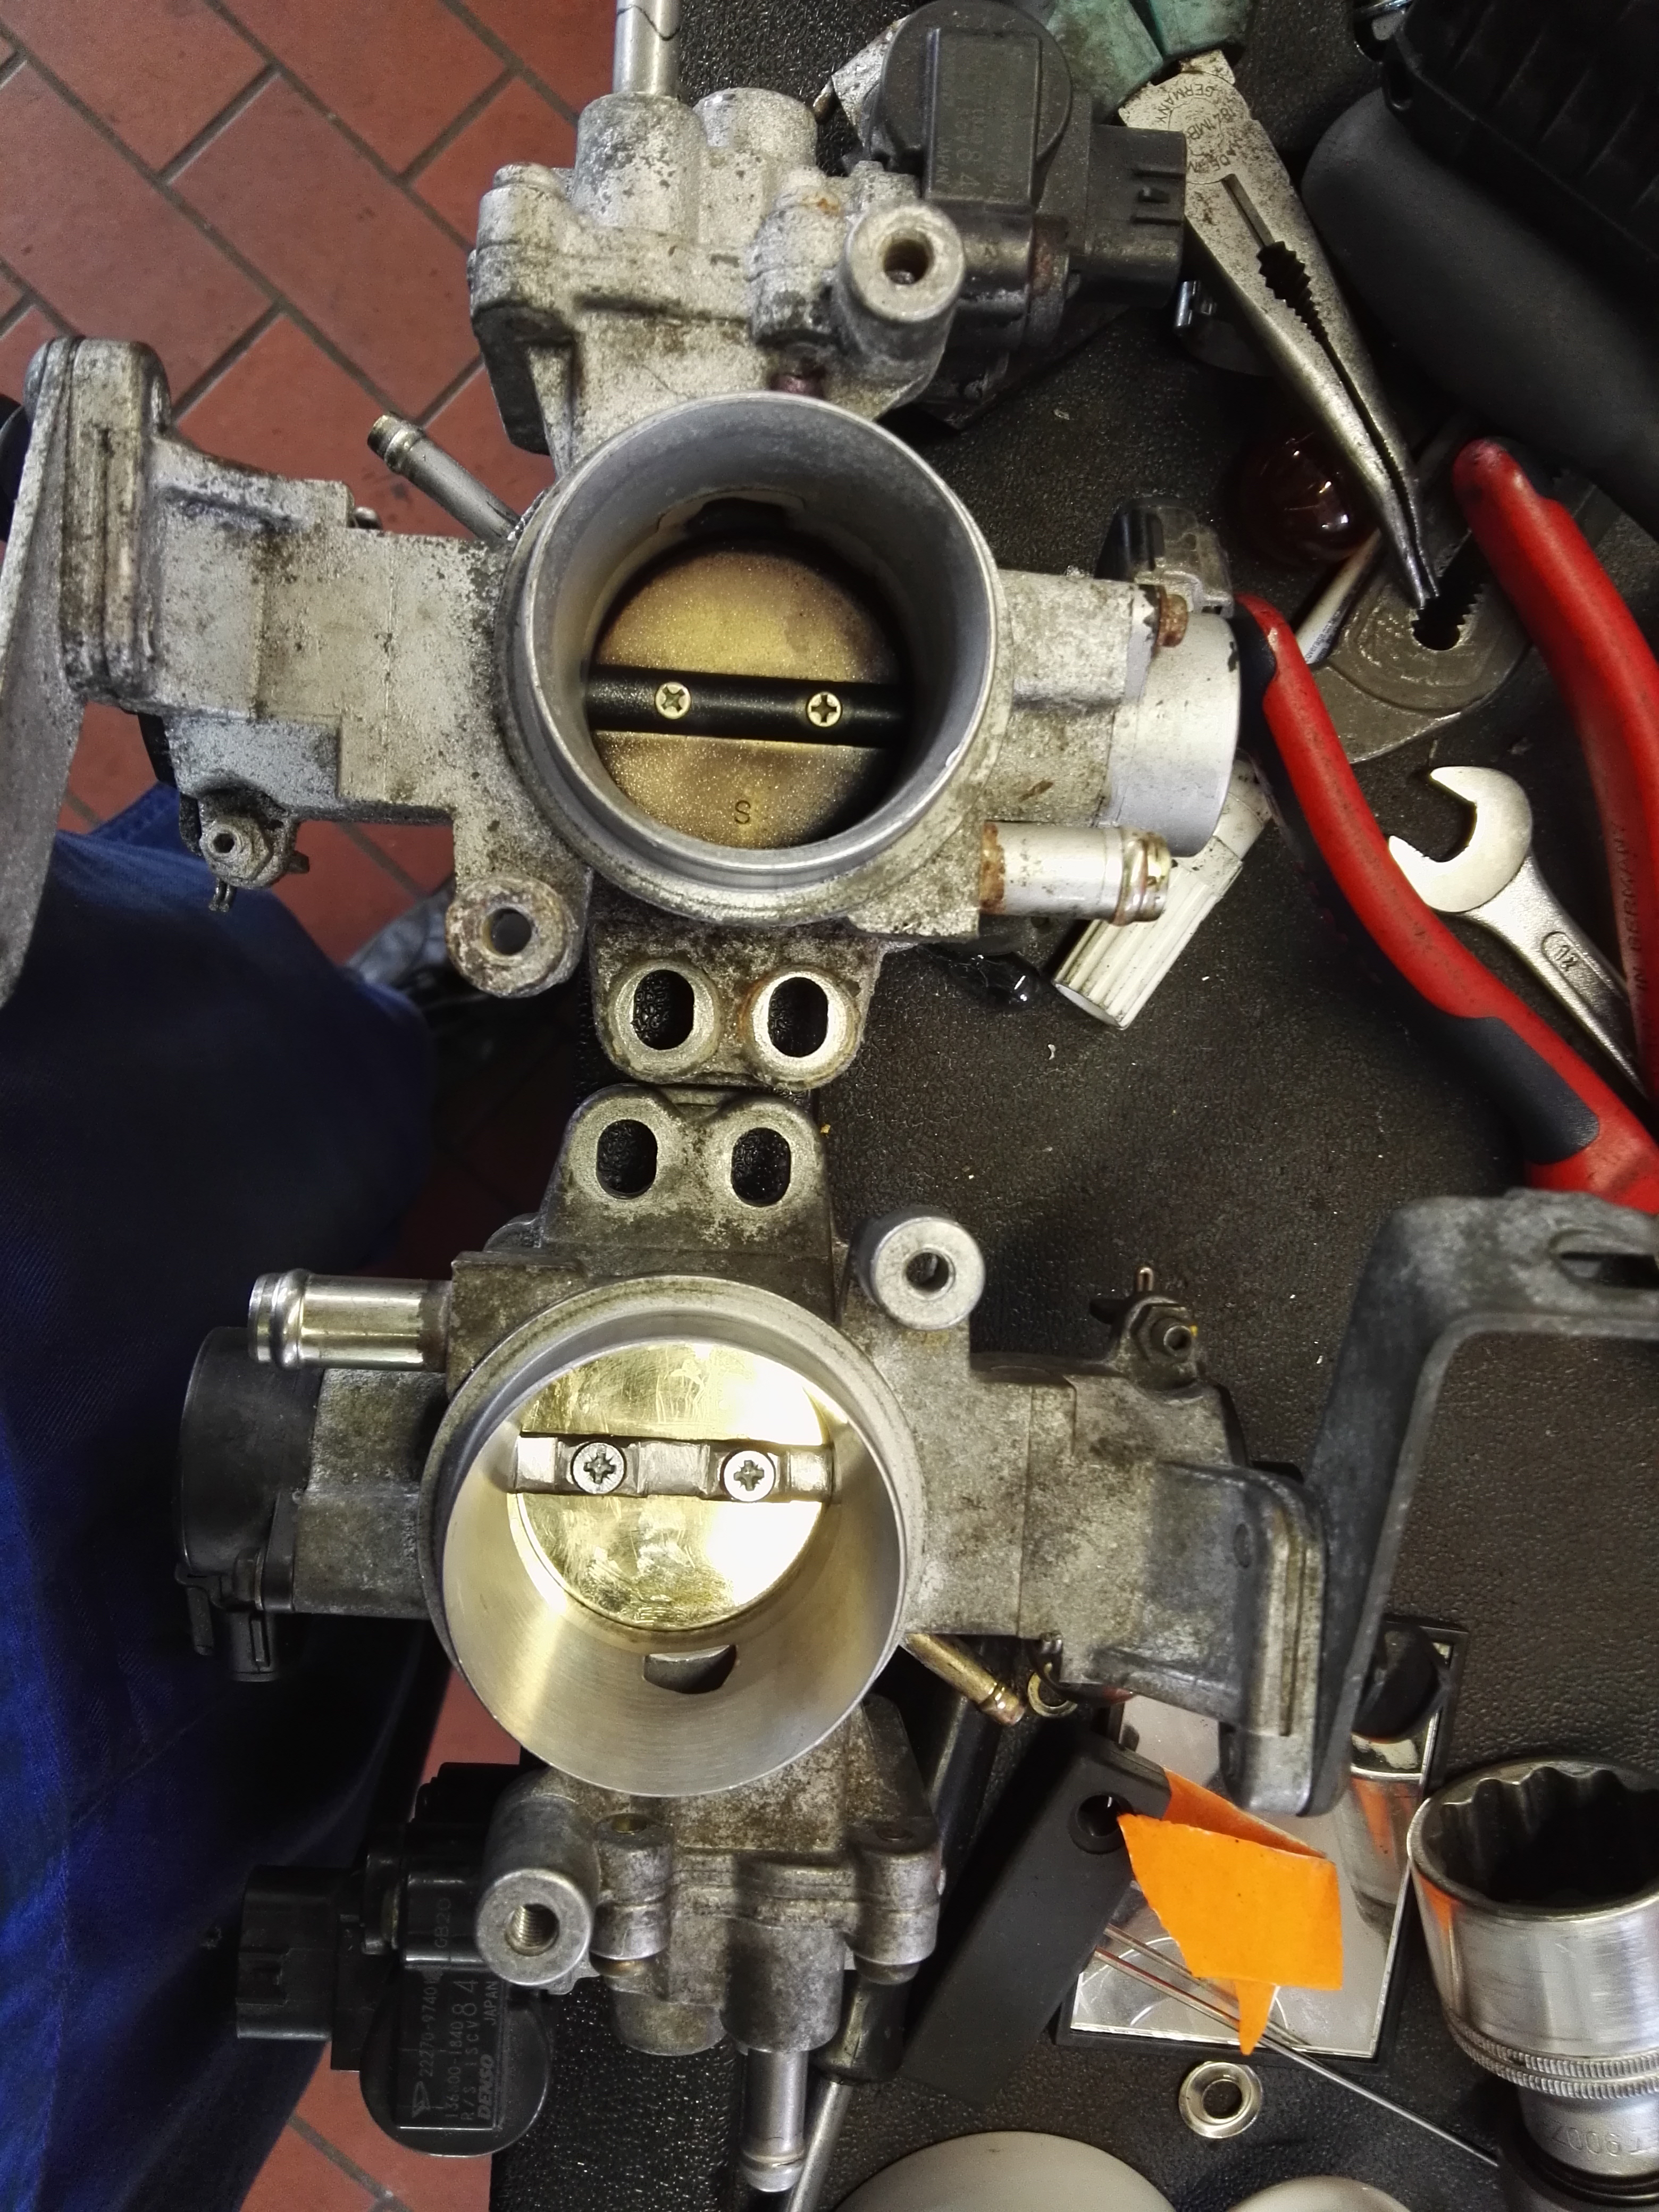
Throttle body arrived courtesy of MrG. It looks the goods!
-
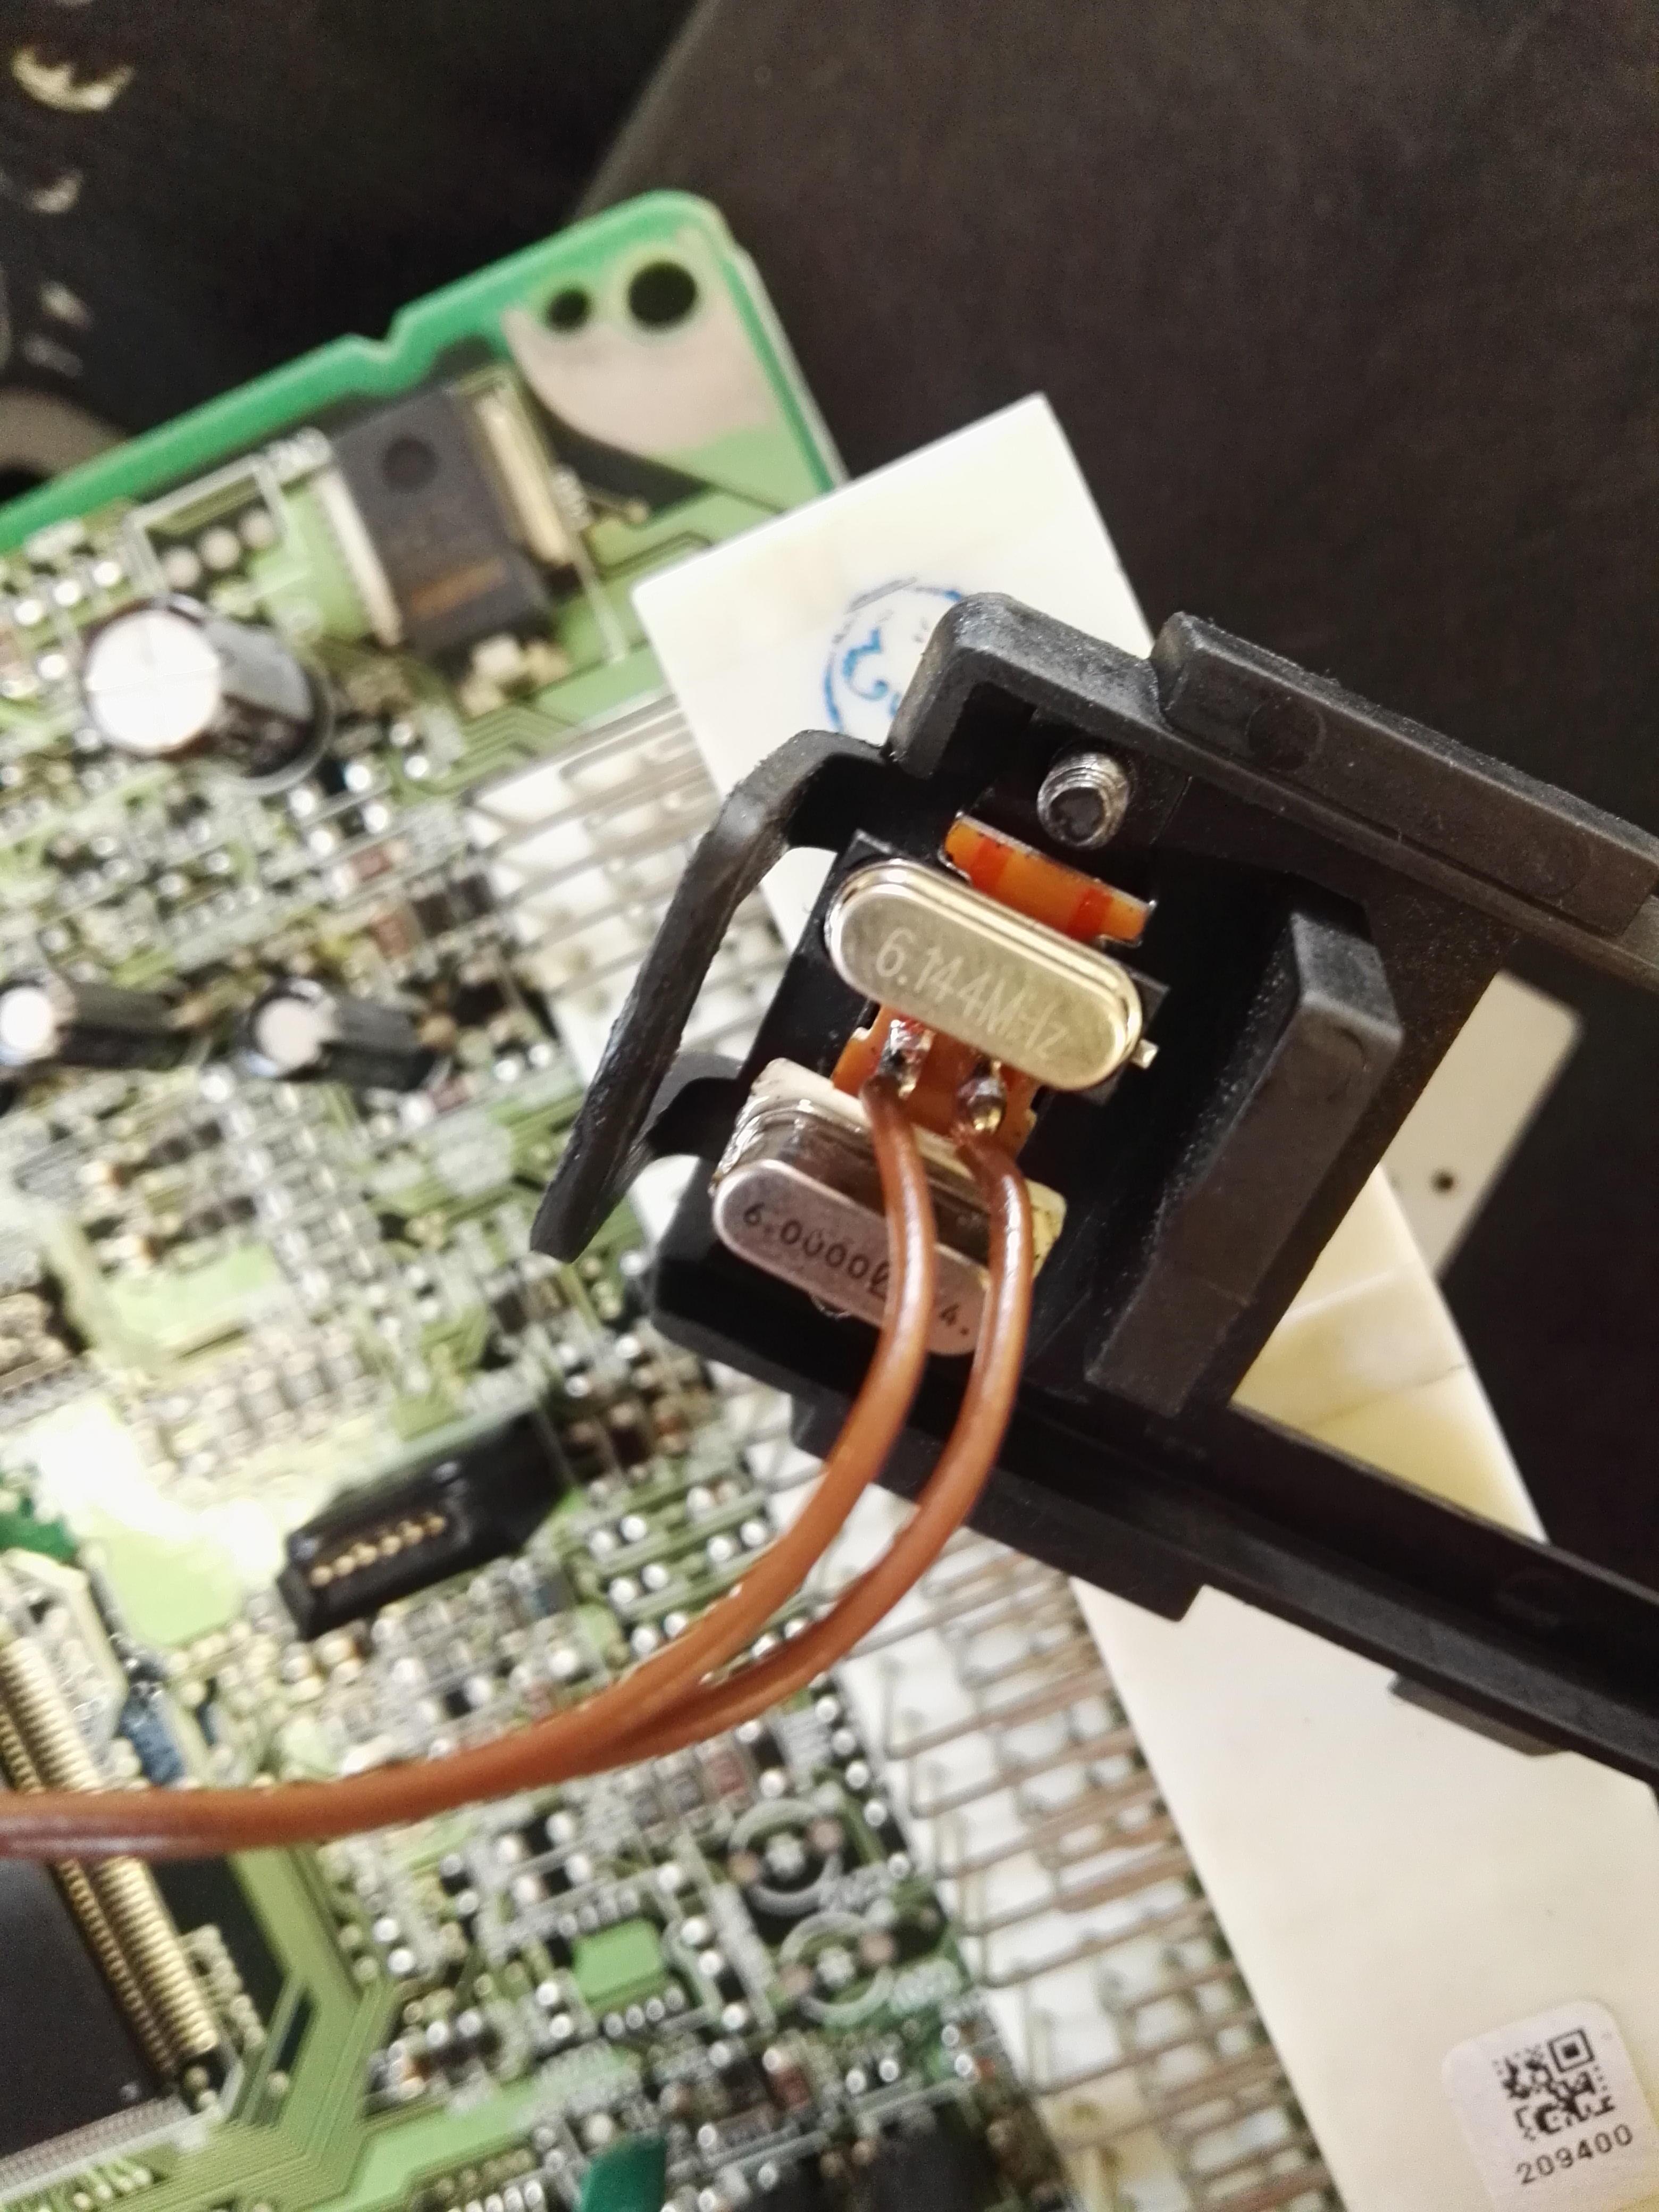
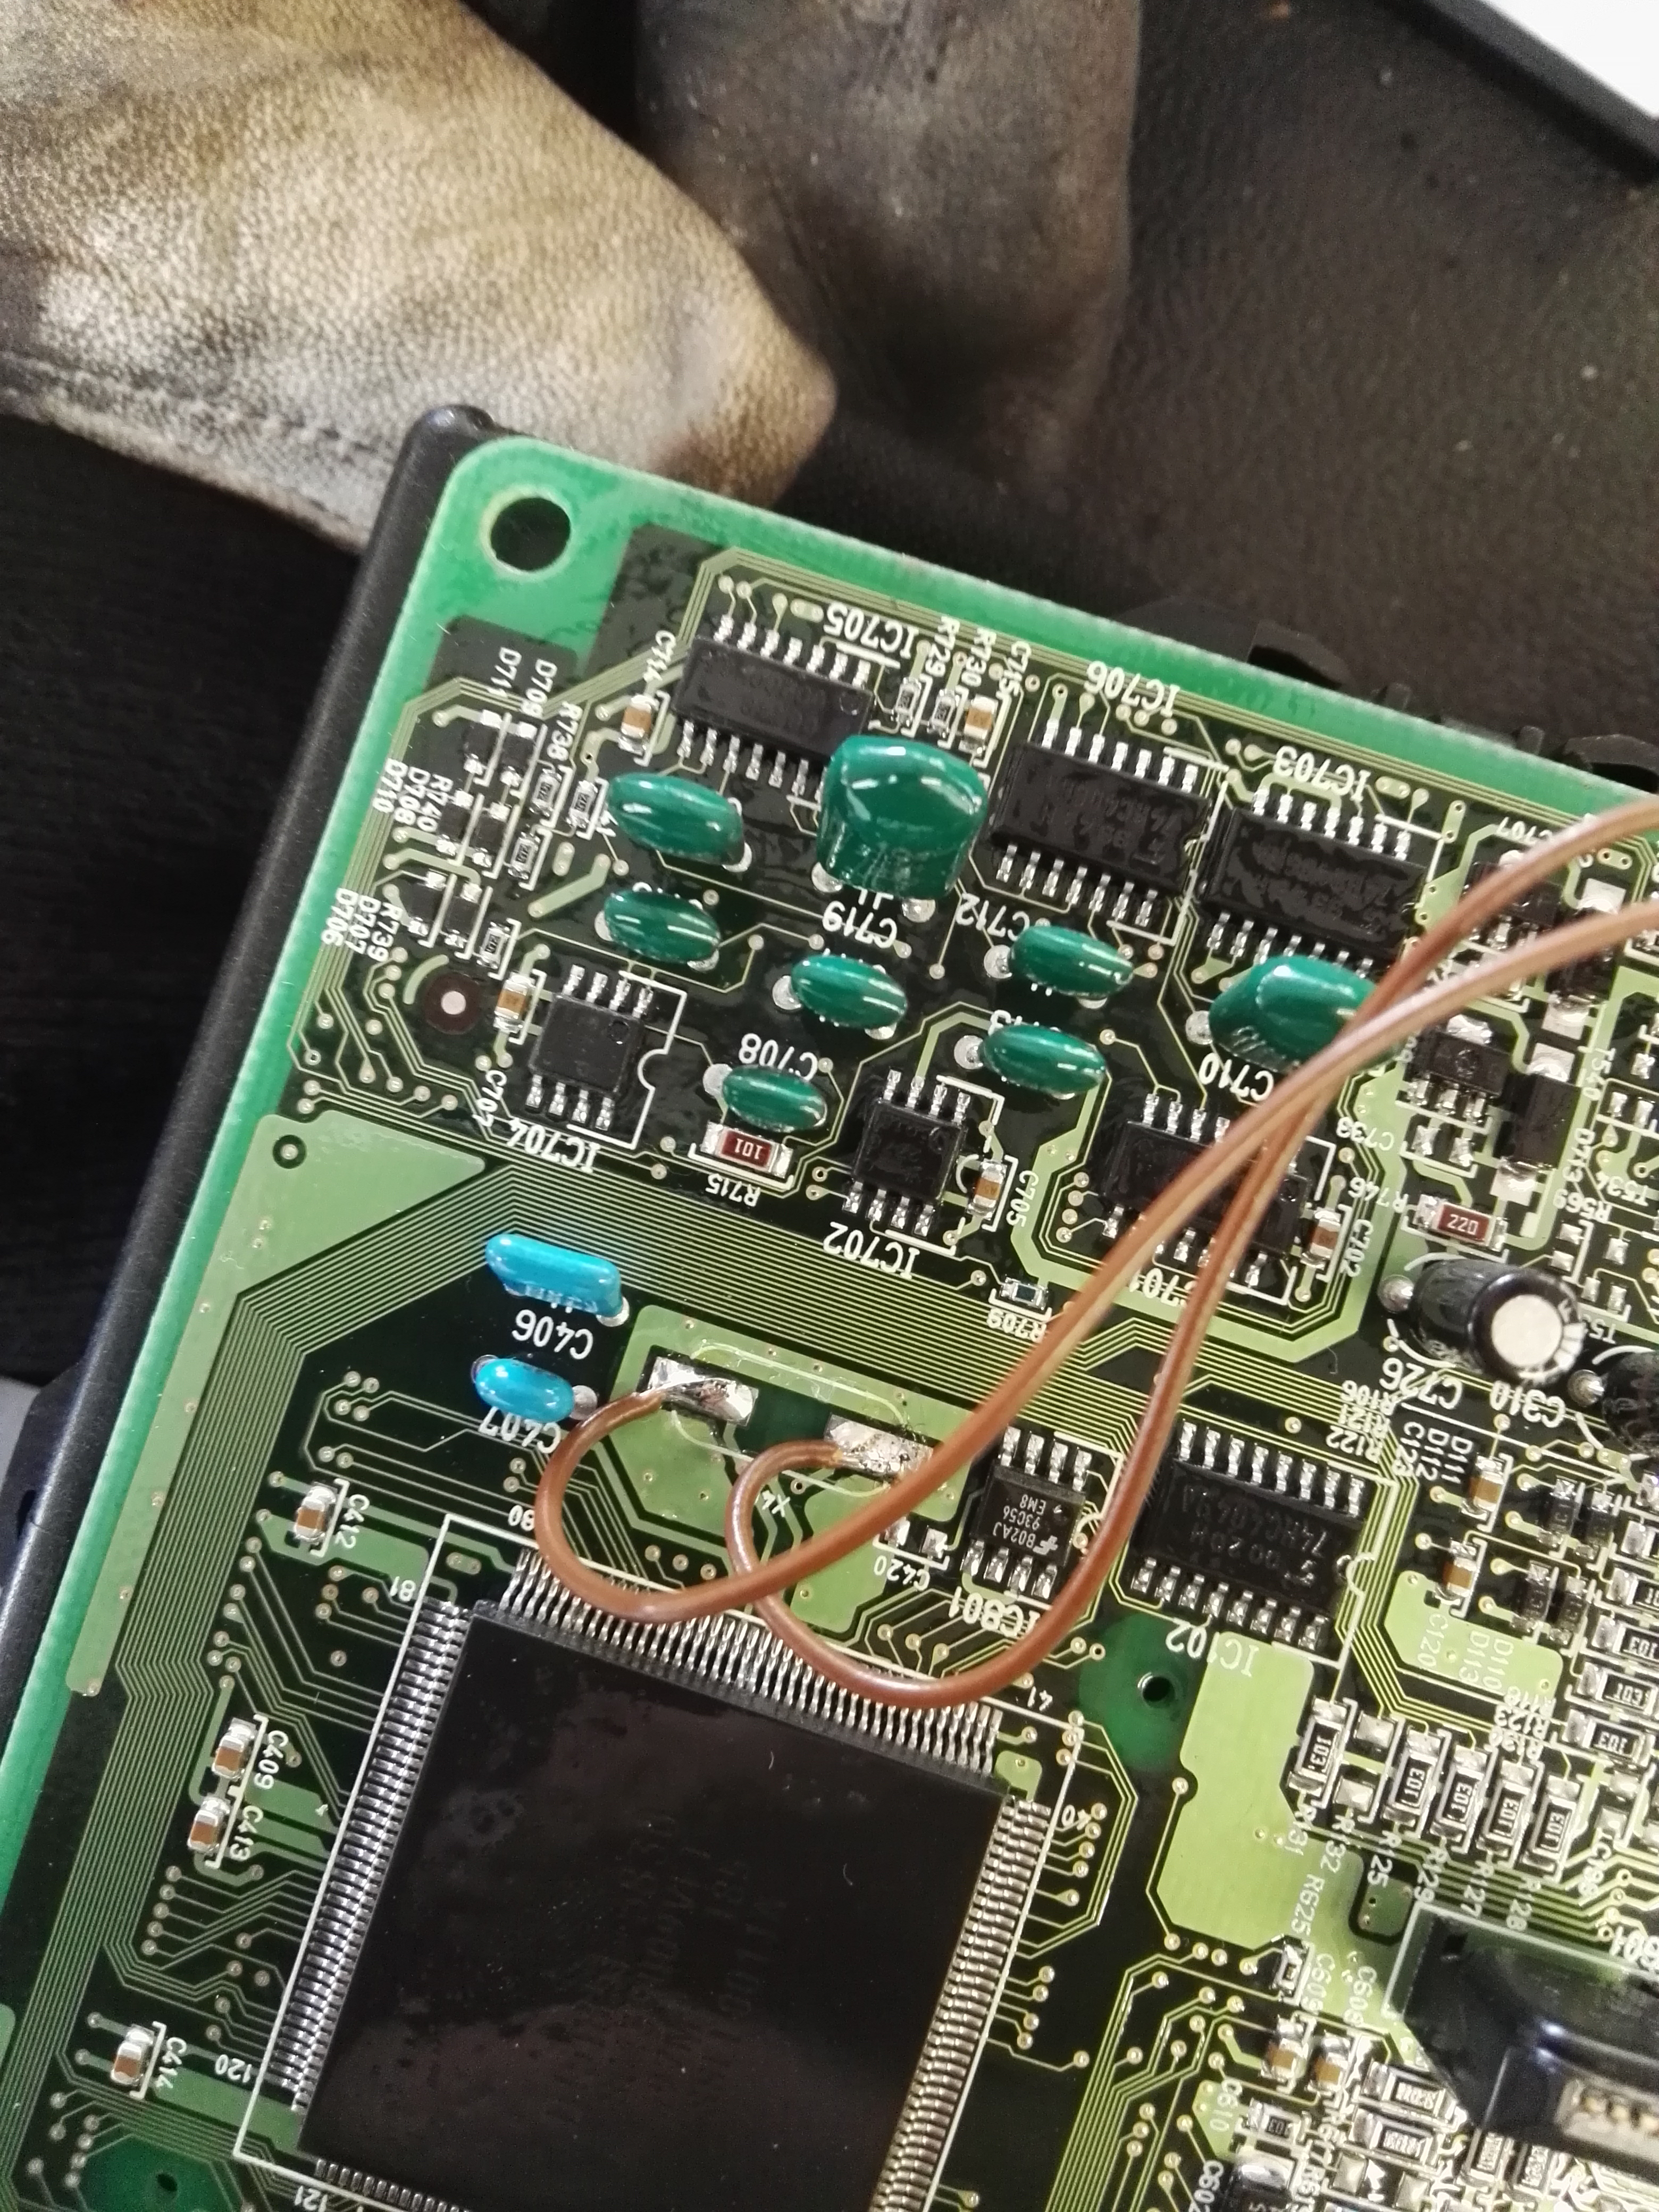
Successfully overclocked the ecu, raising the rev limiter from 7500rpm to 7700rpm. The availability of crystals in the 6mhz range meant I had to eather do a 2.5% overclock or jump straight to 10% which would bring the limit to 8250rpm, I chose the more conservative route. A switch was installed in order to switch between 7500 and 7700 limits.
-
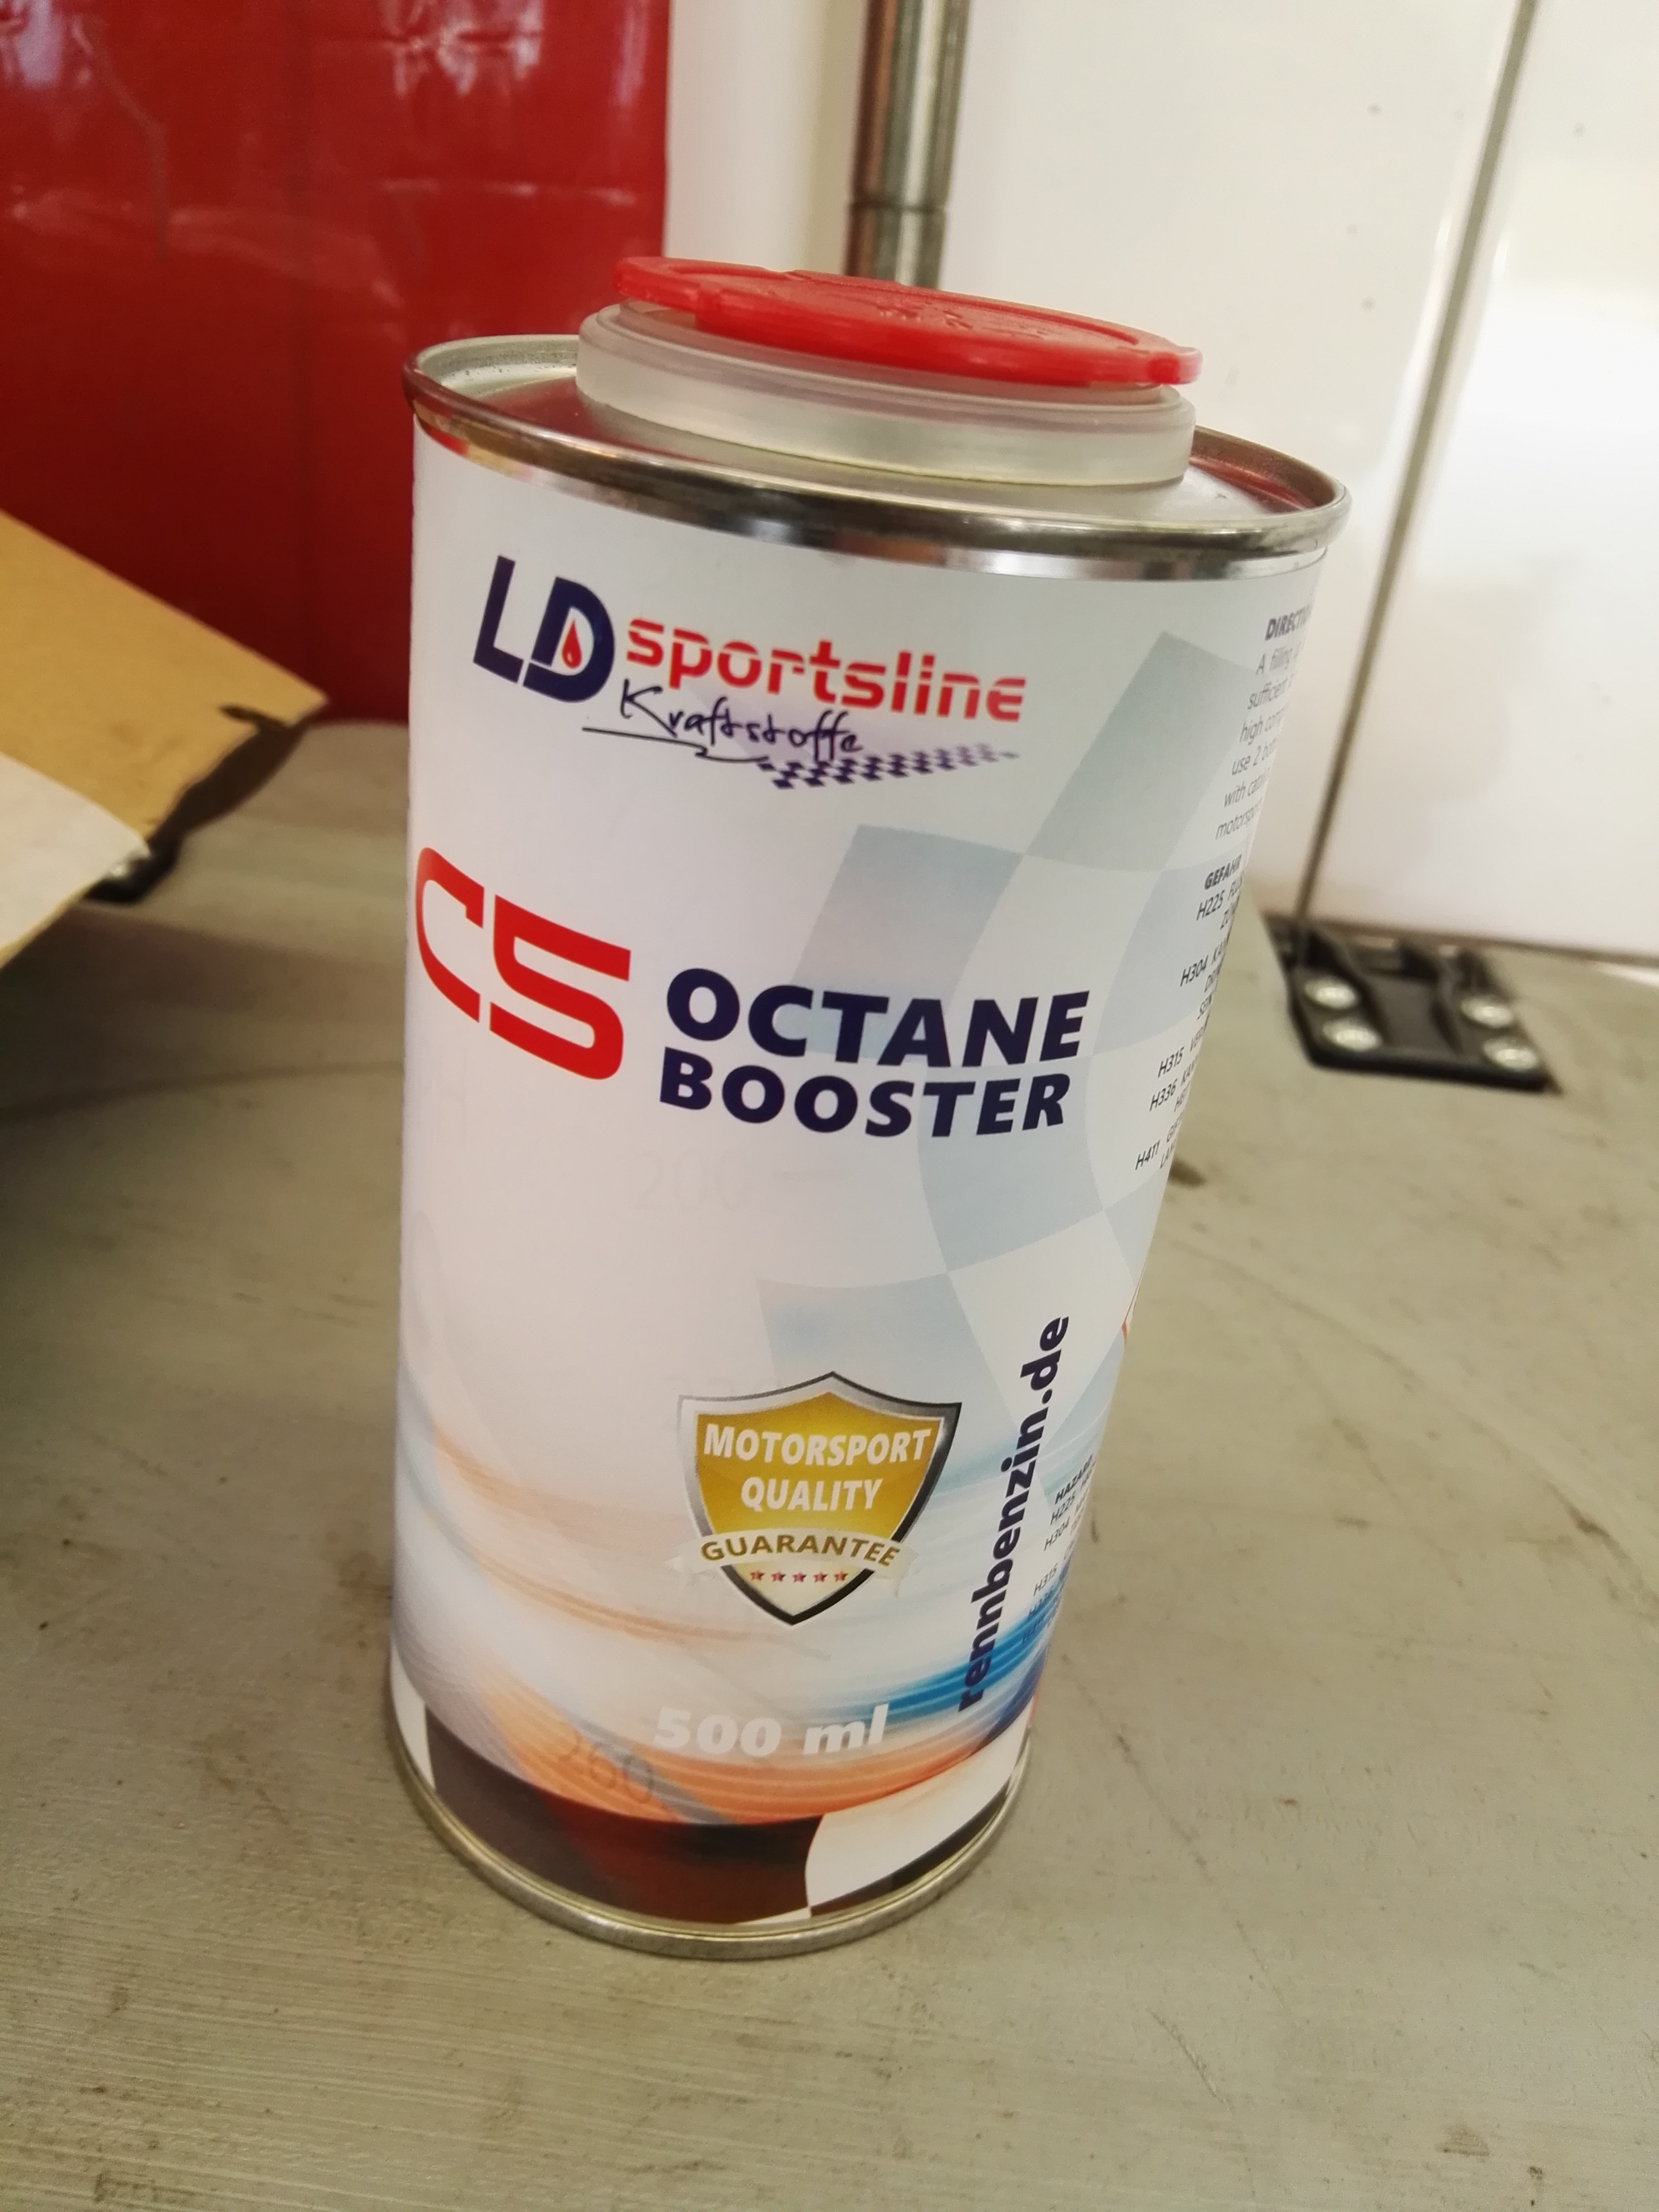
After the 5° advanced crank sensor wheel was installed I noticed some pinging, that was on 98 octane. Im now running 102octane fuel with an octane booster added to bring it higher again. C5 is the strongest available here in Germany.
And thats about it for the time being…
5 Likes
Nice work. Glad the clutch was so simple. Wow, on the ECU mod - well outside anything I have any understanding of. Can’t wait to find out how things go.
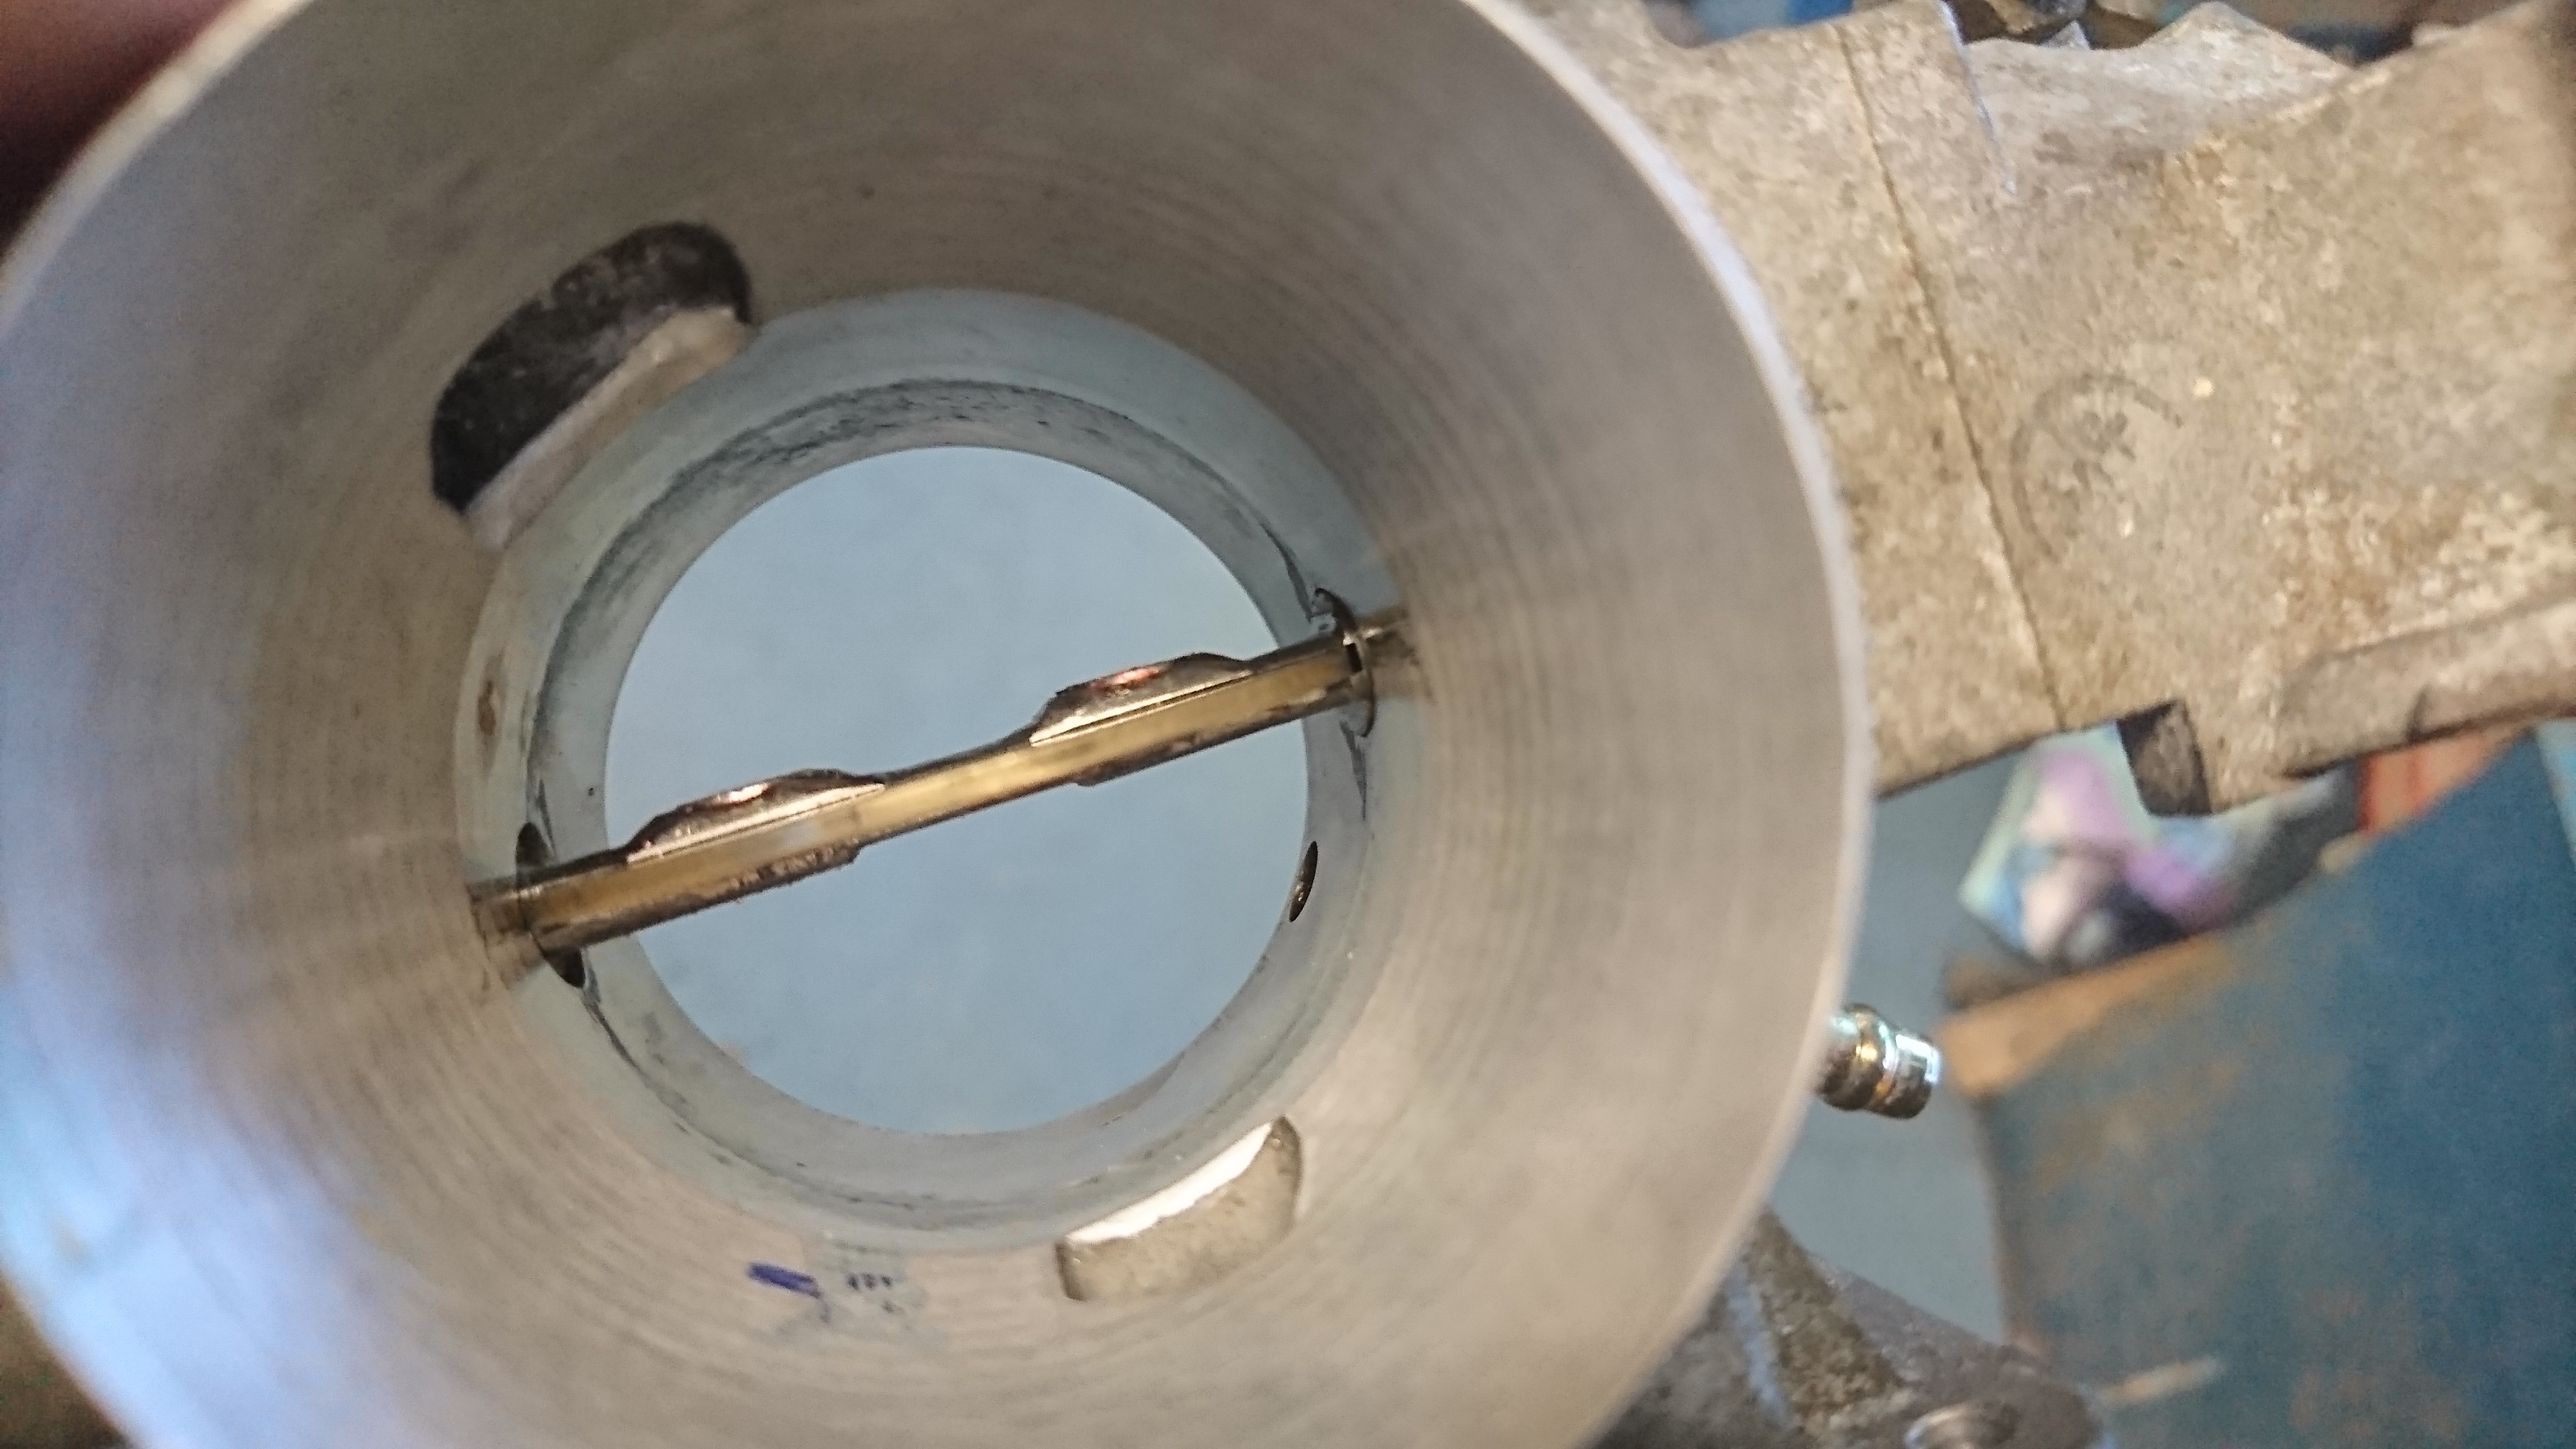
A pic of WOT for the audience. Unfortunately no “before and after”. New taper bore is less than 7deg. Throttle body axle aggressively milled then hand finished. Butterfly plate edges are micro radiused with P800 wet and dry. All held together with posidrive countersunk screws and super strength loctite then screw ends are peined (more force to tighten than Phillips or a 3mm Allen key - envisage that it won’t come out again). Next step is to go up in plate size. Only needs 2-3mm to make a significant difference. Mick I have found a plate that I think will be 5mm bigger - if needed. One day I’ll make a flow bench to test this stuff. Simple to make but I am time poor.
5 Likes
